Overview
The continent of Pywel is home to a wide range of hostile forces that players encounter throughout Crimson Desert. Enemies range from organized human factions and roaming bandits to dangerous wildlife, supernatural creatures, and colossal boss monsters. Learning how each type of enemy behaves is essential for survival, since different opponents demand different approaches to combat. Most enemies have predictable attack patterns, and studying their movements helps players avoid unnecessary damage while finding openings to strike.
Defeating enemies yields a variety of rewards depending on the enemy type. Common foes drop crafting materials, gold, and consumables, while boss enemies can drop unique weapons, Abyss Artifacts for upgrading core stats, and signature abilities that expand the player's skill set. The game broadly divides its hostile encounters into four categories: hostile factions (organized human and non-human groups), wildlife (huntable and aggressive animals), monsters and supernatural creatures, and bosses (powerful enemies with dedicated health bars and cinematic encounters).
Hostile Factions
Several organized groups operate across Pywel, each with their own leadership, territory, and motivations. These factions serve as recurring enemies during both the main story and faction quests. Their members include foot soldiers, officers, and faction leaders who serve as bosses. Clearing faction strongholds and completing related quests contributes to the contribution system and can unlock new areas, vendors, and resources through the liberation system.

Duchy of Hernand Factions
The Hernand region is home to the largest concentration of hostile factions. These groups prey on merchants, travelers, and local settlements throughout the duchy.
Faction | Leader | Territory | Description |
|---|---|---|---|
The personal guard of Kailock the Hornsplitter, the leader of the Goldleaf Merchant Guild. They enforce Kailock's control over trade routes and guild operations through intimidation and violence. | |||
Unknown | Across Hernand | An armed faction that has plunged Hernand into fear. Their influence spread across the region with alarming speed. They operate war machines such as Marni's Excavatron at locations like the Karin Quarry. | |
Unknown | A roaming band that scours Pywel in search of prey. They are skilled hunters who track both animals and people through the wilderness. | ||
Unknown | Southern Pywel | Bandits who threaten the southern reaches of Pywel. They mainly target merchants and travelers, ambushing and plundering them along trade routes. | |
Unknown | A band of goblin scholars scarcely different from common thieves. Despite their scholarly pretensions, they resort to theft and violence. | ||
Followers of the demon that haunts the reed fields near Frozen Soul Mountain. The Reed Devil itself is a world boss encounter. | |||
Unknown | A House of Healing once dedicated to treating mental illness. Now corrupted, its members have become hostile to outsiders. |
Tribal State of Pailune Factions
The Pailune region is dominated by one major hostile faction that plays a central role in the game's narrative.
Faction | Leader | Territory | Description |
|---|---|---|---|
A powerful hostile faction led by the formidable Myurdin, who oppresses the people of Pailune. The Black Bears are the primary antagonist faction and serve as the catalyst for the Greymanes' story. Myurdin personally deals a lethal blow to the protagonist early in the narrative. |
Other Hostile Groups
Beyond the named factions, players encounter other hostile forces tied to specific story chapters and locations. Gwen Kraber's soldiers occupy Root Hold, and clearing them out returns the stronghold to House Celeste. The forces of Cassius Morten create havoc in the Calphade territory. Various unnamed bandit camps and outlaw hideouts are scattered across the open world, providing optional combat encounters and loot.
Wildlife
The world of Pywel is populated by a diverse range of animals, many of which are passive but some of which are hostile. Players can engage in hunting to collect crafting materials such as meat, pelts, bones, and rare components. Hunted materials feed into cooking recipes and crafting at the blacksmith, making hunting a foundational life skill for progression.
Animal Type | Region | Hostility | Common Drops |
|---|---|---|---|
Passive (flees when approached) | Meat (3-4 per kill), hides, small bones | ||
Wolves | Hostile (attacks in packs) | Fangs, pelts, meat | |
Boars | Hostile (charges when provoked) | Meat, thick hides, tusks | |
Rare Beasts | Hostile | Rare crafting materials, valuable pelts | |
Sand Creatures | Hostile | Endgame materials, rare bones |
Wolves are the most common hostile wildlife encounter. They attack in packs and can overwhelm unprepared players. Damiane's firearms are particularly effective for hunting wildlife due to their range and damage, allowing players to pick off targets before they close the distance. Hunting materials are also essential for armor crafting and camp animal farming at the Greymane Camp.
Monsters and Supernatural Creatures
Beyond common wildlife, Pywel is home to monsters, demons, and other supernatural threats. These creatures are significantly more dangerous than standard wildlife and often guard valuable resources or serve as quest objectives. Some are tied to the lore of the Abyss and the supernatural forces at work across the continent.
Monsters can appear as standard field encounters in certain regions or as dedicated boss fights with health bars and cinematic introductions. Supernatural enemies such as specters and cursed beings may require special abilities or equipment to defeat effectively. The Urn Soldiers, for example, are animated warriors found in specific dungeons and ancient ruins.
Creature Type | Examples | Characteristics |
|---|---|---|
Goblins | Fundamentalist Goblins, various goblin mobs | Smaller, weaker enemies that attack in groups. Found primarily in Hernand. Despite their size, large numbers can be dangerous. |
Urn Soldiers, Urn Swordsmen | Animated warriors found in ancient ruins and dungeons. They wield various weapons and can appear in large numbers. | |
Specters | Otherworldly beings summoned from different realms. Often fly or teleport, making them difficult to hit with melee attacks. | |
Fallen warriors bound by dark magic. Fortain fights alongside a ghostly apparition that attacks independently. | ||
Enormous creatures with immense health pools. Players must dodge rather than block their devastating attacks. | ||
Elemental Creatures | Snow Walker, Desert Ancient | Beings infused with elemental power. The Snow Walker uses ice attacks in Pailune, while Desert Ancients wield fire in the desert biome. |
Mechanical Constructs | War machines and mechanical creatures. Marni's Excavatron is a drill-armed diving suit used by the Bleed Bandits, while Golden Star is a mechanical dragon. |
Boss Categories
Crimson Desert features over 76 boss battles spread across the main story, side quests, and open world exploration. Bosses are distinguished from regular enemies by prominent health bars (typically one to three bars), cinematic introductions, and unique attack patterns. The developers have organized bosses into several broad categories based on their nature and the type of encounter they provide.

Human Bosses
Human bosses take the form of classic duel encounters. These fights test the player's mastery of dodge, block, and parry mechanics and reward precise timing. Human bosses are often faction leaders, rival warriors, or story antagonists.
Location | Quest | ||
|---|---|---|---|
Tutorial-style duel. Teaches basic combat through the observation learning system. Vulnerable to Pump Kick spam. | |||
Shield-wielding knight. Heavy attacks damage through his blocks. Equip the Tauria Curved Sword for best results. | |||
Arena quest | An eight-foot powerhouse who fights unarmed with lightning-fast fists. Fights in a gladiator arena with spectators. | ||
Side quest | Wields a double-barreled shotgun. Uses projectile attacks at range and can punish players who stay at distance. | ||
Side quest | Spear-wielding warrior at a remote camp. Defeating him drops an obtainable spear weapon and liberates Root Hold. | ||
Fort Ironclad | Captain who wields a spear with exceptional strength. Environmental hazard: arrows are shot from the walls during the fight. |
Beast Bosses
Beast bosses are large monsters that often allow players to climb onto them to target weak points. These encounters emphasize positioning, stamina management, and environmental awareness over pure melee exchanges.
Location | Quest | ||
|---|---|---|---|
Giant gorilla-like monster with three health bars. Cannot be blocked; requires constant dodging. Enters super armor mode with devastating follow-up strikes. One of the hardest bosses in the game. | |||
Redfox Forest | Exploration encounter | Massive crab that hides underground and surfaces to attack. Players must climb onto its back and destroy the magical jar to deal damage. Requires managing energy while climbing on and off. | |
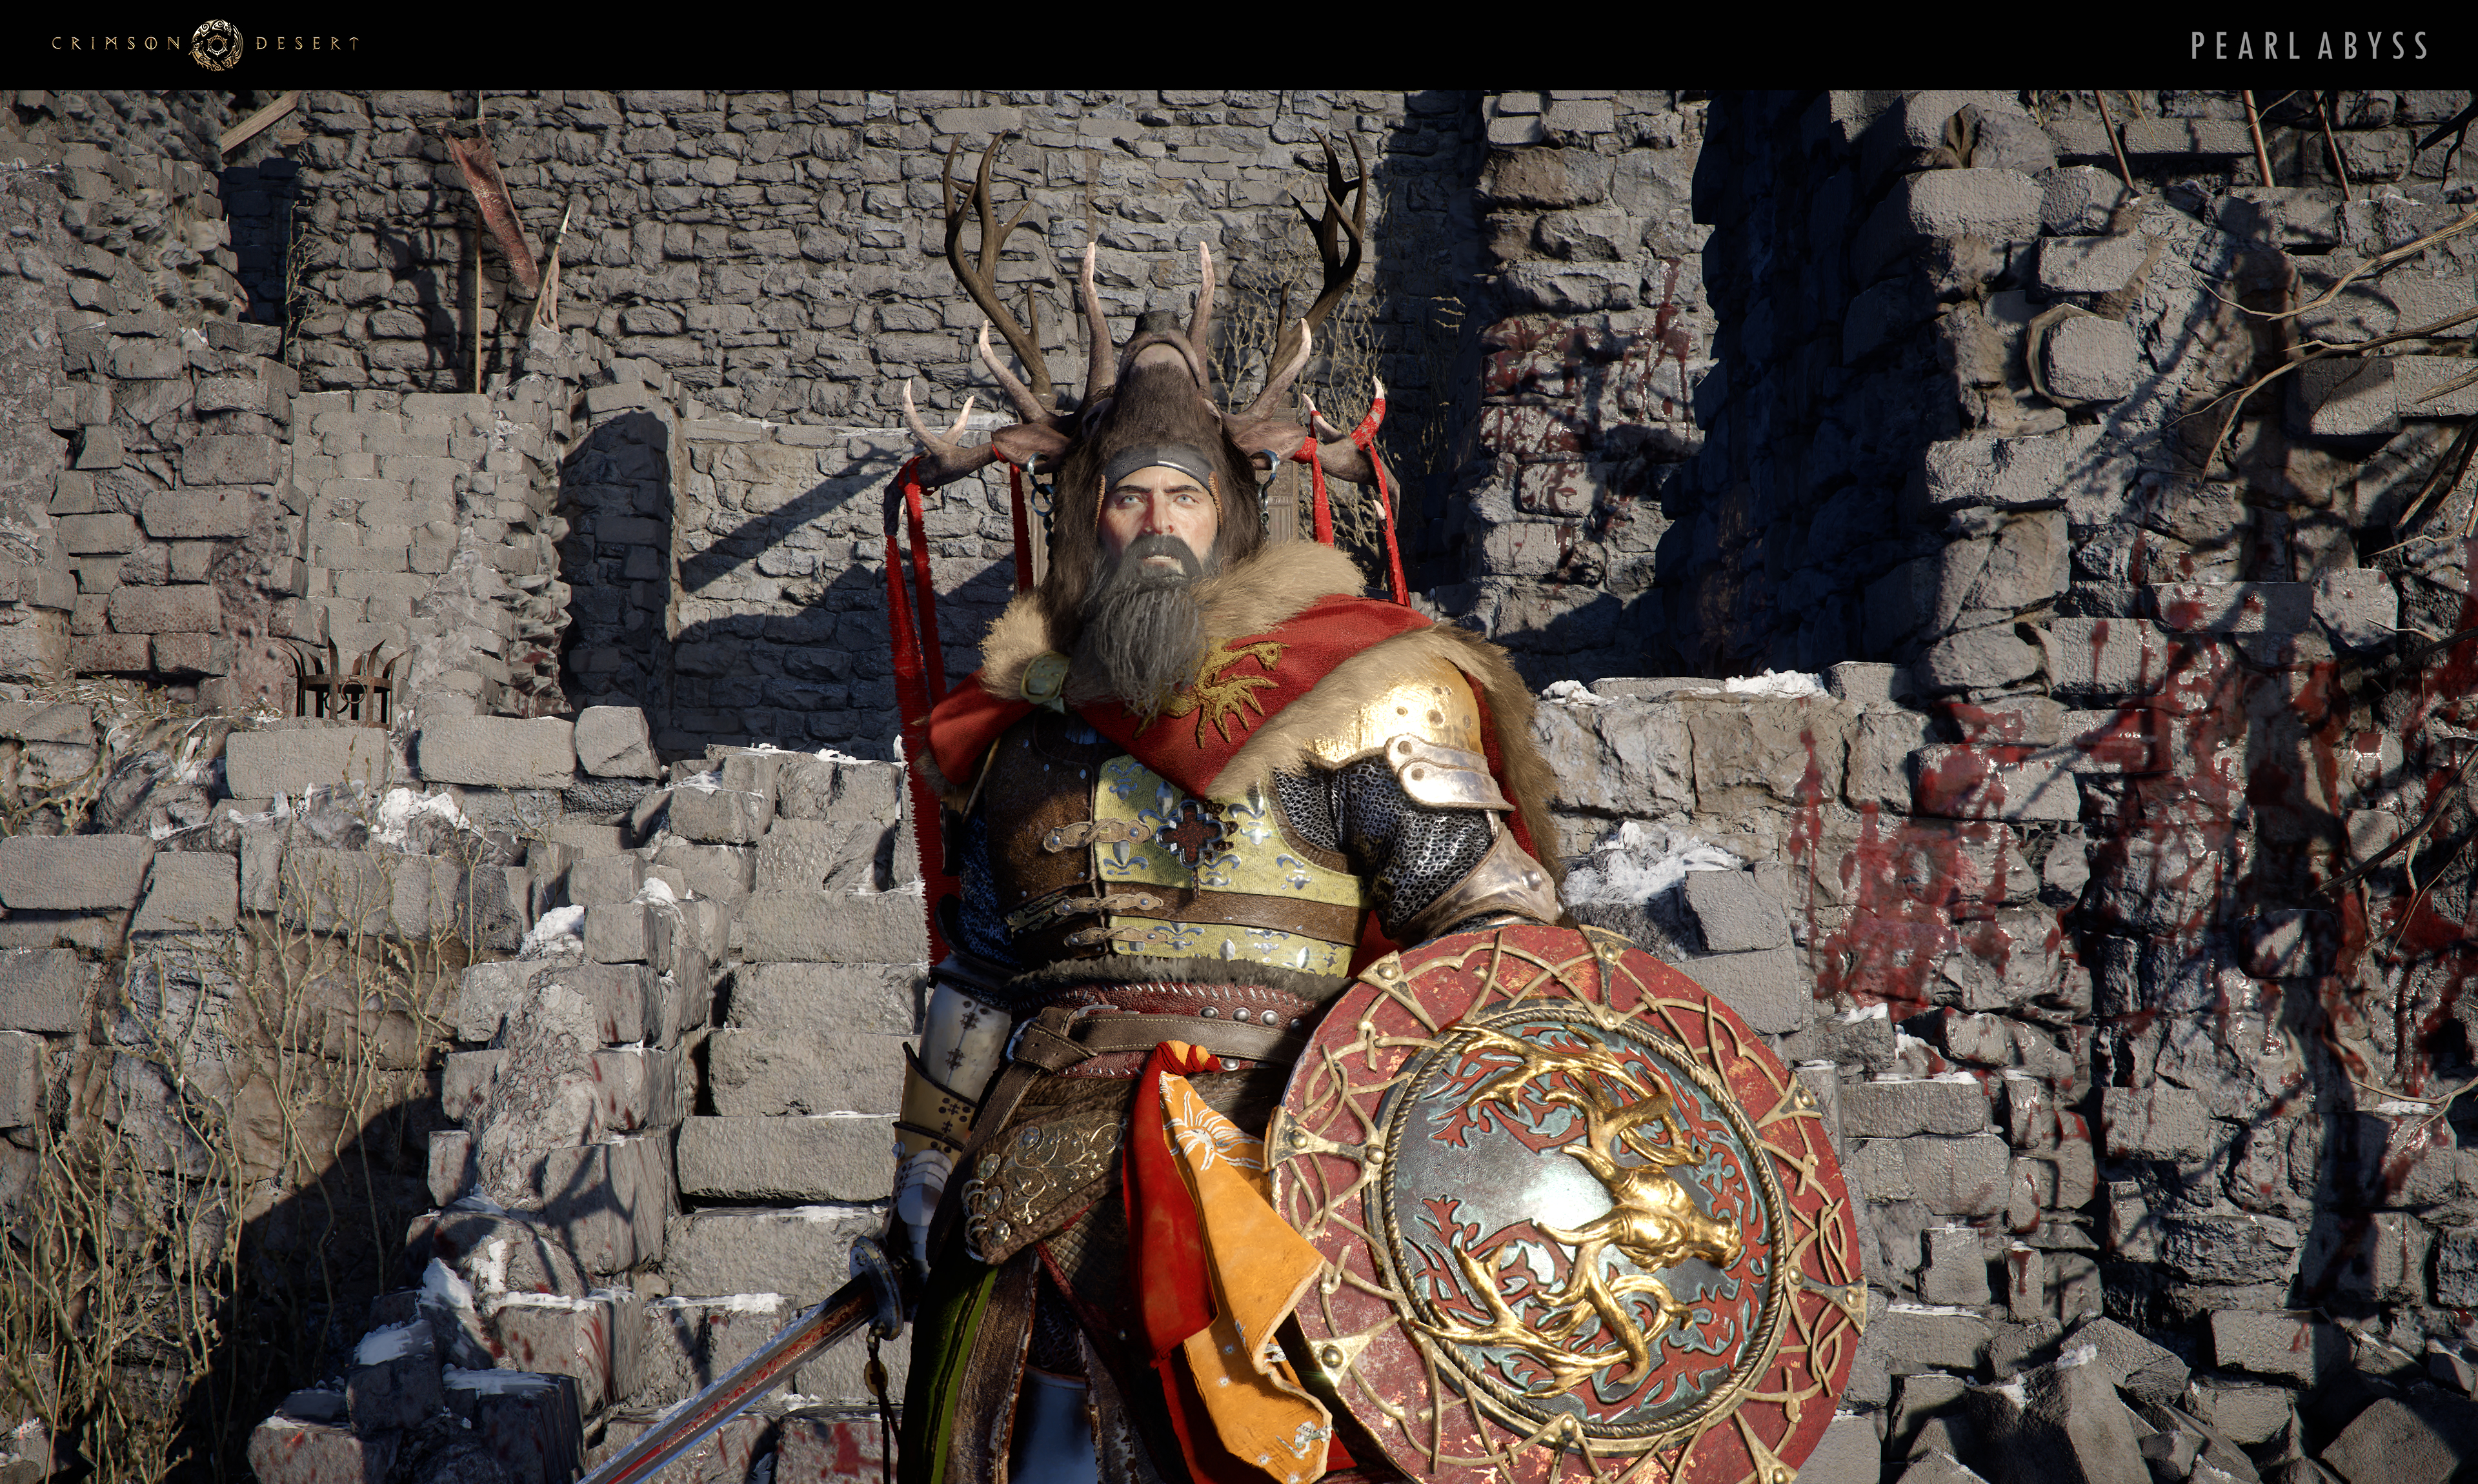
A fallen king of huge stature with three health bars who fights with a sword and shield. Wears stag-head armor and charges at the player. | |||
Story quest | A massive ice elemental in the Pailune region. Uses charging attacks and melee ice strikes across multiple combat stages. |
Supernatural Bosses
Supernatural bosses include spirits, cursed beings, and otherworldly entities. These encounters often feature unique puzzle mechanics alongside standard combat.
Location | Quest | ||
|---|---|---|---|
Three health bars. Phase one: melee strikes with shield counters. Phase two: summons five totems that must all be destroyed. Phase three: highly aggressive with red projectiles. | |||
Flying specter puzzle boss. Use Blinding Flash to reveal its weak spot, then fly up with double-tap square and hit it with Force Palm. Hide behind pillars to recharge Spirit. | |||
Unknown | Story quest | A vengeful figure seeking payback for her slain child. Can summon minions and warp across the battlefield. Uses several types of charged attacks. | |
Castle interior | Fights alongside a ghostly apparition that attacks with ground strikes or arrows. Use heavy attacks to break his shield defense. The apparition kills Fortain after the fight concludes. | ||
An optional boss encounter that rewards Hernandian Contribution EXP, Freya's Elixir, and other consumables. | |||
A void spirit leading Antumbra's Order. Rewards include an Abyss Artifact and Vessel of Dark Pursuit. |
Multi-Phase Bosses
Several bosses in Crimson Desert feature multiple phases where they transform or gain new abilities mid-fight. These are among the most challenging encounters in the game.
Phases | Key Differences Between Phases | |
|---|---|---|
Two phases, two health bars | Phase one: constant teleportation with lightning attacks. Phase two (Awakened): uses forbidden magic gained from consuming a prisoner. Even more aggressive teleportation. | |
Two phases, two health bars | Phase one: standard melee attacks, can be parried. Phase two (Lava): transforms with fire and lava damage. Requires constant dodging and stamina management. | |
Single phase, one health bar | Fought as Oongka (forced character switch, no shield). Uses lightning attacks. Dual-wielding swords is faster than axes for this encounter. | |
Three health bars | First encounter has one health bar. Second encounter: three bars with flying, diving attacks, and midair dodges. Roll after the second midair dodge to avoid damage. |
World Bosses
World bosses are massive, powerful enemies found in the open world rather than being tied exclusively to story quests. They offer some of the most spectacular encounters in the game. For a full list and strategies, see the World Bosses and Boss Strategies pages.
Type | Location | Notable Features | |
|---|---|---|---|
Mechanical Dragon | Open world | Fought while mounted on a Wyvern. Uses powerful projectiles and fire tornadoes that circle the arena. One of the most visually spectacular fights in the game. | |
Mountain Spirit | White Mountains | A terrifying snowy apex predator resembling a cross between a reindeer and a yeti. Demands heavy use of fire-based environmental hazards to lower its defenses. Multi-stage fight. | |
Giant Creature | Redfox Forest | Hides underground and surfaces to attack. Players must climb onto its back to reach the weak point: a magical jar. Requires energy management during the climbing sections. | |
Demon | Swift opponent haunting the reed fields. Three-phase fight with totem summoning mechanics. | ||
Fallen King | A mighty warlord of huge stature with three health bars. Shield and sword combat style. |
General Combat Strategies Against Enemies
Crimson Desert's combat system rewards adaptability. Different enemy types require different approaches, and players who rely on a single weapon type will struggle against enemies with varied strengths and weaknesses. Here are key principles for engaging each category of enemy.
Against Human Enemies
Human enemies, including faction soldiers and human bosses, generally respect the same combat rules as the player. They can be staggered by combos, countered with shields, and interrupted with well-timed attacks. The pattern of landing three light attacks followed by three heavy attacks is effective for interrupting most human opponents. Shield-bearing enemies require heavy attacks (which damage through blocks) or the Force Palm ability.
Against Wildlife
Wolves attack in packs, so crowd control and area-of-effect attacks are valuable. Ranged weapons allow players to thin a pack before they close in. Larger animals like boars charge and can knock players down, so dodging to the side is essential. Damiane's firearms excel at wildlife encounters due to their range and damage output.
Against Monsters and Bosses
Large monsters often cannot be blocked and require dodge-heavy strategies. Dodging forward and to the right to get behind the enemy, then landing two or three quick attacks before retreating, is a reliable pattern. When bosses enter super armor mode (indicated by a blue glow), players should sprint to safety behind cover. Bringing 100 to 200 grilled meat to boss fights provides essential healing. Upgrading armor to refinement level 4 or higher reduces damage taken significantly.
Elemental Weaknesses
The game uses elemental effects and status effects to create tactical depth in combat. Players can infuse attacks with elements to apply specific debuffs on enemies. Environmental factors also play a role: fire-based hazards are effective against ice creatures like the White Horn, while different weapon types interact differently with various enemy defenses. Switching between weapon types using the weapon switching system is key to exploiting these weaknesses.
Notable Boss Rewards
Many bosses drop unique weapons and valuable items that cannot be obtained elsewhere. Keeping these weapons rather than selling them is strongly recommended, as they often have special properties or serve as upgrades for specific combat styles.
Notable Rewards | |
|---|---|
Sword of the Lord, Seal of Greed (Goldleaf Merchant Guild), Iron Ore x7 | |
Blackwing Leather Armor, Blackwing Mask, Tauria Curved Sword (excellent for heavy attacks) | |
Obtainable spear weapon, Root Hold liberation | |
Tips for Fighting Enemies
Always bring at least 100 grilled meat to boss fights for healing. Upgrade to higher quality food as it becomes available.
Upgrade armor to refinement level 4 or higher before taking on mid-game and late-game bosses.
Learn the observation learning system: watching enemies perform moves can teach you new skills.
Use environmental combat to your advantage. Enemies can be pushed off ledges, and pillars can serve as cover during projectile-heavy fights.
Switch weapons frequently. The Tauria Curved Sword is particularly effective for heavy attacks against shielded enemies.
When a boss glows blue (super armor), do not attack. Sprint behind walls or to the opposite end of the arena until the state ends.
Invest skill points in health and stamina upgrades for survivability against tough enemies.
For humanoid bosses, the pattern of three light attacks followed by three heavy attacks with a dodge to recharge stamina works consistently.
Keep all unique boss weapons. They cannot be reacquired and often outperform crafted alternatives.
See Also
Combat System
Boss Battles
Boss Strategies
World Bosses
Weapons
Elemental Effects
Dodge, Block, and Parry
Hunting
Factions of Pywel