Overview
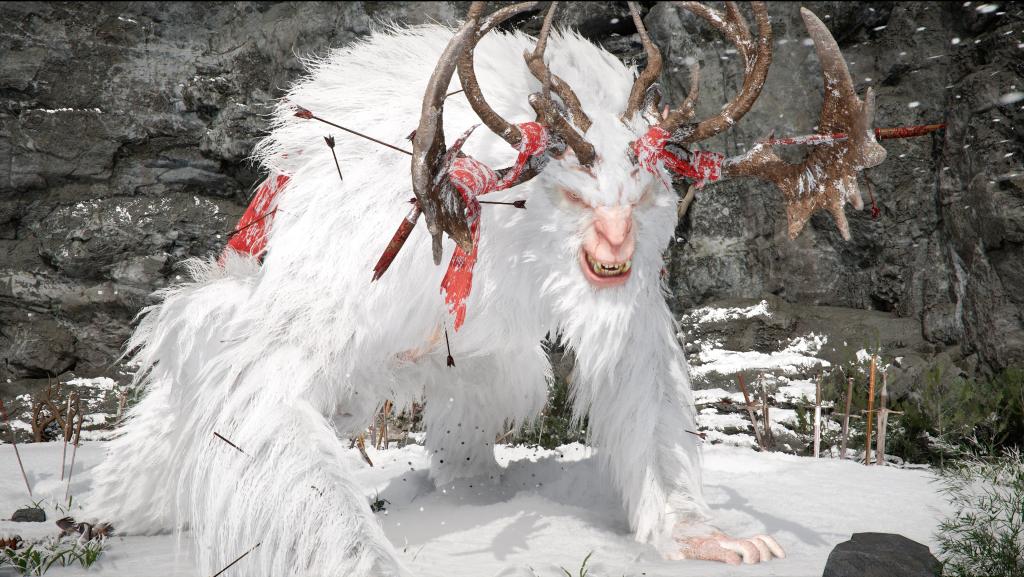
White Horn, Shepherd of Souls, is a boss encountered at Snowhaven Hearth of Pywel, the frozen northern region of Pywel. Born from the blizzards that rage through the mountain peaks, White Horn, Shepherd of Souls, is a massive creature that resembles a cross between a yeti, a monkey, and a giant elk, with sharp fangs and towering antlers. The fight unfolds across three distinct phases set in the eye of a whirling snowstorm, making it one of the most visually dramatic encounters in the game. White Horn was showcased in a 7-minute gameplay video at Gamescom 2024.
Boss Profile
Attribute | Detail |
|---|---|
Boss Name | |
Type | Mountain Spirit (Beast) |
Location | Snowhaven Hearth, Pailune |
Appearance | Yeti/monkey/elk hybrid with sharp fangs and antlers |
Origin | Born from the blizzards near Snowhaven Hearth |
Phases | Three |
Arena | Snowstorm arena in the mountain peaks |
Weakness | Fire damage |
Lore
White Horn, Shepherd of Souls, is a primal spirit of the Snowhaven Hearth peaks, a manifestation of the harsh winters that have shaped Pailune for centuries. The creature has guarded the mountain peaks since before recorded history, and local communities speak of it with a mixture of reverence and fear. Its existence is tied to the blizzards themselves; the snowstorm that surrounds the arena is not just weather but an extension of White Horn's power.
Arena
The fight takes place in the eye of a massive, whirling snowstorm high in the mountains near Snowhaven Hearth. Visibility is limited by driving snow and wind, and the footing is treacherous on ice-covered rock. The storm intensifies as the fight progresses through its three phases, with blizzard conditions becoming more severe and reducing sight lines further. The arena itself is relatively open, but patches of deep snow and ice formations create natural obstacles.
Three-Phase Fight
Phase 1
White Horn opens the fight with aggressive melee attacks, using its massive ape-like fists to pound the ground and its antlers to charge at the player. Its movements are fast and powerful despite its large size. The snowstorm is present but relatively mild, allowing decent visibility. This phase teaches players the basic rhythm of White Horn's attack patterns: ground pounds create shockwaves that must be jumped or dodged, while antler charges require lateral evasion.
Phase 2
As White Horn's health drops, the snowstorm intensifies and the creature begins incorporating ice-based attacks alongside its physical strikes. Hail attacks rain down on the arena, forcing players to stay mobile. White Horn's ground pounds now create ice eruptions that linger as hazard zones. The creature becomes more aggressive, chaining attacks with shorter recovery windows. Players may need to climb onto White Horn's back during this phase to reach vulnerable points.
Phase 3
In the final phase, the blizzard reaches full intensity. White Horn summons devastating snowstorms and concentrated hail barrages that cover large portions of the arena. Its physical attacks hit harder and come faster. The combination of reduced visibility, environmental hazards, and heightened aggression makes this the most demanding phase. Success requires precise timing on dodges and parries while managing stamina under sustained pressure.
Attack Patterns
Attack | Description |
|---|---|
Ground Pound | Slams both fists into the ground, creating a shockwave. In later phases, this also creates ice eruption hazard zones |
Antler Charge | Lowers its head and charges at the player with its antlers. Covers a long distance quickly and deals heavy damage on contact |
Hail Barrage | Summons hail from the storm that rains down on the arena. Becomes more intense and widespread in later phases |
Snowstorm Summon | Channels the blizzard's power to create localized snowstorms that obscure vision and deal chip damage to players caught inside |
Fist Combo | Rapid sequence of ape-like punches. Fast for a creature of White Horn's size and punishing if the player is caught without stamina for dodging |
Climbing
Like other large creature bosses such as the Queen Stoneback Crab, White Horn features climbing mechanics. Players can scale the creature's body during specific stagger windows to reach weak points on its back and head. The climbing segments require stamina management, as falling from White Horn's body leaves the player vulnerable to follow-up attacks on the ground.
Location and Quest
White Horn is encountered during the Soul Shepherd quest, which belongs to the Skog Horn tribe faction. To unlock this quest, the player must first complete the main quest through the end of Chapter 7, then finish the Palun militia faction quest line, followed by the Nest of White Feathers and Bloody Path quests, and finally the Skog Horn tribe quests themselves.
During the Soul Shepherd quest, the player speaks with NPCs at Skog Horn Farm, then heads west into the mountains. After defeating a group of thugs, the player faces White Horn in a boss fight.
Acquisition Chain (Pelune Malisia -> Soul Shepherd -> White Horn)
White Horn is gated behind a multi-step faction chain that begins in the Pelune Malisia militia track and ends at the Soul Shepherd quest in the Skog Horn (also referred to in-game as the Skelgon) tribe line. The boss does not appear until the Soul Shepherd quest is active, and the militia track is the only path that opens Skog Horn quests on the faction board. Each stage below points at a single in-game waypoint or quest entry, so the chain can be cleared in one play session if the militia line is already partially complete.
Stage | Quest / Trigger | What To Do | Next Stage Unlock |
|---|---|---|---|
1 | Pelune Malisia militia entry quests | Pick up the opening Pelune Malisia militia quests from the faction board and clear them in order. The line includes the starter "Dark Shadow Engulfing the Fort" objective, which is a short combat encounter. | Bloody Path bounty appears on the militia tab. |
2 | Bloody Path bounty | Pull up the militia tab, accept the Bloody Path bounty, and travel to the marked location. The full Bloody Path quest does not need to be completed; arriving at the bounty location is enough to advance the chain. | Skog Horn (Skelgon) tribe quests auto-surface alongside the militia track. |
3 | Inside the Skog Horn tribe entries, locate the Soul Shepherd quest. The hook is a missing boy whose trail leads west into the mountains. Follow the marked trail until the encounter triggers. | White Horn boss fight begins at the end of the trail. | |
4 | White Horn boss fight | Clear the three-phase encounter detailed in the sections above. Fire imbue and the climbing mechanic are the main shortcuts; otherwise the fight is a pure skill check. | Reward drops in inventory on victory. |
The encounter itself is one of the most cinematic boss fights in the early-to-mid game, set in the eye of a whirling snowstorm with a three-phase escalation. Treat the chain above as the route to the fight rather than spoilers for the fight itself; the Soul Shepherd setup is short, and the boss arena does the heavy lifting on atmosphere.
Frost Hail Reward Confirmation
Defeating White Horn drops the Frost Hail abyss gear. Earlier internal notes that named the drop "Frost Tail" referred to the same core. Frost Hail summons a freezing rain effect over the target zone that slows aggressive mobs to a crawl, and it is the second half of the canonical frost-build pair alongside Shattering Frost, which drops from Gwen Kraber via a separate quest chain that starts at Lion Crest Manor.
If you are routing a full frost loadout, plan the day so you run this acquisition chain back-to-back with the Lion Crest Manor -> Legendary Hunter -> Elder Tree -> Gwen Kraber chain. The two boss drops slot together on a single pair of plate boots after a visit to any Witch's Workshops extract and embed flow, which collapses both frost cores into a one-button frost mode for combat.
Related Drops
Drop | Where It Comes From | Notes |
|---|---|---|
Auto-added to inventory after White Horn falls. | Mandatory pair with Shattering Frost for the frost build. | |
Drop tied to the boss fight reward bundle. | Frost-themed accessory; cross-references White Horn's Ring. | |
Drop tied to the boss fight reward bundle. | Pairs with the earring for a full set bonus where the build supports it. | |
Hide/skin reward processed after the fight. | Headgear option for frost-resist or themed builds. | |
Bulletin that propagates across faction boards after the fight is closed. | Surfaces militia / town reactions and may open new dialogue lines. | |
Themed cosmetic / collectible referencing the boss. | Tracked separately from the boss-fight rewards above. |
Combat
White Horn is weak to fire damage. Players using a fire imbue build with gears like Volcanic Eruption and Flames of Judgment will find this fight considerably easier than those relying on physical damage alone.
Rewards
Defeating White Horn drops the Frost Tail abyss gear along with other loot. Frost Tail is one of two abyss gears that augment ice imbued attacks, and it pairs with Shattering Frost for a complete ice imbue loadout.
After defeating White Horn, continuing a bit further west into a small alcove reveals the unique Chill Fallen sword. Make sure to explore this area before leaving.
Strategy
Fire damage is effective against White Horn. Use fire-imbued weapons and fire arrows to deal bonus damage throughout all three phases
Stay mobile during hail barrages. Standing still for even a few seconds during Phase 2 and 3 can result in significant accumulated damage from falling ice
Learn the antler charge telegraph. White Horn lowers its head and pauses briefly before charging. Dodge laterally, not backward, as the charge covers long distances
Save stamina for Phase 3. The final phase demands constant dodging and the reduced visibility makes it harder to read attacks. Having stamina reserves for emergency dodges is critical
Use climbing windows to deal burst damage to weak points. These opportunities are limited, so maximize damage during each climb
Ice eruption hazard zones from Phase 2 ground pounds linger on the arena. Track their positions mentally and avoid retreating into them during dodges
Rewards
Defeating White Horn yields exclusive equipment imbued with its mountain spirit abilities. The boss also drops Abyss Fragments, crafting materials for cold-themed equipment upgrades, and a Knowledge System entry documenting the creature's lore and combat data.
Preparation
White Horn is the first major skill-check boss in Crimson Desert, and proper preparation can mean the difference between a quick victory and a frustrating series of deaths. Before entering the Snowhaven Hearth arena, visit a bonfire and cook a meal that grants bonus Max HP and Stamina Regeneration. These buffs last for 30 minutes, which is more than enough time for the encounter.
Because mythical boss fights can last 10 to 15 minutes, your primary weapon will degrade during the fight. Always bring a fully repaired secondary weapon mapped to your quick-swap D-pad slot, and carry at least 3 Repair Kits. Stock up on healing food items such as Veal Burgers or Braised Ribs, which provide both health and spirit restoration.
White Horn is weak to Fire damage. Equip a Fire alchemy coating on your weapon using the Axiom Bracelet before engaging. Striking White Horn with a flaming weapon deals significantly increased damage to its fur-covered body, and the ambient heat from fire imbue negates the Hypothermia debuff for 30 seconds when the blizzard intensifies in Phase 2.
Detailed Attack Patterns
White Horn's moveset changes across the fight's three phases. The following table covers specific attacks to watch for in each phase:
Phase | Attack | Indicator | |
|---|---|---|---|
Phase 1 | Ground Pound | Raises both fists overhead | Dodge roll to either side; the impact creates a shockwave in a cone |
Phase 1 | Antler Charge | Lowers head and scrapes ice with front hoof | Dodge roll diagonally forward and to the left to slip past |
Phase 1 | Swipe Combo | Alternates left-right arm swings | Block the first swing, then parry the second for an opening |
Phase 2 | Blizzard Roar | Rears back and roars at half health | Cannot be interrupted; use fire imbue to counter the Hypothermia debuff |
Phase 2 | Ice Shard Barrage | Slams ground causing ice eruptions | Sprint away from the impact zone; shards erupt in a line toward you |
Phase 2 | Grapple Lunge | Beats chest and glows red | Roll forward and left under its arm; if caught, it slams you for massive damage |
Phase 3 | Frenzy Combo | Eyes glow bright red | Cannot be parried; use dodge i-frames to roll completely out of the hitbox |
Phase 3 | Avalanche Slam | Leaps high into the air | Sprint away from the shadow indicator on the ground |
When White Horn's eyes or weapon flash bright red, the incoming attack cannot be parried. You must use your dodge i-frames to roll completely out of the hitbox. Attacks with a yellow flash can be parried for a significant counterattack window.
Recommended Gear
A two-handed greatsword is the recommended weapon type for this fight. The wide swings of greatswords let you hit White Horn's large body consistently, and the higher stagger damage per hit helps break through its poise during Phase 1 and Phase 3. However, any weapon type can work if you are comfortable with its moveset.
Weapon: Two-handed greatsword or any weapon you are skilled with
Element: Fire alchemy imbue (essential for Phase 2 Hypothermia counter)
Armor: Prioritize cold resistance and HP bonuses from your equipment set
Consumables: Healing food, stamina restoration items, and at least 3 Repair Kits
Abyss Cores: Fortification cores for extra defense help survive the Phase 2 grapple if you mistime a dodge
Climbing Mechanic
White Horn incorporates the climbing mechanic that Crimson Desert uses for several of its mythical bosses. At specific moments during the fight, Kliff can grab onto White Horn's fur and climb its body to reach weak points. During these climbing segments, the camera shifts to a more cinematic angle and the player must time attacks while clinging to the creature's back. Successfully landing hits during a climbing segment deals increased damage and can stagger White Horn into a vulnerable state.