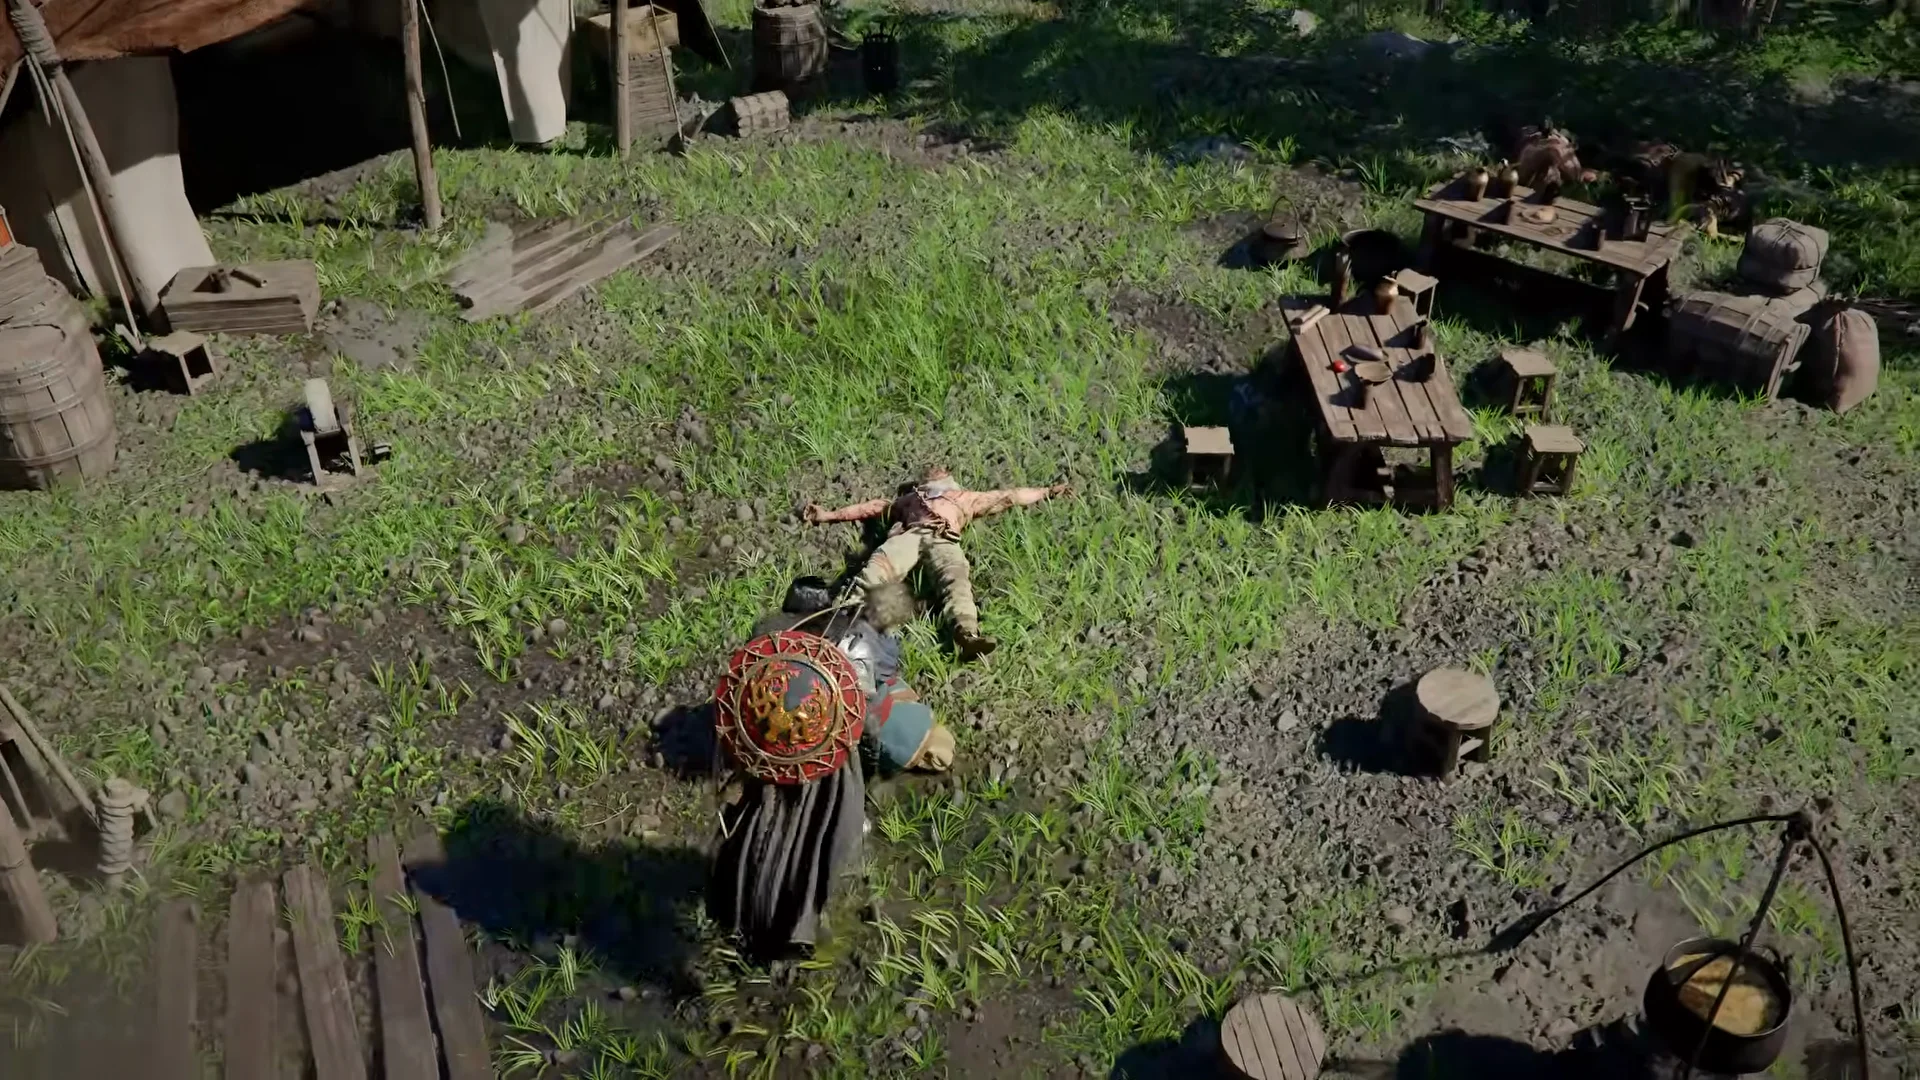
Crafting
Comprehensive guide to Crimson Desert's crafting system covering blueprints, the Knowledge System's 355 manuals, crafting categories (forging, cooking, alchemy, camp construction), resource gathering tools, nine Life Skills, equipment crafting with Abyss Gear and boss gear, gear enhancement methods, dye crafting, Greymane Camp facilities, the Freesword Dispatch system, material sources across Pywel, and tool durability.
On This Page
Overview
Crafting in Crimson Desert is a core gameplay pillar that encompasses equipment forging, consumable creation, resource gathering, and camp development. Pearl Abyss showcased these systems in their official Features Overview #3 video (February 12, 2026), titled "Life in Pywel," which detailed the full range of life skills available to Kliff and the Greymanes.
The crafting system is tightly connected to the Greymane Camp in Hernand, which is the player's home base. Resources gathered through exploration feed into camp workshops and vendors, while camp upgrades in turn unlock new crafting capabilities and improve character statistics. Crafting is not optional window dressing; weapons crafted at blacksmiths provide bonuses to core stats and skill enhancements that make them functionally different from standard loot drops.
The game's Knowledge System tracks 355 crafting manuals in total. These manuals cover the full range of craftable items from weapons and armor to consumables, dyes, and camp structures. Discovering new manuals through exploration, quest rewards, and vendor purchases expands the player's crafting repertoire throughout the game.
Crafting is one of the most important systems in Crimson Desert, allowing players to create powerful weapons, armor, consumable elixirs, cooked food, and cosmetic dyes. Rather than relying solely on loot drops and vendor purchases, the crafting system rewards players who explore the world of Pywel, gather crafting materials, and collect crafting manuals. Mastering the various crafting disciplines gives Kliff a significant edge in combat and exploration.
There are five major crafting disciplines in the game: equipment crafting (weapons and armor at a smithy or tailor), alchemy (elixirs and potions at a cauldron), cooking (food at bonfires and field pots), dye crafting (cosmetic fabric dyes at a dye station), and gear refinement (upgrading existing equipment at a blacksmith). Each system uses different materials, stations, and recipes, but they all follow a similar pattern: learn a recipe or formula, gather the required ingredients, then visit the appropriate crafting station.
This guide provides a complete overview of every crafting system, explains where to find crafting stations, lists key recipes and materials, and offers practical tips to help you get the most out of each discipline. For detailed recipe lists and material locations, follow the wikilinks to the dedicated articles.
How Blueprints Work
Blueprints function as permanent recipes that, once obtained, remain in the player's crafting knowledge. To create equipment from a blueprint, players must:
Obtain the blueprint (boss drop, dungeon reward, exploration discovery, or quest completion)
Gather the required materials (ore, hides, wood, herbs, and other resources from the open world)
Visit the appropriate crafting station (blacksmith forge for weapons and armor, cooking station for food, alchemy table for potions)
Craft the item, which produces a consistent result every time
Higher-tier blueprints come from more challenging content. Boss gear blueprints drop from powerful bosses and create equipment with unique properties, including signature skills tied to the boss the blueprint came from. For example, defeating a specific boss may yield a weapon blueprint that grants a special combat technique when the forged weapon is equipped.
Crafting Books and Manuals
The Knowledge System tracks 355 crafting manuals in total. These manuals function as permanent recipes that, once obtained, remain in the player's crafting knowledge forever. Manuals cover the full range of craftable items: weapons, armor, consumables, dyes, and camp structures.
How to find crafting manuals:
Exploration: Manuals are hidden in chests, bookshelves, and loot drops throughout the world. Check ruins, dungeons, and abandoned buildings.
Quest Rewards: Many faction quests and side quests reward crafting manuals upon completion.
Vendor Purchases: Merchants in towns and settlements sell crafting manuals. The Goldleaf Merchant Guild is a reliable source.
Boss Drops: Defeating major bosses can drop unique manuals for high-tier equipment that cannot be obtained elsewhere.
Manuals can also be read for lore entries in the Knowledge System. Some manuals have a sell value if the player already knows the recipe, but selling unique boss drop manuals is not recommended since they cannot be repurchased.
Recipe Discovery Methods
There are three primary ways to permanently learn crafting recipes in Crimson Desert. Once a recipe is learned, it stays in the Knowledge System forever and does not need to be relearned.
Crafting Books and Scrolls
Recipe books and scrolls are scattered throughout Pywel in chests, on bookshelves, and as loot drops. To learn a recipe from a book, equip the book in your inventory and then shine your lantern on the pages. The recipe registers automatically in the Knowledge menu. After learning it, the book can be safely sold or discarded since the recipe is permanently yours. The mini-map displays a small book icon when a crafting book is nearby, making them easier to spot during exploration.
When exploring the open world, the mini-map displays a small book icon whenever a crafting manual is nearby. Manuals are sometimes tucked away in manor houses, hidden on vendor shelves, or sitting on bookshelves in buildings that are easy to walk past. Once picked up, manuals appear in the inventory grouped by type. Each one shows its name (for example, "One-Handed Weapons Volume Two" or "Cloth Armor Volume One") and indicates whether its recipes have already been learned with a grayed-out appearance and a "1 of 1" counter.
To learn the recipes from a manual, select it in the inventory and press "Use." The book is then read and its recipes permanently register in the Knowledge System. Players who want to review which items a particular manual taught can open the book again from inventory, flip to the second page, and see a list of every recipe it contained. This is useful when players are away from a blacksmith and want to check what they have learned without traveling back to a crafting station.
Improvisation at Cauldrons
Players can select the Improvise option at any cauldron to experiment with ingredient combinations. This works similarly to the cooking system in Breath of the Wild: throw ingredients into the pot and see what comes out. If the combination produces a valid recipe, cooking that same combination three times permanently adds it to the recipe list, just as if the player had found the recipe book. This is especially useful for dye recipes, where experimentation with flowers and insects can unlock colors without ever finding the written formula.
Vendor Purchases and Quest Rewards
Merchants in towns and settlements sell crafting manuals directly. The Goldleaf Merchant Guild is one of the most reliable sources for cooking and alchemy manuals. Additionally, many faction quests and side quests reward crafting manuals on completion. Boss encounters can also drop unique manuals for high-tier equipment that cannot be purchased elsewhere.
Crafting Categories
Crimson Desert's crafting spans four main categories, each tied to different crafting stations and materials:
Station | Products | Notes | |
|---|---|---|---|
Weapon and Armor Forging | Blacksmith Forge | Primary gear crafting; uses ore, hides, and specialty materials | |
Bonfire / Camp Kitchen | Meals and food buffs | Cookable at bonfires in the open world and at the Greymane Camp kitchen | |
Alchemy Table | Potions, dyes, elemental coatings | Potions can be used in the field during combat; dyes customize equipment appearance | |
Camp Construction | Structures, stations, upgrades | Building new facilities at the camp using gathered resources |
Resource Gathering
Crimson Desert has a Valheim-style gathering system where players directly interact with the environment to harvest materials. Gatheringtools (axes, pickaxes, blacksmith hammers) have durability and will wear out with use, unlike weapons, which degrade through combat use and must be repaired at a blacksmith when broken. Will Powers, Director of Marketing and PR at Pearl Abyss, noted that gathering tools are easy to "discover and craft" so running out is never a major setback.

Activity | Tool | Resources |
|---|---|---|
Axe | Wood from trees | |
Ore and minerals from rock deposits | ||
Bow | Meat and fur from wildlife | |
Fish from rivers and lakes | ||
Foraging | By hand | Flowers, herbs, and insects for alchemy |
By hand | Crops cultivated at the Greymane Camp | |
N/A | Products from livestock (cows, pigs, goats, chickens) raised at camp |
Farming involves physically cultivating crops at the Greymane Camp, including watering plants by hand. Ranching provides a steady supply of ingredients from livestock kept in camp pens. Both systems produce ingredients used in cooking, alchemy, and equipment upgrading.
Life Skills
Pearl Abyss has confirmed nine Life Skills that serve as the raw material pipeline for the entire crafting system. Life Skills are learned by observingNPCs performing them in the world (the observational learning system) or through quest completion.
Life Skill | Description |
|---|---|
Growing crops at the Greymane Camp for cooking ingredients and trade goods | |
Catching fish from rivers, lakes, and the coast for food and alchemy ingredients | |
Tracking and killing wildlife for hides, meat, and crafting materials | |
Chopping trees for wood used in camp construction and equipment crafting | |
Extracting ore and minerals from deposits for blacksmith forging | |
Raising livestock at the camp for animal products | |
Preparing meals from gathered ingredients at bonfires and the camp kitchen | |
Brewing potions, creating dyes, and producing elemental coatings | |
Buying and selling goods between settlements; profits fund camp upgrades |
Life Skill resources serve multiple purposes: they fuel crafting, support Greymane Camp upgrades, and supply the Freesword Dispatch system with provisions for companion missions. This creates a self-reinforcing loop where Life Skill activities feed back into all other progression systems.
Equipment Crafting
Weapons and armor can be crafted from scratch at blacksmiths located in towns and at the Greymane Camp. Crafting requires gold, raw materials gathered through exploration, and sometimes a base item to upgrade. Crafted weapons provide bonuses to core stats and skill enhancements that differentiate them from standard loot drops found in the world.
Armor can also be repaired and upgraded when it wears out. The crafting system ensures that players who invest time in gathering and camp development have access to consistently strong equipment throughout the game.
Blacksmith Crafting Process
Blacksmiths in Hernand, the Greymane Camp, and other settlements across Pywel offer the same core forging services. When interacting with a smithy, players select an item category (one-handed weapons, two-handed weapons, bows, firearms, shields, leather equipment, cloth equipment, plate armor, bullets, and more) and choose a recipe from the available list.
Unlike cooking, blacksmith recipes do not support ingredient substitutions. Each recipe requires specific materials with no alternatives, so players must gather the exact resources listed. Patch 1.01 added a "Make Now" button (R on keyboard) that instantly crafts the selected item without requiring manual ingredient confirmation, streamlining the process considerably.
Crafted gear gains its full stats immediately upon creation. The real depth of the system comes from what happens after forging: refinement to improve base stats, and the Abyss Gear socket system to add custom augments. These post-crafting systems are what allow players to push equipment far beyond its baseline power level.
Abyss Gear and Equipment Upgrading
Equipment upgrading uses Abyss Remnants, artifacts obtained from defeating enemies and bosses, completing quests, and exploration throughout Pywel. These remnants serve as the primary currency for enhancing gear beyond its base stats.
The Abyss Gear system allows weapons to be customized with augments that provide specific combat effects. Augments can increase attack speed, critical hit chance, or add bonus damage against stronger foes. The most powerful Abyss Gear comes from the most challenging enemies and bosses, creating a natural progression loop where harder content yields better augmentation materials.
Abyss Gear Socket Counts
Every piece of equipment has a fixed number of Abyss Gear sockets that can be unlocked at a Witch workshop. Sockets must be individually created (at a silver cost) before Abyss Gears can be embedded. The socket counts are standardized across all items of the same slot type:
Equipment Slot | Sockets | Notes |
|---|---|---|
One-Handed Weapon | 3 | Dual-wielding two one-handed weapons gives access to 6 total sockets |
Two-Handed Weapon | 5 | Includes all ranged weapons (bows, firearms) |
Shield | 2 | Sword and shield users get 3 + 2 = 5 total weapon/shield sockets |
Helmet | 1 | Defensive augments only |
Chest Armor | 3 | Defensive augments only |
2 | Offensive augments in gloves only apply to unarmed (fist) attacks | |
Boots | 2 | Offensive augments in boots only apply to kick attacks |
0 |
The total socket count is balanced so that one-handed weapon plus shield users (5 sockets) match two-handed weapon users (5 sockets). Players who choose to dual-wield one-handed weapons gain the highest socket count at 6, but they sacrifice the defensive benefits of a shield.
Witch Workshop Services
Abyss Gear management is handled by WitchNPCs located throughout Pywel, not at standard blacksmiths. The first Witch players encounter is Sylvia in Shadow Whisper Cave, located north of Hernand city. Additional Witches with expanded services (including synthesis) become available around midway through Chapter 5 of the main story. The Witch in the Witchwoods (south of Hernand) unlocks the full suite of services including crafting and synthesis.
Each Witch workshop offers four core services:
Service | Description | Cost |
|---|---|---|
Create Socket | Unlocks a locked socket on a piece of equipment, allowing an Abyss Gear to be placed in it | |
Embed Abyss Gear | Slots an Abyss Gear from the player's inventory into an open socket on equipment | Free |
Extract Abyss Gear | Removes an Abyss Gear from equipment and returns it to inventory, leaving the socket empty | Free |
Craft Abyss Gear | Creates a new Abyss Gear from raw materials (Abyss Cells and other components); requires a recipe |
Because embedding and extracting are both free, players can swap Abyss Gears between pieces of equipment without any resource cost. This encourages experimentation: if a player finds a new weapon they prefer, they can pull all their Abyss Gears from the old weapon and embed them into the new one at no penalty. Extraction does not destroy the socket or the gear.
When embedding, the interface shows which Abyss Gears are compatible with the selected equipment type. Each Abyss Gear specifies which equipment slots it can be installed in (for example, "Equipable on melee weapons" or "Equipable on armor"). Gears that are incompatible with the current item appear grayed out at the bottom of the list. Some Abyss Gears provide effects that are conditional. For instance, an "Orbs of Lightning" gear only activates when the player imbues their weapon with lightning, not at all times.
Abyss Gear Synthesis
In addition to crafting new Abyss Gears from raw materials, the Witch workshop offers two synthesis options for combining existing gears into more powerful versions.
Standard Synthesis
Standard synthesis works similarly to equipment refinement: take two identical Abyss Gears of the same type and tier, and combine them into one gear of the next tier. For example, two Destruction Tier 1 gears can be synthesized into a single Destruction Tier 2. Both input gears must be at the exact same tier level; a Tier 1 cannot be combined with a Tier 3. This is the primary method for upgrading specific Abyss Gears to higher tiers.
Special Synthesis
Special synthesis is a gamble. It consumes one Abyss Gear and produces a random result. The outcome depends on the tier of the input material:
Input Tier | Standard Result | Upgraded Result | Greater Abyss Gear Chance |
|---|---|---|---|
Tier 1 | 50% chance of Tier 1 | 46% chance of Tier 2 | 4% |
Tier 2 | 50% chance of Tier 2 | 46% chance of Tier 3 | 4% |
Tier 3 | 96% chance of Tier 3 | N/A | 4% |
The 4% chance to produce a Greater Abyss Gear is the same regardless of the input tier. This has a practical implication: since Tier 1 Abyss Gears are the easiest to obtain, they are the most efficient material for gambling toward Greater Abyss Gears. Using expensive Tier 2 or Tier 3 materials as synthesis input does not improve the odds.
When performing special synthesis, the player chooses which Abyss Gear to use as the primary input and which to sacrifice as the secondary material. The secondary slot defaults to Steelbane but can be swapped to any Abyss Gear the player owns. Using gears that the player has in bulk (like surplus Insights or Primal Banes) makes the process more sustainable.
Greater Abyss Gears
Greater Abyss Gears are the most powerful augments in the game. They offer dramatically stronger effects compared to their standard counterparts. Examples include Attack Speed Level 10, Critical Hit Rate Level 10, or a 40% damage increase against specific enemy types through Greater Primal Bane variants.
There is a significant trade-off: all Greater Abyss Gears have a durability meter that depletes during combat. Once the durability reaches zero, the Greater Abyss Gear is permanently destroyed and removed from the equipment. This makes Greater Abyss Gears function as powerful but temporary upgrades rather than permanent additions to a build. Because of their limited lifespan and the low 4% acquisition rate from special synthesis, it is best to save Greater Abyss Gears for specific challenging encounters (difficult bosses, endgame Sanctum runs) rather than using them during routine exploration.
Abyss Cell Sources
Abyss Cells are the primary crafting ingredient for making Abyss Gears at the Witch workshop. There are two main ways to obtain them:
Abyss Creatures: Killing Abyss-type enemies in the open world drops Abyss Cells. Bismuth Oreback Crabs are the most consistent source, as they always drop cells along with Bismuth Ore. These crabs tend to cluster around Abyss Fast Travel Points throughout Pywel.
Camp Farming: An Abyss Cell can be converted into an Abyss Seed by selecting it in the inventory and choosing "Use." Planting the seed in a farm plot at the Greymane Camp grows an Abyss tree that produces up to 5 Abyss Cells when harvested. Applying fertilizer (rewarded from the Queen of Spiders and Restore Factory quests in Hernand) maximizes the yield. With all 8 farm plots dedicated to Abyss trees and consistent fertilizer use, each harvest cycle yields up to 40 Abyss Cells.
Abyss Gear crafting recipes are sold by Witches in each region of Pywel, with different Witches carrying different recipe sets. Players must visit Witches across multiple regions to collect the full set of crafting formulas for all Abyss Gear types (Destruction, Insight, Swift, Primal Bane, and others).
Boss Gear Drops
Defeating major bosses drops unique equipment with "Signature Abilities" tied to that boss's fighting style. These are special effects that cannot be obtained through regular crafting. For example, a weapon dropped by a boss known for rapid strikes might grant increased attack speed, while gear from a defensive boss could boost blocking efficiency. Boss gear represents some of the strongest equipment available and incentivizes taking on optional encounters.
Armor Set Bonuses
Some armor sets may provide bonuses when wearing matching pieces, though the extent of set bonuses varies. Players can mix and match armor pieces freely for stats while maintaining their preferred look through the Dye System.
Armor Type Implicit Stats
Every piece of armor in Crimson Desert belongs to one of three weight classes: cloth, leather, or plate. Beyond their raw defense values, each weight class carries implicit stats that are always present on armor of that type, regardless of the specific piece. These implicits are not random; they are inherent to the weight class and give each type a distinct identity.
Armor Type | Primary Implicit | Secondary Implicits | Trade-Off |
|---|---|---|---|
Cloth | Varies by piece | Lowest base defense; best mobility | |
Critical Rate, Lightning Resistance | Attack Speed (commonly on gloves) | Moderate defense; offensive bonuses | |
Plate | Higher base defense | Daze Immunity (commonly on helmets) | Highest defense; no movement bonus |
The armor type is clearly stated in each item's name (for example, "Solless Plate Armor" or "Frostcrusted Plate Armor"), making it easy to identify at a glance. The current community consensus leans toward plate armor because of its superior defense, but the Abyss Gear socket system allows players to compensate for any armor type's weaknesses by socketing the right augments. Players who prefer a particular armor's appearance or feel can use any weight class and customize its stats through sockets to bring it closer to their preferred playstyle.
How Equipment Stats Apply to Your Character
Understanding which equipment stats are actually active at any given time is one of the most overlooked aspects of Crimson Desert's gear system. Not all equipped gear contributes its stats simultaneously.
Weapons: Only the currently drawn (unsheathed) weapon contributes its attack stats and Abyss Gear bonuses. Sheathing a sword and drawing a two-handed weapon changes which attack values are applied. Check the character stat screen after swapping weapons to see the difference.
Gloves and Boots: Attack stats on gloves only apply when using unarmed (fist) attacks. Attack stats on boots only apply during kick attacks. If the player is using a standard melee weapon, the attack values on gloves and boots do not contribute to damage. This means investing in attack-boosting Abyss Gears for gloves and boots is only worthwhile for players who heavily use unarmed combat.
Shields: A shield's defense bonus and any movement speed implicit remain active even when a two-handed weapon is drawn, as long as the shield stays equipped on the character's back. This is one of the few cases where a piece of equipment contributes stats while not actively held.
Accessories: Rings, earrings, and necklaces always apply their bonuses regardless of which weapon is drawn. Necklace stats are particularly valuable because they effectively grant double their listed value. A necklace with Attack 6, for example, actually provides 12 attack to the character. Jewelry with Critical Rate also applies to all weapons, unlike Critical Rate on a specific weapon which only affects attacks with that weapon.
Armor and Helmets: Defense stats from armor and helmets are always active. Any attack speed bonuses on armor act as a general multiplier applied to the character regardless of weapon choice.
Stats are clustered in breakpoints of five. Reaching 5, 10, or 15 in a stat triggers additional boosts to attack, defense, or secondary attributes. Planning gear around these breakpoints can yield disproportionate returns compared to incremental stat increases that fall between thresholds.
Gear Enhancement
Beyond initial crafting, Crimson Desert offers several systems for upgrading and modifying equipment after it is forged:
Enhancement Method | Description |
|---|---|
Blacksmith Refinement | Upgrading base stats of forged equipment through additional materials at the blacksmith |
Abyss Gear Sockets | Inserting Abyss Fragments into gear sockets to add special properties |
Elemental Alchemy | Coating weapons with elemental properties (fire, ice, lightning) that interact with the environment |
Abyss Artifacts play a central role in gear enhancement. These progression items, earned through exploration, boss kills, and liberation, can be socketed into equipment to grant additional abilities or stat boosts. The Abyss Gear system represents the endgame tier of equipment customization.
The primary method of upgrading equipment stats is Refinement at the blacksmith. Each weapon, armor piece, and accessory can be refined up to level 10. Levels 1 through 4 use standard materials (ores, hides, wood) and are inexpensive. Starting at level 5, the blacksmith requires Abyss Artifacts in addition to standard materials, making higher refinement levels a significant resource commitment. Players must decide whether to spend Abyss Artifacts on refinement or save them for Axiom Force skill unlocks. For a complete breakdown of refinement materials and costs, see the Gear Refinement article.
Cooking
Cooking can be done at any bonfire encountered in the open world or at cauldrons in the Greymane Camp. Recipes are obtained through exploration or purchased from merchants. Each recipe lists its required ingredients, and players physically stir ingredients in cauldrons during the cooking process.

Meals restore health, spirit, and stamina, and many also provide combat buffs such as increased damage, defense, or health regeneration for a limited duration. Ingredients come from hunting, fishing, farming, and ranching. The camp's Food Shop, run by the NPC Ronnie, sells provisions and basic ingredients.
Known food items from preview materials include barley, meat jerky, salt-grilled fish, and fruit juice, suggesting a range of recipes that use different ingredient types and provide varied buffs.
Cooking produces food items that restore Health, Spirit, and Stamina while also granting temporary resistance buffs. The cooking system is one of the first crafting disciplines you can access, and good food makes a noticeable difference in both exploration and combat. See the dedicated How to Cook Food article for a step-by-step walkthrough, and the All Recipe Locations article for where to find every cooking recipe.
Cooking Methods
There are two cooking methods in Crimson Desert, each suited for different situations:
Method | Station | Complexity | Quality |
|---|---|---|---|
Grilling | Bonfire / Campfire | Simple, one or two ingredients | Basic restoration, quick to prepare |
Cooking Pot at a bonfire | Multiple ingredients, requires recipes | Stronger healing, better buffs, more versatile |
Bonfires and campfires are found throughout Pywel, both inside settlements and out in the wilderness. The first easily accessible bonfire is near Renee in Hernand. Once you unlock your camp during Chapter 3's Homestead subquest, you will have your own bonfire available at Howling Hill for convenient cooking.
Recipe Discovery and Quality Tiers
Cooking recipes are obtained by finding books and scrolls in the world, purchasing them from innkeepers and food vendors, or by experimenting. The game supports an Improvise feature similar to Breath of the Wild: throw different ingredients into the pot and, if the combination is valid, you discover a new recipe. Cook a new dish three times and it is permanently added to your Knowledge menu. Failed experiments produce a "mysterious dish" with subpar recovery.
Food comes in four quality tiers that reflect the quality and quantity of ingredients used. Higher-tier versions of the same recipe provide stronger healing and longer buff durations:
Quality Tier | Healing Strength | Buff Duration |
|---|---|---|
Modest | Weak restoration | Short or no buff |
Basic | Moderate restoration | Brief buff |
Filling | Strong restoration | Extended buff |
Hearty | Maximum restoration | Longest buff duration |
To produce higher quality meals, use better ingredients or increase the quantity of ingredients in the recipe. Lean Meat can be swapped for Tender Meat or Marbled Meat for improved results. Grains like Lentils can be replaced with Oats, Barley, or Wheat, though using lower-tier substitutes may reduce the final quality.
Cooking Recipe Categories
Cooking recipes are organized into several categories based on preparation method and complexity:
Category | Recipe Count | Examples | Typical Effects |
|---|---|---|---|
Feasts | 3+ | Spirit +75%, Ice Res, Sleep Immunity, Stamina Cost reduction | |
1+ | |||
8+ | Health +140 to +340, Ice Resistance | ||
Field Grill Cooking | 12+ | Health +80 to +260, Fire Resistance |
During the early game, focus on Hearty Grilled Meat by hunting deer in the wild and skinning them for fine meat. Meat Skewers are another excellent early recipe because they restore both Health and Spirit, making them far superior to basic Grilled Meat.
Ingredient Sources
Cooking ingredients come from multiple sources. Vendor shops sell staples like Salt, Sugar, Cooking Oil, Eggs, Milk, and Water, and their stock refreshes every 24 in-game hours. Wild ingredients such as meat, fish, fruits, and vegetables are gathered through hunting, fishing, foraging, and farming. Once you unlock the Greymane Camp farm and ranch facilities, you can grow crops and raise animals for a steady supply of ingredients. Dispatch missions from the camp also reward cooking ingredients.
Craftable Provisions Quick Reference
The tables below list individual recipes and craftable items. Each item has its own dedicated page with full ingredient lists, effects, and tips. See the Cooking and Alchemy pages for broader system overviews.
Drinks
Drinks are brewed at cauldrons. They primarily restore spirit and grant temporary buffs.
Drink | Key Effect | Crafting Station |
|---|---|---|
Stamina +64, Ice Resistance Lv 1 (3 mins) | Cauldron | |
Cauldron | ||
Cauldron |
Grilled Foods
Grilled foods are cooked at a Cooking Field Tool (portable grill) at bonfires. These are the simplest recipes, requiring one or two ingredients.
Food | Key Effect | Main Ingredient |
|---|---|---|
Health +80 | Tough Meat x1 | |
Spirit +4 | Onion x1 | |
Health +100 |
Pot Cooking
Pot cooking produces advanced meals with multiple effects, including elemental resistance buffs. These require more ingredients.
Food | Key Effect | Main Ingredients |
|---|---|---|
Health +240, Fire Resist Lv 4 (1 min) | ||
Alchemy Consumables
Alchemy items can be crafted in the field without a fixed station. They provide combat-oriented buffs.
Item | Key Effect | Main Ingredients |
|---|---|---|
No Spirit Consumption (4s) | Medicinal Herb, Luminous Moss, Purified Water |
Ammunition
Ammunition is crafted at Blacksmith stations and consumed on each ranged attack.
Ammo | Weapon | Ingredients | Buy Price |
|---|---|---|---|
2 | |||
3 |
Key Early Recipes
During the first several chapters, food resources are limited and players need efficient recipes that use commonly available ingredients. The following recipes are recommended priorities for early progression:
Recipe | Type | Key Ingredients | Effect | Why It Matters |
|---|---|---|---|---|
Grilled Food | Tough Meat x2, Salt x1 | Health +120 | Upgraded version of basic Grilled Meat. Deer and boar are plentiful in Hernand, making this the most reliable early healing option. | |
Basic Toasted Grains | Grilled Food | Lentils x2 | Cheap stamina sustain. Lentils are gathered from Greymane Camp farms or purchased from Ronnie. Can be upgraded to Hearty Toasted Grains with additional grain. | |
Grilled Food | Meat x1, Fruit or Vegetable x1 | Dual recovery from one recipe. Good for exploration when carrying light. | ||
Water x2, any single herb x15 | Revival; restores small HP when downed | The single most important early alchemy recipe. Found in Shadow's Whisper Cave north of Hernand. | ||
Grilled Food | Fish x1, Salt x3 | Health +100 | Easy to prepare at bonfires near rivers. Northern Pike is a common catch in Hernand waterways. |
Recipe quality tiers determine the strength of the resulting meal. The four tiers are Modest, Basic, Filling, and Hearty. Adding extra portions of the main ingredient during cooking upgrades the tier. For example, Basic Toasted Grains becomes Hearty Toasted Grains when extra grain is included. Higher tiers provide stronger healing and longer buff durations, so it is worth investing a few extra materials per cook.
Alchemy
Alchemy allows crafting potions, medicines, and dyes using flowers and insects gathered during exploration. Unlike cooking, alchemy can be performed on the fly during gameplay without returning to a bonfire or camp. This makes it particularly useful for crafting quick remedies during exploration or before boss encounters.
Potions provide temporary combat buffs, while medicines heal ailments and restore health. Both are consumable and stack in inventory for use during combat.
Alchemy Recipes and Ingredients
Alchemy recipes are records of brewing techniques that guide players in crafting elixirs, potions, and dyes. Each formula has its own set of ingredients and requires a cauldron to brew. Unlike blacksmithing, alchemy recipes can be crafted on the fly in the field, making it especially valuable when far from civilization. Recipes are obtained by purchasing from vendors or by exploring Pywel. Some formulas must be discovered in the world through exploration before they can be produced.
The most important early alchemy recipe is the Palmar Pill, which functions as a revival item. When knocked down, consuming a Palmar Pill lets the player get back on their feet and replenishes a small amount of health. The Palmar Pill recipe is found inside Shadow's Whisper Cave, north of Hernand city. The cave entrance is a very thin crack in a cliff face, easy to miss during casual exploration. Once inside, the recipe is on a ledge near the back of the cave.
Recipe | Effect | Key Ingredients | Location Found |
|---|---|---|---|
Revival; restores small HP when downed | Water x2, any single herb variety x15 (31 types accepted; all 15 must be the same) | ||
No Spirit consumption for 4 seconds | Medicinal Herb, Luminous Moss, Purified Water | Vendor / Exploration | |
Significant health restoration | Rare herbs, Purified Water | House Roberts questline reward | |
Temporary defense boost | Medicinal Herb, Butterfly, Purified Water | Vendor / Quest reward | |
Temporary attack power boost | Vendor / Quest reward |
The Scholastone Institute's Research Projects can reveal gathering locations for rare alchemy materials. One project reveals the location of Rosemary gathering areas for 9 Silver and takes 6 hours to complete.
Another valuable early potion is Meliara's Elixir, which increases maximum health by 150 and improves attack speed for 10 minutes. The Lesser version requires Medicinal Herb, Beetle, and Purified Water, and the formula is located in Mudridge Cabin north of the Porrorin woods in Hernand. For defensive play, Apollonia's Lesser Elixir provides a temporary defense boost using Medicinal Herb, Butterfly, and Purified Water.
Dye Crafting
Dyes are crafted through alchemy using flowers and insects. They provide cosmetic customization for outfits, armor, weapons, mounts, and even the War Robot (mech). The full color palette is available from the start of the game once the player has the required ingredients, with no progression gating on which colors can be crafted. Dyes are applied at the Dyehouse within the Greymane Camp.
Even without a recipe, players can select the Improvise option at any cauldron and experiment with different combinations of flowers and insects to discover new dye colors. Successful experiments are permanently added to the recipe list.
Dye | Ingredients | Source Type |
|---|---|---|
10 Dunbaria, 3 Beetle, 3 Longhorn Beetle | Recipe / Improvise | |
10 Dunbaria, 3 Beetle, 1 Longhorn Beetle, 2 Stag Beetle | Recipe / Improvise | |
10 Peony, 3 Rhinoceros Beetle, 1 Longhorn Beetle, 1 Stag Beetle | Recipe / Improvise | |
10 Peony, 3 Rhinoceros Beetle, 1 Longhorn Beetle, 2 Stag Beetle | Recipe / Improvise | |
10 Peony, 3 Rhinoceros Beetle, 3 Stag Beetle | Recipe / Improvise | |
15 Lavender, 5 Blue Lavender, 2 Longhorn Beetle, 1 Stag Beetle | Recipe / Improvise |
Flower ingredients like Dunbaria, Peony, and Lavender are gathered from wildflower patches across Hernand and other regions. Insects such as Beetles, Longhorn Beetles, Rhinoceros Beetles, and Stag Beetles are caught by hand in grassy and wooded areas throughout Pywel.
Alchemy produces combat consumables, primarily elixirs that grant temporary buffs such as increased attack speed, boosted defense, reduced stamina cost, and spirit gauge restoration. The alchemy system becomes available once you find a cauldron, and it is one of the most powerful tools for preparing for boss fights and difficult encounters.
How Alchemy Works
Alchemy combines three types of ingredients at a cauldron: reagents, catalysts, and containers. Reagents are plants, fungi, and insects that determine the elixir's effect. If an insect restores stamina when eaten raw, using it in an alchemy recipe will produce a stamina-based elixir. Catalysts are binding agents like ores, animal materials, and webs that trigger the alchemical reaction and influence its strength. Containers are empty bottles that hold the finished product.
Reagents and Catalysts
Both reagents and catalysts come in two tiers. Lesser-tier ingredients produce weaker brews, while Common-tier ingredients unlock stronger, longer-lasting formulas. As you explore further regions of Pywel, you will encounter higher-quality reagents and catalysts.
Type | Tier | Examples |
|---|---|---|
Reagent | Lesser | Medicinal Herb, common insects, basic fungi |
Reagent | Common | Crimson Root, Oakwood Mushroom, Palmar Leaf, Palmar Beetle |
Catalyst | Lesser | |
Catalyst | Common |
Empty Bottles are sold by Provisioners in every major town. Buy them in bulk whenever you visit a vendor, because you will burn through them quickly once you start brewing elixirs regularly.
Cauldron Locations
You need a cauldron to perform alchemy. The two earliest accessible cauldrons are located in the Hernand region:
Location | Region | Notes |
|---|---|---|
North of Hernand City, west of Three Saints' Falls | Requires squeezing through a cliff crack to access; close to the city for repeat crafting runs | |
Hernand City east side | Located in a building marked with a mortar and pestle sign |
Additional cauldrons become available as you travel to new regions including Pailune, Calphade, and Beighen. Every inn district in a major settlement typically has at least one cauldron in a nearby building. You can also unlock an Alchemy Lab at the Greymane Camp through the camp upgrade system, which requires wood from logging and ore from mining.
Key Alchemy Recipes
The following table lists some of the most important alchemy recipes in the game. For the complete list with all ingredients and effects, see the dedicated All Alchemy Recipes article.
Recipe | Effect | Key Ingredients |
|---|---|---|
Max Health +75, Attack Speed Lv.1 (5 min) | 2x Lesser Health Reagent, 1x Lesser Catalyst, 1x Empty Bottle | |
Defense +10 (5 min) | 2x Lesser Defense Reagent, 2x Lesser Catalyst, 1x Empty Bottle | |
No Spirit Cost (4 sec) | 2x Lesser Spirit Reagent, 1x Lesser Catalyst, 1x Empty Bottle | |
No Stamina Cost (4 sec) | 2x Lesser Stamina Reagent, 1x Lesser Catalyst, 1x Empty Bottle | |
Attack +7 (10 min) | 5x Common Attack Reagent, 1x Lesser Catalyst, 1x Empty Bottle | |
Max Health +150, Attack Speed Lv.2 (10 min) | 3x Common Health Reagent, 2x Lesser Catalyst, 1x Empty Bottle | |
No Spirit Cost (8 sec) | 3x Common Spirit Reagent, 2x Lesser Catalyst, 1x Empty Bottle | |
Instant revive at 30% health | 15x Medicinal Herb, 2x Water | |
Instant revive at 100% health | 1x Quality Medicinal Herb, 1x Palmar Leaf, 1x Palmar Beetle, 1x Water | |
Stamina +160, Ice Res Lv.5 (10 min) | 2x Oakwood Mushroom, 2x Water |
The Attack Speed Potion (crafted from Crimson Root, Adrenaline Gland, and Alcohol) is widely considered the single most impactful alchemy recipe in the game. It grants +30% attack speed for 60 seconds and should be used immediately before every boss fight. Prioritize unlocking this recipe as early as possible.
Greymane Camp Integration
The Greymane Camp in Hernand is the central hub for crafting activity. It starts as a small tent settlement and grows into a fortified base as players invest gathered resources into construction. The camp contains functional buildings that support every aspect of the crafting system.
Facility | Function |
|---|---|
Blacksmith | Weapon and armor crafting, upgrading, and repair |
Food Shop (Ronnie) | Buy and sell provisions, basic ingredients |
Trading Center | Exchange goods between players and merchants |
Farms | |
Livestock Pens | Raise cows, pigs, goats, chickens for crafting materials |
Dyehouse | Apply crafted dyes to equipment and cosmetic items |
Character appearance customization |
Camp upgrades directly improve character statistics, unlock new abilities, and expand companion rosters. Construction happens in real-time as players physically place furniture and buildings. Players can also construct and customize personal housing within the camp.
Companion Dispatch System
The Freesword system allows players to send recruited Greymane members on resource-gathering missions. Dispatchedcompanions go out to gather timber, ore, and other raw materials. Missions take anywhere from hours to days of in-game time and yield both currency and crafting materials upon completion.
This system supplements personal gathering by providing a passive income of resources. As the camp grows and more companions are recruited, more dispatch missions become available simultaneously, creating a scaling resource pipeline that supports increasingly ambitious crafting projects.
Material Sources
Crafting materials come from multiple sources across Pywel:
Where Found | |
|---|---|
Mining Deposits | Ore, minerals, gemstones for forging |
Wood for camp construction and equipment handles | |
Hunting Wildlife | Hides, sinew, bones for armor and accessories |
Farming (Camp) | Crops for cooking and trade |
Ranching (Camp) | Animal products for cooking and crafting |
Foraging | Herbs and plants for alchemy |
Boss Drops | Rare materials and blueprints for high-tier gear |
Dungeon Chests | Blueprints and specialty materials |
Trade Merchants | Purchased materials available in settlements |
Different regions of Pywel yield different materials, encouraging players to explore the full continent rather than farming a single area. The five regions of Pywel each feature unique ecosystems with region-specific resources.
Tool and Weapon Durability
Weapons in Crimson Desert have durability that depletes through combat use. When a weapon reaches 0% durability, it becomes "broken" and suffers approximately a 90% damage penalty, making it nearly useless in combat. Broken weapons can be repaired at a blacksmith to restore full effectiveness. Gathering tools (axes, pickaxes, etc.) also have durability and will wear out with use. Replacement tools are easy to craft or purchase, so running out of a gathering tool is a minor inconvenience rather than a progression blocker. The durability system encourages players to keep spare weapons and tools on hand or to visit blacksmiths regularly for repairs.
Individual Material Guides
For detailed farming locations and routes, see the Materials hub page and these individual guides:
Category | |
|---|---|
Ores and Gems | Iron Ore, Copper Ore, Bloodstone, Scolecite Ore, Azurite, Garnet, Epidote, Diamond |
Wood | |
Hides | Thin Hide, Thick Hide, Short Hair Hide, Long Hair Hide, Sturdy Hide |
Miscellaneous |
See also: Refinement and Upgrade Materials for information on processing raw materials into refined components, and Mining, Logging, Hunting, and Gathering for gathering technique details.
Cauldron Locations
Cauldrons are crafting stations used for cooking and alchemy. They are found at fixed locations across Pywel and cannot be moved or constructed. Players can use any cauldron they discover, regardless of faction standing or story progression.
Location | Region | Notes |
|---|---|---|
Available after establishing the camp in Chapter 3 | ||
Hernand City | In the building just north of the rock-paper-scissors minigame location | |
North of Hernand city, west of Three Saints' Falls; also contains the Palmar Pill recipe | ||
Witch of Wisdom's House | Near the Witch's residence in the hills above Hernand | |
Various Bonfires | All regions | Portable cooking is available at bonfires using Cooking Field Tools |
Related Articles
Topic | Connection |
|---|---|
Boss drops provide high-tier blueprints and rare materials | |
Central hub for crafting stations and camp upgrades | |
Socketed into gear for enhancement; earned through exploration | |
Provides resources for crafting and camp progression | |
Crafted provisions supply dispatch missions | |
Cooking at bonfires ties into the temperature mechanic | |
Elemental alchemy coatings interact with the environment | |
Cosmetic skins are visual-only; crafting provides actual gear |
Crafting (crafting overview page)
How to Craft Equipment (step-by-step equipment crafting)
Crafting Manuals (all manual locations)
Crafting Materials (all material sources)
Gear Refinement (detailed refinement guide)
Refinement and Upgrade Materials (material locations for upgrades)
How to Cook Food (cooking walkthrough)
All Recipe Locations (every recipe in the game)
All Alchemy Recipes (complete alchemy recipe list)
Alchemy Recipes (alchemy overview)
Life Skills (gathering and production skills)
Crafting Systems at a Glance
The table below summarizes the five crafting disciplines, their stations, and what they produce. Each system is explained in detail in the sections that follow.
Discipline | Station | Products | Key Ingredients |
|---|---|---|---|
Equipment Crafting | Smithy / Tailor | ||
Cauldron / Alchemy Lab | Elixirs and potions | Reagents, catalysts, empty bottles | |
Bonfire / Field Pot | Cooked food and feasts | Meat, fish, vegetables, grains, spices | |
Dye Crafting | Dye Station (Greymane Camp) | Cosmetic fabric dyes | Flowers, inks, mordant, minerals |
Smithy | Ores, hides, timber, Abyss Artifacts |
Equipment Crafting
Equipment crafting lets you forge new weapons, armor, shields, and projectiles at a smithy or tailor shop. Unlike most RPGs, crafting equipment in Crimson Desert does not cost any currency. You only need the right crafting manual and the required raw materials.
How Equipment Crafting Works
Equipment crafting follows a straightforward four-step process. First, you need to find a crafting manual that teaches the recipe. Second, examine the manual in your inventory to learn the recipe permanently. Third, gather the raw materials listed in the recipe. Finally, visit the appropriate crafting station and select the item you want to craft.
Find a Crafting Manual in the world, from a vendor, or as a quest reward. Manuals are small books or parchments marked with a book icon on the minimap when you are nearby.
Examine the Manual from your inventory to learn its recipes permanently. Once learned, the manual can be sold or gifted to a relevant shop vendor to increase your trust level with that NPC.
Gather Materials through mining, logging, skinning animals, defeating enemies, or purchasing from vendors. Check the recipe in your Knowledge menu to see exactly what you need.
Visit a Smithy or Tailor and select the item from the crafting menu. The blacksmith handles weapons, metal armor, shields, and projectiles. Tailor shops handle leather armor, cloth armor, and cloaks.
Crafting Manuals
There are over 60 crafting manuals scattered across Pywel, covering weapons, armor, cooking recipes, and alchemy formulas. Weapon manuals alone number around 19, organized into series such as "One-Handed Weapons of the World, Vol. I" and "Two-Handed Weapons of the World, Vol. II." Armor manuals include the "Leather Armors of the World" and "Plate Armors of the World" series.
Crafting manuals can be obtained in several ways. Many are sold by equipment shops and provisioners in major towns. Others are found in treasure chests, looted from caves, or discovered inside buildings. Some manuals in locations like Glenbright Manor and the Scholastone Institute must be stolen. Equipping a Mask before taking them prevents reputation loss. A small book symbol on the minimap alerts you when a manual is nearby, so keep an eye out while exploring.
Crafting Manual Series
Manual Series | Type | Crafts |
|---|---|---|
One-Handed Weapons of the World | ||
Two-Handed Weapons of the World | ||
Ranged Weapons (Bows and Guns) | Bows, crossbows, hand cannons | |
Shields of the World | Round shields, tower shields | |
Plate Armors of the World | Plate chest, greaves, gauntlets, helms |
Crafting Materials for Equipment
Raw materials for equipment crafting fall into several categories. Each recipe requires a specific combination of these materials, and higher-tier gear generally demands rarer ingredients. See the full crafting materials article for detailed locations.
Material Category | Examples | How to Obtain |
|---|---|---|
Ores | ||
Logging trees with a Logging Axe | ||
Hides and Leather | Skinning animals or purchasing from the Tannery | |
Cloth and Fibers | Provisioner shops, enemy drops, gathering | |
Gems |
You can obtain a Pickaxe early in the game by completing Rhett's Request in Hernand, and a Logging Axe by completing Turnali's Request. Both tools are essential for gathering the ores and timber that most equipment recipes require.
Dye Crafting
Dye crafting is a purely cosmetic discipline that lets you recolor your equipment's fabric components. All dyes are crafted at the Dye Station, which unlocks at the Greymane Camp through a dedicated life skills quest chain. Dyes persist permanently on an item until you apply a new color over it.
Dye Recipes
Dye | Ingredients | Source Notes |
|---|---|---|
Crimson Dye | Red Desert Flower + Mordant | Red Desert Flower gathered at dawn in the Crimson Desert region; respawns daily |
Midnight Black Dye | Squid Ink + Charcoal + Mordant | |
Royal Gold Dye | Gold Dust + Saffron + Mordant | Gold Dust mined from gold ore; Saffron purchased from specialty merchants in Hernand or Demeniss |
Forest Green Dye | Green Moss + Copper Sulfate | Green Moss gathered in Redfox Forest and Hernand woodlands; Copper Sulfate from alchemist merchants |
Mordant is a chemical fixative required for three of the four dye recipes. Purchase it in bulk from provisioner shops whenever you have the chance. Copper Sulfate can be bought from alchemist merchants in most major towns.
Gear Refinement
Gear refinement is the system for upgrading your existing equipment to improve its stats. Instead of replacing gear with new drops, you bring raw materials to a blacksmith and enhance the weapon or armor piece you already own. For full details, see the dedicated Gear Refinement article and the Refinement and Upgrade Materials article.
How Refinement Works
Refinement takes place at any smithy. Interact with the blacksmith and select the Refinement option. Choose the weapon or armor piece you want to upgrade, review the required materials shown on the right panel, and submit the materials to improve its stats. Like equipment crafting, refinement does not cost any currency. The only cost is the raw materials themselves.
All standard weapons, armor pieces, and jewelry can be refined up to a maximum of 10 refinement levels. Each level adds a fixed stat increase (attack power for weapons, defense for armor). Your current refinement level is displayed in the item's stat box.
Material Requirements by Level
The materials required for refinement scale with the level you are targeting. The specific materials depend on the type of equipment being refined:
Refinement Levels | Material Type | Examples |
|---|---|---|
Levels 1 to 4 | Standard materials (inexpensive, readily available) | Iron Ore, Copper Ore, Timber, Fine Timber, hides |
Level 5 and Above | Rare materials including Abyss Artifacts | Higher-tier ores, gems, Abyss Cells, rare hides |
Material type depends on the gear category. Metal weapons require ores. Bows and wooden shields use timber. Leather armor uses hides. Plate armor uses a mix of ores and hides. Jewelry uses ores and gems.
The Duplicate Item Method
There is an alternative refinement method: if you have two identical copies of the same weapon or armor piece, you can sacrifice the duplicate to refine the original. This consumes the duplicate in place of standard materials and can be more efficient if you happen to find a second copy of a piece of gear. However, Unique Weapons do not support this method, so rare gear must be refined with raw materials.
The Level 4 Strategy
Starting at refinement level 5, the blacksmith begins requiring Abyss Artifacts. These same artifacts are also used to unlock character skills and increase base health through the Skill Tree. Early in the game, Abyss Artifacts are scarce, and spending them on gear refinement means fewer skills and survivability upgrades.
The widely recommended approach is to push your primary weapon and armor pieces to level 4 only, then stop. Save your Abyss Artifacts for unlocking essential combat abilities like Parry and Counter first. Once you have a comfortable skill loadout and enough artifacts to spare, revisit the blacksmith and push select pieces to level 5 and beyond.
Temporary Boosts From Field Stations
While exploring, you may encounter grindstones and anvils in bandit camps and other outposts. Interacting with these gives your weapon or armor a temporary stat boost for a short period. Use these free buffs before tackling nearby boss encounters or tough enemy camps.
Crafting Station Locations
Finding the right crafting station is the first step in any crafting endeavor. This summary lists where to find each type of station across the regions of Pywel:
Station Type | Notable Locations | Availability |
|---|---|---|
Smithy (Blacksmith) | Blacksmith Turnali (Hernand City), Howling Hill Camp, Demeniss settlements | From game start (Hernand); Chapter 3 onward (Camp); later regions as you progress |
Tailor Shop | Typically near the equipment shop or smithy in each settlement | |
Cauldron (Alchemy) | Shadow's Whisper Cave, Hernand Town east side, Pailune, Calphade, Beighen inn districts | First available in Hernand region; one in most inn districts |
Alchemy Lab | Unlocked through camp upgrades; requires wood and ore | |
Bonfire / Cooking Pot | Near Renee (Hernand), campsites throughout Pywel, Howling Hill Camp | Found in settlements and at campsites in the wild; personal bonfire from Chapter 3 |
Dye Station | Unlocked through a life skills quest chain at the camp |
On the world map, blacksmiths are marked with an anvil icon, and cooking stations appear as a pot icon. Cauldrons and dye stations do not always have a dedicated map marker, so look for the mortar and pestle sign on buildings in inn districts.
Gathering and Life Skills
Most crafting materials must be gathered from the world rather than purchased. Crimson Desert features several life skills that tie directly into the crafting pipeline:
Mining: Use a Pickaxe on ore deposits to collect Iron Ore, Copper Ore, Silver Ore, Bloodstone, and gem materials. Complete Rhett's Request in Hernand to obtain your first Pickaxe.
Logging: Use a Logging Axe on trees to collect Timber and Fine Timber. Complete Turnali's Request in Hernand to obtain your first Logging Axe.
Skinning: After killing an animal, interact with the carcass to skin it for hides, bones, and meat. Wolves, deer, and goats yield Small Bones and Thin Hides. Cows, boars, and bears yield Large Bones, Thick Hides, and better meat.
Foraging: Collect plants, herbs, mushrooms, fruits, and insects from the wild. Reagents for alchemy and ingredients for cooking are found this way.
Fishing: Catch fish at rivers, lakes, and coastal areas for cooking ingredients like Northern Pike and other freshwater and saltwater species.
Farming and Ranching: Once unlocked at the Greymane Camp, grow crops and raise animals for a steady supply of cooking ingredients and materials.
Prioritize obtaining the Pickaxe and Logging Axe during Chapter 1. These tools open up the majority of material gathering opportunities and are essential for both equipment crafting and gear refinement.
Tips and Best Practices
General Crafting Tips
Learn every manual you find immediately. Recipes are learned permanently once examined, and the manual itself can be sold afterward for extra coins.
Check vendor inventories in every new town. Provisioners, equipment shops, and innkeepers all sell crafting manuals and materials that may not be available elsewhere.
Expand your inventory early. Crafting materials accumulate quickly. Buy Small Bags from vendors whenever you can to avoid constant inventory juggling.
Sell refined surplus gear. If you find duplicate weapons or armor you do not need for the duplicate refinement method, sell them for profit rather than hoarding them.
Alchemy Tips
Buy Empty Bottles in bulk. You will burn through them faster than you expect once you start brewing elixirs regularly.
Unlock the Attack Speed Potion first. The +30% attack speed for 60 seconds is the single most impactful buff you can have before any boss fight.
Gather insects obsessively. Reagent insects like Dragonflies, Longhorn Beetles, and Butterflies are scattered throughout the Hernand woodlands and are easy to miss while running past them.
Craft Palmar Pills as insurance. The instant revive at 30% health can save a boss attempt. The Refined Palmar Pill (revive at 100%) requires Palmar Beetle and Palmar Leaf from Crescent Lake, so plan a trip to Demeniss when you reach that region.
Cooking Tips
Experiment early and often. The Improvise feature lets you discover recipes by trying ingredient combinations. Cook a new dish three times and it becomes permanent in your Knowledge menu.
Hunt deer for early food.Deer drop fine meat, which produces Hearty Grilled Meat for strong early-game healing.
Upgrade recipes with better ingredients. Swap Lean Meat for Tender or Marbled Meat to push a recipe from Modest to Hearty quality.
Stock up on Meat Skewers. They restore both Health and Spirit, making them far more efficient than basic Grilled Meat for exploration and combat.
Refinement Tips
Stop at level 4 early on. Levels 1 through 4 only require basic materials. Level 5 and above demand Abyss Artifacts, which are better spent on skills and health upgrades early in the game.
Use the duplicate method when possible. If you find two copies of the same weapon, sacrifice the duplicate at the blacksmith instead of spending raw materials. This does not work for Unique Weapons.
Use grindstones and anvils before boss fights. These field stations found in bandit camps provide free temporary stat boosts to your weapon or armor.
Refine your primary weapon first. Attack power gains from weapon refinement have a larger impact on clear speed than small defense increases from armor refinement.