Overview
Accessories are equippable items in Crimson Desert that provide stat bonuses beyond what standard weapons and armor offer. Players can equip up to six accessories at once: two Rings, two Earrings, one Necklace, and one Cloak. Filling every slot as early as possible gives a noticeable power spike, and upgrading those pieces through the Refining System pushes their value even further.
This guide breaks down the best accessories for each slot, where to find them, and how to prioritize upgrades. Every recommendation below has been verified through in-game data. For the best armor picks, see the Best Armor Guide and Best Early Armor articles. For weapon recommendations, see Best Early Weapons.
Accessory Slots Quick Reference
Before diving into specific picks, This summary lists how each accessory type works and what stats they tend to provide.

Slot Type | Slots Available | Primary Stat Tendency | Refinement Tertiary Bonus |
|---|---|---|---|
Ring | 2 | Attack | Stamina Regeneration |
Earring | 2 | Health Regeneration | |
Necklace | 1 | Attack / Critical Rate | Spirit Regeneration |
Cloak | 1 | Defense / Elemental Resistance | Varies |
Rings lean toward Attack bonuses and unlock Stamina Regeneration at higher refinement levels. Earrings provide Defense and sometimes Movement Speed, with Health Regeneration appearing as a tertiary stat. Necklaces boost Attack and can unlock Critical Rate, while their refinement bonus is Spirit Regeneration. Cloaks are a hybrid category that primarily offers elemental resistance (fire, ice, or lightning) alongside some base Defense.
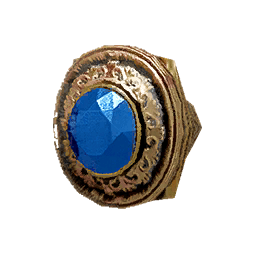
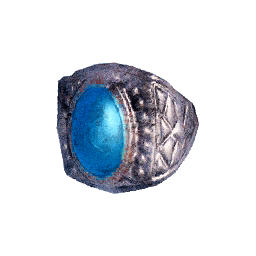
Best Rings
Ring slots are your primary source of extra Attack from accessories. You can equip two rings at the same time, so running the best available ring in each slot stacks the bonuses.
Ring | ATK | DEF | Special Effect | How to Obtain |
|---|---|---|---|---|
+2 | 0 | None | Contribution Shop, Hernand Castle (65 Contribution Points) | |
Varies | Varies | None | Contribution Shop, Demeniss Cathedral (25 Contribution Points) | |
+1 | 0 | None |
The Hernandian Signet is the strongest offensive ring currently documented, offering +2 Attack. It is purchased from the Contribution Shop inside Hernand Castle for 65 Contribution Points (no Silver required). Getting to 65 Contribution takes some time, since Contribution is earned through story missions, side quests, and faction activities. Before you reach that threshold, a pair of Tarnished Rings provides +2 Attack combined, which matches the output of a single Signet.
For players who have reached Demeniss, the Demeniss Cathedral Ring is available at the cathedral contribution shop in the southeastern district for 25 Contribution Points. It is more affordable than the Hernandian Signet but requires progression to the Demeniss region.
Recommendation: Start with two Tarnished Rings from bandit drops. Replace one with the Hernandian Signet as soon as you can afford it. In the late game, consider picking up a Demenissian Signet (65 Contribution Points in Demeniss) or a Delesyian Signet (65 Contribution Points in Delesyia) for your second slot, as faction signets from different regions stack.
Best Earrings
Earrings lean toward Defense and utility effects. Two earring slots are available, and combining a defensive earring with one that grants Movement Speed covers both survivability and mobility.
Earring | DEF | ATK | Special Effect | How to Obtain |
|---|---|---|---|---|
+2 | 0 | None | Bluemont ManorStrongbox (owl tile puzzle) | |
+1 | 0 | Movement Speed Lv.1 | Lioncrest ManorStrongbox (painting puzzle) | |
+1 | 0 | None | Exploration / enemy drops | |
0 | 0 | None | Exploration / enemy drops |
The Oath of Darkness is the strongest defensive earring in the game at +2 Defense. It is a guaranteed reward from the strongbox inside Bluemont Manor in Hernand. The puzzle requires rotating tiles to form a complete owl image. Remember that you need a mask equipped to collect strongbox loot; masks can be purchased from the Back Alley Shop east of Hernand for about 10 copper coins.
The Engraved Gold Earring provides +1 Defense plus a passive Movement Speed Lv.1 buff. It is found inside a strongbox at Lioncrest Manor, which is on the northwest outskirts of Hernand Town. Enter through a second-floor window around the back, then find the locked door on the southeastern side to reach the strongbox room. The puzzle involves rotating nine painting pieces to form a complete image.
Recommendation: Run the Oath of Darkness in one slot for raw Defense and the Engraved Gold Earring in the other for the Movement Speed bonus. This combination gives +3 Defense and a mobility boost. Both are obtainable early in the game through strongbox puzzles in and around Hernand.
Best Necklaces
Only one necklace can be equipped at a time. Necklaces primarily boost Attack and can unlock Spirit Regeneration through refinement.
Necklace | DEF | ATK | Special Effect | How to Obtain |
|---|---|---|---|---|
+5 | 0 | Rapid Stamina Restoration (L2+R2, 30 min cooldown) | Hillside ManorStrongbox (button rotation puzzle) | |
Varies | +1 | Critical Rate bonus | Southern Bluemont Strongbox (tumbler lock puzzle) | |
Varies | Varies | None | Contribution Shop, Demeniss Cathedral (27 Contribution Points) | |
0 | +1 | None |
The Saint's Necklace is the standout pick for the necklace slot. It provides +5 Defense (the highest base Defense of any necklace) and carries an active ability that rapidly restores Stamina when activated with L2+R2. The 30-minute cooldown means you should save it for critical moments like extended climbing sequences, tough boss fights, or situations where you are low on Stamina with no safe window to rest. The Saint's Necklace is found inside a strongbox at Hillside Manor. The puzzle requires rotating five buttons in a specific sequence: 2 spins, 3 spins, 4 spins, 5 spins, and 5 spins. You need to enter the manor by climbing the exterior wall and vaulting through a window.
The Finely Crafted Gold Necklace is the best offensive necklace, providing an Attack bonus and Critical Rate. It is found inside a strongbox in Southern Bluemont. From Northern Bluemont Manor, head south to the neighboring building, break into the second floor through the balcony or a window, and look for the strongbox with a tumbler lock puzzle.
The Tarnished Necklace is the earliest necklace most players find, dropping from bandits in the open world. At +1 Attack, it is modest, but it fills the slot and the bonus stacks with ring Attack. Equip it immediately and replace it later when you find a stronger option.
Recommendation: The Saint's Necklace is the overall best necklace thanks to its +5 Defense and active Stamina restoration. If you prefer an offensive loadout, the Finely Crafted Gold Necklace provides Attack and Critical Rate. Use the Tarnished Necklace as a placeholder until you solve one of these strongbox puzzles.
Best Cloaks
Cloaks are a unique accessory type that primarily provides elemental resistance. Every cloak grants at least one level of fire, ice, or lightning resistance. Cloaks cannot be socketed with Abyss Cores, so their value comes purely from base stats and resistance coverage. The best cloak for any given situation depends on which elemental threats you are facing.
Cloak choice is situational. Swap between fire, ice, and lightning resistance cloaks depending on the enemies and bosses in the area you are exploring. Below are the top options by resistance type.
Cloak | DEF | Resistance Type | How to Obtain |
|---|---|---|---|
3 | Contribution Shop, Hernand | ||
Varies | Contribution Shop, Scholastone | ||
Varies | Contribution Shop, Hernand (14+ Contribution) | ||
Varies | Lightning Resistance | Contribution Shop, Demeniss | |
Varies | Lightning Resistance | Boss drop / exploration |
The Bolton Plate Cloak is the easiest to obtain early since it comes from the Hernand Contribution Shop alongside the Bolton Plate Armor. It provides solid Defense alongside fire resistance. For ice resistance, the Hernand Ceremonial Guard Cloak is a good mid-game pick. For lightning resistance, the Demenissian Uniform Leather Cloak becomes available once you reach Demeniss.
Recommendation: Keep at least two cloaks in your inventory: one for fire resistance and one for ice or lightning resistance. Swap as needed based on the area. The Bolton Plate Cloak is the best starting cloak for most players.
How to Get Accessories Early
The fastest way to fill all six accessory slots in the early game is a combination of bandit farming, strongbox puzzles, and Contribution Shop purchases.
Bandit Farming
Bandits spawn along roadsides throughout Hernand Territory and appear in camps during quests. They have a solid drop rate for Tarnished Rings and Tarnished Necklaces. White minimap dots indicate corpses with uncollected loot, so always check after combat. Even if these items seem weak, they fill empty slots and provide free stat bonuses.
Strongbox Puzzles
Several of the best early-game accessories come from Strongbox puzzles in Hernand. The Oath of Darkness earring (Bluemont Manor), Engraved Gold Earring (Lioncrest Manor), Saint's Necklace (Hillside Manor), and Finely Crafted Gold Necklace (Southern Bluemont) are all locked behind puzzles. You must wear a mask to collect strongbox loot.
Contribution Shops
As you build Contribution with different factions, their shops unlock accessories. The Hernandian Signet (65 points) is the top priority from Hernand. The Demeniss Cathedral Ring (25 points) and Demeniss Cathedral Necklace (27 points) are affordable options once you reach Demeniss. Later regions like Delesyia and Tashkalp sell their own signets at 65 Contribution Points each.

Refinement Priority
All accessories can be refined at a Smithy for up to 10 levels. Refinement uses upgrade materials like Azurite (a blue crystal ore found west of Rocca's Hill, across the river north of Hernand City). You can also use a duplicate copy of the same accessory as a refinement material, so hanging onto extra Tarnished Rings and Tarnished Necklaces is worthwhile.
Some accessories do not reveal their tertiary stat until Refinement level 3. Always refine an accessory to at least level 3 before judging its value. The tertiary bonuses (Stamina Regeneration on rings, Health Regeneration on earrings, Spirit Regeneration on necklaces) can significantly change how useful a piece is for your build.
Refinement priority order: Refine your best earring first (Oath of Darkness or Engraved Gold Earring) to unlock Health Regeneration. Then refine your Hernandian Signet to unlock Stamina Regeneration. Necklaces come third since Spirit Regeneration is less immediately impactful than Health or Stamina recovery.
Full Recommended Loadout
Here is the recommended accessory setup for players who have completed the early chapters and explored Hernand thoroughly.
Slot | Recommended Accessory | Where Found | |
|---|---|---|---|
Ring 1 | +2 Attack | Contribution Shop (65 pts) | |
Ring 2 | +1 Attack | Bandit drops | |
Earring 1 | +2 Defense | ||
Earring 2 | +1 DEF, Move Speed Lv.1 | ||
Necklace | +5 DEF, Stamina Restore | ||
Cloak | DEF 3, Fire Resistance | Contribution Shop, Hernand |
This loadout provides +3 Attack from rings, +3 Defense from earrings, +5 Defense and active Stamina restoration from the necklace, a Movement Speed bonus from the Engraved Gold Earring, and fire resistance coverage from the cloak. It is achievable before leaving the Hernand region.
Why Accessories Are the Baseline
Before picking any specific rings, earrings, or a necklace, it helps to understand why these slots are the single most important part of a Crimson Desert build. Unlike boots and gloves, which the game treats as weapons for the purpose of stat application, the two rings, two earrings, and one necklace apply their stats globally. Any damage, critical rate, attack speed, movement speed, or secondary stat printed on those five slots follows you onto every weapon you pick up, including bows and unarmed punches or kicks. Boots and gloves, by contrast, only contribute their weapon-style stats while you are punching or kicking, so a big attack number on a glove is almost never worth chasing for a weapon build.
That global application is the foundation doctrine that makes these slots special. Pick the highest-impact piece per slot once, pour your refinement materials and abyss artifacts into maxing it out, and never replace it. Every other slot in the game (armor, cloaks, gloves, boots, and weapons) becomes flexible after the foundation is locked in, because those slots can be swapped for looks or resistance tuning without losing your core damage, crit, attack speed, or movement speed numbers. Treat accessories as a one-time investment, then forget they exist.
Stat Caps and the 5/10/15 Segments
All gear stats from critical rate onward share a hard maximum of 15 and are split into three visible segments of 5. For offensive stats like crit, attack speed, and movement speed, these segments are mostly cosmetic marks along the bar. For resistances, each of the 5, 10, and 15 thresholds grants a specific immunity or condition, so stacking resistance in blocks of 5 is the correct approach when you want a particular status protected against a specific boss. The segmentation is the reason accessories are typically tuned to either 4 per slot (to leave headroom for weapon sockets and abyss gear stacks) or pushed all the way to 15 when the stat genuinely matters for a fight.
Recommended Foundation Set
The core five-piece foundation below locks in the highest-impact global stats in the current patch. Every piece here is a one-time farm that you refine to level 10 and then never touch again. The totals listed assume full refinement.
Slot | Piece | Why It Locks the Slot | |
|---|---|---|---|
Necklace | 4 Critical Rate, 0.3 Spirit Regen per second | The displayed crit stat on a necklace is widely reported to be doubled in practice, and even if you consider the value at face, 4 crit on a globally applied slot already hits the current 4-crit baseline cap for most weapons. Paired with the passive Spirit regen, it covers both damage and sustain in a single line. | |
Ring 1 | Stamina Regen, Attack, 4 Attack Speed | One of the only rings in the game that rolls 4 attack speed at full refinement. Drops from the boss at the Nest of Valor abyss encounter at the end of the Unwavering Steps quest in Chapter 9. | |
Ring 2 | Stamina Regen, Attack, 4 Attack Speed | The second half of the 4+4 attack speed stack. Found inside a strongbox puzzle at Windmere Manor north of Demenissh. The total of 8 global attack speed is the key DPS baseline for the foundation. | |
Earring 1 | Defense, Health Regen, 4 Movement Speed | Strongbox pickup at Southern Court, southwest of Demenissh. The easiest puzzle in the game and one of very few earrings that hits the 4 movement speed tier. | |
Earring 2 | Defense, Health Regen, 4 Movement Speed | Rewarded from the Legendary Hunter quest chain in Hernand. Skin the black lion after the fight to obtain the earring. Completes the 4+4 movement speed stack for 8 global movement speed. |
The combined foundation delivers 4 global critical rate, 8 global attack speed, 8 global movement speed, passive spirit regen, stamina regen on both ring slots, and health regen plus defense on both earring slots. Every one of those numbers follows you onto a two-handed weapon, a dual wield, a bow, or an unarmed kick-shield setup without any further tuning.
Refinement Plan
Push all five pieces to refinement level 10 as your top priority before investing in weapon or armor refinement. The materials come from minerals and abyss artifacts, and the gathering time is dramatically reduced once you slot a mining setup that stacks bonus ore abyss gear. See the Refinement Priority section below for the full material breakdown and the specific gathering route.
Equip the Mining Knuckledrill and refine it to at least rank 6 for Expert Mining, then stack Blessing of the Earth abyss gear on a dedicated farming armor set for 60% additional bonus ore chance.
The final refinement rank for every foundation piece requires Assyrian Scales, which can be looted freely from the small island in the south without engaging the resident serpent dragon. Axiom Force lets you scoop them into your Kukupot for storage until needed.
Medium Bag quest rewards become valuable late game because they stop giving inventory space at the 240 slot cap and instead roll valuable materials, including Flawless Timber for bow refinement later.
Tips
Fill all six accessory slots as soon as possible. Even weak accessories like the Tarnished Ring provide free stats.
Always loot bandit corpses. White minimap dots mark uncollected loot, and bandits are the primary source of early accessories.
Buy a mask from the Back Alley Shop before attempting any strongbox puzzles. Without a mask, you cannot collect the rewards.
Do not sell duplicate accessories. Use copies of the same accessory as refinement materials at the Smithy.
Refine accessories to at least level 3 to reveal their hidden tertiary stat.
Swap cloaks based on the elemental threats in your current area. Keep one fire-resistant and one ice or lightning-resistant cloak in your inventory.
See the Best Armor Guide and Best Early Weapons for gear recommendations in other equipment slots.
Crafting Alternatives via Terif
Most of the best accessories in the game are one-time pickups from strongbox puzzles, but a handful can be crafted at a Blacksmith once the right books are read. The two key books are Accessories of the World, Vol. II and Accessories of the World, Vol. III. Both can be collected in the town of Terif, in the north of the Demeniss region near the Den River:
Vol. II: Sold by the vendor Kron in Terif. Browse Kron's wares and purchase the book to unlock the recipes.
Vol. III: Free pickup. Walk into the watchtower at the northern POI in Terif and climb all the way to the top. The book sits on a table and can be grabbed without any combat.
After reading both books, the recipes for the Finely Crafted Gold Ring, the Rough Bluestone Ring, the Green Coral Reef Earring, and a second copy of the Engraved Gold Earring all become available.
Craftable Ring Alternatives to Mark of Darkness
The Mark of Darkness is a unique ring with Attack, Attack Speed, and Stamina Regen. Because it is unique, only one copy can be obtained per playthrough from the strongbox inside Windmere Manor, located between the King's Shield Mountains and the Crimson Wall to the north of Demeniss. To fill the second ring slot with the same stat profile, craft either the Rough Bluestone Ring or the Finely Crafted Gold Ring. Both craftable rings share the Attack, Attack Speed, and Stamina Regen stat line with the Mark of Darkness, which means they stack cleanly into a two-ring loadout.
One caveat: the stamina regen bonus on both craftable rings does not appear at low refinement. It unlocks after several upgrades, so treat these rings as a long-term slot rather than an immediate drop-in. A widely recommended best-in-slot ring loadout is Mark of Darkness plus either of the two crafted rings, upgraded to the tier where stamina regen activates.