Housing and Farming
Complete guide to housing and farming in Crimson Desert: unlocking the camp (A Fresh Start quest), camp construction, furniture and collectibles, housing benefits (bed rest, Supply Chest, grindstone and anvil buffs), camp fast travel via Abyss Nexus, named facilities and NPCs, farm crops and grains, ranch animals and meat types, cooking, the resource loop, companion dispatch, and inventory management tips.
On This Page
Overview
Crimson Desert includes a housing and farming system that lets players build personal living spaces, cultivate crops, and raise livestock. These systems operate within the Greymane Camp. Pearl Abyss showed the mechanics in the Features Overview #3: Life in Pywel trailer. The resources produced by farming and ranching feed directly into cooking and crafting. Growing your own ingredients is an alternative to buying from vendors or gathering in the wild. When field resources are scarce, the farm and ranch provide a self-sustaining supply.
The camp functions as a self-sustaining ecosystem, featuring dedicated zones for meat production, vegetable patches, market stalls for trade, cooking facilities, and alchemy stations. Unlike traditional RPGs with instant resource collection, players must physically perform actions. Logging involves chopping trees by hand, gathering food from the farm requires picking crops, and livestock must be managed directly.
Housing
Unlocking the Camp
The Greymane Camp becomes available during Chapter 3 of the main story. After speaking with Marquis Serkis, Kliff is directed to a new camp location at Howling Hill. A soldier on horseback leads you to the camp site at Howling Hill. Marquis Serkis is the one who formally grants the land to the Greymanes, while Marshal Middler oversees the camp and introduces Damiane.

The quest "A Fresh Start" (the 32nd main mission) requires players to complete four construction tasks to establish the camp. These objectives can be done in any order:
Task | Details |
|---|---|
Move the sacks | Pick up three specific sacks and carry them one by one to the marked area where other sacks are stacked. |
Push the wagon | Find a pickaxe near rocks blocking the wagon's path, destroy the obstacles, then push the wagon into the tent from behind. |
Raise the banner | Use the Nature's Grasp skill to carry the pike and plant it next to the Banner Stand. This objective is slightly outside the main camp area but remains marked on the map. |
Drive in the stakes | Locate a mallet near a tent and hit four stakes three times each to secure the structure. |
Finishing these tasks establishes the functional camp base, which becomes essential for all future progression.
House Location
Kliff's personal house is located southeast of the main Greymane Camp, across a small ravine. Once the camp is established at Howling Hill, head east along the ravine path and up toward the clifftops to find it. The house is marked on the map after completing the Rustling Hill quest in Chapter 3. A large hole in front of the house leads to an underground area connected to an Abyss Nexus puzzle. Solving it unlocks a fast travel point right next to your home, which makes returning to the camp area much faster throughout the rest of the game.
Inside the house, a small house icon appears in the quick menu. Selecting it opens a bird's-eye furniture placement view with the roof removed, letting you freely position and rotate decorative items before confirming their placement. Any item marked with a house icon in its inventory tooltip can be placed inside your home.
Construction
Buildings at the Greymane Camp are constructed in real time. Players contribute materials and watch structures go up post by post. Lumber from logging and minerals from mining are the primary construction materials. When Kliff first arrives in Hernand, the camp is a handful of tents. Every building that eventually stands there was placed and built by the player's investment of resources and currency.
Upgrading the camp directly improves character stats, unlocks new skills, and expands the roster of available companions. Camp expansion is unlocked after completing the "A Gentle Touch" main quest in Chapter 3. Both the Alchemy lab and Dye Crafting stations must be unlocked through the base upgrade system via the "Restore the Greymane Camp" main story quest. Until that quest is completed, these crafting stations remain unavailable even if the player has the required resources.
Furniture and Decoration
Individual buildings can be decorated with furniture and props. Players physically place items inside their housing, arranging interiors by hand rather than selecting from preset layouts. The decoration layer is cosmetic, but the buildings themselves are functional. A kitchen enables cooking. Workshops enable crafting. The customization station enables dye work and hairstyle changes.
Furniture can be purchased from vendors or found during exploration. Players craft furniture from gathered materials at the camp's workshops. The housing system does not affect combat stats, but it provides a way to personalize the camp and create a distinct home base.
House Layouts (Patch 1.04)
Patch 1.04 added selectable interior layouts for Kliff's personal house at the Greymane Camp. The available layouts unlock based on Camp Expansion level, so a freshly established camp offers the Compact option, while fully upgraded camps and the later Pailune campsite unlock progressively more spacious floor plans. Swapping layouts is a free action performed from the housing menu; furniture already placed inside the house is returned to inventory and must be repositioned in the new layout.
Layout | Unlock Requirement | Footprint | Notes |
|---|---|---|---|
Compact House | Available by default once the camp is established. | Smallest interior. | Everything is pulled in tight, with the main door opening into the middle of the single living space. Best for players who only need a bed, a few craft stations, and a handful of storage chests nearby. |
Standard House | Unlocks at a mid-tier Camp Expansion level. | Medium interior. | Balanced layout that leaves clear floor space along each wall for chests and decorative items. Recommended for players who want a full set of storage furniture without running out of wall room. |
Spacious House | Unlocks at a higher Camp Expansion level. | Large interior. | Adds extra square footage and enough wall length to comfortably hold a full lineup of Sturdy Gatherables Chests, the Collectibles Chest, multiple Wardrobes, and a cooking corner built around the Kuku Cooler. |
Spacious Pailune House | Available only after moving the camp to Pailune. | Largest interior. | A Pailune-themed variant unlocked alongside the camp relocation. It also comes bundled with the Private Storage item, which only spawns after the move. This is the largest layout in the game at 1.04 and the recommended endgame option for players who want every chest type placed in one room. |
Housing mode itself was also given a UI pass in Patch 1.04. Controls for picking up, rotating, and snapping furniture are more responsive, and a new retrieve-all button returns every housing-mode placement back to your inventory in one action. This is especially useful when changing layouts, since switching floor plans resets the interior and the retrieve-all saves a lot of manual cleanup.
Collectibles
Collectibles are handcrafted items that serve both decorative and social purposes. Players can use them to decorate their home at the Greymane Camp or gift them to various NPCs around the towns of Pywel. Collectibles can be found by exploring towns and interacting with environmental objects, or by purchasing them from vendors. Some can also be stolen from other people's homes and sold for money.
There are several categories of collectibles:
Examples | |
|---|---|
Containers | Ceramic bowls, wooden jars, metal pots, goblets, water bottles, ceramic grain storage jars, liquor bottles |
Lighting | Plain candles, twin candles, five-candle candelabras, glass lamps (Twilight, Icy White, Lilac Pavilion styles) |
Decorative | Dolls (simple dress, brown bonnet, brown dress), flower baskets, kinetic art sculptures, blue dragon scale decorative stones |
Paintings | Acclaimed: Prelude to War, Study: Golden Lands, and others found or stolen from locations like Glenbright Manor |
Magnifying glasses, scales, weapons boxes, waterskins | |
Special items like Trophy: Spear Duel, which honors a tournament achievement |
Gifting Collectibles to NPCs
Beyond decoration, collectibles can be given to NPCs as gifts to increase their trust. Higher trust with NPCs may lower item costs when buying from them or grant access to new quests and requests. This makes collecting and gifting a practical way to unlock discounts and story content. Collectibles can also be sold to vendors for currency if the player has no use for them. See the Collectibles Guide for full locations and NPC gifting details.
Housing Benefits
The player's residence at Howling Hill provides several practical benefits beyond simple decoration:
Feature | Description |
|---|---|
Rest and time advancement | Approach any empty bed and lie down to advance time by 3, 6, or 12 hours. Sleeping also removes Kliff's fatigue, making him more effective in combat. Note that there is a cooldown on resting; you cannot sleep back-to-back. After resting, you need to wait before Kliff can rest again, so choose the time increment carefully. |
The camp includes a Supply Chest that functions as a delivery box. Rewards from Dispatch missions and clearing hostile strongholds are deposited here for retrieval. Loot you miss during exploration is also automatically sent to this chest as a safety net. The Supply Chest is not a general-purpose stash; you cannot place your own items inside it. | |
A wardrobe in the house allows players to modify Kliff's appearance and swap between saved outfit sets. | |
Interacting with a grindstone temporarily sharpens your equipped weapon, increasing the Reinforcement stat and granting a raw attack power boost. This buff lasts for a limited time. Use it before major boss fights for a noticeable damage increase. | |
Anvil | The anvil works like the grindstone but for armor. Using it boosts your gear's Reinforcement stat for defense, reducing incoming damage temporarily. Grindstones and anvils also appear at bandit camps throughout the world. |
Item Storage and Inventory Notes
Crimson Desert does not feature a traditional item bank or storage chest at launch. Your personal inventory is the only general-purpose storage available, which makes inventory management an important concern. The Supply Chest at camp is limited to receiving dispatch rewards and recovering missed loot; it does not accept player-deposited items.
To free up inventory space, speak with Carl at the Greymane Camp to donate unwanted gear. Donated items convert into Camp Resources used for facility upgrades. You can also cook meals or craft items to consolidate loose materials into finished products.
Pearl Abyss has confirmed that housing storage furniture will arrive in a post-launch update, allowing players to store items in their house at camp. Until then, expanding inventory capacity through quest rewards (Inventory Expansion Tools, which add 3 slots each) and purchasing Small Bags from general goods vendors (50 Copper each, adds 1 slot) is the primary solution.
Storage Items (Patch 1.04)
Prior to Patch 1.04, personal housing at Howling Hill had no true player-managed storage: the Supply Chest only accepted dispatch rewards and safety-net drops. Patch 1.04 resolved that by adding a full suite of housing-mode placeable storage furniture. Each item below is placed using housing mode and counts toward the house interior footprint, so larger layouts allow more combined storage.
The new chests are also integrated with the crafting and cooking systems: materials and ingredients stored inside them are pulled automatically during crafting, refinement, and cooking, even when they are not carried in your inventory. This removes most of the old pressure to keep active-use materials on your person at all times.
Storage Item | Slots | Acquisition | Notes |
|---|---|---|---|
1,000 slots per chest. | Purchased from the Furniture Shop at the Greymane Camp. | Holds generic gatherables: plants, ore, refined materials, timber, and other raw crafting stock. Items inside can be consumed directly by crafting and refinement stations without transferring back to the backpack first. Because the chest holds a thousand slots, a single placement is usually enough to empty out most of a hoarder's inventory. Multiple chests can be placed if a layout supports it. | |
40 slots. | Blueprint granted through a Patch 1.04 side quest. The cooler itself is the reward item for finishing the quest chain. | Smaller food and ingredient cooler intended as an early-game stepping stone. Cooking stations pull ingredients directly from the cooler, so you can cook without topping up your inventory every time. | |
330 slots. | Crafted at the Kilnden Workshop after unlocking the blueprint. Requires the smaller Kuku Cooler to be obtained first. | The upgraded version of the base cooler. Same cook-from-storage integration, but with enough capacity to hold a full pantry of raw ingredients, spices, and prepped dishes. Most players eventually crafting-route toward this version and retire the 40-slot model. | |
1,000 slots. | Granted through the Patch 1.04 side quest "A Friendly Encounter" once its prerequisites are met. You receive it automatically on login if you already qualify. | Dedicated stash for quest items and crafting recipes, keeping both out of the main backpack. Entries here remain visible to the relevant quest and recipe UI, so items stored inside still count toward quest tracking and recipe unlocks. | |
100 slots per wardrobe, up to 10 wardrobes placed for 1,000 slots total. | Purchased from the Furniture Shop. Multiple copies can be bought and placed in the same house. | Used to store outfits and cosmetic gear separately from combat equipment. Each wardrobe contributes 100 slots of outfit storage, and the total rises linearly with every extra placement. Because the cap is 1,000 slots across ten wardrobes, the Spacious and Spacious Pailune layouts are the only ones with realistic room to place all ten. | |
Private Storage (Pailune) | Game-provided personal storage item. | Granted automatically after moving the camp to Pailune. | A housing-mode placeable storage item received as part of the Pailune relocation reward. Acts as a personal stash distinct from the Supply Chest, so your own deposited items finally have a general-purpose home in the Pailune house. |
Housing-mode furniture, including every storage item above, now supports a retrieve-all function. A single button call in housing mode returns every placement in the current house back to your inventory in one action, which makes remodelling or swapping layouts far less tedious than the pre-patch process of clicking each piece individually.
Patch 1.04 also added a well directly at the Howling Hill camp. Before the patch, cooking stations required players to fetch water by hand from nearby rivers or cauldrons. With a permanent well on-site, cooking can now pull a constant supply of water without any setup, which pairs well with the cook-from-storage behaviour of the new coolers.
Camp Fast Travel
The Abyss Nexus for Howling Hill is not immediately available when you first establish the camp. The teleportation pad is hidden near Kliff's house. If you step out the front door and go left, you will reach a short drop. Along that edge, between two trees, is a pile of thick, thorny bracken covering the pad. This fast travel point requires a central component that can only be obtained in Chapter 4 or later.
Prerequisites:
Prerequisites and Activation
Reach Chapter 4 or later in the main story
Learn the Focused Force Palm skill (obtained during the Scholastone quest in Act 4, by observing an Axiom spirit demonstration in a cavern with multicolored stone)
Obtain the Kuku Pot from the dwarves at Kilnden Workshop after repairing it
Complete House Roberts side quests, including clearing Karin Quarry of Bleed Bandits and defeating the boss Marni's Excavatron
How to retrieve the teleportation stone:
After defeating the Karin Quarry boss, use the crane to extract a buried relic. This creates a hole leading underground.
Descend into the underground area. Use Focused Force Palm to break through the special destructible walls (marked as Abyss walls).
Retrieve the large hovering wheel (the Abyss Transporter) using your Axiom tether, then store it inside the Kuku Pot.
Return to the teleportation pad near Kliff's house at Howling Hill.
Place the stone over the pad and use Force Palm to connect it to the device.
Once activated, fast travel to and from the Greymane Camp is permanently unlocked. This lets you quickly teleport home to stock up on supplies, sell items, deposit resources, check dispatch mission results, and cook meals between adventures.
Named Facilities
Facility | Description |
|---|---|
Food shop | Run by a vendor named Ronnie. Sells provisions and prepared meals. |
Trading center | A marketplace where merchants buy and sell goods. Trading menus show items like barley, meat jerky, salt-grilled fish, and fruit juice. |
Smithy | Bring required materials to have weapons crafted. The Smithy can also upgrade existing gear, granting higher stats. Quality improves as the camp develops. |
Character customization: hairstyles, tattoos, and armor dye. Dyes can be found in the world, purchased, or brewed through alchemy. See Barber Shop and Dyehouse. | |
Farm and ranch | Dedicated plots for crops and pens for livestock. See the Farming and Livestock sections below. |
Freesword Management Office | Run by Ross. Oversees dispatch missions and companion assignments. Hire combat units and dispatch workers for gathering resources. See Companion Dispatch Guide. |
Supply Management | Run by Carl. Handles donations of funds and unwanted goods, which convert into camp resources for facility upgrades. |
Wagon Management Office | Run by Brice. Manages the camp's wagons used for transporting goods and resources. |
Quartermaster | Run by Tranan. Distributes equipment and oversees the camp's inventory of arms and supplies. |
Lost Item Recovery | A service to reclaim items you missed or accidentally lost during exploration. Functions as a safety net for valuable loot. |
Farming
Unlocking the Farm
The farm is unlocked through the Grounds of the Sunrise faction questline. After progressing to the "A Rumor in Goldleaf Trading Post" quest, players meet an NPC named Kamu. Speak with Kamu to begin the farm unlock sequence:
Accept Kamu's request to perform the Apple Picking Mission at Glenbright Farm.
Complete the Apple Harvest Mission (also at Glenbright Farm).
Dispatch a construction mission at Howling Hill to build the farm facility.
Once the dispatch mission completes, the farm becomes a permanent fixture at the camp with dedicated crop plots.
Crop Cultivation
The farm has dedicated plots where players grow crops. Crops need to be watered by hand. The gameplay loop is planting seeds, watering plants over time, and harvesting when they mature. Gathering food from the farm requires you to physically pick the crops rather than collecting through a menu.
Harvested crops are ingredients for cooking recipes and crafting materials. Growing your own supply removes the need to buy from vendors or spend time gathering in the field.
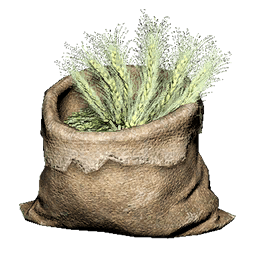
What You Can Grow
The farm supports a variety of grains and vegetables that supply the cooking system. Grains are edible seeds used as core ingredients in many cooking recipes. The following grains have been confirmed:
Grain | Notes |
|---|---|
Available for purchase from a Grocer. Also tradeable at the camp trading center. | |
Used in various cooking recipes. | |
Used in various cooking recipes. | |
Used in various cooking recipes. | |
Used in various cooking recipes. | |
Used in various cooking recipes. | |
Used in various cooking recipes. | |
Used in various cooking recipes. |
In addition to grains, the farm includes vegetable patches. Harvested crops feed directly into the cooking and alchemy systems at camp.
Farm Expansion and Efficiency
The farm starts with a small number of crop plots, but expands as you complete camp upgrades. Each camp expansion tier adds more plots and potentially new crop varieties. By the third expansion, the farm supports enough plots to maintain a self-sufficient food supply for the entire camp operation, including dispatch mission costs.
Crops grow on an in-game timer. After planting seeds and watering them by hand, you wait for the plants to mature before harvesting. Crops that are not watered regularly take longer to reach maturity. Plan your farming around dispatch mission timers so that both systems produce results at roughly the same pace.
In the late game, the Magic Sickle becomes available. This tool lets you cut an entire row of crops in a single swing, dramatically reducing the time spent harvesting compared to picking each plant individually. The Magic Sickle does not automate watering or planting, but it removes the most tedious part of the farming loop. Combined with the Large Farming Scythe available from Provisioner vendors, these tools transform farming from a slow chore into a quick routine.
Farm Building Prerequisites
Constructing the farm requires recruits with the Builder skill. Without a Builder in your roster, the farm construction dispatch mission at Howling Hill remains locked. Only one construction mission can run at camp at a time, so if you are building both the farm and the ranch, you must wait for one to finish before starting the other.
A recommended approach is to build the farm first. Apple trees take real in-game time to mature, so starting the farm early lets your first batch of crops grow while you complete Ben's ranch tutorial missions. By the time the ranch construction finishes, your crops will be close to the first harvest.
Ranching
Unlocking the Ranch
Like the farm, the ranch is unlocked through the Grounds of the Sunrise questline. During the "A Rumor in Goldleaf Trading Post" quest, players meet an NPC named Ben. Speak with Ben to start the ranch unlock chain:
Ben requests you complete the Milk Harvest Mission at Bloomwood Ranch via dispatch.
Dispatch another mission to Howling Hill to construct the ranch facility.
Complete Ben's Request mission, which teaches fundamental ranch management: catching wild goats, registering livestock at the ranch, and slaughtering animals for meat.
Ranch Operations
The ranch sits alongside the farm. Players raise livestock for meat, hides, and other animal products used in cooking and crafting. Animals need care, and the player interacts with them directly. An NPC named Bram operates the camp ranch. One of the Sealed Abyss Artifact challenges, "The Herder's Lament," requires selling 3 goats to Bram at the Camp Ranch.
Ranch Animals
Several types of livestock can be raised at the ranch. Each animal produces different resources:
Animal | Products and Notes |
|---|---|
Pigs (Hogs) | Produce meat for cooking. Kliff physically picks up pigs and carries them on his shoulders to move them between pens. |
Goats | Produce milk and meat. Wild goats can be caught and registered at the ranch. Can be sold to Bram. |
Cows (Cattle) | Produce tender meat when skinned. Cattle are among the larger livestock at the ranch. |
Sheep | Can be slaughtered for meat. Provide hides for crafting. |
Chickens | Produce bird meat. A smaller livestock option at the ranch. |
Ducks | Produce bird meat and feathers. Cannot be found in the wild; must be stolen from NPC farms. |
Physical Animal Handling
Pearl Abyss has specifically shown pig handling: Kliff physically picks up pigs and carries them on his shoulders to move them between pens. The Features Overview #3 trailer shows the protagonist hoisting a pig and walking it to a different plot. This is not a menu interaction.
Bram and Livestock Sales
An NPC named Bram operates the camp ranch alongside Ben. While Ben handles the initial setup quests and livestock tutorials, Bram is the day-to-day ranch operator. You can sell surplus livestock directly to Bram for silver, creating an additional income stream beyond dispatch missions and trading.
One of the Sealed Abyss Artifact challenges, "The Herder's Lament," requires selling 3 goats to Bram at the camp ranch. Keep this in mind before selling all your goats elsewhere.
Ranch Expansion

Like the farm, the ranch expands with camp upgrades. Higher expansion tiers allow more animal types and increase the maximum number of livestock you can keep at once. Expanded pens accommodate larger herds, which in turn produce more ingredients per in-game day. Ranch expansion is especially important because animal products (milk, eggs, meat) are used in many of the higher-tier cooking recipes that provide the strongest combat buffs.
Livestock Vendors (Patch 1.04)
Patch 1.04 introduced a distributed network of Livestock Vendors scattered across Pywel. Before the patch, players who wanted livestock for the camp ranch had to befriend specific farmers and livestock keepers around Hernand before those animals appeared in the main Camp Vendors catalog. Patch 1.04 replaces that hub-and-spoke model with dedicated vendor NPCs placed in the field, so each animal type can now be purchased directly where the vendor is found rather than after unlocking it at the main camp.
Between them, the Patch 1.04 vendors cover all six core livestock categories. Any livestock you had already unlocked at the main Camp Vendors catalog by befriending Hernand-area NPCs remains available there as well, so returning players keep their previous unlocks.
Animal | Sold By | Primary Use |
|---|---|---|
New field-based livestock vendors across Pywel, plus the existing main camp catalog if already unlocked. | Standard cow for the camp livestock pen. Higher-tier variants such as the Highland Cow remain tracked as separate wild creatures rather than being stocked by the patch 1.04 vendors. Produces milk and, when slaughtered, tender meat. | |
Pig | Patch 1.04 Pywel livestock vendors. | Fills the pig pen at the camp. Produces meat on slaughter and is still moved between pens by physically carrying each animal on Kliff's shoulders. |
Patch 1.04 Pywel livestock vendors. Bram at the camp ranch still buys surplus goats back for silver. | Smaller livestock option that pairs well with a mixed pen. Produces milk and meat with a much smaller grazing footprint than cows. | |
Sheep | Patch 1.04 Pywel livestock vendors. | Adds wool and meat to the camp's livestock output. Wool flows into crafting materials, while meat and hides feed both cooking and gear recipes. |
Duck | Patch 1.04 Pywel livestock vendors. Previously only obtainable by stealing from NPC farms. | Produces bird meat and feathers. With direct vendor access now in place, dedicated duck farming at the camp ranch is viable for the first time. |
Chicken | Patch 1.04 Pywel livestock vendors, plus existing butchery stock. | Produces bird meat and eggs. The most reliable entry-level livestock loop for a cheap, steady food supply at camp. |
The Patch 1.04 livestock vendors also complement the new field ore nodes and wells added across Pywel. Between the new ore nodes, wells, and livestock sources, a full camp-restocking run no longer has to end at the main Greymane Camp: supplies, animals, and water can all be picked up in the same loop out in the countryside.
Products
Livestock produce cooking ingredients and crafting materials. Combined with farm-grown crops, the ranch creates a self-sufficient food supply. The following meat types have been confirmed in the game:
Meat Type | Source |
|---|---|
Purchasable from a butchery. Also obtained from chickens. | |
Purchasable from a butchery. | |
Purchasable from a butchery. | |
Purchasable from a butchery. | |
Purchasable from a butchery. | |
Purchasable from a butchery or obtained by skinning cows. | |
Purchasable from a butchery. | |
Obtained by cleaning fish. |
Hunting
Hunting is another source of meat and crafting reagents. Players track animals with bows and can equip stealth gear for better results. Hunted animals yield meat for cooking and reagents for alchemy. Unlike farming and ranching, hunting requires leaving the camp and exploring the wilderness. You can kill cows, sheep, and chickens in the wild for different types of meat, which can be used to cook food for yourself and your companion animals.
Cooking
Meals are cooked at the bonfire at the Greymane Camp. Each meal provides buffs to one or more of three stats:
Stat | Effect |
|---|---|
Increases maximum health or restores missing health. | |
Buffs the spirit stat used for abilities. | |
Extends the stamina pool for climbing, sprinting, and combat actions. |
Recipes are collected throughout Pywel. Hands-on previews confirm at least one named consumable: Veal Burgers, described as a restorative item usable even during boss fights. The trading center's inventory (barley, meat jerky, salt-grilled fish, fruit juice) gives a sense of the ingredient variety. See Cooking for the full recipe and buff breakdown.
Camp Donations and Resource Conversion
The camp's donation system, managed by Carl at the Supply Management office, converts items and silver into camp resources that fuel upgrades, dispatch missions, and passive camp growth. This is separate from the loot stored in the Supply Chest. Donations are permanent and cannot be reversed, so always check whether you still need a material before committing it.
To donate, speak with Carl and select "Manage Provisions," then choose "Camp Provisions." Your inventory opens with donation values displayed next to each eligible item. Items convert into one of five resource categories:
Resource | Donated Items | Notes |
|---|---|---|
Armaments | Weapons, armor, accessories, cloth, bones | Biggest bottleneck for 3rd and 4th camp expansions |
Stones | Azurite provides 63 points per donation | |
Wood, logs, lumber | Easy to stockpile through logging dispatch missions | |
Food | Raw ingredients, cooked meals, herbs, animal products | Required for nearly every dispatch mission type |
Money | Also available via the "Donate Funds" option |
Donating resources also increases your camp's donation level. Higher donation levels reward you with newly placed decorative items and objects around the camp, giving visual feedback on your investment. These rewards are separate from mission-related resource spending. Regular donations are a practical way to repurpose duplicate gear and surplus materials that would otherwise sit unused in your inventory.
The Resource Loop
Housing, farming, and ranching connect to a larger resource loop:
Gather raw materials through exploration, logging, and mining.
Hunt animals and fish in rivers for additional ingredients.
Build facilities at camp using those materials.
Farm and ranch to produce cooking and crafting ingredients.
Cook meals at the bonfire for Health, Spirit, and Stamina buffs.
Craft gear at the Smithy.
Upgrade existing equipment for higher stats. See Crafting.
Upgrade the camp further, unlocking better facilities and expanding the companion roster.
Companion Contributions
Greymane companions who have been reunited contribute to camp operations. The dispatch system lets companions gather timber, ore, and other materials in the background while the player is elsewhere. More companions means more productive facilities.
As you recruit NPC campmates, you can dispatch them on missions to gather resources passively, creating a steady stream of materials during late-game play. The Dispatch Coordinator at the Greymane Camp lets you choose missions from a single screen and manage your team without having to use the map.
Some dispatch missions require up to 18 in-game hours to complete and reward valuable resources for camp upgrades. Use the bed in your house to advance time while waiting for dispatch results. See the Companion Dispatch Guide for detailed mission types and strategic tips.
Automation Hint
One scene in the Features Overview #3 trailer shows Kliff reactivating an old machine with a conveyor belt, where items move along an automated production line. Pearl Abyss has not explained this in detail. Whether this is a late-game upgrade, a separate facility type, or a one-off quest scene remains unconfirmed.
Tips
Always use the grindstone and anvil at camp before heading into major boss fights. The temporary Reinforcement stat boost can make a significant difference in tough encounters.
Start farming and ranching as early as possible. The passive ingredient generation saves time that would otherwise be spent gathering in the wilderness.
Use the food shop for quick restocking before heading into dangerous areas, but rely on cooking for long-term sustainability.
Donate unwanted gear to Carl at the Supply Management office. The camp resources you receive in return are essential for facility upgrades.
Dispatch companions on timber and ore missions to maintain a steady supply for camp upgrades, especially in the early-to-mid game when upgrade demands are highest.
Choose your bed rest duration carefully. There is a cooldown between rest sessions, so you cannot sleep repeatedly to skip large amounts of time in quick succession.
Unlock the camp fast travel point as soon as you reach Chapter 4. Having the Abyss Nexus at camp saves considerable travel time for the rest of the game.
Check the Supply Chest regularly. Dispatch rewards and loot from cleared strongholds accumulate there and can be forgotten.
The camp grows more populated as you reunite with Greymane members. More companions mean more dispatch slots and a livelier home base.
Abyss Cell Seed Planting
Abyss Cells collected from enemies throughout the world can be converted into seeds and planted at the camp farm. To do this, open your inventory, select an Abyss Cell, and choose "Use" to convert it into an Abyss Seed. Plant the seed in an available farm plot.
Growth Timeline and Yields
Each Abyss Seed grows into a full tree in approximately three to four in-game days. Once mature, each tree yields about five Abyss Cells when harvested. Using fertilizer (obtained from completing the Queen of Spiders and Restore Factory quests in Hernand) can increase this yield. The fertilizer item has unlimited uses, so apply it every time you visit your farm.
If you dedicate two full rows of farm plots to Abyss Seeds, the harvest every few in-game days produces a large number of cells. After harvesting, replant immediately to keep the cycle going. This turns every single Abyss Cell you bring home into roughly five more, making it one of the most efficient passive resource multipliers in the game. Use the surplus cells to craft Abyss Cores at a Witch NPC or to enhance Health past Level 11 on the skill tree. See the Best Farming Locations guide for the full breakdown of all top farming methods.
Patch 1.04 Changes
Version 1.04 touched almost every part of housing and farming at Howling Hill and across Pywel. The list below consolidates every change from the patch that affects this page. Each item is installed automatically on login; no quests are locked out after the fact, but a few storage items are gated behind patch-specific side quests described in the sections above. Full details for every change in the build are covered in the Patch Notes.
Housing Changes
Selectable house layouts. Four interior floor plans now exist for Kliff's personal house: Compact, Standard, Spacious, and Spacious Pailune House. Available options unlock based on Camp Expansion level.
New Sturdy Gatherables Chest furniture item. Holds 1,000 gatherable slots and is purchased from the Furniture Shop. Crafting and refinement stations pull materials directly from the chest without requiring inventory transfers.
New Kuku Cooler (40 slots) and Enhanced Kuku Cooler (330 slots) food storage. The base cooler is granted through a new side quest. The Enhanced version is crafted after the blueprint is unlocked. Cooking stations pull ingredients directly from either cooler.
New Collectibles Chest (1,000 slots) storage item. Dedicated stash for quest items and crafting recipes, unlocked through a Patch 1.04 side quest.
Outfit storage added to the Wardrobe. Each wardrobe provides 100 outfit slots, and up to 10 wardrobes can be placed for a total of 1,000 slots.
Private Storage item granted after moving the camp to Pailune. Placed through housing mode in the new Pailune house. Provides a general-purpose player stash distinct from the Supply Chest.
A new well was added directly at the Howling Hill camp, providing a permanent local water source for cooking stations and other camp activities.
Retrieve-all function added to housing mode. A single action now returns every housing-mode placement in the current house back to your inventory, which is essential when switching between the new layouts.
Farming and Livestock Changes
New Livestock Vendors distributed across Pywel. Cows, pigs, goats, sheep, ducks, and chickens can now be purchased directly from dedicated NPCs in the field. The main Camp Vendors catalog still sells whichever livestock you unlocked by befriending Hernand area NPCs before the patch.
Additional ore nodes and wells seeded across Pywel, reducing how often camp runs have to detour back to Howling Hill for mining or water.
Gathering and mining yields were improved to apply consistent quantities, which makes planning farm-building material runs more predictable.
Patch 1.04 also introduced broader quality-of-life improvements that indirectly help farm and camp management: caught animals, fish, and insects now stack in the inventory instead of occupying one slot each, items can be locked to prevent accidental selling or donating, and Damiane and Oongka both gained new skills that make travelling back to camp faster. See the Patch Notes for the full build-wide summary.
Patch 1.06 House Expansion Overhaul
Pearl Abyss rolled multiple house-expansion improvements into Patch 1.06.00 on May 10, 2026, in response to community feedback on the launch placement system. The headline changes are deeper, more flexible decoration options at the player house, and direct in-housing placement of the specialized storage containers shipped in Patch 1.04.00. The earlier Patch 1.05.00 had already cleaned up the storage retrieval display so housing items auto-retrieved during a camp expansion are correctly listed in the Housing Installable UI; the 1.06 changes build on that base.
The full feature list pulled into the housing flow with this patch:
Change | What It Does |
|---|---|
Stack furniture and ornaments | Furniture pieces and Ornaments can now be stacked on top of each other in housing mode. The placement preview validates the stack before commit, so an invalid arrangement still cannot be confirmed. |
Storage containers placed directly in housing mode | The Sturdy Gatherables Chest, Kuku Cooler, Enhanced Kuku Cooler, and Collectibles Chest can be placed through the same housing-mode placement preview as other furniture, rather than from a separate menu. The chests behave as standard housing items once placed. |
Cleaner placement preview | Visual feedback during placement is clearer. Stacked items show their own outline against the surface beneath them, which makes it easier to assemble multi-piece arrangements like lamp-on-shelf or display-on-table setups. |
Knowledge unlocks for some factions | Several faction knowledge entries previously locked behind hidden conditions now have alternative acquisition paths visible in the housing-adjacent knowledge UI, making faction-specific decoration sets easier to acquire. |
HDR quality improvements | HDR quality is improved across the board, and enabling HDR no longer disables Direct-to-Play. The housing previews benefit from the improved highlight handling on materials such as polished wood and metal lamps. |
Waterfall rendering | Waterfalls now look less unnatural at distance, which matters for plot-side houses positioned near rivers, gorges, and the falls themselves. |
Working With Stacked Furniture and Ornaments
Stacking is the largest single change to housing-mode flexibility since launch. The placement preview lets the player set a base item, then place additional pieces on top of it with the same drag-to-rotate and snap-to-grid behavior as standalone placement. The visible silhouette of the stacked item attaches to the base in the preview, and the commit prompt is greyed out until the arrangement is valid.
Display tables. Place a table, then stack lamps, candle holders, or small decorative items directly on top. Multiple small pieces can stack on a single surface as long as their collision boxes do not overlap.
Lighting stacks. Lantern and candle pieces stack with each other to produce layered lighting effects, particularly useful for evening photo-mode shots while Night Tone Mode is enabled.
Trophy displays. Award and trophy pieces can stack on shelves, ledges, and tables to assemble a personal display wall without requiring custom shelf furniture.
Lighting items from the Claw Machine. The 12 lighting items pulled from the Claw Machine integrate naturally into the stacking workflow; pair them with circus-themed furniture for a cohesive theme.
In-Housing Storage Placement
Before Patch 1.06.00, the four specialized storage containers used a separate placement flow from the rest of the furniture catalog. After the patch, all four are placed through the same housing-mode placement preview as standard furniture:
Sturdy Gatherables Chest (1,000 slots, gathering materials with crafting-from-chest behavior).
Kuku Cooler (40 slots, food with cooking-from-cooler behavior).
Enhanced Kuku Cooler (330 slots, upgraded version of the same).
Collectibles Chest (1,000 slots, quest items and recipes).
All four chests interact with their respective systems (crafting, refinement, cooking) the same way they did when placed through the separate flow. The change is purely a placement convenience; existing chests already on the lot do not need to be moved or re-placed.
Patch 1.09.00 (May 29, 2026) added the ability to assign seeds to quickslots, so planting can be done from the quickslot bar instead of the inventory. This streamlines repeated sowing on larger farming plots.
See Also
Article | Description |
|---|---|
The camp as a whole, including dispatch and story role | |
Recipes, bonfire buffs, and named consumables | |
Gear creation at the Smithy | |
Field gathering as an alternative to farming | |
Brewing dyes and consumables | |
Full list of collectibles, locations, and NPC gifting details | |
Challenges including The Herder's Lament at the ranch | |
All Abyss Nexus locations and how the fast travel system works | |
Dispatch mission types, companion skills, and strategic tips | |
Storage options, bag upgrades, and inventory management |