Overview
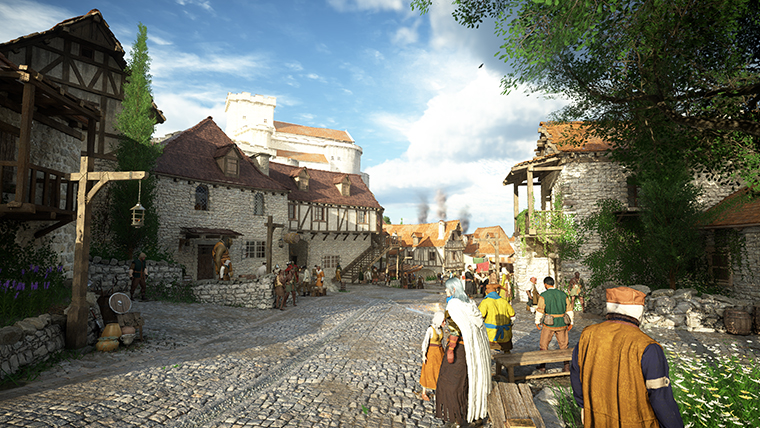
One Armed Ludvig is the third and final mandatory boss encounter against Ludvig in Crimson Desert. After escaping Pailune Castle with severe injuries (including the loss of one arm), Ludvig has retreated to the Kingshield Mountains in the Hernand region. This fight occurs during the main quest "Time to Face Justice," which is part of Chapter 7: Homecoming, in the Twisted Fate sub-chapter.
Unlike the previous two encounters, players control Oongka, the orc warrior, for this fight. This is the first time players use Oongka in a boss encounter, and his moveset and weapon system differ significantly from Kliff's. Oongka can dual-wield weapons and has access to a Rage ability that dramatically increases damage output for short bursts.
Despite having lost an arm, Ludvig is still dangerous. He fights with a single sword and retains some of his lightning abilities from his awakened state. His movements are slower and more predictable than the earlier encounters, but he can still deal heavy damage if you let him string attacks together. With only one health bar and a more limited moveset, this fight is generally considered the easiest of the three Ludvig encounters. That said, players unfamiliar with Oongka's playstyle can still struggle here, since his rhythm and toolkit feel very different from Kliff's.
Boss Stats
Stat | Details |
|---|---|
Quest | |
Location | |
Chapter | Chapter 7: Homecoming (Twisted Fate) |
1 | |
Damage Type | Lightning / Physical (single sword) |
Weakness | Parrying, Quick Grab, break bar attacks |
Playable Character | |
Recommended Weapon | One-hand + shield (easiest parrying) or dual one-handed swords |
Boss Type | Mandatory (cannot be skipped) |
1,109 | |
Attack | 82 |
100 | |
100 | |
Knockout | 750 |
Fatal | 5 |
Weapon Type | One-Hand Sword |
Boss Large Human (passive) |
Boss Equipment
One-Armed Ludvig carries a signature weapon and wears two pieces of the Hungering Fang set during the encounter. These items reflect his identity as a survivor of the Lonely Jackals faction.
Item | Slot | Type |
|---|---|---|
Main Hand | One-Hand Sword | |
Cloak | Light Armor | |
Foot | Light Armor |
Preparation
After several consecutive boss fights leading into this quest, your food supply is likely running low. Before engaging Ludvig, hunt animals in the surrounding forest of the Hernand Region and cook at a cooking pot in nearby Beighen village. Aim for at least 40 to 50 Grilled Meat or equivalent food items. With that much healing, you can afford to trade hits and recover, which takes a lot of pressure off learning Oongka's timing.
Check for an Anvil and Grindstone at the camp before the fight. Using the Grindstone on your weapon grants a temporary attack buff, and using the Anvil on your armor grants a temporary defense buff. These buffs last through the entire encounter and can make a noticeable difference, especially if your gear is under-reinforced. The Grindstone and Anvil work on any weapon or armor in your inventory, not just what you currently have equipped.
Weapon Setup
Oongka starts with the Dekarrr Greataxe, a two-handed weapon. You have two solid choices for this fight, and which one to pick depends on your comfort level with parrying.
Option A: One-Hand + Shield (recommended for easier parrying). Open your equipment menu and equip a one-handed weapon with a shield. The shield makes parry timing more forgiving because you can hold block and then time the parry input from a guarded state. This is the easier setup, particularly if you are not yet comfortable with Oongka's parry windows. The Melted Ambition one-handed weapon is a strong pick here.
Option B: Dual One-Handed Swords (higher damage ceiling). Equip two one-handed swords for faster attack speed and higher combo damage. Since Oongka strikes with both weapons, the combined damage output is higher than the slow greataxe. The Sword of the Lord (obtained from the Kailok the Hornsplitter boss fight) is a strong option because its wave attacks add extra damage. Pair it with the Silver Wolf Axe or a second sword. If you do not have two swords available, the two purple axes in Oongka's default inventory also work well.
A spear is another viable choice. The extra range lets you poke Ludvig during windows where swords cannot quite reach, and the quick jab attacks are effective for chipping damage between his combos.
Attack Patterns
With only one arm, Ludvig's moveset is more limited than his previous forms, but his attacks still hit hard. He relies on wide sword swings to compensate for reduced speed and mixes in lightning abilities carried over from his awakened state. His attacks are more telegraphed than before, and several of them can be blocked or parried. Early in the fight he sticks primarily to physical sword attacks. As his health drops below roughly half, he begins mixing in more lightning-based abilities and becomes noticeably more aggressive.
Attack | Description | How to Counter |
|---|---|---|
A standard horizontal slash with his remaining arm. Moderate damage, moderate speed. His most common attack. | Block with shield, then immediately counterattack with a light combo. This is one of the easiest attacks to punish. | |
A forward thrust aimed at the player's center mass. Slightly slower than the slash but deals more damage. | Parry the thrust and follow up with a quick combo. The narrow hitbox also makes sidestepping viable. | |
Ludvig unleashes a rapid series of backhand slashes, dealing continuous damage. This cannot be blocked and hits multiple times in quick succession. | Slide backward or dodge roll away the moment you see the backhand windup. Once the fury ends, close the distance and punish his recovery. This has the longest recovery animation of any of his moves. | |
Invoke Lightning Sword | Carried over from his awakened form. Ludvig channels his remaining lightning power to form a large energy sword, then performs a three-hit combo covering a wide area. | Watch the greatsword carefully and dodge in the opposite direction of each swing to use your i-frames properly. The hitbox is wide, so rolling sideways through the arc is safer than backing away. |
Dual Arc Swing | Two consecutive wide arcs with his sword. The first swing goes left to right, the second right to left. Covers a wide area in front of him. | Roll backward to avoid both swings, then close in during the gap after the second arc. |
Three lightning bolts slam the ground in sequence, tracking the player's position. Each bolt has a small area of effect. | Sprint in one direction to outrun the tracking. The bolts land in the player's previous position, so constant movement avoids all three. | |
Ludvig rushes forward with his sword extended. Covers moderate distance and deals knockback on contact. | Sidestep at the last moment. Ludvig's recovery after the charge is long enough for a full combo. | |
Floor Electrocution | Lightning courses across a section of the ground around Ludvig's position. Stepping on the electrified ground deals ticking damage. | Dodge roll out of the electrified area. Wait for the effect to fade (roughly three seconds) before re-engaging. |
Pull-In AoE | Ludvig raises his sword overhead and generates a magnetic pull that drags the player toward him, followed by an area burst. | Space out as soon as you see the overhead windup. If caught in the pull, dodge roll away from Ludvig immediately before the burst connects. |
Lightning Lines | Ludvig slams his sword into the ground, sending lines of lightning radiating outward in a fan pattern. | Stand between the lines to avoid damage. The gaps between each line are wide enough for Oongka to fit comfortably. |
Lightning Orbs | Ludvig conjures several slow-moving orbs of lightning that track toward the player. | Dodge or roll through them. The orbs move slowly enough that sprinting to one side works, but rolling through them with i-frames is more reliable at close range. |
Darkness Clap AoE | Ludvig draws both his arm and stump together, charging dark energy before releasing a large shockwave around himself. | Space out when you see him charge this up. The shockwave has a fixed radius, so getting outside it avoids all damage. You can also interrupt the windup with a well-timed Force Palm. |
Strategy
Early Fight: Physical Attacks
The beginning of the fight is essentially free parry training. Ludvig sticks to his physical sword attacks (Sword Slash, Sword Stab, Dual Arc Swing) and telegraphs every move clearly. His timing is deliberate enough that you can react to each windup without needing to predict what comes next.
The core loop here is straightforward: parry his melee swings, follow up with two to three light attacks using R1, then back off before he starts his next combo. If you are using a one-hand and shield setup, you can hold block and tap the parry input when his swing connects. Successful parries stagger him and open windows for full light attack combos.
Quick Grab technique: Oongka has a Quick Grab skill that functions as both a parry and a grapple. Activate it as Ludvig attacks to catch his swing, which knocks him down briefly and deals a burst of stagger damage. This builds his break bar faster than standard parries and gives you a short DPS window while he is on the ground. Learn to weave Quick Grab into your rhythm alongside regular parries.
Destructible terrain: The arena contains stone pillars that can be broken. Smash a pillar to create debris, then grab a chunk and slam it into Ludvig for heavy damage. Landing a debris hit also staggers him, opening a generous DPS window. If you spot a pillar within reach during a safe moment, prioritize breaking it; the damage from a debris slam is substantial compared to a normal combo.
When Ludvig uses his Pull-In AoE, space out immediately. Do not try to parry this one. If he begins the Backhand Slash Fury, dodge backward and wait for the full flurry to end before closing in. The recovery after Backhand Slash Fury is the longest of any of his moves, so treat it as your best opportunity for extended damage.
Late Fight: Lightning Attacks
Once Ludvig's health drops past roughly the halfway point, the fight shifts. He starts using his lightning abilities more frequently and becomes harder to pin down. New attack patterns appear (Lightning Lines, Lightning Orbs, Darkness Clap AoE), and his aggression ramps up. If the early fight felt manageable, this is where things get serious.
Lightning Lines: When Ludvig slams his sword down and sends radiating lines of lightning across the ground, position yourself in the gaps between the lines. The safe zones are generous, so you do not need pixel-perfect positioning. Stay calm, find a gap, and wait for the lines to dissipate.
Lightning Orbs: He conjures slow-moving tracking orbs. You can dodge-roll through them to use your i-frames, or simply sprint sideways if you have enough distance. At close range, rolling through is more reliable than trying to outrun them.
Darkness Clap AoE: Ludvig charges up dark energy before releasing a shockwave around himself. When you see him pull his arm and stump together, back away. The shockwave has a fixed radius. If you have a Force Palm ready, you can interrupt the charge-up entirely, cancelling the attack and staggering him. This is one of the best uses of Force Palm in the entire fight.
Using Focus in the late fight: Activating Focus during the lightning phase is very effective. Focus slows down time and lets you regenerate Spirit, which helps you react to his faster attack chains. If you have Focused Insight (Focus Lv3), entering Focus mode gives you an automatic parry against the next incoming melee attack, which is valuable when Ludvig is mixing physical strikes between his lightning patterns.
Force Palm interrupts: After deflecting an attack with Nature's Retribution while in Focus, follow up with Force Palm to cancel Ludvig's next combo and deal high stagger damage. The chain of deflect into Force Palm is your most efficient tool for building his stun meter during the lightning phase. Once the stun meter fills, Ludvig staggers for several seconds, giving you the biggest DPS window in the fight. Rush in and unload your strongest combo or activate Rage for maximum damage.
If you prefer to play it safe at range, you can fire focused shots from a distance to build the stun meter without having to engage in melee. It takes longer, but the stun buildup from ranged Focus shots is steady and the risk is minimal. Once the meter fills and Ludvig staggers, close the gap and deal your burst damage.
Oongka's Rage Ability
Oongka has a unique Rage ability that Kliff does not. Enter Focus mode and press the right bumper (or equivalent input) to activate Rage, which sends Oongka into a frenzy with dramatically increased attack speed and damage. Use this during the longest recovery windows, especially after Backhand Slash Fury or after filling Ludvig's stun meter.
Time the Rage activation carefully. You need Ludvig to be in a recovery state when you trigger it, or he will interrupt you with a quick attack before Rage fully activates. The safest activation windows are after dodging his Backhand Slash Fury (longest recovery of any move), after a successful debris slam from a broken pillar, or immediately after filling his stun meter. The damage you deal during a full Rage burst can take a significant percentage off his remaining health.
Grapples and Break Bar
Unlike Awakened Ludvig, this version can be knocked down. Use Lariat and Leg Sweep to build the break bar for finishing moves that take large chunks off his health. The Quick Grab parry technique also contributes to the break bar, so you are building toward a finisher every time you successfully grab one of his attacks.
When the break bar fills, you get a finishing move prompt. These finishers deal far more damage than any normal combo, so always prioritize getting the break bar full. Between Quick Grabs, grapple moves, and regular parry follow-ups, the bar fills faster than you might expect.
Rewards
Defeating One Armed Ludvig grants the following rewards:
Reward | Details |
|---|---|
Heavy armor piece. | |
Heavy boots matching the Solas armor set. | |
Ludvig's signature one-hand sword. Part of the Hungering Fang gear set. | |
Cloak worn by Ludvig during the encounter. Part of the Hungering Fang set. | |
Boots worn by Ludvig during the encounter. Part of the Hungering Fang set. |
Defeating Ludvig for the final time ends the Lonely Jackals faction's threat and concludes the Twisted Fate sub-chapter of Homecoming. This wraps up Ludvig's arc, which began with his betrayal of the Greymanes under Myurdin's influence.
Tips
Use the Anvil and Grindstone before the fight. Temporary attack and defense buffs from camp equipment make a real difference, especially if your gear is under-reinforced.
One-hand + shield is the easiest setup. If you are struggling with parry timing, equip a shield. You can hold block and then parry from a guarded state, which is more forgiving than parrying with dual swords.
Parry, do not block. Blocking is safe but wastes your best damage opportunities. Parrying staggers Ludvig and opens him up for full combos.
Learn Quick Grab. This skill functions as both a parry and a grapple, builds the break bar faster than standard parries, and knocks Ludvig down for a short DPS window.
Break the pillars. Destructible pillars in the arena yield debris that can be thrown at Ludvig for huge damage plus a stagger. Do not ignore these.
Save Rage for after Backhand Slash Fury or a stun. These openings have the longest recovery animations. Activate Rage when Ludvig is staggered and you will get the maximum number of hits.
Use Force Palm to interrupt Darkness Clap. If you have Force Palm ready and Ludvig begins charging his AoE shockwave, a well-timed Force Palm cancels it entirely.
Ranged Focus shots build stun in the late fight. If you find the lightning phase overwhelming up close, fire focused shots from range to build his stun meter safely. Once stunned, rush in for your burst.
Cook at Beighen before the fight. Your food supply is probably running thin after recent fights. The cooking pot in Beighen is nearby and lets you stock up on Grilled Meat. Aim for 40 or more.
He is faster than he looks. Even with one arm, Ludvig still has quick movement speed between attacks. Stay at mid-range rather than trying to kite him from far away, since his Charge Attack closes distance quickly.
Dodge opposite the Lightning Sword swings. When Ludvig summons his lightning greatsword for the three-hit combo, dodge in the opposite direction of each swing to use your i-frames. Rolling away from the swing arc is safer than rolling backward.
Lore Context
Ludvig's story across all three encounters traces a descent driven by ambition and desperation. He originally allied with Myurdin, who promised him control of Pailune in exchange for betraying the Greymanes. As leader of the Lonely Jackals, Ludvig sought to dominate cities and rule survivors through raw force.
His first encounter shows a calculating warrior confident in his abilities. His second, awakened form reveals his willingness to resort to forbidden magic and human sacrifice rather than accept defeat. By this third encounter, Ludvig is a broken figure: wounded, one-armed, cornered in the Hernand region with nowhere left to run. The fight itself reflects this arc; his attacks are more desperate, his patterns less controlled, and his defeat feels inevitable rather than triumphant.
Ludvig Encounters Overview
Players face Ludvig three times across the main story. Each encounter has a different health pool and expanded moveset, with One-Armed Ludvig being the final and weakest form.
Encounter | Notes | |
|---|---|---|
Ludvig (First Encounter) | 1,664 | Fought as Kliff. Full two-armed moveset with sword and lightning. |
Awakened Ludvig (Second Encounter) | 1,332 | Fought as Kliff. Forbidden magic form. Cannot be knocked down; requires stun-meter finishers. |
One-Armed Ludvig (Third Encounter, this article) | 1,109 | Fought as Oongka. Reduced moveset due to missing arm. Can be knocked down. Grapples and break-bar finishers available. |
Related Articles
Ludvig (character page)
Ludvig (Boss) (first encounter)
Awakened Ludvig (second encounter)
Time to Face Justice (quest)
Oongka (playable character)
Hernand Region
Boss Battles
Focus (ability system)
Quick Grab (parry/grapple skill)
Community Difficulty Notes
One Armed Ludvig is regularly placed in S Tier on community difficulty rankings, with most players citing the forced character switch to Oongka as the main reason. Players entering this fight have usually spent the entire campaign as Cliff and have not unlocked many of Oongka's skills, so even routine combo windows feel slower and less reliable than they would in a normal fight. On top of that, Ludvig's awakened phase has very large area-of-effect attacks and many invincibility frames on his lightning sequences.
Recurring community tips:
Health, stamina, and spirit upgrades carry over from Cliff to Oongka, so players coming in with a fully upgraded base build are not as undergeared as they may feel; the unfamiliarity is the main cost.
Pulling a tree from outside the arena boundary using Turning Slash and using it as a thrown weapon deals significant damage. This is one of the most reliable ways to clear the fight when standard rotations are not yielding kills, and it has been re-recommended for players using the boss replay feature.
Ludvig's grapples can be punished if read early, but if they connect during a combo string the followup chain often reaches lethal damage. Saving Turning Slash for the grapple read is safer than burning it on routine attacks.
After the 1.04 patch, several of Ludvig's heavier attacks no longer carry full invincibility frames, making Force Palm stagger viable in moments where it previously failed.
Database Stats
Combat attributes recorded in the game database for ONE-HAND SWORD.
Stat | Value |
|---|---|
HP | 777 |
Attack | 97 |
Defense | 85 |
Stamina | 100 |
Knockout | 500 |
Fatal | 5 |