

Overview
Boss encounters in Crimson Desert are among the game's most demanding challenges. Across the continent of Pywelfearsome bosses rule, coming in many forms: human and beast, steel and sorcery, brute force and mystery. They test the player's limits in different ways, and defeating them rewards unique equipment with Signature Abilities Abyss Fragments and rare crafting materials. For general combat tips and fundamentals, see the dedicated guide.
Health Bar and Phase System
Boss health bars use a color-coded phase system that signals how the fight will progress:
Bar Color | Phase | Meaning |
|---|---|---|
Blue | Phase 1 | Opening phase. The boss uses its base moveset with standard aggression. |
Green | Phase 2 | Mid-fight escalation. Boss gains new attacks and increases speed. Only present on 3-phase bosses. |
Red | Final Phase | Most dangerous. Maximum aggression, fastest attacks, and often new mechanics. |
When a health bar is depleted, a cutscene plays showing an interaction between Kliff and the boss. After the cutscene, the health bar resets to the next color and the boss's aggression escalates noticeably. Most bosses have 2 health bars (blue then red). Some bosses like the Staglord and Kearush the Slayer have 3 health bars (blue, green, red). Walter Lanford is an exception with only 1 health barcompensating with swift evasive movement.
Confirmed Bosses
Type | Health Bars | Key Mechanic | |
|---|---|---|---|
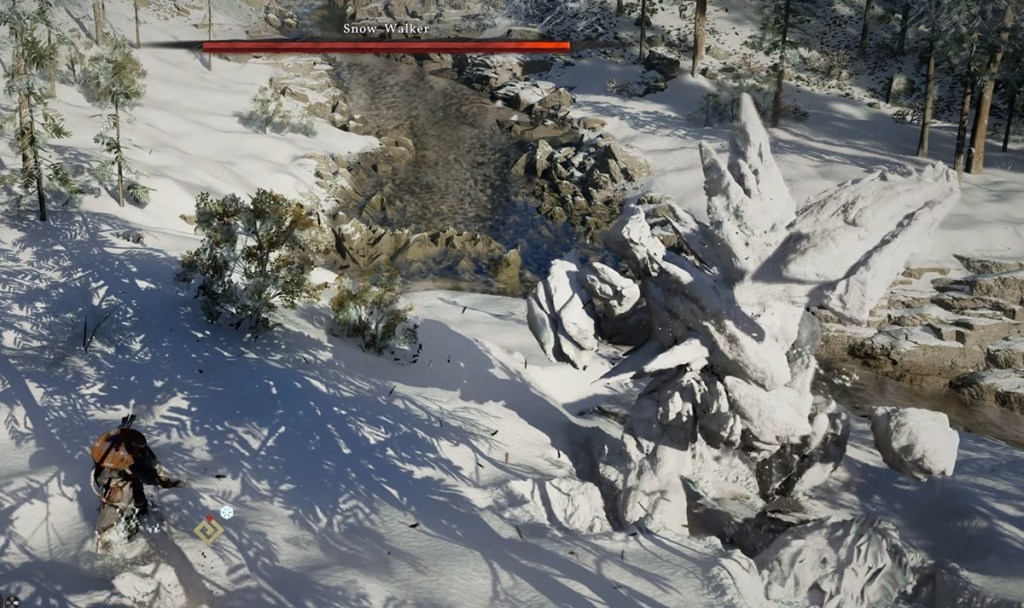
Beast (mountain spirit) | 3 | Conjures snowstorms and hail blizzards; rhythm-based pattern learning | |
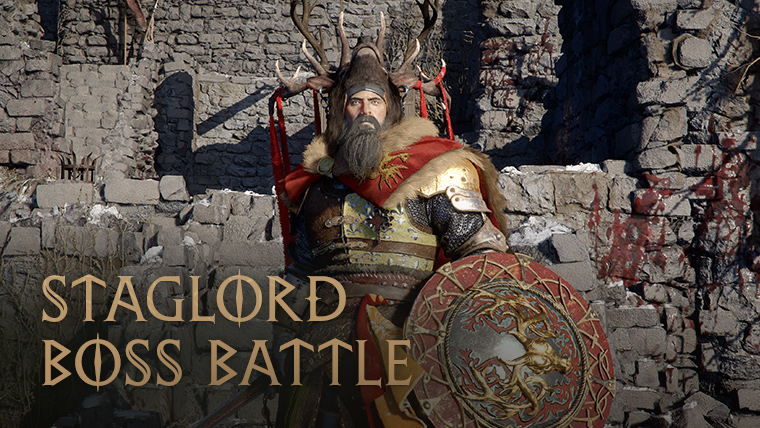
Humanoid warlord | 3 | Mirror-match sword-and-shield; immune to grapple due to massive size | |
Colossal creature | 2+ | Climb the boss's body to reach weak points; geysers launch the player airborne | |
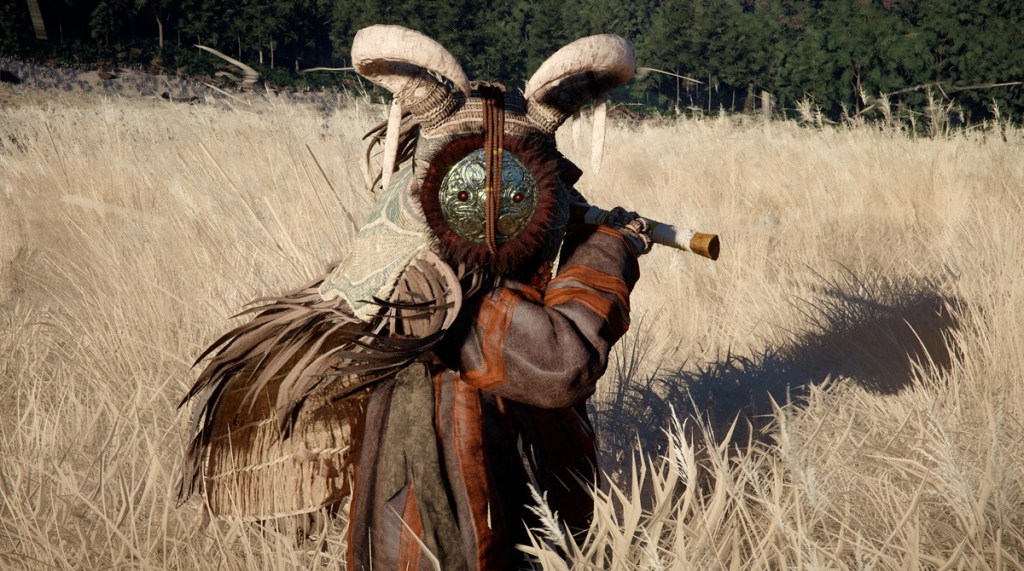
Fast swordsman | 3 | Creates protective totems; uses clones and hides in wheat field | |
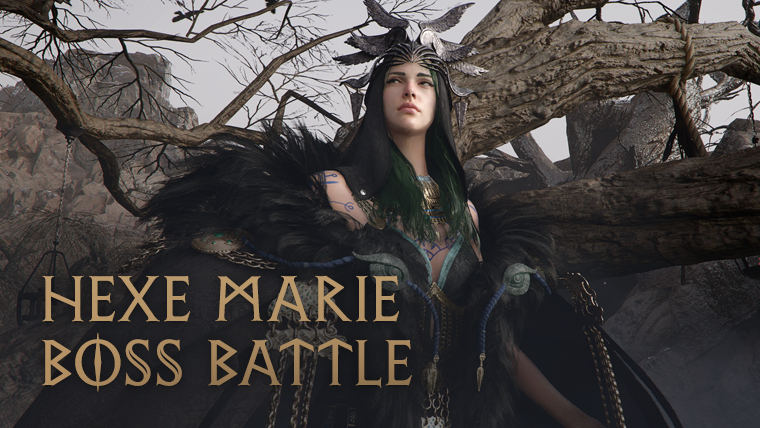
Sorcerer | 2 | Transforms into crows; summons Hexe warriors; teleports around arena | |
Human gunslinger | 1 | Double-barreled gun smoke bomb evasion; smoke bomb evasion; use Blinding Flash to close gaps | |
Gorilla-like beast | 3 | Wall-climbing slams; can be mounted Dragon's Dogma-style | |
Humanoid traitor | 1 | Heavy mace and shield; use Nature's Grasp to pick up arena pillars and swing them as devastating weapons against him | |
Humanoid brawler | 2 | Bonepit arena fighter; pugilist with sweeping kicks and choke slams (details from pre-release footage; some specifics may differ in released game) | |
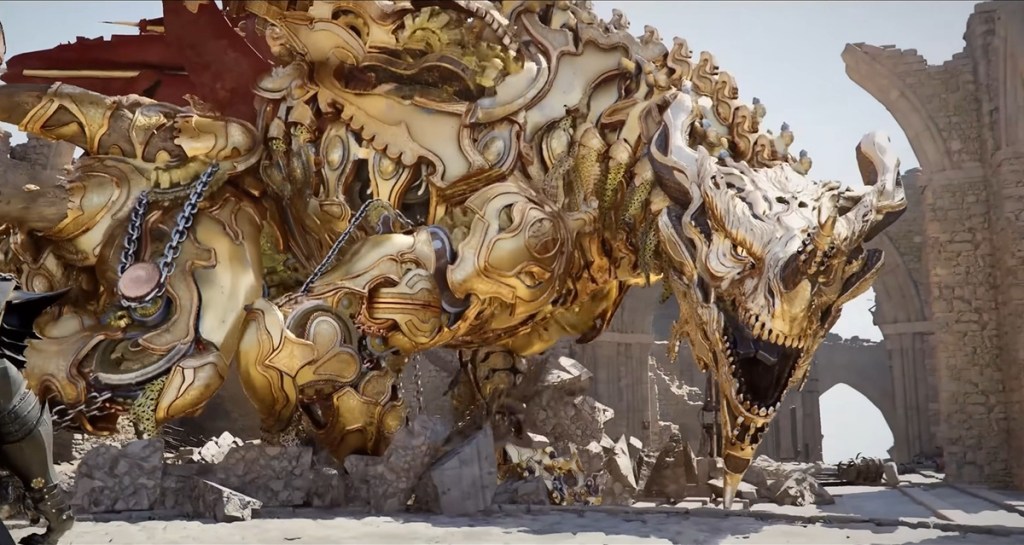
Mechanical dragon | Multi | Mandatory story boss (Chapter 11); fortress arena with EMP bombs; electrical weakness | |
Goblin king | 2 | Goblin boss; fast and chaotic projectile attacks | |
Humanoid (Branchmaster) | 1 | Branchmaster of the Goldleaf Merchant Guild sword with wind-powered ranged slashesparry-focused fight | |
Humanoid occupier | 2 | Must be defeated to reclaim Root Hold | |
Black Bear leader | 2+ | Leader of the Black Bears story-critical encounter |
Boss Rewards
Defeating bosses drops their equipment along with Signature Abilities and unique stat bonuses. Boss-derived gear carries the boss's signature skill as a built-in effect when equipped. Some Signature Abilities carry elemental properties baked in, meaning the player gains elemental enhancement effects without manually applying them. A piece of gear with a Signature Ability can outperform higher-stat equipment that lacks one, especially when its effect counters upcoming challenges.
Bosses also drop Abyss Fragments used for the skill treerare crafting materialsand Knowledge System entries. Loot is not randomized in the ARPG style; unique gear comes specifically from boss drops, blueprints and crafting recipes.
Preparation
Upgrade weapons and armor to the highest tier available before the fight.
Stock up on healing consumables and buff items from cooking and alchemy.
Review the boss's elemental affinity and equip appropriate resistance from the Axiom Bracelet.
Assign relevant abilities from the Abyss skill tree to active slots.
Carry auto-revive consumables for insurance against sudden death.
A commonly overlooked preparation step is using a Grindstone and Anvil before entering a boss fight. Grindstones provide a +5 attack buff, while Anvils provide a +5 defense buff. These buffs are temporary but last long enough for a full boss encounter. Learn their locations across the map (discoverable with the lantern) and make a habit of visiting them before every major fight. The combined +5 attack and +5 defense boost can make a noticeable difference, especially in early-game boss encounters where your base stats are still low.
Pattern Recognition
Every boss telegraphs attacks with animations and audio cues. Spend the first attempts of a new boss fight observing rather than attacking aggressively. Identify the tells for major attacks, the safe windows for counter-attacks, and the recovery animations where the boss is vulnerable. Most bosses follow a repeating pattern within each phase that changes when they transition to the next phase. The way each heavy-hitting boss moves to a rhythm makes syncing with their attacks and finding their telegraphs essential.
Stamina Management
Stamina is the primary limiting factor in boss fights. Dodging, sprinting, and heavy attacks all consume stamina, but light attacks cost nothing. Running out at the wrong moment leaves Kliff unable to dodge a follow-up attack. Keep at least 30% stamina in reserve at all times. Certain combo chains and weapon skills bypass stamina cost entirely.
Perfect dodge timing is critical: a perfectly timed dodge restores stamina rather than consuming it, rewarding precise play during extended boss fights. Burning all stamina on blocks right before a boss's major attack is the most common mistake. A successful parry followed by the strongest available attack deals bonus damage and can stagger even large enemies.
Spacing vs Perfect Evade
Two defensive options exist for avoiding boss attacks: spacing (moving out of range) and perfect evade using Keen Senses. Knowing when to use each one is critical for spirit management and survival.
During long multi-hit combos, spacing is often the better choice. Simply walking or dashing away from the boss completely avoids the entire combo string without spending any spirit. Many bosses have forward-tracking combos that look intimidating but have limited lateral reach. Moving perpendicular to the boss or backing away at the right moment lets you avoid the whole sequence for free.
Keen Senses perfect evade excels against bosses with slow, deliberate single attacks that hit in a wide area. A well-timed perfect evade against a massive overhead slam or sweeping charge rewards you with a generous counter window. However, using perfect evade against bosses that chain five or six rapid hits in a row will drain your stamina dangerously fast, since each individual dodge costs stamina.
The general rule: space against combo-heavy bosses to conserve spirit, and save your perfect evade for punishing slow, high-damage single attacks where the counter window pays off.
Focus Level 3 (Focused Insight)
Focus at Level 3, called Focused Insightslows time significantly and lets you see boss attack animations with complete clarity. This ability is a game-changer for difficult boss fights, especially when you are underleveled or learning a new boss's moveset.
While Focused Insight is active, you can read even the fastest boss telegraphs and react with a free parry. Bosses that seem impossibly fast at normal speed become manageable when you can see every wind-up in slow motion. Early Sanctorum bosses that would otherwise require high-level gear become entirely beatable with Focused Insight alone, even when underleveled.
Another overlooked benefit is that spirit regenerates during Focus. This means activating Focused Insight gives you a defensive window and a parry opportunity and tops off your spirit bar while you plan your next move.
Advanced Combat Strategy
Understanding how to chain abilities and manage resources during boss fights separates competent players from those struggling through encounters. The key to dealing heavy sustained damage is the Force Palm debuff loop.
Force Palm Debuff Combo
Force Palm (palm strike) is one of the most valuable abilities in boss fights because it serves two purposes: it interrupts enemy attacks and applies a debuff that causes the target to take increased damage from all sources. The bread-and-butter combo for boss fights is straightforward: open with a palm strike to debuff and interrupt, then follow up with heavy attacks while the debuff is active. This sequence maximizes your damage window on every opening.
Spirit Management and Burst Damage
Equipping a spirit siphon enchantment on your weapon allows you to regain spirit with every hit. This creates a sustainable loop where your standard attacks fund your ability usage. Between openings, weave in high-damage abilities like Turning Tide or Blinding Flash Flurry (a rapid sequence of five to six heavy attacks) for massive burst damage during stagger windows.
Spirit restore food is more potent than healing food when it comes to overall fight efficiency. The strategy is to dump all your spirit on abilities, eat spirit-restoring food to refill the bar, then dump spirit again. This effectively doubles your ability output during key damage windows. Carry a full stack of spirit food into every boss fight; it will contribute more damage over the course of the encounter than healing food contributes to survivability.
Recovery Mechanics
The game provides several recovery options during boss fights:
Mechanic | Details |
|---|---|
Consumable food items | Inventory wheel displays food such as grilled skewers and burgers that restore Health and Stamina. Players can craft or purchase these. |
Auto-revive consumables | Stackable items that automatically revive the player after death. Multiple can be carried for multiple revives in a single fight. |
If a boss is too hard, the intended solution is to leave, explore, upgrade equipment, complete side content, find more Abyss Fragments, and return better prepared. |
Boss Retry Mechanic
If you die during a boss fight, the game offers a retry option. Choosing retry respawns you at the start of the boss encounter with all food, resources, and revive items fully restored to the state they were in before you entered the fight. Nothing is permanently lost from a failed attempt.
This mechanic has a practical trick: if you arrive at a boss arena on low health with depleted consumables, you can intentionally die at the start of the fight and choose retry. The game treats it as a fresh attempt, meaning you start the next try at full health with all your items intact. This is faster than backtracking to cook food or rest, and costs nothing.
Environmental Tactics
Boss arenas are not featureless platforms. Each arena contains interactive elements that factor into the fight:
Environmental Tactic | |
|---|---|
Geysers on the boss's back launch the player airborne. The arena is the boss itself. Use Crow Wings to prevent fatal falls. | |
Dragon fire activates fortress pylons that dispense EMP bombs. Load them into the arm-mounted cannon to stun the dragon. | |
Use Nature's Grasp to pick up broken pillars in the arena and swing them offensively against the boss for massive damage. His own shield can be used against him. | |
Wheat field provides concealment for the boss's stealth and clone mechanics. Bow is essential for destroying totems. | |
Snowstorms and blizzards affect visibility. The boss uses weather to hide and reposition. |
Unique Boss Mechanics
Several bosses feature distinctive mechanics not found in regular combat
Details | |
|---|---|
Mounting bosses | Players can clamber onto the Queen Stoneback Crab and Kearush the Slayer attacking weak points from their bodies. Bosses actively try to shake the player off. |
Bullet reflection | Against Walter Lanford players must dodge his shotgun blasts (they cannot be parried) and use Blinding Flash Finishers to close the gap. |
Launching into the air (via Force Palm or environmental geysers) and activating slow-motion archery for devastating multi-shot barrages from above. | |
Grapple attacks | The grappling hook latches onto scalable enemies as a gap closer. On the Queen Stoneback Crab, a Spider-Man-style grapple lets the player swing around the boss. |
EMP cannon | In the Golden Star fight, players use an arm-mounted cannon loaded with arena-dispensed EMP bombs to stun the mechanical dragon. |
defeats | Some bosses like the Reed Devil and Hexe Marie escape via narrative cutscenes rather than dying permanently, allowing recurring encounters. |
Elemental Weaknesses
The Axiom Bracelet's elemental system plays a role in boss fights. Four main elements exist: FireIceLightningand Wind. Fire deals extra damage and stuns through rapid hits. Ice freezes enemies, halting movement and interrupting attacks for a reliable stun. Lightning is particularly effective against mechanical bosses like the Golden Star. Elemental effects come from artifactsboss drops with built-in elemental properties, and progression-locked skills.
Beyond the four-element system, each boss has a specific weakness that dramatically changes the fight experience when exploited. Learning these weaknesses before entering a fight is often the difference between a grueling battle and a manageable one.
Known Boss Weaknesses
Boss / Enemy Type | Weakness | Effect |
|---|---|---|
Quarry Boss / Golems | Palm strikes (Force Palm) | Very weak to palm strikes. Force Palm deals significantly increased damage and staggers golems much faster than other attacks. |
Chapter 5 Gorilla | Fire (Elemental Attacks) | Extremely vulnerable to fire. Fire attacks cause a hard crowd-control effect. The gorilla panics and actively tries to put itself out, creating long openings. |
Experimenting with different elemental attacks and ability types against new bosses is worth the effort. A weakness hit can stagger a boss that otherwise shrugs off your attacks, turning a punishing encounter into a fair fight.
Common Mistakes
Mistake | Details |
|---|---|
Over-committing to combos | Attacking through a boss's wind-up animation results in heavy damage. End combos early when the boss begins a new attack. |
Ignoring adds | Some bosses like Hexe Marie summon smaller enemies. Clearing these prevents being overwhelmed from multiple directions. |
Hoarding consumables | Use healing items and buffs freely during boss fights. They exist for this purpose. |
Staying at range | Most bosses have gap-closing attacks that punish passive play. Controlled aggression is safer than constant retreat. |
Burning stamina on blocks | Blocking drains stamina quickly. Saving stamina for perfect dodges (which restore it) is more sustainable than shield-tanking every attack. |
Boss Difficulty Tier List
Crimson Desert ships with around 75 boss encounters across the campaign and post-game, ranging from scripted introductions to optional superbosses gated behind long quest chains. The list below collects the encounters most often discussed by the community as the hardest, framed by community-reported difficulty rather than any single objective ranking. Patch history matters here: many of these fights were significantly tougher at launch and have been adjusted in later patches (notably the 1.04 reduction of boss invincibility frames on heavy attacks). Tier letters reflect rough community consensus and not a fixed in-game classification, so individual experience may differ depending on character build, Abyss Gear loadout, and the order in which fights are tackled.
Tier definitions used in this table:
S Tier: fights that consistently demand prepared gear, careful spirit management, and several attempts even for experienced players. Most are post-game or late-campaign encounters.
A Tier: fights that are reliably difficult on a first attempt, often because of a forced character switch, an early-game position in the campaign, or unforgiving punish timing.
B Tier: challenging fights that can usually be solved by learning two or three key tells, but still bite back if approached without preparation.
C Tier: moderate fights, most of which become straightforward once a single mechanic (Force Palm stagger, Blinding Flash counter, Axiom Force grab) is understood.
D Tier: scripted, optional, or heavily-cheeseable fights. Frequently included on lists for completeness rather than for difficulty.
Boss | Community Tier | Key Threat | Recommended Strategy |
|---|---|---|---|
S | Massive AOEs, very high health pool, fast aggression in a cold biome that drains stamina recovery. | Bring Kuku Frost Enhancer or equivalent cold-resistance armor. Move diagonally toward the boss to dodge most attacks instead of straight backward, and keep a healing rotation ready on every cooldown. | |
S | Tracking orbs, one-shot windows when defense is low, cold-zone stamina drain, large invincibility windows on his combos. | Use an elixir buff before engaging. Blinding Flash finisher and Force Palm stagger his hammer combo, and Turning Slash's invincibility frames are the safest counter to his orb attacks. | |
S | Summoned knights converging from arena corners, teleport gap closers, and a sustained illusion phase. | Position along the safe lane between the corner spawns and use the vertical jump to escape the most punishing aerial attack. Force Palm interrupts her staff-summon animation, and Turning Slash gives invincibility frames through the worst of the wave attacks. | |
S | Aggressive teleports, raven swarm summons, and exploding jar adds that surround you during her ultimate. | Nature's Snare handles the ravens, Blinding Flash finisher creates clean punish windows during her teleport recovery, and Turning Slash buys safety frames against the larger sweep attacks. | |
S | Forced to play as Oongka against a fast, lightning-heavy moveset with arena-wide reach and many invincibility frames on his attacks. | Most of Kliff's upgrades carry over to Oongka (health, stamina, spirit), but the kit is unfamiliar. Pulling a tree from outside the arena with Turning Slash and using it as a thrown weapon deals significant damage if the standard rotation is too risky. | |
S | Forced to play as Damiane, with a fast second phase, summoned shadow clones, and a third phase that introduces unfamiliar attack patterns. | Damiane's Turning Slash form provides invincibility, and her lightning R2 (especially when respec'd with the upgrade tree) is the most reliable damage tool. Some players prefer to kite from outside the arena and ranged-attack the boss. | |
A | Wide area lava bursts that follow up missed sword attacks, frequent ringouts, and large area-of-effect fire damage. | Stay aware of the rising lava warning markers and always reposition after dodging. The reward is an Abyss Gear piece tied to the same fire ability the boss uses, making fire-resist food and gear worth bringing. | |
A | Pre-nerf: aggressive long combos, heavy knockback, and a third phase where every hit can chain into a wipe. | Post 1.04 the AI is less aggressive and his knockback is reduced, but the third phase still demands disciplined dodging. Healing items kept in reserve and using the church doorway to break line of sight remain valid escape options. | |
A | Encountered very early, often without health upgrades or healing knowledge, so even modest attacks become threatening. | If the fight feels overtuned, level up first and return with more health and stamina. The fight also acts as a tutorial for the evasive roll, so practicing dodge timing here pays off later. | |
A | A long-range beam attack with very forgiving tracking that can register a hit even when the visual seems to miss. | Treat the beam as undodgeable at close range and commit to longer evasive sprints when you see the wind-up. The rest of his moveset is well telegraphed and easier to punish. | |
A | Pre-nerf: the stab critical-hit window was extremely tight, forcing a long focus-fire fight against ranged and ramming attacks. | Nature's Snare keeps the boss in its ranged attack pattern and reflects projectiles. Post-patch the critical-hit window is more forgiving, but spirit management still matters because the only safe damage windows are after a successful snare. | |
A | Three health bars, fast aerial dives, ranged crow swarms, and very little downtime between combos. | Parry timings work but are tight; Force Palm breaks the dive recovery, and clearing the swarm before engaging the boss directly prevents stunlocks. | |
B | Large invincibility windows on the avatar phase, plus a flying punch sequence that the game does not explicitly tutorialize. | Use Force Palm to punch the eye when the stagger bar fills. Death does not reset boss health, so persistence works even without optimal play. | |
B | A non-traditional encounter staged across an open chasm with shockwave knockbacks and pillar cover, where intuitive openings rarely work. | Force Palm is the intended damage tool. Hide behind pillars during shockwaves, and approach the boss only after the wind-up animation begins. | |
B | Requires Axiom Force grabs on a moving cube core; raw damage rotations do not progress the fight. | Axiom Force on the core after each landing phase is the only consistent damage. The fight is more about input timing than combat skill. | |
B | Summons a clone that fires at you while the main body has invincibility frames during its big attacks. | Side-dodge the clone's arrows and break the clone first when it is summoned. The Shackle of Might reward from this fight is itself a strong cheese tool against later bosses. | |
B | Heavy single-hit attacks that can shred a low-level health bar if engaged at the start of the game. | Force Palm (especially the third upgrade) reliably staggers him out of his combo. Returning later in the campaign with mid-tier gear makes the fight much fairer. | |
B | Mid-to-late-game spear-style moveset shared with related Reaper encounters, with reliable but punishing tells. | The fight rewards patient dodge-and-punish play. Most attacks are well telegraphed once the moveset is recognized, so the difficulty curve flattens quickly. | |
B | Ghost-punch follow-ups that chain after his strikes, with quick burst potential if the player is unprepared. | Read the ghost-punch tell as a separate attack rather than the end of his combo, and dodge twice in succession. Otherwise the fight rewards standard dodge-and-punish play. | |
B | Three health bars and pre-patch invincibility frames, plus arena-wide projectiles during the clone phase. | Blinding Flash finisher cuts through most of his moveset. After the invincibility-frame patch, dodge-style players have a much easier time than parry-focused builds. | |
C | Ice-based attack pattern similar to Kearush, but the third phase is partially handled by an allied combatant. | Stick to the same anti-Kearush tactics for the first two phases. Once Kearush the Slayer enters during phase three, hold back and let the duel finish. | |
B | Confusing first encounter with parry windows that are not obvious; a summoned clone phase adds adds to the pressure. | Clone phase is ended by destroying the scarecrow markers, not by attacking the boss directly. Parry timings work once the moveset is learned. | |
C | Aggressive movement pattern; can hit hard at low character levels, but staggers easily. | Force Palm (third upgrade) breaks its pattern repeatedly. The Bee Club was previously a strong cheese before its nerf. | |
D | Optional encounter with several invincibility-frame attacks pre-patch; mostly forgiving once the move tells are read. | Skippable for early-game players. Returning later with stronger gear and the post-patch reduced invincibility makes this a low-pressure fight. | |
C | Knockback attacks that launch you into the air, plus crystal weak points that must be broken in sequence. | Stab the glowing crystals on the back to deal large chunks of damage. The Abyss Spear reward is a strong drop, with a status that reliably builds throughout the fight. | |
D | Pillar-drop and predictable swing patterns; almost entirely countered by a single skill. | Blinding Flash finisher leaves him helpless for most of the fight. Drop-pillar attacks do not damage him, only the player. | |
D | Telegraphed spear thrusts in an arrow-trapped arena. | Side-dodge the thrusts and watch the arrow patterns at the arena edges. Ator's Orbs deal strong sustained damage during punish windows. | |
D | A scripted encounter rather than a real combat challenge; primarily teaches a mechanic. | The fight cannot be lost in any meaningful way. Treat it as story content, not a difficulty test. | |
D | Puzzle-style dragon fight with thrown spears as the main damage source. | Pick up and throw the arena spears between dodges. The boss's own attacks are easy to read, and most of the fight is repositioning between throws. | |
D | An introductory encounter with a fixed wall-pin tactic that ends the fight in seconds. | Use Turning Slash to push him into the wall. The fight is mainly memorable for his armor design rather than mechanical depth. |
Several recurring patterns appear across the hardest fights. Many bosses had high invincibility frames before the post-launch combat patches, which made traditional aggression risky and pushed players toward Force Palm, Blinding Flash, and Nature's Snare as central counters. The forced playable-character swaps for the One Armed Ludvig and Awakened Lucian Bastier fights add another difficulty layer because most players have not invested time into Oongka or Damiane before being thrown into a high-stakes encounter. The hardest fights overall (Beloth, Aethelred, the Forgotten General, Hexe Marie) reward specific gear preparation more than reflex play, so investing in elemental resistance, Abyss Gear, and elixirs before attempting them remains the safest progression path.
Tier placements above are community consensus and are subject to revision as the game continues to receive balance patches. A boss currently rated A Tier may become C Tier after a future invincibility frames adjustment, just as several originally S Tier encounters have already moved down after the 1.04 changes.