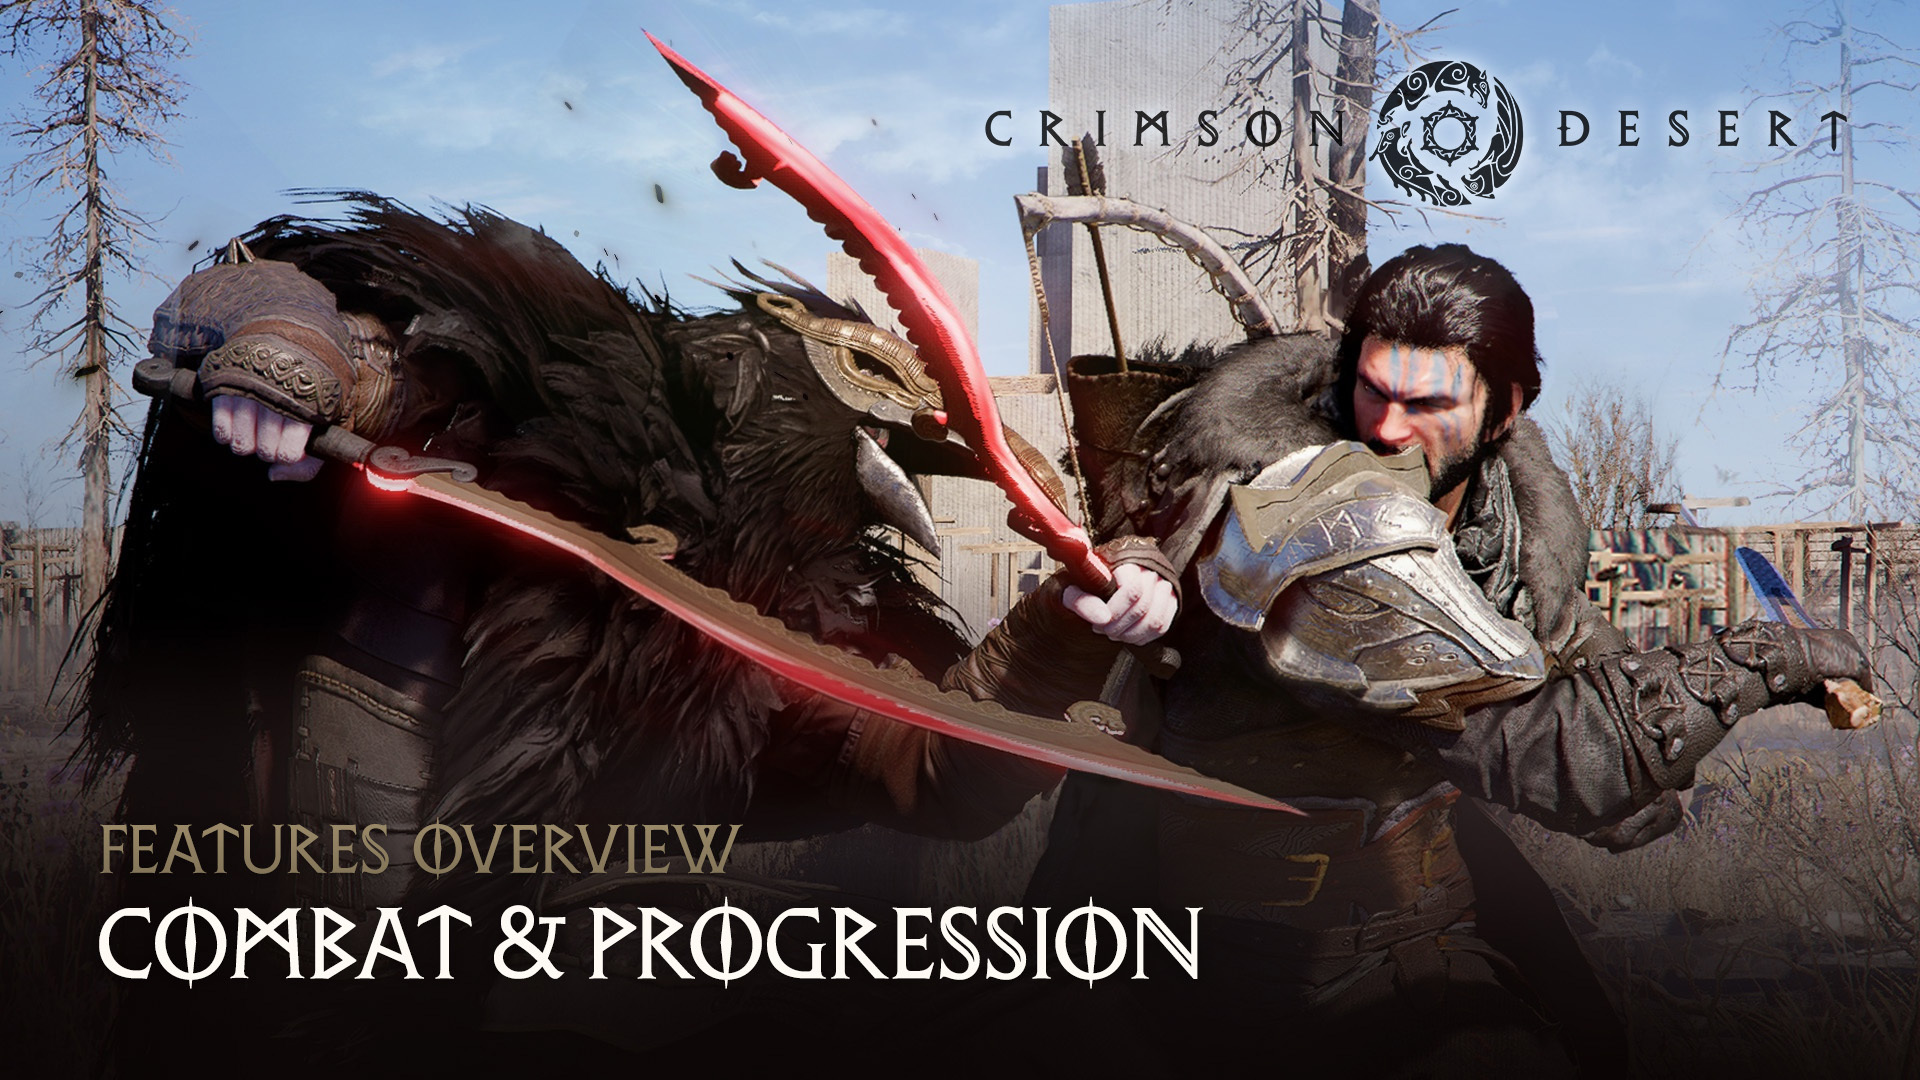
Overview
Crimson Desert has a deep, fast-paced combat system that Pearl Abyss describes as having "no single correct answer." Rather than following a traditional action RPG model, the combat draws direct inspiration from fighting games like Samurai Shodown and King of Fighters, requiring players to memorize specific button combinations rather than relying on simple light and heavy attack buttons. The system seamlessly chains weapon strikes, unarmed grapples, kicks, elemental abilities, and mounted attacks into a continuous flow of combat.
Pearl Abyss has stated that Crimson Desert is not a Soulslike. It is closer to a brawler with fighting game influences. Its combat favors combo creativity and environmental interaction over methodical, stamina-heavy play.
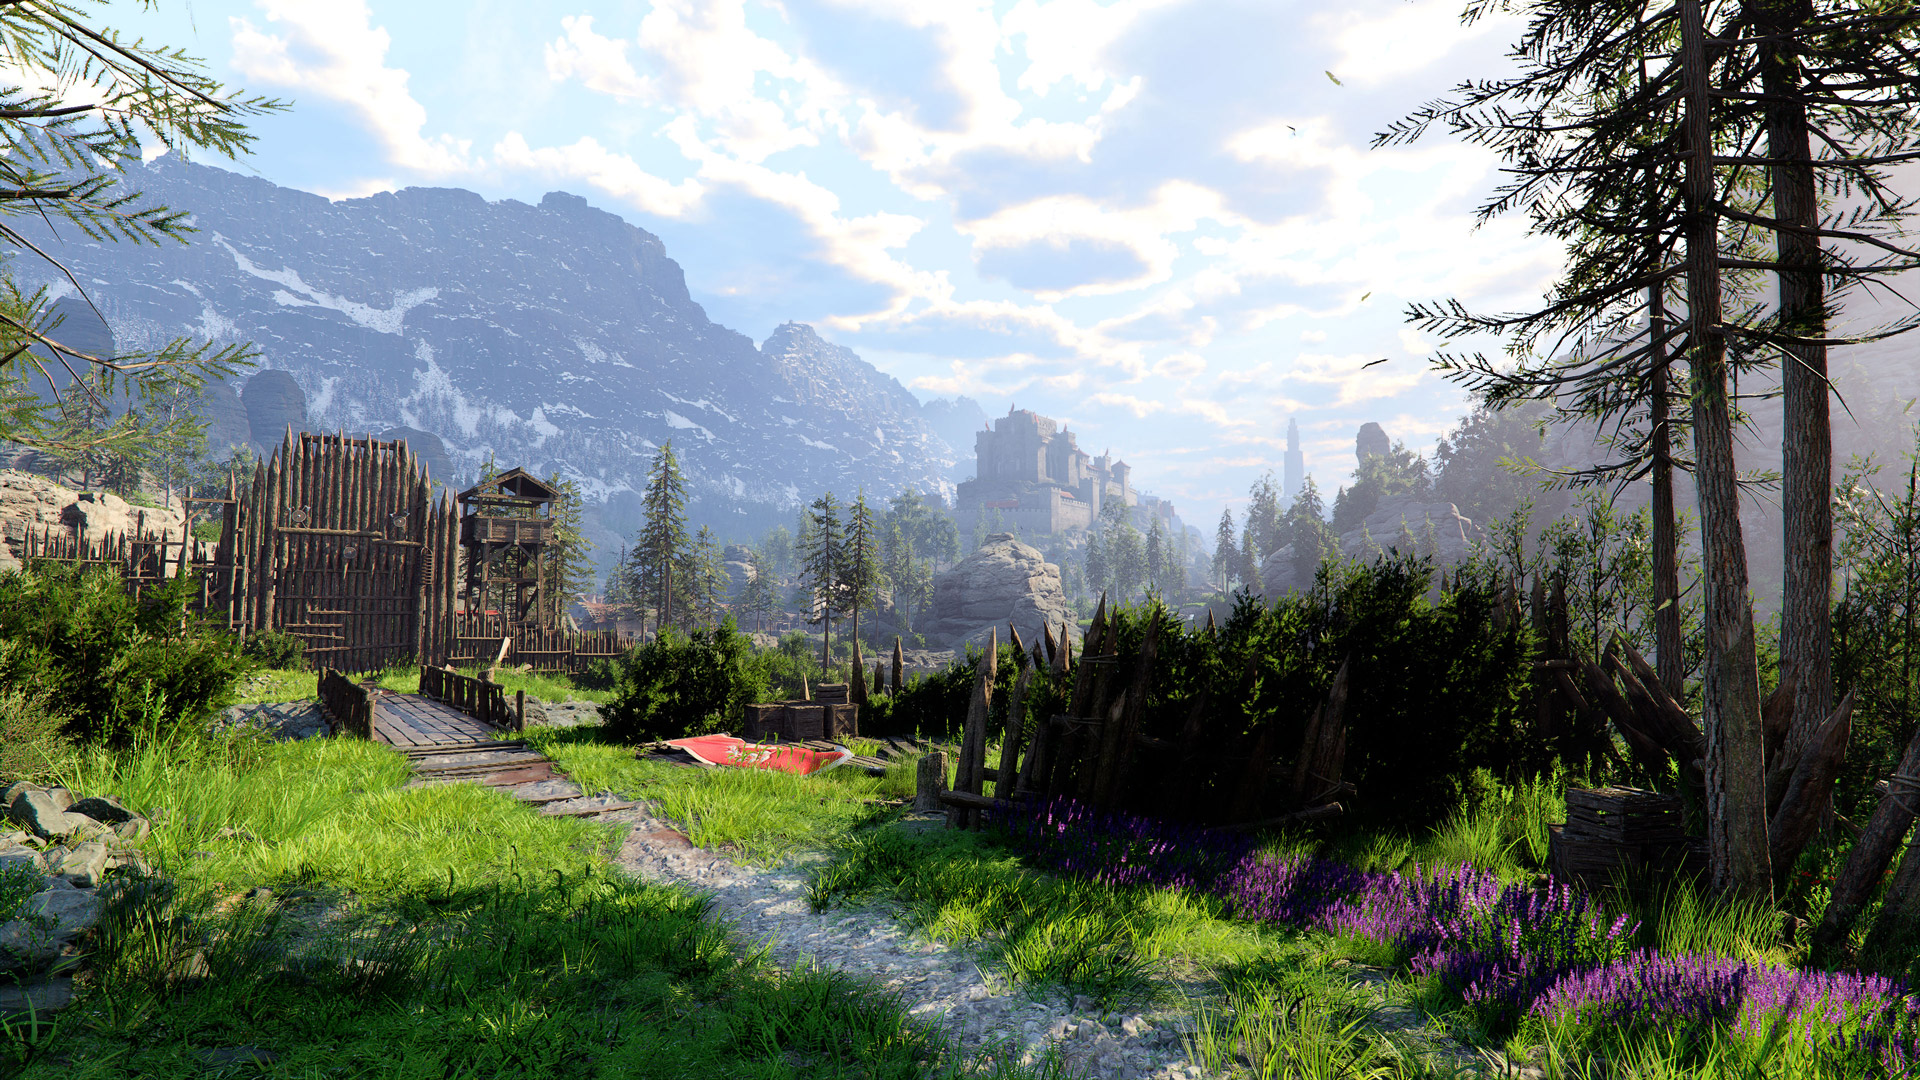
Crimson Desert's Knowledge System tracks 573 territories across the continent of Pywel, each with its own enemy encounters, environmental challenges, and rewards. This territory count reflects the scale of the world that the combat system is designed for, with encounters tailored to each region's distinct enemies and terrain.
Weapon Types
Protagonist Kliff can wield multiple categories of weapons, each with a distinct moveset. Players can equip multiple weapons and swap between them on the fly mid-combat.
Weapon Type | Key Characteristics |
|---|---|
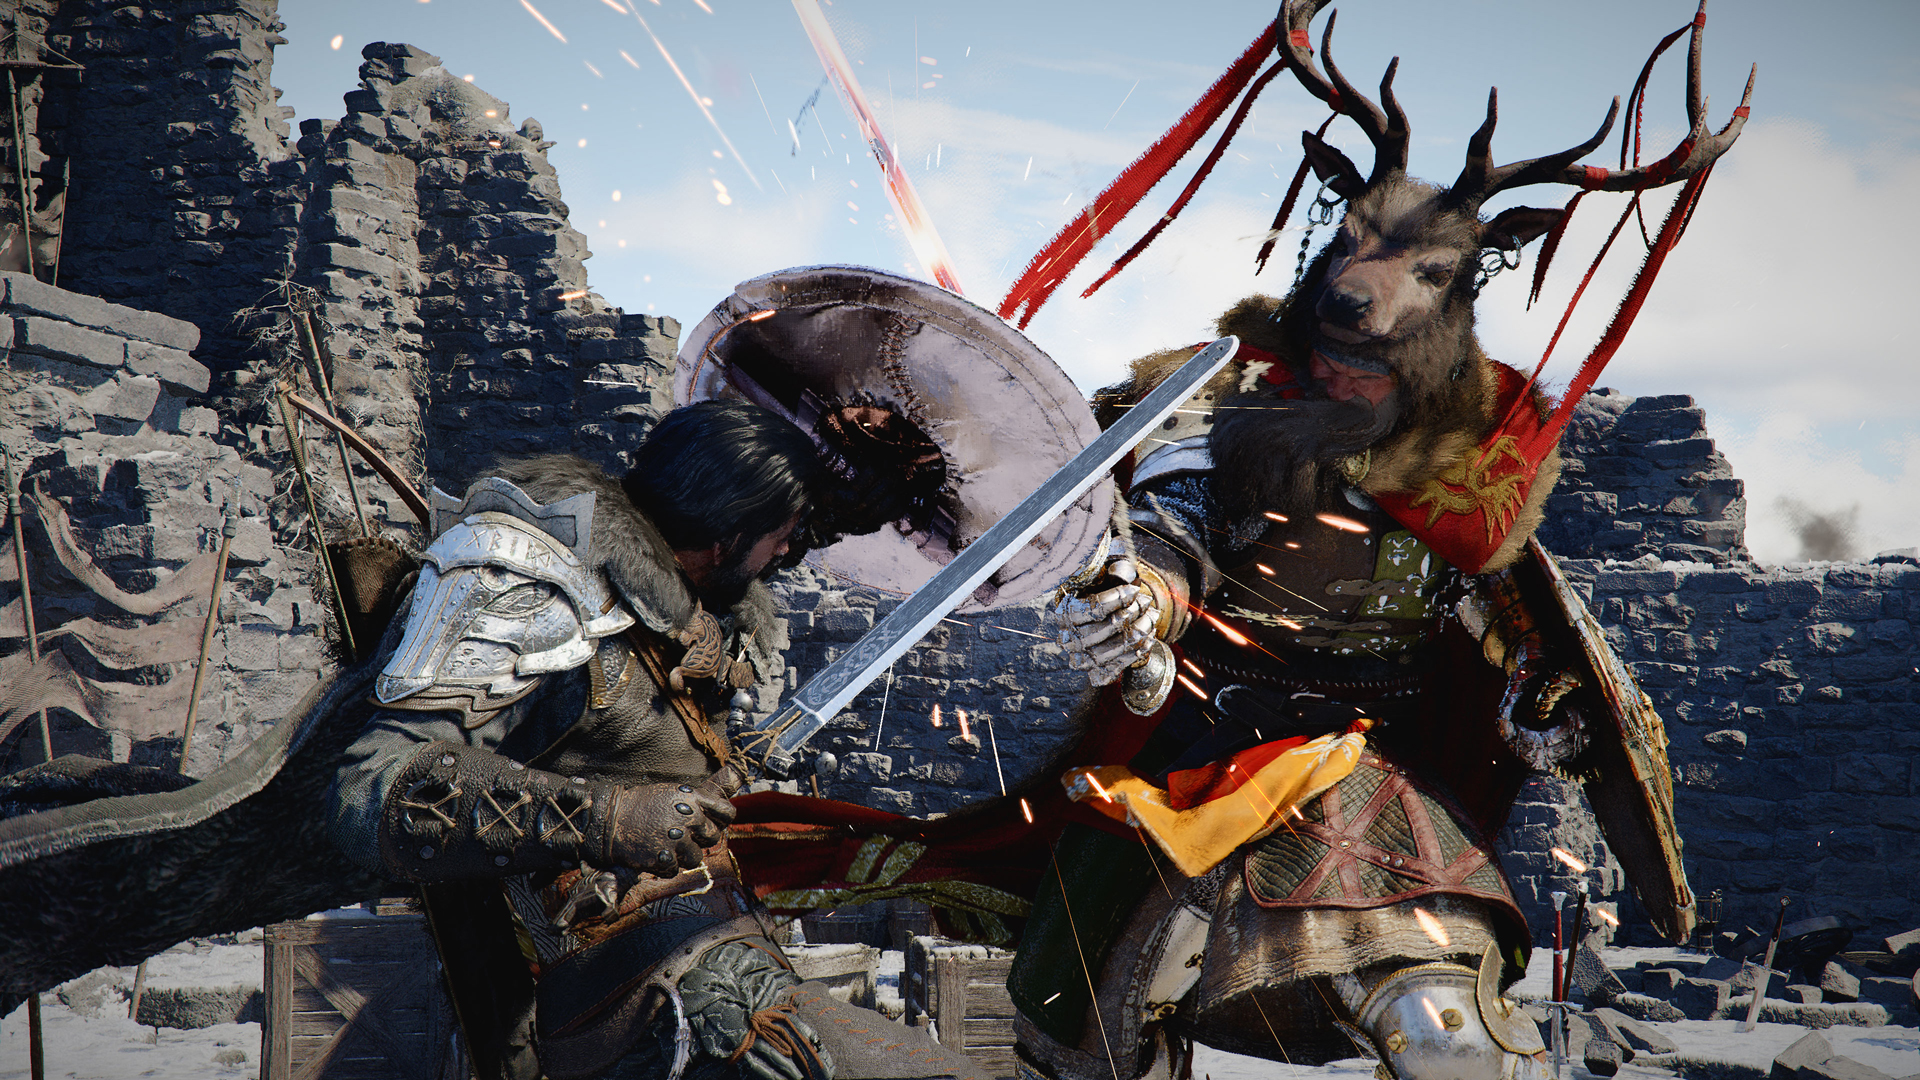
Sword and Shield | Balanced offense and defense; parry chains, overhead slams, and shield bashing |
Spear / Polearm | Extended reach with rapid single-target attacks; wind blast effects and aerial attacks |
Greatsword | Heavy swings with wide area-of-effect damage; high commitment per attack |
Axe / Longsword | Brutal cleaves with high damage output; wide-arcing swings |
Fast combo chains with quick strikes; evasion-focused playstyle | |
Ranged (Bow, Arquebus) | Precision shots; whistling arrow airstrikes; slow-motion headshots in Precision Focus mode |
Bare-Handed / Unarmed | Punches, kicks, and grapples that chain into weapon attacks; has its own damage stat suggesting upgrade paths |
Each weapon performs differently and encourages a different combat approach. The game rewards players who learn the movesets of multiple weapon types and switch between them to exploit enemy weaknesses.
Weapon Switching and Quick Swap
Players can equip multiple weapons and swap between them during combat. Before unlocking the Quick Swap skill, weapon switching requires opening the Radial Menu, navigating to the right tab, and selecting the desired weapon. This is functional but interrupts combat flow.
The Quick Swap skill becomes available once the Armed Combat skill reaches Level 5. With Quick Swap unlocked, players can cycle through assigned weapons instantly using a button press without opening any menu. The key advantage of Quick Swap is that it enables mid-combo weapon transitions: a player can start a combo with a sword and shield, swap to a greatsword for a heavy finisher, then switch to a bow for a ranged follow-up, all without breaking the attack chain.
This mechanic is central to Crimson Desert's combo philosophy. Pearl Abyss designed weapon switching to feel like swapping between fighting game characters, where each weapon functions as a distinct moveset that flows into the next. Mastering Quick Swap dramatically increases combo variety and damage output in the late game.
Weapon Switching Between Characters
Each of the three playable characters has a distinct weapon pool, and switching between characters means switching between entirely different combat styles. Understanding how weapon switching works for each character is critical for maximizing damage and adaptability.
Character | Available Weapons | Switching Method |
|---|---|---|
Multiple weapon categories: Sword and Shield, Spear, Greatsword, Axe, Dual Blades, Bow/Arquebus, Unarmed | Radial Menu (hold Left D-pad) or Quick Swap (requires Armed Combat Lv5) | |
Greatsword, Rapier with Buckler, Pistol | Same Radial Menu system; her Armed Combat level also determines Quick Swap access | |
Two-Handed Greataxe, Large Hammer, Arm Cannon (Orc Blaster) | Fewer weapons but higher impact per swap; same input system |
Core Combat Actions
Combat in Crimson Desert centers on the bumper buttons, with L1 for parrying and R1 for main weapon strikes. The face buttons use a nonstandard layout that takes time to master.
Input | Action | Description |
|---|---|---|
R1 | Light Attack | Fast strikes for combo building, hammer repeatedly for chains |
R2 | Heavy Attack | Powerful charged blows, context-sensitive |
R1+R2 (Hold) | Special Attack | Devastating down-swing attack |
L1 | Block/Parry | Timed blocks create counterattack windows |
L2 | Aim/Palm Attack | Context-sensitive: Aim bow or use Force Palm |
Square | Jump | Vertical movement, combo starter |
X (Cross) | Run | Stamina-based sprinting |
Circle | Evasive roll with invincibility frames | |
Triangle | Kick/Mount/Interact | Context-sensitive: kick in combat, mount horse, interact |
Circle+Triangle | Grab | Initiates grapple moves, direction-dependent |
Right Stick Press | Energy wave ability using Spirit meter |
Controller Layout (DualSense)
Input | Action |
|---|---|
L1 | Block / Parry |
R1 | Attack (fast strikes) |
Square | Jump |
X | Run (stamina-based) |
Circle | Dodge / Evade |
Triangle | Mount / Kick / Interact |
L1 + R1 | Stun-flash sword attack |
R1 + R2 | Powerful downswing |
L3 + R3 | Activate elemental bracelet / Focus Mode |
D-Pad | Item and element selection |
Every button serves multiple purposes depending on context. Preview journalists have consistently noted that the control scheme resembles a fighting game character's entire moveset mapped to a controller, creating a steep but rewarding learning curve.
Combo System
The combo system is the heart of Crimson Desert's combat. Unlike traditional action games with simple attack buttons, the system uses fighting game-style inputs where two to three buttons pressed simultaneously trigger different moves. Players must memorize specific combinations rather than mashing a single attack button.
Attack Chaining
Attacks flow seamlessly between weapon strikes, bare-hand combat, kicks, and grapples. The game actively encourages mixing input types to extend combos:
Weapon to unarmed: Swing a sword, then chain into a flying kick or suplex
Unarmed to weapon: Land a punch combo, then switch to a greatsword for a finishing cleave
Aerial combos: Vault into the air, perform aerial attacks, and chain air-to-ground sequences
Magic launch: Shoot magic at the ground to launch Kliff into the air, then follow with a slow-motion arrow barrage or dive attack
Combo Philosophy
Pearl Abyss prioritizes the 'rule of cool,' allowing players to pull off unexpected move combinations. As one reviewer explained: 'When you're in a fight, you're doing all of this stuff, switching weapons on the fly, landing those big hits, jump kicking some dude and then following that up with a big sword combo, and RKOing the next mook unlucky enough to get close to you, it feels great.'
Attack Commitment
Once an attack animation starts, players cannot cancel mid-swing. This adds commitment and risk to every attack, forcing players to read enemy movements and choose their openings carefully. Whiffing a heavy attack leaves Kliff vulnerable to counterattacks, while correctly timing a swing rewards with full combo potential.
Dodge, Block, and Parry
Defensive options are tightly integrated into the combat flow. For a full breakdown, see the dedicated Dodge, Block, and Parry article.
Mechanic | Description |
|---|---|
Dodge / Roll | Slides, dodges, and evasions that chain directly into attacks. A perfect dodge opens counter opportunities. |
Shield Block | Holding block absorbs incoming attacks. Shield can also be used offensively for bashing. |
Well-timed guards create openings for counterattacks. Shield parries trigger back-and-forth duels. | |
Attack Commitment | Once an attack animation starts, it cannot be cancelled. This creates risk-reward tension in every swing. |
The system emphasizes skillful timing over button-mashing. Reading enemy movements and attack patterns is essential for survival.
The dodge roll includes a perfect dodge window. Nailing the timing at the exact moment of an incoming attack restores stamina rather than consuming it, rewarding precise timing with resource recovery. This mechanic makes mastering dodge timing one of the most efficient ways to sustain aggressive play during extended encounters. The Quick Recovery skill (unlockable via the Abyss Tree) lets players tap the dodge button to instantly roll back onto their feet after being knocked down, preventing enemies from stun-locking Kliff on the ground.
Evasive Roll
Evasive Roll is a key defensive ability that Kliff can learn for free through the Watch and Learn system during Chapter 2. During the boss fight against Kailok, the Hornsplitter in the End of Greed questline, the Hornsplitter performs a rolling dodge maneuver. Pay attention to the observation prompt that appears and hold the observation button to learn the technique.
While the basic dodge lets you move out of the way before getting hit, Evasive Roll ensures you can still recover after taking damage. When knocked down or staggered, pressing the evade button triggers a roll that gets you back on your feet and out of danger. This is essential against aggressive bosses that chain attacks, as it prevents stun-locking on the ground. Combined with the Quick Recovery skill from the Abyss Tree, Evasive Roll gives you reliable escape options even after taking a hit.
Grappling and Wrestling
Crimson Desert has a robust, physics-driven wrestling system inspired by professional wrestling. Grapple moves are activated by pressing Circle + Triangle (on PlayStation) or the equivalent input on other platforms. The grappling system is always available regardless of equipped weapon and chains seamlessly into weapon combos.
The core grapple moves include:
Move | Input | Effect |
|---|---|---|
Basic Grab | Circle + Triangle | Grabs an enemy; directional input determines follow-up (slam, throw, or hold) |
Grappling Lv2 | Slams an enemy into the ground with enough force to impact nearby foes | |
Sprint + Grab | Running grab that wraps arm around enemy's neck using momentum | |
Grab from behind | Leaps onto enemy's back for sustained damage; drains enemy stamina | |
Suplex | Grab + directional input | Grabs and suplexes human-sized enemies into the ground |
Neckbreaker (RKO) | Circle + Triangle + direction away | Wrestling finisher; grabs and slams enemy with a neck twist |
Grab + rotation input | Swings enemy in a circle, throwing them into other enemies for collision damage |
Directional grapples add depth to the system. A stationary grab slams enemies into the ground, while adding directional input tosses them in that direction. Thrown enemies become projectiles that damage other enemies they collide with, making grappling an effective crowd control tool in group encounters. The Grappling skill has a maximum of 5 ranks, with higher ranks unlocking additional grab types and follow-up attacks.
Combo Integration and Kicks
Wrestling moves are fully integrated into the combo system. Suplexes, chokeslams, hammer throws, shoulder tackles, back breakers, knee thrusts, drop kicks, and flying front kicks can all be chained with weapon attacks. Directional grapples add depth: a stationary grab slams enemies to the ground, while adding directional input tosses them, turning enemies into projectiles that damage other enemies.
The kick animations in Crimson Desert are motion-captured from Taekwondo practitioners, giving them a distinctive martial arts feel that sets them apart from typical video game kick animations. This contributes to the fluid, fighting-game-inspired feel of the unarmed combat system.
Stamina
Crimson Desert uses a stamina system with one important distinction: normal strikes do not consume stamina. Only advanced movement and special skills drain the stamina bar. This design makes combat flow smoother and faster than games where every attack costs energy.
Uses Stamina | Does Not Use Stamina |
|---|---|
Dodging and evasion | Standard weapon attacks |
Special skills and abilities | Basic combo chains |
Sprinting | Walking and jogging |
Climbing (including boss climbing) | Standard movement |
Players can invest Abyss Artifacts into the stamina stat branch of the Abyss Tree to increase their energy pool for evasion and special actions. The stat distribution between Health and Stamina can be respecced for build experimentation.
Stamina Costs
While standard weapon strikes are free, many combat actions have specific stamina costs that add up quickly during prolonged fights. Skills like Swift Stab cost 50 stamina per use, Charge drains 30 stamina per second while held, and Spinning Slash requires 30 stamina. Dodging, blocking, sprinting, climbing, and gliding all pull from the same stamina pool. Players who chain multiple evasive maneuvers without pausing to recover will find themselves running dry at the worst possible moment.
Stamina Recovery Through Parrying
Parrying is the single most efficient method for stamina recovery during combat. A successful parry instantly restores a portion of both Stamina and Spirit, while simultaneously creating a counterattack window. This makes parrying not just a defensive tool but a resource management technique. Players who consistently land parries can sustain aggressive offense far longer than those who rely solely on dodging, since dodging consumes stamina while parrying replenishes it.
Stamina Reserve Strategy
Always keep at least 20% of your stamina bar in reserve during extended combos. This ensures you have enough energy for an emergency dodge if an unblockable attack comes your way. One of the most common mistakes new players make is burning their entire stamina bar on blocks and heavy attacks right before a boss launches a major combo. With no stamina left, the dodge roll becomes unavailable, leaving you completely exposed. Maintaining a partial reserve is especially important against bosses with wide sweeping attacks that cannot be parried.
If stamina drops to zero during a complex action like a weapon switch or a charged heavy attack, Kliff enters an "empty stamina" stagger state. During this brief animation, he is completely unable to act, block, or dodge. Enemies will capitalize on this vulnerability immediately. Avoid this by monitoring the stamina wheel and canceling combos early when the bar is running low rather than committing to one more swing.
Force Palm and Axiom Bracelet
Force Palm is a signature ability that shoots a wave of green energy from your palm, activated by pressing the right stick. It uses the Spirit meter and serves multiple purposes:
Combat - Knock back enemies, interrupt attacks
Traversal - Give yourself vertical boosts when combined with jumps
Air Combo - Use three times in a row to propel yourself up in the air
Slam - Dive kick down, palm thrust back up, then slam down with a massive green fist
Boss Fights - Launch into air before activating bullet-time bow attacks
Spirit Resource Management
The Spirit meter governs Force Palm usage and certain other abilities. Repeated use drains the meter, and once empty, Force Palm becomes unavailable until it regenerates. Spirit refills gradually over time, but there are faster ways to recover it. Landing a successful parry restores a portion of Spirit alongside Stamina, making parrying the most efficient way to keep all three combat resources (Health, Stamina, Spirit) topped up simultaneously.
You can also manually recharge Spirit by holding L3+R3 (left stick + right stick pressed together) on controller, or the X key on keyboard. This triggers a brief channeling animation during which Kliff is vulnerable, so only use it when you have breathing room between enemy attacks. Some consumable items also restore Spirit, though these are less common than food-based health recovery.
Conservation Strategy
Managing Spirit consumption is an important part of combat rhythm. Spamming Force Palm for traversal and aerial combos can leave you with an empty meter when you need it most, such as during a boss phase where Force Palm is required to stagger the enemy or break a specific mechanic. Keep a mental note of your Spirit level before entering difficult encounters and avoid unnecessary Force Palm use during exploration if a boss fight is imminent.
Focused Force Palm
Focused Force Palm is a specialized version of the standard Force Palm ability that becomes available during Chapter 4 (The Price of Knowledge: Forbidden Knowledge). When you are heading toward Scholastone, follow the main road until you see a blocked passageway. A spirit guide appears nearby and teaches you the ability through the Watch and Learn system.
Important: Focused Force Palm is semi-missable. If you take an alternate route to reach Scholastone and advance the main quest without encountering the spirit guide, you may pass the opportunity. Make sure to follow the main road during this quest segment.
Focused Force Palm is essential because it breaks through magical barriers scattered throughout Pywel. These glowing walls block access to treasure chests, shortcuts, and hidden areas that contain Abyss Artifacts and rare gear. Without Focused Force Palm, these barriers are impassable. The ability also sees use in several puzzle sequences later in the story where you need to shatter specific objects to progress.
Elemental Powers
The Axiom Bracelet grants elemental abilities that serve both combat and exploration purposes. Players select an element via the D-pad wheel and activate it with thumbstick clicks (L3/R3).
Element | Combat Effect | Environmental Use |
|---|---|---|
Fire | Incinerates and explodes; burning damage over time; effective against clustered enemies | Clears thorny terrain; sets wooden structures ablaze |
Ice | Freezes enemies solid for follow-up shattering strikes; best for crowd control | Creates floating ice platforms on water surfaces |
Lightning | Paralyzes and stuns enemies; disrupts shielded foes | Electrifies water for bonus damage against wet enemies |
Wind | Enables aerial positioning and dive-kick attacks | Used for traversal and puzzle-solving |
Elements can be infused into melee weapons for ongoing status effects: burning damage over time, freezing slows, and shocking stuns. The Axiom Bracelet also enables sequential casting (L3-R3-L3 for triple jumps) and can launch Kliff into the air for aerial combos.
The Axiom Bracelet grants elemental powers that can be infused into weapons and attacks. Elements are selected via D-Pad and apply status effects to enemies.
Elemental effects can be applied to both melee weapons and arrows, creating powerful combinations. Different arrow types plus elemental infusions can stack effects on enemies.
Mystical Powers
Throughout the story, Kliff gains magical powers granted by mysterious spirits:
Crow's Wing
Kliff's cloak transforms into large, tattered raven wings, enabling gliding across terrain. This ability is crucial for traversal and tactical combat positioning. During the Queen Stoneback Crab fight, forgetting to use Crow's Wing after being thrown can result in death from falling.
Artillery Whistling Arrows
Summons allied reinforcements to shell enemy positions with a barrage of raining fire arrows from the sky, dealing massive area damage to groups of enemies.
Super Armor and Stagger
Super Armor
Super Armor is a combat mechanic indicated by blue splashes when an attack connects with an enemy who is currently executing a Super Armor move. When an enemy enters a Super Armor state, they become immune to stagger and interruption, meaning normal attacks will not knock them out of their animation. Blue flashes on contact are the visual indicator that the enemy's attack has Super Armor properties.
When you see blue splashes, stop attacking immediately. Trying to trade hits with a Super Armored enemy is a losing proposition because your attacks will not interrupt their combo while theirs will still damage you. Instead, dodge or block until the Super Armor window ends, then punish during the recovery frames.
Breaking Through Super Armor
Certain high-level abilities can break through Super Armor. Kliff's fully upgraded Stab skill with the Rend Armor perk bypasses Super Armor entirely. Damiane's Piercing Light with the Rend Armor upgrade also ignores Super Armor. For players without these upgrades, the safest approach is to dodge continuously until the Super Armor sequence ends and then counterattack during the recovery window.
Another option for breaking Super Armor is the Turning Slash skill at Level 3, which unlocks the Rend Armor perk. This upgrade lets Turning Slash bypass enemy Super Armor and send armored enemies airborne, creating a juggle opportunity for follow-up attacks. Because Turning Slash is a relatively early unlock, it provides a practical answer to Super Armor well before reaching the fully upgraded Stab skill.
Stagger System
Bosses and elite enemies have a stagger meter displayed as a yellow bar beneath their health bar. As you land attacks and trigger successful parries, this meter fills. Once it reaches full, the enemy collapses to one knee in a staggered state, creating a window for a devastating finishing blow.
Building Stagger
Different actions build stagger at different rates. Heavy attacks (R2/RT) fill the stagger meter significantly more than light attacks. Grappling moves inflict high stagger buildup, making them one of the fastest ways to stun a boss. Force Palm can stagger enemies who are standing still, and it is particularly effective against bosses during their recovery animations. Perfect parries also contribute a large chunk of stagger buildup on top of their stamina recovery benefit.
Action | Stagger Buildup |
|---|---|
Light attacks (R1/RB) | Low buildup per hit, but fast |
Heavy attacks (R2/RT) | High buildup, especially fully charged |
Perfect parries | |
Grapple moves | Very high buildup per grab |
Varies by skill; named skills generally build more |
Finishing Blows
When the stagger meter is full and the boss kneels, press R1+R2 (RB+RT on Xbox) simultaneously to execute a finishing blow. This deals a large burst of damage and often triggers a cinematic attack animation. Finishing blows are one of the highest single-damage actions in the game, so filling the stagger meter should be a priority in every boss encounter. After the finishing blow connects, the stagger meter resets and you resume the normal fight cycle.
Not every enemy has a visible stagger meter. Standard field enemies can be staggered by individual heavy hits or parries without needing to fill a bar. The visible stagger meter appears primarily on bosses, mini-bosses, and named elite enemies throughout Pywel.
Named Combat Skills
Beyond basic attacks, players can execute named skills through specific multi-button inputs:
Skill Name | Effect | Input/Activation |
|---|---|---|
Slow-motion arrow shooting while diving | L2 + directional input while airborne | |
Flurry Slash | Deadly combo of rapid sword swipes | Multi-button combo |
Vicious blow that hurls enemies away | Directional + attack | |
Neckbreaker (RKO) | Wrestling finisher, grabs and slams enemy | Circle+Triangle + direction away from enemy |
Flash sword to blind and incapacitate enemies | Special input | |
Sprint Grab | Wrap arm around neck using momentum | Circle+Triangle while sprinting |
Wrestling-style slam attack | Face button combination | |
Suplex | Grab and suplex human-sized enemies | Grab + directional input |
Observational Skill Learning
The Watch and Learn system (also called Observation Learning) is Crimson Desert's unique skill acquisition mechanic. When an enemy or NPC performs a technique that Kliff does not yet know, an observation prompt appears above their head. Hold the observation button for two to three seconds while within visual range to begin learning.
A "Learning" bar appears in the top left corner. This shows a skill name and a progress counter such as 1/3. This indicates the number of times you need to observe that specific move being performed. Getting hit during observation interrupts the progress, so maintaining distance while watching is important. Once the observation counter is filled, a "Technique Observed" notification confirms the skill has been banked.
Unlocking Observed Techniques
After observation, open the skill menu and spend one Abyss Artifact to permanently unlock the observed technique. You can observe multiple techniques from the same enemy before spending artifacts. Each observed technique remains banked until you choose to unlock it. During boss fights, prioritize observing before finishing the boss, as certain boss-exclusive techniques can only be observed during specific phase transitions.
Crimson Desert has a unique skill acquisition system where players learn combat techniques by watching NPCs and enemies perform them. There are no character levels or experience points. Instead, skill progression follows a two-step process:
Step 1: Observe: Watch an NPC or enemy perform a technique (hold the observation button for approximately two seconds)
Step 2: Invest: Spend an Abyss Artifact to "lock in" the technique permanently in the Abyss Tree
Crucially, "Artifacts alone don't teach you skills." Players must first witness the move being performed. Some techniques can even be learned mid-combat from enemies. Confirmed examples include a palm strike learned from a passive NPC and a body slam mimicked from an enemy's technique.
Mid-Combat Observation Tips
Learning skills mid-combat requires balancing aggression with patience. When the observation prompt appears above an enemy, you need to maintain visual line of sight and hold the observation button for two to three seconds without getting hit. In practice, this means backing off to a safe range where the enemy will still perform their attacks for you to watch, but where their swings will not reach you. Against bosses with wide attack arcs, use the brief pauses between combo strings to begin observing, and dodge away if the boss turns toward you.
Some boss-exclusive techniques can only be observed during specific phases of the fight. If the boss transitions to a new phase before you finish observing, the opportunity may be gone. For this reason, prioritize observation early in the fight rather than waiting until the boss is nearly dead. The Evasive Roll technique, for example, is learned from Kailok the Hornsplitter during his fight in Chapter 2. Missing the observation prompt during this encounter means losing a valuable defensive skill.
Abyss Gear System
Equipment in Crimson Desert can be enhanced through the Abyss Gear socket system, which represents the endgame tier of equipment customization. For full details on crafting and enhancement, see Blueprints and Crafting.
Enhancement | Description |
|---|---|
Weapon Sockets | Gear has slots for passive stat jewels. Multiple slots per item allow stacking bonuses. |
Abyss Gear Augments | Provide effects like increased attack speed, critical hit chance, and bonus damage against stronger foes |
Boss Signature Equipment | Defeating bosses yields exclusive gear; equipping it grants that boss's signature combat skill |
Blacksmith Upgrading | Attack stats upgraded using mined materials, boss drops, hunted animal parts, and exploration finds |
Enchanter Optimization | Interacting with an enchanter allows loadout optimization |
Targeting System
Crimson Desert does not use automatic lock-on. The camera does not snap to opponents automatically. The game offers two lock-on modes. Hard Lock (D-Pad Down on controller, Caps Lock on PC) persistently targets a chosen enemy and keeps them in focus even among groups. Soft Lock (hold L1/LB on controller, hold Ctrl on PC) automatically locks onto the nearest enemy while guarding and switches to any attacker, making it useful for parrying and reactive combat.
Enemy Behavior
Enemies in Crimson Desert are aggressive and coordinate attacks. In group encounters, enemies attack from multiple directions simultaneously rather than waiting politely for their turn. Different enemy and boss types require entirely different tactical approaches:
Humanoid bosses (Staglord): One-on-one duels with parry-counter dynamics
Fortain: Two-on-one duel; summons a ghost companion armed with axe and crossbow
Beast bosses (White Horn, Queen Stoneback Crab): Climbing mechanics and environmental tactics
Supernatural bosses (Hexe Marie): Teleportation, minion summoning, transformation phases
Mounted enemies: Enemies ride mounts, and players can grapple them off and commandeer the mount
Boss Combat Strategies
Different boss archetypes demand different tactics. Recognizing what type of boss you are facing within the first few seconds of an encounter determines which strategy to apply.
Human-Type Bosses
Humanoid bosses such as The Staglord, Fortain, and Matthias fight in a duel-like style with readable attack patterns. The most reliable approach against them is to parry with L1/LB to interrupt their attack, then immediately follow up with a quick R1/RB combo. Human-type bosses stagger after a successful parry, giving you a short window for two to three fast strikes before they recover. Repeat this cycle of parry into punish and you can chip away at even the toughest duelists without taking unnecessary damage.
Shield and Blocking Bosses
Some humanoid bosses and elite enemies carry shields or adopt blocking stances that absorb your regular attacks. Light attacks (R1/RB) do not break their guard. Against these enemies, you need to use heavy attacks (R2/RT) to shatter their block. A fully charged R2 swing will stagger a blocking enemy and leave them open to a follow-up combo. Watch for enemies raising their shield or crossing their arms into a guard posture, and switch to heavy attacks immediately. Alternatively, grapple moves bypass shields entirely, so a well-timed grab can be just as effective.
Monster-Type Bosses
Large creature bosses like White Horn and the Queen Stoneback Crab rely on sweeping, unblockable attacks that cannot be parried. Trying to block or parry these hits will drain your entire stamina bar or knock you flat. The correct approach is to dodge through or away from their attack combos, wait for the boss to finish its sequence, and then move in for a brief window of attacks. Land two to four hits at most, then back off before the next combo starts. Patience is key: greedy players who overcommit to damage will get punished by follow-up swings. Use the Crow's Wing to reposition after being knocked away, and keep an eye on climbing opportunities when the boss exposes weak points.
Universal Boss Strategy: Food Healing
One of the most powerful survival tools in boss fights is the fact that Kliff can eat food at any time during combat, even while taking damage. There is no eating animation lock and no significant cooldown between food uses. You can consume Grilled Meat roughly every two seconds during a fight to keep your health topped off. Before entering any difficult boss encounter, stock up on at least 100 Grilled Meat (or equivalent healing food). Grilled Meat is cheap to craft from hunted animal drops and provides reliable healing per use. With a full stack, you can absorb a surprising amount of punishment while still playing aggressively. This approach does not replace learning boss patterns, but it gives you a massive safety net while you figure out their timing.
Pre-Fight Preparation
Before walking into a challenging boss encounter, two preparation steps can make the difference between a clean victory and repeated deaths.
Weapon and Armor Reinforcement
Grindstones and Anvils provide temporary reinforcement buffs to your equipment. Visit a Grindstone to temporarily boost your weapon's attack power and an Anvil to temporarily boost your armor's defense before tough fights. Both stations can be found at Greymane Camp, major settlements, and certain field locations. These buffs add bonus attack power or defense on top of your base gear stats. The buffs are consumed through combat (hits dealt or taken) and eventually wear off. Running into a boss fight without reinforcement buffs is one of the most common reasons players hit a difficulty wall. Make it a habit to reinforce your gear at a Grindstone and Anvil before any challenging encounter.
Recommended Early Skill Progression
When spending Abyss Artifacts in the Abyss Tree, prioritize survivability before offensive power. The recommended path is:
Health Level 4 first, to increase your total HP and survive combos that would otherwise one-shot you
Stamina Level 4 second, giving you enough energy to dodge multiple times in a row and use special skills freely during boss fights
Nature's Echo third, which provides a powerful passive benefit that enhances your combat effectiveness once you have a solid health and stamina foundation
This progression ensures you can survive long enough to learn boss patterns. Offensive upgrades matter less if you are dying before you get a chance to deal damage. Players who invest too heavily in damage early on often struggle against mid-game bosses that punish fragile builds.
Mounted Combat
Combat abilities extend to various mounts, each offering unique capabilities:
Horse Combat - Use lances, spears, and standard weapons while riding
Bear Mount - The huge black bear can maul foes directly during combat
Dragon Riding - Scorch entire battlefields with aerial fire attacks (limited duration)
Dwarven Mech - Machine guns, missiles, jump jets, and EMP blasts (late game, energy-limited)
Large-Scale Battles
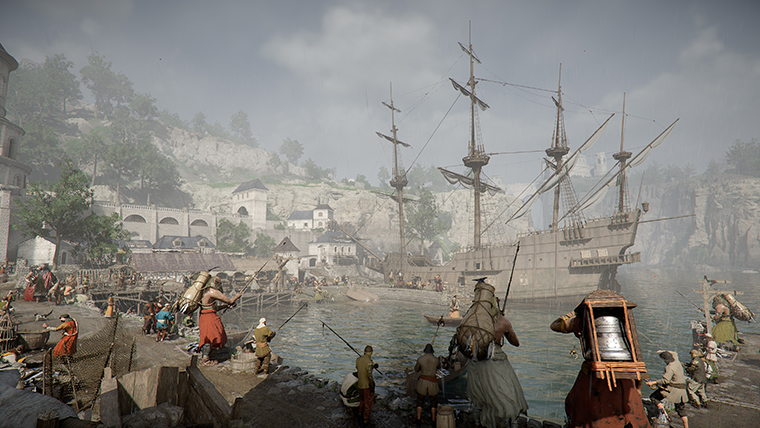
Some story sequences feature Dynasty Warriors-inspired large-scale encounters with dozens of enemies simultaneously. The Calphade siege showcased battlefield combat alongside allied NPCs with cannon fire and environmental destruction. These sequences blend the one-on-one precision of boss fights with crowd-clearing AOE combat.
Playable Characters and Character Switching
Three characters are playable, each with a unique combat style:
Character | Combat Style | Key Abilities |
|---|---|---|
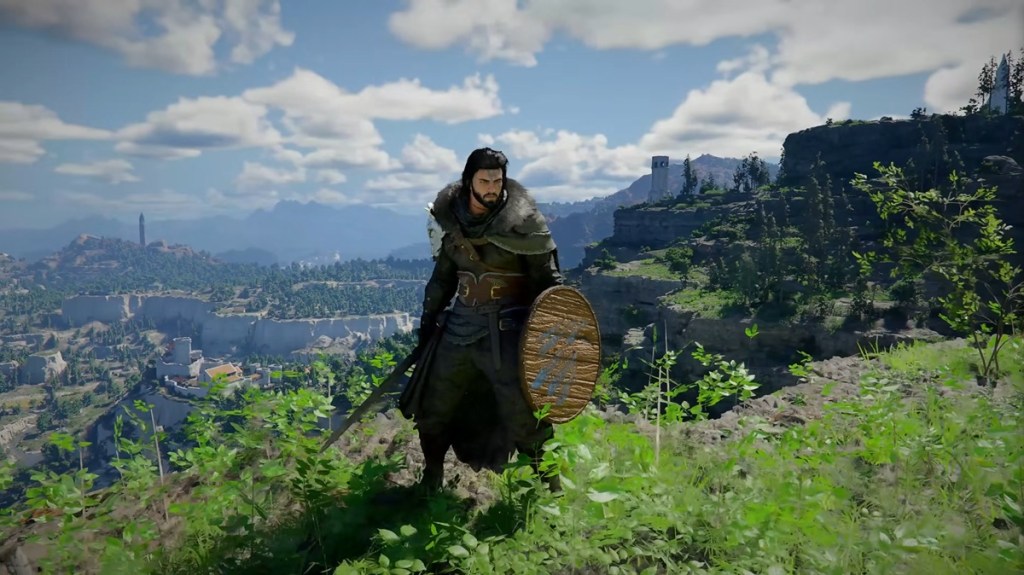
Versatile swordsman with seven weapon types | Full weapon switching, Axiom Bracelet, Crow's Wing, wrestling grapples | |
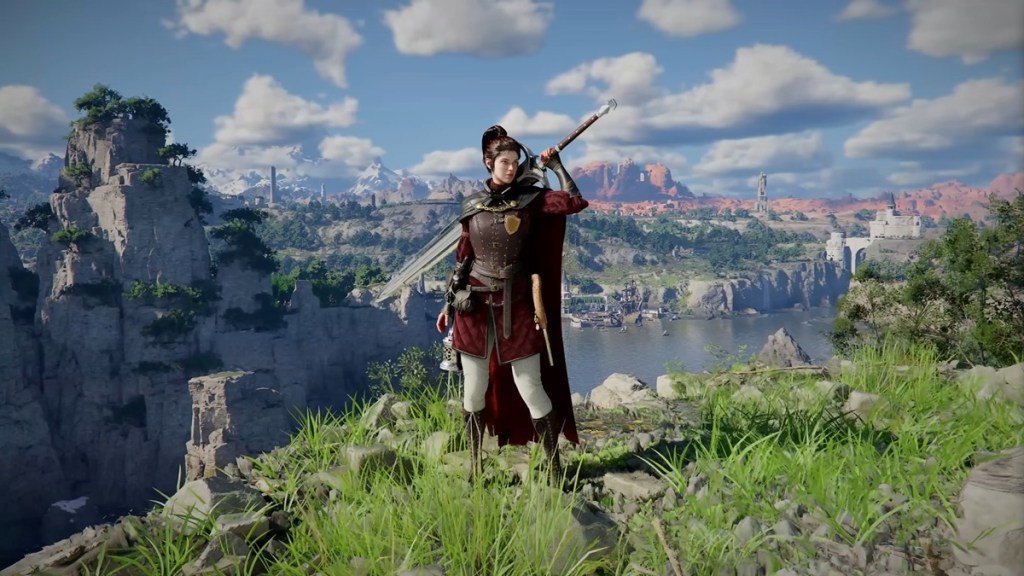
Agile duelist | Greatsword, rapier with buckler, pistol with charged shots, Izuna Drop spinning kick | |
Power bruiser | Two-handed greataxe, large hammer, arm cannon (orc blaster) with crowd-knockback, leap slams, spinning attacks |
Character switching occurs at specific story points. Damiane's signature move, the Izuna Drop, involves a spinning kick that grabs an enemy mid-air and slams them into the ground. Oongka's ground-shattering leap slam deals massive area-of-effect damage.
Character Switching
As you progress through the story, you unlock Damiane and Oongka as playable characters. Once unlocked, you can swap between characters at any time during free roam (not during certain scripted sequences).
How to Switch Characters
Controller: Press Up on the D-pad. A character selection overlay appears. Move the pointer over the desired character and release to switch.
Keyboard: Press F1. The same overlay appears. Move the cursor to select your character.
When you switch characters, the camera zooms out briefly and then snaps to the selected character wherever they currently are in the world. Each character retains their own equipment, skill investments, and inventory. Switching characters effectively changes your entire combat approach:
Kliff is the versatile all-rounder with seven weapon types, the Axiom Bracelet, and grappling moves.
Damiane is an agile duelist who excels at precise, flashy combat with her rapier, greatsword, and firearms. Her signature Izuna Drop grabs enemies mid-air and slams them into the ground.
Oongka is a power bruiser who deals massive area damage with greataxes and hammers. His leap slam and spinning attacks excel against groups of enemies.
Experiment with all three characters against different enemy types. Some boss encounters and story sequences require specific characters, so keeping all three reasonably upgraded prevents difficulty spikes.
Character Progression
Character progression focuses on obtaining better equipment from defeating bosses and unlocking new moves or skills. Similar to Devil May Cry or Ninja Gaiden, as you progress by defeating bosses and exploring, you unlock more moves to add to your combat repertoire. The Abyss Tree skill system also lets players spend Abyss Fragments across three branches (Stamina, Health, and Spirit) to unlock additional combat abilities and stat upgrades.
Environmental Destruction and Physics
Crimson Desert's BlackSpace Engine powers a physics-driven combat environment where the world reacts to combat in real time. For a detailed breakdown, see Environmental Combat and Physics.
Mechanic | Description |
|---|---|
Object Destruction | Boxes shatter, structures collapse, and grass reacts to attacks. Destruction varies based on force applied. |
Burning Gates | Setting fire to wooden gates weakens them as they burn, allowing players to bust through once-immovable surfaces |
Electrified Water | Lightning abilities electrify water, dealing bonus damage to enemies standing in it |
Ice Platforms | Ice darts create floating platforms on water for traversal and tactical positioning |
Environmental Weapons | Players can use magic to lift broken pillars and slam them down to crush bosses |
Physics-Based Reactions | Enemies dynamically collide with the environment; hit reactions convey weight and impact |
The engine also features GPU-based cloth and hair simulation, volumetric fog that swirls as Kliff moves through it, and realistic water simulation with waves and flow. These visual systems contribute to combat readability and immersion.
Tactical Environmental Exploitation
Fighting near cliff edges or elevated terrain opens up instant-kill opportunities. Sprinting at a humanoid enemy and pressing the kick button (F on keyboard, Y/Triangle on controller) knocks them backward. If a ledge is behind them, the kick sends them tumbling off for an instant kill regardless of their remaining health. Grappling throws work the same way: a directional toss aimed toward a cliff edge disposes of enemies that might otherwise take dozens of hits to defeat. Position yourself so that enemies stand between you and the drop, then use knockback moves to push them over.
Explosive Hazards and Elevation
Explosive barrels and flammable objects scattered throughout combat encounters can be detonated with fire abilities from the Axiom Bracelet or by striking them during a fight. Luring groups of enemies near these hazards before triggering an explosion deals heavy area damage. Be careful when using grappling techniques near explosives, as the blast radius can catch Kliff as well, potentially killing him instantly if his health is low.
Elevation and terrain type also influence combat effectiveness. Attacking from above with a plunging strike deals bonus damage and can stagger enemies on impact. Narrow corridors and doorways funnel groups into single-file lines, preventing flanking. Open fields favor ranged weapons and mounted combat, while tight spaces favor greatswords and area-of-effect skills that hit multiple enemies bunched together.
Boss Climbing
Large boss encounters feature climbing mechanics reminiscent of Shadow of the Colossus and Dragon's Dogma. Players can clamber onto massive creatures, search for weak points, and deliver devastating attacks from atop the boss.
Queen Stoneback Crab
The most detailed climbing encounter shown in previews involves the Queen Stoneback Crab. Players must clamber up her back as she bucks and rears to fling them off. The strategy involves searching for silvery patches to smash and stab through, releasing a poisonous effect. Players then grapple to the creature, swing around, and smash down on pots atop her shell. The Crow's Wing gliding ability is essential to survive being thrown off, allowing Kliff to glide safely back to solid ground rather than falling to his death.
Additional Climbing Encounters
White Horn: A snowy arena boss featuring heavy charges and climbing-based attack opportunities on its massive frame
Grappling mechanics: A web-like grappling tool is used to swing to and attack weak points on large bosses
Stamina management: Players must manage stamina during mount transitions and aerial finishers on bosses
Precision Focus
Players can enter a slow-motion mode for enhanced precision. During a sideways dive, Kliff enters Precision Focus, allowing slow-motion arrow shots with enhanced accuracy. This mode can also trigger after launching Kliff into the air, enabling an aerial arrow barrage in bullet time.
Difficulty and Death
Crimson Desert has no difficulty settings, though Pearl Abyss has announced Easy, Normal, and Hard options for a post-launch update. At launch, a single difficulty curve applies to the entire game. Will Powers (Pearl Abyss Director of Marketing and PR) stated: "Does that mean the game's easy? Hell no."
Feature | Details |
|---|---|
Difficulty Adjustment | No slider or presets at launch. Easy, Normal, and Hard difficulty options have been announced for a post-launch update. Players can prepare for tough fights by finding alternate paths, upgrading gear, and learning new skills before retrying. |
No harsh death penalties. No corpse runs or lost currency. | |
Autosave | Robust autosave system makes it "extremely rare to lose huge chunks of progress." |
Emergent Challenge | World enemies do not scale to player level. Some areas are genuinely harder than others. |
Day-1 Patch Balance Changes
Pearl Abyss released a significant balance patch on launch day (March 19, 2026) that adjusted several combat encounters and added new abilities. Players who started before the patch may notice different behavior from bosses and skills.
Boss Adjustments
Change | Details |
|---|---|
Bear instant-kill removed | The bear's instant-kill damage attack was removed entirely, and its overall damage output was reduced. Before the patch, the bear encounter could one-shot players with a specific grab attack. |
QTE difficulty scaling | QTE (quick-time event) difficulty when captured by enemies now gradually increases based on the number of times you have been captured. Previously, QTEs were uniformly difficult from the first instance. |
Boss revival protection | Bosses can no longer attack players during revival animations. This prevents unfair deaths when using Palmar Pills or recovering from knockdowns. |
Tenebrum puzzle fix | The puzzle section in the Tenebrum boss fight no longer needs to be replayed after dying during the fight. Previously, death reset the entire encounter including the puzzle. |
New Character Abilities
The day-1 patch added follow-up moves for all three playable characters, expanding their combo potential.
Character | New Ability |
|---|---|
Added a finishing blow to Flurry of Blows, allowing a powerful final strike at the end of the rapid combo chain | |
Added a follow-up skill to her greatsword stab and uppercut, extending the combo chain for additional damage | |
Added a follow-up attack to his dual-wield stab, giving the power bruiser more combo flexibility |
Other Combat Changes
Watch and Learn improvements: The usability of the skill-learning feature was improved, making observation prompts more visible and the learning process smoother.
Abyss Gear tutorial: A mandatory tutorial quest was added at the start of Chapter 3 to teach players the Abyss Gear socket system. Note: this was added in patch v1.00.03 (March 23, 2026), not the launch-day patch.
Hidden and Advanced Combat Mechanics
Crimson Desert's combat system carries a large pool of mechanics that the tutorial never surfaces. Most weapon categories (bow, shield, spear, two-handed, dual-wield, gauntlet, unarmed) have unlisted moves, and Vault actually doubles as an invulnerable dodge option. Understanding these extras turns scripted combos into a much deeper improvisation system. Full inputs and effects are catalogued in the Combat Tips article.
Directional Inputs Change Your Moves
Throws and wrestling grabs in Crimson Desert read your stick direction at the moment of input. Neutral, forward, back, and left/right each produce a different throw or takedown, and several moves have a back-input variant that becomes a wholly different technique. With the Consecutive Move passive the directional variants also chain into a second follow-up hit. The Unarmed Combat and Wrestling system is built around this, and standard Throw inputs behave the same way.
Combo Skipping
You can fast-forward a combo by mashing two light attacks and then swapping inputs. The chain will jump straight into a later strike, so you can reach the sweep knockdown, the stab, or the finisher without rolling the full string. This works across most weapons and is the backbone of the Combat Tips juggle routes.
Vault is a Dodge
The Vault move has invulnerability frames through its startup, so it counts as a dodge you can schedule in reaction to telegraphed boss attacks. Most players only use vault to start aerial combos, but framing it as a defensive option opens new positioning lines in high-pressure fights.
Attack Canceling via Dodge Tap
Doubletapping the circle dodge button immediately after any offensive action cancels most of the move's recovery. You can use this to chain into another attack, a throw, a stab, or a fresh dodge without waiting out the full animation, which is what makes long hidden combos possible in the first place.
Hidden Mechanics Live on Almost Every Weapon
Every main weapon category carries at least one unlisted technique. The Bow has a melee move set including a somersault kick. Shields have Shield Rush bounce chains, small-shield disarms, and a timing-based shield dash combo. Spear carries an auto-parry stance on R1 + circle and a banner pole vault on double-jump. Two-handed weapons gain a launcher on R1 + circle. Dual-wield swords amplify Shield Rush into a continuous bounce. Gauntlet unarmed has a turning slash, shadow step, and rising uppercut. None of these appear in the basic controls screen.
Tips
Always keep at least 20% of your stamina bar in reserve during extended combos. This ensures you have enough energy for an emergency dodge if an unblockable attack comes your way.
Before entering any difficult boss encounter, stock up on at least 100 Grilled Meat. Kliff can eat food at any time during combat with no eating animation lock and roughly a two-second cooldown between uses.
Visit a Grindstone and Anvil before tough fights to temporarily boost your weapon attack power and armor defense. Running into a boss fight without reinforcement buffs is one of the most common reasons players hit a difficulty wall.
When the observation prompt appears above an enemy, back off to a safe range where the enemy will still perform their attacks but their swings cannot reach you. Prioritize observation early in boss fights, as some techniques can only be observed during specific phases.
When you see blue splashes indicating Super Armor, stop attacking immediately. Dodge or block until the Super Armor window ends, then punish during the recovery frames.
Fighting near cliff edges opens up instant-kill opportunities. Use kicks and grappling throws aimed toward ledges to dispose of enemies regardless of their remaining health.
Prioritize Health Level 4 first in the Abyss Tree, followed by Stamina Level 4, then Nature's Echo. Survivability matters more than offensive power in the early game.
Related Articles
Topic | Connection |
|---|---|
Detailed breakdown of defensive mechanics | |
Wrestling moves integrated into the combo system | |
Combat while riding horses, bears, raptors, dragons, and mechs | |
Physics-driven environmental destruction in combat | |
Fast combo-focused weapon type | |
Blueprints and Crafting | Weapon forging and gear enhancement |
Progression currency for skill learning and stat boosts | |
Source of the Abyss Tree skill progression system | |
Boss Encounters | Multi-phase boss fights featuring climbing and unique mechanics |
Crimson Desert features an exceptionally deep Combat System with multiple ability types. Every button on the controller serves multiple purposes, creating what feels like a fighting game character's entire moveset. As one preview described: 'Its Combat System has the depth of an ocean, which is expressed by a many different button combos you can press to execute different attacks and moves.'
Skill Specializations
Players can choose between three distinct specializations that alter their combat approach. The game maintains constant enemy difficulty standards with no level scaling, making specialization choices meaningful.
Specialization | Playstyle | Key Benefits | |
|---|---|---|---|
Archery | Range | Emphasizes ranged combat and bow mastery | Precision Focus, enhanced arrow damage |
Tanking | Improved blocking, counter opportunities | ||
Agility | Prioritizes evasion and ambush tactics | Enhanced dodges, backstab damage |
The Axiom Bracelet
Element | Effect | Combat Application |
|---|---|---|
Fire | Incinerates, causes explosions | Area damage, damage over time, environmental ignition |
Ice/Freeze | Freezes enemies solid | Crowd control, vulnerability windows, stops fast enemies |
Lightning | Paralyzes targets | Stun effects, chain damage, interrupts enemy attacks |
Wind | Pushes enemies with gust force, enhanced knockback | Crowd control, repositioning enemies near hazards |