World Boss Locations and Drops
A practical guide listing every boss in Crimson Desert, where to find them, what quest triggers the fight, and the specific weapons, armor, and Abyss Artifacts they drop.
Loading...
Crimson Desert features 76 bosses spread across the continent of Pywel. They range from story-mandatory encounters tied to main quests to optional side quest bosses discovered through faction quests and open-world exploration. This guide lists every confirmed boss, the exact location or quest that triggers the fight, and the specific rewards you receive for winning.

Boss rewards in Crimson Desert generally fall into three categories: unique weapons (often the weapon the boss was wielding), armor pieces, and Abyss Artifacts used to upgrade Kliff's core stats. Some bosses also grant Contribution EXP for their region and consumable items.
Main quest bosses are fought as part of the campaign. They cannot be missed during a normal playthrough. The table below lists them in the order you encounter them through the story.
Quest | Location | HP Bars | Notable Drops | |
|---|---|---|---|---|
Myurdin (Prologue) | 1 | None (tutorial fight; defeating Myurdin here grants no extra rewards) | ||
Hernand Town Square, City of Hernand | 2 | Pump Kick ability unlock |
Quest | Location | HP Bars | Notable Drops | |
|---|---|---|---|---|
1 (multiple phases) | Sword of the Lord (Unique One-Handed Sword, ATK 13, pre-fitted with Wind Slash + Destruction I + Gale I Abyss Cores), Seal of Greed, Iron Ore x7, Evasive Roll ability unlock |
The Sword of the Lord is one of the best early-game weapons. It comes with three Abyss Core slots already filled, including Wind Slash which fires a ranged projectile at the end of your combo string.
Quest | Location | HP Bars | Notable Drops | |
|---|---|---|---|---|
3 (two phases + gimmick phase) | Sunset Reed Cloth Gloves (Gloves with Fluttering Reeds perk and passive health regeneration), Hernandian Contribution EXP x600 |
The Reed Devil fight is divided into three segments. Phase two involves a gimmick section where you must destroy wicker totems using your lantern while dodging the boss's iaijutsu strikes in a field of reeds.
Quest | Location | HP Bars | Notable Drops | |
|---|---|---|---|---|
2 | ||||
3 | The Grove's Thorn (One-Handed Weapon), Gale I (Abyss Core), Howling of Chaos (Abyss Core) |
Kearush is a massive gorilla-like beast that can climb walls and slam down from above. The three-phase fight requires careful stamina management. The Grove's Thorn and its two bundled Abyss Cores make this one of the most rewarding boss encounters in the early-to-mid game.
Quest | Location | HP Bars | Notable Drops | |
|---|---|---|---|---|
3 | Tauria Curved Sword (Two-Handed Weapon, top-tier for heavy attacks), Blackwing Leather Armor (Body Armor), Blackwing Mask (Head Armor) | |||
The Unyielding Shields (Cracks in the Shield) | 1 | Shield of Betrayal (Shield) |
The Crowcaller fight is widely regarded as one of the campaign's highlights. The Tauria Curved Sword he drops is considered one of the best weapons in the entire game, particularly for heavy attack builds and crowd control. Pair it with the Nature's Echo skill to duplicate your heavy swings.
Quest | Location | HP Bars | Notable Drops | |
|---|---|---|---|---|
2+ | ||||
2+ (two forms) | Melted Ambition (Sword), Pailunese Contribution EXP x3,000 |
Myurdin returns in Chapter 7 as Lava Myurdin, an empowered form with fire-based attacks. This is a rematch against the Black Bear leader first encountered in the Prologue, but significantly more dangerous.
Quest | Location | HP Bars | Notable Drops | |
|---|---|---|---|---|
Fort Ironclad, Demeniss | 1 | Golden Vanguard (Lance), Abyss Artifact x1 | ||
Demeniss mountains | 1 | Ignir (Sword), Solas Plate Armor (Body Armor), Solas Plate Boots (Boots) | ||
Hernand region | 2+ | Shackle of Might (Sword), Abyss Artifact x1 |
Chapter 8 is boss-dense. The One-Armed Ludvig fight is unique because you play as Oongka for the first time. The Solas Plate Armor set (body + boots) is one of the strongest late-game armor drops.
Quest | Location | HP Bars | Notable Drops | |
|---|---|---|---|---|
Hexe Marie questline | 2 (two phases) |
Hexe Marie teleports around the arena, fires swarms of crows, and summons Hexe warriors. In phase two she creates multiple clones of herself. Destroying the surrounding totems is required before you can damage her directly.
These bosses appear through faction quests, request quests, and other side content. They are entirely optional but drop some of the game's best equipment.
Quest / Trigger | Location | HP Bars | Notable Drops | |
|---|---|---|---|---|
Estate in Dismay (Stolen Quarry, House Roberts faction) | 2 | Mining Knuckledrill (II) (unique weapon/mining tool), Gold Vein Map | ||
Continuing Concern (House Roberts faction) | 2 | Hernandian Contribution EXP x100, Freya's Elixir x1, Apollonia's Lesser Elixir x2, Meliara's Lesser Elixir x2 | ||
3 | Staglord's Shield (Shield) | |||
2 | ||||
Bleed Bandits questline | 1 | |||
The Bonepit challenge | The Bonepit, Tommasoan territory | 2 | ||
Reclaiming Roothold (House Celeste faction) | 2 | Spear weapon, Roothold stronghold returned to House Celeste | ||
Side quest (triggered by Diederik) | Redfox Forest (coastal region) | 2 |
The Mining Knuckledrill from Marni's Excavatron doubles as both a weapon and a mining tool, making it one of the most useful side quest rewards in the game. The Staglord's Shield is the only shield dropped by a side quest boss.
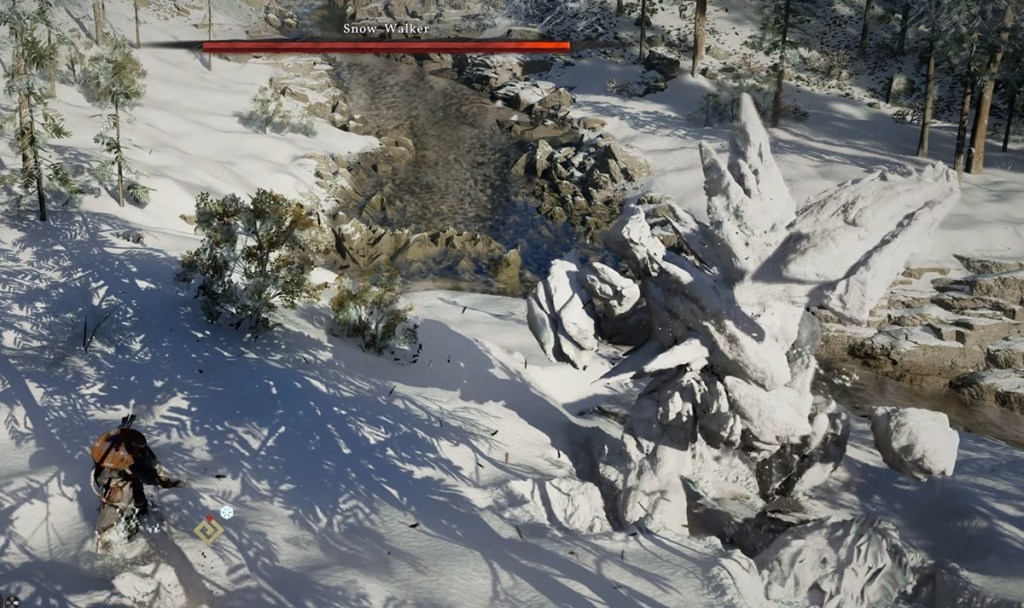
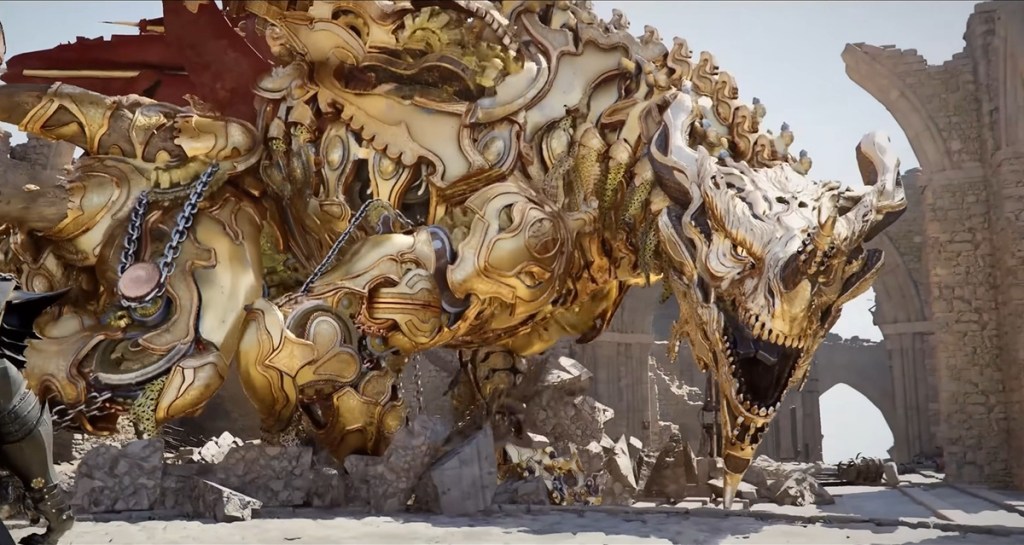
Several large creature bosses roam specific areas of Pywel. These fights often occur in dramatic environments and reward Abyss Artifacts along with story progression.
Region | Location Details | HP Bars | Notable Drops | |
|---|---|---|---|---|
White Mountains (high elevation, blizzard conditions) | 3 | |||
2 | Abyss Artifact x1 (fought while riding a Wyvern mount) | |||
Frozen tundra (ice elemental arena) | 2 | |||
Forest region | Summoned through a Rakkash encounter | 2 |
Many bosses drop the weapon they were wielding during the fight. These weapons are classified as Unique rarity and come pre-fitted with Abyss Cores that grant signature abilities. For example, the Sword of the Lord comes with Wind Slash, Destruction I, and Gale I already socketed. You can extract these cores and move them to other weapons if you prefer a different weapon type.
Select bosses drop armor instead of (or alongside) weapons. The Crowcaller fight is the most generous, awarding both the Tauria Curved Sword and a full set of Blackwing gear (leather armor + mask). The One-Armed Ludvig encounter in Chapter 8 drops the Solas Plate Armor set.
Nearly every boss drops at least one Abyss Artifact. These are the primary progression currency in Crimson Desert, used to upgrade Kliff's Health, Stamina, Spirit, and other core stats. Boss-dropped Abyss Artifacts are separate from the Sealed Abyss Artifacts found at stone altars throughout the open world.
Bosses tied to regional faction quests award Contribution EXP for their respective region (Hernandian, Pailunese, etc.). This EXP improves your standing with regional factions and unlocks additional vendor items, side quests, and stronghold upgrades.
Stock up on food. Boss fights in Crimson Desert are balanced around the assumption that you are eating cooked meals to heal. Bring at least 20 to 30 meals (Chewy Rice Cakes are a reliable option) to any serious encounter.
Use Force Palm for stagger. The Force Palm skill staggers most bosses when timed correctly, interrupting their most dangerous attacks and creating openings for heavy combos.
Match your weapon to the boss. Heavy two-handed weapons like the Tauria Curved Sword are excellent against humanoid bosses that block frequently. Fast one-handed weapons work better against agile enemies.
Revisit later if stuck. There are no difficulty settings. If a boss is too hard, leave the area, upgrade your gear, unlock new Abyss Artifacts, and return when you are stronger.
Check your Abyss Tree. Before a tough fight, invest any unspent Abyss Artifacts into Health first, then Stamina, then Spirit. Survivability matters more than damage output.
Watch for environmental hazards. Many boss arenas contain environmental elements: musket-firing soldiers (Fortain), wall-mounted arrow traps (Gregor), falling shrapnel (Walter Lanford), and destructible totems (Reed Devil, Hexe Marie).
If you are looking for specific upgrades, these are the boss fights worth prioritizing:
Drop | Type | Why It Matters | |
|---|---|---|---|
One-Handed Sword | Best early-game sword; Wind Slash core provides free ranged damage on combos | ||
Two-Handed Sword | Top-tier heavy weapon; pairs with Nature's Echo for devastating double heavy attacks | ||
One-Handed Weapon | Comes bundled with two Abyss Cores (Gale I and Howling of Chaos) | ||
Unique Weapon/Tool | Dual-purpose weapon and mining tool; essential for ore gathering | ||
Solas Plate Armor + Boots | Body Armor + Boots | One of the strongest late-game armor sets in a single drop | |
Lance | Best lance weapon; acquired alongside an Abyss Artifact | ||
Body Armor + Head Armor | Full armor set from a single boss; strong mid-game gear | ||
Shield | Only shield dropped by a side quest boss |
Bosses for a general overview of the boss system
Boss Strategies for detailed combat tactics per boss
Abyss Artifacts for how boss-dropped artifacts feed into progression
Sealed Abyss Artifacts for the open-world collectible artifacts
Weapons for a complete weapon list including boss drops
Faction Quests for the side quests that trigger optional boss encounters