Crowcaller
Draven the Crowcaller is a recurring main story boss in Crimson Desert, first fought during the Bloodwind quest and again at the Spire of Soaring during Toward the Nest. This guide covers his location, all three fight phases, attack patterns, strategy, recommended preparation, and rewards including the Tauria Curved Sword and Blackwing armor set.
On This Page
Overview
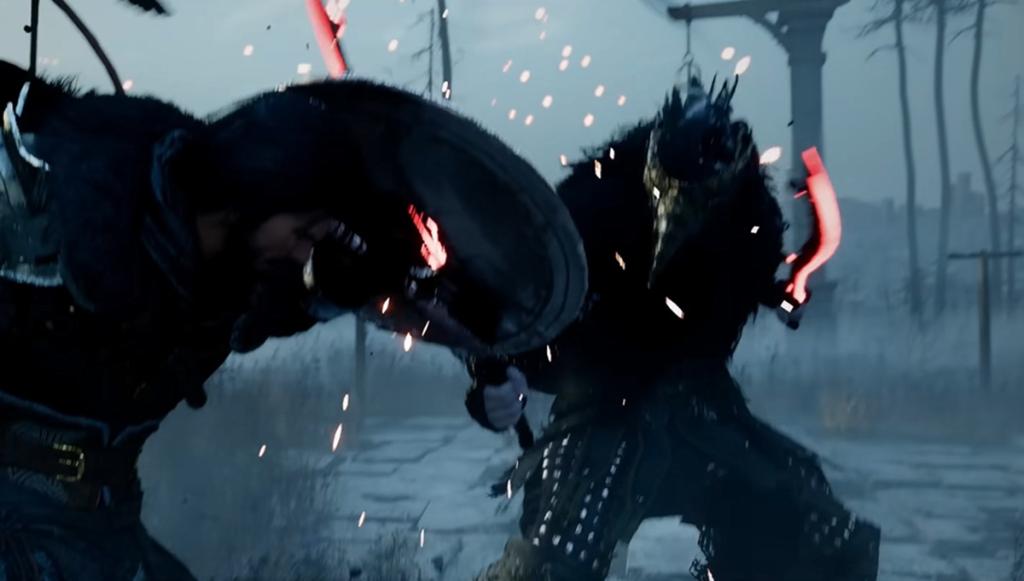
Draven the Crowcaller is a recurring antagonist and main story boss in Crimson Desert. He is a feathered warrior who commands flocks of crows and wields dual curved blades with lethal speed. The Crowcaller orchestrates the attack on the Axiom Archive during Chapter 5's Black and White arc, kidnapping White Crow and leading to a prolonged pursuit across Demeniss and the Abyss.
Players fight the Crowcaller twice over the course of the main story. The first encounter takes place during the Bloodwind quest, where he has a single health bar and is an introduction to his fighting style. The definitive battle occurs at the end of the Toward the Nest quest, where the Crowcaller has three full health bars and significantly more aggressive behavior across three escalating phases. This second fight takes place at the top of the Spire of Soaring in the Abyssreached after solving the Crescent Skybridge puzzle. A fast travel point is available at his location, making it easy to resupply and return if needed.
The Crowcaller is not a particularly tough fight compared to some of the later bosses in the game, but he does require solid parry timing and a healthy supply of food. Going in unprepared, especially without healing itemswill lead to a quick defeat.
Quick Reference
Attribute | Details |
|---|---|
Full Name | |
Type | |
Chapter | 5: Guest Unbidden |
Quest | Toward the Nest (final encounter) |
Location | Spire of Soaring / Crow's Nest (Abyss) |
Health Bars | 1 (Bloodwind) / 3 (Toward the Nest) |
Difficulty | Moderate to Hard |
Key Mechanic | |
Rewards | Tauria Curved SwordBlackwing Leather ArmorBlackwing MaskAerial Roll skill |
World Boss Stats
The Crowcaller is classified as a World Boss in Crimson Desert. His base combat stats, are listed below.
Stat | Value |
|---|---|
619 | |
Attack | 18 |
20 | |
100 | |
Knockout | 400 |
Fatal | 5 |
Equipment
The Crowcaller equips dual Crow Whisperer daggers alongside a full set of crow-themed cloth gear. These items form the basis of the Crowcaller armor set that drops upon defeating him.
Item | Slot |
|---|---|
One-Hand Dagger (right) | |
One-Hand Dagger (left) | |
Crowcaller's Cloth Armor | Upperbody |
Crowcaller's Cloth Boots | Foot |
Crowcaller's Cloth Gloves | Hand |
Crowcaller's Cloak | Cloak |
Skills
The Crowcaller has two passive skills that affect how the encounter functions mechanically:
Boss Small Human (passive): A classification skill that tags the Crowcaller as a human-type boss. This affects which status effects and abilities can interact with him during combat.
Min Hp Percent 5 Do Not Use Groggy (passive): Once the Crowcaller's health drops to 5% or below, the groggy state cannot be triggered. This prevents players from locking him into a stagger loop at the very end of the fight, forcing the final blow to be dealt through direct attacks rather than stagger combos.
Boss Encounters
The Crowcaller appears as a boss in two separate main story quests. The first encounter introduces his core fighting style, while the second is a full three-phase battle that tests everything you have learned.
First Encounter: Bloodwind
During the Bloodwind quest, you confront the Crowcaller at the Church of West Demeniss. After defeating a group of his guards, the Crowcaller himself steps forward. This fight has a single health bar and relatively straightforward attack patterns. He uses basic sword combos and a single dive-bomb attack. Blocking and striking during openings is sufficient to win this encounter, and it is a tutorial for the parry mechanics you will need later.
Second Encounter: Toward the Nest
The definitive Crowcaller fight takes place at the end of the Toward the Nest quest. After ascending the Spire of Soaring and solving the Crescent Skybridge puzzle, you reach the Crow's Nest in the Abyss. There is a fast travel point here, so if you die or need to resupply, you can warp back to the mainland, stock up on food and consumablesand return without having to redo the puzzles.
This encounter features three full health bars, with each phase introducing new attacks and increased aggression. The Crowcaller is faster, hits harder, and chains longer combos than in the Bloodwind encounter. Despite the escalation, the fight is manageable with proper preparation and patience. Many players report defeating him on their first attempt as long as they bring enough food.
Attack Patterns
The Crowcaller uses a combination of melee sword combos, aerial dive-bombs, ranged crow projectilesand grab attacks. His patterns escalate across the three phases of the Toward the Nest encounter. Learning his tells is essential for survival.
Attack | Description | |
|---|---|---|
Sword Combo | A rapid chain of dual-blade slashes at close range. Red highlight indicators flash before each swing. The number of strikes in the chain increases with each phase. | Parry with L1/LB when the red highlights are about to connect. A successful parry stuns the Crowcaller briefly, opening him up for a counter-attack combo. |
Cross Slash | The Crowcaller dashes toward you and leaps into the air to perform a crossing slash. This is a fast gap-closer used when you try to create distance. | Block with L1/LB. This attack is easy to block and deals low stamina damage, making it a reliable opportunity to follow up with a grapple. |
Shadow Dance | Assumes a stance with blades pointing upward, then performs three teleporting strikes from the air. Used across all phases. | Use the Aerial Force Palm skill to double jump (or triple jump) to avoid the strikes. The upward blade stance is the tell to start jumping. |
Aerial Dive-Bomb | Crosses swords near his chest and glows blue before launching into the air. Phase 1 features one dive, Phase 2 has two consecutive dives, and Phase 3 has up to three. | Wait for each individual dive to begin its descent, then roll with Circle/B. Do not try to block dive-bombsdodge each one individually. |
Retreats to a distance and fires explosive crows at your position. Used more frequently in Phase 2 and Phase 3. | Hold L1/LB to block incoming damage while closing the gap. If your stamina is low, sidestep instead of blocking. | |
Grab Attack | Reaches out and catches you, holding you momentarily. Introduced in Phase 3. | Dodge sideways when you see him reach forward. If caught, mash buttons to break free faster. |
Invulnerable Charge | In Phase 3, briefly becomes invulnerable before rapidly dive-bombing up to three times in a row. | Focus entirely on evasion. Do not attempt any attacks until the full sequence ends and he lands. |
Phase Breakdown
Phase 1
Phase 1 is the tutorial for the rest of the fight. The Crowcaller's greatest weakness is the parry mechanic, and this phase gives you time to learn his timing. He uses basic sword combos, the Cross Slash gap-closer, and a single Aerial Dive-Bomb. His combos are short and his telegraphs are generous. Focus on mastering the parry timing here, as the same rhythms carry into the later phases. After each successful parry, follow up with a quick combo or a grapple to start building his Stagger bar.
Phase 2
Phase 2 is mechanically similar to Phase 1, but the Crowcaller becomes noticeably faster and more aggressive. The biggest change is his Aerial Dive-Bomb, which now comes in pairs: he will dive twice in a row rather than once. He also begins using Crow Projectiles to punish you at range, dashing away before firing explosive crows at your position. The key is to stay close and maintain pressure so he has fewer opportunities to use his ranged attacks. Continue using parries and grapples, but be ready to dodge two consecutive dives whenever he takes to the air.
Phase 3
Phase 3 is the most intense stage of the fight. The Crowcaller unleashes longer melee combos, introduces the Grab Attack, and his dive-bomb count increases to three in a single sequence. He also gains access to the Invulnerable Charge, where he briefly becomes immune to damage before rapidly dive-bombing three times in a row. During this phase, always keep your shield up and hold the Block button between your own attacks. The windows between his combos become shorter, so prioritize defense and only attack during clear openings. Patience is critical here; do not get greedy with your combos.
Combat Strategy
Parrying and Counters
The Crowcaller fights are built around the parry system. Perfectly timed blocks with L1/LB create openings for counter-attacks. Watch the Crowcaller's shoulders before each swing to read his telegraphs. Even in Phase 3, when his chains become longer, the telegraphs remain readable if you stay focused. The parry window is forgiving enough that you can succeed with practice, and mastering it turns the fight from a war of attrition into a methodical takedown.
Grappling and Stagger
The most effective way to deal large chunks of damage is through grappling moves. Grapples build Stagger rapidly, and once the Stagger bar is full, the Crowcaller becomes stunned for several seconds. Use the Lariat Follow-Up skill upgrade, which lets you perform the Lariat skill multiple times in succession to fill the Stagger bar quickly. Once he is staggered, use Turning Slash during the opening for heavy burst damage. Equipping the Leather Helm of the Fallen Kingdom (which grants +35% Turning Slash damage) makes this combo devastating.
Blocking his melee attacks also provides small openings to initiate grapples. The block-then-grapple loop is especially effective in Phase 1 while his patterns are still simple.
Blinding Flash
Use Blinding Flash (L1 + R1 / LB + RB) to temporarily stun the Crowcaller. This creates a reliable window for landing a full combo or starting a grapple chain. Blinding Flash is available from the top (blue) branch of the skill tree and should be equipped before this fight.
Tripping and Ground Stabs
The Crowcaller is vulnerable to being tripped. Perform a roll dodge followed by an unarmed melee attack (Y/Triangle) to execute a leg sweep that consistently trips him. While he is on the ground, follow up with a ground stab for significant damage. You can animation-cancel the stab recovery and chain additional pump kicks (hold Y/Triangle) for extra bleed damage over time.
Aerial Dive Evasion
When the Crowcaller crosses his swords and glows blue, an aerial dive is incoming. Focus entirely on evasion during this sequence. In Phase 1, he dives once. In Phase 2, he dives twice in a row. In Phase 3, he may enter an invulnerable state before executing up to three rapid dive-bombs. Wait for each individual dive to begin its descent before rolling. Do not commit to a counter-attack until the full sequence is complete and he has landed.
Preparation
Preparation is the difference between a clean first-attempt victory and a frustrating series of deaths. The Crowcaller hits hard and fast, and even experienced players will take damage. You cannot go into this fight without healing items.
Healing Items
Bring plenty of cooked food. Visit grocers and butchers in Hernand or Demeniss before heading to the Spire of Soaring. For the Toward the Nest encounter, bring at least 20 to 30 Hearty Grilled Meats or equivalent cooked meals. Experienced players report using around 10 healing items on a successful first attempt, but having extra provides a comfortable safety margin. If you want to play aggressively and trade hits, stock up even more heavily.
Also consider bringing Chewy Rice Cakes and porridge for Spirit regeneration, as well as any alchemy concoctions that boost Spirit recovery. Maintaining Spirit lets you use skills more frequently during the fight.
Since there is a fast travel point at the Crowcaller's location, you can always warp back to the mainland to stock up on food, pills, and everything you need before retrying the fight.
Recommended Gear
Item | Effect | Source |
|---|---|---|
+35% Turning Slash damage | Found in Hernand region | |
Adds poison to stab attacks for high DPS over time | ||
High base defense | ||
Shield (any) | Required for parrying; even the default shield works |
Upgrade your armor and weapons to refinement level 4 or higher before this fight. The extra defense makes a noticeable difference. In the Skill Treeinvest in at least 4 Health upgrades and 4 Stamina upgrades.
Abyss Cores
Slot Abyss Cores into your weapons and armor for additional bonuses. Cores that grant health regeneration, Spirit regeneration, and damage reduction are all strong choices for this fight. The Queen's Fang from the Queen Spider boss is particularly effective, as its venom stab is one of the highest DPS abilities available at this point in the story.
Recommended Skills
Lariat Follow-Up: Allows chaining Lariat grapples to rapidly fill the Stagger bar.
Turning Slash: A powerful burst damage skill to use during stagger openings.
Blinding Flash: Stuns the Crowcaller temporarily, creating a reliable attack window.
Aerial Force Palm Enables double or triple jumps to avoid Shadow Dance strikes.
Aerial Roll: You can learn this skill during the Crowcaller fight itself through the Watch and Learn mechanic. Keep an eye out for the prompt.
Rewards
Defeating the Crowcaller during Toward the Nest awards three item drops and unlocks a new skill. These are some of the most impactful rewards in the main story.
Reward | Type | Notes |
|---|---|---|
Weapon (One-Handed Sword) | One of the best weapons in the game. Its heavy attack sends homing crows that track enemiesmaking it exceptional for crowd control. | |
Dark leather chest armor associated with the Crowcaller. | ||
Head Armor | Feathered mask worn by the Crowcaller. | |
Skill | Learned through Watch and Learn during the fight. Allows aerial evasion. |
The Tauria Curved Sword is particularly noteworthy. Its homing crow heavy attack is extremely strong at clearing out groups of enemies, making it one of the two most impactful weapon drops in the entire main story. Keep it equipped going forward.
Crow's Pursuit Abyss Gear
In addition to the weapon, armor, and skill rewards listed above, defeating the Crowcaller at the end of Chapter 5 auto-rewards the Crow's Pursuit Abyss Gear. The gear is added directly to the player's Abyss Gear inventory after the cutscene that follows the Toward the Nest victory. No additional pickup, witch visit, or extraction step is required.
Crow's Pursuit summons a murder of crows that auto-tracks the targeted enemy on a forward slash or heavy attack. The crows continuously mini-stun the target, which produces two combat benefits:
Boss control window. The mini-stun creates a safe attack window where the player can land follow-up hits without trading damage.
Flying-boss grounding. When a flying boss lifts off, the crow swarm breaks their poise and drags them back to the ground, neutralizing the most common reason fights against airborne enemies become drawn out.
Crow's Pursuit pairs especially well with Relentless, a consecutive-hit damage Abyss Gear. Because Crow's Pursuit keeps the target locked in mini-stuns, the player has a long uninterrupted window to stack hits and ramp the Relentless damage multiplier. The full combat reward summary, including Crow's Pursuit:
Reward | Type | Delivery |
|---|---|---|
Weapon (One-Handed Sword) | Drops to inventory after the boss is defeated. Heavy attack sends homing crows. | |
Body Armor | Drops to inventory after the boss is defeated. | |
Head Armor | Drops to inventory after the boss is defeated. | |
Skill | Learned through Watch and Learn during the fight. | |
Abyss Gear | Added directly to the Abyss Gear inventory after the post-fight cutscene. |
Crow's Pursuit can be extracted and re-embedded at any Witch the same way as any other Abyss Gear, so players who want it on a different weapon or in a dedicated boss-fight loadout can move it freely after pickup.
Boss Rematches
In Patch 1.07.00 on May 15, 2026, Draven the Crowcaller was added to the Boss Rematches roster. The rematch venue is the Church of West Demeniss, the same site as the first-encounter Bloodwind fight rather than the Crow's Nest Toward the Nest arena. This is part of the 1.07 design change that places previously Abyss-origin rematches on land.
The rematch uses the standard Reminisce and Resonate modes documented on the Boss Rematches page. Reminisce restores the Toward the Nest stat profile (three health bars, full three-phase fight). Resonate scales the Crowcaller up to the player's current progression so the encounter remains a meaningful challenge for endgame builds. Memory Fragments lists the entry under the Knowledge menu once the Toward the Nest clear has been logged.
Drops and consumables follow the rematch system rules: the Tauria Curved Sword, Blackwing Leather Armor, Blackwing Mask, and the Aerial Roll skill all remain locked to the original first clear, and consumables used during the rematch are refunded after the battle ends.
Draven the Crowcaller is one of five additions made to the rematch roster in the 1.07.00 batch, alongside Muskan, Corrupted Caliburn, Goyen, and the Clockwork White Horn. The 1.07 cluster brings the rematch roster total to 74 entries, up from the 69 supported at launch in Patch 1.05.00.
The rematch reuses the cinematic intro animation from the original first-encounter fight, so the Church of West Demeniss re-staging plays back the same set-piece introduction before combat begins. The entry is browsed from Memory Fragments under the Knowledge menu once the original clear has been logged.
Lore and Story Context
The Crowcaller's attack on the Axiom Archive marks a turning point in Chapter 5. Until the quest named "Crowcaller" (quest #65), the Black and White sub-chapter focuses on political tensions in Hernand. The kidnapping of White Crow shifts the narrative toward the supernatural threat of the Abyss and the forces that dwell within it.
Over the next several questsKliff pursues the Crowcaller across Demeniss and eventually confronts him at the Spire of Soaring. The Crowcaller's connection with crows runs deeper than mere combat utility; he appears to command them as both weapons and surveillance tools. His identity and motives become clearer as the Black and White arc unfolds through The Crow's WarningBloodwindSecret at the Churchand finally Toward the Nest.
Tips
Bring more food than you think you need. The fight is manageable, but running out of healing items mid-fight will almost certainly result in death.
There is a fast travel point at the Crowcaller's arena. If you die or run out of supplies, warp back to the mainland, restock at vendors, and return without replaying the Spire puzzles.
Cook your meat before the fight. Raw ingredients do not heal during combat. Visit butchers and grocers in town to stock up on prepared food.
A shield is required for this fight, but even the default starting shield is sufficient. The parry mechanic does not depend on shield quality.
Do not try to tank through the Crowcaller's combos. Each phase makes his chains longer, but his telegraphs stay readable if you watch his shoulders before each swing.
In Phase 3, always keep your shield raised between your own attacks. The windows between his combos become very short.
The Aerial Roll skill can be learned mid-fight through the Watch and Learn mechanic. Watch for the on-screen prompt during the battle.
If you are struggling with the puzzle that precedes the fight, see the dedicated How to Activate the Spire of Soaring guide.
See Also
Toward the Nest
Bloodwind
How to Activate the Spire of Soaring
Boss Battles
The Abyss
Tauria Curved Sword
Chapter 5: Guest Unbidden
Combat
Abyss Cores
Database Stats
Combat attributes recorded in the game database for DUAL DAGGERS.
Stat | Value |
|---|---|
HP | 520 |
Attack | 103 |
Defense | 70 |
Stamina | 100 |
Knockout | 500 |
Fatal | 5 |