Abyss Island Puzzle Solutions
Complete guide to all Abyss island puzzles in Crimson Desert. Covers the floating sky islands accessed through Spires and Skybridges, with step-by-step solutions for the Ethereal Pathway, Crescent Skybridge, Abyss Without Balance, Path of Providence, Path of Serpents, and Triangle Ring puzzles.
On This Page
Overview
Scattered across the skies above Pywelthe Abyss islands are floating puzzle realms that reward Abyss Artifacts when solved. These islands are accessed through ancient structures called Spires, which serve as elevators to the sky, and connected by Skybridges that must be restored using Axiom Force. The puzzles range from simple object placement to multi-room sequences involving light redirection, power routing, and timed platforming.
Abyss Artifacts collected from these puzzles are critical for character progression. They fuel the skill treeunlocking new abilities and enhancing core stats for Kliff and the other playable characters. Some of these puzzle sequences are encountered during the main story (particularly in Chapters 4, 5, and 9), while others are entirely optional and can be tackled at any point after unlocking the required abilities.
Key Abilities Required
Before attempting most Abyss island puzzles, you need access to these core abilities. Axiom Force is unlocked during the main story and is required for nearly every puzzle in the Abyss.
Ability | How to Use | Purpose |
|---|---|---|
Hold L3 / Left Stick to grapple objects and mechanisms | Grab, move, and rotate objects; operate alignment devices; grapple to mechanisms | |
R3 / Right Stick (charge with middle mouse button on PC) | Punch objects into wall slots; activate cog mechanisms; propel yourself upward mid-air | |
Hold RB/R1 to paint targets, release aim to fire simultaneously | Hit multiple targets at once; required for some Vault and Courtyard puzzles | |
Context-specific grab ability | Raise doors and lift heavy wall sections | |
Flight (Wings) | Press X / Square to deploy; consumes Stamina | Glide between islands and reach elevated platforms; unlocked after Abyss Without Balance |
Hold RB + LB to shine sword light | Reveal hidden objects; light lanterns; used in the Path of Providence |
Spire Entry Points
Spires are towering ancient structures found throughout Pywel that serve as entry points to the Abyss islands above. Each Spire contains its own set of puzzles that must be solved before the elevator activates and launches you into the sky. Five of the named Spires have been confirmed, and each connects to a different section of the floating Abyss network.
Spire | Region | Story Requirement | Connects To |
|---|---|---|---|
South of Hernandnear Scholastone Institute | Chapter 4 (Forbidden Knowledge) | Ethereal Pathway and Path of Providence | |
Spire of Soaring | Northern Demeniss | Chapter 5 (Toward the Nest) | Crescent Skybridge and Crow's Nest |
Southern Pywel | Chapter 9 (Thinning Blade) | Mirror puzzle branch | |
East of Beighensoutheastern Pailune | Optional (no main quest) | ||
South of Hernandpast Pororin Village | Optional (no main quest) | Riddle rooms branch |
Spire of the Stars
Located near the Scholastone Institutethe Spire of the Stars is the first Spire most players encounter. You visit it during Chapter 4 as part of the Forbidden Knowledge questline, specifically during the Gate to the Otherworld mission. The main door requires a key obtained earlier in the quest.
Symbol Puzzle: Inside the elevator room, four symbols must be arranged in the correct vertical positions on the wall. Before solving the main puzzle, explore the side corridors and use Force Palm on three wall buttons (one to the left and two to the right) to collect three Engraved Stones. These stones are inserted into the symbol mechanisms to make them movable.
Correct symbol positions from top to bottom:
Infinity (insert stoneautomatically moves to position 1)
Circle (already in position 2 with a stone inserted)
Triangle (insert stone, climb and hang on the lever, jump off when it reaches position 3)
Square (insert stone, climb and hang on the lever until it reaches position 4)
Once all four symbols are correctly placed, ride the elevator to the top. A cutscene plays, after which you interact with the abyssal gate to teleport to the Ethereal Pathway sky islands.
Spire of Soaring
Found in northern Demenissthe Spire of Soaring is visited during Chapter 5 as part of the Toward the Nest quest. The entrance door is broken, so you must climb the exterior of the tower through broken windows or use an underground entrance at the nearby cliffs.
Power Routing Puzzle: Inside the tower, you encounter rotatable wall panels. Use your sword to highlight the power currents running through the tiles, then rotate each panel so that energy flows continuously from left to right across the wall. On the upper floor, rotate the middle circular device so that power enters from both the left and right sides and flows down the middle. Completing this routing activates the Spire elevator and lifts you to the Crescent Skybridge in the Abyss above.
Spire of the Sun
Visited during Chapter 9 (Thinning Blade), the Spire of the Sun features mirror-based light puzzles. The goal in each room is to shaped plinths with mirrors along tracks on the ground until the light beam hits a red crystal at the back of the room.
First room: A simple arrangement where you push the single mirror plinth along its track to redirect the beam into the red crystal.
Second room: Five movable mirrors must be repositioned. Move Mirror 1 to the left. Move Mirror 2 down, right, and up so it sits next to the right-hand wall. Move Mirror 3 right twice and up, placing it adjacent to Mirror 2. Move Mirror 4 down and right, next to the farthest immovable mirror from the crystal. Move Mirror 5 upward, adjacent to the leftmost immovable mirror. Once all beams connect to the red crystal, the Spire activates.
Spire of Frost
An optional Spire located along the road east of Beighen at the southeastern edge of Pailune. Unlike the story Spires, no main quest sends you here. The interior is filled with enemies including Antumbra wizards, and the frigid cold can freeze your character for several seconds.
Preparation: Equip armor and Abyss Gear with ice resistance. The Reindeer Cloakfound at a research site south of Scholastoneprovides level 5 ice resistance and is a strong option.
The Frostwarden Quest: Your objective is to light seven lanterns scattered throughout the Spire's interior. Climb the interior staircase while lighting each lantern you encounter. The sixth lantern is outside on the exterior, and the seventh is in the chamber near the top of the tower. Lighting all seven completes the Frostwarden side quest and opens the path to the Passage of Malice Abyss branch above.
Spire of Insight
Another optional Spire, located south of Hernand past Pororin Village. Thorny vines block the entrance; burn them away using Blinding FlashConcentrated Light, or light an arrow from a nearby brazier and shoot the vines.
Floor 1: The riddle reads: "When the bones of the earth awaken from their long silence and find their place, time begins to flow once more." Pick up one of the pebbles (bones of the earth) from the ground and place it in the receptacle.
Floor 2: Pick up the gravestone from the dresser and place it inside the bowl, then press the switch to ride the lift.
Floor 3: The riddle: "Records filled with wisdom guide us to the past, while tools that look to distant places illuminate the future." Take the telescope (tool for distant places) and place it in the bowl. Then check the back room for the pen tip (records filled with wisdom). With both objects in the bowl, press the button to ride the lift.
Floor 4: A book shows three round objects: a sundial and two globes. Find these items scattered around the room, grab them, and place them all in the bowl to complete the Spire and access the Abyss above.
Ethereal Pathway
The Ethereal Pathway is the first Abyss island area most players reach, accessed through the Spire of the Stars during Chapter 4. This is where you learn the fundamentals of Abyss puzzle mechanics, including Axiom Force object manipulation and the Force Palm technique. Completing the Ethereal Pathway is mandatory for story progression.
Puzzle 1: Removing the Barrier Wall
Upon arriving in the Ethereal Pathway, you find a barrier blocking the way forward. Use Axiom Force (hold L3) to grab the floating blue cube nearby and bring it over to the pedestal. Release the cube onto the pedestal to deactivate the wall. You will then drop into a pit below, which you can escape by climbing the walls.
Puzzle 2: Abyss Cell Combination
Locate the square Abyss Cell in the area and grab it with Axiom Force. Position it in front of the wall slot with the flat side facing you. A ghostly silhouette nearby demonstrates the Force Palm technique. Observe the ghost using L1/LB to fill the "learning in progress" bar and unlock Force Palm. Once learned, use Force Palm (R3) to punch the cell into the wall slot, completing the circuit.
Puzzle 3: Activating the Abyss Nexus
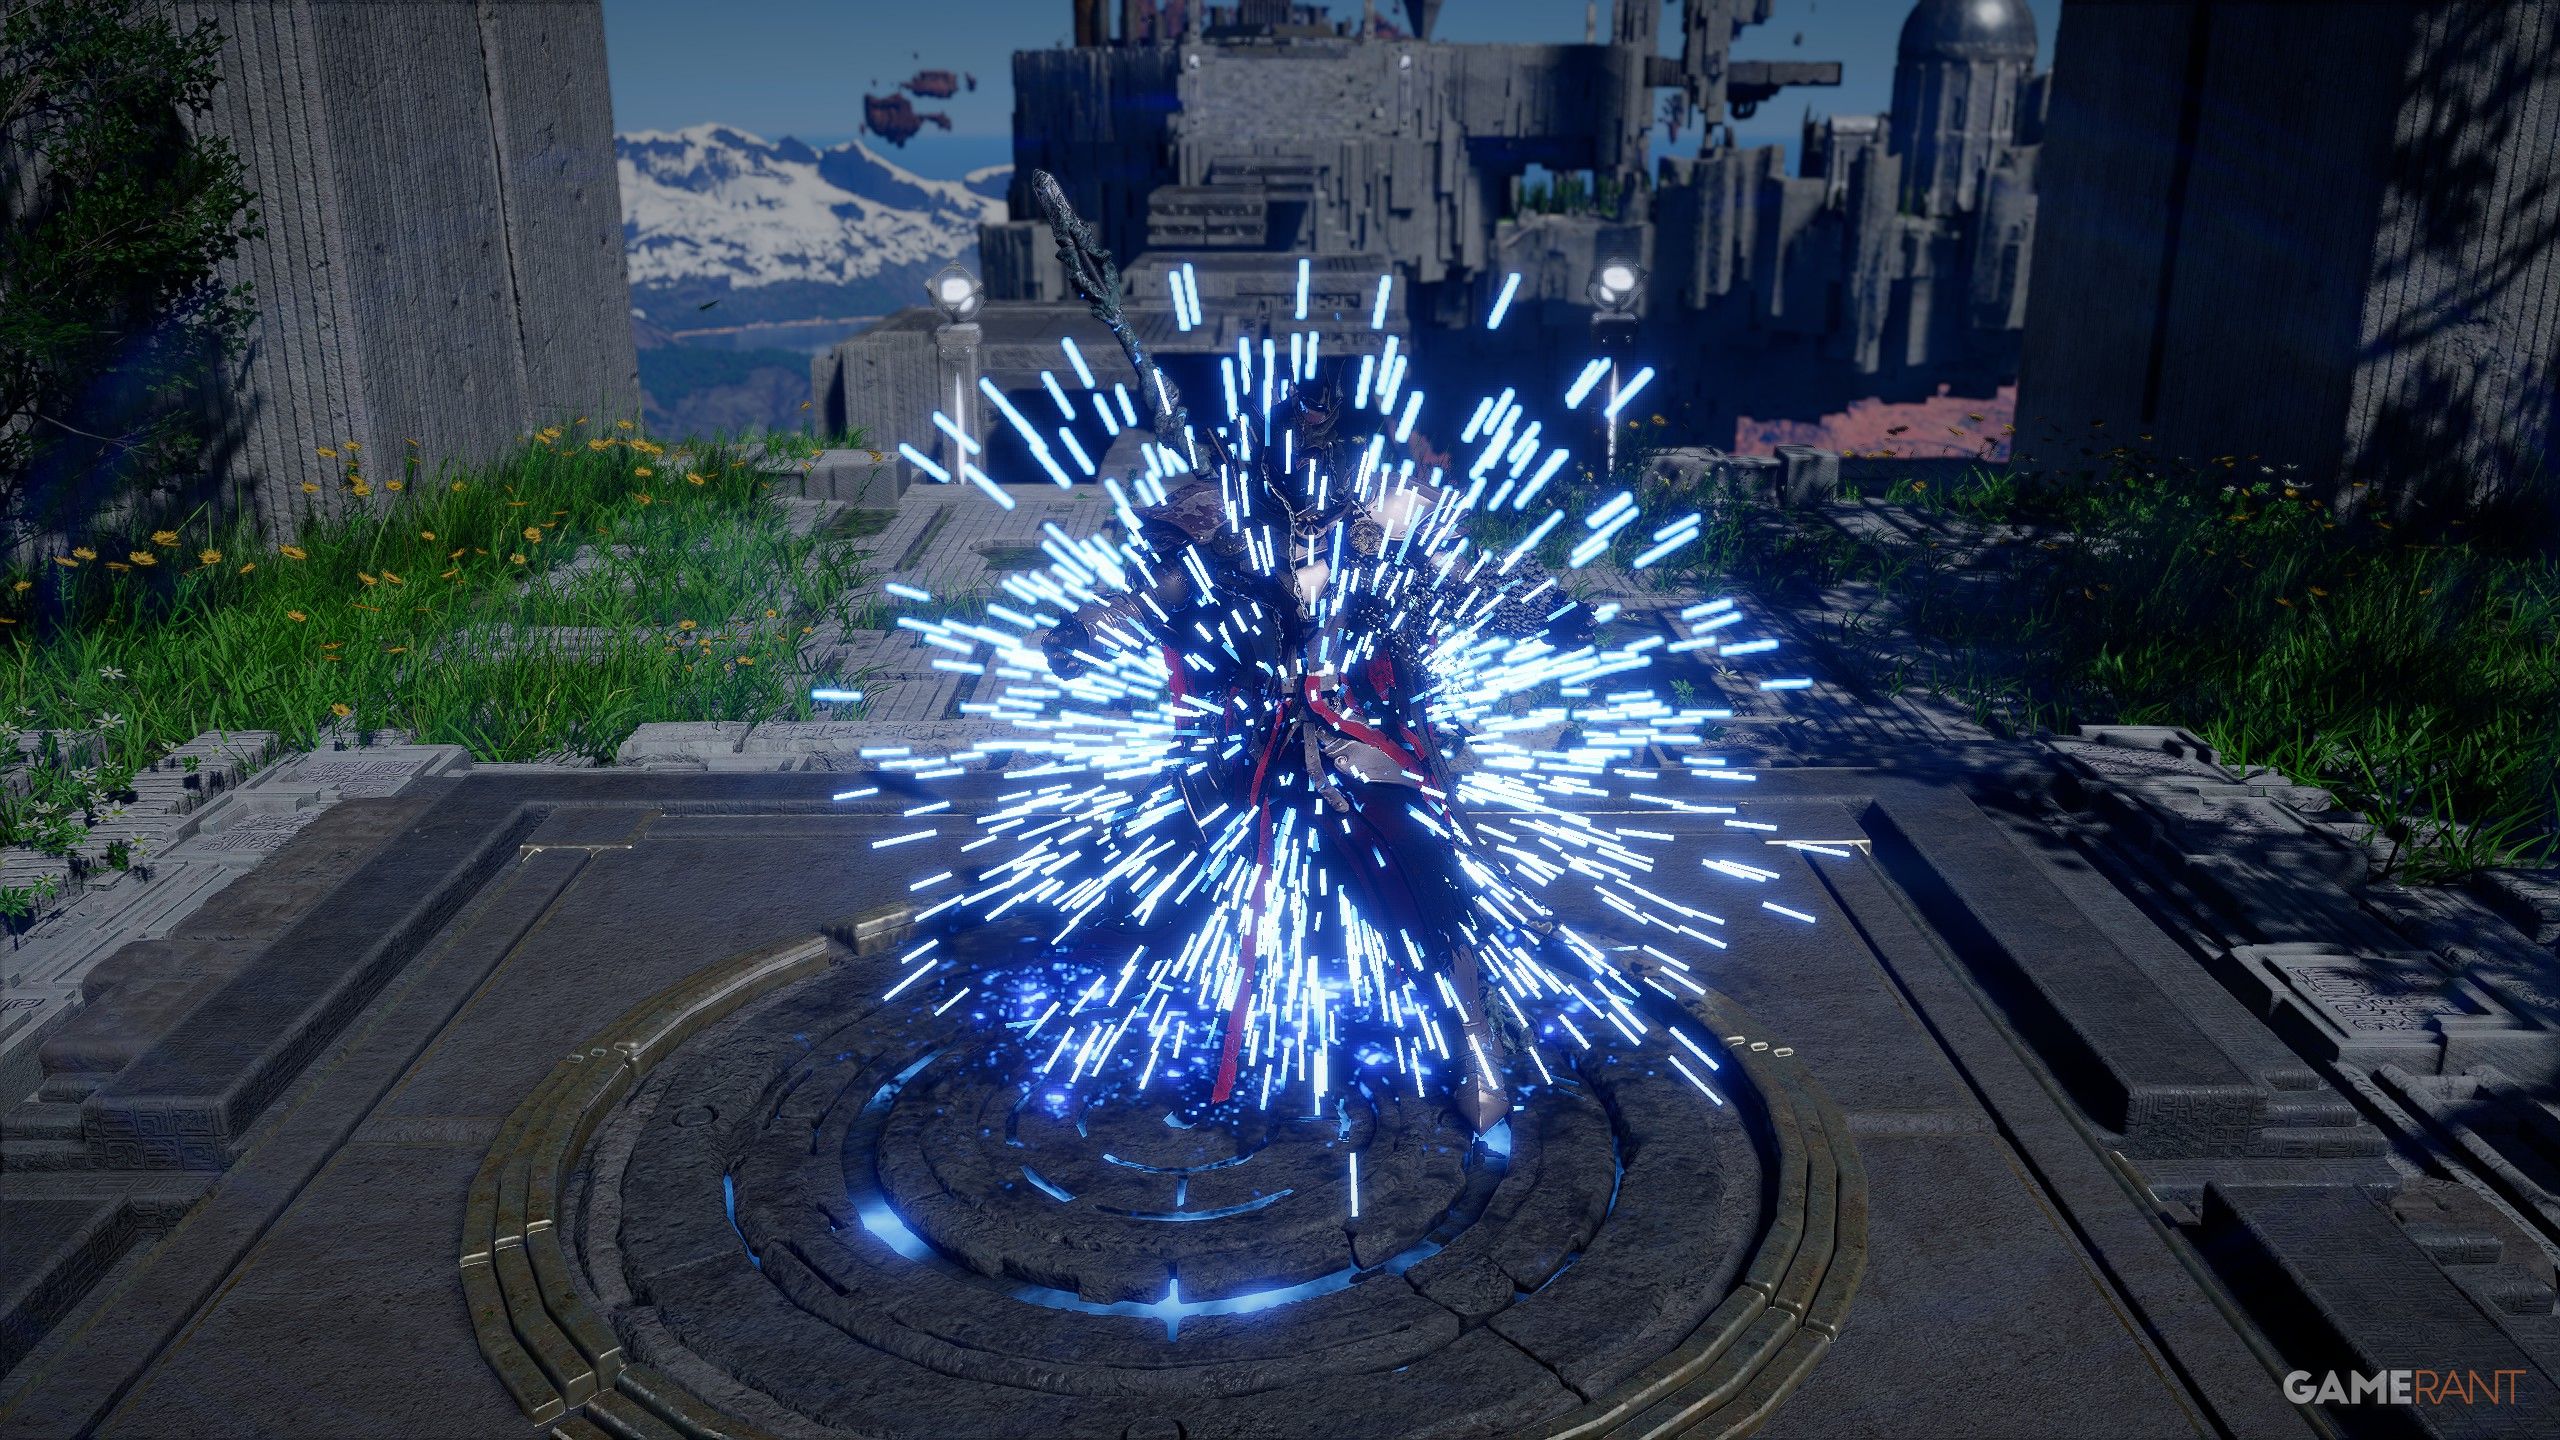
Find the large circular metal device resembling a door. Climb to its center and use Force Palm on the center of the device to activate the Abyss Nexus. This is a fast travel checkpoint and marks the completion of the Ethereal Pathway. The Abyss Nexus also provides your first Abyss Artifact.
Abyss Without Balance
The Abyss Without Balance is the 12th main mission in Chapter 1's extended sequence. It follows the Polar Opposites quest and tasks you with restoring the Abyss according to Alustin's guidance. This puzzle sequence is one of the most important in the game because it culminates in unlocking the Wings ability, granting Kliff flight.
Section 1: Skybridge Gate and Alignment Device
After regaining control of Kliff, use Axiom Force on the gate ahead to pass through. You reach a totem with a blue glowing center. Grapple the center with Axiom Force and rotate it using the D-pad (left/right) until it glows blue and produces audio feedback confirming activation. The totem creates a pathway of platforms. Board each moving platform in sequence until you reach the top level, then stand in the center of the final platform to trigger teleportation to a distant area.
Section 2: Power Core Placement
In the central garden area, step on the round floor plate with a white ring (this registers as a fast travel checkpoint). You will see a blue glowing cube floating above. Use Axiom Force to manipulate this cube and place it on the right pedestal, which removes a blockade and allows descent into the middle section. The left cube stays on its original pedestal throughout.
Section 3: Force Palm Unlock and Abyss Cell Installation
Descend into the pit to discover a power cell on the right wall. A blue ghost demonstrates the Force Palm placement technique. Observe the ghost using L1/LB until the learning bar fills and you unlock Force Palm. Position the power cell in front of the wall slot (flat side toward the wall, mirroring the ghost's demonstration), then use Force Palm via R3 to punch the cell into the wall, completing the power circuit.
Section 4: Cog Mechanism and Unlocking Wings
Climb out of the pit and locate the large circular cog device above. The cog is now active with power flowing through it. Climb onto the cog and navigate to the central circle. While still attached to the wall, use Force Palm to slam the center in. This triggers a cutscene in which Kliff receives Wings and unlocks the ability of flight. Press X or Square to deploy wings and glide. Upgrading Stamina extends your flight range.
Crescent Skybridge
The Crescent Skybridge is reached after activating the Spire of Soaring during Chapter 5's Toward the Nest quest. It is an elevated area filled with laser-firing orbs and rotating mechanical rings. The core objective is to restore power to a deactivated gear on the east side by repairing three power cables connected to it.
Reaching the Upper Platform
Your first goal is to reach the upper platform directly across from the laser-firing orb where you arrive. Multiple approaches work: walk along the crescent edge and climb the structure, use the rotating rings as platforms and glide away, or perform consecutive jumping Force Palms to gain height and glide to the platform.
Right Cable Repair
Follow the right cable along the crescent walkway until you find a split section. Interact with the connecting pipe to repair the break. Continue tracing the cable past deadly blue flowers until you reach a square machine. Use Axiom Force to grab the center of the laser orb across the gap, then use directional controls to align the laser beam so it hits the target gem on the far wall.
Upper Left Cable
Return to the gear and follow the upper left cable. Repeat the laser orb procedure: grab the orb's center with Axiom Force and position the beam so it hits the corresponding target gem.
Lower Left Cable
Follow the lower left cable down the walkway. Find and repair another break at a connecting pipe. Once all three cables are powered, climb onto the gear's center and strike it with Force Palm to fully activate the mechanism. Pass through the triangle forcefield, where a switch pops out of the ground. Use Axiom Force to manipulate it and find the sweet spot, then traverse the spawned platforms and deploy your cape above wind generators to reach the Crowcaller boss arena.
Triangle Ring (Monolith Crown)
After defeating the Crowcallerreturn to the Crow's Nest and enter the triangle forcefield on the west side of the boss arena. A switch appears that you can manipulate with Axiom Force and the D-pad to find the sweet spot, creating a series of platforms you can cross to enter a teleporter.
Reaching the Main Island
You arrive on a tilted platform floating in the sky with debris and sky islands to the northeast. Glide carefully toward the islands, but be careful not to fly in front of wind generators that would push you backward. Use wind generators on the far side to propel yourself north to the main island. Register the Abyss Nexus fast travel point before climbing the broken stairs to the puzzle room.
Laser Box Puzzle
The central puzzle has a large box hanging in the sky with lasers shooting from its various sides. Around the room are gems that need to be hit by the corresponding lasers. A small platform on the northwest edge has live electronic cables and an elevated button you can interact with using Axiom Force to rotate the box.
Solution: Locate the side of the box with two lasers and align it to face the room's west wall (which has two gems). For remaining misaligned sides, flip the box rather than rotating it to avoid disrupting sides you have already aligned. Once all lasers hit their respective gems, perform a jumping Force Palm on the gear on the floor to complete the puzzle and collect the Abyss Artifact.
Path of Serpents
The Path of Serpents is accessed from Bowspirit Capelocated southeast on the Hernand landmass, south of the Bay of Abundance. Look for a crashed block of ancient technology with a broken fuse and CPU floating in the air above it.
Machine Assembly and Flight Sequence
Use three consecutive jumping Force Palms to gain enough height to reach the floating CPU. Grab it with Axiom Force and push it through the hole in the structure. Repeat this process with the broken fuse. Once inside, insert both components into their designated slots and palm them in place to initiate the flight sequence.
The structure rotates during ascent, so maintain your positioning carefully to avoid falling through openings. Approximately halfway through the climb, a CPU will dislodge and slide out of its slot. Retrieve it, drag it back into place, and use Force Palm to re-seat it. The structure then completes the climb into the Abyss.
Interior Puzzles
Power Surge Puzzle: Navigate past the fast travel point to a floor puzzle where you must make the power surge through the wires to reach pillars on the left and right sides of the room.
Cog Mechanism: Climb onto the rotating cog and Force Palm it into position. This grants access to the Abyss Artifact above.
Triangle Force Gate: Head east and pass through the gate. Manipulate the device with Axiom Force, using the D-pad to locate the optimal activation point. Cross the bridge, descend at the tree location, and collect the chest containing bismuth ore.
Path of Providence
The Path of Providence is the largest Abyss puzzle chain in the game, containing seven interconnected puzzle rooms accessible after unlocking flight. Each room awards an Abyss Artifact upon completion and requires increasingly complex use of Axiom Force, Force Palm, and other abilities. This chain begins from the Ethereal Pathway Abyss Nexus fast travel point.
Puzzle Room | Reward | |
|---|---|---|
Crumbling platforms, electrical fuse placement | ||
Precipice of Truth | Explosive orbs, CPU transport across platforms | |
The Secret Garden | Light beam redirection with mirrors | |
Vault of Vengeance | Focused Shot targets, laser defensegolden sword | |
Airborne Focused Shot on floating squares | ||
Altar of Solitude | Multi-level CPU maze, floor flipping | Abyss ArtifactFaded Abyss Fragment (bonus chest) |
Ice Cradle | Musical instrument sequence, ice fuse placement | Abyss Artifact (final) |
Root's End
The first room in the Path of Providence, accessed after crossing the initial triangle forcefield at the Abyss Nexus on the Ethereal Pathway. Navigate the floating platforms carefully, as some sections crumble underfoot. Use crouch plus Force Palm on a circular metal grate to flip through it. Retrieve the "blue rectangle surrounded by electricity" using Axiom Force, position it into a fuse slot, and secure it with a jumping Force Palm. Collect the Abyss Artifact to proceed.
Precipice of Truth
Accessible after Root's End. This room introduces explosive orbs that can be destroyed by grabbing them with Axiom Force. Collect power cores in a kuku pot (grab with Axiom Force, press Y/Triangle). Instead of placing traditional blocks, use these power cores on cube pedestals. Transport disconnected CPUs across multiple platforms, then activate wind generators by Force Palming powered fuses into place. Navigate between elevated sections using floating elevator rocks.
The Secret Garden
Unlocked after completing the Scholastone Institute main mission. Access it from the Abyss fast travel point. Bring plenty of arrows before entering.
Light Beam Puzzle: Position a floating CPU in front of an unpowered light emitter. Use Axiom Force on the circular mechanism at the orb's back to control the light direction. Redirect beams using mirrors to activate blue gems on the wall. For the first orb, shine light onto a mirror above it, then onto an upper-left mirror to activate one gem. For the second orb, direct the light straight up to activate the second gem.
Wind Tunnel Ascent: Open your cloak to float upward through the wind tunnel. At the top, interact with a broken cable to activate a cog. Use a jumping Force Palm on the cog to restore the Abyss and claim your artifact.
Vault of Vengeance
Accessed via a circular platform that launches you across the sky. This room has three distinct chambers.
Chamber 1 (Vault Entry): Place blue cubes on two cube pedestals flanking the vault door, then shoot them with an arrow in quick succession to open the vault. Use Nature's Grasp to raise the door.
Chamber 2 (Laser Defense): This section requires the Focused Shot skill (unlocked from the spirit tree's top-left branch; costs two Abyss Artifacts if you have not invested in shooting skills). Paint the laser-target symbols using RB/R1, then fire simultaneously by releasing aim. Grab the golden sword from the central pedestal.
Chamber 3 (CPU Transport): Navigate through timed laser patterns by sliding underneath them. Position a CPU and Force Palm it into its recess. Use the technique of jump, Force Palm for air, glide, then Force Palm again to cross larger gaps. Fix a broken electrical fuse by positioning and Force Palming it into place, then climb onto the powered gear and Force Palm its center while hanging on.
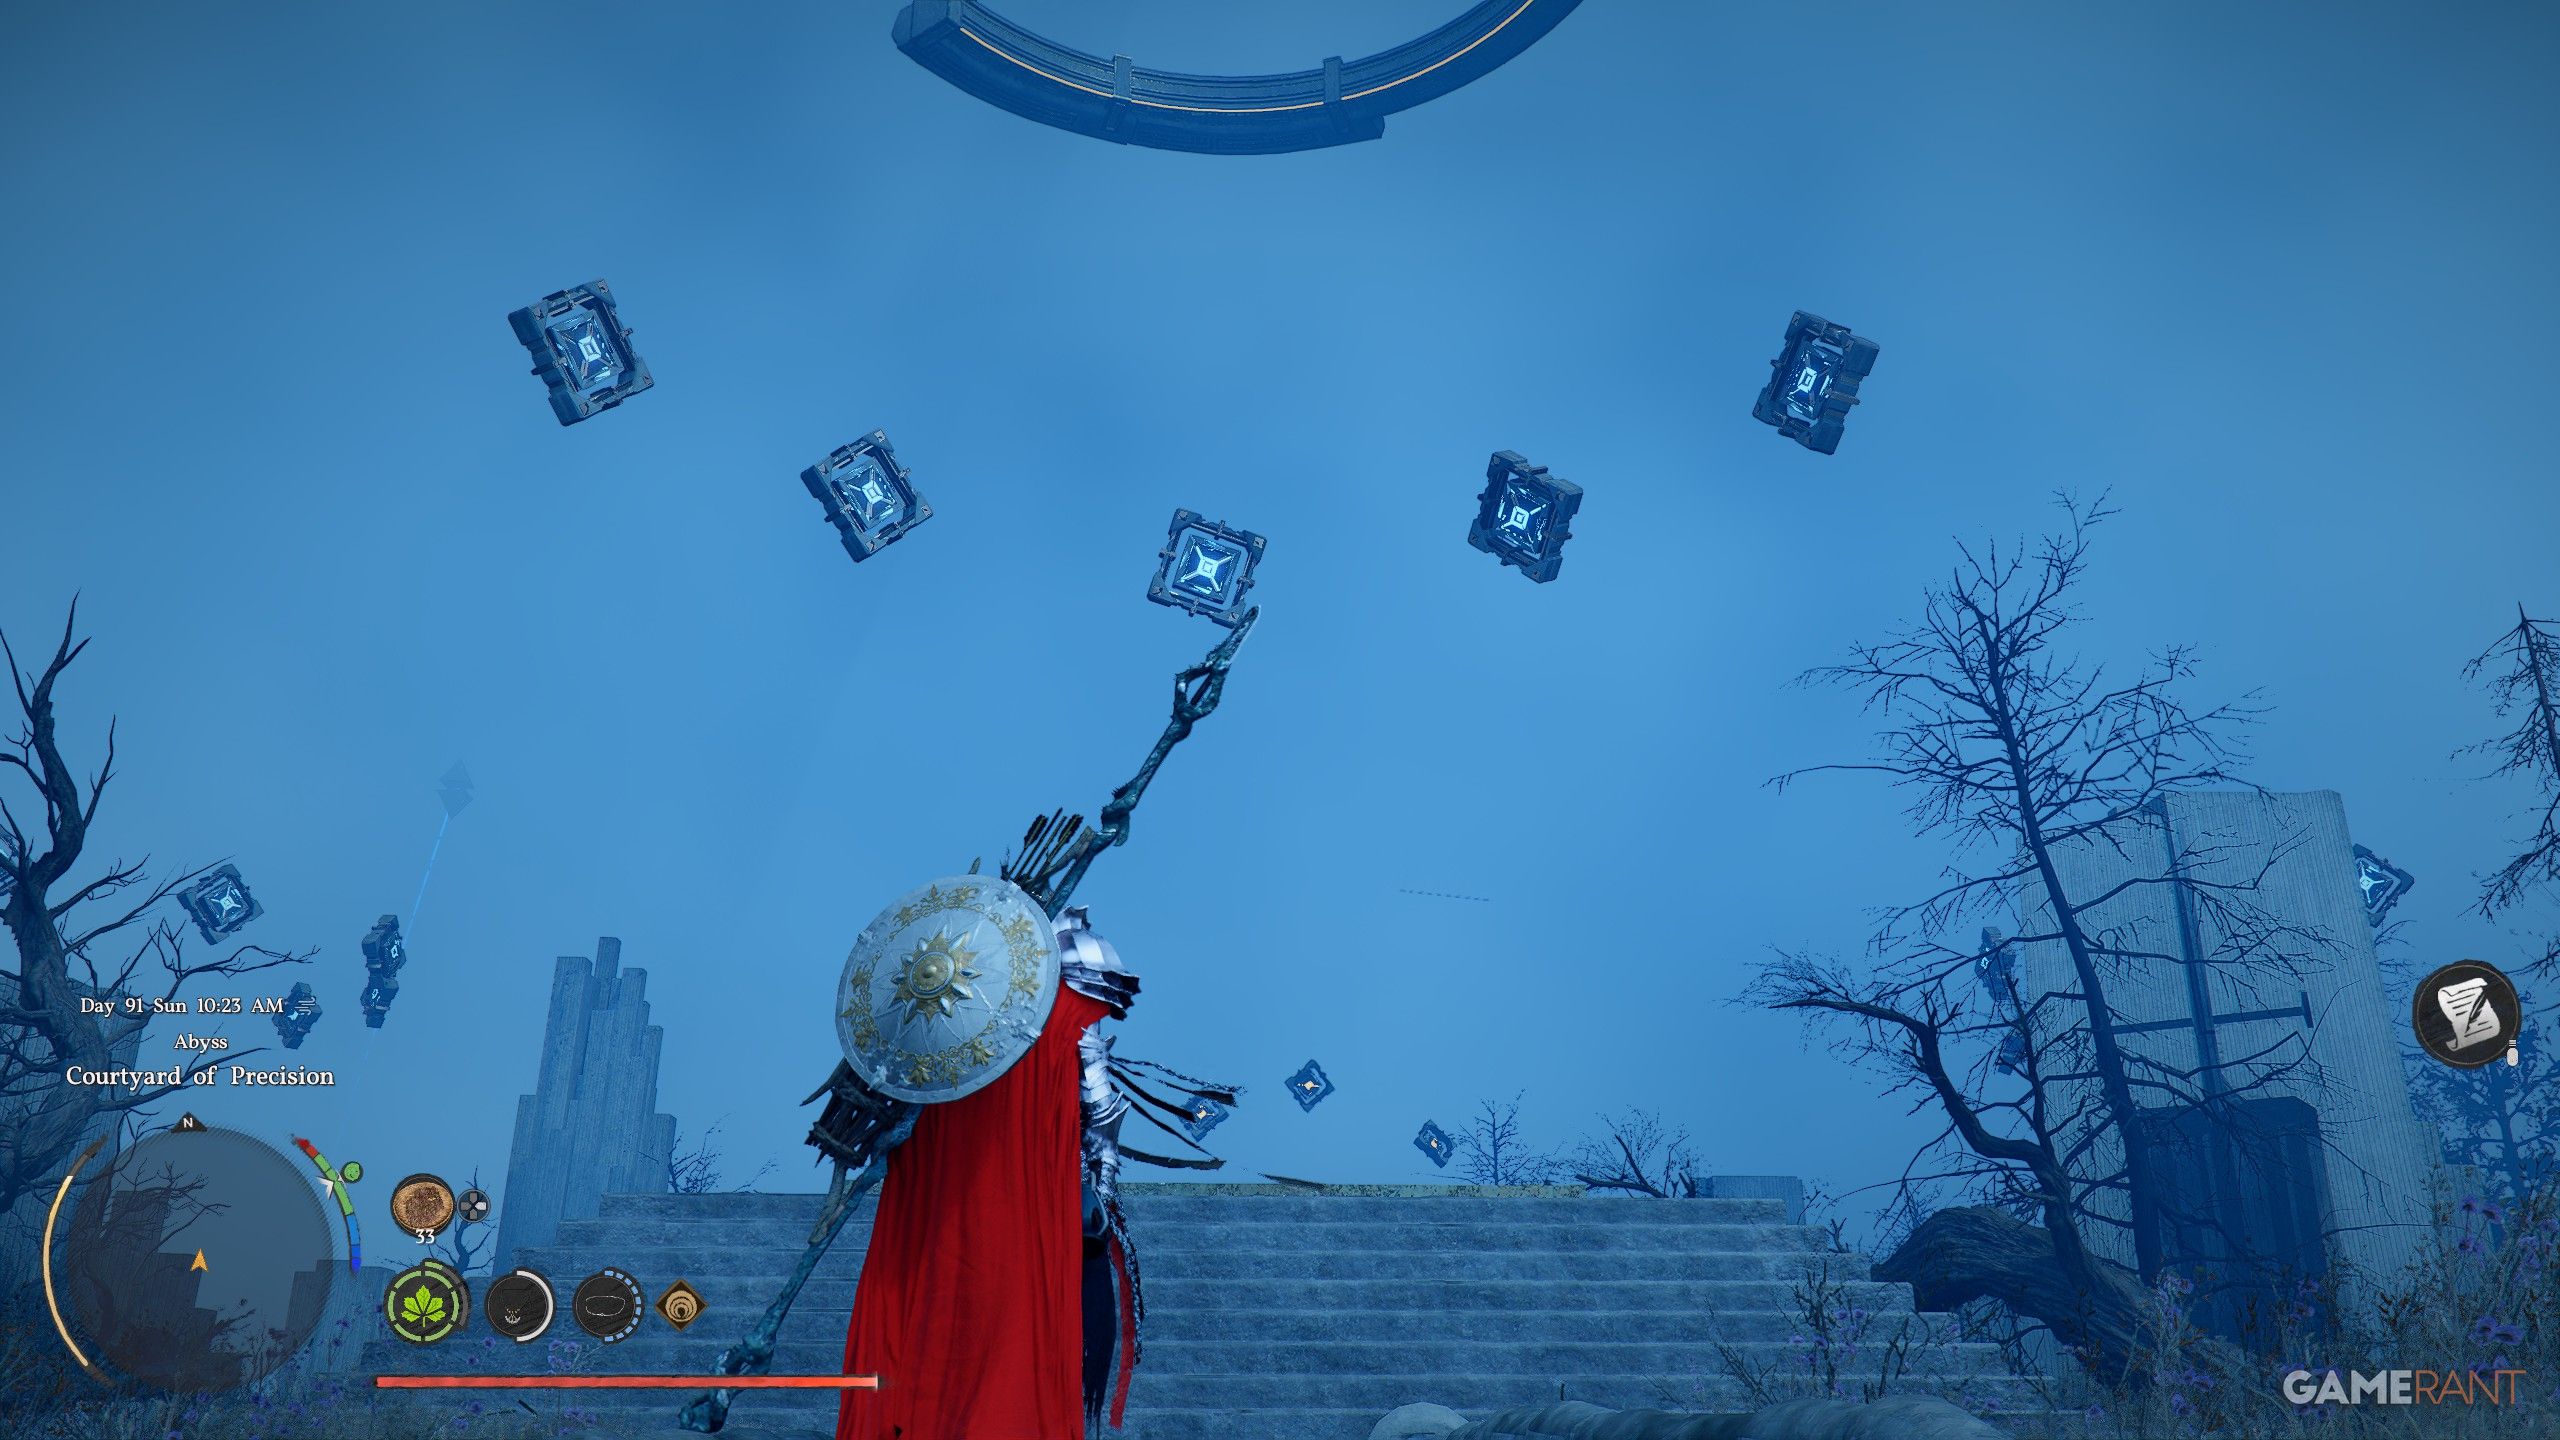
Courtyard of Precision
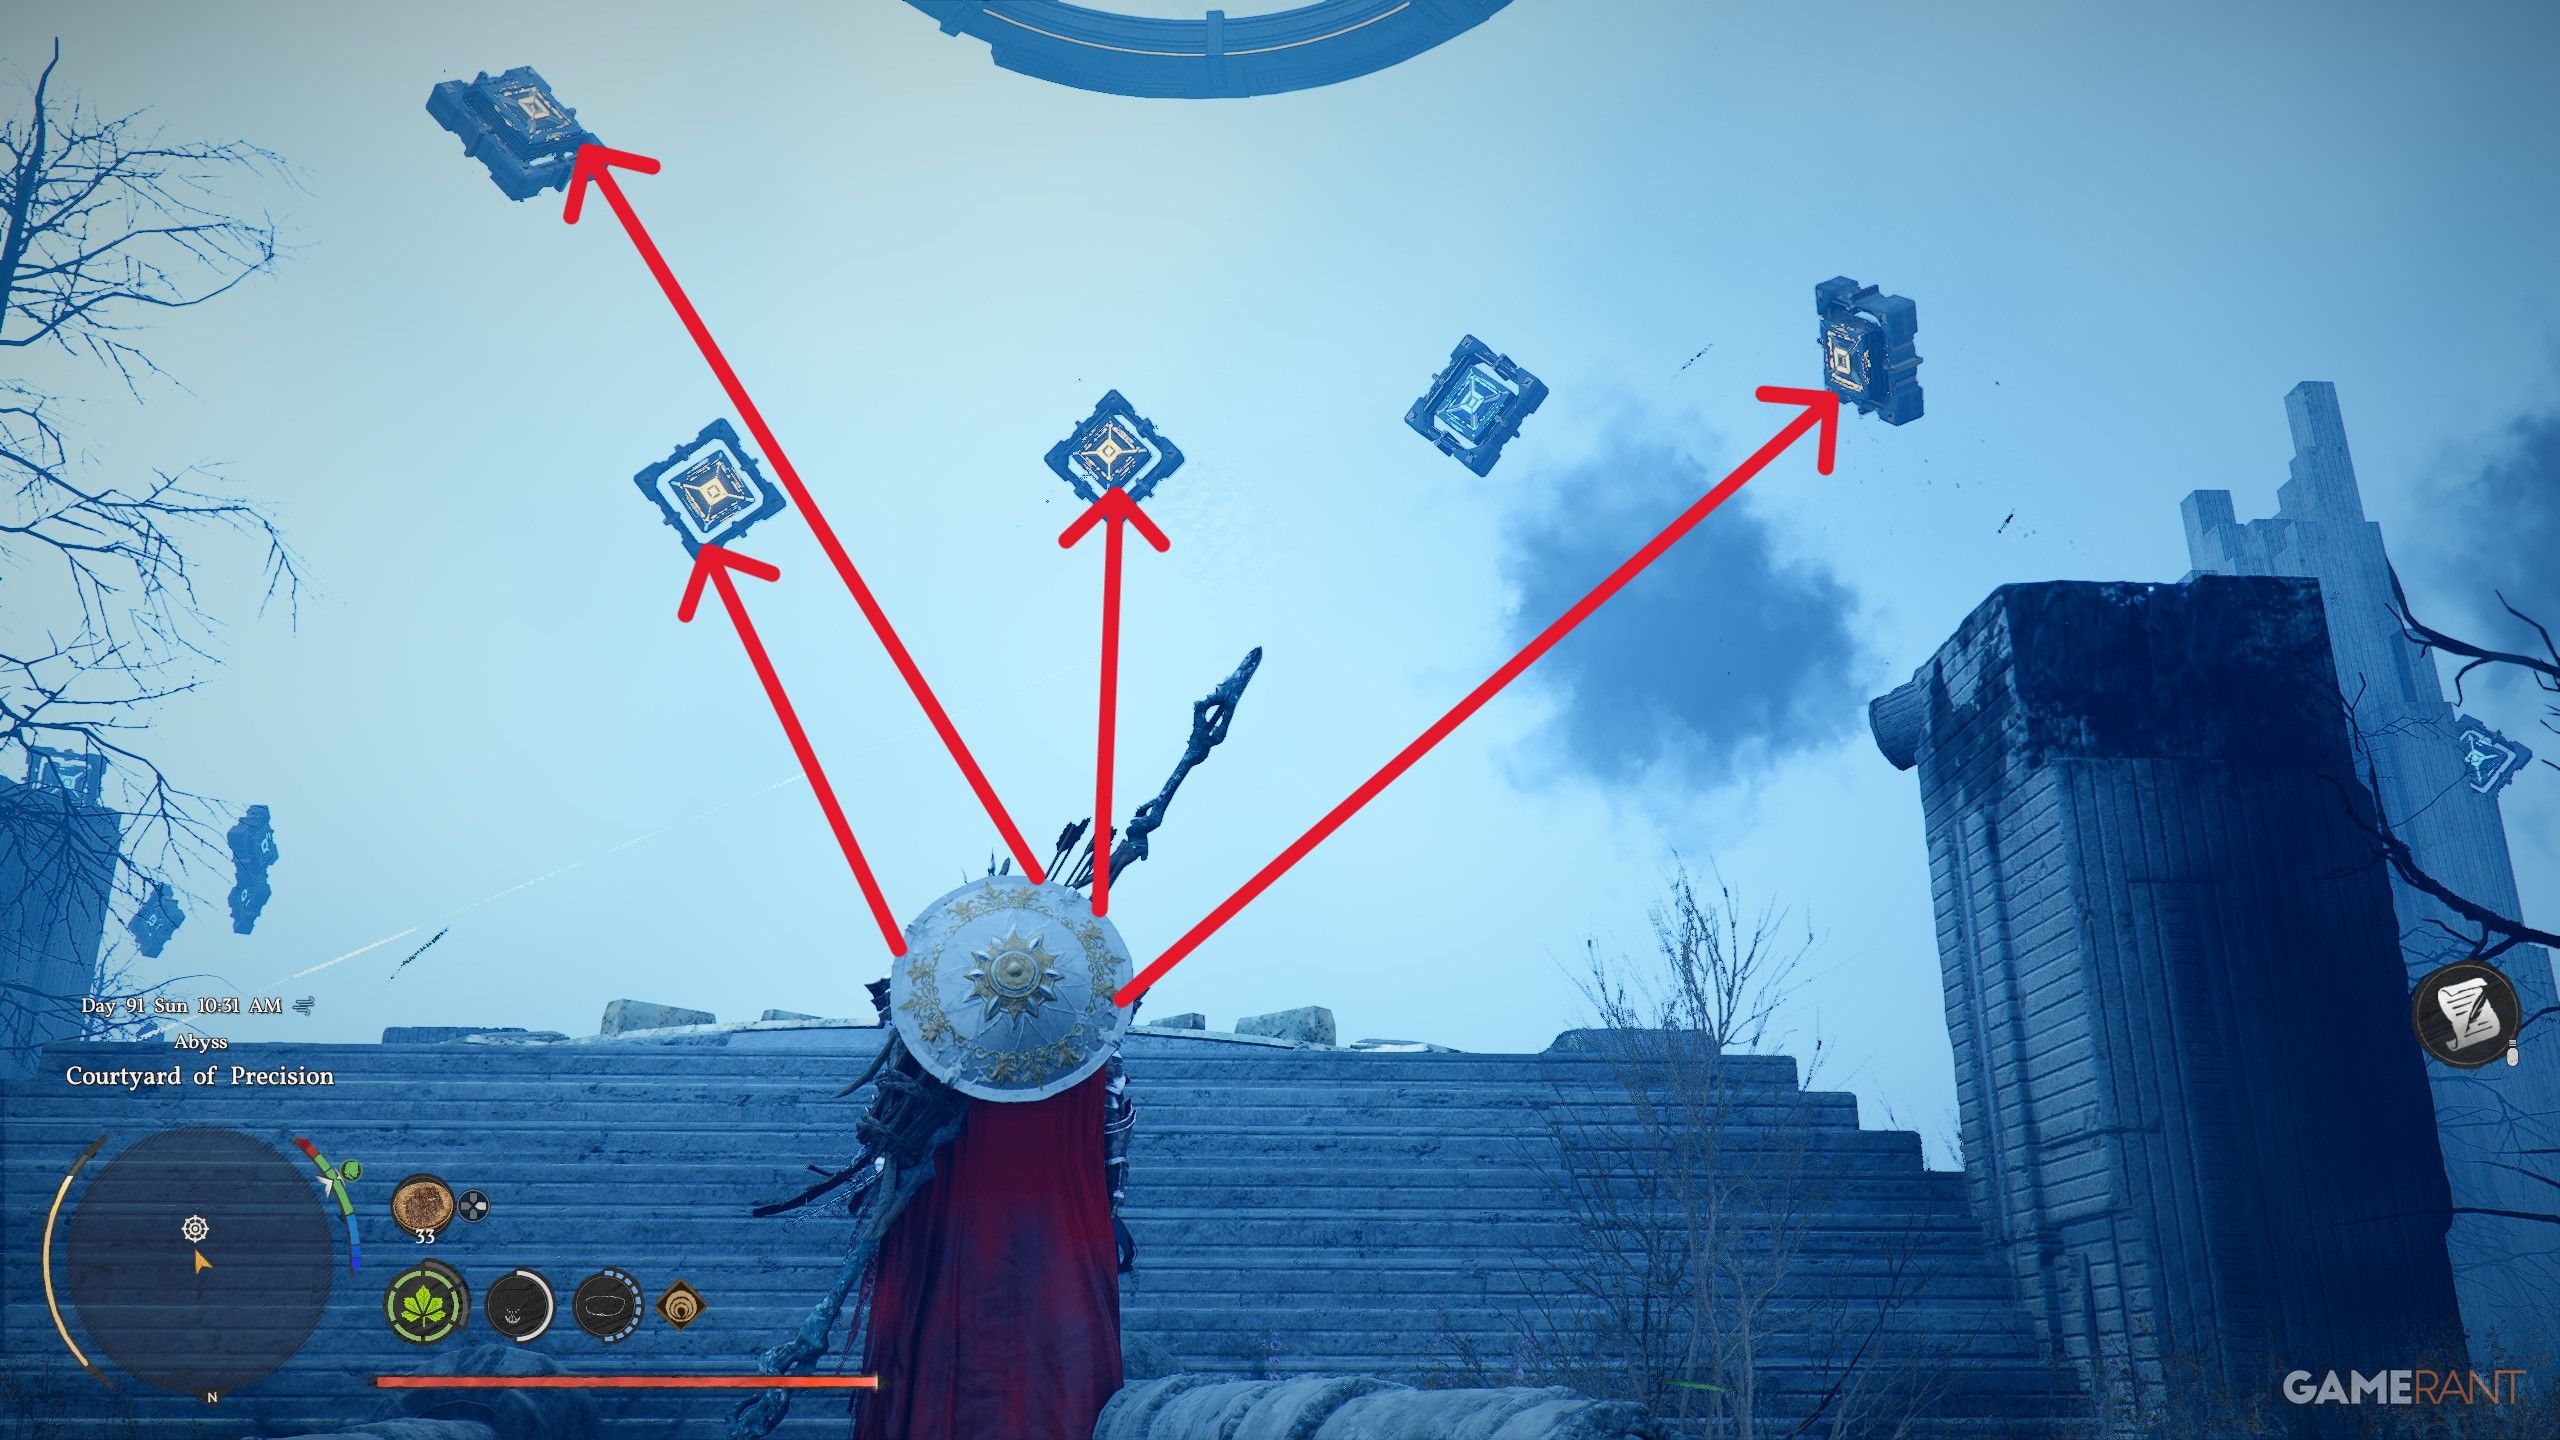
Following the Vault of Vengeance forcefield triangle, this room tests your ranged combat accuracy. Identify red and blue floating squares firing bolts in the arena. Use Focused Shot to paint all red squares in a group simultaneously, then fire. Complete this for all ground-level groups first. Enter an activated wind tunnel to become airborne, then repeat the Focused Shot technique on elevated targets. You can land on circular platforms for steadier aiming. After clearing all targets, perform a jumping Force Palm on the resulting gear switch to unlock the Lightning Pulse and Lightning Surge skills.
Altar of Solitude
This room has the most complex puzzle in the Path of Providence. Grab a floating blue cube and place it on a square pedestal. The key mechanic is that placing or removing the cube from the pedestal causes floor sections to flip, revealing different levels and openings.
CPU Navigation Sequence: Rearrange CPUs between left, right, and center floor slots. Flip sections by moving the cube on and off the pedestal. Drop through openings during floor flips to access lower areas. Extract a CPU trapped behind wall gaps using Axiom Force, rotating it as needed. Drag the CPU through vertical holes, pull right, push through the next vertical hole, drag to the right, flip and pull through the horizontal hole, then push through the hole near the save point.
Bonus Chest: In the back-right corner of the room, use nearby blocks to stop the lasers guarding a chest containing a Faded Abyss Fragment and Haste 2 Abyssal Gear.
Ice Cradle
The final room in the Path of Providence chain.
Musical Instrument Puzzle: Stand in the light breaking through the cave and hold RB and LB, then press LB to shine light from your sword onto the piano buttons. Numbering the buttons 1 through 5 from left to right, play them in this sequence: 5, 1, 2, 3, 4, 5, 1, 1. This activates the mechanism and unlocks the next puzzle area.
Fuse and Cable Mechanism: Locate a floating blue fuse near an ice wall and the power cable exit. Drag the fuse to the slot beside the powered CPU, then glide and Force Palm the fuse into place. Exit the cave and fix the broken pipe leading to the cog. Climb the powered cog and Force Palm its center. Collect the final Abyss Artifact of the Path of Providence, then exit through the triangle forcefield.
Sanctorum of Insight (Lightning Surge Path)
A laser puzzle requiring precise alignment of laser beams to receptacles. Connected to the Secret Garden island. Part of the Lightning Surge unlock path.
Either Rest (Frost Mantle Path)
Features fans, spinning gates, and Nature's Grasp traversal challenges. Contains an abyss core at the center. Part of the Frost Mantle unlock path.
Frostbitten Paradise (Frost Mantle Path)
Involves laser cubes that must be repositioned, a conveyor belt section, and battery insertion puzzles. Force Current is useful for inserting batteries from a distance. Part of the Frost Mantle unlock path.
Path of Trials (Frost Mantle Path)
Contains a frozen battery that must be thawed using a fire arrow before it can be used. The final island in the Frost Mantle unlock path. Completing all Frost Mantle path islands is a prerequisite for the Flame Strike unlock chain.
Sanctorum of Darkness (Flame Strike Path)
A battery swap puzzle. Retrieve a square panel battery through a gate using Axiom Forceplug it into a different socket to activate a laser device, then align two lasers at the central receptacle. Use Force Palm on the final device. The first island in the Flame Strike unlock path.
Loop of Life (Flame Strike Path)
A battery puzzle involving three rotating loops. Each loop has two sockets that must both contain batteries for the loop to activate. Batteries must be located, freed from force fields, and transported between loops. After all three loops are spinning, glide to the final device and use the resist input to avoid being blown back, then Force Palm to complete. The second island in the Flame Strike path.
Tree of Slumber (Flame Strike Path)
Save before attempting. A sword stab wheel puzzle requiring precise pillar alignment. Stab the central wheel at specific notch positions and rotate in the correct directions to lower pillars and drain a lava pool. The final device is surrounded by lava and cannot be reached on foot. Use Force Current (Axiom Force on device, channel Force Palm through tether) to activate it from a safe distance. The final island in the Flame Strike path.
Riddle Square (Storm Veil Path)
A timed ring race. Use Axiom Force on the central fan to start the timer and create air currents. Glide through a series of rings before their individual timers (shown as draining yellow circles) expire. If any timer runs out, restart from the central device. Force Palm the final device to complete. Accessed from the Spire of Clockwork. The only island required to unlock Storm Veil.
General Tips
Register every Abyss Nexus you find as a fast travel point. If you die during a puzzle, you will respawn at the last Nexus you activated rather than having to repeat long traversal sequences.
Bring cooked meals from inns or grocers before entering longer Abyss sequences. Health recovery items can be the difference between completing a section and having to restart.
Jumping Force Palm grants height. In mid-air, performing Force Palm propels you upward, which is essential for reaching platforms that seem out of reach. Chain three consecutive jumping Force Palms for maximum elevation.
Use the D-pad for fine adjustments. When manipulating alignment devices and switches with Axiom Force, the D-pad provides more precise control than the analog stick. Watch for visual and audio feedback confirming correct positioning.
Flip the box, do not rotate it. In the Triangle Ring laser box puzzle, flipping the cube preserves previously aligned sides. Rotating can undo your progress.
Equip resistance gear for optional Spires. The Spire of Frost requires ice resistance; equip the Reindeer Cloak or Abyss Gear with cold protection before attempting it.
Focused Shot unlocks are worth the investment. Several Vault of Vengeance and Courtyard of Precision puzzles require Focused Shot. If you have not unlocked it naturally, it costs two Abyss Artifacts from the spirit tree's top-left branch.
Look for bonus chests. Some puzzle rooms (notably the Altar of Solitude) contain hidden chests guarded by lasers. Use nearby blocks or objects to block the lasers and access the reward.
Rewards Summary
Completing the Abyss island puzzles yields Abyss Artifacts, new abilities, and progression through the main story. The table below summarizes the major rewards from each puzzle area.
Puzzle Area | Primary Reward | Additional Rewards |
|---|---|---|
Abyss ArtifactForce Palm ability | Abyss Nexus fast travel point | |
Abyss ArtifactWings (flight) | Story progression | |
Crescent Skybridge | Access to Crowcaller boss arena | |
Triangle Ring | Story progression | |
Bismuth ore chest | ||
Path of Providence (7 rooms) | Lightning Pulse/Surge skills, Faded Abyss Fragment, Haste 2 Abyssal Gear |
For a complete list of all Abyss Artifact sources (including sealed artifacts found in the open world), see the Sealed Abyss Artifact Locations article. For information on Abyss Nexus fast travel points and Abyss Cresset teleporters found at Ancient Ruins puzzle sites, see their respective pages.