Overview
Crimson Desert has a wide variety of mounts spanning rideable creatures, flying mounts, mechanical vehicles, and utility transports. This guide provides a comprehensive comparison of every mount in the game, organized by category.
Each mount type offers distinct strengths. Horses excel at speed and versatility, bears dominate in ground combat, raptors specialize in hit-and-run tactics, dragons rule the skies, and mechanical mounts deliver overwhelming firepower. Mounts are obtained through various methods including taming, story progression, crafting, purchasing, and defeating bosses. Some mounts are available early in the game, while others require reaching late-game chapters.
Horse Mounts
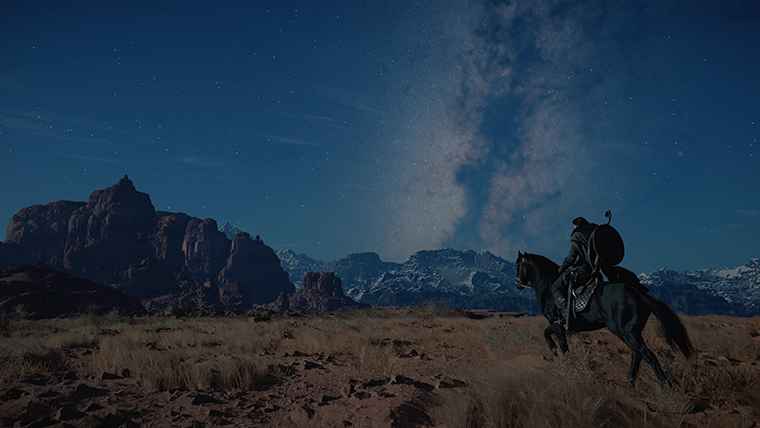
Horses are the most common mount type and the first one players encounter. They excel at long-distance travel, support full mounted combat, and can be equipped with Champron (head protection), Barding (body armor reducing incoming damage), Saddle (improving handling and stamina efficiency), and Stirrups (increasing rider stability and mounted attack power) to improve performance.
Your first horse, Herspia, is given automatically after the prologue during the Unknown Space quest. Herspia is a reliable all-around mount that levels up through riding, gaining improved defense, speed, stamina, and other attributes over time. Wild horses can be found roaming open areas, particularly in the river areas east and south of Hernand. Each wild horse has randomized stat distributions, so players who invest time in taming can search for horses with ideal stat spreads.
Horse Breeds
Mount | How to Obtain | Notes |
|---|---|---|
Automatically given after the prologue (Unknown Space quest) | Starter horse. Levels up through riding. Reliable all-around mount. | |
Default mount for Damiane; unlocked in Chapter 3 | Character-specific horse breed. | |
Tamed in the wild across multiple regions | Regular breed; required for Harmonious Hooves 7 challenge. | |
Tamed in the wild across multiple regions | Regular breed; required for Harmonious Hooves 7 challenge. | |
Tamed in the wild across multiple regions | Regular breed; required for Harmonious Hooves 7 challenge. |
Legendary Horses
There are three legendary horses in Crimson Desert, each with significantly higher stats than regular breeds. You need at least 6 Stamina attribute points to realistically tame any of them. It is recommended to save before each attempt, as the taming minigame is quite demanding.
Mount | Location | Specialty |
|---|---|---|
Lake near Snowgrass Shelter, Silver Wolf Mountain, Pailune | Legendary white horse. Best stamina (315) and speed (4) of all legendary horses. Best all-around mount in the game. | |
Lake by Spire of Insight, Steel Mountains, Grace Estate | Legendary black horse. Highest health (600) of all legendary horses. War horse tank built for mounted combat. | |
Redtree Forest near Red River, Tashkalp | Legendary red horse. Highest attack (27) and defense (100) of any horse. True battle horse. Note: Tashkalp is a hot region, so heat-resistant clothes help mitigate stamina loss during taming. |
Legendary Horse Stats
Royler's superior stamina and speed combination makes it the best general-purpose mount for everything Crimson Desert asks you to do. Rokade is a dedicated war horse that can absorb enormous punishment in battle but is noticeably slower. Camora strikes a balance between durability and raw offensive power, making it ideal for aggressive mounted combat encounters.
Bear Mounts
Bear mounts are heavy combat mounts with massive HP pools, strong damage output, and independent attack actions. Bears can perform claw swipes, bite attacks, and body slams without rider input, effectively doubling the offensive pressure in any mounted engagement. When ridden, bears also unlock hidden movesets including long slashes, rising bites, and heavy forward charges.
Large animals like bears can be beaten into submission and temporarily ridden. Keep attacking until the creature stops moving and a prompt to ride appears. However, these are only temporary mounts that revert to hostility once you dismount. Permanent bear mounts require completing specific taming encounters.
Mount | How to Obtain | Specialty |
|---|---|---|
Defeat and ride in forested regions | Temporary mount. Can be ridden after beating into submission. | |
Found in wilderness areas | Slower than horses but significantly more durable in combat. | |
Taming encounter in wilderness areas (Pailune region) | Fast and agile combat mount. Agile flanking maneuvers with pack-hunting coordinated attacks alongside rider. |
Raptor Mounts
Raptor mounts are reptilian creatures that serve as the fastest land combat mounts, ideal for hit-and-run tactics. Raptors have high speed and decent stamina with movement-related special abilities. They can be obtained through taming encounters in open terrain.
Mount | How to Obtain | Specialty |
|---|---|---|
Raptor | Tamed in open terrain areas | Fast land combat mount with decent damage-dealing capability. |
Dragon and Wyvern Mounts
Flying mounts are the most powerful mount category in the game. The Blackstar Dragon is the primary dragon mount, obtained as an unmissable part of the main story. See the Dragon Riding article for detailed aerial combat mechanics.
Blackstar (Abyssal Dragon)
Players first encounter Blackstar in Chapter 9: The Sage of the Desert, roughly 50 hours into the game. However, you cannot actually ride it until completing Chapter 11: Truth and Reality. During the Foreboding Shadow questline, you travel to Delesyia and face the Golden Star Mecha Dragon boss. After depleting the boss's health, Blackstar swoops in to aid you, and upon completing the quest you permanently acquire it as a summonable mount.
Abilities: Dragonfire breath, fireballs, dive bomb, barrel rolls, sharp evasive dives
Active duration: Approximately 15 minutes per summon (real-world time)
Cooldown: Approximately 50 minutes before re-summoning (real-world time)
Both timers run in real-world minutes, not in-game time. There is no known method to reduce the cooldown.
Mechanical Mounts
Mechanical mounts are late-game vehicles offering the highest raw firepower of any mount category. The ATAG is the primary mechanical mount.
ATAG (All-Terrain Armored Gear)
The ATAG becomes available during Chapter 10: Counterattack, roughly 50 to 60 hours into the game. During the Hidden Ace questline, you learn how to operate the ATAG while defending Gorthak, the bastion of the Ironflame Orcs, from mechanized attackers.
Weapons: Rapid-fire machine gun, wide-area blast cannon, EMP discharge, ramming maneuver
Upgrades: Customizable with lasers and heavy plating for additional offensive and defensive capability
Functions as a walking tank. The most devastating land-based mount in the game.
is your primary offensive mount during the Blackstar dragon's 50-minute cooldown window.
Vehicles and Transport
Vehicles serve utility roles such as cargo transport, aerial exploration, and regional traversal. Unlike combat mounts, vehicles are focused on reaching areas or carrying goods rather than fighting.
Pywel Wagon
Wagons are essential for the trading system, as they are the only way to transport large quantities of trade goods across the map. To build a wagon, you must first recruit Brice to your Greymane Camp on Howling Hill. This requires progressing the Greymane 'Grounds of the Sunrise' questline until you complete 'Rumor in Glenbright Farm'.
Once Brice is recruited, you need a Freesword with the Engineer skill (such as Arnold or Otto). Speak to Ross and choose Mission Dispatch, then select the Timberturner Wainwright task. You can craft different wagon sizes: Old Wagon, Freight Wagon, or Trading Wagon. Bigger wagons have more cargo slots but require more workers, longer crafting times, and more resources.
Alternatively, you can steal NPC wagons you encounter on the roads, though this carries crime penalties.
Cloudcart (Hot Air Balloon)
The Cloudcart is a hot air balloon used primarily to reach altitude rather than spanning large distances. It proves useful for accessing previously unreachable elevated areas and discovering fast travel points before fuel runs out.
To craft the Cloudcart, you must first find the blueprints hidden in Glenbright Manor's secret basement. Once you have the blueprints, the crafting option becomes available at the Emberwind Workshop. The crafting requirements are:
The Cloudcart can be upgraded through camp research projects:
Cloudcruiser: Unlocked via the "Enhanced Cloudcart Efficiency" research project. Costs 9 silver and takes 6 hours to complete.
Skystreaker: Unlocked via the "Enhanced Cloudcart Altitude" research project. Costs 100 silver and takes 18 hours to complete. This is the top-tier variant with the highest altitude capability.
Delesyia Train
Once you reach the Delesyia region in the southeastern part of the continent, you can find railroad tracks running through the countryside. Follow the tracks to find an active train, then grapple onto it or climb aboard to ride it across the Delesyia countryside. The train follows a fixed route, serving as an alternative form of regional traversal.
Skiff
Skiffs are small rowing boats found at docks and shorelines throughout Pywel. They allow water traversal across rivers, lakes, and coastal waters, opening access to waterfront locations that are otherwise inaccessible by land. Skiffs are not permanent mounts; you board them at specific locations and leave them when you reach shore.
Red Dodo
The Red Dodo is a rideable bird mount. Specific details about how to obtain it are still being documented.
Mount Comparison by Role
Use this quick reference to find the best mount for each situation:
Role | Best Mount | Reason |
|---|---|---|
Long-Distance Travel | Highest stamina (315) and speed (4) of any horse | |
Ground Combat (Tank) | Highest health (600) of all horses; survives extended fights | |
Ground Combat (DPS) | Highest attack (27) and defense (100) of any horse | |
Hit-and-Run Tactics | Raptor | Fastest land combat mount with high burst speed |
Heavy Ground Combat | Massive HP pool with independent attack actions | |
Most powerful flying mount with fire breath; 15-min active window | ||
Maximum Firepower | Machine gun, cannon, EMP, ramming; upgradeable with lasers | |
Altitude Exploration | Hot air balloon for reaching elevated areas; upgrades to Skystreaker | |
Trade and Commerce | Only way to transport large quantities of trade goods | |
Water Traversal | Skiff | Only mount that crosses rivers and coastal waters |
Permanent Aerial Traversal | Cloud Cart, Cloudcruiser, and Skystreaker are permanent summonable mounts after Patch 1.04, offering vertical lift anywhere open ground is available. |
Taming Mechanics
Most creature mounts are obtained through the taming system. Horses, bears, raptors, and other tameable creatures all use the same core mechanic. The basic process works as follows:
Approach the creature without startling it.
Jump onto its back to initiate the taming minigame.
A taming progress circle appears on screen. You must fill the circle with yellow energy by countering the mount's movements.
Hold the movement input toward the creature's tail (press the opposite direction of the mount's movement). On PC, use W/A/S/D keys; on controller, use the left analog stick.
Fill the taming circle completely before your stamina depletes. If your stamina runs out first, you get bucked off and must try again.
Taming difficulty varies by mount type. Regular wild horses are the easiest, while legendary horses require at least 6 Stamina attribute points. It is strongly recommended to save your game before each taming attempt, especially for legendary mounts.
Environmental conditions also affect taming difficulty. For example, taming Camora in the hot Tashkalp region drains stamina faster, so wearing heat-resistant clothes helps. Rokade is generally considered the easiest legendary horse to tame because the Steel Mountains have no extreme heat or frost penalties.
Horse Leveling and Equipment
Horses level up the more you ride them. Each level boosts their defense, speed, stamina, and other attributes. This means that even a basic starter horse like Herspia can become a capable mount with enough time invested.
Every horse has eight stats: Health, Stamina, Attack, Defense, Movement Speed, Acceleration, Handling, and Jump Power. Wild horses come with randomized stat distributions, meaning no two wild horses are exactly alike.
Horses can be outfitted at stables with four equipment slots:
Slot | Effect |
|---|---|
Champron | Protects the horse's head and face |
Barding | Covers the horse's body, reducing incoming damage |
Saddle | Improves handling and stamina efficiency |
Stirrups | Increases rider stability and mounted attack power |
Horses can also be healed using Force Palm: Healing, Horse Tonic, or by having them retrieved at a stable.
Cloud Cart Family (Patch 1.04)
Patch 1.04 turned the Cloud Cart and its two upgrade tiers into permanent, summonable mounts. Previously, the balloon behaved as a one-shot vehicle tied to its crafting mission. Now all three tiers live on the same D-pad up swap as horses and other mounts, so you can call them in anywhere there is open ground around you. The crafting mission that grants the base balloon can only be completed once per save, but the vehicle itself stays with your character permanently afterward.
Operation is shared across all three tiers. Hold R2 to maintain altitude once you reach the desired height; release to descend. The Cloud Cart family is slower than a dragon mount for crossing long distances, but it is the only aerial option that works in regions where dragons are on cooldown or unavailable, and it is the most reliable tool for reaching high ledges, spires, and mountain peaks without climbing.
Mount | Type | Obtained | Notable Feature |
|---|---|---|---|
Base balloon | Craft once at the Emberwind Workshop using the recovered blueprints; now a permanent mount. | Entry-tier vertical lift; summoned via the D-pad up swap. | |
Upgraded balloon | Unlocked through the Enhanced Cloudcart Efficiency research project at the Greymane camp. | Improved flight efficiency over the base Cloud Cart; keeps altitude while R2 is held. | |
Top-tier balloon | Unlocked through the Enhanced Cloudcart Altitude research project after the Cruiser tier is completed. | Strongest vertical lift of the family; best choice for scaling mountains and spires. |
If you are upgrading through the research tree, the Cruiser tier is the meaningful step for day-to-day traversal, while the Sky Streaker is worth chasing once you start hunting for hidden locations at elevation.
Naming Horses and Mounts (Patch 1.04)
Patch 1.04 added a rename function for all horses and pets. Open the pets tab, highlight the animal you want to rename, and trigger the change-name prompt at the bottom of the panel (press the left stick in on controller) to type a new name. The option applies to horses, bear mounts, raptor mounts, the newly tameable Heuklang cats, bird pets gained through the Sotdae of Bond, and the Cloud Cart family. Names persist across sessions and are visible whenever you swap between your stabled companions.
Special Mounts (Patches 1.06 and 1.07)
Patches 1.06.00 and 1.07.00 introduced a separate Special Mounts line of mounts with its own inventory tab, distinct from horses. Each row below lists how the player gets each mount registered, the food category that drives the trust meter, the world spawn, and the speed feel reported in-game. The Special Mounts roster is bear-and-cat heavy by design, with the iguana and leaping kuku bird filling niche roles (acid spit and high jumps) rather than raw speed.
Mount | How to Obtain | Food | Where to Find | Speed Feel / Notes |
|---|---|---|---|---|
Knock the rider off at Beast Hunters Camp, then Force Palm until the Ride prompt | Non-bird meat (40 trust per piece) | Beast Hunters Camp near Silver Wolf Mountain | Heavy slow gait, strong swing-grab attack | |
Force Palm until the Ride prompt, feed from inventory | Non-bird meat (~3 pieces total) | Fast travel point above the Steel Mountains, below the Sanctum of Penitence | Heavy slow gait, very high HP | |
Defeat the legendary white bear, skin the corpse, bring the item to a witch NPC to craft the unlock consumable | Not applicable (kill + skin + craft path) | Frostpeak Cave and Whitewash Sanctuary near Wolf Mountain | Heavy slow gait, legendary visual variant | |
Kite the pride to isolate a regular male, then Force Palm until the Ride prompt | Meat (bird 35 trust, lean/fine/tough/marbled 40) | Cliff/island east of Demenissia, north of Delesyia, above the Old Soul Legendary Island | Pretty nippy across open ground | |
Three paths: Force Palm a pride male near Vanya, steal a captive lion from the Demenissia Circus pen, or break a male from the Hasteless legendary-animals encounter | Meat (bird 35 trust, others 40) | Vanya pride, Demenissia Circus, Hasteless encounter site | Pride-male only; standard pride respawns at night | |
Knock the enemy rider off the riderless raptor, chase it, then mount on the prompt | Meat (~40 trust per piece; bird ~35) | Southern Crimson Desert / Tash Kalpha. Spawns at Crimson Mountains Fortress, Watchtower, Dushar, and Dawnreach outposts | Not crazy fast; agile turning | |
Steal one with the lantern from the fighting pit inside a Tash Kalpha town | Vegetables only (carrot, sweet potato, asparagus = 40 trust each) | Fighting pit inside a Tash Kalpha town | Not crazy fast but has a ranged acid spit on right trigger | |
Climb the roofed building in the Blood Steel Camp fortress, grab the egg and the research journal, carry the egg to the marked nest, drop and wait ~5 real minutes, then hold X/Square to hatch | Not applicable (hatched from egg) | Steel Mountains south of Demenissia, inside Blood Steel Camp | Almost glides between jumps | |
Complete the Red Wind Merchant Guild side quest "Outlaws of the Desert" | Not applicable (quest reward) | Red Wind Merchant Guild storyline in the Crimson Desert | Steady desert pace; appears in Special Mounts tab on completion | |
Kite or kill the pack, then Force Palm the alpha | Meat (bird 35, others 40) | Howling Hill camp ridge, Silver Wolf Cave fast travel, Fort Ocelon (Hernand and Pailune) | Quick sprint; pack predator profile | |
Same Force Palm loop as the Large Wolf | Meat (bird 55, others 40) | Hernand highland ridge near The Sage's Peak | Quick sprint with the larger wolf silhouette |
Every Force Palm mount uses the universal tame loop documented on the Special Mounts page. Brown Bear, Clawed Bear, Tiger, Lion, and Red-Feathered Raptor all follow the same Force Palm to Ride prompt to feed cycle. The White Bear is a kill-skin-craft unlock instead, the Sandwalk Camel is a quest reward, and the Leaping Kuku Bird hatches from an egg you carry to a nest. Saddles for each species are sold by the regional Saddleries, and the bear and wolf entries each share a single saddle across their variants.
The Special Mounts inventory tab holds 30 slots, and the mount quick-slot now accepts one regular mount plus one Special Mount, so the player can swap between a horse for traversal and a Special Mount for combat or terrain without re-binding the slot each time.
Tips
Keep multiple mount types available. No single mount excels at everything, so switching between mounts based on the situation is the key to efficient gameplay.
The Blackstar dragon and ATAG Mech complement each other perfectly. Use the dragon when it is available, and switch to the ATAG during its 50-minute cooldown.
For general exploration, horses are still the most versatile option due to their speed, stamina, and mounted combat capability.
Invest in Stamina attribute upgrades early. Many late-game mount encounters require high stamina to complete taming minigames. You need at least 6 Stamina for legendary horses.
Royler is widely considered the best general-purpose mount in the game. Its stamina and speed combination outperforms every other horse for everyday travel and exploration.
Save before every legendary horse taming attempt. The minigame is punishing, and a failed attempt wastes time repositioning.
Upgrade your Cloudcart to the Skystreaker variant as soon as possible. The increased altitude makes it far more useful for reaching hidden locations.
Related Articles
Mounts
Horse Taming
Bear Mounts
Raptor Mounts
Dragon Riding
Dragon Mount
ATAG Mech
Hot Air Balloon
Mounted Combat
Trading
Greymane Camp