Horse Guide
Complete horse guide for Crimson Desert. Covers taming mechanics and controls, horse trust levels (1-5) with skill unlocks, all five horse breeds, rarity tiers (Common, Rare, Legendary), legendary horses (Royler, Rokade, Camora) with full stats and locations, eight horse stats explained, equipment slots and saddlery vendor locations, healing methods including Healing Force Palm, horse fatigue and exhaustion, mounted combat abilities, horse drifting, buying and selling, cargo transport for bounties, horse racing, all 10 Harmonious Hooves challenges, stable management, and tips.
On This Page
Overview
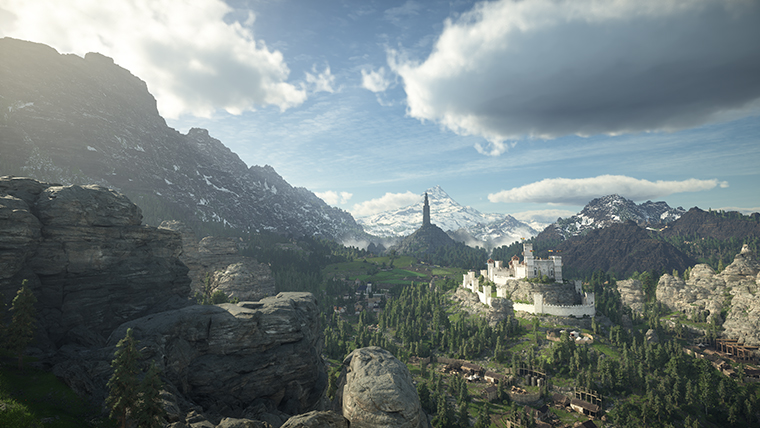
Horse taming is one of the core traversal and life skill activities in Crimson Desert. Wild horses roam across Pywel, and players can tame them through a hands-on minigame. Horses are integral to both traversal and combat, with their own stats, equipment slots, and customization options. The game features 34 different mounts visible in the Knowledge System) at launch (expanded to 37 with patch 1.01.00), with horses being the most common and earliest available.
Each horse has randomized stats, a trust level that unlocks new abilities as it increases, and four equipment slots that can be filled with gear from saddleries and contribution shops across the world. Horses can be healed, fed, customized with dyes, and even raced against other players. Whether you are crossing the open plains of Hernand or charging into a bandit camp on horseback, understanding how the horse system works will make your time in Pywel significantly more efficient and enjoyable.
Getting Your First Horse
Your first horse is obtained early in the main story at Deepfog Basin, a battlefield area in the Hernand region. This is a scripted story event during the Unknown Space quest, where Sebastian offers the wild capture. Kliff mounts the wild horse and must complete the taming minigame to gain control of it. After acquiring the horse, you can summon it at any time by pressing down on the D-pad (controller) or the assigned whistle key on PC. The horse will run to your location from wherever it is in the world.
From this point forward, horseback riding is your primary method of long-distance travel. The estimated map size is 80 to 110 square kilometers, and crossing it on horseback takes roughly two hours compared to six hours on foot. Pywel's open world is described as larger than the maps of both Skyrim and Red Dead Redemption 2, so a reliable horse is essential.
The starter horse is a Herspia breed, which is a general-purpose mount with balanced stats. As you explore more of Pywel, you will encounter other breeds and eventually the three legendary horses, all of which can be tamed to replace or supplement your starting mount.
Registering Horses at Stables
Riding a horse is not the same as owning it. A tamed or stolen horse only becomes permanently yours after you register it at a stable. To register, ride the horse to any stable and speak to the stablehand. Once registered, the horse appears in your stable roster and can be summoned, switched, or sold at any time. Unregistered horses are temporary mounts that will not persist if you switch to another mount or reload your save. Always register a new horse as soon as possible after taming it, especially if it has good stats.
Players obtain their first horse, Herspia, during Chapter 1: The First Encounter, the opening chapter of the main story. Early in the quest, Kliff follows a scout to Deepfog Basin, a battlefield area in the Hernand region. After a scripted sequence, Kliff acquires Herspia, which is automatically registered to the player's stable. From that point forward, wild horses appear across Pywel and can be tamed freely. Herspia is a solid starter mount but has lower stats compared to the horses you can tame in the wild or the legendary horses found later.
Horse Stats
Each horse has eight stats that influence both traversal and combat performance. Wild horses come with randomized stat distributions, meaning players who invest time in taming can search for horses with ideal stat spreads. You can view a horse's stats at any stable or when inspecting a tamed mount in your inventory.
The Abyss Tree includes dedicated mount nodes that can improve your horse's stamina capacity and other attributes. Investing in these nodes is especially valuable if you rely heavily on mounted combat. Equipment from saddleries can also boost specific stats, so pairing skill tree investments with the right gear creates a noticeable difference in horse performance.
Horse Trust Levels
Every horse in Crimson Desert has a trust level that ranges from 1 to 5. As trust increases, the horse unlocks new movement and combat abilities. A freshly tamed horse starts at trust level 1 with only basic walking and galloping. Leveling trust requires consistent interaction: riding the horse regularly, petting it, and feeding it treats.
Trust Level | Unlocked Skill | Description |
|---|---|---|
Level 1 | Basic Riding | The horse can walk and gallop at a standard pace. No special movement abilities are available yet. |
Level 2 | Dash | The horse can now dash forward in a burst of speed. Press the assigned dash key repeatedly while riding to activate. Significantly faster than a standard gallop for short distances. |
Level 3 | Drift and Back Kick | The horse learns to drift, allowing sharp, almost racing-game-style turns while galloping. The back kick lets you command the horse to kick enemies behind you with its hind legs, staggering them. |
Level 4 | Sprint | The horse can sprint at its maximum speed, faster than both the standard gallop and the dash. This is the horse's top-speed movement ability and consumes stamina while active. |
Level 5 | Fast Swimming | The horse can now swim faster in water, making river crossings and coastal travel much more efficient. |
How to Increase Trust
Trust increases through three main actions, and doing a mixture of all three will level up your horse in a relatively short amount of time:
Riding: Simply using the horse as your primary mount builds trust passively over time. The more you ride, the faster it levels up.
Petting: Focus on your horse with CTRL (LB on controller) and press R (or the assigned interact button) to pet it. There appears to be a daily limit on how much trust you can build through petting alone.
Feeding: Mount your horse, open your inventory, select a feed item such as hay, sugar beets, sugar cubes, or oats, and long-press the Use button to choose "Feed to Horse." You can gain trust from feeding approximately three times per day.
Controller shortcut for petting: While standing near your horse, hold L1 (PlayStation) or LB (Xbox) to bring up the radial interaction menu, then press X (PlayStation) or A (Xbox) to pet it. On keyboard, hold CTRL and press R. Petting is one of the fastest ways to build trust early on, so make a habit of petting your horse every time you stop to gather materials or visit a town.
You can also build trust by discarding food items that horses like (oats, apples) on the ground near your horse. The horse will walk over and eat the dropped food, granting a small trust increase.
Every horse has a Trust stat that tracks your bond with it. Trust ranges from Level 1 to Level 5, and each level unlocks new riding abilities and boosts the horse's core stats. There are three ways to raise trust:
Ride the horse regularly: Simply using your mount over time gradually increases trust. This is the slowest method but requires no extra effort.
Pet the horse: Focus on your horse with CTRL (LB on controller), then press R to pet it. This gives a meaningful trust boost each time.
Feed the horse: Give treats or feed items from your inventory. Items like Hay, Sugar Beet, and Sugar Cubes all contribute to raising trust. See the Feeding section below for full details.
There appears to be a daily limit on how much trust can be gained through petting and feeding. You can check your horse's current trust progress by selecting it in the inventory menu; the trust bar is displayed on the left side of the screen.
Skills Unlocked by Trust Level
Trust Level | Skills Unlocked |
|---|---|
Level 1 | Base riding abilities: walk, trot, and gallop. |
Level 2 | Dash: Quick burst of speed. Press the sprint key repeatedly to activate. The horse moves much faster than a standard trot. |
Level 3 | Drift: Quickly change direction while galloping, allowing sharp turns. Back Kick: The horse kicks enemies behind it, staggering them. |
Level 4 | Sprint: Maximum running speed beyond the standard gallop. Your horse can now run at its full rated speed stat. |
Level 5 | Swimming: Faster movement in water. Quick Start: Reach top speed instantly from a standstill. Double Jump: Jump again while in midair. Jump Dash: Cover large horizontal distances with a long jump. |
Higher trust levels also gradually boost the horse's core stats such as defense, speed, and stamina. Investing time in a single horse rather than constantly switching mounts is the fastest way to reach Level 5.
Taming Wild Horses
How Taming Works
Wild horses can be found roaming various regions of Pywel. When approaching a wild horse, players engage in a taming minigame comparable to Red Dead Redemption 2. Kliff sprints after a pack of wild horses, mounts one, and must desperately cling on as it tries to kick him off. Successfully holding on long enough tames the horse and adds it to your stable.
Taming Controls
The taming minigame requires you to counter the horse's movements by pulling in the opposite direction of its tail. A circular progress indicator appears on screen that must fill completely in yellow before your stamina runs out.
Platform | |
|---|---|
PC | Press E to mount the wild horse. Use W, A, S, D to pull in the opposite direction the horse is moving. If the horse pulls forward, press S. If it goes left, press D. Keep countering until the circle fills. |
PlayStation | Press Square to mount. Use the left analog stick to steer in the opposite direction of the horse's tail. Pull back when it bucks forward, pull right when it veers left. |
Xbox | Press X to mount. Use the left analog stick in the same manner as PlayStation. The simplest technique is to keep the camera fixed behind the horse and hold back on the stick. |
If you fail to fill the progress circle before your stamina depletes, you get thrown off the horse. However, you can get back up and chase the horse to try again as many times as you want. The horse does not despawn after a failed attempt. Stamina food cannot be consumed during the taming minigame, so make sure your stamina is topped off before you start.
Tips for Taming
The easiest technique is to keep the camera fixed directly behind the horse and hold the backward input (S on keyboard, back on stick). This counters most of the horse's movements.
Approach wild horses carefully and slowly. If you sprint directly at them, they may scatter before you can mount one.
Have at least 6 or more stamina before attempting to tame a legendary horse. Legendary horses buck harder and drain stamina much faster than regular wild horses.
Wild horses appear in groups. If one runs away, look for others in the same herd.
Save your game before attempting to tame legendary horses so you can retry without losing progress.
Where to Find Wild Horses
Wild horses spawn in open fields and grasslands throughout Pywel. The most reliable locations include:
The river areas to the east and south of Hernand, where multiple herds graze near the water.
Open plains and meadows across Demeniss, particularly near Stonewell Farm and Ironwood Farm.
Grassy lowlands throughout the Hernand region, especially along major roads between settlements.
Mountain foothills in Pailune, where sturdier horse breeds tend to roam.
Stealing Horses
In addition to taming wild horses, you can acquire mounts for free by stealing them. There are two main approaches, each with different risk levels.
From bandit camps: Bandit camps north and northeast of Hernand Castle often have horses tied up nearby. You can simply mount a bandit's horse and ride away. Stealing from bandits does not appear to carry the same penalties as stealing from civilians, making this the safest free method.
From populated stables: Stables near settlements have multiple horses available. Equip a mask (purchasable from Back Alley Shops for ten bronze coins), mount the horse, and immediately leave the alert zone. This is the quickest approach but the riskiest, since guards will pursue you if spotted. Once clear of the wanted area, ride the stolen horse to a different stable to register it.
Remember that stolen horses must still be registered at a stable to become permanent mounts. If you want to sell a stolen horse instead of keeping it, the Livestock Black Market southeast of Hernand offers better prices than legitimate stables for animals obtained through theft.
Why Tame Multiple Horses
Since wild horses have randomized stat distributions, taming multiple horses lets you find ones with optimal stats for your preferred playstyle:
Speed-focused horses: Best for players who prioritize fast travel and covering ground quickly.
Stamina-focused horses: Better for extended sprinting sessions and long explorations without rest stops.
Combat horses: High health, attack, and defense for players who engage in mounted combat frequently.
Terrain specialists: Muscular horses for mountain regions like Pailune, leaner horses for desert and plains.
Horse Breeds
Crimson Desert features several distinct horse breeds, each with different base stat tendencies. While individual stats are randomized within each breed, certain breeds lean toward specific strengths. Known horse breeds include:
Breed | Notes |
|---|---|
The most common breed and the player's starter mount after the prologue. Found across multiple regions. Well-rounded stats make it a solid general-purpose horse. | |
A common breed found across multiple regions of Pywel. Well-rounded stats make it a solid general-purpose mount. Required for the Harmonious Hooves 7 challenge. | |
A sturdy breed with higher health and defense. Also is Damiane's default mount, unlocked during Chapter 3. Well-suited for mounted combat situations. | |
Known for good speed and acceleration. A strong choice for players who prioritize fast travel. Required for the Harmonious Hooves 7 challenge. | |
An agile breed with strong handling stats. Performs well in tight terrain and during drifting maneuvers. Required for the Harmonious Hooves 7 challenge. |
One of the Harmonious Hooves horse challenges requires you to ride four specific breeds (Priden, Brianto, Numont, and Elantrima) for over 100 meters each, so it is worth taming at least one of each breed as you encounter them in the wild.
Horse Rarity Tiers
Horses in Crimson Desert fall into three rarity tiers: Common, Rare, and Legendary. Regular wild horses found throughout Pywel are classified as either Common or Rare depending on their stat rolls and breed variation. The three legendary horses (Royler, Rokade, and Camora) occupy the Legendary tier with fixed, significantly higher stats. Harmonious Hooves 9 specifically requires you to tame a horse of each rarity tier to complete the challenge.
Legendary Horses
Three legendary horses exist in Pywel, each with significantly higher stats than any regular wild horse. Legendary horses are harder to tame, requiring at least 6 stamina to have a realistic chance of filling the taming circle before getting thrown off. Each legendary horse has a fixed spawn location and a distinctive coat color.
Horse | Color | Location | Strengths |
|---|---|---|---|
White | Lake by Snowgrass Shelter in Silver Wolf Mountain, Pailune. Head south of the "P" in Pailune on the map to find the lake. | Best stamina of all three legendary horses (315 Stamina, 350 Health). The best all-around legendary horse due to superior stamina, meaning longer rides before fatigue. Speed can be further enhanced with the right saddle and horseshoes. | |
Black | Lake by the Spire of Insight in the Steel Mountains, Grace Estate. Found roaming just south of the lake. | Highest health of any legendary horse, making it a dedicated war horse built to absorb damage. Movement speed, acceleration, and stamina are lower than the other two, so Rokade is best for players focused on mounted combat rather than speed. | |
Red | Redtree Forest of Tashkalp, in the southern region. Located within a hidden area filled with dense trees and foliage. | The true battle horse. Highest attack and defense of any horse, with strong health and stamina. Best for aggressive mounted combat. The Tashkalp region is hot, so equipping heat-resistant clothing reduces stamina drain during the taming attempt. |
Royler's Stats
Rokade and Camora have comparable total stat points distributed differently. Rokade maximizes health at the cost of speed, while Camora maximizes attack and defense at the cost of handling. See the individual legendary horse articles for their full stat breakdowns.
Rokade's Stats
Rokade has the highest health pool of any horse in the game at 600, making it extremely durable in mounted combat. The trade-off is noticeably lower stamina and movement speed compared to Royler, so Rokade is better suited for combat-heavy situations than long-distance exploration.
Camora's Stats
Camora has the highest attack and defense of any horse by a significant margin, with 27 attack and 100 defense. These numbers make the rear kick ability hit considerably harder, and incoming damage is reduced far more than with any other mount. Camora's stamina sits at 240, the same as Rokade, which limits extended sprinting but is adequate for combat-oriented riding.
Legendary Horse Stat Comparison
All three legendary horses have significantly higher total stats than any regular wild horse. The comparison below based on confirmed community data:
Royler is generally considered the best overall legendary horse because stamina is the most universally valuable stat. Longer sprinting means more efficient exploration, and stamina can be further enhanced through saddle equipment and Abyss Tree upgrades. Rokade's high health makes it the choice for players who frequently engage in mounted combat and need their horse to absorb hits. Camora's attack and defense stats make it the most aggressive option, dealing the most damage with the rear kick ability and taking less damage from enemy attacks.
Taming Legendary Horses: Region Tips
Royler (Pailune): The Silver Wolf Mountain area where Royler spawns is at high elevation and can be cold. Cold weather drains stamina faster, so consider equipping cold-resistant clothing before attempting to tame Royler.
Rokade (Steel Mountains): The area near the Spire of Insight has no significant weather penalties, making Rokade slightly easier to tame from a stamina perspective. Focus on keeping at least 6 stamina and holding the backward input.
Camora (Tashkalp): The Redtree Forest in the southern Crimson Desert region is hot. Heat-resistant clothing reduces the stamina penalty from the environment, giving you more effective stamina for the taming minigame.
Three legendary horses can be found and tamed in Pywel. These mounts have significantly higher stats than regular wild horses and are harder to tame. It is recommended to save your game before attempting to tame a legendary horse, as they drain stamina much faster during the minigame.
Horse | Location | HP | Attack | Speed | Accel | Handling | Jump | Notes | ||
|---|---|---|---|---|---|---|---|---|---|---|
Silver Wolf Mountain, south of the 'P' in Pailune near Snowgrass Shelter | 375 | 315 | 12 | 50 | 4 | 3 | 2 | 2 | White horse. Best overall stamina and speed. Easiest legendary to reach early. Cold region; wear cold-resistant gear. | |
Near the lake south of the Spire of Insight, Steel Mountains, Grace Estate | 600 | 240 | 15 | 65 | 3 | 2 | 3 | 3 | Black horse. Highest health of any horse. Top handling and jump power. No environmental penalties at the location, making taming easier. | |
Redtree Forest of Tashkalp, secret paradise area in the south | 450 | 240 | 27 | 100 | 3 | 2 | 3 | 3 | Red horse. Highest attack and defense of any horse. Hot region; wear heat-resistant clothing when taming. |
All three legendary horses can be leveled to Trust Level 5 like any other horse, further boosting their already impressive stats and unlocking the same skill progression.
Of the three, Royler is generally considered the best all-around mount thanks to its superior stamina and speed, making it ideal for exploration and long-distance travel. Rokade is a dedicated tank with its massive 600 HP health pool and 65 defense, excelling in mounted combat where survivability matters more than raw speed. Camora is the offensive powerhouse with 27 attack and 100 defense, making it the strongest horse for aggressive mounted combat. Players who want a single horse for general use should tame Royler first, while combat-focused builds benefit more from Rokade or Camora.
Taming all three legendary horses contributes progress toward the Horse Challenges. Completing 10 horse challenges in total unlocks the Tamer of Legends trophy, so taming legendaries is worth pursuing even if you already have a preferred mount.
Preparing for Legendary Taming
Legendary horses put up a much stronger fight than regular wild mounts. Before heading out to tame one, make sure you are properly prepared.
Invest in stamina upgrades: Open the skill menu and invest Abyss Artifact upgrade points into the stamina stat (the blue wolf icon at the top of the skill tree). A minimum of Stamina Level 6 is recommended. If you have already spent your points elsewhere, you can respec for the cost of one Faded Abyss Artefact and redistribute them into stamina.
Save before each attempt: Always create a manual save before approaching a legendary horse. The taming minigame for legendaries is long and draining, and saving lets you retry without chasing the horse down again if it wanders off.
Wear climate-appropriate clothing: Royler's location in Silver Wolf Mountain is cold, so equip cold-resistant gear to slow stamina drain. Camora's Redtree Forest in Tashkalp is hot, so wear heat-resistant clothes. Rokade's area in the Steel Mountains has no temperature extremes, making it the most forgiving taming environment of the three.
Identifying the legendary horse: Legendary horses graze alongside regular wild horses at their spawn location. At Royler's lakeside camp, for example, four horses appear together but only the white one is Royler. Look for the distinct coat color to pick out the legendary before mounting.
Consume stamina food before mounting: You cannot eat food during the taming minigame, but you can eat stamina-boosting items right before you jump on. Top off your stamina bar just before the attempt to maximize your window.
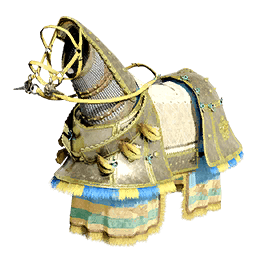
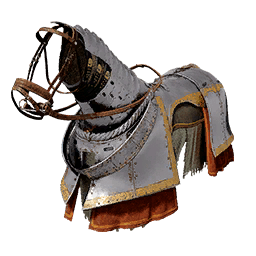
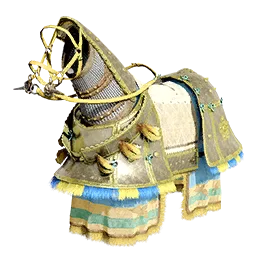
Horse Equipment
Horses have five equipment slots that can be equipped and customized independently. Equipment is purchased from Saddlery shops found near stables in most settlements, crafted at a blacksmith, or acquired from Contribution Shops in exchange for Contribution points.
Equipment Slot | Effect | Where to Get |
|---|---|---|
Champron (Head Armor) | Protective headpiece for the horse's face and skull. Increases defense and may boost attack. | Saddlery shops, blacksmiths, quest rewards |
Covers the horse's torso for significant defense. The most impactful defensive equipment piece. | Saddlery shops, Contribution Shops (costs Contribution points earned from bounties) | |
Saddle | Riding seat that increases health pool. Better saddles make the mount more durable in combat and during long rides. | Saddlery shops, crafted at blacksmiths |
Foot supports that provide passive health regeneration to the horse over time. Some stirrups also increase rider stability and mounted attack power (e.g., Crude Stirrups restore +1.0 health per second). | Saddlery shops, blacksmiths | |
Horseshoes | Fitted to the horse's hooves. Provide passive stamina regeneration (e.g., Shabby Horseshoes replenish 1.0 stamina per second) and may boost speed. | Saddlery shops, blacksmiths |
Each settlement's saddlery and blacksmith offer horse equipment matching the region's aesthetic. Players can mix and match pieces from different settlements for unique combinations. Full equipment dramatically extends the horse's usefulness in combat-heavy mounted encounters against large groups of enemies.
Notable Saddleries
Saddlery | Location | Notes |
|---|---|---|
Annabella's Saddlery | Northeast of the City of Hernand | One of the earliest accessible saddleries. Solid selection of starting horse equipment. |
Fiona's Demeniss Saddlery | North of Demeniss Castle | Serves the Demeniss region. Good mid-tier equipment options. |
Eldred's Saddlery | Northern side of the City of Pailune | Stocks higher-tier horse equipment for the Pailune region. |
Serkis lands, southeast outside the city | Offers higher-tier horse gear. Good source of late-game upgrades. | |
Various cities across Pywel | Sell bardings in exchange for Contribution points rather than currency. Points are earned by completing bounties and increasing a town's Contribution level. |
Horse Equipment Upgrade Priority
When building out your horse's equipment loadout, prioritize slots based on your playstyle:
Exploration focus: Start with Horseshoes (passive stamina regeneration) and a good Saddle (health pool increase). These two pieces have the biggest impact on long-distance travel.
Combat focus: Prioritize Barding (body armor for defense) and Stirrups (mounted attack power and stability). These make your horse significantly more survivable in fights.
Balanced: Equip the best available piece in every slot. Even lower-tier equipment in every slot is better than leaving any slot empty.
Contribution Shops offer high-tier bardings in exchange for Contribution points earned from bounties. If you have been completing bounties regularly, check Contribution Shops before spending gold at saddleries.
Pre-Order Equipment
Pre-order editions include exclusive horse equipment sets. The Deluxe Pack includes the Exclaire Horse Tack Set, and the Ultimate Pack includes the Hyperion Horse Tack Set. These are cosmetic sets that do not provide stat advantages over equipment obtained through normal gameplay.
Dye Customization
All horse equipment slots can be dyed individually at the Dye Station in settlements, which is the same location as the Barber Shop and Dyehouse. The Dye System offers full color and material customization, section by section. Each piece has multiple dyeable layers, allowing for detailed color combinations.
Dyes are found through exploration or crafted via alchemy. Horse customization is purely cosmetic and does not affect gameplay mechanics or combat stats.
Horse Healing and Fatigue
Horses take damage from combat encounters and falls from high places. A wounded horse is visually identifiable by blood or dirt on its body, and an injured mount cannot gallop. Instead, it limps slowly while you ride, which makes exploration painfully slow until you heal it. If the horse sits down on the grass, it has reached critical condition and needs immediate attention.
Horse Fatigue
Separate from health damage, horses can become fatigued from extended sprinting. When a horse's stamina bar is fully depleted, it enters a fatigued state and refuses to sprint. The most obvious visual indicator is bloody marks appearing on the horse's body. A fatigued horse will not gallop no matter how many times you press the sprint button; it simply walks at a sluggish pace until its stamina is restored.
Fatigue is distinct from injury. An injured horse (one that has taken combat or fall damage) limps and may sit down on the grass when critically wounded. A fatigued horse, on the other hand, moves at normal walking speed but cannot sprint. The two conditions can overlap: a horse that is both injured and fatigued will limp and refuse to gallop. Treating one condition does not fix the other, so you may need to address both health and stamina separately depending on the situation.
Horse Stamina Management
Stamina management is critical for efficient exploration across Pywel. When your horse's stamina is fully depleted, it enters a fatigued state and displays visible bloody marks on its body. A fatigued horse refuses to sprint and moves sluggishly until stamina is restored. There are two primary ways to restore stamina, along with several preventive measures that reduce how often fatigue occurs.
Stamina Restoration Methods
Method | Effect | Details |
|---|---|---|
Stable Rest | Fully restores stamina and health | Visit any stable and speak to the stablehand. Select "Retrieve and Heal Horse" to fully restore your mount in one action. This is the most complete recovery option, since it restores both health and stamina simultaneously. Key early locations include the stable north of Hernand (slightly west of the Abyss Nexus) and the Greymane Camp stable, which becomes available after completing faction quests and building your base. On the map, stables use a horseshoe icon while saddleries use a saddle icon. Do not confuse the two. |
Food Items | Partial restoration per item | Sugar Cubes are the most effective food item for restoring a fatigued horse's stamina. To feed your horse: open your inventory while mounted, hover over the item, hold A (Xbox) or X (PlayStation), and select "Feed to Horse" from the dropdown menu. A single sugar cube does not fully restore stamina, so you will need several to bring the horse back to full capacity. Horse Stimulant is the strongest consumable option; it amplifies stamina to maximum in one use. Keep a few in your inventory for emergencies or long cross-map rides. |
Stable rest is the better option when you are near a settlement, since it fully restores your horse at no item cost. Food items work better for field recovery when stables are far away. For long journeys across Pywel, carry both Sugar Cubes and Horse Stimulant so you can keep riding without detours.
Preventing Fatigue
Horseshoes: Equip horseshoes with passive stamina regeneration. Even basic Shabby Horseshoes replenish 1.0 stamina per second, which adds up significantly during long rides. Silver Iron Horseshoes provide +2 stamina regeneration per second, making fatigue far less frequent.
Horse Stimulant: This consumable amplifies your horse's stamina to maximum instantly. Keep a few in your inventory for taming attempts or long cross-map journeys where stopping is not practical.
Abyss Tree investment: The mount stamina node on the Abyss Tree permanently increases your horse's stamina capacity. This is one of the most valuable early investments for exploration-focused players.
Pacing your sprints: Rather than holding sprint until stamina depletes completely, alternate between short sprint bursts and normal galloping. Letting stamina partially recover between sprints keeps your average speed higher than depleting it fully and waiting for the long recovery period.
Stable rest: Visiting any stable fully restores your horse's stamina along with its health. The stable north of Hernand is one of the most accessible early options.
Healing Methods
Method | Cost | How It Works |
|---|---|---|
Consumes Spirit | The best healing method in the game. Unlock Healing Force Palm by spending an Abyss Artifact on the upgrade to the standard Force Palm. On controller, press the right thumbstick to charge Force Palm, then press the left thumbstick to switch to Healing Force Palm, aim at the horse, and release. On PC, hold Mouse Wheel (R3 equivalent) then press Tab (L3 equivalent). Restores the horse to full health immediately. Can be used anywhere in the open world. | |
Feeding Items | Requires feed items in inventory | Mount your horse, open the inventory, select a treat or tonic, and long-press the Use button to choose "Feed to Horse." Hay restores moderate health. Sugar Cubes recover weary horse health. Horse Tonic maximizes health and lets the horse survive one otherwise-fatal blow. Horse Stimulant amplifies stamina to maximum. Sugar beets provide small health recovery. Note that food does not fully replenish the horse in a single use, so you may need several pieces to bring it back to full condition. |
Stable Visit | Free or small coin cost | Interact with any stable in a town or city across Pywel. Speak to the stablehand and choose "Retrieve and Heal Horse" to restore your mount to full health. If you do not ride the horse to the stable yourself, a delivery fee is charged based on distance, though the cost is relatively small. Note: healing at a stable may cause you to lose some trade goods you are carrying. |
Force Palm Heal is the most practical option during extended exploration sessions, since stables are only found in settlements. Make sure you have invested at least one Abyss Artifact into the Healing Force Palm upgrade on the Abyss Tree before relying on this method. On PC, hold Mouse Wheel (R3 equivalent), then press Tab (L3 equivalent) to switch to the healing variant. Aim at the horse and release to heal. You may need to repeat the process if the horse is severely wounded, as a single use may not restore it to full health.
Feed Items Reference
Item | Effect |
|---|---|
Restores moderate health. Common and inexpensive. Can be fed while mounted. | |
Recovers weary horse health. Good for quick field healing. | |
Provides small health recovery. Easy to find while foraging. | |
Maximizes health. Also allows the horse to survive one lethal blow. Purchasable at stables. | |
Amplifies stamina to maximum. Useful before long rides or taming attempts. | |
Oats / Apples | Can be dropped on the ground near the horse. The horse eats them automatically, providing a small health and trust boost. |
Stable healing trade-off: Healing your horse at a stable by selecting "Retrieve and Heal Horse" may cause you to lose some trade goods you are carrying. If you are transporting valuable cargo for a trade route, consider using feed items or Force Palm Heal instead to avoid losing inventory. The delivery fee for summoning a distant horse is relatively small (Copper or Silver coins depending on distance), but the potential trade goods loss can be significant.
Preventing Horse Damage
Avoid riding off tall cliffs. Fall damage applies to horses and can leave them limping even if Kliff survives the drop.
Dismount before engaging large groups of enemies. Your horse can be hit by area attacks and staggered, which interrupts mounted combat.
Horse armor (especially barding) significantly reduces incoming damage. Equip it before heading into dangerous areas where mounted combat is likely.
If your horse is killed in combat, it can be recovered at an outpost and is not permanently lost. However, recovering a dead horse takes longer than simply healing a wounded one.
Stirrups with passive health regeneration (like Crude Stirrups at +1.0 HP per second) help keep your horse topped off during light skirmishes.
Mounted Combat
Basic Mounted Combat
While riding, you retain access to your weapon attacks. Combat on horseback combines your personal combat moveset with the horse's own capabilities:
Weapon attacks (swords, bows, spears) can be performed while mounted, allowing hit-and-run tactics against ground enemies.
The horse provides a speed advantage, letting you charge through enemy groups and strike from unexpected angles.
Some enemies are easier to fight from horseback due to their size or attack patterns.
Archery is particularly effective while mounted, as you can keep distance and circle enemies while shooting.
Horse Combat Abilities
As your horse's trust level increases, it unlocks combat-related abilities. The Abyss Tree also includes dedicated mount nodes that unlock additional horse-specific combat options:
Ability | Source | Description |
|---|---|---|
Rear Kick | Trust Level 3 | Command your horse to kick enemies behind you with its hind legs. Staggers enemies and knocks them prone. Activated automatically as part of the drift/kick trust unlock. |
Dash Charge | Trust Level 2 | Burst forward at high speed while mounted, dealing impact damage to enemies in your path. |
Mount Handling | Abyss Tree | Improves overall horse control, making it easier to maneuver during combat encounters. |
Stamina Upgrades | Abyss Tree | Increases your mount's stamina capacity for longer sprints and sustained combat engagements. |
Mounted Attack Power | Stirrups Equipment | Stirrups increase rider stability and boost damage dealt during mounted weapon attacks. |
Note that the horse's only independent attack is the back kick. Unlike bears and other late-game mounts, horses do not attack enemies on their own. All other mounted damage comes from the rider's weapon attacks.
Horses are a core part of the combat loop, not just a way to get around:
Mounted melee: Kliff can swing his sword while riding, allowing charging attacks through groups of enemies.
Mounted archery: Bow combat from horseback works with generous auto-lock targeting, making it an effective way to engage enemies at distance while staying mobile.
Grapple from horseback: Players can use the grapple ability to yank an enemy off their own mount and commandeer it.
Horse Skill Tree Nodes
Players can invest in horse-related nodes on Kliff's Abyss skill tree to unlock mounted combat abilities:
Horse Kick: The horse kicks enemies with its hind feet, knocking them prone.
Mounted Grab: Grab enemies from their mounts and smash them to the ground.
Horse Summoning and Death
Press D-pad Up (controller) or the assigned whistle key (PC) to summon the horse to the player's location. The horse runs to your position from wherever it currently is in the world, so there is no penalty for dismissing it or leaving it behind.
If a horse is killed in combat, it can be recovered at an outpost and is not permanently lost. However, losing a horse mid-mission can make traversal significantly slower until you reach the next outpost. Recovering a dead horse also takes longer than healing a wounded one, so it is always better to heal or dismount before your horse's health drops to zero.
Horse Drifting
Horses in Crimson Desert can perform sharp, almost racing-game-style turns once they reach trust level 3. In Black Desert Online, Pearl Abyss used a similar horse Drift skill; in Crimson Desert this drifting mechanic allows rapid direction changes during mounted travel and combat. The feature has been described as "over-the-top in a very video game sort of way."
To drift, gallop at speed and input a sharp turn direction while pressing the drift button. The horse slides sideways before snapping into the new direction, maintaining most of its momentum. Drifting is useful for dodging obstacles, repositioning during combat, and navigating tight mountain paths at high speed.
Buying and Selling Horses
In addition to taming wild horses, you can buy and sell horses at any stable across Pywel. Visit a stable and speak to the stablehand to browse available horses for purchase. Purchased horses have set stats that you can inspect before buying, unlike wild horses whose stats are only revealed after taming.
You can also sell your tamed horses at stables for currency. This provides a way to profit from taming multiple wild horses. If you tame a horse with poor stats, selling it and trying again is a viable strategy. The stable also lets you switch between your owned horses, assign horses to different characters, and manage your full stable roster.
How to Buy a Horse
Visit any stable and speak to the stablehand. Select the "Buy Horse" option to browse the available selection. Each horse for sale has its stats displayed so you can inspect health, stamina, speed, and other attributes before committing. Purchased horses are automatically registered to your stable roster. The stable northwest of the Royal Trading Post and the one north of the City of Hernand are among the first you will encounter.
How to Sell a Horse
To sell a horse legitimately, visit any stable and choose "Manage Horses" from the stablehand's menu. Select the horse you wish to sell and press the Sell option. The sale price depends on the horse's breed, rarity, and stats. Taming wild horses specifically to sell them at stables is a viable way to earn extra currency in the early game.
Livestock Black Market
If you have stolen animals or want a higher price for your mounts, the Livestock Black Market buys horses and other animals at better rates than legitimate stables. The earliest Livestock Black Market is located southeast of Hernand, near Grimrak's shop. You must be actively riding or carrying the animal to sell it there. This is the primary fence for stolen horses, livestock, and poached animals. Selling at the Black Market does not incur a wanted penalty on its own, since the transaction itself is handled discreetly.
Buying Horses
Pre-trained horses can be purchased at stables from the stablehand. Visit the stable, speak with the keeper (such as Merton), and select "Buy Horse." Purchased horses start at Trust Level 1, so you will still need to level them up through riding, petting, and feeding. This is a convenient alternative to taming if you want a horse with known stats.
Selling Stolen Horses
Horses that are stolen from NPCs or settlements cannot be sold at regular stables. Stealing a horse is treated as a crime and increases your bounty if witnessed. Stolen livestock must be sold at a Livestock Black Market or a Back Alley Shop vendor on the outskirts of towns.
In the Hernand area, the Back Alley Shop is located east of the city, past the large model castle on the left side of the road, then turning left down the track. These underground merchants deal in stolen goods and are one of the faster ways to earn money early in the game. Keep in mind that any crimes committed while stealing will add to your bounty, so exercise caution.
Horse Cargo and Transport
Horses in Crimson Desert serve as more than just mounts. You can load animals, captured bounties, and dead bodies onto the back of your horse for transport. This is essential for completing bounty quests, where you need to haul captured outlaws back to a Guard Station.
How to Load Cargo
Pick up the target: Walk up to a knocked-out or tied-up bounty target (or a dead body/animal) and press the interact button to pick them up. Kliff will carry the body over his shoulder.
Load onto horse: While carrying a body, approach your horse. Hold L1 (PlayStation) or LB (Xbox) to focus on the horse, then press the corresponding face button to stow the cargo on the horse's back. On PC, hold CTRL and use the interact key.
Ride with cargo: Mount up and ride to your destination. Kliff will automatically manage the cargo while riding. If the bounty target was captured alive and tied up, they may struggle and break free during transport. If that happens, dismount, subdue them again, re-tie them, and reload them onto the horse.
Carrying Two Bounties at Once
You can transport two bounty targets in a single trip. Load the first captured target onto your horse's back, then go pick up the second target and carry them on foot while riding. This saves significant travel time on multi-target bounty hunts.
Transporting Bounty Targets
Captured bounties pay double compared to killed targets. If you bring a dead body back to the Guard Station, you still collect the bounty, but at half the reward. Always try to tackle, beat down, and tie up your mark before transporting them. You cannot fast travel when transporting bounties, so plan your route accordingly. See the Bounties article for a full list of outlaw bounties and capture strategies.
Horse Racing
Horseback Racing is a side activity in Crimson Desert where players race on horseback against NPC opponents along courses that wind through the open world. Different mount stats affect racing performance, giving players incentive to tame and train horses with high speed and stamina. Speed determines top sprint speed, while stamina governs how long you can maintain that speed. Handling affects how well you navigate turns at high speed.
The key to winning races is stamina management. Sprinting consumes your horse's stamina bar, and when it runs out, your horse slows to a walk. Balance full gallop bursts with short recovery periods where you ease off the sprint button and let stamina refill. Horse equipment such as horseshoes (stamina regeneration) and saddles (health pool) can improve your race performance.
Racing joins other side activities like fishing, cooking, and other life skills.
Horse Challenges
The Horse Challenges are part of the Mastery category in the Challenges system. There are 10 horse challenges in total, called the Harmonious Hooves series. Completing all Horse Challenges unlocks the Tamer of Legends trophy and achievement. Each challenge also rewards an Abyss Artifact and a passive bonus.
Challenge | Location | Objective | Reward |
|---|---|---|---|
Harmonious Hooves 1 | Demeniss, southwest of Stonewell Farm | Tame 2 wild horses | |
Harmonious Hooves 2 | Demeniss, northeast of St. Halssius's House of Healing | Hunt 5 animals within 5 minutes while riding a horse | Abyss Artifact, Bond I |
Harmonious Hooves 3 | Demeniss, east of Ironwood Farm | Defeat 20 enemies within 5 minutes without stopping while mounted | Abyss Artifact, Headstart II |
Harmonious Hooves 4 | Travel from Sunset Valley to Varnia while riding | ||
Harmonious Hooves 5 | Perform 10 mounted bow kills in a single encounter | ||
Harmonious Hooves 6 | Win 3 horseback races | ||
Harmonious Hooves 7 | Hernand, west of The Ironwood | Ride four specific breeds (Priden, Brianto, Numont, Elantrima) for over 100m each | Abyss Artifact, Bond II |
Harmonious Hooves 8 | Trample 10 enemies while galloping on horseback | ||
Harmonious Hooves 9 | Tame a horse of each rarity tier (Common, Rare, Legendary) | ||
Harmonious Hooves 10 | Pailune region (Sealed Abyss Artifact) | Complete a mounted escort mission without the caravan taking damage |
Challenges are unlocked by finding Sealed Abyss Artifacts scattered throughout the world. Look for glowing stone markers near intersections and crossroads to discover new horse challenges.
Managing Your Stable
The Greymane Camp's ranch is the home base for your collected animals. You can steal NPC animals and bring them back to your camp, where they can be raised and either sold or butchered for resources. Note that stealing in towns triggers the wanted system, so exercise caution.
Stable Interface
When you visit a stable, speak to the stablehand and select "Use Stable" to open the management menu. From here you can:
Manage Horses: View all your owned horses, inspect their stats, and choose which horse to ride by selecting a mount and pressing "Switch Mount."
Retrieve and Heal Horse: Summon your current horse back to the stable and heal it to full condition. A delivery fee may apply if the horse is far away.
Buy and Sell: Browse horses available for purchase with set stats you can inspect before buying, or sell your own horses for currency.
Stables are marked on the map with a horseshoe icon, but undiscovered locations appear as question marks until you visit them for the first time. Ringing bells in cities and churches clears the fog of war in surrounding areas, which can reveal nearby stable question marks on your map and save you from searching blindly. Once you visit a stable, its horseshoe icon permanently appears on the map for easy return trips. Look for farm-like areas with horses as a visual clue when exploring for undiscovered stables in the wild.
Other Mount Types
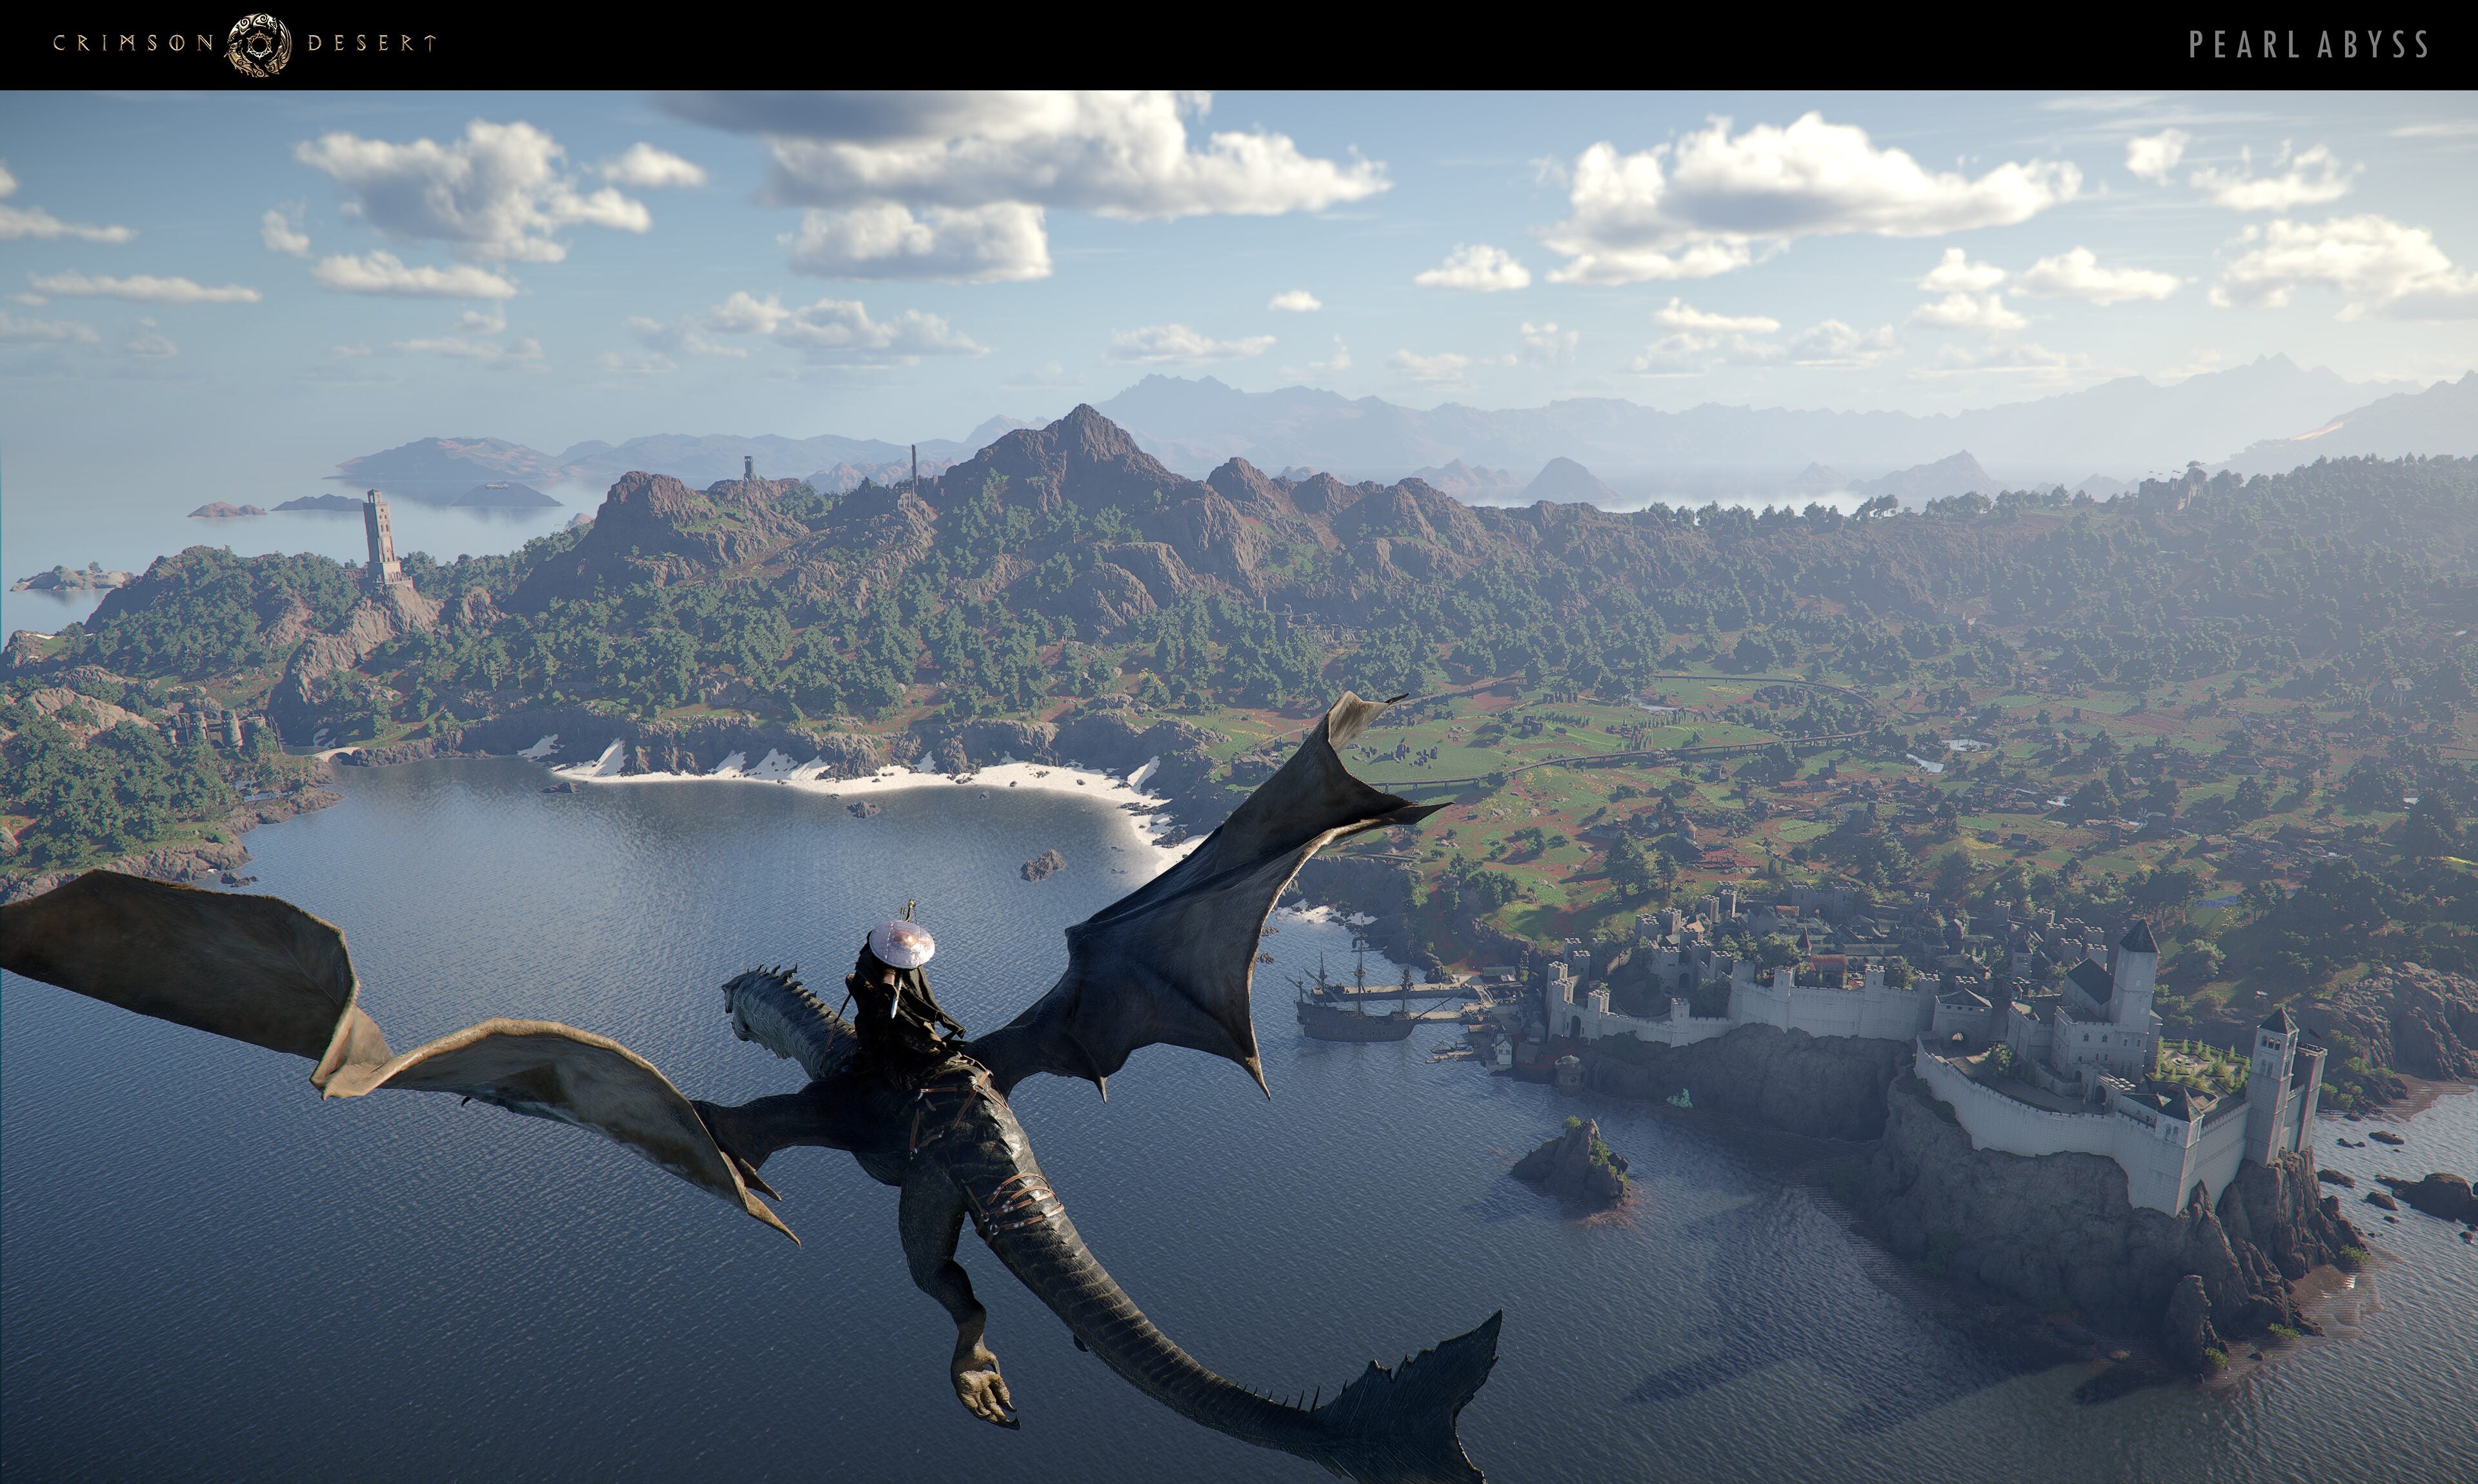
While horse taming is the primary mount system, Crimson Desert features several other rideable creatures that become available through progression. See the Mounts article for the full list of all 29 mounts.
Mount | Details |
|---|---|
Bears | Large black bears that maul enemies with claw swipes, bites, and body slams. The bear attacks independently while you fight from its back, effectively doubling offensive pressure. |
Wolves | Agile, stealthy alternative to bears. Fast and nimble, ideal for hit-and-run engagements. |
Raptors | Dinosaur-like mounts available through progression. See the Raptor Mount article for details. |
Dragons | Late-game aerial mounts that can breathe fire and perform swooping attacks. Time-limited use to prevent trivializing ground exploration. |
War Robot | Dwarf-engineered mech with machine gun, lock-on missiles, jump jets, and EMP blast. Time-limited use with depleting energy reserves. |
Used to visit floating sky islands in the Abyss. | |
Skiff | Rowboat for water traversal across Pywel's rivers and coastlines. |
Dragons and the War Robot are intentionally time-limited to prevent them from trivializing ground exploration. Pearl Abyss has designed "tons of hidden corners" throughout the world that cannot be spotted from above. This keeps ground-level exploration with horses remains valuable throughout the game.
Traversal Integration
Kliff can smoothly land from a Crow Wings glide directly onto a horse, allowing seamless transition between aerial and ground-based movement. Horses are faster and more efficient than sprinting on foot, making them the primary way to cover long distances across Pywel's open world.
There is no auto-path feature for horses. Riders must manually guide their mounts along roads and across terrain. Both horse riding and gliding require stamina, which can be upgraded through progression.
Traversal Comparison
Method | Details |
|---|---|
Horse Riding | Primary ground traversal. Summoned by whistling (D-pad Up). Requires horse stamina for sprinting. |
Crow Wings | Raven-wing gliding ability. Unlocked very early. Allows long-distance aerial traversal with stamina cost. |
Climbing | Scale most cliffs and walls. Governed by player stamina gauge. |
Energy hook for advanced movement and Spider-Man-style swinging. | |
Via discovered landmarks and Traces of the Abyss. |
Tips
Taming Tips
Tame wild horses whenever you encounter them. Each horse has randomized stats, and you may find one with a better stat spread than your current mount. You can always sell unwanted horses at a stable.
When taming, hold back on the stick and keep the camera behind the horse. This simple technique works against most wild horses and conserves your stamina.
Legendary horses require at least 6 stamina to tame. Do not attempt them until your stamina stat is high enough, or you will waste time getting thrown off repeatedly.
Combat Tips
Use mounted combat for hit-and-run tactics against groups of enemies. The speed advantage makes it easy to disengage and re-engage at will.
Horse armor (especially barding) is worth acquiring before tackling mounted combat in dangerous areas. An unprotected horse can be knocked down, throwing you off and leaving you vulnerable.
Travel and Exploration Tips
Summon your horse frequently with D-pad Up (or the whistle key on PC). It runs to you from anywhere, so there is no penalty for dismissing it or wandering away on foot.
Pay attention to horse stamina during long rides. Let the horse recover by slowing to a walk when stamina gets low rather than depleting it completely.
Invest in the mount stamina node on the Abyss Tree early. Extended sprinting makes exploration much more efficient across Pywel's enormous map.
Equip horseshoes with stamina regeneration (like Shabby Horseshoes) to passively recover stamina during long rides. This reduces the number of times you need to slow down and wait.
Different horse breeds suit different regions. Consider keeping multiple horses for different environments if you find terrain specialists through taming.
Load bounty targets onto your horse for transport instead of carrying them on foot. You can even carry two targets at once by loading one on the horse and carrying the second yourself while riding.
You cannot fast travel while transporting bounty cargo. Plan your route to a Guard Station before picking up bounty targets to minimize travel time.
Horse Care Tips
Visit the Dyehouse to customize your horse's appearance. Cosmetic changes do not affect stats, but they make your mount feel more personal.
Unlock Healing Force Palm with an Abyss Artifact as soon as possible. Being able to heal your horse anywhere in the field is far more convenient than riding to a stable every time it takes damage.
Pet and feed your horse daily to build trust faster. A trust level 3 horse with drift and back kick is significantly more useful than a level 1 horse with only basic riding.
Keep hay and sugar cubes in your inventory at all times. They are cheap to buy and provide reliable field healing when Force Palm is not yet available. You may need several pieces to fully restore a severely wounded horse.
Taming Mechanics
When approaching a wild horse, players engage in a taming minigame. Kliff can either sprint directly at a wild horse or crouch and sneak up to get closer before being detected. Once in range, press the interaction button to leap onto the horse's back.
The moment Kliff mounts the horse, a circular progress indicator (sometimes described as a lasso or rope icon) appears at the center of the screen. The indicator starts partially filled and must be completed entirely in yellow to tame the horse. The horse bucks and pulls in random directions, and you must push the left stick (or WASD keys on PC) in the exact opposite direction to counter each movement. If the horse lurches forward, pull back. If it veers left, push right. Correctly countering the horse's direction causes the yellow progress to build up gradually.
React to the horse's movements as quickly as possible. Hesitating even briefly slows the meter's progress and eats into the hidden time limit. When the horse rears up, the meter can actually decrease, so sustained pressure in the correct counter-direction is critical. If the progress bar fills completely before your stamina runs out, the horse is tamed. If your stamina depletes first, you are thrown off. However, the horse does not flee after a failed attempt, so you can chase it down and try again immediately.
Taming Tips
Camera trick: Keep the camera fixed directly behind the horse and hold S (PC) or pull the left stick backward (controller). As the horse spins, adjust the camera to stay glued to its tail. This simplifies the minigame considerably.
Hidden time limit: There is an invisible stamina timer. If you take too long to fill the progress circle, the horse throws you off. Move quickly and decisively.
Retry freely: If you fail, you can chase the same horse and try again as many times as needed. The horse does not despawn after a failed attempt.
No food allowed: You cannot eat stamina-restoring food during the taming minigame, so do not rely on consumables to extend the attempt.
Legendary horse stamina: When attempting to tame legendary horses, have at least 6 or more stamina upgrades. They buck harder and drain your stamina much faster than regular wild horses.
Heat-resistant clothing: If taming Camora in Tashkalp's Redtree Forest, the region is hot. Wear heat-resistant clothes to reduce stamina loss during the taming attempt.
Respec for stamina: If your Abyss Artifact upgrade points are invested in other stats, you can respec at any time for the cost of one Faded Abyss Artefact. Redistribute points into the stamina stat (the blue wolf icon on the skill tree) before attempting legendary taming, then respec back afterward if desired.
Cold-resistant clothing for Royler: Royler's location at Silver Wolf Mountain is in a cold, snowy area. Equip cold-resistant gear to reduce the rate of stamina loss during the taming attempt. The white horse also blends into the snowy surroundings, which can make reading its directional movements slightly harder.
Wild Horse Locations
Wild horses roam freely across many regions of Pywel. They appear in herds of two to five animals grazing in open fields, along riverbanks, and across grassy plains. Common areas where wild horses can be found include:
East and south of Hernand: The river areas running east and south of the City of Hernand are among the first places players encounter wild horses.
Pailune plains: The open grasslands south and west of Pailune have consistent wild horse spawns, including some rarer breeds.
Steel Mountains foothills: The rolling hills and meadows at the base of the Steel Mountains region host several herds.
Serkis Estate farmlands: Pastures around the farmland areas south of Hernand occasionally have wild horses grazing nearby.
Wild horses come in various breeds and colors, each with different stat distributions. Rarer breeds tend to spawn in more remote areas further from major settlements. As you explore and remove the fog of war from the map by ringing bells in cities and churches, you will discover more spawning grounds.
Horse Stats
Each horse has its own set of attributes that influence both traversal and combat performance:
Horses have varied stat distributions described as "similar to Red Dead Redemption 2." Some horses naturally favor speed while others have higher stamina or health pools. Stamina upgrades can be earned through progression to extend riding duration.
Registering and Stabling Horses
After successfully taming a wild horse, you can view its stats and choose to register it as a mount. Registered horses are stored at stables and can be retrieved at any time. Spare mounts can be stabled at any stable across Pywel, including the stable north of Hernand (slightly west of the Abyss Nexus) and the Royal Trading Post.
Stables are marked on the map with a horseshoe icon. If a stable has not been visited, it may appear as a question mark instead. Do not confuse the horseshoe icon (stables) with the saddle icon (saddleries). The Greymane Camp also gains a stable as you progress through faction quests and develop the base.
Managing Your Horses
To manage horses, visit any stable and speak with the stablehand. Select "Use Stable" and then "Manage Horses" to access the following options:
Switch Mount: Choose a different registered horse to ride. Select the desired horse and confirm with "Switch Mount."
Retrieve and Heal Horse: If your current horse is injured or killed, the stablehand summons it back and restores it to full health for a small fee in Copper or Silver Coins.
View Stats: Inspect any registered horse's attributes, trust level, and equipped gear.
Buy Horse: Some stables sell pre-trained horses. Speak to the stablehand (such as Merton near Hernand) and select "Buy Horse" to browse available mounts. This skips the taming minigame entirely.
Saddlery Shops
Horse equipment is purchased at Saddlery shops, which are typically located near stables in major settlements. These shops are marked with a saddle icon on the map (distinct from the horseshoe icon for stables). Each Saddlery sells saddles, horseshoes, stirrups, champrons, and barding, along with consumable items like Horse Tonics and Horse Stimulants.
Saddlery | Location | Notes |
|---|---|---|
Annabella's Saddlery | Northeast of the City of Hernand | One of the first saddleries accessible. Sells basic tack including Crude Stirrups and Shabby Horseshoes. |
Eldred's Saddlery | Northern side of the City of Pailune | Offers mid-tier horse equipment. Available after reaching the Pailune region. |
Fiona's Saddlery (Demeniss) | North of Demeniss Castle | Sells advanced horse gear. Located in the Demeniss region. |
Serkis lands, southeast outside of Hernand | An additional early-game option for horse equipment. |
Equipment Stat Effects
Each equipment slot provides a specific stat bonus. To equip purchased items, open your inventory, navigate to the horse tab, select any piece of gear, and press Equip.
Equipment Slot | Primary Stat Bonus |
|---|---|
Saddle | Improves handling and stamina efficiency while riding. |
Horseshoe | Boosts movement speed and acceleration. Some tiers restore passive stamina (e.g., Shabby Horseshoes: +1.0 stamina/sec). |
Stirrups | Increases rider stability and mounted attack power. Some tiers restore passive health (e.g., Crude Stirrups: +1.0 HP/sec). |
Champron (Head Armor) | Protects the horse's head and face. Increases overall mount defense. |
Barding (Body Armor) | Covers the horse's torso for damage reduction. Can also be obtained from Contribution Shops in exchange for Contribution points. |
Higher-tier equipment may unlock as you build trust with a particular Saddlery merchant. Equipment from different regions has different aesthetics, so mixing and matching pieces from multiple saddleries gives your horse a unique look. Check back after progressing through the story.
Horse Customization
All five horse equipment zones can be dyed individually at the Dye Station in settlements (the same location as the Barber Shop). The Dyehouse offers full color and material customization, section by section. Dyes are found through exploration or crafted via alchemy. Horse customization is purely cosmetic and does not affect gameplay mechanics or combat stats.
Feeding Your Horse
Feeding your horse restores health and stamina, and contributes to raising its Trust level. There are two ways to feed a mount:
From the inventory while mounted: Open your inventory, hover over a feed item, hold the Use button (A on Xbox, X on PlayStation), and choose "Feed to Horse" from the dropdown.
Drop food on the ground: Summon the horse, select a food item in your inventory, and discard it. The horse walks over and eats it. Do this away from other horses so they do not steal the food.
Item | Effect | Availability |
|---|---|---|
Restores moderate health. | Purchased from stables and general vendors. | |
Restores a small amount of health. Also increases trust. | Dropped by some animals; sold by vendors. | |
Restores stamina effectively. One of the best portable items for long rides. | Sold by most vendors and stables. Carry several. | |
Extreme health boost. Allows the horse to endure an otherwise deadly blow briefly. | Crafted via alchemy or purchased from saddleries. | |
Amplifies horse stamina to maximum capacity. | Crafted or purchased from saddleries. |
When a horse's stamina drops too low, it becomes fatigued: it stops galloping, slows to a crawl, and may show visible damage on its coat. Stock up on Sugar Cubes and Hay before long journeys to avoid detours to the nearest stable.
Healing Your Horse
Horses take damage from combat and environmental hazards. A wounded horse may sit on the grass when summoned, display visible coat damage, or refuse to gallop. If you receive the message "Horse exhausted: recovery needed," you must actively heal the mount. Simply waiting will not fix exhaustion.
Stable Healing
Visit any stable and speak with the stablehand. Select "Retrieve and Heal Horse" to summon your mount and restore it to full health. If you ride the horse to the stable yourself, the fee is minimal. If the horse is too injured to ride and must be delivered, the cost scales with distance, paid in Copper Coins or Silver Coins. Note that using stable delivery may cause you to lose some trade goods if your horse was carrying them.
Healing Force Palm
The most versatile field healing method is Healing Force Palm, an upgraded version of the standard Force Palm ability. To unlock it, you need a specific Abyss Artifact. Once unlocked, press the right thumbstick (R3) to charge Force Palm, then press the left thumbstick (L3) to switch it to healing mode. Aim at your horse and release to restore its health. This works anywhere in the field without visiting a stable.
Feed Consumables
While riding, open your inventory, select Hay, Sugar Cubes, or a Horse Tonic, and feed it directly to the mount. Hay provides moderate healing, Sugar Cubes restore stamina, and Horse Tonic fully restores health. See the Feeding section above for the complete item list.
Passive Equipment Regeneration
Certain horse equipment provides continuous passive regeneration. For example, Crude Stirrups restore +1.0 health every second, and Shabby Horseshoes restore +1.0 stamina every second. Equipping higher-tier gear from later saddleries provides even faster regeneration, keeping your horse topped off during long rides and reducing the need for consumables.
Other Horse Activities
Horse Summoning and Death
Press D-pad down to whistle and summon the horse to the player's location. The horse runs to the player's position for mounting. If a horse is killed in combat, it can be recovered at an outpost and is not permanently lost. However, losing a horse mid-mission can make traversal significantly slower until reaching the next outpost.
Horse Drifting
Horse Racing
Horse racing is confirmed as a side activity in Crimson Desert. Different mount stats affect racing performance, giving players incentive to tame and train horses with high speed and stamina. Racing joins other side activities like fishing, cooking, arm wrestling, and sheep wrangling.