Oongka Skills
Complete guide to all 70 of Oongka's skills in Crimson Desert, covering the full Stamina (41 skills), Health (12 skills), and Spirit (17 skills) branches with inputs, costs, prerequisites, descriptions, recommended priorities, combo synergies, and build archetypes.
On This Page
Overview
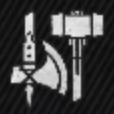
Oongka is one of three playable characters in Crimson Desert, alongside Kliff and Damiane. A half-human, half-orc warrior and powerhouse of the Greymanes, Oongka specializes in raw physical strength, wielding greataxes, hammers, spears, and hand cannons. His skill set focuses on devastating ground slams, wide spinning attacks, powerful grappling moves, elemental strikes, and berserker rage. He is the most beginner-friendly character in the game, with large weapon arcs that are forgiving when it comes to aiming and a high health pool that lets him absorb punishment.
Oongka is unlocked after defeating Lava Myurdin at Ashclaw Keep during Chapter VII. Once unlocked, players can freely switch to him in the open world via the character wheel. His starting equipment includes the Dekarr Greataxe, the Orc Blaster (hand cannon), Small Cannon Balls, and a Pailunese Riteblade.
Oongka's unique skills are unlocked primarily through Abyss Artifacts or by observing enemies using certain techniques during combat. Some skills (like Quaking Fury) are automatically unlocked when Oongka becomes playable. Skills that can be enhanced are leveled up by spending additional Abyss Artifacts, which unlocks inner skills (sub-abilities) that modify or extend the parent skill.
Oongka also has access to shared combat fundamentals (blocking, dodging, basic attacks) that all playable characters can use. This page covers his full skill tree of 70 confirmed abilities across the Stamina, Health, and Spirit branches. For the general skill system shared by all characters, see the Skills article.
Skill Tree Structure
Like Kliff and Damiane, Oongka's skill tree is divided into three color-coded branches tied to the three core stats. Each character has their own separate tree that must be invested in independently, though stat upgrades to Health, Stamina, and Spirit carry over to all characters.
Blue Branch (Stamina): Contains 41 skills covering Oongka's core melee combat, grappling, kicks, ranged weapon attacks, and the signature Quaking Fury, Rampage, and Dual Wielding Mastery abilities. These are his primary damage-dealing skills.
Red Branch (Health): Contains 12 skills covering Oongka's elemental attacks (Flame Quake, Lightning Pulse, Storm Howl), elemental skill enhancements, flight, Frost Mantle, and Imbue Element. These give him magical damage and aerial mobility.
Green Branch (Spirit): Contains 17 skills covering defensive techniques (Parry, Dodge, Counter, Evasive Roll), focus abilities (Focus, Focused Shot, Focused Charged Shot), ranged options (Scatter Shot, Evasive Shot), and the unique Rage berserker mode. Also includes the shared Nature's Grasp skill.
Stamina is Oongka's most important resource. His signature moves cost 60 to 100 Stamina per use, so investing in Stamina upgrades early (up to Stamina Lv 14) is essential. Spirit skills cost less individually but are critical for defensive timing and focus mechanics.
Blue Branch: Stamina Skills
The Blue Branch houses 41 skills and is the largest of Oongka's three branches. It contains his signature combat skills organized into several sub-categories: Armed Combat, Unarmed Combat, Kick skills, Grappling, Ranged Weapon skills, and his unique power attacks (Quaking Fury, Rampage, Raging Lightning, and Leaping Smash). Dual Wielding Mastery is Oongka's most distinctive passive, allowing him to wield two-handed weapons with a single hand.
Armed Combat
Armed Combat covers Oongka's basic weapon attacks. Investing in Armed Combat increases the damage of all melee weapon strikes. The Slash line provides his core melee combo tools.
Icon | Skill | Input | Cost | Prerequisites | Description |
|---|---|---|---|---|---|
| R1 / RB | Varies | Base skill | Perform a basic attack with your melee weapon. Further investment increases the damage of all melee weapon attacks. | |
| R1 + Triangle / RB + Y | 40 Stamina | Perform a fast forward swing that drives enemies into the ground. A core combo starter for Oongka. | ||
| R1 + Triangle (repeat) | 40 Stamina | Slash Lv 2 | Chain multiple Slash attacks in rapid succession. Each subsequent hit deals increasing damage. | |
| Move forward after charged Slash | 50 Stamina | Slash Lv 2 | Follow up a charged Slash with a spinning grab throw. Combines melee damage with a repositioning throw. | |
| R1 + Triangle / RB + Y | N/A (passive) | Slash Lv 3 | Slash ignores the enemy's Super Armor and strikes them down. Essential against late-game armored enemies and bosses. | |
| L1 + R1 / LB + RB | N/A | Reflect light to temporarily blind enemies. Also used to reveal fast travel points in the open world. | ||
| X + X / A + A (while guarding) | 30 Stamina/s | Armed Combat Lv 2 | Rush forward with your weapon raised, smashing through enemies. Drains Stamina continuously while active. | |
| L1 + L2 / LB + LT | N/A | Rapidly switch between primary and secondary weapons to perform a transition attack. Enables seamless weapon combos. |


Quaking Fury
Quaking Fury is Oongka's defining ability: a massive ground slam that creates a shockwave damaging all nearby enemies. It is automatically unlocked when Oongka becomes playable and is the foundation of his combat identity. Investing Abyss Artifacts into Quaking Fury unlocks inner skills that increase its range, let you chain it into other combos, and eventually let it break through Super Armor.
Skill | Input | Cost | Prerequisites | Description |
|---|---|---|---|---|
| R1 + R2 / RB + RT | 100 Stamina | Automatically unlocked | Slam the ground with tremendous force, creating a shockwave that damages all nearby enemies. Oongka's signature skill with the widest area of effect in his kit. |
| R1 + R2 during another skill | 10 Spirit | Automatically unlocked | Quickly chain into Quaking Fury while using another skill. One of Oongka's best skills because it lets you cancel other animations into Quaking Fury. |
| Passive | N/A (passive) | Quaking Fury Lv 3 | Increase the range of Quaking Fury's shockwave. Extends the effective radius so you can hit enemies further from the impact point. |
Passive | N/A (passive) | Quaking Fury Lv 4 | Quaking Fury ignores the enemy's Super Armor and strikes them down. Combined with Elemental Quaking Fury, this is Oongka's best tool for breaking through heavily armored enemies. |


Rampage
Rampage unleashes a devastating 360-degree spinning attack. Its damage is directly boosted by Dual Wielding Mastery, making it one of Oongka's highest-damage abilities when fully upgraded.
Skill | Input | Cost | Prerequisites | Description |
|---|---|---|---|---|
| R1 + Triangle / RB + Y | 80 Stamina | Unleash a devastating spinning attack that hits everything in a full 360-degree arc. Damage is increased by Dual Wielding Mastery. | |
| Passive | N/A (passive) | Rampage Lv 2 | Increase the base damage of Rampage. A straightforward damage boost to the spinning attack. |
| Passive | N/A (passive) | Rampage Lv 3 | Rampage attacks will always hit their target. Guarantees every swing connects, even against fast-moving enemies. |


Raging Lightning
Raging Lightning delivers heavy follow-up damage to enemies already on the ground. It pairs perfectly with Quaking Fury and Slash, which both knock enemies down.
Skill | Input | Cost | Prerequisites | Description |
|---|---|---|---|---|
| R1 + Triangle (enemy downed) | 60 Stamina | Deliver a powerful lightning-infused follow-up strike while an enemy is on the ground. Capitalizes on knockdowns from Quaking Fury or Slash. | |
| Passive | N/A (passive) | Raging Lightning Lv 2 | Increase the damage of Raging Lightning. Boosts follow-up damage on downed enemies. |


Dual Wielding Mastery and Leaping Smash
Dual Wielding Mastery is unique to Oongka and defines his playstyle. No other character in the game can wield two-handed weapons with one hand. Leaping Smash provides an aerial gap-closer that transitions into ground combat.
Skill | Input | Cost | Prerequisites | Description |
|---|---|---|---|---|
| Passive | N/A (passive) | Wield two-handed weapons with a single hand. Also increases the damage of Rampage and Spinning Slash. Unique to Oongka and essential for his playstyle. | |
| X + Triangle / A + Y | 60 Stamina | Abyss Artifact x1 or Observe | Leap into the air and slam down upon an enemy with crushing force. An effective gap-closer that transitions into ground-based combos. |

Unarmed Combat
Oongka's bare-fisted attacks. Investing in Unarmed Combat increases the damage of all unarmed strikes. The Proficiency upgrade further boosts unarmed damage output.
Icon | Skill | Input | Cost | Prerequisites | Description |
|---|---|---|---|---|---|
| Triangle / Y | N/A | Base skill | Strike an enemy with bare fists. Further investment in Unarmed Combat increases unarmed strike damage. | |
| Passive | N/A (passive) | Unarmed Combat Lv 2 | Further increases the damage of all unarmed attacks. |
Kick Skills
Oongka's kick abilities cover ground-based power kicks, aerial kicks, and the devastating Meteor Kick. These are particularly useful for crowd control and setting up grapple opportunities.
Icon | Skill | Input | Cost | Prerequisites | Description |
|---|---|---|---|---|---|
| Triangle (hold) / Y (hold) | N/A | Perform a powerful two-footed kick that sends your enemy flying. A reliable knockback tool for creating space. | ||
| Triangle (hold, running) | N/A | Launch your body forward and deliver a double-kick that sends your enemy flying. Good for engaging from distance. | ||
| Triangle (hold, crouching) | N/A | Dropkick Lv 2 | A crouching variant of Dropkick that targets the legs, tripping enemies. Sets up ground follow-ups. | |
| Triangle (high aerial) / Y (high aerial) | 10 Spirit | Perform an unarmed attack while high in the air to drive a precise diving kick into the ground. Deals massive impact damage. | ||
| R1 + Square / RB + X | 40 Stamina | Use an enemy as a stepping stone to leap behind them. Repositions you for backstab opportunities. |

Grappling
Oongka's grappling moves are significantly more powerful than those of the other characters due to his immense physical strength. He can grab enemies and use them as weapons against their allies. The Grappling tree includes throws, slams, holds, and aerial grabs.
Icon | Skill | Input | Cost | Prerequisites | Description |
|---|---|---|---|---|---|
| Square + X / X + A | N/A | Base skill | Allows you to perform grapples. Further investment increases grappling move damage. Oongka's grapples are stronger than other characters. | |
| Triangle + Circle (after grab) | 40 Stamina | Grappling Lv 1 | Toss an enemy across the battlefield. Can launch enemies into other enemies for crowd damage. | |
| Triangle + Circle (during stab) | N/A | Grappling Lv 2 | Take an enemy hostage, using them as a human shield. Restricts their movement and blocks incoming attacks from that direction. | |
| Square + X / X + A | 60 Stamina | Grappling Lv 2 | Slam your enemy into the ground with overwhelming force. One of Oongka's most satisfying high-damage grapples. | |
| Square + X (during grapple) | 60 Stamina | Grappling Lv 5 | Perform multiple consecutive Lariat attacks on an enemy. Chains slam after slam for devastating sustained damage. | |
| Triangle + Circle (during kick) | 20 Stamina/s | Grappling Lv 3 | While performing a Pump Kick or Dropkick, grab your enemy and hurl them away with a centrifugal throw. | |
| Triangle (crouching) | N/A | Unarmed Combat Lv 2 | While crouching, wrap your legs around an enemy and bring them down. A low-profile takedown that avoids high attacks. | |
| Triangle + Circle (aerial approach) | 10 Stamina/s | Grappling Lv 3 | Get closer while airborne and latch onto a target's back to attack or escape danger. Drains Stamina while attached. | |
| Square + X (running) | 60 Stamina | Abyss Artifact x1 or Observe | While sprinting, hook an enemy with your arm and slam them into the ground. A high-momentum running grapple. | |
| Square + X (aerial) | 60 Stamina | Abyss Artifact x1 or Observe | While airborne, grab an enemy and slam your full weight down on them. Deals massive impact damage from above. |
Ranged Weapon Skills
Oongka's ranged skills cover his hand cannon (Arm Cannon) and crossbow attacks. Marksmanship increases all ranged damage, while Charged Shot, Evasive Shot, and their variants provide tactical ranged options. Oongka's Arm Cannon gives him surprising ranged versatility, allowing him to alternate between devastating melee crowd control and explosive ranged bombardment.
Icon | Skill | Input | Cost | Prerequisites | Description |
|---|---|---|---|---|---|
| L2 / LT | N/A | Base skill | Perform a basic attack with your ranged weapon. Further investment increases the damage of all ranged weapon attacks. | |
| L2 + R2 (aim + charge) | 10 Spirit | While aiming, charge your shot and fire a powerful projectile. Gathers wind power for increased impact. | ||
| L2 + Circle + Circle (aim) | 45 Stamina | Dodge sideways while aiming to evade an enemy attack and fire a shot. Provides mobility without breaking ranged combat flow. | ||
| Passive | N/A (passive) | Evasive Shot Lv 2 | Fires two projectiles per evasive dodge instead of one, doubling the damage output during evasive maneuvers. | |
| Passive | N/A (passive) | Evasive Shot Lv 3 | Further increases Evasive Shot damage and unlocks additional movement options during the evasive animation. |
Red Branch: Health Skills
The Red Branch contains 12 skills that give Oongka access to elemental attacks, flight, and defensive magic. Each elemental skill (Flame Quake, Lightning Pulse, Storm Howl) requires learning the corresponding element first. The elemental enhancement skills (Elemental Quaking Fury, Elemental Scatter Shot, Elemental Charged Shot, Elemental Meteor Kick) apply elemental effects to Oongka's existing Stamina and Spirit skills for bonus damage. Flight skills provide aerial mobility for traversal and combat positioning.
Elemental Attacks
Oongka's elemental attacks channel the elements directly into devastating area-of-effect strikes. Unlike Kliff's Fist of Flame or Damiane's Flame Rush, Oongka's versions emphasize ground-based area damage that matches his brawler playstyle.
Icon | Skill | Input | Cost | Prerequisites | Description |
|---|---|---|---|---|---|
| L2 + R2 / LT + RT | Varies | Both Flame and Frost unlocked | Wield the elements and apply them to your skills. The master ability that enables elemental enhancements across Oongka's entire kit. | |
| R2 + Triangle / RT + Y | 10 Spirit | Flame Lv 1 | Strike the ground with fire-imbued fists, dealing fire damage in an area. Oongka's version of the flame attack, creating a fiery shockwave around his position. | |
| R2 + Circle / RT + B | 10 Spirit | Lightning Lv 1 | Gather lightning in both hands and electrocute nearby enemies. Creates a sustained electrical field that damages and briefly stuns enemies. | |
| R2 + X / RT + A | 10 Spirit | Wind Lv 1 | Let out a powerful roar that drives enemies back with a gust of wind. Provides crowd control and breathing room in tight situations. | |
| R2 + Square / RT + X | 10 Spirit | Frost Lv 1 | Freeze the surrounding air to create a protective frost barrier. Reduces incoming damage and slows enemies who enter the frozen zone. |

Elemental Enhancements
These skills apply elemental effects to Oongka's existing abilities. Each one requires Imbue Element to be unlocked first. Elemental Quaking Fury is the most impactful since it enhances Oongka's best skill with bonus elemental damage.
Icon | Skill | Input | Cost | Prerequisites | Description |
|---|---|---|---|---|---|
| L2 + R2 during Quaking Fury | 20 Spirit | Imbue Element Lv 1 | Imbue Quaking Fury with an element for additional elemental damage. Combined with Quaking Rend Armor, this is Oongka's strongest single skill against bosses. | |
| L2 + R2 during Scatter Shot | 20 Spirit | Imbue Element Lv 3 | Imbue Scatter Shot with an element for elemental area damage. The spread projectiles each carry elemental effects. | |
| Auto during Charged Shot | 30 Spirit | Imbue Element Lv 2 | Automatically applies your current element to Charged Shot attacks. Adds elemental damage to your strongest single-target ranged skill. | |
| L2 + R2 during Meteor Kick | 20 Spirit | Imbue Element Lv 4 | Imbue Meteor Kick with an element (typically lightning) for a devastating elemental diving kick. The impact zone carries the elemental effect. |


Flight Skills
Flight skills provide Oongka with aerial mobility for traversal and combat. While all three characters share access to gliding, Oongka uniquely gains Vertical Flight, which launches him straight upward for repositioning or escaping ground-based threats.
Icon | Skill | Input | Cost | Prerequisites | Description |
|---|---|---|---|---|---|
| Square (aerial) / X (aerial) | N/A | Story progression | While airborne, glide through the air on the wind. Enables long-distance traversal from elevated positions. | |
| X (during Flight) / A (during Flight) | 50 Stamina/s | Flight Lv 2 | Reduce air resistance to fly at higher speeds. Burns Stamina rapidly but covers ground much faster. | |
| Square + X (grounded) | 60 Stamina | Flight Lv 3 | Launch straight upward with an explosive vertical jump. Unique to Oongka, this provides an aerial escape or sets up Meteor Kick and Leaping Smash from above. |

Green Branch: Spirit Skills
The Green Branch contains 17 skills covering Oongka's defensive techniques, focus abilities, ranged options, and his unique Rage berserker mode. The defensive skills (Keen Senses tree, Dodge, Parry, Counter, Evasive Roll) provide essential survivability tools. Focus slows time for precision attacks, while Scatter Shot and Evasive Shot (Spirit) give Oongka ranged flexibility. The branch also contains Nature's Grasp, a utility skill shared with Kliff and Damiane.
Keen Senses and Defensive Skills
Keen Senses is the parent skill for Oongka's defensive abilities. As you invest more Abyss Artifacts into it, you unlock Parry, Dodge, Counter, Evasive Roll, and Double Jump. These skills define Oongka's ability to survive in melee combat.
Icon | Skill | Input | Cost | Prerequisites | Description |
|---|---|---|---|---|---|
| Passive | N/A | Harness the power of nature to enhance momentary movements. The parent skill that unlocks the full defensive toolkit as it levels up. | ||
| L1 (just before hit) / LB (just before hit) | N/A | Keen Senses Lv 1 | Guard right before being hit to precisely block an enemy attack. Costs no Stamina and creates an opening instead of just absorbing a hit. | |
| Circle (just before hit) / B (just before hit) | N/A | Keen Senses Lv 1 | Input evade just before being hit to escape danger. Provides invincibility frames during the dodge animation. | |
| Attack (just before hit) | N/A | Keen Senses Lv 2 | Attack right before being hit to interrupt an enemy attack. The only Keen Senses ability that deals damage on its own. | |
| X (while being hit) / A (while being hit) | 10 Spirit | Keen Senses Lv 2 | Input evade while being hit to roll away and escape quickly. The last-resort escape when you fail to Parry or Dodge. | |
| Square + Square (aerial) / X + X (aerial) | 5 Spirit | Keen Senses Lv 3 | Perform an extra jump in mid-air by stepping on air or an enemy. Extends aerial mobility and sets up Meteor Kick. |
Focus Skills
Focus slows down time around Oongka, allowing him to line up precision shots and react to incoming attacks. The Focused variants of his ranged skills deal increased damage during this window.
Icon | Skill | Input | Cost | Prerequisites | Description |
|---|---|---|---|---|---|
| L3 + R3 / LS + RS | 5 Spirit | Enter Focus mode to slow down time around you. While active, Spirit regenerates faster. Shared with Kliff and Damiane. | ||
| L3 + R3 + R1 (aim) | 3 Spirit | Focus Lv 2 | While in Focus mode, aim your ranged weapon to fire precision shots at multiple targets. Each shot is guided for accuracy. | |
| R2 (during Focus aim) | 10 Spirit | Focus Lv 3 | While in Focus mode, charge and fire a rapid succession of powered shots. Combines Focus precision with Charged Shot power. | |
| Square or roll + L2 (during Focus) | 20 Stamina | Focus Lv 3 | While in Focus mode, perform an evasive repositioning shot. Combines the defensive benefits of evasion with Focus accuracy. |
Rage and Offensive Spirit Skills
Rage is Oongka's unique berserker mode that grants Super Armor, making him unstoppable in combat. Explosive Strike and Explosive Leap provide burst damage with elemental properties. Scatter Shot and Evasive Shot (Spirit) are his primary Spirit-cost ranged attacks.
Skill | Input | Cost | Prerequisites | Description |
|---|---|---|---|---|
| Activation skill | N/A | Enter a state of rage that grants Super Armor. Incoming damage is stored and released as a powerful counterattack when Rage ends. A strong endgame tool for aggressive play. | |
| L2 + R1 (aim + fire) | 30 Spirit | Fire a spread of projectiles at enemies for area damage. Oongka's primary ranged area-of-effect skill using the hand cannon. | |
L2 + Circle (aim) | 20 Spirit | Scatter Shot Lv 2 | A Spirit-cost variant of Evasive Shot. Dodge sideways while aiming and fire a quick shot without consuming Stamina. | |
| R2 + Triangle / RT + Y | 30 Spirit | Deliver a powerful elemental strike that creates an explosion on impact. Deals area damage with knockback. | |
| X + Circle / A + B | 40 Stamina | Leap high into the air with an explosive jump that damages enemies below. The blast propels Oongka upward for aerial follow-ups. |


Utility Skills
These utility skills round out Oongka's Spirit branch with crowd control and environmental interaction.
Icon | Skill | Input | Cost | Prerequisites | Description |
|---|---|---|---|---|---|
| Triangle + Circle (on liftable target) | 40 Stamina | Nature Lv 1 | Summon vines that entangle enemies, restricting their movement. Can also be used to lift or move heavy objects. Shared with Kliff and Damiane. | |
Triangle + Circle (during combo) | 10 Spirit | Nature's Grasp Lv 2 | A Spirit-cost restraining technique that pins an enemy in place using natural energy. Different from the Stamina-based Grappling Restrain. |
Recommended Skill Priorities
Based on community builds and the recommended skills from community guides, the following priority order makes the most of Oongka's strengths as a close-range brawler.
Early Priorities
Quaking Fury (invest to Lv 3+): Automatically unlocked and one of Oongka's strongest skills. The ground slam shockwave hits a wide area. Quaking Fury Proficiency lets you chain it into other combos. Expertise at Lv 3 increases the shockwave range.
Slash: A fast forward swing that combos well. Unlock Hack and Slash at Lv 2 for rapid chaining. Slash and Sling at Lv 2 adds a throw follow-up.
Dual Wielding Mastery: A passive that lets Oongka wield two-handed weapons with one hand and boosts Rampage and Spinning Slash damage. Essential for his playstyle and unique to Oongka.
Keen Senses (invest to Lv 2): Unlocks Parry and Dodge at Lv 1, then Counter and Evasive Roll at Lv 2. These defensive tools are critical for surviving melee combat.
Mid Priorities
Rampage (invest to Lv 3): A devastating 360-degree spinning attack. Pairs with Dual Wielding Mastery for increased damage. Rampage Sure Hit at Lv 3 guarantees every swing connects.
Raging Lightning: Heavy follow-up damage on downed enemies. Use it after Quaking Fury or Slash to capitalize on knockdowns.
Scatter Shot: Oongka's primary ranged ability. Fires a spread of projectiles for area damage, giving him options at range against enemies that stay back.
Grappling (invest to Lv 3): Unlocks Lariat at Lv 2 for powerful slams, Back Hang at Lv 3 for aerial grabs, and Giant Swing at Lv 3 for throwing kicks.
Leaping Smash: An aerial gap-closer that lets Oongka close distance quickly and slam down with crushing force.
Late Priorities
Elemental skills (Flame Quake, Lightning Pulse, Storm Howl): Add elemental damage to Oongka's toolkit. Elemental Quaking Fury at Imbue Element Lv 1 is the most impactful since it enhances his best skill.
Slash Rend Armor: At Slash Lv 3, lets you ignore enemy Super Armor. Essential against late-game armored enemies and bosses.
Rage: Grants Super Armor and stores incoming damage for a powerful counterattack. A strong endgame tool for aggressive play against bosses.
Quaking Rend Armor: At Quaking Fury Lv 4, ignores enemy Super Armor. Combined with Elemental Quaking Fury, this is Oongka's best tool for breaking through heavily armored enemies.
Vertical Flight: At Flight Lv 3, launches Oongka straight up for repositioning. Sets up devastating Meteor Kick and Leaping Smash combos from above.
Focus tree (invest to Lv 3): Focused Shot and Focused Charged Shot provide precision ranged damage during slowed time. Focused Evasive Shot combines evasion with accuracy.
Skill Synergies and Combos
Oongka's skill set rewards aggressive, combo-oriented play. His wide-arc attacks and ground slams are designed to be chained together for sustained damage output.
Slash into Quaking Fury: Use Slash to knock enemies down, then chain into Quaking Fury via Quaking Fury Proficiency for a massive area-of-effect slam on the downed targets.
Quaking Fury into Raging Lightning: Quaking Fury knocks enemies to the ground, and Raging Lightning deals heavy follow-up damage to downed enemies. This is the bread-and-butter combo.
Rampage with Dual Wielding Mastery: Dual Wielding Mastery passively increases Rampage damage. Combine with Rampage Sure Hit (Lv 3) so attacks never miss, even against fast-moving enemies.
Hack and Slash into Slash Rend Armor: Chain rapid Slash attacks with Hack and Slash. Once you reach Slash Lv 3, Rend Armor lets these combos cut through enemy Super Armor.
Elemental Quaking Fury combo: With Imbue Element and Quaking Rend Armor, Quaking Fury gains elemental damage AND ignores Super Armor, making it Oongka's strongest single skill against bosses.
Vertical Flight into Meteor Kick: Launch upward with Vertical Flight, then input Meteor Kick for a devastating elemental diving kick. Apply Elemental Meteor Kick for even more damage.
Leaping Smash into Raging Lightning: Gap-close with Leaping Smash to knock enemies down, then immediately follow up with Raging Lightning for heavy ground damage.
Rage into Rampage: Activate Rage for Super Armor, then wade into enemy groups with Rampage. The Super Armor prevents interruption while the spinning attack clears everything around you.
Scatter Shot into Quaking Fury: Open with Scatter Shot from range to soften groups, then use Quaking Fury Proficiency to instantly chain into the ground slam as enemies close in.
Grapple chain: Grab with Grappling, follow with Throw or Lariat, then use Lariat Follow-Up at Grappling Lv 5 for multiple consecutive slams. Giant Swing off a kick adds variety.
Build Archetypes
The community has identified three main build directions for Oongka, based on weapon and skill combinations. Each build emphasizes different aspects of his kit while maintaining his core identity as a heavy-hitting brawler.
Build | Key Skills and Strategy | |
|---|---|---|
Greataxe + Arm Cannon | Prioritizes Quaking Fury, Rampage, and Scatter Shot. Uses the Arm Cannon for ranged pressure and the Greataxe for close-range devastation. The most versatile build that excels in both group fights and boss encounters. | |
Raging Berserker | Greataxe + Wrist Crossbow | Focuses on Rage, Slash chain (Hack and Slash), and Raging Lightning for all-in melee aggression. The Wrist Crossbow provides incendiary bolts for medium-range harassment between melee engagements. Best for players who want maximum melee damage. |
Prioritizes Quaking Fury, Leaping Smash, and elemental skills. The Hammer's slower but heavier strikes pair well with Quaking Fury's area damage for a ground-pound playstyle. Strong against large bosses and groups. |
The Observe Mechanic
Several of Oongka's skills can be unlocked through the Observe mechanic instead of (or in addition to) spending Abyss Artifacts. When fighting enemies, you may notice them performing techniques that flash a visual prompt on screen. Watching the enemy complete the technique teaches Oongka the corresponding skill.
Skills confirmed to be unlockable via Observe include Leaping Smash, Clothesline, Body Slam, and several kick variants. Keep an eye out for new techniques during encounters, especially against strong enemies and bosses who use more advanced combat moves.
Abyss Artifact Investment
Most of Oongka's skills require Abyss Artifacts to unlock or enhance. These are acquired by defeating bosses, completing dungeons, and discovering hidden caches throughout the world. Key investment advice for Oongka:
Quaking Fury scales well to Lv 4, where Quaking Rend Armor makes it break through Super Armor. This should be your first major investment.
Dual Wielding Mastery only requires 1 Abyss Artifact but provides a permanent passive boost. Unlock it as soon as possible.
Slash benefits from investment to Lv 3 (Slash Rend Armor). The chain skills at Lv 2 are also valuable for extended combos.
Rampage is worth investing to Lv 3 for Rampage Sure Hit, which guarantees all spinning attacks connect.
Keen Senses should be invested to at least Lv 2 for Counter and Evasive Roll. Lv 3 adds Double Jump.
Grappling benefits from investment to Lv 5 for the powerful Lariat Follow-Up chain.
Resetting one character's skill tree also resets the others, so plan your Abyss Artifact investments carefully before committing.
Tips
Oongka's wide-arc attacks make him the best character for fighting groups of enemies. Position yourself in the center of enemy packs before using Quaking Fury or Rampage.
Stamina is Oongka's most important resource. His best skills cost 60 to 100 Stamina each. Invest in Stamina upgrades early (he can reach Stamina Lv 14).
Quaking Fury Proficiency is one of Oongka's best skills because it lets you cancel other animations into Quaking Fury. Use it to chain combos seamlessly.
Oongka can switch to Kliff or Damiane at any time in the open world via the character wheel. Use Oongka for clearing enemy camps and difficult fights, then switch as needed.
His grappling moves are significantly more powerful than those of Kliff or Damiane. Against humanoid enemies, prioritize grabs and throws for high burst damage.
Use Rage strategically against bosses. The Super Armor prevents interruption, and the stored damage counterattack can deal significant burst damage when Rage expires.
Vertical Flight sets up Meteor Kick and Leaping Smash from above. Use it to reposition in chaotic fights or escape ground-based area attacks.
The Arm Cannon (hand cannon) is excellent for interrupting enemies at range and applying pressure between melee engagements. Scatter Shot is particularly effective against groups.
Resetting your skill tree also resets the trees of all other characters. Plan your Abyss Artifact investments carefully before committing.
The Observe unlock method lets you learn skills by watching enemies use them in combat. Seek out enemies that use techniques similar to Oongka's kit, such as grappling warriors and heavy-weapon fighters.
Patch 1.07.00 Unarmed Combat Expansion
Patch 1.07.00 added a comprehensive set of new unarmed attacks and combo routes to Oongka's kit. The new moves live in the Oongka Fists tree and require selecting the Fists option from the two-handed weapon slot to access most of them. Several upgrades chain into Oongka's existing Quaking Fury, Rage, and Grappling skills, so the new tree slots into a wider build rather than replacing the existing branches.
Charged Stab and Smash Pound
Holding the stab input while unarmed charges up a dash attack, sending Oongka flying toward the target. Two follow-ups are available depending on what input is held after the charged hit connects.
Move | Trigger | Effect |
|---|---|---|
Charged Dash Stab | Hold the stab input while unarmed | Charges and sends Oongka flying forward into the target for a single strike |
Forward Blast | Continue holding the forward direction after the dash | Pushes the enemy back with a follow-up palm-blast, can be extended with a winch grapple prompt |
Smash and Pound | Continue holding light attack after the charged hit | Repeatedly slams the ground, launching the enemy. Chainable while stamina lasts |
Upheaval | Hold any movement direction after the charged hit | Lifts the entire ground beneath the target into the air for a launching combo opener |
Smash to Grapple | Press the grapple button immediately after Smash and Pound finishes | Grabs the enemy out of mid-air and slams them into the ground, opening grappling combos |
Evasive Slash Counter
The evasive slash input now performs an automatic counter while Oongka is unarmed. The counter is highly spammable and pairs naturally with Rage mode's super armor: when Rage is active, the counter retains its damage output while also benefitting from the super armor passive, making it nearly impossible to interrupt out of.
King Knee-Kick Combo
Holding the spinning slash input while unarmed performs a continuous knee strike sequence, similar to a wrestling pro grappler. The chain launches enemies on contact and grants invincibility frames during the animation, so the move doubles as both a counter and an opener against grouped enemies.
Kick Branches
Oongka's kick repertoire has multiple new chains based on input timing.
Kick | Input | Notes |
|---|---|---|
Drop Kick | Hold the unarmed melee button | Now the entry point for chained follow-ups |
Spinning Air Kick | Jump, then press the unarmed melee button again | Mid-air spinning attack |
Drop Kick into Sweep | Hold the melee button after the drop kick | Follows up with a leg sweep |
Stomp Finisher | Press Triangle (Y on Xbox) after the sweep | Stomps on the downed enemy, ending the kick chain |
Combo Branch | Continue with melee or grapple inputs after sweep | Free-form continuation into other unarmed or grappling chains |
Sprinting Rolling Kick | Sprint, then unarmed melee button | Range and impact improved in 1.07. Axiom Force interaction now adds follow-up options |
Charge-Wave Turning Slash
Holding the unarmed turning slash input executes a charged forward motion. On release the move sends out a large shockwave attack, followed by an enemy-launching ender. The wave is wider than the charged stab and works well as a crowd opener at mid-range.
Four-Strike and Pulse Heavy Combo
With the Gauntlet equipped in the two-handed weapon slot, holding the heavy attack button near an enemy now executes a fluid four-strike chain that ends with a pulse attack launching the target.
Axiom Force grapple after the pulse extends the combo into a winch loop.
Turning slash into a chase into another pulse attack delivers a longer ender that re-launches the enemy for a second juggle.
Grapple Universality
Oongka can grapple the vast majority of enemies in the game regardless of their size. Many of the new combo routes intentionally produce launches or stuns that flow directly into a grapple animation, letting Oongka 'yeet' targets around the arena. The grapple universality also covers a discovered triple-choke-slam tech: with running distance between Oongka and the enemy, press the grapple input mid-sprint and then hold the jump button during the animation to chain three slams in a row.
Aerial Stab Access
Patch 1.07.00 added Aerial Stab to Oongka. The skill lives at the end of the Stab upgrade chain in the Fists tree and uses the same air input as on Kliff. Aerial Stab is now part of Oongka's traversal and combat kit, although the animation is bulkier than Kliff's faster version. Pairing the chain with infinite-stamina items (such as Skyroot consumables) allows for repeated stabs as both an air-to-ground finisher and an exploration tool.
Explosive Strike Charge Phase
Oongka's Explosive Strike now has up to three charge phases. After firing the cannon, holding Triangle (Y on Xbox) charges the follow-up explosion through each tier. Each phase exponentially increases both the damage and the radius of the resulting blast. The cost in spirit scales accordingly, so the highest charge is expensive but devastating in boss windows.
Hidden Tech and Quality-of-Life
Jump-Cancel into Mid-Air Grapple. Pressing the jump button mid-combo transitions into an unlisted mid-air grapple that works on regular enemies and on bosses.
Ambush Directional Influence. Inputting a movement direction during the ambush teleport now changes the exit angle and target selection.
Grounded Enemy Hits. Most unarmed attacks and skills now successfully register on lying enemies. Earlier patches treated downed targets as untargetable for many of Oongka's strikes, which broke combos after a knockdown.
Stab Dual-Wield Animation. Oongka's stab animation while dual-wielding was also tightened up in 1.07.
Recommended 1.07 Combo Routes
Route | Sequence |
|---|---|
Burst Opener | Charged Dash Stab into Smash and Pound into Grapple into Axiom Force winch |
Crowd Wipe | King Knee-Kick into Drop Kick into Sweep into Stomp into Flame Quake imbu |
Boss Punish | Evasive Slash counter into Charged Dash Stab into Upheaval into Aerial Stab |
Sustained DPS | Four-Strike Pulse into Turning Slash into Pulse repeated, with Smash and Pound for stamina reset windows |
Ranged-Melee Hybrid | Charge Explosive Strike to phase 3, fire, then close with Charged Dash Stab into King Knee-Kick |