Gear Refinement
Complete guide to gear refinement in Crimson Desert. Covers refinement levels 1 through 10, required materials per equipment type, Abyss Artifact costs, blacksmith locations, the duplicate sacrifice method, grindstones, anvils, stat categories, and strategies for efficient upgrading.
On This Page
Overview
Refinement is the primary method for upgrading weapons and armor in Crimson Desert. Every piece of standard gear has a maximum of ten refinement levels. Each level permanently increases the item's base stats, boosting attack power on weapons and defense on armor. Refinement does not cost any gold or silver. The only requirement is having the correct raw materials on hand. This makes it one of the most accessible and rewarding progression systems in the game, since players can start upgrading their equipment as soon as they reach a blacksmith and gather a few resources from the open world.
The system is divided into two tiers. Levels 1 through 4 use standard gathering materials such as ores, timber, hides, and bones. From level 5 onward, the blacksmith begins requiring Abyss Artifacts in addition to raw materials. Because Abyss Artifacts are also the currency used to unlock skill points on the Abyss Tree, players must make strategic choices about whether to invest artifacts into gear refinement or character skills.
The refining system is the primary method for upgrading weapons and equipment in Crimson Desert. Rather than relying on randomized loot drops with varying stats, the game uses a fixed-stat model where each piece of equipment has defined base values that can be improved through refinement. Players bring their gear to Blacksmiths found in towns across Pywel, provide the required materials, and receive an incremental boost to the item's stats.
This system creates a clear two-step progression loop: acquire a weapon through purchase, quest rewards, or loot drops, then invest gathered materials to refine it to higher tiers. Every weapon in the game can be refined, making even early-game equipment viable in later regions if the player invests in upgrading it.
How Refinement Works
When you choose to refine a piece of equipment, the blacksmith displays the item's current level and the materials required for the next upgrade. Each refinement level provides a stat boost that stacks on top of all previous levels. You can preview every level's stat gains and material costs for a given item by opening your inventory, selecting the item, choosing Inspect, and then clicking Refinement Information. This preview screen shows all ten refinement ranks and their associated costs, letting you plan ahead.
There is no chance of failure. Every refinement attempt succeeds as long as you have the required materials. There is also no monetary cost; the only price is the materials themselves. Refinement is permanent and cannot be reversed, so all stat boosts are locked in once the upgrade completes.
Refined items display their current level as gold tick marks on the inventory icon. A fully refined item at Level 10 will show all ten ticks filled in. The +N indicator also appears next to the item name (for example, "Iron Longsword +4").
To refine a piece of gear, visit any Blacksmith and select the "Refine Equipment" option from the interaction menu. The refinement screen lists all weapons at the top and armor below. Select the item you want to upgrade, and the blacksmith shows the required materials along with a preview of the stat increase. If you have the materials, confirm the refinement. There is no currency cost and no chance of failure. Every refinement attempt succeeds as long as you have the materials.
You can check the refinement requirements for any item at any time by opening your inventory, selecting the item, clicking Inspect, and then clicking Refinement Information. This shows every refinement level, the materials needed, and the resulting stat boost for each tier.
Stat Categories
Refinement can improve several categories of stats depending on the equipment type. The stat gains per refinement level are roughly +2 to +3 points per level for primary stats, meaning a weapon refined to Level 10 gains between 20 and 30 additional Attack over its base form. The same range applies to armor Defense.
Stat Category | Equipment Types | |
|---|---|---|
Primary | Attack, Defense | |
Secondary | Critical Rate, Attack Speed, Movement Speed, Elemental Resistance (Fire, Ice, Lightning) | Boots, gloves, and certain armor pieces |
Tertiary | Accessories (rings, earrings, amulets); unlocks at Refinement Level 3 and above |
Note: Accessories (rings, earrings, and amulets) cannot be previewed using the Refinement Information screen. Their stat gains at each level remain hidden until you actually perform the refinement. Because of this, consider refining an accessory only when you have surplus materials.
Refinement Levels
There are ten refinement levels for every piece of equipment. Levels 1 through 4 require only standard gathering materials such as ores, timber, hides, and cloth. Starting at Level 5, every subsequent refinement also demands Abyss Artifacts on top of the usual materials. This is a critical inflection point because Abyss Artifacts are the same resource used to unlock new skills and increase Kliff's stats. The highest refinement levels (8 through 10) additionally require rare materials like Bloodstone, which can only be mined from a handful of specific ore deposits across Pywel.
The stat gains from refinement are not evenly distributed. Most of the significant stat jumps occur at the higher levels. Levels 1 through 4 provide modest, steady improvements, while Levels 7 through 10 deliver the largest single-level boosts.
Level | Material Tier | Abyss Artifacts Required | Stat Gain |
|---|---|---|---|
1 | Basic (Iron Ore, Timber, Thin Hide, Cloth Pieces) | None | Small increase |
2 | Basic (Iron Ore, Timber, Thin Hide, Cloth Pieces) | None | Small increase |
3 | Standard (Copper Ore, Fine Timber, Sturdy Hide, Fleece) | None | Moderate increase |
4 | Standard (Copper Ore, Fine Timber, Sturdy Hide, Fleece) | None | Moderate increase |
5 | Standard + Uncommon Ores | Yes | Notable increase |
6 | Standard + Uncommon Ores | Yes | Notable increase |
7 | Rare (Scolecite Ore, Gold Ore, Long Hair Hide) | Yes | Large increase |
8 | Rare + Bloodstone | Yes | Large increase |
9 | Rare + Bloodstone | Yes | Very large increase |
10 | Rare + Bloodstone + additional rare materials | Yes | Maximum increase |
The quantity of materials needed increases with each level. Early levels require only a handful of basic ores or timber, while Level 10 can demand dozens of rare materials combined with multiple Abyss Artifacts. Always check the Refinement Information preview before committing resources.
Each item supports ten refinement levels. Levels 1 through 4 require only standard gathering materials and are relatively inexpensive. Starting at level 5, the blacksmith also demands Abyss Artifacts alongside the base materials. The material quantities increase at each level, and higher levels may require rarer variants of the same material category.
Level Range | Materials Required | Difficulty | Notes |
|---|---|---|---|
1-2 | Small quantities of basic ores, timber, or hides | Very easy | Cheap and highly encouraged from the start |
3-4 | Moderate quantities of standard materials | Easy | Still uses common materials; recommended before mid-game |
5-7 | Standard materials plus Abyss Artifacts | Moderate | Abyss Artifacts compete with skill tree investments |
8-9 | Rarer ores and materials plus Abyss Artifacts | Hard | May require Bloodstone or other rare minerals |
10 | Rare materials, Abyss Artifacts, and specialty components | Very hard | Maximum refinement; significant stat boost at this tier |
Materials by Equipment Type
Different categories of equipment require different types of crafting materials. The material requirements are tied to the type of gear rather than the specific item, so all plate armor pieces use the same material family, all wooden shields use the same family, and so on.
Equipment Type | Primary Materials | Source |
|---|---|---|
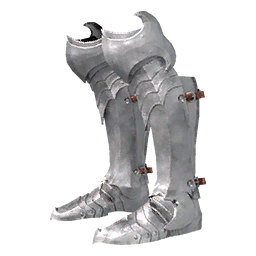
Plate Armor, Metal Weapons, and Metal Shields | Iron Ore, Copper Ore, Scolecite Ore, Gold Ore, Silver Ore, Bloodstone | Mine ore deposits on cliff faces and mountainsides using a Pickaxe |
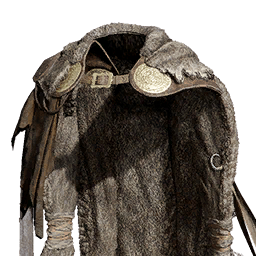
Leather Armor and Jewelry | Thin Hide, Thick Hide, Short Hair Hide, Sturdy Hide, Long Hair Hide, Small Bone, Large Bone, Fang | Hunt and skin animals in the wild |
Wooden Shields | Fell trees using a Logging Axe or the Turning Slash skill | |
Soft Cloth Armor and Cloaks | Purchase from Provisioner's Shop, loot from enemies and bandits, or obtain through camp expansion activities | |
Accessories (Rings, Earrings, Amulets) | Mine gem deposits, hunt animals | |
Ores and minerals | Weapon refinement; higher-tier weapon upgrades | |
Hides, bones, and sinew | ||
Boss Drops | Rare components | High-tier weapon and armor upgrades |
Quest Rewards | Specialty materials | Unique equipment refinement |
Regional resources | Region-specific equipment upgrades | |
Treasure Chests | Mixed materials | Various refinement supplies |
The type of material required for refinement depends on the equipment category. Metal weapons and plate armor need ores, wooden shields need timber, leather gear requires animal products, and cloth armor uses textiles. Knowing which materials your loadout requires helps you plan your gathering routes efficiently.
Equipment Type | Primary Materials | How to Obtain |
|---|---|---|
Iron Ore, Copper Ore, Bloodstone (high levels) | Mine ore veins with a Pickaxe or use the Force Palm skill | |
Ranged Weapons (bows) | Chop trees with a Logging Axe or use the Turning Slash skill | |
Wooden Shields | Chop trees with a Logging Axe | |
Plate Armor (metal) | Iron Ore, Copper Ore, Scolecite Ore (high levels) | Mine ore veins throughout Pywel |
Leather Armor and Jewelry | Hunt animals and skin them | |
Cloth Armor and Cloaks | Purchase from the Provisioner's Shop or loot from enemies |
Refinement materials are gathered through several gameplay activities across Pywel. The specific materials required vary by equipment type and refinement tier. Common materials are abundant in the open world, while rare materials needed for higher-tier upgrades come from specific sources.
The camp crafting system is central to keeping equipment up to date. Camp upgrades themselves require regional resources: timber from Hernand forests, stone from Demeniss ruins, ore from Delesyia mines, and rare components from the Crimson Desert itself. Upgrading the Blacksmith at camp unlocks higher-tier weapon enhancements.
Refinement Materials
Below is a comprehensive breakdown of every refinement material in the game, organized by category. Each entry lists where to find the material and which equipment types require it.
Ores and Gems
Ore deposits are scattered across cliff faces, mountainsides, and cave interiors throughout Pywel. You need a Pickaxe to harvest them. The Pickaxe can be purchased from the Provisioner's Shop in Hernand (the shop across from the blacksmith) or acquired by completing Rhett's Request early in Chapter 1. Iron Ore is the most common, found extensively throughout the Hernand region along cliff walls. Copper Ore is slightly less common but still appears regularly in the same areas.
Ore deposits stay marked on your map once you have mined them and they regrow over time, making it possible to farm specific locations repeatedly. High-altitude deposits that are difficult to reach can often be dislodged using the Charged Shot skill or by climbing up and using Force Palm to break the rock.
Bloodstone is the rarest ore and is required for the highest refinement levels (8 through 10). There are a limited number of Bloodstone veins across Pywel, and each vein yields around two to three pieces when mined. Known locations include ore veins near Rocca's Hill and scattered deposits in the highlands. Because Bloodstone is so scarce, plan your usage carefully and prioritize your most important gear.
Gem materials like Azurite, Garnet, Epidote, and Diamond come from specialized gem deposits typically found deeper in caves and in the Abyss Dungeons. These are primarily used for refining accessories.
Material | Used For | Source |
|---|---|---|
Plate armor, metal weapons, metal shields | Common ore deposits throughout the Hernand region along cliff walls | |
Plate armor, metal weapons, metal shields | Slightly less common than Iron Ore but found in the same areas | |
Plate armor, metal weapons (Levels 7+) | Uncommon ore deposits in higher-level regions | |
Plate armor, metal weapons (Levels 7+) | Rare deposits in remote highlands and caves | |
Plate armor, metal weapons, accessories | Scattered deposits in mid-to-late game regions | |
All equipment types (Levels 8-10) | Extremely rare veins; known locations near Rocca's Hill and highland areas | |
Accessories (rings, earrings, amulets) | Gem deposits in caves and Abyss dungeons | |
Accessories (rings, earrings, amulets) | Gem deposits in caves and Abyss dungeons | |
Accessories (rings, earrings, amulets) | Gem deposits in deeper caves and Abyss dungeons | |
Accessories (Levels 8-10) | Very rare gem deposits in late-game areas and Abyss dungeons |
Hides and Bones
Animal materials come from hunting wildlife in the open world. The type of drop depends on the size and species of the animal. Small creatures like rabbits and foxes yield Thin Hide and Small Bone. Medium-sized animals such as deer and wolves drop Short Hair Hide and Thick Hide. Larger animals including boars and bears provide Sturdy Hide, Long Hair Hide, Large Bone, and Fang. After killing an animal, approach the carcass and interact with it to skin it and collect materials. The quantity of drops scales with the size of the animal, so targeting larger prey is more efficient when you need bulk materials for higher refinement levels.
Material | Used For | Source |
|---|---|---|
Leather armor, jewelry | Small animals (rabbits, foxes) | |
Leather armor, jewelry (higher levels) | Large animals (boars, bears) | |
Small animals (rabbits, foxes) | ||
Medium animals (deer, wolves) | ||
Medium animals (deer, wolves) | ||
Leather armor (mid-level refinements) | Large animals (boars, bears) | |
Leather armor (Level 7+ refinements) | Large animals (bears, highland wildlife) | |
Leather armor, jewelry |
Timber
Wood is obtained by felling trees with a Logging Axe. You can also chop down trees using the Turning Slash combat skill, which is a convenient alternative when you encounter harvestable trees during exploration without switching to a tool. Like the Pickaxe, the Logging Axe can be purchased from the Provisioner's Shop in Hernand. Standard trees yield Timber, while larger or older trees in more remote forests yield Fine Timber and Flawless Timber. Trees respawn over time, so revisiting forested areas is a reliable farming strategy.
Material | Used For | Source |
|---|---|---|
Wooden shields | Standard trees found throughout Pywel | |
Wooden shields (mid-level refinements) | Larger trees in more remote forested areas | |
Wooden shields (Level 7+ refinements) | Old-growth trees in deep forests and secluded groves |
Cloth and Miscellaneous Materials
Cloth Pieces and Fleece are available from the Provisioner's Shop in Hernand and also drop as loot from bandit enemies and outlaw camps. You can additionally obtain these materials through camp expansion activities at the Greymane Camp, making camp upgrades doubly valuable as they gradually supply refinement stock. Feather can be collected from bird nests or purchased from merchants. Spider Web drops from spider-type enemies in caves and the Forest of Wolves. Ivory is a rare drop from certain large animals and boss creatures.
Material | Used For | Source |
|---|---|---|
Soft armor, cloaks | Provisioner's Shop, enemy loot, camp expansion | |
Soft armor, cloaks | Provisioner's Shop, enemy loot, camp expansion | |
Soft armor, cloaks, jewelry | Bird nests in the wild, merchant purchases | |
Jewelry, cloaks (higher levels) | Rare drop from large animals and boss creatures | |
Soft armor, cloaks | Spider-type enemies in caves and the Forest of Wolves |
Abyss Artifacts
The Abyss Artifact is the most contested resource in the game because it is used for both gear refinement (Level 5 and above) and skill progression. You earn one Abyss Artifact every time the yellow Abyss gauge to the left of the minimap fills up, which happens by defeating enemies. Additional Abyss Artifacts can be found as quest rewards, inside Sealed Abyss Artifact containers hidden throughout the world, and from completing challenges. For a detailed farming guide, see Abyss Artifacts Farming Guide.
Refinement Tokens
Introduced in Patch 1.01, refinement tokens are a new way to upgrade gear without spending raw materials. Each token raises an item's refinement level by one. Tokens are region-specific, meaning a Hernand Refinement Token can only be used at the blacksmith in Hernand, a Pailune Refinement Token at the Pailune blacksmith, and a Delesyia Refinement Token at the Delesyia blacksmith.
Tokens can only be used on equipment that has been refined fewer than five times. Once an item reaches refinement level 5, tokens no longer work because the upgrade costs beyond that point require Abyss Artifacts that the Duke's tokens do not cover. Each token raises the item by exactly one level; a single token will not jump an item from level 0 to level 4 or 5.
You earn refinement tokens by completing main quests and faction quests in each region. Players who installed Patch 1.01 after already finishing Hernand quests received retroactive tokens in their inventory. To use a token, visit the relevant blacksmith, select the item you want to upgrade, and switch to the Refinement Token tab (located to the right of the standard materials tab and the same equipment tab).
Token Type | Region | Blacksmith Location | Level Limit |
|---|---|---|---|
Hernand Refinement Token | Turnali's Smithy in Hernand City | Below level 5 | |
Pailune Refinement Token | Pailune blacksmith | Below level 5 | |
Delesyia Refinement Token | Delesyia blacksmith | Below level 5 |
Refinement tokens are particularly useful early in the game when gathering materials is still slow. They let you quickly boost your primary weapon or armor piece to level 4 without any material farming. Save them for gear you plan to keep, since tokens are limited and cannot be purchased from shops.
Blacksmith Locations
Refinement can be performed at any blacksmith in the game. Blacksmiths handle all equipment types: weapons, armor, shields, and jewelry are all refined at the same NPC. There is no separate vendor for armor refinement. All blacksmiths offer the same refinement service; there is no bonus or advantage to using one over another.
Blacksmith | Location | Notes |
|---|---|---|
Hernand Town, center north district | First blacksmith encountered. Complete his request in Chapter 1 to unlock the Refinement System. | |
Howling Hill Camp Blacksmith | Available after Chapter 3. Requires camp expansion through Faction Quests. Can be upgraded to unlock higher-tier services. | |
Regional Blacksmiths | Accessible after reaching each region during the main story. Look for the anvil icon on the map. |
How to Unlock Refinement
Refinement becomes available early in the game through two introductory quests in the City of Hernand. These quests also reward the player with the basic gathering tools needed to collect refinement materials.
Turnali's Request
Turnali's Request is posted on the Notice Board in Hernand. After reading the notice, head to the blacksmith shop inside the city and speak with Turnali. He explains that his hammer is worn out and asks you to bring him three Fine Timber so he can get back to work. He gives you a free Logging Axe to complete the task. Chop trees near Hernand to gather the Fine Timber, then return to Turnali.
Completing the quest rewards a Logging Axe (permanent), a Medium Bag (extra inventory slot), a Bekker Shield, 10 Timber, 50 Trust with Turnali, and 100 Hernandian Contribution. After turning in the quest, read the Smithy Flyer that appears. It instructs you to refine the Bekker Shield at Turnali's forge. This first refinement is the tutorial and unlocks the full refinement menu for all future visits.
Rhett's Request
Immediately after finishing Turnali's Request, Rhett's Request unlocks just outside the smithy. Rhett is a large storekeeper who asks you to mine two Iron Ore. He gives you a Pickaxe to complete the task. The quest marker leads east of Hernand, past the river, to an ore deposit at the base of Anvil Hill. Follow the marker east from the city and cross the river to reach the iron ore node. Equip the pickaxe from your tool wheel and strike the ore vein to mine it. Deliver the two ores to Rhett's assistant south of Hernand near some wagons. You keep the pickaxe after the quest, giving you the tools for both mining and logging going forward.
Gathering Tools
Before you can collect refinement materials from the open world, you need the right tools. Without a Pickaxe you cannot mine ore deposits, and without a Logging Axe you cannot chop trees. Both tools are obtained for free during the introductory quests in Hernand. Better versions of each tool can be purchased later from vendors or found as loot. Upgraded tools increase gathering speed, letting you collect materials faster.
Tool | Use | How to Obtain |
|---|---|---|
Mining ore deposits | Rhett's Request quest (free); Provisioner's Shop (purchase) | |
Chopping trees for timber | Turnali's Request quest (free); Provisioner's Shop (purchase) |
There are also skill-based alternatives. The Force Palm ability can be used to break ore deposits without a Pickaxe, and the Turning Slash skill can fell trees without a Logging Axe. These are handy if you stumble upon a deposit while exploring but do not have the tool equipped.
Duplicate Sacrifice Method
Crimson Desert offers an alternative to gathering raw materials: you can refine a weapon by sacrificing an exact duplicate of that item. If you have two copies of the same weapon, bring both to the blacksmith and the duplicate can be consumed in place of standard materials. For example, if you want to refine a White Wood Bow, you can melt down a second White Wood Bow to cover the refinement cost instead of spending timber. This is particularly useful when you find duplicate drops from enemies or chests and do not want to sell the extra copy.
To use this method, bring the duplicate item with you to the blacksmith. When you select the item to refine, the interface shows the option to use a duplicate in place of raw materials.
Important: Unique Weapons obtained from boss fights cannot use the duplicate sacrifice method because they have no duplicates. If you own a one-of-a-kind weapon, you must gather the standard materials to refine it. For common and uncommon weapons that you pick up regularly, the duplicate sacrifice route can save significant farming time.
Same-level requirement: When using the same equipment method at higher refinement levels, both copies must be at the exact same refinement level. You cannot merge a level 1 item into a level 3 item. For example, to upgrade a +3 weapon using a duplicate, you need another copy of that same weapon that is also at +3. At the base level (no refinement at all), two unrefined copies of the same item can be combined to produce a single +1 version.
This method scales up in cost, since each duplicate you sacrifice must match the target's current level. At higher refinement levels, finding or crafting two identically refined copies becomes increasingly difficult. However, it remains a useful option when you have surplus duplicate drops from repeated boss kills or crafting sessions.
Grindstones and Anvils
Scattered throughout the open world, grindstones and anvils provide temporary stat boosts that complement permanent refinement. These are separate from the blacksmith's refinement service and should not be confused with it. You interact with them by approaching the object and selecting the Repair prompt.
Object | Effect | Duration | Where Found |
|---|---|---|---|
Temporarily increases equipped weapon's attack power | Short duration (fades over time) | Bandit camps, outposts, settlements, homesteads | |
Anvil | Temporarily increases equipped armor's defense | Short duration (fades over time) | Bandit camps, outposts, settlements, homesteads |
One early-game anvil can be found at Bloomwood Ranch, southeast of Hernand. Grindstones and anvils also appear frequently inside bandit camps, so look for them before engaging the enemies. Interacting with one before a tough fight can make a noticeable difference in difficult encounters. The temporary boosts from these environmental objects stack on top of your permanent refinement levels.
Object | Effect | Duration | Where Found |
|---|---|---|---|
Temporarily increases equipped weapon's attack power | Short duration (fades after a period) | Bandit camps, outposts, settlements | |
Anvil | Temporarily increases equipped armor's defense | Short duration (fades after a period) | Bandit camps, outposts, settlements |
These environmental objects are especially useful right before a tough fight. If you spot a grindstone or anvil inside a bandit camp, interact with it before engaging the enemies. The temporary boost can make a noticeable difference in difficult encounters.
Abyss Artifacts and Higher Refinement
Starting at refinement level 5, the blacksmith requires Abyss Artifacts in addition to standard materials. Abyss Artifacts are the same resource used to purchase skill points on the skill tree, which creates a meaningful trade-off. Spending artifacts on refinement means fewer points available for new combat abilities, and vice versa.
Abyss Artifacts can be obtained from multiple sources throughout the game:
Defeating enemies and bosses (fills the Abyss gauge on the HUD)
Completing challenges and finding Sealed Abyss Artifacts
Quest rewards and story progression
Exploration discoveries and hidden caches
Clearing Abyss Dungeons
Because of the shared resource pool, most players stop refining at level 4 during the early and mid game. Pushing to level 5 and beyond is better reserved for your endgame loadout, when you have accumulated a surplus of Abyss Artifacts and have already unlocked the skills you need.
Abyss Gear: A Separate Upgrade Layer
Beyond standard refinement, Crimson Desert has a second upgrade system called Abyss Gear. While refinement improves an item's base stats, Abyss Gear provides passive bonus effects that are socketed into equipment. Abyss Gear is managed by Witch NPCs found on the outskirts of major cities, not by blacksmiths. Each Abyss Core grants a specific passive trait, such as increased attack speed, bonus critical hit chance, elemental damage, or stagger enhancement. Abyss Cores can be swapped freely, allowing you to customize your loadout for different encounters without any cost.
Refinement and Abyss Gear work together. A fully refined weapon with well-chosen Abyss Cores equipped is significantly more powerful than a weapon with only one of the two upgrade paths completed. For the best results, invest in both systems as you progress.
Beyond base stat refinement, weapons support a separate customization layer through Abyss Gear augments. These are special modifier items that slot into weapon sockets, granting powerful passive effects without altering the weapon's base stats.
Abyss Gear is managed at a dedicated NPC (separate from the Blacksmith). Players visit this NPC to view their weapon's available sockets and slot in or swap out Abyss Gear loadouts. Common weapons typically have three Abyss Gear sockets, while boss weapons and unique drops may have different socket configurations.
The ability to swap Abyss Gear loadouts without cost means a single weapon can be configured for different combat scenarios. A sword might be fitted with attack speed augments for general exploration and then re-socketed with critical hit augments before a boss fight. This flexibility reduces the need to maintain multiple weapons and encourages experimentation.
Refinement Preview
You can preview refinement outcomes before committing any materials. Open your inventory, select the item you want to inspect, and choose the Refinement Information option. This screen displays all ten refinement ranks alongside their exact stat changes and required resources. Use this to plan which pieces of gear to prioritize and to calculate how many materials you need to farm.
Note: Accessories (rings, earrings, and amulets) cannot be previewed using the Refinement Information screen. Their stat gains at each level remain hidden until you actually perform the refinement. Because of this, consider refining an accessory only when you have surplus materials.
To access the refinement preview, open your inventory and highlight the item you want to inspect. Press R on mouse and keyboard (or Y on a controller) to open the item details screen. From there, press F on keyboard (or Y again on controller) to switch to the refinement details view. This screen lists the exact material costs for every refinement level, letting you plan your resource gathering in advance. For example, you might see that refining a sword requires 2 iron ore at level 1, then 3 at level 2, then 4 at level 3, and so on, with the quantity increasing at each step.
Aeserion's Scales and Final Refinement
Beyond the standard ten refinement levels, the endgame introduces a final upgrade tier that requires a unique material: Aeserion's Scales. These scales are the single most important endgame refinement material in Crimson Desert. While most refinement levels provide roughly two to three stat points per level, the final upgrade powered by Aeserion's Scales grants approximately five stat points. Summed across all equipped gear, this final tier represents a massive cumulative increase in combat power.
Aeserion's Scales are found exclusively at the Serpent Shrine, a secret endgame location on the southwestern coast of Delesyia. They are collected using Axiom Force and sealed into the Kuku Iron Pot for storage. Before visiting the blacksmith, you must withdraw scales from the pot into your regular inventory, because the refinement menu will not recognize materials that are still inside the pot.
The scales do not stack in your inventory. Each individual scale occupies one slot, so withdraw only as many as you need for a given upgrade session and deposit the extras back into the pot afterward. A single visit to the Serpent Shrine typically yields around 50 scales, which is usually enough to fully upgrade all equipment to maximum level. For a detailed guide on collecting and using this material, see the Aeserion's Scales article.
Armor Implicits and Refinement Planning
Every piece of armor in Crimson Desert belongs to one of three weight classes: cloth, leather, or plate. Each weight class carries implicit stats that are always present on that item regardless of refinement level. These implicits affect how you should approach refinement, because upgrading a piece of gear amplifies its base stats while preserving its implicit bonuses.
Armor Type | Implicit Stats | Refinement Considerations |
|---|---|---|
Cloth | Best for builds that prioritize mobility. Refining cloth armor raises its defense while keeping the speed bonus intact. | |
Critical Rate, Attack Speed, Lightning Resistance | Offensive-leaning armor. Leather gloves typically roll Attack Speed, while other leather pieces lean toward Critical Rate. Refinement boosts the base defense without affecting these implicits. | |
Plate | Higher base Defense, Daze Immunity (helmets) | The highest raw defense of all three types. Plate helmets often grant Daze Immunity. Refinement stacks additional defense on top of an already high base, making plate the most durable option. |
The community consensus leans toward plate as the strongest option because of its superior defense values. However, the Abyss Gear socket system means you can compensate for lower base stats by embedding the right cores. A fully refined leather set with well-chosen Abyss Gears can perform competitively against plate. The game identifies which type a piece belongs to right in its name (for example, "Solless Plate Armor" or "Tariv Cloth Attire"), so check the label before deciding what to refine.
When planning your refinement investments, think about which implicits complement your playstyle. If you rely on critical hits, refining a full set of leather gear gives you both higher defense and persistent crit rate bonuses. If raw survivability matters more, plate is the clear winner. Cloth is niche but valuable for players who want maximum mobility during exploration and kiting encounters.
How Attack Stats Apply Per Equipment Slot
One of the most misunderstood aspects of the refinement and gear system is how attack stats translate into your character's actual damage numbers. Not every piece of equipped gear contributes its attack value at all times. Understanding these rules will prevent you from wasting refinement materials on the wrong items.
Only the active weapon counts. When you draw a weapon, its attack stat (plus any bonuses from Abyss Gears socketed into it) gets added to your character's attack total. If you switch from a one-handed sword to a two-handed greatsword, the character sheet updates to reflect the new weapon's stats. Weapons that are sheathed or in your inventory do not contribute.
Gloves and boots only matter for unarmed and kick attacks. Even though gloves and boots display an attack stat, that number only factors in when you fight with your bare hands or use kick abilities. If you are using a sword, a bow, or any other equipped weapon, the attack values on your gloves and boots are ignored. This is confirmed by community testing and the character stat screen, which itemizes contributions per slot.
Shields contribute to defense, not attack. When using a one-handed weapon with a shield, the shield's defense stat always applies. Even when you swap to a two-handed weapon while the shield is still on your back, you retain the shield's defense and movement speed bonuses.
Amulets provide double their listed bonus. Your equipped amulet is a special case. Whatever attack or defense value the amulet displays, it actually contributes twice that amount to your character's total. For example, an amulet with 6 attack effectively provides 12 attack. This makes amulets exceptionally valuable targets for refinement, since each level of refinement has double the normal impact on your overall stats.
Accessories are always active. Unlike gloves and boots, rings, earrings, and amulets always add their stats regardless of which weapon you have drawn. This means refining accessories gives you a universal, permanent boost that applies across every combat stance.
Equipment Slot | Attack Contribution | Notes |
|---|---|---|
Main Weapon | Active only when drawn | Includes attack from Abyss Gears socketed into that weapon |
Off-Hand Weapon | Active only when drawn | Dual-wielding: each hand's attack applies separately when that weapon is out |
Shield | Defense always active | Defense and movement speed persist even when two-handing a different weapon |
Helmet | Defense always active | Attack speed implicits (if present) apply universally |
Defense always active | Attack speed from armor is a general multiplier that always applies | |
Attack only during unarmed combat | Glove attack and crit rate apply only when punching with Ordinary Gloves equipped | |
Boots | Attack only during kick attacks | Boot attack applies only to kick abilities |
Amulet | Double the listed value, always active | An amulet showing Attack 6 actually contributes 12 to your total |
Always active | All accessory stats apply regardless of equipped weapon |
Because of these rules, you should prioritize refining your main weapon and amulet first for the biggest damage increase, followed by rings and earrings. Refining gloves and boots for their attack value is only worthwhile if you use an unarmed or kick-focused build. For everyone else, refine gloves and boots purely for their defense gains.
Strategies and Tips
Stop at Level 4 early on. Levels 1 through 4 use only basic materials, making them cheap and accessible. Level 5 and above require Abyss Artifacts, which are far more valuable when spent on skills and stat upgrades early in the game. Push past Level 4 only when you have a comfortable surplus of Abyss Artifacts.
Prioritize plate armor. Plate armor provides higher defense than leather or cloth armor, and there is no weight or movement penalty system in Crimson Desert. Invest your refinement materials into plate armor first for the biggest survivability gain.
Refine your primary weapon above all else. Attack power boosts from refinement directly affect your damage per hit. A refined weapon lets you defeat enemies faster, which in turn generates more Abyss Artifacts through combat.
Farm ore deposits on a loop. Once mined, ore deposits are marked on your map and respawn over time. Establish a circuit of nearby deposits and revisit them periodically to stockpile Iron Ore and Copper Ore.
Use grindstones and anvils before boss fights. Temporary weapon buffs from grindstones stack with refinement and cost nothing. Always look for a grindstone or anvil before tackling a major encounter.
Sell duplicate gear you are not sacrificing. If you have a duplicate weapon and do not plan to use the sacrifice method, sell it for silver. Duplicate drops become more common as you progress and can fund other purchases.
Check Refinement Information for every item. The preview screen lets you compare stat gains per level across different items. Sometimes a lower-tier weapon with high refinement outperforms a higher-tier weapon at base level.
Save Bloodstone for endgame gear. Because Bloodstone veins are extremely limited, do not spend them on mid-game equipment you plan to replace. Reserve all Bloodstone for the weapon and armor you intend to use against the final bosses.
Use refinement tokens on your best gear first. Tokens are limited and region-locked, so spend Hernand tokens on equipment you plan to keep through the mid-game. Do not waste them on gear you will replace soon.
Refine your amulet early for double value. Since amulets contribute double their listed stats, each refinement level on an amulet is worth twice as much as the same level on other accessories. Prioritize amulet refinement once you have a good one.
Check armor implicits before committing materials. Cloth, leather, and plate each carry different implicit bonuses. Make sure the weight class matches your build before investing refinement materials into a piece you might swap out later.
Gloves and boots attack stats are irrelevant for most builds. Unless you actively use unarmed punches or kick attacks, the attack value on gloves and boots does not contribute to your damage. Focus on their defense value instead when deciding what to refine.
Same equipment merging requires matching refinement levels. If you want to use a duplicate item instead of raw materials, both copies must be at the same refinement level. A +1 cannot merge into a +3.
Frequently Asked Questions
Does Refinement Cost Gold or Silver?
No. Refinement is entirely free in terms of currency. You only need the correct raw materials or a duplicate item.
Can Refinement Fail?
No. Every refinement attempt succeeds as long as you have the required materials. There is no random failure chance.

Can I Refine Unique or Boss Weapons?
Unique weapons obtained from boss defeats can be refined, but they require specific materials rather than generic ores or timber. The duplicate item method does not work for unique weapons.
Where is the Best Place to Farm Iron Ore?
Multiple ore deposits are found east of Hernand near Anvil Hill, and throughout mountainous regions of Pywel. Ore veins are marked on the map after you mine them once and they regrow over time. See the Iron Ore Locations article for a complete list of deposit locations.
Should I Refine or Invest in Skills First?
For levels 1 through 4, always refine because no Abyss Artifacts are required. For levels 5 and above, prioritize skills in the early game and save refinement for your endgame gear.
Can I Preview Accessory Refinement?
No. Unlike weapons and armor, accessories (rings, earrings, and amulets) do not support the Refinement Information preview. You will not see the stat gains until you actually perform the refinement.
How Do Refinement Tokens Work?
Refinement tokens are region-specific consumables introduced in Patch 1.01. Each token raises an item by one refinement level at no material cost. They can only be used on gear that has been refined fewer than five times, and each token type can only be spent at its corresponding region's blacksmith (Hernand tokens at the Hernand smithy, Pailune tokens at the Pailune smithy, and so on).
Does My Amulet Really Give Double Stats?
Yes. Your equipped amulet contributes twice its displayed attack and defense values to your character's total stats. An amulet showing 6 attack actually provides 12. This makes amulets one of the most efficient items to refine in the game.
Do Gloves and Boots Attack Stats Apply to Weapon Attacks?
No. The attack stat on gloves only applies when you fight using unarmed strikes (Ordinary Gloves equipped in the tool slot). The attack stat on boots only applies when using kick abilities. For standard weapon combat, gloves and boots contribute only their defense values.
What Max Refinement Unlocks
The final baseline values on accessories are only reached at maximum refinement. A ring or earring that looks like a four Attack Speed or four Movement Speed piece on the stat screen only hits that exact number once it has been refined all the way to 10 out of 10. Earlier refinement levels hold a lower ceiling, which is why build guides assume the accessory slot has already been maxed out before discussing baseline caps.
Accessory Cap Requires 10 Out of 10
The four Crit ceiling on a necklace, the four Attack Speed ceiling on each ring, and the four Movement Speed ceiling on each earring are all locked behind max refinement. Because these ceilings set the global baselines that every build relies on (see the Attack Speed and Movement Speed pages for the full baseline math), accessory slots are almost always the first items you should push to 10 out of 10 before touching weapon or armor refinement.
Assyrian Scales and the Final Rank
The very last rank of any refinement track needs Assyrian Scales as its key mineral. Scales are far easier to gather than most players assume. Head to the small southern island that sits near the Serpent Dragon boss arena, either by sailing in directly or by dropping in from any nearby Abyss teleporter. The island is covered in scale nodes. Pick them up with Axiom Force and they go straight into your Kukku pot without any fighting required. The Serpent Dragon itself does not aggro as long as you keep your distance, so loot the whole island in a single run, store everything in the pot, and withdraw scales one at a time as you push each piece of gear to its final rank. Most players report that the island has enough scales to cover multiple full playthroughs without ever engaging the dragon.
Related Articles
Aeserion's Scales - Final endgame refinement material
Serpent Shrine - Location where Aeserion's Scales are found
Refinement System - Detailed system overview
Refinement and Upgrade Materials - Full materials reference
Crafting - Crafting system overview
Weapons - All weapon types
Armor - All armor types
Blacksmiths - Blacksmith locations and services
Abyss Artifacts Farming Guide - How to earn Abyss Artifacts efficiently
Bloodstone Locations - Where to find Bloodstone deposits
Iron Ore Locations - Where to find Iron Ore deposits
Abyss Gear - Abyss-infused equipment overview
Abyss Cores - Complete list of all Abyss Cores
Duplicate Item Method
Standard (non-unique) weapons and armor can be refined by sacrificing an exact duplicate of that item instead of spending raw materials. For example, if you want to refine a White Wood Bow, you can melt down a second White Wood Bow to cover the refinement cost instead of spending timber. This method is particularly useful when clearing bandit camps and looting identical low-tier weapons that would otherwise just be sold for a few coins.
To use this method, bring the duplicate item with you to the blacksmith. When you select the item to refine, the interface shows the option to use a duplicate in place of raw materials. Note that unique weapons obtained from boss fights do not support the duplicate item method. These special weapons must be refined using specific materials.
Recommended Refinement Strategy
Because refinement costs no currency, there is no reason to delay it. Refine every piece of equipped gear to at least level 4 as soon as materials are available. Here are some practical tips for making the most of the system:
Refine early and often. Levels 1 through 4 cost only common materials. Grab every ore vein and tree you pass while exploring, and visit the blacksmith regularly.
Prioritize your main weapon. A weapon's attack power increase from refinement directly translates to faster kills and smoother boss fights. Upgrade your primary weapon first, then your body armor.
Plate armor is generally superior. Plate armor provides higher defense than leather or cloth alternatives. There is no equipment weight penalty, so heavier armor has no downside. Focus your ore gathering on plate armor refinement.
Hold Abyss Artifacts for the skill tree early on. During Chapters 1 through 4, skill unlocks tend to have a bigger impact on combat effectiveness than pushing a weapon from level 4 to level 5. Save artifact spending on refinement for the late game.
Use the duplicate item method for common gear. Loot from bandits and common enemies often includes weapons you already own. Instead of selling duplicates for a few coins, feed them into the refinement system to save materials.
Stock up on Bloodstone for endgame. The highest refinement levels require rare ores like Bloodstone. Start collecting it whenever you find deposits, even if you do not need it yet.
Use grindstones and anvils before boss fights. The temporary boosts from these environmental objects stack on top of your permanent refinement levels. Always look for them before entering a difficult encounter.
One of the most important early-game tips is to refine all gear to level 4 as a baseline. This applies to weapons, armor, and accessories alike. Levels 1 through 4 use only common, easy-to-access resources such as ore, gems, cloth, and basic crafting materials. These are inexpensive and widely available, so reaching level 4 across all equipped gear is both affordable and highly impactful for overall combat effectiveness.
Starting at level 5, the resource requirements shift dramatically. Each refinement from level 5 onward requires blood stones in addition to the standard materials. More significantly, every level beyond 4 also costs abyss artifacts, which are the same currency used to unlock nodes in the skill tree. This means that every refinement past level 4 directly competes with skill point progression. Players should only invest past level 4 under two conditions: they have already unlocked all desired skill tree upgrades, and they are confident they want to keep using that particular piece of equipment long-term.
Because refining past level 4 locks in abyss artifacts that could otherwise go toward new abilities, it is worth being certain about a weapon or armor piece before committing those resources. If a better item drops or a different build becomes more appealing, those abyss artifacts spent on refinement cannot be recovered easily.
How Refining Works
Refining is performed at Blacksmith NPCs located in towns and settlements throughout Pywel. Each region has its own Blacksmith, and some regions also have Tailors who handle armor refinement. The process is straightforward: select the weapon or armor piece to refine, confirm the required materials are available, and the Blacksmith performs the upgrade.
Each refinement tier increases the equipment's base stats by a fixed increment. For example, a weapon with 10 Attack might increase to 12 Attack after its first refinement. The increments become more significant at higher tiers, but the material costs also scale accordingly.
Aspect | Detail |
|---|---|
Location | Blacksmiths in towns and settlements across Pywel |
Armor Refinement | Handled by Tailors in certain regions |
Stat Increase | Fixed increment per tier (e.g., Attack 10 to 12) |
Cost Scaling | Higher tiers require rarer materials and larger quantities |
Durability |
Refinement Cost Tiers
Refinement Level | Materials Required | Abyss Artifacts Needed | Recommendation |
|---|---|---|---|
1 to 4 | Common resources (ore, gems, cloth, basic materials) | None | Refine all equipped gear to this level immediately |
5+ | Common resources + blood stones | Yes (increasing per level) | Only when all desired skill tree nodes are unlocked and the equipment is confirmed long-term |
Refinement Priority Order
When allocating refinement resources, the recommended priority is:
Weapons first: Weapon refinement directly increases damage output. Since combat is the core gameplay loop, boosting attack power provides the most immediate and noticeable benefit. A refined weapon translates to faster enemy kills, quicker boss encounters, and easier progression into harder content.
Armor second: Armor refinement increases defense values, reducing incoming damage. This becomes increasingly important as enemies in later regions deal more damage. Surviving longer in combat is less urgent than dealing more damage, but still essential for tackling tougher encounters.
Accessories third: Accessories provide a wide range of secondary stats that round out a build. While they may seem like lower priority, the stat bonuses from refined accessories can be surprisingly significant.
Accessories Refinement
Accessories are often overlooked in the refinement process, but even inexpensive crafted jewelry benefits substantially from upgrading. Refining rings, necklaces, and earrings boosts secondary stats that are difficult to raise through other means. The stats gained from accessory refinement include:
Accessory Slot | Stat Bonuses from Refinement | Notes |
|---|---|---|
Ring | Attack, attack speed | Stacks with weapon refinement for higher damage output |
Necklace | Spirit regen is arguably the most important stat in the game; refine necklaces early | |
Earring | Movement speed, stamina regen | Improves mobility and sustain in extended fights |
Spirit regeneration from necklace refinement deserves special attention. Spirit governs the ability to use skills and special attacks. Higher spirit regen means more frequent skill usage in combat, which directly translates to higher damage output and better survivability. Players who refine their necklace to level 4 early will notice a substantial difference in how often they can execute their strongest abilities.
Cheap crafted accessories from early-game vendors or basic crafting recipes work perfectly well as refinement targets. The stat gains from refinement outweigh the base stat differences between low-tier and mid-tier accessories, so investing in readily available jewelry is a smart use of resources while waiting for rare drops.
Where to Find Refinement Materials
Keeping a steady supply of refinement materials requires tapping into multiple sources across Pywel. The following are the most reliable ways to stock up:

Source | Details | Refresh Rate |
|---|---|---|
Town Vendors | Sell ore, gems, cloth, and general crafting materials | Stock refreshes daily |
Liberation rewards fill the camp supply chest with materials | After completing liberation events | |
World Exploration | Gathering nodes, treasure chests, and hidden stashes throughout the open world | Respawns over time |
Ore deposits and mineral veins found across all regions | Respawns over time | |
Enemy Drops | Monsters and humanoid enemies drop crafting components and refinement materials | On every kill |
Vendor purchases are the most consistent and effortless way to accumulate basic materials. Make a habit of buying out the daily vendor stock of ore, gems, and cloth whenever visiting a town. Over time, this passive accumulation adds up significantly and keeps refinement resources from becoming a bottleneck.
Liberation rewards from Greymane Camp are another valuable source. Completing liberation missions fills the camp's supply chest with various materials. Checking this chest regularly ensures no rewards go unclaimed.
Abyss Gear Effects
Augment Type | Effect |
|---|---|
Increases the speed of attack animations | |
Critical Hit Chance | Increases the probability of critical strikes |
Damage Boost | Increases overall damage output |
Elemental Damage | Adds or enhances elemental properties on attacks |
Stagger Enhancement | Increases stagger buildup on enemies |
Stamina Efficiency | Reduces stamina consumption for heavy attacks |
The strongest Abyss Gear augments are obtained from the toughest enemies in the game. This creates a reward loop where defeating challenging bosses earns augments that make weapons more effective against the next tier of challenges. The progression feels earned rather than random, reinforcing the game's emphasis on skill-based advancement.
Unique Equipment
Boss defeats reward unique weapons, armor, and outfits that stand apart from standard refined gear. These unique items come with signature special skills and visual effects tied to the boss they came from. Equipping a boss weapon grants access to that boss's signature ability, adding a new tool to the player's combat repertoire.
Unique equipment follows its own upgrade path. While the specific materials and methods may differ from standard refinement, the core loop of gathering materials and visiting crafting NPCs remains consistent.
Upgrading the Blacksmith
The Blacksmith at the player's camp can be upgraded as part of the broader camp improvement system. Each Blacksmith upgrade unlocks access to higher refinement tiers, allowing players to push their equipment further. Camp upgrades require regional materials from across Pywel, tying world exploration directly to crafting progression.
Investing in Blacksmith upgrades early provides compounding benefits. Higher refinement tiers offer larger stat increases, and having access to these tiers sooner means the player can push into more difficult content with better-refined equipment. Balancing Blacksmith upgrades against other camp facilities is one of the strategic resource management decisions in the game.