
Overview
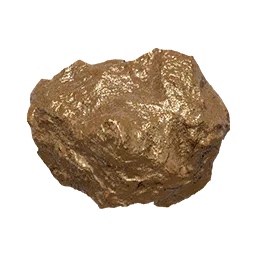
Gold Ore is the rarest and most valuable ore in Crimson Desert. It is found exclusively inside Gold Mines, which are hidden caves scattered across Pywel. Each Gold Mine contains roughly 15 to 20 Gold Ore deposits. Gold Ore is used for jewelry refinement at the blacksmith and can be smelted into Gold Bars, which serve as a major currency for banking and high-value transactions.
How to Unlock Gold Mine Locations
Gold Mines are not visible on the map by default. To reveal them, you need the Gold Vein Map, which is obtained by defeating the Marni Excavatron boss at Karin Quarry, located north of Rocca's Hill in the Hernand region. The map reveals Gold Ore locations on the world map; the earlier exact 10-cave count is not independently established as exhaustive.
An alternative method is the Gold Vein Research project available at the palace of Urdavah in the desert region. The older project quote is 130 Silver and eight hours. Version 1.18.00 changed research funding to Camp Funds; it does not establish a numeric conversion, that timer or the exact map-unlock outcome for this project.
Ironwood Gold Mine
Ironwood contains another accessible gold mining location. The site has an Abyss Nexus right next to the mine entrance, making it one of the most convenient gold ore sources in the game since you can fast travel directly to it. A diamond mine is also located nearby, so you can stock up on both gold ore and diamonds in a single trip.
Earlier account (precision and current applicability unverified): Gold ore deposits at this location respawn every 7 in-game days. Plan your mining runs on a weekly in-game schedule to keep a steady supply of Gold Ore flowing for Gold Bar crafting. Combined with the Golden Apple hedgehog farms at Snake Tail War or Gray Rock Dock, the Ironwood mine provides the ore side of the Gold Bar recipe efficiently.
Gold Mine Locations
The Gold Vein Map reveals the following cave locations across multiple regions:
Anvil Hill Cave (Demeniss region): The most accessible early-game Gold Mine. The entrance sits at the bottom of a canyon in southwest Demeniss, slightly east of the Gold Ore icon on the map. A large golden boulder blocks the entrance; use Force Palm to destroy it.
Mistshard Cave (Deadfire Mountain, Demeniss region)
Second Finger Cave (Five-Finger Mountain, Pailune region)
Silver Wolf Cave (Wayward Woods, Pailune region)
Two Sandpeak Gold Mines (Tashkalp territory, Crimson Desert region)
Cliffside Gold Mine (Crimson Mountain area, Crimson Desert region)
Desert Lake Gold Mine (Varnia territory, Crimson Desert region)
Uses
Gold Ore has two primary uses:
Jewelry refinement: Gold Ore is used at the blacksmith to upgrade rings, necklaces, and other accessories at higher refinement tiers.
Gold Bar smelting: Gold Ore can be converted into Gold Bars through multiple methods.
Gold Bar Crafting Methods
The Witch routes require the Gold Bar alchemical formula. The documented Spire of Insight pickup is on its third floor in Demeniss; the earlier south-of-Pororin Village/Hernand location is incorrect. A separate formula pickup is the Witch Hideout southwest of the City of Pailune; the guide notes the city's Chapter 7 liberation without independently proving the formula is unavailable earlier. There are three ways to turn Gold Ore into Gold Bars:
Blacksmith smelting: Bring 100 Gold Ore to any town blacksmith to smelt them into 1 Gold Bar. This is the least efficient method and should be treated as a last resort.
Witch alchemy (Silver Ore recipe): Bring 3 Brimstone, 3 Mercury, and 10 Silver Ore to any Witch NPC to craft 1 Gold Bar. This is the most material-efficient method for players who stockpile alchemy ingredients.
Witch alchemy (Golden Apple recipe): Combine 3 Gold Ore and 1 Golden Apple at a Witch NPC to produce 1 Gold Bar.
Cave Farming Method
Once you have reached a Gold Mine cave, the goal is to strip the interior of every deposit in a single run. The Mining Knuckledrill is the recommended tool because its auto-pickup feature grabs most mined ores the instant they drop, saving you the time normally spent walking over each ore chunk.
Focus on the full golden ore nodes that sit in the corners of each cavern. These are the ones that are entirely gold-colored. Skip the half-stone, half-gold nodes, which yield less Gold Ore per hit and waste your mining time. Gold nodes sit in dense clusters, so clearing a few corners typically nets dozens of ore per cave.
Even with the Knuckledrill's auto-pickup, some ore chunks still land where they have to be picked up manually. Do a second sweep of each node after mining it to grab any stragglers, especially in tight corners where the auto-pickup radius does not reach. Pairing the Knuckledrill with ore- or material-boosting Abyss Gears dramatically increases the total Gold Ore you walk out with per cave run, often to the point where a single visit to Anvil Hill Cave supplies enough ore for multiple Gold Bar crafts.
Tips
Defeat the Marni Excavatron at Karin Quarry as early as possible to unlock all Gold Mine locations on your map.
The Anvil Hill Cave in Demeniss is the easiest Gold Mine to reach in the early game. Look for the golden boulder blocking the entrance.
Use Force Palm or Force Current to quickly destroy gold deposits inside caves.
The Witch alchemy recipe using Brimstone, Mercury, and Silver Ore is far more efficient than smelting 100 Gold Ore at the blacksmith.
Gold Mines respawn their deposits over time. Revisit cleared caves periodically for additional Gold Ore.
Basic Information
Property | Value |
|---|---|
Type | Material |
Category |
The Gold Ore guide documents a Pickaxe or the special Mining Knuckledrill as mining tools, gold-colored ore nodes and the map reward from the Stolen Quarry mission in Estate in Dismay at Karin Quarry. The Knuckledrill record gives Mining Yield Up Lv.2 and a 30% chance of additional minerals, not a guaranteed multiplier. Named Gold Ore seller references include Flint, Nita, Bernor, Torgel, Seratien and Connor; these are leads, not proof of current stock gates. The older exclusive-cave wording, 15-to-20 deposits, Force Palm yields and seven-day or multi-day resets remain unverified precision.
See Also
Materials - Overview of all crafting materials
Crafting - Crafting system overview
Three-Cave Force Palm Route Around Pailune and Demeniss
Earlier account (precision and current applicability unverified): In addition to the canonical Gold Ore Locations list, three caves near Pailune and Demeniss each contain a single fully golden ore rock that can be broken with Force Palm for a fast bulk yield. Hitting all three caves in one trip nets roughly 70 to 80 Gold Ore, enough to feed many Gold Bar crafts at the witch. Each rock repopulates after a few in-game days, so the route is fully repeatable.
Earlier account (precision and current applicability unverified): Unlike the standard ore-vein nodes scattered across the canonical Gold Ore Locations caves, these three rocks are the larger, glowing-gold variety. They burst into a substantial pile of ore on a single Force Palm strike rather than requiring multiple swings or a pickaxe.
Cave | Map Reference | Approach | Yield |
|---|---|---|---|
Demeniss D-Pit Cave | Below and to the left of the D in Demeniss | Walk to the edge of the visible pit and drop straight in. The gold rock sits in the chamber at the bottom. No tough enemies block the path. | 25 to 30 Gold Ore |
Left of the A in Pailune | Fast travel to the nearby Abyss Nexus, walk slightly forward, then drop into the pit. A single enemy patrols the chamber; most builds can clear it in one engagement. After the kill, Force Palm the gold rock. | 25 to 30 Gold Ore | |
Aligned with the L in Pailune | Approach the cliffside structure visible from the surface and move just south of it to pick up the Ator, Archon of Antumbra base artifact, which doubles as a fast travel point. From the artifact, drop straight down. The third gold rock waits at the bottom. Do not engage Ator unless geared for the fight; the boss arena lies further below the gold rock chamber. | 25 to 30 Gold Ore |
Why This Route is Worth Running
Earlier account (precision and current applicability unverified): All three caves are clustered around the Pailune and Demeniss region, so fast travel between them is short.
Earlier account (precision and current applicability unverified): Each rock yields its full stack on a single Force Palm strike, so no pickaxe is required and the actual mining takes seconds per cave.
Earlier account (precision and current applicability unverified): Combined with a Golden Apple hedgehog run at Greyrock Dock, the three caves provide enough material to bankroll an entire Aeserion Longsword forging session in 20 to 25 minutes (see Silver and Gold Farming).
Earlier account (precision and current applicability unverified): Cave rocks respawn on a roughly multi-day in-game timer. Skip the time forward by sleeping or using the Wait function to reset all three at once.
Route Order Tips
Start at the Demeniss D-pit cave because there is no enemy on the way in. This gives you a head start on the ore stack with zero combat.
Move to Silverwolf Cave next. Clearing one enemy is faster than the longer drop and boss-adjacent navigation at Second-Finger Cave.
Finish at Second-Finger Cave. Picking up the Ator, Archon of Antumbra artifact on the way down adds a permanent fast travel point that is useful for future runs.
Return to the witch with a full stack and immediately craft Gold Bars using the Golden Apple recipe (3 Gold Ore + 1 Golden Apple per bar).