Abyss Artifacts Farming Guide
A comprehensive guide to farming Abyss Artifacts and Abyss Gears in Crimson Desert, covering pickpocketing at Scholar Stone Institute, disarming enemies at Spire of Frost, the XP bar kill loop, blockaded area farming, Root's End Ruins, Special Synthesis crafting, and optimization tips.
On This Page
Overview
Abyss Artifactsare the primary progression currency inCrimson Desert. They are used to unlock skills and increase your three base stats, making them one of the most sought-after resources in the game. Unlike traditional RPGs that rely on experience points and level-ups, Crimson Desert ties character growth directly to how many Abyss Artifacts you collect.
There are multiple ways to obtain Abyss Artifacts, ranging from one-time collectibles likeSealed Abyss Artifacts(141 total scattered across the world) to infinitely repeatable farming methods. This guide focuses on the repeatable methods that let you accumulate large quantities of Abyss Artifacts andAbyss Gearsfor endgame builds. Whether you prefer combat, stealth, or crafting, there is a farming approach that fits your play style.
Type | Yield Rate | Difficulty | |
|---|---|---|---|
Pickpocketing(ScholarStoneInstitute) | 3-4 per 15 min | Easy | |
Enemy Kill XP Bar | 1 per bar fill (unlimited) | Medium | |
Blockaded AreaFarming | Varies by area | Medium | |
Root's EndRuins Loop | Abyss Gears (Cells) | ~1 core per minute | Medium |
Disarming (Spire of Frost) | Abyss Gears | 5-10 weapons per run | Medium-Hard |
Special Synthesis | Higher Tier Gears | Depends on input | Easy (RNG) |
Chapter 3 Totem Farm | 10-15 per 30-60 min | Easy (time-limited) | |
Abyss Debris Expedition | Abyss Gears | Tier 3+ every ~4 days | Easy (passive) |
Timeworn Ruins Expedition | 1+ every ~3 days | Easy (passive) |
Abyss Artifacts are the primary resource used to unlock and upgrade Skills in Crimson Desert. They function as skill points: each Abyss Artifact spent on the skill tree unlocks or improves an ability for Kliff, Damiane, or Oongka. Because skills are essential for handling increasingly difficult enemies and bosses, gathering Abyss Artifacts is one of the most important tasks throughout the game.
There are four main methods to obtain Abyss Artifacts: liberating enemy camps, completing challenges from Sealed Abyss Artifacts, finishing quests, and completing Greymane Rumor quests. This guide covers all of them.
Abyss Artifact Farming: Pickpocketing at Scholar Stone Institute
One of the most reliable repeatable sources of Abyss Artifacts ispickpocketingNPCs. While you can pickpocket in many towns and settlements, theScholar Stone Instituteoffers the best combination of NPC density and route efficiency. This method works especially well once you have pickpocket-enhancing Abyss Gears equipped, which allow multiple successful steals per run.
Location and Setup
The Scholar Stone Institute is located to the left ofHernandon theworld map. Travel to the nearestfast travelpoint (anAbyss Nexus) to begin the route. The fast travel point also is your reset mechanism: after completing a run, simply fast travel back to this same point and all NPCs in the area will respawn with fresh inventories.
The best area within the Institute is theeating quarters, where friendly NPCs sit at tables eating their meals. These seated scholars frequently carry square-shaped abyss artifacts in their pockets. The eating quarters concentrate many NPCs in a small space, making it the most efficient area for pickpocketing runs. Visiting at night makes it easier to spot the shiny items in NPC pockets.
The Pickpocketing Route
From the fast travel point, run forwards through the Institute grounds.
Pass through the archway on the right side of the path.
Use a tripleForce Palmjump to reach the main walkway that leads to the central section.
Head towards the cafeteria area, which is the large open hall with numerous scholars seated at tables.
Work your way through the cafeteria, checking each scholar with your lantern before deciding whether to steal.
After clearing the cafeteria, continue through any adjacent rooms with NPCs before fast traveling back to reset.
Updated route (more efficient):Instead of running back to the fast travel point to reset NPC inventories, run between theclassroomand thecafeteria. Moving between these two areas refreshes NPC inventories without needing to fast travel, saving significant time per loop.
Jump on tables to get an elevated view of all pockets in the room. NPCs may require up to three pickpocket attempts to yield an artifact; the first attempt often gives an apple or pouch. Kick sitting NPCs to make them stand up, then bump into them to initiate the pickpocket. This is available from Chapter 4 onward.
How to Identify Abyss Artifacts
Before stealing from an NPC, you need to check what they are carrying. Equip yourLanternand shine it at NPCs to reveal the items in their pockets. There are two main types of loot you will see:
Money bags: The most common item. These appear as small pouch-shaped objects and yieldSilverwhen stolen.
Abyss Artifacts: Much rarer. These appear as distinct cube-shaped objects that are visually very different from money bags. Only target these for maximum efficiency.
You can also use the Blinding Light ability to see items on NPCs from a greater distance. However, this has two drawbacks: it spooks nearby NPCs (causing them to move around or become alert) and it forces your character to walk more slowly. For most runs, the standard Lantern is sufficient since you will be passing close to each NPC anyway.
Stealing Technique
The method for stealing depends on whether the NPC is standing or sitting:
Sitting NPCs (most common in the cafeteria): Walk up to the seated scholar with your Lantern out. Press Triangle (or your platform's equivalent) to kick the NPC, knocking them off balance. Immediately run towards them and press Square to steal the item from their pocket.
Standing NPCs: Approach from behind while crouching. Get close enough and press Square to pickpocket them directly. Standing NPCs are more likely to notice you, so approach carefully.
Tip:You can also use thekick abilityto force seated NPCs to stand up. Equip amaskand use the kick move near any sitting NPC. Once they stand, bump into them to pickpocket as normal. This is faster than the weapon-guard approach and works reliably in the eating quarters.
If you have pickpocket-enhancing Abyss Gears equipped on your weapons or armor, you gain additional steal attempts per NPC encounter. This effectively doubles or triples your yield per run, making the pickpocket Abyss Gear one of the most valuable support gears for farming.
Expected Rates and Reset Method
On average, a single run through the Scholar Stone Institute yields about 3 to 4 Abyss Artifacts per 15 minutes. This rate is RNG-dependent, as not every scholar carries anAbyss Artifact. Some runs may yield only 1 or 2, while lucky runs can produce 5 or more.
To reset the area, fast travel back tothe AbyssNexus near the Institute entrance. All NPCs will respawn with randomized inventories, allowing you to immediately begin another run. This creates an indefinitely repeatable loop with no cooldown.
Cafeteria Positioning and NPC Refresh Distance
The cafeteria on the northeast side of the Scholar Stone Institute building is the single best room for pickpocketing during daytime hours. More NPCs are present when the sun is up, so visiting between roughly 8 AM and 6 PM maximizes the number of pockets you can check per loop.
Rather than fast traveling to reset inventories, you can simply walk far enough away from the cafeteria. NPC pocket contents refresh based on distance, not just fast travel. Walking to the classroom at the far end of the building and back is sufficient to reset everything in the cafeteria. This saves the fast travel loading time and lets you chain loops more quickly.
Optimized Glide Loop and Timing
The fastest way to run this farm is a clean glide loop that skips climbing and avoids the main pathway entirely. From the southernfast travelpoint, jump once, then chain threeAerial Force Palmuses in a row, followed by oneAerial Stabif you have the skill unlocked. This gets you up to the ledge that leads into the eating quarters without having to climb.
Use the farthest back statue (the one closest to you when you first arrive) as your anchor point. From that statue you can double jump, chain a triple Aerial Force Palm, and then use Aerial Stab once before gliding forward to reach the ledge cleanly. Missing the timing on Aerial Stab is normal, but with practice this becomes a consistent jump.
Once you land on the ledge, activateBlinding Flashto enter the slow detection stance, then walk off the ledge into the room. Falling off the ledge while Blinding Flash is active cancels the slow movement and drops you into fast mode, so you can move around the eating quarters quickly while the pocket X-ray effect is still active. Walk up to each scholar and look for the cube-shaped silhouette, which is the visual tell for anAbyss Artifact.
After checking the room, leave the way you came in. Climb or double jump back up to the ledge, chain two Aerial Force Palms, and glide forward. Rather than fast travelling after every run, it is faster to simply glide back to the farthest statue, turn around, and repeat the triple Aerial Force Palm plus Aerial Stab glide back into the room. NPC pocket contents reset based on distance, not just fast travel, and the statue-to-ledge distance is far enough to consistently refresh the loot pool.
With clean execution, one full loop of this farm takes roughly1 minute 17 secondsand produces an abyss artifact on about a 1 in 3 cycle, which averages out to one artifact every3 minutes 51 seconds. RunningLedgermain I(and its higher tiers) in yourAbyss Gearsockets gives you a chance to pull a bonus item on every successful pickpocket. The bonus item is usually a minor drop such as an apple, a magnifying glass, or a copper pouch, but the extra value adds up across long sessions.
Detecting Targets with Blinding Flash
Blinding Flash does not just reveal whether a pocket is occupied; the item's silhouette shows you exactly what kind of item the NPC is carrying. Cube-shaped silhouettes always correspond to Abyss Artifacts. If you see a cube, the pickpocket is a guaranteed artifact and the loot will pop up on the left side of the screen instead of the normal right side.
If you spot more than one cube in the same room (it is rare but possible), save yourGreat Thief's Glovescharge for the first pickpocket so it stays undetected. That lets you grab the first cube without triggering a red circle, and you can then grab the second cube normally and just run out of the detection zone afterward.
Handling Sitting NPCs
Seated scholars cannot be pickpocketed directly. To handle them, stow your weapon, press the lantern button, and then press the kick button. The scholar will stand up, be briefly upset, and then start wandering passively. Bump into them once they are moving and the pickpocket prompt will work normally. Make sure you are wearing amaskbefore you try any of this: without a mask equipped, the kick trick still counts as a crime but the steal prompt never appears.
Escaping the Red Circle
Each pickpocket spawns a red detection circle centered on you, and the radius grows with every consecutive theft. If the circle gets uncomfortably large, fast travel to a distant point such asGreymane CamporDemenissto fully reset the area before returning to the Institute. You can also rest in a bed at Greymane Camp to clear the immediate bounty pressure. Investing in movement speed biscuits and any movement speed bonuses on your equipment makes the escape significantly easier.
Abyss Artifact Farming: Enemy Kill XP Bar
The most universally accessible farming method in the game is the Abyss Artifact XP bar. A yellow experience meter sits next to the minimap on the lower-left corner of the screen. Every enemy you kill pushes this meter forward. When the bar fills completely, you receive one Abyss Artifact. The bar then resets and you can fill it again. There is no cap on how many times you can repeat this cycle, making it a truly unlimited source of Abyss Artifacts.
How the XP Bar Works
Every enemy kill contributes progress to the yellow bar next to the minimap.
Tougher enemies (elites, bosses, and higher-level mobs) fill the bar faster than standard soldiers or wildlife.
The bar has no daily limit, session limit, or lifetime cap.
Each full bar awards exactly one Abyss Artifact.
The bar persists across fast travel and zone changes, so partial progress is never lost.
Best Farming Locations: Blockaded Areas
The fastest way to fill the XP bar is to targetBlockaded Areas, which are enemy camps marked as red building icons on the world map. These locations pack in dense groups of enemies that respawn when you leave and return, providing a reliable rotation for continuous kills.
Critical tip:Do not destroy the Infirmary structure within a Blockaded Area. If the Infirmary remains intact, enemies will respawn each time you leave and return to the area. If you destroy the Infirmary, the area becomes permanently liberated and enemies stop spawning. Likewise, do not kill the area boss if you want enemies to keep coming back. Leave both the Infirmary and the boss alive to maintain the respawn loop.
Large Blockaded Areas are the best targets. In small Blockaded Areas, any remaining enemies will flee once the liberation meter reaches 0%, cutting your farming session short. Larger areas have enough enemies and space to sustain longer runs before the meter depletes.
Story Mission Kill Farming
During main quest missions that send waves of enemies at you, resist the urge to sprint past them toward the objective marker. Killing every enemy in those sequences can net you multiple Abyss Artifacts in a single mission. This is free bonus progress that many players overlook.
Guard Farming in Demeniss and Delasia
InDemenissandDelasia, city guards are initially hostile during certain story scenes. You can farm these guards for XP bar progress without suffering reputation loss, because the hostile state is scripted as part of the narrative. The guards respawn continuously and are relatively easy to defeat, making this an excellent way to fill the XP bar multiple times in quick succession.
This opportunity is time-limited to the specific story chapter where the guards are hostile. Once you progress past that narrative point, the guards return to neutral and attacking them incurs normalContributionpenalties. Take advantage of the free XP while the window is open.
Chapter 3 Totem Farm (Time-Limited)
DuringChapter 3of themain story, there is a powerful but time-limited farming opportunity. On the mountain just beforethe Reed Devilboss encounter, you will find enemy-spawning totems that produce enemies in a continuous loop. These totems generate an endless stream of foes, making this one of the highest-density kill zones in the early game.
Players who spend 30 to 60 minutes farming at the totem location can accumulate 10 to 15 Abyss Artifacts, which is a massive boost to early-game progression. The enemies spawned by the totems are relatively easy to defeat, so even a modestly geared character can sustain long farming sessions here.
Warning:This farming window closes permanently once you defeatthe Reed Devilboss. Beating the boss destroys all nearby totems and stops enemy respawns in that area for the rest of the game. If you are interested in maximizing your early artifact count, spend time at the totems before progressing the story past the Reed Devil fight.
The best spot is the hill just before the Reed Devil encounter, where minions spawn infinitely from totems. Position yourself on the hill and let the spawned enemies come to you. The yellow XP bar next to the minimap fills with each kill, and each full bar awards one abyss artifact. Because the totem continuously spawns fresh enemies, you can stay in place indefinitely without needing to reset or fast travel. This is one of the highest-density XP farming locations in the early game.
Abyss Gear Farming: Root's End Ruins Infinite Loop
Root's End Ruins, located nearSage's Peakin Hernand, is widely considered the best location for farming Abyss Gears (also called Abyss Cells orAbyss Cores). The area has a nearby Abyss Nexus for fast travel and a high cliff that allows the game to respawn enemies in just a few seconds, creating one of the most efficient farming loops in the game.
How the Loop Works
Travel to the Root's End Ruins Abyss Nexus.
Climb to the summit and defeat three to four rock crab enemies.
Watch the minimap for circular icons, which indicate that a defeated enemy has dropped an Abyss Gear.
Collect the dropped gears.
Leave at least one enemy pack alive in the cluster (this is critical).
Fast travel back to the Abyss Nexus to reset the area.
Repeat the loop.
Keyrule:The rock enemies only stop respawning if you kill every single enemy in the cluster. As long as at least one pack survives, the rest respawn when you fast travel back. This is what makes the loop infinite.
With practice, you can average approximately oneAbyss Coreper minute using theForce Palmreset method. The most common drops at Root's End Ruins are Destruction and Insight cores, both of which are valuable for offensive builds.
Auto-Save Warning
Be aware that auto-saves can disrupt the farming loop. If the game auto-saves after you defeat a crab but before you fast travel, that crab will be permanently gone on your next loop iteration. To avoid this, create a manual save before you begin farming so you can reload if the loop breaks.
Abyss Gear Farming: Disarming at Spire of Frost
Disarming enemies at theSpire of Frostis one of the most rewarding endgame farming methods in Crimson Desert. By forcing enemies to drop their weapons, you can collect equipment loaded with Abyss Gears and then extract those gears at aWitchNPC. This method also generates significant passive income from selling the stripped weapons.
Location and Best Spots
From Hernand, travel northeast to the Spire of Frost in theDemenissregion. While the entire Spire area has enemy camps you can farm, the following locations are most efficient:
Ice Watch Altar: The recommended starting point. This area is less icy than other parts of the Spire, making combat easier and reducing the chance of environmental hazards slowing you down.
Frost Hold: Another occupied area around the Spire with dense enemy groups.Enemieshere carry similar weapon types to those at Ice Watch Altar.
Other occupied camps: Any enemy camp in the Spire of Frost vicinity works for this method. If you have previously cleared enemies from an area, they may reoccupy it periodically through quest events.
Fast Travel Strategy: The Sky Island
Above the Spire of Frost, there is a sky island that is an excellent reset point. To unlock access to the sky island, you must complete the quest that requires you to light lanterns around the Spire. Once unlocked, you can fast travel to the sky island, jump off the edge, and glide down to your preferred farming marker below. This provides a faster reset cycle than running back on foot.
The Disarm Technique
Disarming is a mechanic that the game does not explicitly teach you, but it is essential for this farming method. It requires theShield Bashskill, which is unlocked in theskill tree. Here is how to execute it:
Hold L1 (or LB on Xbox) to raise your shield and enter a blocking stance.
Wait for an enemy to strike your shield. You will hear a distinct clashing sound on impact.
Immediately after the hit lands, press R2 (or RT on Xbox) while still holding L1 to perform a Shield Bash.
If the Shield Bash connects, the enemy drops their weapon and shield on the ground.
Pick up the dropped equipment. Each weapon and shield contains one or more Abyss Gears.
The best enemies to target are those carrying maces and shields.Macescommonly contain Fortitude gears, while shields frequently carry Bane gears. These two gear types can be synthesized together later for potentially higher-tier results.
Pet Collection
Summon yourPailune(pet companion) to help collect dropped items during combat. While you focus on disarming the next enemy, your pet will automatically pick up nearby loot. This saves time and prevents items from being lost in the chaos of battle.
Extracting Gears at Witch NPCs
After 5 to 10 minutes of farming, your inventory will be full of maces and shields. Take these to anyWitch NPCto extract the Abyss Gears from each weapon. The first Witch you can access isElowen, who becomes available in Hernand early in the game. Other Witches include Bari inPailune, Lyselia inSerpent Marsh, and Areciel nearUrdavah.
Witch | Location | Unlock Requirement |
|---|---|---|
NearHernand(The Witchwoods) | Chapter 5 main quest | |
Pailune(Witch's Cabin in a lake) | Witch of Kindness quest | |
Serpent Marsh(hidden cave) | Witch of Humility quest | |
NearUrdavah(mountain) | Chapter 8-9 progression |
At the Witch's crafting interface, extract the Abyss Gears from each weapon one at a time. Unfortunately, there is no batch extraction option, so you must process each item individually. After extraction, the stripped weapons can be sold for 6 to 7 Silver each, creating a passive money farm alongside the gear farming.
Special Synthesis: Crafting Higher-Tier Gears
Once you have accumulated a stockpile of Abyss Gears through farming, you can useSpecial Synthesisat any Witch NPC to combine gears and attempt to create higher-tier versions. Special Synthesis is the only reliable way to obtain Greater-tier Abyss Gears, which are significantly more powerful than their standard counterparts.
How Special Synthesis Works
Visit any Witch NPC and open the crafting menu.
Navigate to the "Special Synthesis" option (press R2/RT to switch to the Synthesis tab first).
Select two Abyss Gears of the same tier to combine. You can queue up to 20 synthesis operations at once.
Confirm the synthesis. The result is a random gear determined by the probability table below.
Unlike regular synthesis (which combines two identical gears into a deterministic higher-tier result and requires a blueprint), Special Synthesis produces a random output. The type of gear you receive is completely random regardless of what you put in.
Tier 1 Special Synthesis Probabilities
When you combine two Tier 1 Abyss Gears via Special Synthesis, the following probabilities apply:
Result | Probability | Notes |
|---|---|---|
Random Level 1 Gear | 50% | Same tier, different type |
Random Level 2 Gear | 46% | One tier upgrade |
Greater Gear | 4% | Highest rarity, very powerful |
Important finding:Using Tier 1, Tier 2, or Tier 3 gears as synthesis materials all yield the exact same 4% probability of producing a Greater result. This means you should always use your cheapest Tier 1 gears for Greater farming attempts rather than wasting higher-tier gears. Save your Tier 2 and Tier 3 gears for regular (deterministic) synthesis where you know the outcome.
Save Scumming for Better Results
Because Special Synthesis results are determined at the moment of crafting (not when you select the materials), you can use save scumming to improve your outcomes:
Save your gamemanually before starting any Special Synthesis session.
Perform your synthesis operations (up to 20 at a time).
Review the results. If you did not get any Greater gears or the results are poor,reload your saveand try again.
Repeat until you get results you are satisfied with.
This technique is especially valuable when you have a large batch of gears to process, as reloading lets you re-roll all 20 synthesis results at once.
Optimal Crafting Path
The most efficient approach to gearing up through Special Synthesis follows this path:
Farm Tier 1 gears in bulk using the disarm method at Spire of Frost or Root's End Ruins.
Run Tier 1 gears through Special Synthesis in batches of 20. Keep any Greater results and useful Tier 2 results.
Take the Tier 2 gears you want to upgrade further and synthesize them. You have a chance of getting Tier 3 or Greater results.
Continue cycling upward: Tier 2 into Tier 3, Tier 3 into Greater.
Save scum at each tier to maximize the number of Greaters you produce from your stockpile.
Synthesis Tier | Input | Best Possible Output | Strategy |
|---|---|---|---|
Tier 1 → Synthesis | 2x Tier 1 Gears | Greater (4%) or Tier 2 (46%) | Bulk craft, save scum for Greaters |
Tier 2 → Synthesis | 2x Tier 2 Gears | Greater (4%) or Tier 3 | Use leftover Tier 2s from above |
Tier 3 → Synthesis | 2x Tier 3 Gears | Greater (4%) | Last resort, expensive inputs |
Abyss Gear Extraction for Skill XP Gears (Pre-Farming Step)
Before committing to any of the artifact farming loops, it pays to pre-farmSkill XP Abyss GearsandInfinite Arrows(for bow builds). Skill XP gears dramatically speed up artifact farming by increasing the experience gained from every kill, which means your XP bar fills faster and you earn artifacts from level-ups more frequently.
Frost Hold Camp Disarm Loop
At the Frost Hold Camp near theSpire of Frost, enemies carryFrozen Soul MacesandFrost Bone Shields. Use a small shield to block (L1), then press R2 to knock their weapons and shields off. The key to making this repeatable is tonot kill the enemies: after disarming them, fast travel away and return. The enemies respawn with new gear, but you keep the loot from the previous run.
Take the collected gear to aWitchand extractAbyss Gears. Then useSpecial Synthesisto combine up to 20 gears at once into random higher-tier gears. Target farm Skill XP gears specifically; once you have a few equipped, every subsequent farming method in this guide becomes significantly faster.
Pickpocket Abyss Gear: The Feedback Loop
One of the most valuable outcomes from Special Synthesis is obtaining the Pickpocket Abyss Gear. When this gear is slotted into your equipment, it increases the number of successful pickpocket attempts you can make per NPC encounter. This creates a powerful feedback loop that accelerates all pickpocket-based farming.
Here is how the loop works:
Farm Abyss Gears via disarming at Spire of Frost (or Root's End Ruins).
Extract the gears at a Witch and run them through Special Synthesis.
If you obtain a Pickpocket Abyss Gear, equip it immediately.
Returnto the Scholar Stone Institute and run the pickpocketing route. With the Pickpocket gear equipped, you can steal from more NPCs per run.
This yields more Abyss Artifacts per run, plus Gold Bars and Silver from money bag steals.
Use the extra Abyss Artifacts to unlock more skills, making combat farming faster too.
The Pickpocket Abyss Gear essentially doubles as a farm multiplier for both Abyss Artifacts (from pickpocketing scholars) and Silver (fromselling stolen goodsand stripped weapons). Prioritize obtaining and upgrading this gear early in your farming journey.
Expedition Farming (Passive Method)
Expeditionsare the only truly passive farming method for both abyss gear and abyss artifacts. Once you discover certain locations and assignGreymanesto them, the expeditions run automatically in the background while you do other activities. There are two key expedition targets for abyss farming:
Expedition | Unlock Method | Team Size | Returns Every | Rewards |
|---|---|---|---|---|
Abyss Debris | Discover location near Tash Calp by defeating the enemy inside | 10 Greymanes | ~4 in-game days | Abyss gear(can be Tier 3 or greater; may yield multiple pieces) |
Timeworn Ruins | Clear all enemies at the ruins to discover it | Varies | ~3 in-game days | Baseabyss artifacts(can yield more than one per return) |
Start these expeditions as early as possible in your playthrough. They require no active effort once initiated and generate a steady trickle of resources. The Abyss Debris expedition is especially valuable because it can return Tier 3 or higher abyss gears, saving you the material cost of synthesizing up from Tier 1.
Tip:Check expedition results regularly. Resources accumulate in the expedition return screen and can stack up over time if left uncollected.
One-Time Abyss Artifact Sources
While this guide focuses on repeatable farming, it is worth noting the one-time sources that contribute to your total Artifact count. Make sure to collect these as you explore the world, since they add up significantly.
Source | Total Available | Details |
|---|---|---|
141 | Found on altars and cairns throughout the world; visible as glints of light | |
60 | Puzzle-locked artifacts; solving each puzzle also unlocks afast travelpoint | |
Main Quest Rewards | Varies | Severalmain storyquests awardAbyss Artifactson completion |
Varies | Found in theJournal; marked with question marks on the map | |
MasteryChallenges | Varies | Require using specific weapons against certain enemies |
Vendor Purchases | Limited stock | NPCslikeElowensellAbyss ArtifactsforSilver; stock does not restock |
Complete Challenges
Various challenge types rewardAbyss Artifactsupon completion:
Challenge Type | How to Find | Details |
|---|---|---|
Question marks on the map | Puzzles, platforming, discovering hidden areas. Found throughout all regions. | |
Challengejournal | Defeat specific enemies using designated weapon types. Tests weapon proficiency. | |
Random enemy drops and worldlocations | Collectibleswith a challenge condition listed in your inventory. Complete the condition to convert into a usableAbyss Artifact. |
Sealed Abyss Artifacts are particularly valuable because they reward both standardAbyss Artifactsand sometimesFaded Abyss Artifacts(for respec) upon completion. Check the challenge condition for each Sealed Artifact in your inventory, as many challenges are things you complete naturally during exploration (e.g., defeating a certain number of enemies, visiting a location).
Quests and Boss Rewards
Main storyquests, side quests, andFaction Questsall award Abyss Artifacts as completion rewards. Faction bounties in particular are quick to complete and pile up fast. Check theFaction Queststab in yourJournalevery time youreturnto a settlement. Boss enemies also drop Artifacts upon defeat, with harderbossesgiving more.
Purchase From Vendors
CertainNPCssell Abyss Artifacts directly for silver.Elowenand other witchvendorsstock a limited supply. Patrigio the Wandering Merchant also sells them when he appears. Vendor stocks are finite and do not restock, so buy them whenever you see them available.
Time-Skip Dispatch Farm: Timeworn Ruins Excavation
The second repeatable farming method usesDispatch Missionscombined with a community-discovered time-skip trick. The target is theTimeworn Ruins Excavationmission, a Greymane dispatch found at Timeworn Ruins in theCrimson Desert (Region). On the world map, Timeworn Ruins sits just south of the E and R in the "Crimson Desert" region label, in the northeast section of the desert. You will need to clear the enemies around the ruins first (you can skip the boss) to unlock the dispatch.
Once the dispatch is active, it rewards between1 and 5 Abyss Artifactsper completion on a 3 in-game day timer. This reward is not affected by mission completion bonus modifiers, so stacking completion reward gear does nothing here. Normally this dispatch is treated as a slow passive drip, but with the time-skip trick below you can turn it into an active farm that averages about one artifact every 1 minute 33 seconds of real time.
The Time-Skip Cycle
The technique requires a quest that has await promptat the interaction point. Wait prompts only advance time forward, they never rewind, so they can be used to push the clock forward by many in-game hours in a single button press. Two reliable examples: the Lord Keg faction quest in Demeniss, and a wait prompt in Chapter 9 of the Black Crow main story. Any quest with a wait prompt works, so keep an eye out for the option while playing.
The cycle works like this. First, travel to your chosen wait-prompt quest NPC and wait until the clock reaches their required time. Fast travel back to Greymane Camp and use your bed to sleep for6 hours(choose the 6 hour option specifically). Fast travel back to the quest NPC and use the wait prompt again: because the required hour is now about 18 hours in the future, time advances by roughly 18 in-game hours in a single step. The game only blocks repeat sleeps for about 12 in-game hours after the previous rest, so the 18 hour wait is always long enough to unlock another sleep. Rinse and repeat.
With this loop, a full in-game day passes in roughly1 minute 46 secondsof real time, limited mostly by travel distance between the fast travel point and the quest NPC. With the Timeworn Ruins Excavation rewarding 1 to 5 artifacts every 3 in-game days, the average is about3 artifacts every 4 minutes 38 secondsof real time, which is meaningfully faster than the Scholastone Institute pickpocket loop when you have the dispatch already running.
Why 6 Hours and Not 12
Sleeping for 12 hours does not work reliably. The wait prompt only advances time forward the minimum amount needed to reach the required hour, so after a 12 hour sleep the next wait advances time by less than 12 hours, which is not enough to unlock the next sleep. A 6 hour sleep followed by an 18 hour wait is the sweet spot: both halves of the cycle always clear the 12 hour post-sleep cooldown.
Other Uses for the Time Skip
This time-skip trick is useful beyond the Timeworn Ruins farm. Any in-game system that advances on a timer benefits from it, including institute research progress across Pywel, other dispatch missions, and any quest objective that waits for a specific hour. Whenever you have free dispatches running and a spare wait-prompt quest, you can burn through days of in-game time in a matter of minutes.
Additional Quests with Wait Prompts
Beyond the Lord Keg faction quest in Demeniss and the Podium of Hope mission in Chapter 8, the Black Crow witch questline in Chapter 9 also has a wait prompt that works for this trick. Any quest where the bottom-right corner of the screen shows a "wait" option when you press the menu button can be used. Keep an eye out for new wait prompts as you progress through the story, since each one is a potential time-skip anchor.
The specific 6-hour sleep option is important because it moves the in-game clock just far enough past the quest's desired timing window. When you return to the quest location and wait again, time jumps forward to 9:30 PM of thenextday rather than the same evening. This is what makes each loop advance a full calendar day. Sleeping for 3 hours is too short (the next wait only advances a few hours on the same day), and sleeping for 12 hours can cause inconsistent results where the rest cooldown overlaps with the wait timing.
With clean execution, the entire loop (travel to quest NPC, wait, travel to bed, sleep 6 hours, travel back) completes one 3-day dispatch cycle in roughly 4 to 5 minutes of real time. If you have the resources to keep the Timeworn Ruins Excavation dispatch running continuously, this is one of the most efficient artifact farms in the game.
Farm at a Glance
Method | Real Time perArtifact(Average) | Prerequisites |
|---|---|---|
Scholastone Institutepickpocket loop | 3 minutes 51 seconds | Mask,Blinding Flash,Aerial Force Palm,Aerial Stab(optional) |
Timeworn Ruins time-skip dispatch | 1 minute 33 seconds | Timeworn Ruins cleared, Excavation dispatch active, quest with wait prompt |
Hexa Sanctuary Elite Farming (Chapter 9+)
TheHexa Sanctuarycontains elite pot enemies (marked with a red star icon on the minimap) that drop bothAbyss ArtifactsandAbyss Gears. These elites also give massive XP, so you get artifacts from both direct drops and the frequent level-ups they cause.
Elite Types and Farm Route
Two elite types spawn in the sanctuary: large spear pots and "ronin hat" pots. Start from the southern fast travel point and follow the main roads through the sanctuary, killing every elite pot you encounter along the way. The route is straightforward and does not require any special setup.
Important:This method only works if you have not already cleared the area. If the enemies are gone and have not respawned, the farm will not produce results. This makes Hexa Sanctuary a strong option if you are reaching it for the first time in Chapter 9 or later.
Demeniss Wildlife Park Combat (Best Combined Farm)
TheDemeniss Wildlife Parkis one of the best combined farming locations in the game because it yieldsgold bars, XP, andAbyss Artifactssimultaneously.
Demeniss contains Sealed Abyss Artifacts that unlock Horse Challenges, Spear Challenges, Sword Challenges, Rapier and Shield Challenges, and Challenges and Changes entries. Look near Stonewell Farm, Flame Knight's Castle, Ironwood Farm, and the Spire of Clockwork.
The Combat Loop
UseFocus Shotwith explosive arrows to panic the nobles. When panicked, they run toward the closed gate and pile up against it. AoE kill the grouped nobles and loot their bodies for gold bars, ancient shell rings, engraved silver earrings, and other valuables.
After the nobles are dealt with, guard captains spawn. Each guard captain gives roughly 30 to 40% of an XP bar, making them excellent sources of Abyss Artifacts through level-ups. Farm the guards repeatedly or reset the entire area by fast traveling away and back.
Managing Bounty
Killing nobles and guards at the Wildlife Park accumulates bounty. The maximum bounty is 100 silver, which is relatively cheap to clear. Travel to the monastery below theCrow's Nestabyss island and purchase aRight of Absolutionto wipe your bounty clean.
This location is also useful for building trust and reputation with NPC vendors through copper bags dropped by the nobles. The combination of gold bars, XP, artifacts, and vendor reputation makes the Wildlife Park the single most efficient all-in-one farming spot in the game.
Why Killing Beats Pickpocketing at the Wildlife Park
While pickpocketing nobles at the Wildlife Park is safe and bounty-free, killing them outright is actually more profitable when you factor in the XP gains. Looting bodies yields golden bars, copper pouches, and silver pouches, the same loot you would get from pickpocketing. The difference is that killing also generates XP bar progress, and the guards that spawn in response provide a constant stream of additional XP on top of the noble loot.
This makes the Wildlife Park one of the few locations where you can farm both money andAbyss Artifactsat the same time. The guard captains in particular fill roughly 30 to 40% of the XP bar each, so a sustained session at the park produces artifacts at a faster rate than pickpocketing alone.
The trade-off is bounty accumulation and reducedContributionlevels for the Demeniss region. Pay off your bounty at the monastery below the Crow's Nest, and accept the temporary Contribution hit if the dual farming output is worth it to you.
Institute West of Hernand: Pickpocketing Route
The institute located west ofHernandis another productive pickpocketing route forabyss artifacts. Start at the waypoint near the institute and climb the walls on the right side using thegrappling hookcombined with double jumps to reach the upper levels.
Eating Quarters
Your first stop is the eating quarters. Check the tables for NPCs and inspect their inventories for abyss artifacts. The middle row of tables has the highest concentration of NPCs, so prioritize it. Equip amask, then kick NPCs (or double jump near them to use your spirit ability) to scare them. When they start running, bump into them to trigger a pickpocket.
Classroom
From the eating quarters, head down the hallway to the left side and enter the classroom. There are more NPCs here with abyss artifacts in their inventories. Jump on the tables to efficiently check inventories row by row. Do not skip the professor standing at the back of the room, as they frequently carry valuable artifacts.
Reset and Repeat
Going back through the building does not respawn NPCs or refresh their inventories. To reset everything, you need to use a nearbyAbyss Nexusteleporter. After teleporting, return to the eating quarters and run the route again from the start. This loop is best repeated continuously: eating quarters, then classroom, then teleport to reset.
Witch Hideout Blueprint Farming
Sleeping atWitchhideouts gives a random chance to learn special equipment blueprints. For example, sleeping at the hideout south ofPailune(the same hideout that holds thegold barrecipe) can occasionally award blueprints like the Elegant Carmine Plate Gloves. Simply sleep in the beds and check whether a blueprint notification appears when you wake up. This is a passive method that can be done alongside other farming runs.
XP Bar Artifact Drops
Killing enemies fills the XP bar displayed on the left side of the minimap. Every time the bar fills completely, you receive anabyss artifactas a guaranteed drop. This makes any combat-heavy activity a reliable source of artifacts. Pairing enemy kills with pickpocketing at locations like theDemeniss Wildlife Parkor the Institute west of Hernand maximizes artifact output per hour.
Scholar Stone Institute Farm: Patch 1.02.00 Walkthrough
TheScholar Stone Institute(sometimes called Skola Stone Institute or Skullstone in community guides) became the fastestAbyss Artifactfarm in the game afterPatch 1.02.00. The patch removed the previous restriction on Blinding Flash while mounted, so you can now keep the pocket-detection effect active permanently while riding or sprinting around the institute. This single change is what makes the high NPC density of the institute pay off, because you no longer have to dismount and re-cast Blinding Flash on every approach.
Use this walkthrough as a focused recipe alongside the more general Pickpocketing at Scholar Stone Institute section above. It captures the exact two-chamber loop showcased in post-patch farming guides and the skyAbyss Nexusreset trick.
Step-by-Step Walkthrough
Travel to the Scholar Stone Institute and enter the first chamber filled with seated scholars.
Equip yourLantern(or useBlinding Flash) to scan what each scholar is carrying. You are not looking for the small bag-shaped silhouette that represents Silver pouches. You are looking for a large cube-shaped silhouette, which is the visual tell for an Abyss Artifact, similar to how gold bars appear when scanning for gold.
If the first chamber turns up nothing, run out, head down the corridor, turn right, and head into the next room with more scholars. Check every NPC in this second area as well.
To loot a confirmed cube, equip aMaskfrom your weapon wheel and sprint into the scholar to trigger the pickpocket prompt.
If a target with a cube is sitting down, take your mask off first, draw a weapon (or fire a Blinding Flash near them) to make them stand up, then put the mask back on, bump into them, and steal.
Some attempts return junk like apples, keys, or copper pouches. That is normal RNG. Move on to the next confirmed scholar.
Once both chambers are checked, teleport back to the nearest Abyss Nexus to refresh the loop. The sky-side nexus is the fastest reset because you can dive straight back down into the institute instead of climbing.
Why the Sky Nexus Reset is Faster
There are two Abyss Nexuses you can teleport to from the institute area: one on the ground near the institute itself, and one floating in the sky above. The sky nexus is faster because you can teleport up, immediately leap off the platform, glide down, and re-enter the eating quarters from above without ever needing to climb. The ground-side nexus forces a manual approach. Use the ground nexus only if you have already burned through your gliding spirit and want a slower but quieter reset.
Witness Circle and Bounty Management
Each successful pickpocket grows the red witness circle drawn around your character. Always sprint out of the red zone before the circle reaches an NPC, otherwise you will catch a bounty. If you do pick up bounty, you can clear it at any church for a small Silver fee, then continue the loop. Movement speed bonuses from biscuits and gear make the escape much easier.
Why This Farm is the Best in the Game
The whole farm is RNG based, so any single attempt may yield nothing. What makes the institute unbeatable for Abyss Artifacts is the sheer density of scholars: every chamber has more pockets than you can check before the witness circle forces a reset, which means the worst-case run still produces multiple cube hits. Combined with the post-Patch 1.02.00 mounted Blinding Flash and the sky nexus reset, this is currently the fastest repeatable Abyss Artifact farm inCrimson Desert.
Ice Walker Farming (High-Value XP Method)
Ice Walkersare among the most valuable repeatable targets for filling the Abyss Artifact XP bar. Each kill awards a massive chunk of experience, and with the right setup they can be respawned infinitely. Stacking aptitudeAbyss Gearsthat boost bonus XP makes each kill worth even more, turning a single Ice Walker into a significant portion of a full bar.
Best Ice Walker Location
The most convenient spot is inPailune, near the Wayward Woods. On the world map, look west from the letter A in the region label. There is anAbyss Nexusteleporter at the edge of a cliff, and an Ice Walker spawns just above it. The proximity of the Nexus is what makes this location ideal: after each kill you teleport to the same Nexus to respawn the boss instantly without a loading screen.
Kill Method: Axiom Force Core Pull
UseAxiom Forceto grab the glowing core in the center of the Ice Walker's body. Hold the button to wrench it out. You need to do this twice to fully dismantle the creature, leaving it vulnerable for several seconds.
During the dismantled window, hit it withBlinding Flash's finisher for heavy damage, or use any other strong attacks and Abyss Gear skills you have available. The Ice Walker takes significantly increased damage while dismantled, so front-load your hardest-hitting abilities.
Bow alternative:If you have a bow with 100% infinite arrows from Abyss Gears, explosive arrows and Focus Shot can kill Ice Walkers quickly. Use Focus Shot repeatedly to build the yellow stagger gauge, and eat spirit-recovering food between shots to sustain your spirit meter. This method is slightly slower than the Axiom Force approach but works well for ranged builds.
Speed Method: Fire Imbue One-Shot
For players with a strong build, thefire imbue turning slashmethod can kill the Ice Walker in a single hit, dramatically speeding up the farm. This requires theFlames of JudgmentandVolcanic Eruptionskills from the weapon skill tree.
The technique is straightforward: from the fast travel point, run straight up to the Ice Walker, execute a short combo ending with afire-imbued turning slash. With sufficient gear upgrades andAbyss Gearsequipped, this single attack is often enough to destroy the Ice Walker instantly without needing to use the Axiom Force core grab at all. After the kill, open the map and fast travel back to repeat. This cuts each kill cycle down to just a few seconds.
The fire imbue method pairs especially well with pre-farmedSkill XP Abyss Gears. Stacking these gears increases the XP gained per kill, so each instant Ice Walker takedown fills a larger portion of the Abyss Artifact XP bar. With a full set of Skill XP gears (up to +100% bonus) and the fire imbue one-shot, you can earn 50 to 100Abyss Artifactsin a relatively short farming session before hitting the per-character cap.
Respawn Loop
After killing the Ice Walker, collect any dropped Abyss Cells and Abyss Gears. Then immediately teleport to the nearbyAbyss Nexusand select the same location to return. This skips any loading animation, and the Ice Walker respawns on the spot. Repeat for as long as you want.
Critical rule:Do NOT collect the Power Core that the Ice Walker drops. Picking up the Power Core can prevent the boss from respawning. Do not seal it in your Cocoon Pot either. Sometimes the Power Core is automatically sent to your lost items (you will see a notification), but the boss will still respawn as long as you did not manually pick it up.
What Breaks the Ice Walker Respawn
Several actions can permanently stop the Ice Walker from respawning. Avoid all of these while farming.
Collecting the Power Coredirectly from the ground. This registers the boss as fully defeated.
Saving after the kill, then loading that save.If you save while the boss is dead and reload, it will not come back. Always respawn the boss first (teleport to the Nexus, confirm it is alive) before saving your game.
Opening Sealed Abyss Artifacts.The unsealing cutscene counts as game progression and can mark nearby bosses as defeated.
Unlocking a new Abyss Nexus or Abyss Cressetwhile the boss is dead. Discovering new fast travel points also counts as progression.
Learning a recipe or reading a bookduring the farming session (untested but community reports suggest it should be avoided).
Safety Tips for Ice Walker Farming
Create a manual save before you start farming as a safety backup. If the respawn loop breaks, reload this save.
Always respawn the boss first by teleporting to the Nexus before doing anything else. Confirm it is alive, then save if you want to.
You need level 5ice resistanceto comfortably farm in Pailune. Without it, the cold environment slows your stamina recovery, making combat much harder.
The yellow XP gauge has a cap of roughly 100 Abyss Artifacts per character. Once you hit the cap, switch toDamienorEun Hato keep earning artifacts on a fresh gauge.
With 100% bonus XP from stacked aptitude Abyss Gears, a single Ice Walker kill can fill a noticeable portion of the XP bar.
Other Ice Walker Locations
If the Pailune spot is not convenient or you want variety, several other Ice Walkers are available across the map.
West of Hernand (river):Two Ice Walkers spawn right beside each other near the river, with anAbyss Nexusnearby. Good for back-to-back kills without traveling far between them.
East Pailune (animal group):One Ice Walker spawns near a group of animals on the eastern side of Pailune. An Abyss Nexus sits on top of the nearby hill.
Northwest Hernand (Hoenmark Ruins):One Ice Walker near theHoenmark Ruinsin northwest Hernand. The Nexus is below the ruins, requiring significant climbing to reach the Ice Walker. Aerial Maneuver (Axiom Force level 2) helps with the ascent. This is the least convenient spot but still functional.
Note:Croc Rock Walkers (the crocodile-shaped variants) do NOT award large amounts of XP. Only Ice Walkers are worth farming for Abyss Artifacts through the XP bar.
Tips and Optimization
To maximize your farming efficiency across all methods, follow these recommendations:
General Tips
Combine methods for variety.Alternate between pickpocketing runs and combat farming to avoid burnout. Each method fills a different role: pickpocketing targets Abyss Artifacts directly, while disarming feeds your Abyss Gear and Silver supply.
Always collect Sealed Abyss Artifacts while traveling.Keep an eye out for glints of light in the distance as you move between farming locations. These free collectibles add up over time.
Equip the right Abyss Gears for the task.Swap your loadout based on what you are farming. Pickpocket gears for the Institute, combat gears for Blockaded Areas, and defensive gears for Spire of Frost disarm runs.
Use your pet at all times.Your Pailune automatically collects dropped items nearby, preventing you from missing loot during fast-paced combat encounters.
Combat Farming Tips
Target tougher enemies for faster XP bar progress.Elite enemies and mini-bosses contribute significantly more meter progress than standard soldiers. Seek out higher-level camps when your gear allows it.
Do not fully liberate Blockaded Areas you want to revisit.Leave the Infirmary intact and the area boss alive. If you accidentally liberate an area, it is gone permanently as a farming spot.
Use AOE abilities to clear groups quickly.Skills like Force Palm and wide-swing weapon arts are excellent for mowing down clusters of enemies in Blockaded Areas.
Synthesis Tips
Always save before synthesis.This is the single most important tip for gear crafting. Reload if results are poor.
Use Tier 1 gears for Greater farming.Since all tiers have the same 4% Greater chance, there is no reason to waste expensive Tier 2 or Tier 3 gears on random rolls.
Batch your synthesis in groups of 20.This maximizes the value of each save scum attempt, as you re-roll 20 outcomes at once.
Keep one of every Greater gear type.Greater gears are rare enough that you should never discard them, even if the type does not fit your current build.Buildschange and these gears are hard to replace.
Efficiency Priority
For players looking to optimize their time, here is the recommended priority order:
Chapter 3 Totem Farm(if you have not passed Reed Devil yet). This is the highest yield-per-minute method in the early game.
Root's End Ruins Loopfor Abyss Gears. Fast, consistent, and easy to execute.
Blockaded Area rotationfor Abyss Artifacts via the XP bar. Good for mid-game progression.
Spire of Frost disarmingfor high-value weapon drops and gears. Best once you have Shield Bash mastered.
Scholar Stone Institute pickpocketingfor Abyss Artifacts. Excellent once you have the Pickpocket Abyss Gear equipped.
Special Synthesisafter every farming session. Process your stockpile and save scum for Greaters.
Post-Patch (May 2026) Recommended Routes
Several of the most popular Abyss Artifact farms have been adjusted in successive Crimson Desert patch cycles. As of the May 2026 patch window, the community has reported that pickpocketing at the Scholar's Stone Institute and at the Beggar's Camp now drops Abyss Artifacts much less reliably than before, theguard layout at the Demeniss Wildlife Park has been changed so that civilians scatter in multiple directions instead of pooling at the gate, and the Archwalker boss is now a single-kill encounter that does not respawn. Methods that fill the yellowAbyss ArtifactXP bar through repeatable enemy kills have therefore become the more reliable repeatable source.
The two routes documented below have stayed effective post-patch and are the recommended starting points for players who still need to fill the per-character cap. Both routes are also discussed in their own dedicated sections elsewhere on this page; the table here is a quick reference for choosing between them.
Patch caveat:Pearl Abyss has actively rebalanced repeatable artifact sources between patches. Methods that work today may receive further adjustments in future updates. Treat the rates and tactics in this section as accurate for the May 2026 patch window and verify in your own build before committing a long farm session.
Route Name | Region | Estimated Artifacts/hr | Notes |
|---|---|---|---|
Hernand(south,House Graceterritory) | Approximately one full per-character batch in a focused session, depending on AoE clear speed | Triggered by readingTales of Sunset Valleyinside a village house. Enemies spawn indefinitely and reset on a fast travel point. No bounty risk and no contribution loss. | |
Tashkalpsub-region | Comparable to or faster than the scarecrow field for players with strong AoE, but limited by bounty resets every loop | Two fighting pits patrolled by Tommaso Guards. Walking between pits respawns the cleared side. Costs 100 silver per bounty wipe and a small amount of regional contribution. |
Other repeatable methods documented earlier in this guide (the Scholar's Stone Institute pickpocket loops, the Ice Walker XP method, the Time-Skip Dispatch Farm, and Sealed Abyss Artifact challenges) remain valid in the May 2026 patch window even where their throughput has been reduced. Players who have not yet exhausted those methods on a character should layer them in alongside the two routes in the table above rather than pick a single farm.
Sunset Valley Scarecrow Field
This route activates after Chapter 3, onceKliffhas finished theThe Face Behind the Maskmain quest sub-chapter and defeated its boss. With the chapter cleared, travel south of centralHernandtoSunset Valleyand enter the marked house in the village. TheTales of Sunset Valleybook sits on the floor inside. Pick it up and examine it. From the moment the book is read, the open fields just outside the village (around the southern fast travel point) populate with corrupted villagers and scarecrow enemies that respawn indefinitely on a fast-travel reset.
Why the field works for Abyss Artifacts:Each enemy gives only a small chunk of XP individually, but the spawn density and reset rate are very high. Grouping a pack with sprint kiting and clearing them with an area attack fills the yellow XP gauge faster than most kill-based farms in the region. The field also pairs well with severalSealed Abyss Artifactchallenge categories that ask the player to defeat enemies with a specific weapon or while mounted, since the targets are weak enough to satisfy multi-kill timers without the long boss-fight overhead.
Recommended setup:Equip Aptitude abyss gears across as many armor slots as possible.Aptitude I,Aptitude II, andAptitude IIIstack additively up to a hard 100% Abyss XP gain cap; reaching the cap roughly halves the time per per-character batch. The field has no civilians and no guards, so robbery masks and bounty management are not required. Ranged or AoE-heavy builds clear the most efficiently, but melee builds also work because the enemies do not punish long stand-and-fight engagements.
Reset method:When the immediate area thins out, fast travel to the southern Sunset Valley fast travel point and back. The scarecrow population repopulates the same fields. Pearl Abyss has historically tightened spawn timers on heavily-used farms in patches; if respawns slow noticeably, alternate between the field and theTommasotwo-pit loop rather than relying on a single source.
Per-Character 100 Cap and Cross-Character Strategy
Both post-patch routes share the same per-character ceiling: each playable character can earn approximately 100 Abyss Artifacts through enemy kills before the yellow XP bar on the left of the mini-map fills and turns gray. After that, kill-based artifact gains stop on that character and the player must move to side missions, main missions, Sealed Abyss Artifact challenges, or Greymane rumor quests for additional artifacts on that hero. Switching to a differentPlayable Characterresets the kill-based pool, since each character has an independent XP bar and an independent 100-cap.
Practical farm-cycling tip:IfKliffis your main andDamianeor Anka are under-geared, strip rings and earrings off the main between sessions and re-equip them on the secondary before farming there.Character Switchingkeeps the per-character caps separate, so the borrowed accessories carry their full effect during the secondary's run. Lowering the difficulty also has no impact on Abyss XP gains, which makes easy mode a safe choice for an under-geared secondary character on either of the two recommended routes.
Limit-aware planning:Plan your repeatable routes around the per-character cap so that you do not waste time fighting after the bar grays out. A common cycle is to fill the kill cap on the active character at one of the two recommended farms, swap to the next playable character to repeat, then return to fixed sources (challenges, dispatches, story rewards) once all caps are filled.Faded Abyss Artifactsfor skill respec are not affected by the kill cap and remain available through their usual challenge and progression sources.
Two-Pit Loop Quick Reference (Post-Patch Version)
The detailed walkthrough for theTommasotwo-pit loop lives earlier in this guide under "Tashkalp Fighting Pit Farm (Tommaso Guards)." The post-patch addition is the float-distance trick used to keep both pits in respawn rotation: after clearing the first pit, drift south of the second pit before engaging it, far enough that the first-pit guards re-populate while you are fighting the second. Continue alternating, and the loop runs without forced fast-travel resets. Bounty still maxes at 100 silver per session, paid off at anyChurchon the way out, and a small contribution loss is the only reputation cost.
When to pick the pit over the field:Choose the two-pit loop when you want consistent per-kill XP from elite-flagged guards (the golden-armor variant) and you do not mind paying the 100 silver and the contribution penalty. Choose the scarecrow field when you want a no-bounty, no-contribution session, or when you are also clearing weapon-specific Sealed Abyss Artifact challenges that benefit from the high spawn density.
Root Hold Permanent-Blockade Farm
What this method exploits:A May 2026 patch made someBlockaded Areasrepopulate with enemies whenever the player fast travels to anAbyss Nexus. A subset of those re-blockaded forts spawn with a boss, indicated by a small red crown next to the name on the liberation percentage bar at the upper-left of the screen and by an enlarged red icon on the mini-map. If the player drains the percentage bar to 0% but never engages the boss, the blockade does not clear: most of the regular enemies respawn on the next Nexus teleport, and the player can repeat the loop indefinitely until per-character caps are hit.
Why Root Hold in particular:Root Hold is a small fortress northeast ofHernandpatrolled byWolf Trackers. Its blockade footprint covers two connected clusters: the fortress itself, where the boss is parked, and a large tree on the rise just above it. A single Abyss Nexus sits between the two clusters. Standing at the tree side keeps the player far enough from the fortress that the boss is never aggroed, while the two enemy packs near the tree are densely grouped and easy to clear with area-of-effect attacks. The tight layout, the early-game accessibility, and the boss-avoidance geometry are what make Root Hold cleaner than most other re-blockaded forts.
Patch caveat:This method depends on the May 2026 re-blockade behavior and on the boss-alive blockade-persistence rule. Both are recent additions to the open-world loop and may be tuned in future updates. Treat the steps below as accurate for the current patch window and verify in your own build before committing a long farm session. The developer has indicated that the blockade system will continue to evolve in future patches, so expect additional permanent-blockade spots to surface and existing ones to shift in throughput.
Step | Action | Notes |
|---|---|---|
1 | SetDifficulty Settingsto Easy and Re-Blockade to War | Difficulty does not change Abyss XP gain, so Easy mode just speeds up clears. The War re-blockade setting maximizes the chance that Root Hold (and other forts with bosses) will repopulate after liberation. |
2 | Travel to Root Hold northeast ofHernandand confirm the red crown on the bar | If no red crown appears next to the percentage bar, the current spawn does not include a boss and the blockade will fully clear when drained. Wait for a re-blockade with a boss before starting the loop. |
3 | Approach via the tree cluster, not the fortress | The tree above the fort holds two dense packs of Wolf Trackers and the Abyss Nexus is a few steps away. The boss is locked to the fortress side, so staying at the tree side keeps the boss out of aggro range and prevents accidental kills. |
4 | Clear the tree-cluster Wolf Trackers with elemental AoE attacks | Slot AoE Abyss gears such asVolcanic EruptionandShattering Frostfor fast group clears, and lean on elemental hits to avoid stagger from the rifles the trackers fire. Long-range bow builds withInfinite Arrows IIIplusExplosive Arrowpick targets off before they close into rifle range. |
5 | Drain the percentage bar to 0%, but do NOT enter the fortress | As long as the boss is alive, the blockade keeps its persistence flag. Hitting 0% on the bar without killing the boss is the entire trick. |
6 | Teleport to the adjacent Abyss Nexus to respawn the cluster | Most regular enemies respawn on the Nexus teleport. With theWind Elementunlocked, theStorm Veilsmoke-bomb skill turns the player invisible on the spot and lets the teleport prompt fire from anywhere in the cluster, which is faster than running back to the Nexus when only a few stragglers remain. |
7 | Repeat until the per-character 100 cap is hit | EachPlayable Characterhas an independent 100-artifact kill cap. When the yellow XP bar at the lower-left turns gray on the active hero, switch toDamianeor Anka and run the same loop. Strip rings and earrings off the main between sessions and re-equip them on the secondary if the new character is under-geared.Character Switchingpreserves both inventories and gear sets. |
Expected throughput:With a full 100% bonus Abyss XP loadout (any combination ofAptitude I,Aptitude II, andAptitude IIIstacking up to the hard 100% cap), the loop yields approximately one Abyss Artifact every four to five minutes during a clean run. Throughput drops if rifles stagger the player out of an attack animation, so keep elemental hits flowing or stay out of line-of-sight while channeling. Side income is decent because Wolf Trackers drop rifles and armor that sell for silver. Damaged drops fill inventory quickly though, so turning the pet off skips the auto-loot and avoids the slot churn for players who only care about artifacts.
Daily re-blockade soft cap:There appears to be a soft daily cap on how often a single fort will re-blockade. Multiple Nexus teleports across a session can stop new re-blockades from triggering, so if Root Hold refuses to repopulate, rotate to another fort with a boss-and-Nexus pairing for a few cycles before returning. The simultaneous-blockade ceiling on the world map also matters; if the map is already full of active blockades, clear other ones first to free a slot for Root Hold to re-trigger.
If Root Hold will not blockade at all:The blockade does not appear in the world until certain quest chains are completed. Most players unlock it by finishing the Frozen Elder Tree side quest underHouse Graceterritory, which culminates in defeatingGwen Kraberand rewards theShattering FrostAbyss gear used in this farm. The Frozen Elder Tree quest is gated behind several earlier chains, including theKharonso Troll Allianceline in Scholar Stone Institute (which itself opens afterChapter 4: The Price of Knowledgeis cleared), additional faction quests aroundLion Crest Manor, and theSummon: Legendary Wolfline. Exact prerequisites are not surfaced in the quest log, so if Frozen Elder Tree refuses to appear, work through unfinished House Grace and Lion Crest Manor objectives first.
Alternatives if Root Hold is unavailable:Any other re-blockaded fort that spawns with a boss and has an Abyss Nexus close by works on the same persistence rule. Late-game players in Delicia and the desert region report several productive spots there, but those areas open well after Hernand and are not a fit for a player still finishing the early chapters. The Sunset Valley Scarecrow Field and the Tashkalp two-pit loop documented in the previous sub-sections remain the cleanest fallbacks before Delicia is unlocked.
Related Articles
Abyss Artifacts- full overview of what Abyss Artifacts are and how they affect progression
Abyss Gear- detailed breakdown of gear types, tiers, and socket mechanics
Skills- skill tree and how Abyss Artifacts are spent
Spire of Frost- location guide and puzzle solutions
Witches of Pywel- allWitch locationsand services
Pickpocketing- full mechanics guide for stealing from NPCs
Enemy and Gatherable Respawning- how respawn mechanics work across the world
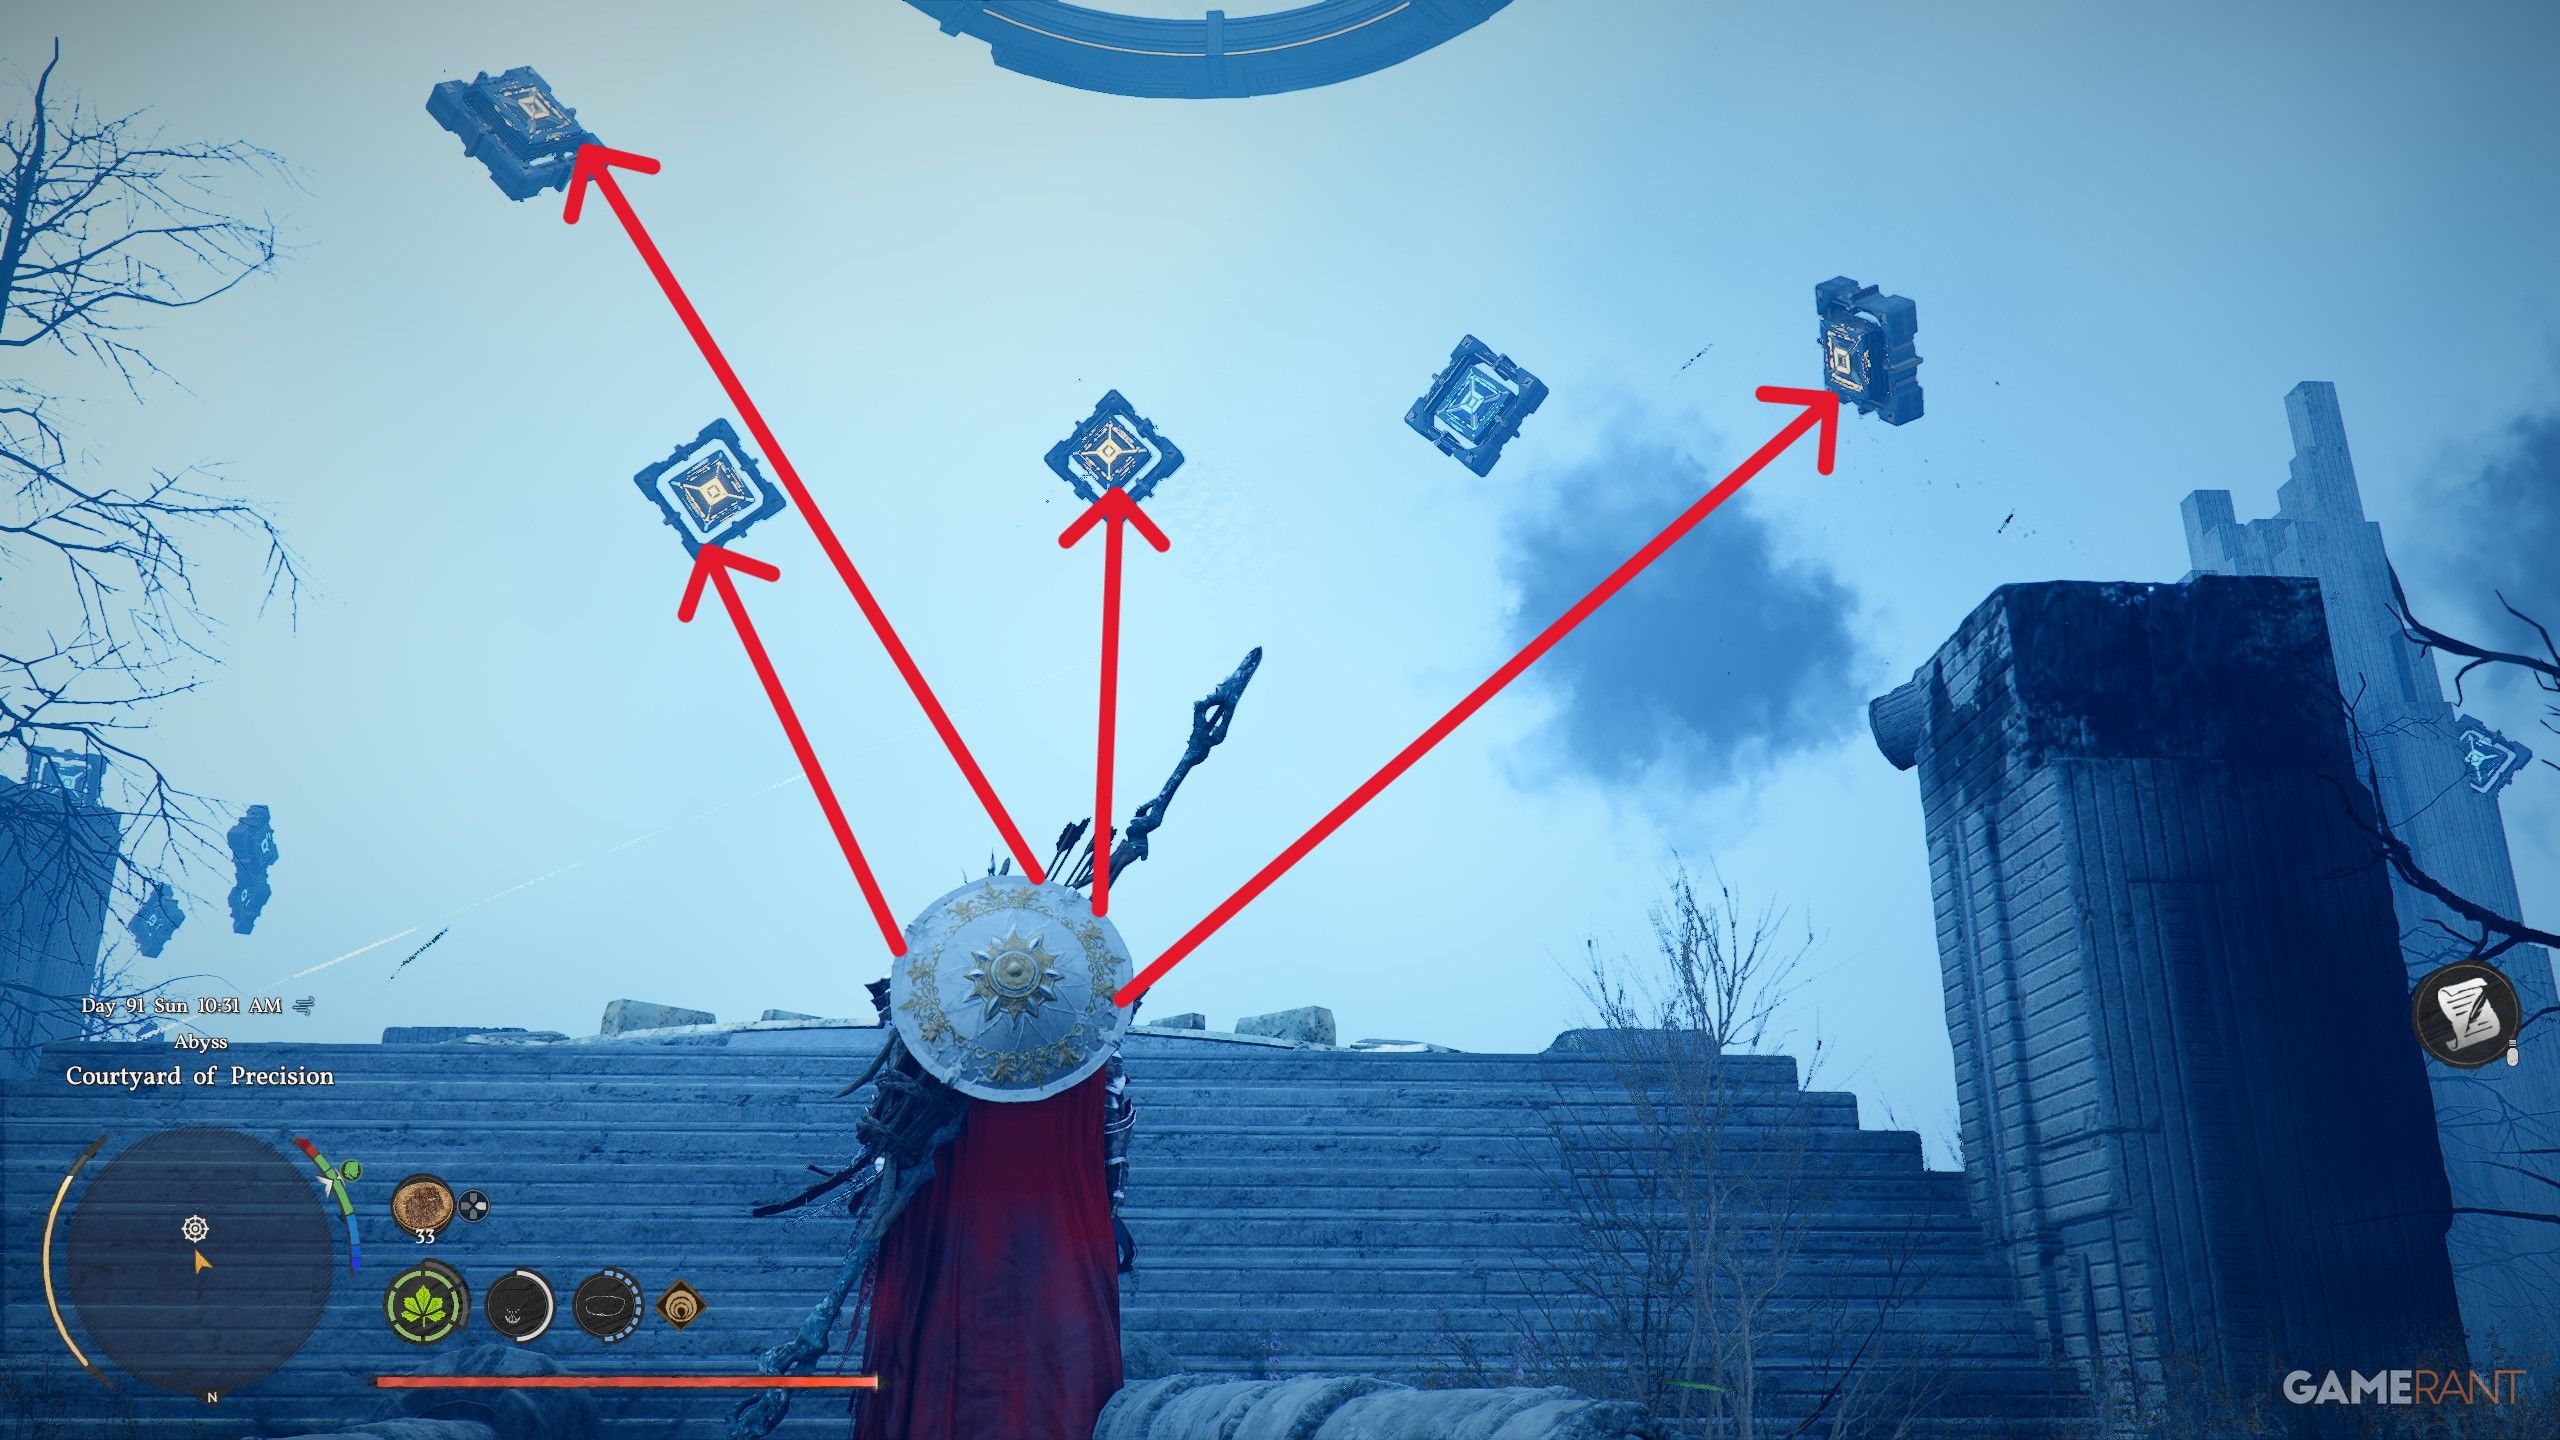
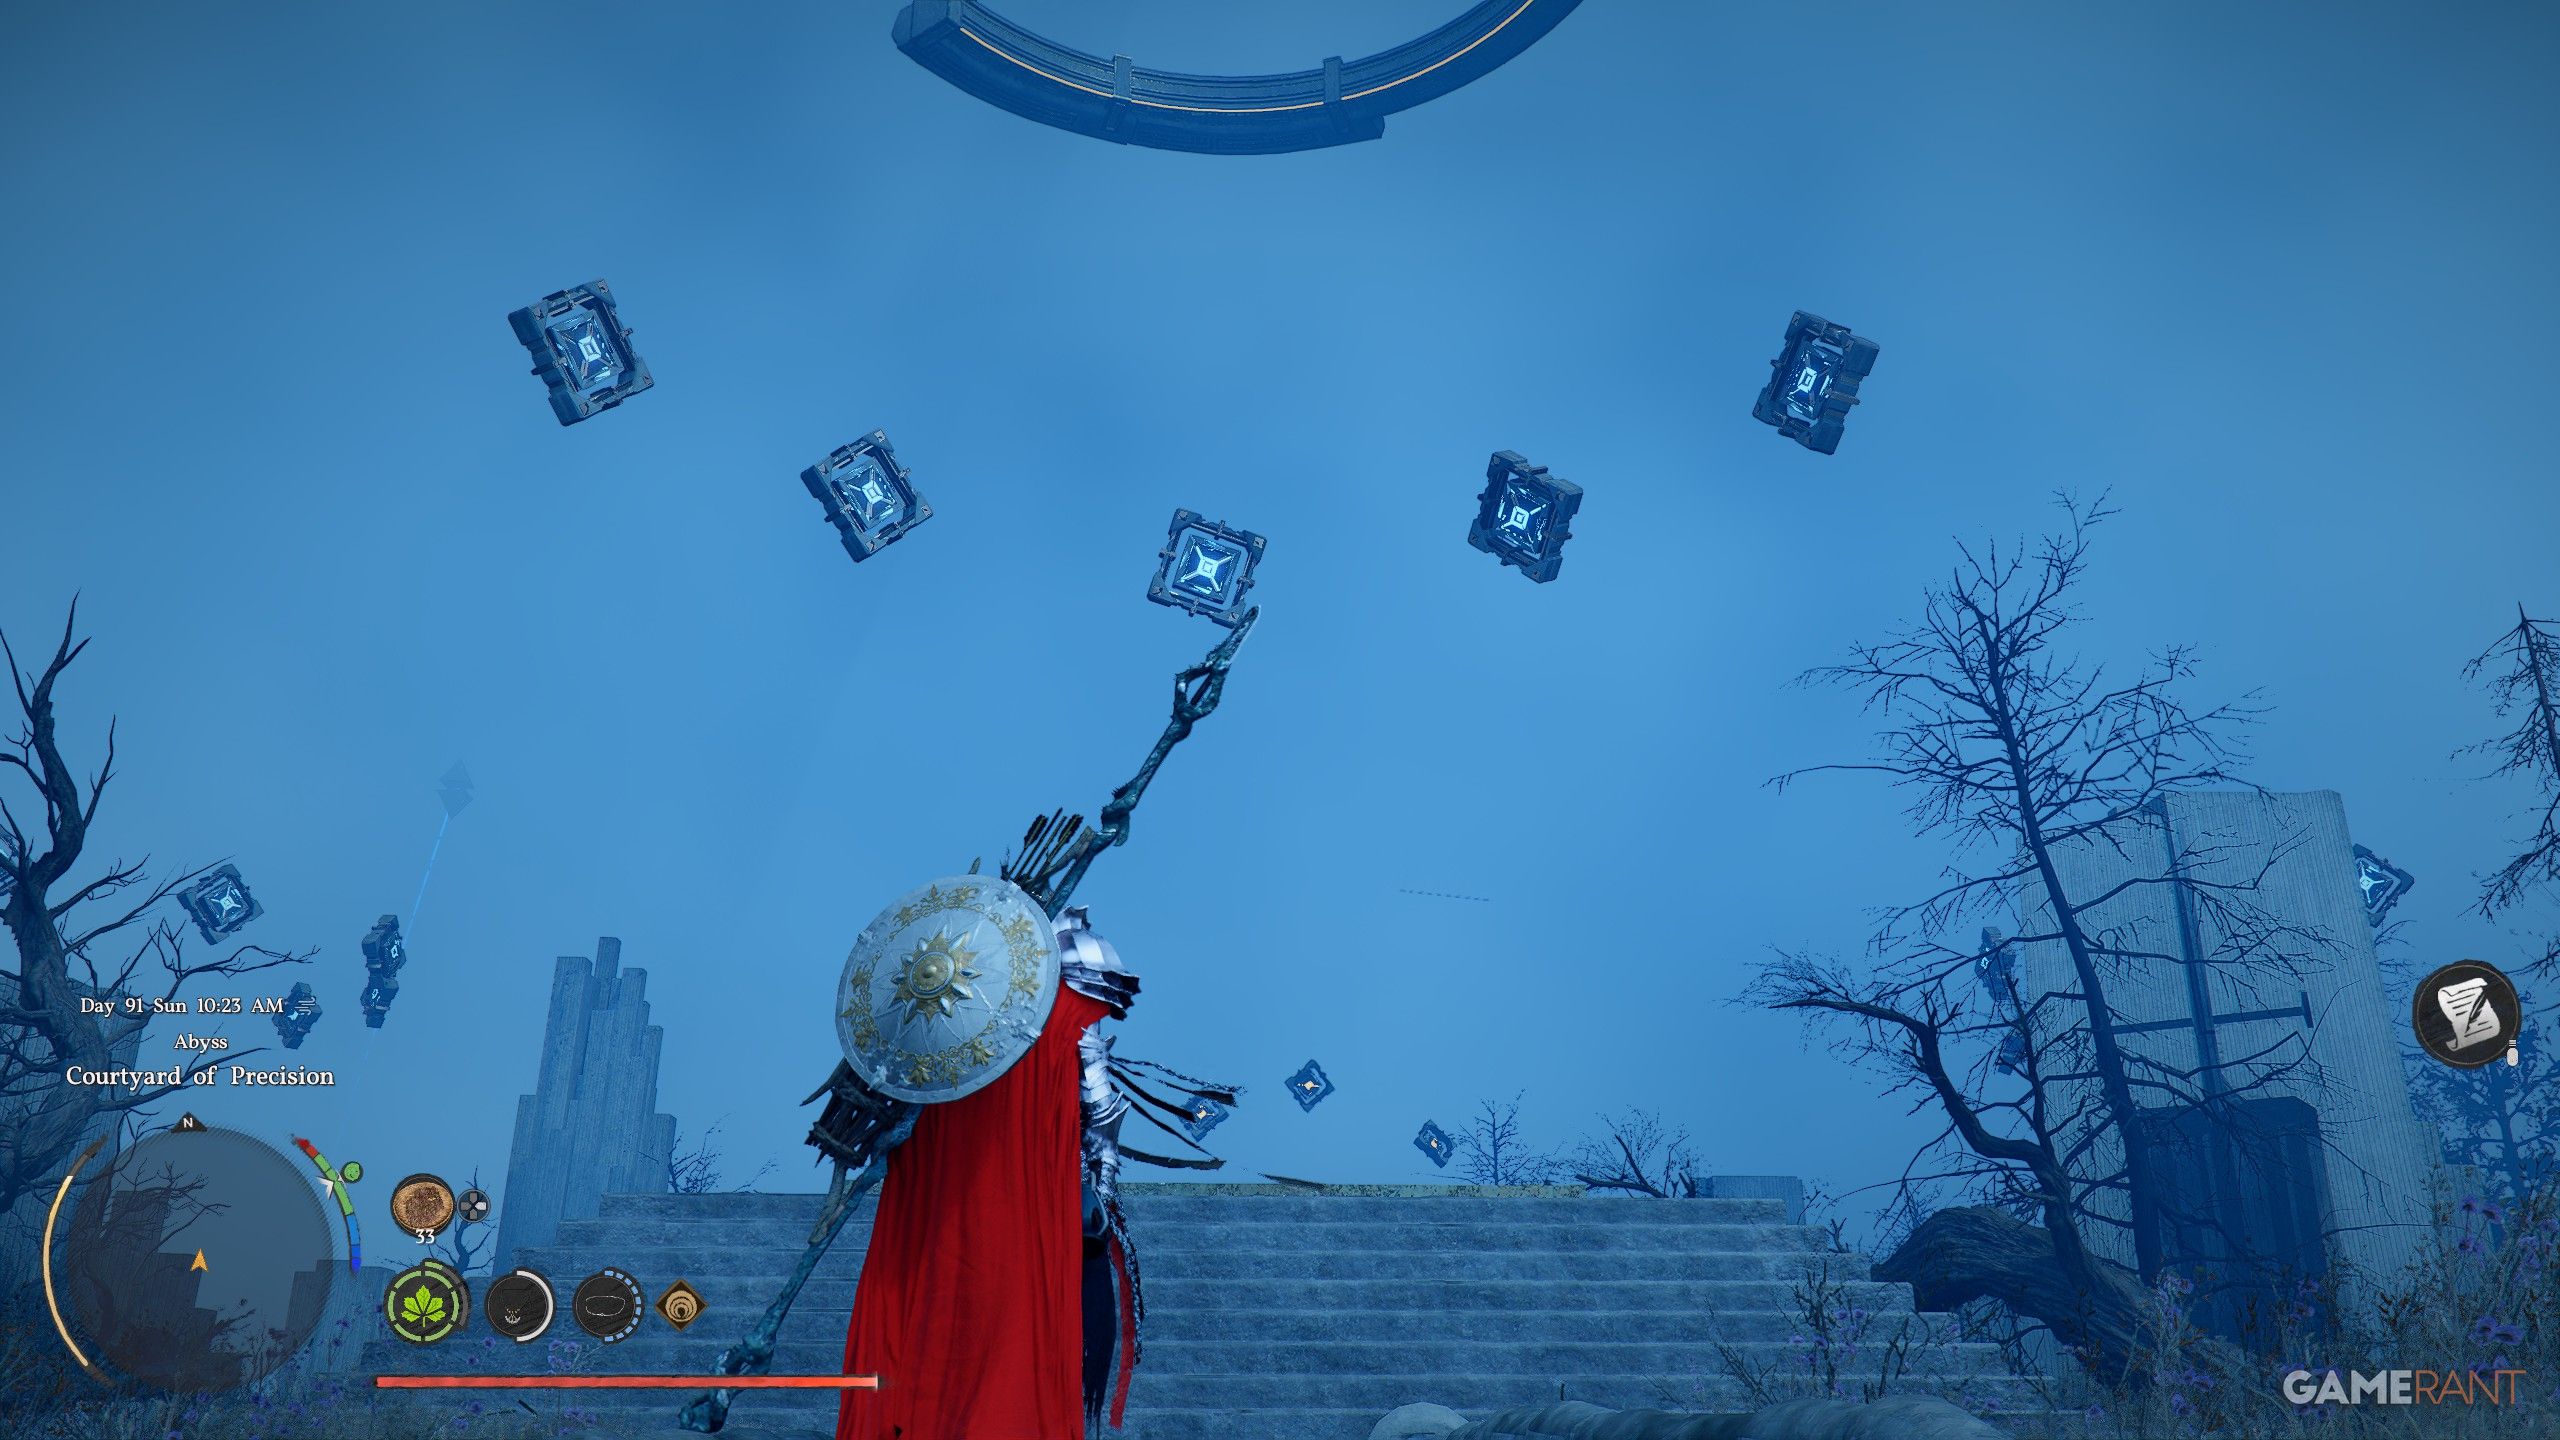
Abyss Sky-Island Puzzle Clusters
Beyond the surface-levelAbyss Crescentsscattered around Pywel, there is a second, elevated tier of puzzles found on the floating islands up in theabyssitself. Each cluster of these sky-island puzzles awardssix additional Abyss Artifacts(equivalent to sixskill points). These become important later in the game because unlocking the elemental imbuement abilities on several weapon trees requires travelling up into the abyss anyway, so you may as well clear the puzzles in the same trip rather than flying up twice.
If you cannot solve a specific puzzle on sight, the Slee Isles playlist of guide videos covers each one individually. Nothing in the game gates these puzzles behind a story chapter, so once you have abyss access you can farm the whole cluster in a single pass.
Puzzle Icons Become Fast Travel Points
This is easy to miss: once you finish any Abyss Crescent puzzle (both the surface puzzles and the sky-island ones), the map icon converts into a permanentfast travel point. That means even if you are running around the map purely for skill points, you are also unlocking a denser fast-travel network for every quest that comes later. Walking from crescent to crescent is almost never wasted time because you get both theAbyss Artifactand a travel node in a single visit.
How Many Artifacts You Actually Need
A fully maxed-outabyss gearset (all slots, all upgrades) costs on the order of72 Abyss Artifacts. That sounds steep, but between the surface crescents, the sky-island clusters, and the renewableTime-Worn Ruinsdispatch (see below), you can hit that number naturally during normal exploration. You do not need to grind in circles.
Renewable Source: Time-Worn Ruins Dispatch
Once you have progressed far enough to use theTime-Worn Ruinsas adispatchlocation, you can send an explorer there on a loop. The reward for that site isAbyss Artifacts, and unlike the fixed crescents, this isinfinite. The turnaround is slow, but it runs in the background while you free-roam, so artifacts keep landing in your inventory between other activities. If you are past the finite-count problem and still want more, this is the only sustainable answer.
Why Save-Scumming Backfires Further
A quick reinforcement of the earlier save-scum warning: Crimson Desert is a time-based world. When you reload repeatedly you are not just wasting real minutes, you are actively rewinding in-game cooldowns andresetting the resources in your camp, which matters for anyone planning to craft or feed their party. Walking the crescent-to-crescent route gives the same artifacts with none of those penalties. The game's design is built to punish repetitive exploit-farming and reward open-world exploration; going with the grain is almost always faster in practice.
Infinite Mecha Worker Loop
Once theHalted Chaya Researchquestline at Dewhaven Keep in Delesia is complete, theMecha Workerdispatch craft unlocks. Each Mecha Worker costs 5,000 weapons and 10,000 coins and takes three in-game hours to build. The craft has no cap, so stacks of 15 scale cleanly to 200 or 300 workers, which is the real engine behind every other loop in this guide.
With a fleet of workers on hand, three infinite ruin dispatches form the artifact, core, and gold bar farm. Every run reportedly drops a distinct slice of rare crafting recipes, including names like Heart of Stone and Beast Bane, so running all three long term is the only way to cover the full recipe pool. Each ruin takes about three in-game days per dispatch, and the three can be queued in parallel.
Time-Worn Ruinsoutput sealed abyss artifacts plus a unique recipe subset, roughly 17,000 wood per completion.
Fallen Abyssdrops abyssal cores and its own recipe pool, also in the 17,000 materials-per-run range.
Bordig Ruinsyields gold bars alongside a separate recipe set, rounding out the rare drop coverage.
Pair each infinite ruin dispatch with one Greymane specialist and nine Mecha Workers.Duncanis the preferred captain for stone and artifact runs because of his triple-mining buff,Evelynleads farming setups, andJosephcovers weapon output. Rotate them based on which ruin is active.
Tashkalp Fighting Pit Farm (Tommaso Guards)
The fastest non-stealing way to fill the yellow XP gauge and cash in Abyss Artifacts is the two-pit loop inTommaso, the main town of theTashkalpsub-region. The town hosts two fighting pits on opposite sides of the map, and each pit is patrolled by Tommaso Guards who grant an unusually large chunk of XP per kill compared to any other guards in the game. The pits are far enough apart that walking from one to the other naturally respawns the guards at the pit you just cleared, which removes the need for loading screens or teleport resets.
How to Identify Tommaso Guards
Golden leather armoris the signature look, making them easy to pick out of the pit crowds.
Long red tasselon the helmet confirms the target.
No shield, so basic attacks and finishers land without being blocked.
Tanky variantsshow up occasionally with a much larger health pool; they do not die quickly but reward a huge chunk of XP in a single kill, so keep hitting until they drop.
Lizard ridersare the same faction and also feed the XP gauge. One rider on each patrol is often out of golden armor and can be skipped.
Two-Pit Loop Route
From the west Nexus teleporter inside Tashkalp, head south and drop down into the west fighting pit. Equip a robbery mask before swinging at anyone so the attack registers and the guards engage back. After wiping the golden-armor guards on this side, travel through the market to the east pit. A horse or glider is fastest, and mounts also prevent the accidental tackles that happen while sprinting past fleeing civilians. By the time the east pit is cleared, the west pit has repopulated, and the loop continues indefinitely.
Targets and Shield Warning
Focus on the golden-armor Tommaso Guards. Other guards give only a trickle of XP and are not worth the swing count. Guards carrying large shields block nearly every hit and stretch the fight out, so leave them for last or ignore them entirely. Regular civilians running away will not fill the gauge at all.
Per-Character 100 Artifact Cap
Each character has a per-character cap of 100 Abyss Artifacts farmed through the XP gauge. Once the bar stops filling onKliff, swap to Damiane or Macduff viaCharacter Switchingand run the loop again for another 100 artifacts. The cap is believed to apply only to gauge-farmed artifacts; artifacts from puzzles and challenges are not thought to count against this limit, though this is community-unconfirmed.
Recommended Gear and Consumables
Aptitude abyss gearsstack Abyss XP gain up to a 100% cap across all armor slots. Fit as manyAptitude I,Aptitude II, andAptitude IIIgears as possible.
Haste abyss gearsspeed up the run between pits.
Fire resistance level 5 or higheroffsets Tashkalp's extreme heat drain. Combine abyss gears and armor pieces to hit the cap.
Blinding Flash Finisheris the go-to crowd-control skill; it hits every blinded enemy in range and shoves the rest back. It costs spirit per cast, so bring spirit-recovery food or use it sparingly.
Wind Slash on Umbra Swordclears pit crowds in a couple of swings if your element tree is not unlocked yet.
Palmar Pillsand food are good safety nets when the guards start to dogpile.
Bounty and Jail Management
Bounty in Highwell caps at 100 silver per town regardless of how many guards you drop, so a single bank visit covers the whole loop. A cheap pre-farm warm-up is the 300-silver buy-in dueling mini-game in Tashkalp: every opponent brings at least 300 silver, and if you catch and accuse cheaters, they are removed and their money splits among the remaining players. Sweeping the accusations basically hands you the full pot without playing the game itself. When the run is over, letting the guards kill you sends Kliff to jail and automatically clears the bounty, which saves a priest trip. Jail also strips the mask, so replace it at a back-alley shop or loot one off a bandit before the next loop.
Why This Beats the Wildlife Park Farm
The popularDemeniss Wildlife Parkguard farm runs on the same XP gauge, but those guards can tackle you, and failing the tackle mini-game warps you straight to jail in the middle of the run. Tommaso Guards in Tashkalp do not tackle; they simply fight to the death, which keeps the loop uninterrupted until you decide to end it.
Scholar's Stone Institute Pickpocket Farm (Skala Stone)
The Scholar's Stone Institute insideSkala Stonehosts a research questline that, once unlocked, spawns Research Scholars who carryAbyss Artifactdrops on their persons. Pickpocketing those scholars is currently the highest per-attempt artifact rate the community has documented for a non-combat method, and the spawn pool can be refreshed indefinitely by speaking to the localAbyss Nexus. The full setup takes only a few minutes because the gating quests in the Skala Stone Institute journal are some of the shortest chains in the game.
Unlock Steps for Abyssal Energy Research
Travel to the Scholar's Stone Institute building inSkala Stoneand find the scholar at the marked desk who asks for aHoney Tea. Most players already have one in inventory; if not, follow the marker the NPC drops to pick up a sample.
Hand over the Honey Tea, then talk to the same scholar a second time to start theAbyssal Environment Researchproject. This unlocks the institute's research tab in the journal.
Open theJournaland scroll to the Skala Stone Institute section. Complete the short prerequisite chains, which are mostly walk-up-and-talk quests inside or just outside the building. They exist purely to feed research progress.
Once the prerequisites are cleared, return to the project board and start theAbyssal Energy Researchquest. This is the quest that will spawn the Research Scholars.
Wait until the Abyssal Energy Research quest progress reaches50%, which triggers the scholar spawns at the marked location. The marker reads asFind Out Why the Research Has Stopped.
Pickpocket Loop at the Spawn Site
Equip aMaskbefore approaching the scholars. Stealing from them counts as a crime, and an unmasked attempt registers your bounty under your real face. Do not talk to the scholar standing next to theAbyss Nexusprop at the site; that NPC is the refresh handle, not a target.
Use aLanternor aBlinding Flashto tag and inspect the scholars. The interface flags whichever scholar is currently carrying an Abyss Artifact, so cycle through the group with the lantern up.
Bump into the tagged scholar to enter pickpocket range, then pressX(orSquareon PlayStation) to attempt the steal.
Each successful pickpocket has roughly a1 in 3chance to drop the actual Abyss Artifact. The other rolls return common items like Apples or Cloth. Keep cycling through targets and re-attempting until the artifact lands.
If the red detection circle appears, sprint out of it before the bounty stamps. Leaving the area in time dissipates the warning. Even if a bounty is applied, it is a small fine and not a run-ending problem.
When every scholar at the site has been checked, talk to theAbyss NexusNPC to despawn the current group and roll a fresh batch of scholars. The refresh is unlimited, so the loop continues for as long as you want to grind.
Drop Rate Tips for the Scholar Method
Run the loop at nightif possible. Night-time visits give an increased chance for scholars to spawn carrying the artifact, which compresses the number of refreshes needed per drop.
Use the wider Skala Stone area as a backup. During the day, additional scholars patrol the streets around the institute. They are less common and require more running between targets, but they are still pickpocket-able and can pad your haul if the central spawn site has been refreshed too many times in a row.
Do not kick or melee the scholars. Knocking them down breaks the pickpocket window and triggers a heavier crime alert than a clean steal.
Keep the mask on between rolls. Removing the mask between attempts can register a fresh witness and stack the bounty unnecessarily.
Why This Method is Recommended
The Scholar's Stone Institute pickpocket loop is the fastest way to bank Abyss Artifacts in bulk because it skips combat entirely, refreshes on demand, and leans on a single NPC (Abyss Nexus) to reset the spawn pool. Once the unlock chain is done, a single play session can collect enough artifacts to max out skill upgrades across multiple characters.
Method 1: Enemy Camp Liberation
The fastest and most repeatable way to earn Abyss Artifacts is by defeating enemies at camps. When you fight enemies, a yellow meter appears on the left side of the minimap. Once the meter fills completely, you earn one Abyss Artifact. Enemy camps are marked as red buildings on the World Map, and each region of Pywel has multiple camps to clear.
During main quests that feature waves of enemies, you can earn multiple Abyss Artifacts by defeating all enemies rather than rushing to the objective. The liberation meter fills based on enemies killed, so areas with large groups of opponents are the most efficient farming spots.
The Liberation System tracks which camps have been cleared in each region. Liberated camps often become friendly outposts or fast travel points.
Method 2: Sealed Abyss Artifacts
Sealed Abyss Artifacts are collectible items found on stone altars scattered throughout Pywel. There are 141 Sealed Abyss Artifacts in total. Each one is tied to a specific challenge. Picking up a Sealed Abyss Artifact adds it to your inventory and unlocks its associated challenge. Once you complete the challenge, the artifact begins to pulsate in your inventory. Using it at that point converts it into a regular Abyss Artifact that can be spent on skills.
How to Find Sealed Abyss Artifacts
Sealed Abyss Artifacts are not marked on the main map, but they appear as a small purple icon on the minimap when you are nearby. Most are placed on stone altars along roads, at intersections, and near landmarks. They tend to be in plain sight rather than hidden.
You can use the sword's Guiding Light ability to detect nearby Sealed Abyss Artifacts. Activating Guiding Light produces a blue glimmer in the direction of the nearest artifact. This ability is available through Keen Senses.
Tip: Activating all 8 hidden bells to unfog the map first makes locating Sealed Abyss Artifacts significantly easier, since you can see road outlines and landmarks as reference points.
Sealed Artifact Locationsby Region
For a detailed list of every individual Sealed Abyss Artifact location with maps and directions, see the dedicated Sealed Abyss Artifact Locations page. Below is a summary of how many artifacts are found in each region and the challenge categories they unlock.
Hernand
Hernand has the highest concentration of Sealed Abyss Artifacts, as it is the starting region and central hub of the game. Artifacts here unlock challenges across many categories including Sword Challenges, Shield Challenges, Bow Challenges, Spear Challenges, Two-Handed Weapon Challenges, Horse Challenges, Training Challenges, Above the Law Challenges, Operation Challenges, Hunting Challenges, Rapier and Shield Challenges, and Challenges and Changes. Notable landmarks near artifacts include the Goldleaf Tradepost, Calphade Outpost, Phoniel Ranch, Fort Warspike, and the Karin Quarry.
Pailune
Pailune has artifacts that unlock Operation Challenges, Two-Handed Weapon Challenges, and Trade Challenges. Check along the roads near River Breeze Hearth, Torvak Camp, and Skoghorn, as well as in Pailune town itself.
Delesyia
Delesyia features artifacts unlocking Cannon Challenges, Challenges and Changes entries, Life Challenges, and Operation Challenges. Search near Chittering Forest, Redfox Trading Post, Windrose Farm, and Delesyia South Gate.
The Crimson Desert
The Crimson Desert region has artifacts across a wide variety of challenge categories including Bow Challenges, Gun Challenges, Cannon Challenges, Battle Challenges, Special Equipment Challenges, Trade Challenges, Hunting Challenges, Life Challenges, and Above the Law Challenges. Key areas include the Well of Reflection, Tommaso, Isvatu Fortress, Arcosa, and Crimson Mountains Fortress.
Challenge Categories
Each Sealed Abyss Artifact is tied to one of the following challenge categories. Completing the challenge unseals the artifact. See All Challenges for the complete list.
Mentor/Source | ||
|---|---|---|
Goyen's Advice | Defeating enemies with sword attacks within time limits. | |
Goyen's Advice | Ranged combat accuracy and timed bow kills. | |
Goyen's Advice | Spear combat proficiency and kill counts. | |
Goyen's Advice | Defensive combat using block andparrytechniques. | |
Goyen's Advice | Heavy weapon combat and damage thresholds. | |
Goyen's Advice | Hand cannon combat challenges. | |
Goyen's Advice | Damiane'srapierandshield combattasks. | |
Goyen's Advice | Pistol and rifle combat challenges. | |
Master Du's Dare | Mounted riding, racing, and combat from horseback. | |
Master Du's Dare | Stealth, deception, and outlaw activities. | |
Alustin's Trials | Physical feats and balance challenges. | |
Alustin's Trials | Varied tasks including mini-game wins and world interactions. | |
White Crow's Gaze | Tracking and killing specific animals or creatures. | |
White Crow's Gaze | ||
White Crow's Gaze | Merchantandtradingactivities. | |
Various | Tactical and strategic combat scenarios. | |
Various | Large-scale combat encounters. | |
Various | Using specialequipmentlike the knuckledrill andlightning spear. | |
Various | One-on-one combat encounters. | |
Various | Strength-based physical challenges. |
Method 3: Quest Rewards
Many main quests and faction quests award Abyss Artifacts upon completion. These are fixed rewards that cannot be missed as long as you complete the quest. Notable quest chains that award Abyss Artifacts include:
The Flames of Greed(Main Quest)
Rumors From the Sawmill(Main Quest)
New Journey(Main Quest, early game)
Multiple faction-specific questlines throughout each region
Check individual quest pages for confirmed Abyss Artifact rewards. Main story quests tend to award them at chapter milestones, while faction quests award them upon completion of each quest in the chain.
Method 4: Greymane RumorQuests
The Rumor System provides short side quests that involve locating scattered Greymane comrades and bringing them back to Greymane Camp. Each completed Rumor quest rewards one Abyss Artifact. These quests are quick to finish, typically requiring you to travel to a location and talk to an NPC, making them one of the fastest sources of artifacts.
Rumors become available as you progress through the main story and explore new regions. Check the quest board at Greymane Camp regularly for new Rumor quests.
Method 5: Boss Defeats
Defeating bosses and world bosses can also reward Abyss Artifacts. The more powerful the boss, the more likely it is to drop artifacts as part of its reward. Major story bosses encountered during the main walkthrough typically guarantee at least one Abyss Artifact.
Faded Abyss Artifacts
Faded Abyss Artifacts are a special variant used to reset your skill tree. Applying a Faded Abyss Artifact refunds all spent Abyss Artifacts on a character, allowing you to redistribute them into different skills. This functions as the respec system in Crimson Desert. Faded Abyss Artifacts are rarer than regular ones and are typically found as rewards for completing difficult challenges or progressing deep into the main story.
Tips for Efficient ArtifactFarming
Clear enemy camps duringmain quests.When a story mission has you fighting waves of enemies, defeat all of them instead of rushing to the next objective. The liberation meter fills from kills, so you can earn multiple artifacts per quest.
Unfog the map first.Activate all 8 hiddenbellsto reveal the full map. This makes it much easier to spot road intersections and landmarks where Sealed Abyss Artifacts sit.
Use Guiding Light.Activate the sword's Guiding Light ability while riding along roads to detect nearby Sealed Abyss Artifacts via a blue glimmer.
Check Greymane Camp regularly.New Rumor quests appear on the board as you progress. Each one completed is a guaranteed Abyss Artifact.
Do not skip Sealed Abyss Artifacts.Even if you cannot complete the challenge immediately, picking up the sealed artifact adds it to your inventory. You can complete the challenge later at your own pace.
Prioritize challenges you can complete naturally.Many challenges involve tasks you would do anyway, like killing a certain number of enemies with a specific weapon type or riding your horse a certain distance.
Frost Mantle Loop at Rebirth Cliff
A high-throughput Abyss Artifact and XP loop runs along the Rebirth Cliff south ofDemeniss. A column of enemy archers stands on the cliff edge firing across the water at the serpent body ofAeserion, the Great Serpent. With the right element and skill setup, a single Right Trigger swing ofFrost Mantleshatters every archer in a straight line, andFast Travelback to the same point resets the pack instantly. Each clean lap nets roughly two Abyss Artifacts plus a large chunk of the active character's XP bar, and the only setup time per loop is the few seconds it takes to fast travel and re-aim.
Mission lockout.This farm depends on the cliff archers being alive. The community-reported lockout is the main questShackled God: the Saeran Great Serpent. Players who have completed that mission report the archers no longer spawn on the cliff; players who still have the mission outstanding can run the loop indefinitely. The exact despawn trigger has not been independently confirmed for every save, so if the cliff is empty after the prerequisite chain, check whether Shackled God: the Saeran Great Serpent is on your completed list. Make a save before the final boss step of that mission if the loop matters to your build.
Why This Loop Works
Three systems combine on the cliff. The archers stand in a clustered line on a narrow ledge with no path back up if knocked off, so a single area attack catches every body.Frost Mantle's shatter pulse is the right shape for the line: held with Right Trigger from the lock-on position, it slams down a frost wave that one-shots cliff archers wearing standard plate. With the Shaoran Frost Abyss Gear extracted from theIcewing Plate Armorreward, frost damage scales high enough on a non-refined armor set to overkill the cliff archers in a single hit, which means no second swing, no kiting, no spook recovery between bodies.
TheFast Travelreset is the second leg. Each fast travel back to the Rebirth Cliff point respawns the archer pack as if a fresh visit; the loop never has to walk back. The third leg is the XP bar itself. The bar that fills on each character's mini-map directly tracks Abyss Artifact earn rate, and the cliff archers grant enough XP per swing that a relaxed run completes a full bar inside a couple of minutes.
Required and Recommended Setup
Slot | Required or Recommended | Notes |
|---|---|---|
Active Element | Required | Frost (Frost Element) unlocked and selected on the radial wheel. |
Skill | Required | Frost Mantleunlocked. The Right Trigger shatter is the swing that one-shots the cliff archers. |
Abyss Gear (Damage) | Required | Shaoran Frost. Extracted from the Icewing Plate Armor reward of House Celeste's Frozen Outertale. Slot it onto the armor you wear during the farm. |
Abyss Gear (XP) | Recommended | Shadow Frost (Attitude family). Reported to grant up to +100% XP gain when fully slotted. Doubles artifact throughput per loop. |
Pet | Recommended | ABird Petauto-loots the drops scattered by knockback so no manual ground sweep is needed between resets. |
Character | Any of three | Kliff,Damiane, orOongka. Frost Mantle is available on all three, which makes the cliff one of the best places to bank XP across the full roster. |
Standard non-refined armor on the active character is enough. The Shadow Frost gear is the only piece that materially changes throughput on top of Shaoran Frost; reported gains land around double XP and double Abyss Artifact yield per loop.
Per-Character Cap and Diminishing Returns
Each character has a hard cap of 100 Abyss Artifacts earned from the XP bar source on that character. The cap is independent across the three playable characters, so running the loop onKliff,Damiane, andOongkain sequence yields 300 Abyss Artifacts total before the bar source dries up. Earnings slow noticeably as a character approaches the cap, and a maxed character may make the cliff loop feel sluggish even though the swing pattern is identical. Switch to a lower-progress character if the bar stalls. SeeCharacter Switchingfor the swap procedure.
Loop Execution
Fast travel to Rebirth Cliff south ofDemeniss. Set the Frost element on the wheel and equip the armor carrying the Shaoran Frost gear.
Run forward toward the line of cliff archers facing out across the water atAeserion, the Great Serpent.
Lock on. Hold Right Trigger to fire the Frost Mantle shatter swing. On Xbox the input is Right Trigger alone; on PlayStation it is Right Trigger plus Square. The whole archer line goes down in one swing if the Shaoran Frost gear is slotted and Frost is the active element.
Let theBird Petsweep loot. Open the map and fast travel back to the Rebirth Cliff point. The archers respawn on arrival.
Repeat. Roughly two Abyss Artifacts plus a substantial XP chunk per loop on a fresh character; less near the per-character 100 cap.
When the active character's bar slows, swap to a sibling character viaCharacter Switchingand start a new bar from the same fast travel point.
Frozen Outertale Quest Chain (Prerequisite Path)
The Shaoran Frost gear and the Frost Mantle skill both gate on completing House Celeste's Frozen Outertale, which sits at the end of a long faction quest chain. Players who have wandered through this content casually may already be most of the way through. The full sequence used by the community to surface Frozen Outertale on a new save is listed below in execution order. Where a quest belongs to a different faction or has its own page already, the faction or quest is wikilinked.
Pre-chain setup.Start theHouse Celestebounty board in the city of Hernand: Outlaws in Hernand opens with three of the nine bounties available. Do not finish all nine yet; the chain unlocks more reliably with that thread held open. In parallel, finish the House Robarts Estate in Dismay arc, which rewards a Gold Ore Vein map and a mining knocker drop. Both threads run alongside each other and need to be in progress before the rest of the chain triggers.
Step | Faction | Quest | Notes |
|---|---|---|---|
1 | Outlaws in Hernand | Three of nine bounties open. Hold the rest until later. | |
2 | House Robarts | Hands you the bridge into the Boulder From the Sky arc. | |
3 | House Robarts | Needs Embers of Return finished first for the Greymanes construction step. | |
4 | Greymanes | Embers of Return(the Grounds of the Sunrise step) | Helper quest tied to the Boulder From the Sky construction task. |
5 | House Circus | Lord of Mysterious | Unlocks once Boulder From the Sky resolves. Triggers the House Alfonso opening. |
6 | Opens the parallel Alfonso storyline. | ||
7 | Both Alfonso quests must finish. They award a transcendent structure that only appears after a fast travel. | ||
8 | House Circus | Flame Mountain: The Chains | Returns the chain to House Circus after the Alfonso steps clear. |
9 | House Circus | Secret of the Last Seal | Companion seal step. |
10 | House Circus | Silent Anvil | Often already completed earlier in the campaign. If not, finish it now. |
11 | House Circus | Who Should Win | Short horse race side step that wraps the House Circus block. |
12 | Queen of the Silk Spun Citadel | Unlocks the Hernandian Parish of Solumen faction. | |
13 | Where Land Meets Sky | New faction quest. Awards the Missing Relic follow-up. | |
14 | Missing Relic | Wrap-up step for the new parish. | |
15 | How Hands | Back to House Celeste. Opens the Vellua Fishermen's Guild. | |
16 | Beyond the Silent Waves | Vellua opener. Triggers Lost in the Mist. | |
17 | Lost in the Mist | Vellua closer. | |
18 | Abandoned Factory | Triggers a fast travel back into Hernand. | |
19 | Legendary Wolf | Opens House Felix when the wolf falls. | |
20 | Family Concerns | House Felix opener. | |
21 | Shackle Breaking Hammer | Opens theBeggars' Alliance. | |
Optional | Outlaws in Hernand (clear the remaining nine) | Now is the time to mop up the rest of the bounty board. The ninth bounty clears the Elvilcome outpost; finishing it triggers a random extra post bounty. | |
Optional | House Circus | The Nemesis Demise | Side trip that helps slot the Chapter checkpoints around the chain. |
Optional | Side trip on the way back to House Celeste. | ||
Optional | Scholar's Stone Institute | The Scholar's Stone Research Institute | Often gated behind Chapter 4 of the main story. |
Optional | Power in Forest Guardians | Children of the Woods | Last Forest Guardians thread if the Toll of Pyre Well and Trembling Wood are already done. |
22 | Beggars' Alliance | Faction opener. | |
23 | Plague Over the Wall | OpensHouse Gracewith two simultaneous quests. | |
24 | Drifting | Grace opener A. | |
25 | The Polygraph Apparition | Grace opener B. Runs in parallel with Drifting. | |
26 | Bridge quest to Owner of Glenbright Manor. | ||
27 | Owner of Glenbright Manor | Puzzle quest. Grab the highlighted keys, spin the upstairs wardrobe dial until sunlight hits the center statue, take both daggers, then place them in the main bedroom to reveal the hidden path. | |
28 | Carrots or Troll Alliance | The Sleeping Heart | Restore the four barrier-stone artifacts. Right to left, place artifact 1 far right, artifact 2 next to it, artifact 3 next to that, and artifact 4 far left. Boss fight that follows is short. |
29 | Fast travel back into Hernand | Required trigger between Sleeping Heart and the final Celeste step. Some saves only spawn Frozen Outertale after a fresh fast travel. | |
30 | Frozen Outertale | Reward includes theIcewing Plate Armor. Extract the Shaoran Frost Abyss Gear from it and slot it onto your farming armor. WithFrost Mantlealready on the skill bar, the Rebirth Cliff loop is ready to run. |
Saves that have skipped earlier campaign sections may find the chain stalls at one of the bridge steps. Common causes are an unfinished Greymanes Embers of Return, an undelivered House Alfonso transcendent structure (only spawns after a fast travel), or an open ninth Outlaws bounty that quietly blocks the Beggars' Alliance opening. If a step refuses to advance, fast travel away and back to the relevant city to force a refresh, and check the journal for any soft-locked side quests sitting under House Celeste, House Circus, or House Felix.
Notes and Cautions
Save before the gate.The Shackled God: the Saeran Great Serpent quest is the suspected lockout. Hold a save from before that mission's final boss if Rebirth Cliff is part of the long-term plan.
Bird first.Pet the bird before each fast travel. The auto-loot saves a manual sweep along the cliff edge between resets.
Watch for the spook gauge.Each kill returns spook, so the gauge stays full as long as kills keep landing. A missed swing on a thinned line can cause a stall.
Rotate characters.The 100 Abyss Artifact bar cap is per character, so the loop is most efficient as a three-leg rotation acrossKliff,Damiane, andOongka.
Stair and slope.If a body falls off the cliff, the bird will still chase it down. Standard archers do not regenerate up the cliff face, so positioning at the high end of the ledge keeps line-of-sight on every target.
Related Pages
Skills- The skill system where Abyss Artifacts are spent
Skill Acquisition Guide- Detailed guide on unlocking and upgrading skills
All Challenges- Complete list ofall challengesin the game
Sealed Abyss Artifact Locations- Detailed map and directions for every sealed artifact
Artifacts and Abyss Fragments- General artifact information
Progression System- How character progression works overall
Collectibles Guide- Guide to all collectible types including artifacts