Flame Knight
The Flame Knight, known as Tristan, is an optional boss in Crimson Desert encountered at the Flame Knight's Castle on the western side of Demeniss. Defeating him rewards the Seal of Devotion and grants access to powerful equipment including the Drake Shield and Spada Sword.
On This Page
Overview
The Flame Knight is an optional boss in Crimson Desert and one of the more challenging encounters players will face in the Demeniss region. Known by his true name Tristan, the Flame Knight was once a decorated soldier who commands fire-based attacks and leads a garrison of soldiers from within his castle stronghold. The battle is part of the Letter of Silence faction quest tied to House Azerian, and the rewards for clearing the castle are among the best available in the mid-to-late game.
Unlike most story bosses that are tied to mandatory main quests, the Flame Knight is a faction quest boss. Players need to specifically seek out and accept the Letter of Silence quest after reaching Demeniss during Chapter 7. The fight itself is demanding, but the payoff is substantial: you get access to a unique shield, a unique sword, an extra pair of Scorchflame armor gloves, and the Seal of Devotion, which permanently unlocks the ability to hire Contribution Workers at your camp.
Boss Stats
Stat | Details |
|---|---|
Name | |
Location | Flame Knight's Castle, western Demeniss |
Quest | Letter of Silence (House Azerian faction quest) |
Chapter | Available from Chapter 7 onward |
Type | Optional faction quest boss |
Damage Type | Physical and Fire |
Difficulty | High |
Seal of Devotion, Drake Shield, Spada Sword, Scorch Flame Plate Gloves |
Location
The Flame Knight's Castle is located on the western side of Demeniss. The castle itself is a fortified military compound with multiple interior rooms and an open courtyard. Soldiers patrol the grounds both inside and outside the walls, and the area is heavily guarded even before the boss fight begins.
To reach the castle, travel west from the main Demeniss settlement. The castle is visible from a distance thanks to its towering stone walls and the smoke rising from within. Once you approach, you will notice that the drawbridge is accessible and the front gate is open, but do not let that fool you into thinking this will be a casual stroll. The interior is packed with enemy soldiers and flamethrower-wielding troops.
Prerequisites
The Flame Knight boss encounter is not available from the start of the game. There are several conditions that must be met before the fight becomes accessible.
Story progression: You must have progressed to at least Chapter 7 of the main story and reached the central part of Demeniss.
Faction quest: The Letter of Silence quest must be accepted. This is a House Azerian faction quest that becomes available once you arrive in Demeniss during the main story.
Gear recommendation: Bring a good supply of healing items. The castle is filled with soldiers and flamethrower enemies that can drain your health quickly before you even reach the boss.
Fire resistance: Equipping gear with fire resistance is strongly recommended. The Flame Knight and his soldiers use fire-based attacks extensively throughout the encounter.
Reaching the Boss
Getting to the Flame Knight is a battle in itself. The castle is packed with soldiers who will engage you on sight. Here is what to expect as you fight your way through.
Enter the Flame Knight's Castle through the front gate. Soldiers will immediately attack.
Fight through the castle courtyard and interior rooms. Enemies with flamethrowers are scattered throughout and can set you on fire, interrupting your attacks and dealing damage over time.
Keep an eye on your mini map. Look for a small circle marker that indicates the boss trigger point.
Walk into the marked area to trigger a cutscene that initiates the boss fight with Tristan.
The flamethrower soldiers deserve special attention. When they hit you with their flame stream, it applies a burning status effect that ticks damage and, more importantly, interrupts any attack animation you are currently performing. This makes them dangerous not because of raw damage but because they can leave you vulnerable to follow-up attacks from other soldiers. Prioritize taking out flamethrower enemies first, or use ranged attacks to eliminate them before closing in.
Boss Fight Strategy
The Flame Knight is a heavily armored boss who fights with a large shield and a one-handed weapon. He combines devastating physical strikes with fire-based area attacks, making the fight a balance between aggressive offense and careful positioning.
General Approach
Forward Slash attacks are extremely effective in this fight. Forward Slashes are your heavy attack, and they excel at breaking through the Flame Knight's guard and building up his stun meter. Landing consecutive Forward Slashes will stagger him, opening a window for a burst of free damage. Combine this with Nature's Echo for devastating results. Nature's Echo replicates your most recent Forward Slash, effectively doubling your damage output with each heavy attack. Even at level 1, Nature's Echo triggers an additional hit after every Forward Slash, which accelerates stun buildup considerably.
Do not try to trade blows with the Flame Knight head-on during his attack sequences. His shield slam attacks cover a wide area, and standing in front of him during a combo chain is a quick way to lose a large chunk of health. Instead, attack during his recovery windows after he finishes a combo or when he is staggered from accumulated Forward Slash hits.
Reading the Abyss Ring
Pay close attention to your Abyss ring during the fight. The ring glows red just before the Flame Knight executes his most dangerous slam attack. This visual cue gives you roughly one second of warning to dodge or back away. Treat the red glow as an immediate signal to disengage: stop attacking and roll to safety. Ignoring this warning will result in massive damage from the area-of-effect slam that follows.
Dealing with the Charge
The Flame Knight periodically charges forward in a straight line, leaving a trail of fire on the ground behind him. This fire trail persists for several seconds and deals continuous burn damage if you stand in it. When you see him lower his shoulder and prepare to charge, dodge to the side rather than backward. Rolling backward puts you directly in the fire trail's path. After dodging the charge, you have a brief opening to land two or three hits before he recovers and turns to face you.
The Blue Ultimate Attack
At certain health thresholds, the Flame Knight charges up a blue-colored ultimate attack. This is his most powerful move. When you see him begin channeling blue energy, immediately back away and put as much distance between you and him as possible. Do not attempt to interrupt this attack; it cannot be staggered or cancelled. Wait patiently for the ultimate to finish, then move back in and resume your offense. Trying to stay close during this phase is almost guaranteed to result in death or near-death.
Attack Patterns
Attack | Description | How to Counter |
|---|---|---|
Shield Slam | The Flame Knight raises his shield high and slams it into the ground, creating a large area-of-effect fire explosion. The Abyss ring glows red as a warning before this attack. | Watch for the red Abyss ring glow. Dodge roll away as soon as you see it. Do not block; the AoE is too wide. |
Charges forward in a straight line at high speed, leaving a trail of fire on the ground that persists for several seconds and inflicts burn damage. | Dodge to the side, not backward. Avoid standing in the fire trail. Punish from the side during his recovery. | |
Sword Combo | A series of two to three melee swings with his weapon targeting the area directly in front of him. | Block if your stamina is high, or dodge roll through the combo. Counter with Forward Slashes during the recovery window after the final swing. |
A quick horizontal shield strike that pushes you back and briefly staggers your character. Often used as a combo opener. | Keep your guard up when close. After the bash, he usually follows with a sword combo, so be ready to dodge the follow-up. | |
Fire Wave | Swings his weapon in an arc, sending a wave of fire along the ground toward you. Medium range. | Sidestep or dodge roll laterally. The wave travels in a straight line and is easy to avoid if you are not directly in front of him. |
Blue Ultimate | Charges up with blue energy at certain health thresholds. Releases a massive explosion of energy that covers a very large area around him. Cannot be interrupted or staggered. | Back away immediately when you see the blue charge. Wait until the attack finishes completely before re-engaging. Do not try to interrupt it. |
Rewards
Defeating the Flame Knight and clearing the remaining soldiers in the castle unlocks several valuable rewards. Note that you need to fully clear the castle after the boss fight to access all of the loot.
Reward | Location | Details |
|---|---|---|
East side of the castle base | A unique shield with the Draconic Retribution Abyss core. has the Dragon Counterattack special move. Can also fire cannonballs if you have them in your inventory, giving the shield ranged attack capability. | |
Weapon rack in the middle of the castle, near the target dummies | A unique one-handed sword found in a box near the target dummy area after clearing the castle. | |
Loot within the castle | An extra pair of Scorchflame Plate Gloves equipped with the Volcanic Eruption Abyss core. Grants Spirit +0.1 per second as a passive effect. | |
Awarded upon defeating Tristan | A key item that permanently unlocks the ability to hire Contribution Workers at your camp. Contribution Workers are temporary workers dispatched on missions to gather resources, freeing up your named Comrades for more important tasks. |
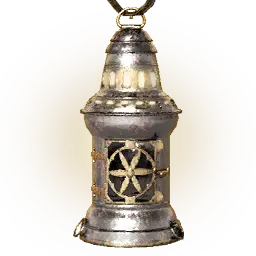
Drake Shield
The Drake Shield is one of the most interesting items you can obtain from this encounter. It is a smaller shield compared to standard tower shield models, trading raw defense for additional attack speed. The shield comes equipped with the Draconic Retribution Abyss core and has two Abyss gear slots.
What makes the Drake Shield unique is its Dragon Counterattack special ability, which activates a powerful counter move when blocking at the right moment. Even more unusual, the shield can fire cannonballs if you carry them in your inventory, effectively giving it a ranged attack. This makes the Drake Shield one of the few shields in the game that functions as both a defensive and offensive tool.
Seal of Devotion
The Seal of Devotion is arguably the most important reward from this quest, even more so than the equipment. Using this key item from your inventory unlocks Contribution Workers, a new category of camp labor. Unlike your named Comrades who have specific skill sets and limitations, Contribution Workers are temporary hires recruited using Contribution Points you accumulate in each region. They can be dispatched on missions that are either too simple or too demanding for your regular Comrades, giving you much more flexibility in managing your camp's resource gathering operations.
Post-Fight Exploration
After defeating Tristan, the castle is not fully clear. Remaining soldiers will still be patrolling the grounds and interior rooms. You need to eliminate these remaining enemies to fully secure the area and access all loot containers.
Check the east side of the castle base for the Drake Shield, which is hidden behind some boxes on the castle walls.
Look near the target dummies in the middle of the castle for the weapon rack containing the Spada Sword.
Search all rooms and corridors for additional loot chests. The castle contains crafting materials and consumables beyond the unique items listed above.
The flamethrower soldiers remain active after the boss is defeated, so keep your guard up while exploring.
Related Equipment
The Flame Knight's name is associated with an entire set of Scorchflame Plate armor. While these pieces are not all found at the Flame Knight's Castle, they share a thematic connection to Tristan and the Flame Knight order. The full set includes:
Item | Location |
|---|---|
Crafted at a Blacksmith using the "Plate Armors of the World Vol. 3" crafting manual | |
Found inside the Silent Falls Hideout | |
Found in Twilight Grotto, north of Rocca's Hill (through the second waterfall) | |
Extra pair found at Flame Knight's Castle (with Volcanic Eruption Abyss core) |
Note that equipping multiple pieces of the Scorchflame set does not grant any set bonuses. Each piece provides its own individual stats regardless of what other armor you are wearing.
Rewards Beyond Gear
The Flame Knight fight is best known for its armor set and weapon drops, but the most impactful reward is actually the key item that drops alongside the gear. Players who only focus on the equipment side of the reward pile tend to underestimate how much this single pickup changes the rhythm of camp management in the mid-game.
The Seal of Devotion Key Item
Defeating the Flame Knight rewards not just his gear set but also the Seal of Devotion, a key item that unlocks the worker hire feature at the Greymane Camp dispatch UI. Once the Seal is in your inventory, a new option appears on the dispatch screen that lets you hire temporary workers using Contribution Points. These hired workers function as regular Greymane members for the purposes of filling mission slots, and they carry the skill set required for whatever dispatch mission you want to queue.
Why Contribution Points Are Refunded
The key detail that makes this system practical is the refund loop. Contribution Points spent on hiring temporary workers are returned to your balance after the dispatch mission they were assigned to completes. You pay them up front, send them out, and when the mission resolves the points come straight back to your pool. In effect, Contribution Points are a reservation fee rather than a real cost, which means there is no downside to leaning on hired workers even if you are trying to conserve reputation currency for other uses.
The Mid-Game Camp Worker Scale-Up
This reward is the single trigger for the mid-game camp worker scale-up. Before the Flame Knight fight, your dispatch capacity is hard-capped by the number of permanent Greymane members you have recruited through story progress and side quests. After the fight, a single permanent member with the required primary skill can anchor a dispatch while every other slot is filled by temporary hires. That is how players go from running one or two dispatch missions at a time to running every dispatch their camp can queue in parallel, which is the first major resource acceleration in the game. If you are sitting on stacks of Contribution Points without a clear use for them, the Flame Knight run is the fastest path to converting those points into additional dispatch throughput.
Demeniss Castle Access
The Flame Knight's castle sits in the western part of the Demeniss region. Reaching the castle entrance is straightforward on the map, but the area is physically gated by hostile patrols and certain side content. In practice, most players need to progress a handful of Faction Missions tied to the Demeniss region before the castle can be cleared cleanly. If you arrive without having touched the regional faction chains, you may find the surrounding roads and checkpoints contested, and the final boss encounter itself often expects a certain amount of local reputation progress before it becomes accessible. The exact trigger varies slightly between builds, so the safest rule of thumb is to finish the local faction work first and then approach the castle gate.
Tips
Stock up on healing items before entering the castle. You will fight through multiple waves of soldiers before reaching the boss, and running low on heals during the actual boss fight is a common reason players fail this encounter.
Forward Slash combined with Nature's Echo is the most efficient damage combo for this fight. The doubled heavy attacks break his guard rapidly and build stun.
The Abyss ring's red glow is your most reliable defensive tool. React to it immediately every time. The shield slam that follows hits hard and covers a wide area.
Do not try to interrupt the blue ultimate attack. It is unblockable and unstaggerable. Just back away and wait for it to end.
Dodge the forward charge to the side, never backward. Rolling backward puts you directly in the fire trail.
After defeating the boss, do not leave the castle immediately. Clear the remaining soldiers and explore thoroughly to collect all rewards, especially the Drake Shield hidden behind boxes on the east side.
The Seal of Devotion is a permanent unlock. There is no reason to delay using it once you have it. Open your inventory and activate it right away to start hiring Contribution Workers.
If you are struggling with the flamethrower soldiers on the way to the boss, consider using ranged attacks or your bow to pick them off from a distance before they can apply the burning status effect.
Database Stats
Combat attributes recorded in the game database for SWORD & SHIELD.
Stat | Value |
|---|---|
HP | 1,404 |
Attack | 124 |
Defense | 100 |
Stamina | 100 |
Knockout | 500 |
Fatal | 5 |