A well-designed farm layout in Starsand Island minimizes wasted time, maximizes crop output, and ensures every square of your Hopeland property is used productively. This guide covers how to position sprinklers, trellises, processing stations, and crops for the best results at every stage of the game.
Core Layout Principles
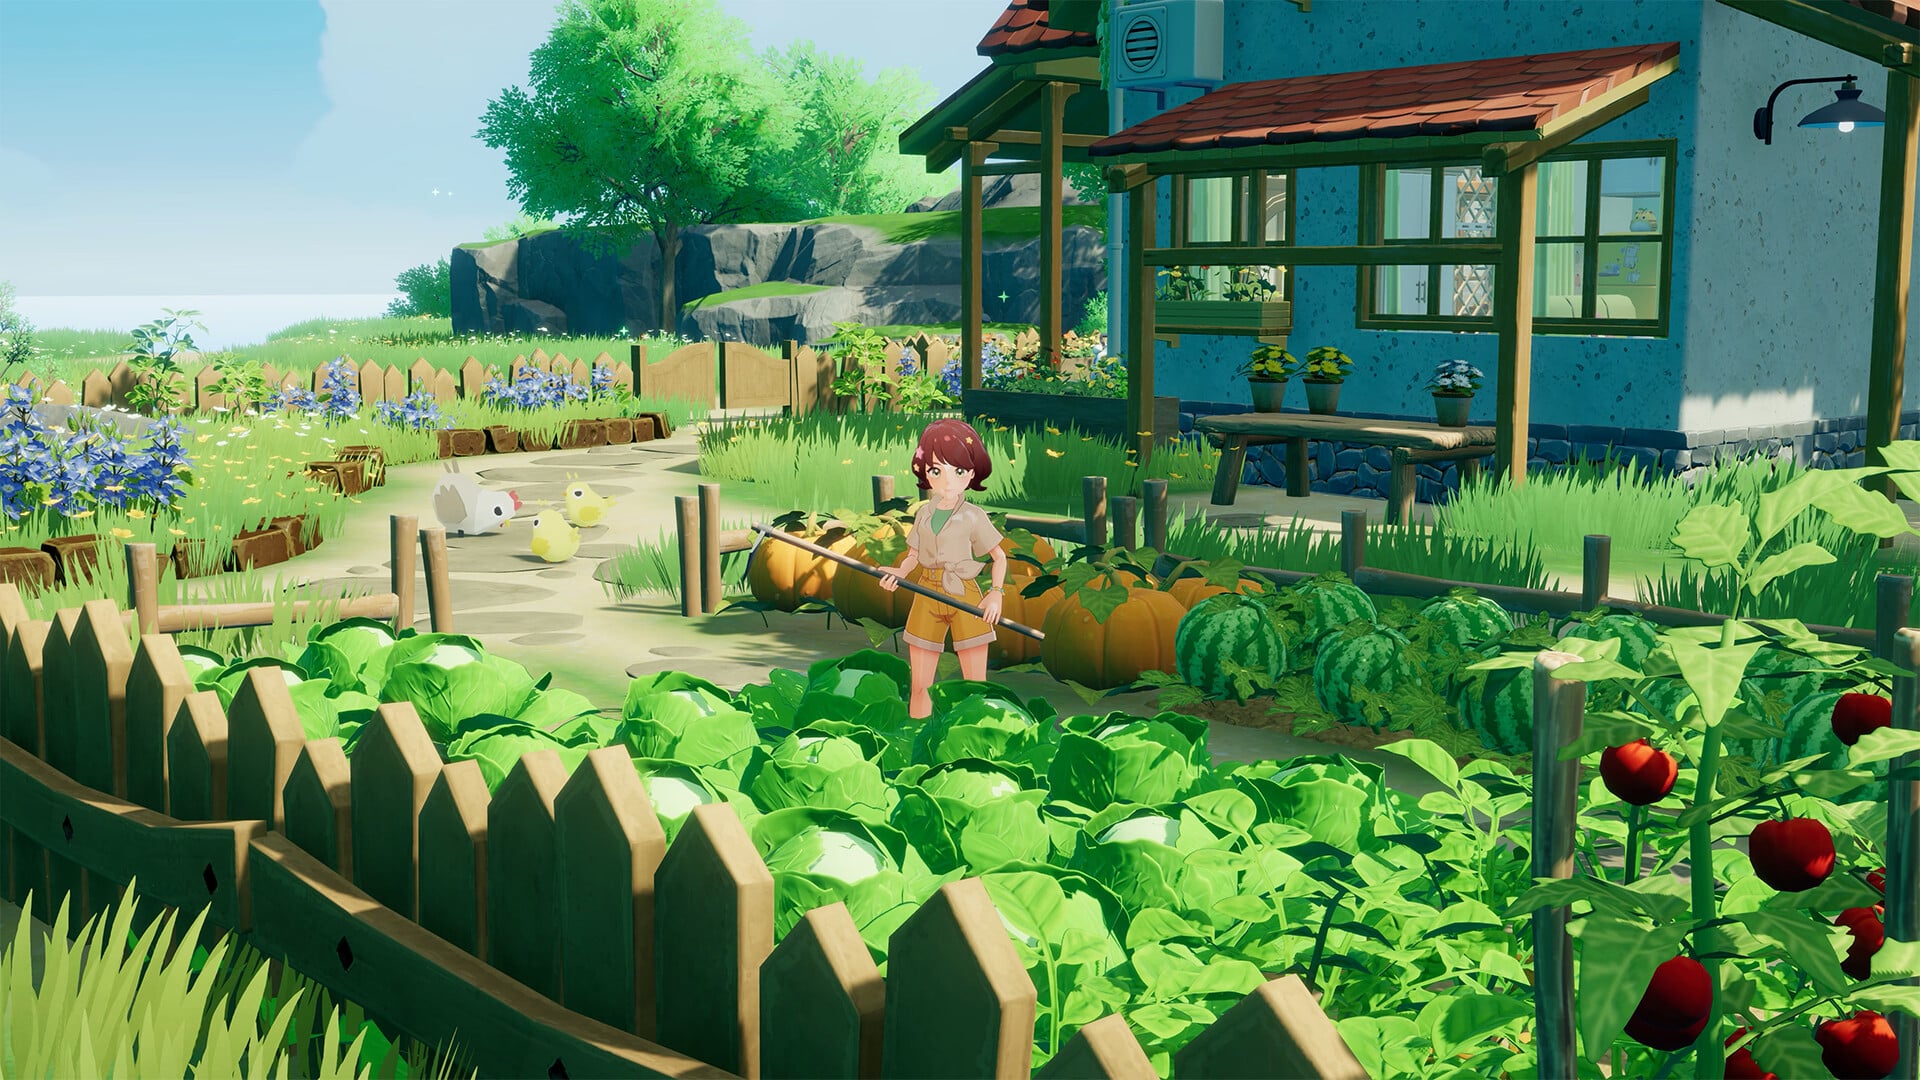
Group crops by growth time and season. Crops that mature together can be harvested in one pass, saving travel time across your farm.
Place processing stations (Separator, Charcoal Kiln, Furnace, Cutter) in a central cluster near your crops. This reduces running back and forth between fields and crafting.
Build multiple Campfires or Gas Stoves near your processing area to cook in parallel while your crops grow.
Leave walking paths between crop sections. One-tile-wide paths let you move through your farm without accidentally harvesting or trampling.
Plan for expansion early. Reserve space near your initial plots for future sprinkler grids and trellis rows rather than filling every tile immediately.

Sprinkler Placement
Sprinklers are the single most important upgrade for your farm. They sit between crop tiles (not on top of them) and automatically water surrounding plots every morning, eliminating the need for manual watering entirely.
Sprinklers unlock at the Intermediate Farmer tier through the Farmer profession questline with Graminova. Higher Farmer tiers unlock improved sprinklers with larger coverage areas. Better sprinklers also require materials from the Crafter profession, so advance both professions simultaneously.
Sprinkler Tiers
Sprinkler | Unlock | Coverage |
|---|---|---|
Sprinkler I | Intermediate Farmer | Waters a small radius of surrounding tiles |
Sprinkler II | Senior Farmer | Waters a medium radius of surrounding tiles |
Sprinkler III | Expert Farmer | Waters a large radius of surrounding tiles |
Because sprinklers sit between tiles rather than on them, they do not consume a planting square. Place them at regular intervals across your tilled field to ensure full coverage with no dry spots. When you place a sprinkler, the watered area is shown visually on the ground. If any tile is not highlighted, shift the sprinkler or add another one to fill the gap.
Sprinkler Layout Tips
Start with one or two Sprinkler I units as soon as you hit Intermediate Farmer. Even partial coverage saves significant stamina each morning.
Align sprinklers in a grid pattern across your tilled area. Place them at consistent intervals so their coverage circles overlap slightly, leaving no dry tiles.
Upgrade to Sprinkler II and III as soon as blueprints are available. Each tier covers significantly more ground, meaning fewer units needed for the same field size.
Do not place sprinklers near paths or non-crop areas. Every watered tile should have a crop planted on it to avoid wasting coverage.
Trellis and Paddy Field Zones
Trellises are vertical support structures for climbing crops like Cucumbers and Grapes. They are crafted at the Worktable from planks and placed directly on untilled soil. Trellises do not require tilling before planting, which saves stamina.
The Farming Trellis (found in the tools tab of your crafting menu) is the functional version. Do not confuse it with the Decorative Trellis in the decoration tab, which cannot be planted on.
Trellis crops yield 2 per harvest and can be harvested multiple times without replanting.
Dedicate a separate row or zone to trellises. They do not mix well with ground-level crops because sprinklers water tilled soil, not trellises.
The Trellis blueprint unlocks during the Apprentice Farmer questline.
Paddy Fields work similarly but for water-loving crops like Rice. Place them near water sources or in a dedicated section of your farm. See the Paddy Fields and Trellises article for full details.
Gmax Crop Grids
Certain crops (Watermelon, Pumpkin, and others) can mutate into Gmax Crops when planted in a 3x3 grid of the same seed type. All 9 plants must reach full maturity at roughly the same time for the mutation to trigger. The mutation is not guaranteed on every attempt.
Reserve at least one 3x3 section of your farm for Gmax attempts. Watermelon and Pumpkin are the most commonly used crops for this.
Plant all 9 seeds at the same time and ensure consistent watering (sprinklers help). Uneven growth prevents the mutation.
Gmax crops are harvested with an Axe, not by hand. They yield significantly more produce than 9 individual plants.
Do not place trellises or other structures inside the 3x3 grid. All 9 tiles must be standard tilled soil with the same crop.
Plot Expansion Strategy
Hopeland has 8 expansion plots that unlock progressively through Land Expansion. The first few plots are cheap, but costs escalate quickly. Plan your expansion strategy around your current income.
Plot | Coin Cost | Starsand Cost | Priority |
|---|---|---|---|
Plot 1 | 2,000 | 50 | High: doubles your starting area |
Plot 2 | 5,000 | 50 | High: cheap, significant space gain |
Plot 3 | 10,000 | 100 | Medium: good ROI if you have crops to fill it |
Plot 4 | 20,000 | 100 | Medium: start needing sprinklers to manage |
Plot 5 | 40,000 | 150 | Low priority until you have Sprinkler II+ |
Plot 6 | 60,000 | 200 | Low: only expand when income supports it |
Plot 7 | 100,000 | 250 | Late game: large investment |
Plot 8 | 160,000 | 300 | Endgame: maximum farm size |
Buy plots 1 and 2 as soon as you can afford them. The space gain per coin is highest for these early plots. Hold off on plots 5 through 8 until you have sprinklers and consistent income from cooking or high-value crops.
Crop Grouping by Purpose
Organizing your farm into purpose-driven zones makes daily routines faster and ensures you always have the right ingredients ready.
Zone | Crops | Purpose |
|---|---|---|
Staple Income | High-volume crops for cooking and selling. Plant in large sprinkler-covered fields. | |
Support ingredients for high-value recipes. Plant near your kitchen area. | ||
Trellis Crops | Dedicated trellis rows. Grapes produce Bonus Ore and Bonus Timber juices. | |
Long-term investment. Plant along farm edges where they will not block paths. | ||
Orchid, Rose, Tulip, Moonrise | Cross-breeding zone. See the Flower Guide for layout. | |
Gmax Grid | 3x3 mutation attempts. Reserve a flat, sprinkler-covered section. |
Kitchen and Processing Area
Place your cooking and processing stations in a centralized cluster, ideally between your crop fields and your storage. A compact kitchen area should include:
2 to 3 Campfires or Gas Stoves for parallel cooking.
1 to 2 Separators for processing raw crops into Flour, Sugar, Vegetable Juice, and other base ingredients.
A Charcoal Kiln for fuel and Salt production.
A Brewing Barrel for Vinegar, Soy Sauce, and Cooking Oil.
A Jam Maker and Pickling Jar for preserved foods.
A Juicer for drinks and buff beverages.
Storage chests organized by ingredient type (raw crops, processed ingredients, cooked meals).
Everlasting Seed Strategy
Everlasting Seeds produce crops that grow back after every harvest without needing to replant. They are the ultimate farming upgrade. Dedicate your best sprinkler-covered plots to Everlasting crops for maximum long-term value.
Everlasting Seeds can be obtained from the Islandpedia plant entries, the Senior Farmer skill 'Eternal Blessings,' and gameplay rewards.
If you remove an Everlasting crop (including cutting down an Everlasting tree), the game refunds the seed. You never lose an Everlasting Seed permanently.
Prioritize Everlasting versions of high-value crops like Star Mango, Lychee, and Grapes for consistent passive income.
Everlasting tree saplings should go along the edges of your farm so they do not block crop tile access.
Sample Early-Game Layout
When starting out with just the initial plot and Plot 1 expansion, a simple layout works well:
Game | Details |
|---|---|
Central area | Processing stations (Separator, Charcoal Kiln, Campfire) clustered together with storage chests. |
East field | Staple crops (Wheat, Corn, Potato) in rows. Add sprinklers as soon as they unlock. |
West field | Mixed vegetables (Cabbage, Tomato, Garlic) for cooking ingredients. |
South edge | One row of Trellises for Cucumbers. |
Reserved corner | Empty 3x3 area for future Gmax experiments. |
Leave a one-tile path running north-south through the middle for quick access to all zones. | -- |