Overview
Roofs are placed through the Structure tab in Build Mode (press I). They cap the top of a building, define its silhouette from the street, and protect the interior from the visual look of exposed ceiling beams. inZOI offers four roof types that can be customized with different materials, colors, and trim. As of the v0.5.0 update (December 2025), the cost of placing roofs has been removed entirely, and a new Roof Decorations category has been added to the Building section.
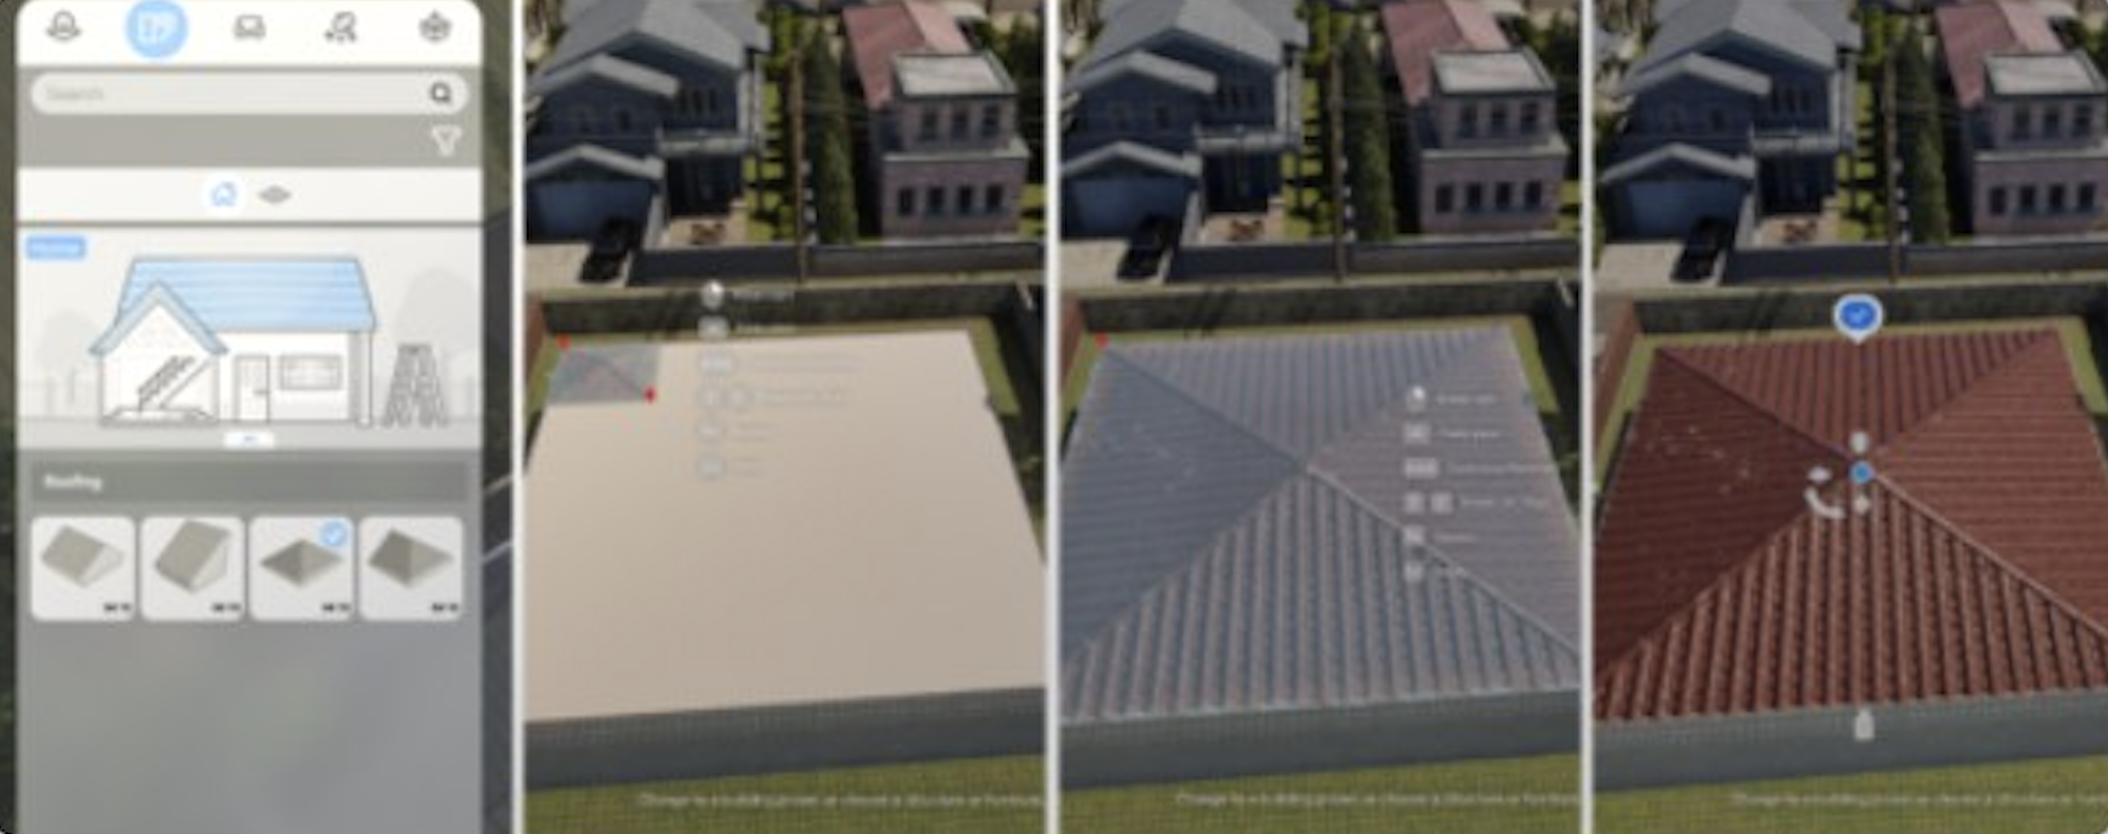
How to Place a Roof
Open Build Mode (press I).
Navigate to the Structure tab and find the Roofs section.
Select one of the four roof types.
Zoom out fully or use Page Up/Page Down to view the top of the building.
Click on one corner of the area you want to cover.
Drag diagonally to the opposite corner to define the roof's footprint.
Release to place the roof. Adjust height and angle using the provided handles.
Roofs can only be placed in a rectangular footprint. Diagonal walls, L-shaped rooms, and irregular building shapes will require multiple overlapping roof sections to achieve full coverage.
Roof Types
inZOI provides four roof styles. Each creates a different silhouette and suits different architectural designs.
Roof Type | Shape | Best For |
|---|---|---|
Gable | Classic triangular profile with two sloping sides meeting at a central ridge. Open triangular ends (gable ends) are visible from the sides. | Traditional houses, suburban homes, simple rectangular buildings |
Half-Gable | One side slopes fully to the eave while the opposite side has a shortened, clipped gable. Creates an asymmetric profile. | Modern designs, adding visual interest to one side of a building |
Hip | Four sloping sides that meet at a ridge or point. No exposed gable ends. All sides slope downward from the ridge. | Wider buildings, colonial and Mediterranean styles, wind-resistant designs |
Flat | Minimal or no slope. Creates a modern, boxy silhouette with a level roofline. | Modern architecture, rooftop terraces, minimalist designs |
Combining Multiple Roofs
Roof sections do not automatically connect with each other. If your building has an L-shape, a T-shape, or rooms of different heights, you will need to place multiple roof sections and manually position them to create a cohesive look.
Technique | Description |
|---|---|
Use Alt for free placement | Hold Alt while positioning a roof section to bypass grid snapping. This is essential for overlapping roofs and aligning them precisely over irregular building shapes. |
Match heights | When placing a second roof section adjacent to the first, adjust the height handles so both ridges align at the same level. Mismatched heights create visible gaps. |
Cover overhangs | Since roofs are rectangular, buildings with diagonal walls may end up with overhangs where the roof extends past the wall. Adjust the roof size or add decorative trim to mask these overhangs. |
Roof Material Customization
Like all structural surfaces in Build Mode, roofs can be painted and retextured using the Customize Paint system.
Select a placed roof section.
Click the paint icon to open the Customize Paint menu.
Choose from available roof materials.
Available Materials
Material | Description |
|---|---|
Shingles | Standard asphalt-style shingles. Multiple color options from dark grey to warm brown and red. |
Tiles | Clay or concrete tile textures. Suitable for Mediterranean, Spanish, and tropical styles. |
Metal | Standing seam or corrugated metal roofing. Works for industrial, modern, and farmhouse designs. |
Wood | Wooden shake or plank textures. Rustic and cabin-style applications. |
Slate | Natural stone-style roofing with a premium, textured appearance. |
Generate any custom roof pattern by typing a text description. The AI creates a tileable texture that wraps onto the roof surface. |
Each material can be further adjusted with color changes and visual effects (weathering, gloss, matte). The interior side of the roof (visible as a ceiling from inside the building) can be painted separately from the exterior.
Roof Decorations
The v0.5.0 update added a dedicated Roof Decorations category to the Building section in Build Mode, containing 11 new decorative pieces. These items attach to roof surfaces and add architectural detail:
Decoration | Description |
|---|---|
Ridge caps | Decorative caps that sit along the ridge line where two roof slopes meet. |
Finials | Ornamental pieces placed at the peak or end of a roof ridge. |
Trim and fascia | Decorative edging along the eaves and rake of the roof. |
Seasonal decorations | Holiday-themed items like garlands and lights (some obtained through the Holiday Festival event). |
Roof decorations are placed like furniture: select the item, position it on the roof surface, and use rotation controls (Z/C or right-click for 45-degree turns, Alt for free rotation) to align it correctly.
Roof and Building Interaction
Multi-Story Buildings
In multi-story buildings, roofs are placed on the topmost floor. Use Page Up to navigate to the roof level before placing. If a building has sections of different heights (e.g., a two-story main house with a one-story garage), each section needs its own roof at the appropriate level.
Viewing Interior Through Roofs
To see inside a building while a roof is in place, use the floor navigation controls (Page Up/Page Down) to lower the camera below the roof level. Build Mode automatically makes the roof transparent when the camera is on an interior floor, allowing you to place furniture and decorate without removing the roof.
Cost Changes
Before v0.5.0, placing roofs cost Meow based on the roof's size and material. The v0.5.0 update removed all roof placement costs, making roofing free. This change was part of a broader cost rebalancing that also removed costs for walls, handrails, rooms, and platforms. Door, window, and stair prices were reduced and standardized in the same update.
Known Limitations
Limitation | Details |
|---|---|
No curved roofs | Roofs can only be placed as rectangular sections. Curved, domed, and octagonal roof shapes are not available. Curved wall support is in experimental development, and curved roofs may follow eventually. |
No automatic connection | Adjacent roof sections do not merge or snap together. Manual alignment with Alt is required for complex roof layouts. |
Interior protrusion | On multi-room buildings with rooms of different sizes, a roof section placed over a larger area may protrude into smaller adjacent rooms. There is no automatic clipping to trim roof geometry at room boundaries. |
Limited overhang control | Roof overhangs (the amount the roof extends past the wall) have limited adjustment. Some players find overhangs too large or too small for their preferred style. |
Rectangular-only footprint | Diagonal walls are not fully covered by the rectangular roof system, leaving gaps or excessive overhangs that require creative workarounds. |
Planned Improvements
The 2026 roadmap includes several build mode improvements that will affect roofing:
Feature | Details |
|---|---|
Curved walls (experimental) | Development of curved wall support is underway. If curved walls become available, curved roof sections may follow to match. |
Wall module decoration (Q4 2026) | Expanded decoration options for interior and exterior wall modules will likely extend to roof trim and detail work. |
Terrain editing (Q4 2026) | Advanced terrain editing will change how buildings interact with sloped ground, which affects roof visibility and design. |
Tips
Always place roofs with the camera fully zoomed out or on the roof floor level (Page Up). Placing roofs from inside the building can cause misalignment.
Hold Alt when positioning roof sections. Free placement is almost always necessary for multi-section roofs to look right.
For L-shaped buildings, use two overlapping gable roofs at a 90-degree angle. Adjust each section's height so the ridges meet cleanly.
Use the Flat roof type for modern or minimalist builds where a visible roofline would look out of place.
Paint the interior ceiling of the roof separately from the exterior. A white or wood-paneled interior ceiling looks much better than leaving the default material exposed.
Roof placement is now free (since v0.5.0), so experiment freely with different types and positions without worrying about Meow costs.