Loading...
Loading...
Dispatch Missions
April 12, 2026 at 10:40 AM
Add Serpent Shrine site, explorer slot cap, and ruin prerequisite details
Dispatch missions are a passive camp management system in Crimson Desert that lets players send their recruited comrades out on timed assignments. While Kliff continues exploring the world, fighting enemies, and completing quests, dispatched comrades work in the background to gather provisions, produce armaments, earn silver, and expand the Greymane Camp. The system runs on in-game time rather than real-world time, so sleeping at camp or completing quests advances the mission clock.

Dispatch missions form the backbone of the camp economy. Nearly every upgrade, construction project, and research endeavor requires resources that come from dispatched workers. Learning how to assign the right comrades to the right missions, and keeping multiple dispatches running at all times, is one of the most important habits for long-term progression. Eventually, players can farm Abyss gears and a wide range of late-game resources through dispatches, along with significant amounts of silver.
Dispatch missions become available during Chapter 3: Howling Hill as part of the Pioneering questline. After Kliff and the Greymanes establish their camp at Howling Hill, the game introduces the dispatch system as a tutorial. Players unlock their first two Freesword comrades, Luke and Ronald, and must dispatch them on the Howling Hill Camp Expansion mission to continue the story. This first dispatch doubles as a tutorial that teaches the core interface.
After completing the initial expansion, Ross sets up the Dispatch Coordinator at camp. From this point forward, players can manage all dispatch missions through two access methods described below. Ross remains the primary NPC for dispatch management throughout the game.
There are two ways to view and manage dispatch missions, and both provide access to the same mission list.
Visit the Greymane Camp and speak to Ross directly. He is marked on the minimap with a helmet icon. Select the mission dispatch option from his dialogue menu to open the full mission list. This method is the most straightforward when you are already at camp.
Open the world map via the pause menu. Hover the crosshair over a camp or region icon (for example, Howling Hill). Press the Inspect button shown at the bottom of the screen (Triangle on PlayStation, Y on Xbox). Navigate to the Missions tab within the location management interface. Select a dispatch mission from the available list and assign comrades.
The world map method is especially useful once the Dispatch Coordinator is unlocked at camp level 2. After that upgrade, you can assign missions remotely from anywhere in the world without physically returning to camp. Simply open the map, hover over any discovered location that has a dispatch icon, and inspect it to view its available missions. Some locations will have multiple missions with different rewards available.
Visit the Greymane Camp and access the dispatch interface
Select a companion from your available roster
Choose a mission from the available list
Assign the companion to the mission and confirm
The companion departs and completes the mission over time
Upon return, collect the gathered resources and rewards
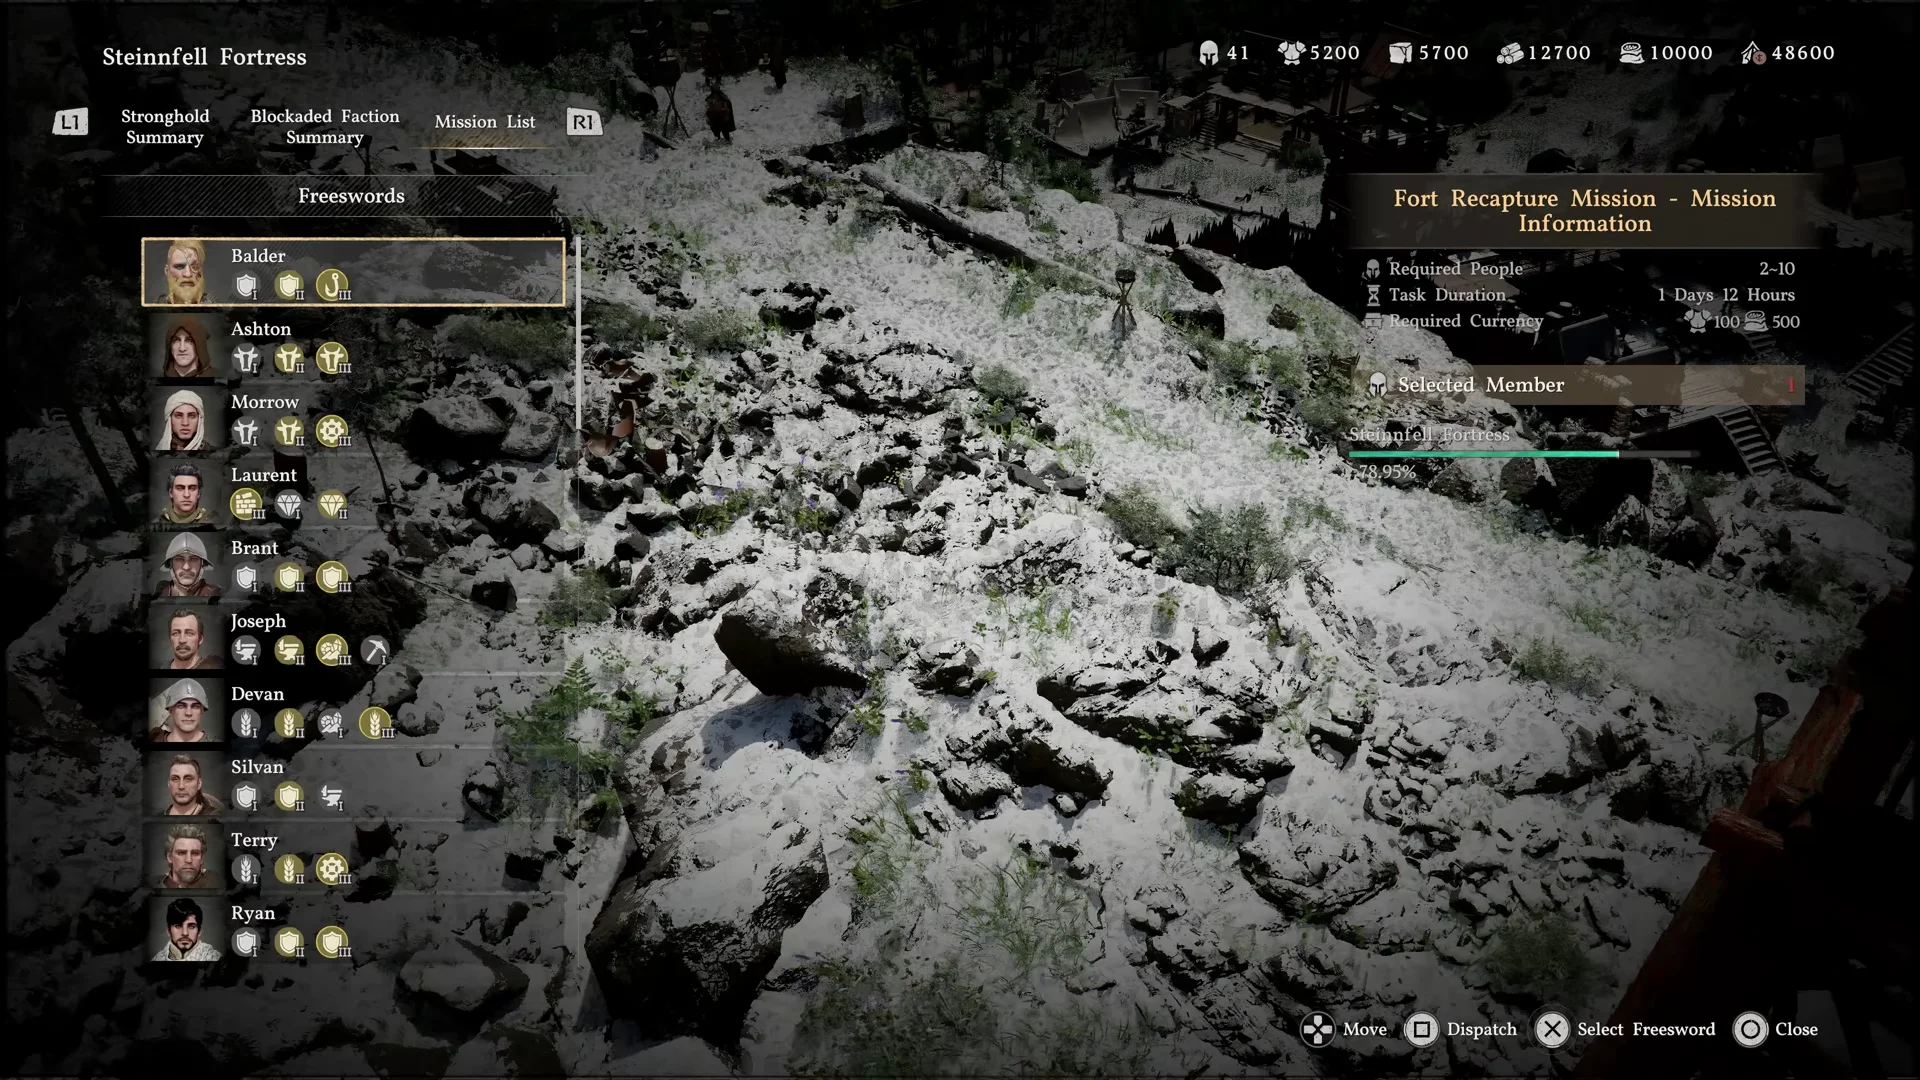
When you select a dispatch mission, the interface shows its resource cost, required number of workers, duration, and any skill requirements. You must then choose which comrades to assign from your available roster. A comrade who is already dispatched on another mission cannot be assigned until that mission finishes or is cancelled.
Each mission has a minimum and maximum comrade requirement. You cannot send fewer than the minimum for reduced rewards, and you cannot exceed the listed maximum. However, sending more comrades than the minimum provides a bonus. Each additional worker beyond the minimum adds a 20% bonus to camp supply rewards, up to a maximum of +40% (two extra workers). Even filler comrades with no relevant skills contribute to this bonus, so assign idle Greymanes to important missions rather than leaving them unused at camp.
Before confirming a dispatch, review each comrade's skill profile. Matching a comrade's skills to the mission type is far more valuable than simply filling slots with random workers. The skill system, described below, can boost rewards by up to 100%.
As your roster grows, you gain more flexibility in dispatch assignments. Consider the following:
Keep some companions in reserve for immediate tasks while others are deployed on longer missions
Each companion may have individual skills that affect mission outcomes. Match companions to missions suited to their strengths
A larger roster allows simultaneous dispatch to multiple regions, increasing your passive resource generation
Each dispatch mission has several requirements that must be met before it can start.
Requirement | Description |
|---|---|
Required Members | Each mission specifies a range of workers. You must send at least the minimum and cannot exceed the maximum. |
Task Time | The duration varies widely. Shorter missions take around 8 hours of in-game time, while some camp expansions can take multiple in-game days. |
Required Goods | Missions require resources from your camp funds, not personal silver. Guard and security missions consume food because you need to feed your comrades. Other missions require silver payments. |
Skill Requirements | Some missions require at least one comrade with a specific skill type (Engineer, Builder, Explorer, etc.). Others accept any comrade regardless of specialization. |
When you select a dispatch mission, the interface displays several pieces of information:
Field | Description |
|---|---|
Resource Cost | The camp provisions required to start the mission |
Required Workers | Minimum number of comrades needed |
Duration | In-game time the mission takes to complete |
Required Skills | At least one assigned comrade must have this skill |
Rewards | Camp supply resources and items earned upon completion |
Dispatch missions provide two categories of rewards. Camp provisions go directly into your camp funds pool (silver, food, armaments, timber, ore, stone). Usable items such as equipment, Abyss gears, and crafting materials are deposited into your storage chest at camp. Early-game rewards may seem modest (five bottles of wine, for instance), but the system scales significantly in later chapters, allowing you to farm Abyss gears and thousands of silver per cycle.
Completed dispatch missions yield several types of rewards:
Currency: Silver and other forms of in-game money
Materials: Crafting and building resources used for camp upgrades and equipment
Unlocked areas: New locations become accessible after successful military or clearing missions
New services: Completion of certain missions expands available camp functionality
Reduced enemy resistance: Sending companions to attack enemy strongholds means less hostile opposition when the player explores those regions
Not every character at the Greymane Camp can be dispatched. The term Freesword specifically refers to comrades who are eligible for dispatch assignments. Story characters like Marius, Carl, and Ross serve important camp roles (provisions management, quest giving, dispatch coordination) but cannot be sent out on missions themselves.
Freesword comrades are recruited exclusively through Greymane Faction Quests. These appear in your Journal under Faction Quests and are divided into three tabs: Scattered Embers (side quests from NPCs), Grounds of the Sunrise (the primary recruitment questline), and Greymane Commissions (requests from existing comrades). Recruitment missions typically begin with a quest labeled "A Rumor..." in the Grounds of the Sunrise tab, each leading you to a former Greymane member who can rejoin the camp.
Freesword comrades are recruited exclusively through Greymane Faction Quests, which appear in the Journal under Faction Quests. These quests are organized into three tabs:
Scattered Embers: Side quests from NPCs like Naira, Yann, and Oongka that lead to discovering lost Greymane members across the continent.
Grounds of the Sunrise: Camp expansion projects and survivor location missions.
Greymane Commissions: Requests from settled Greymanes offering Medium Bags (each granting +3 inventory slots).
Recruit as many Greymanes as possible early on. More recruits means more dispatch missions can run at the same time, and several camp expansions require a minimum recruit count before they can be dispatched.
Key named companions like Damiane and Oongka join through story events and eventually become playable characters. Other Freeswords may arrive at the camp independently as its reputation grows.quests can also recruit new faction members.
Your roster of available comrades grows as you progress through the main story and complete recruitment side quests. The main quest is intertwined with these recruitment quests, so if you ever get stuck finding more Greymanes, try pushing forward in the main storyline. Below is a chapter-by-chapter breakdown of key recruitment milestones.
Chapter | Quest / Event | Comrades Unlocked | Notes |
|---|---|---|---|
Rumors from the Sawmill (after defeating Red Devil boss) | First two Freeswords; required for the tutorial dispatch mission | ||
Chapter 3 | Bustling Hill (camp expansion) | None directly | Unlocks capacity for more camp members; concludes Chapter 3 |
After completing the Mysterious Pot questline | Story character joins; large gap of main questing before more Greymanes become available | ||
Chapter 4 | Complete the Forbidden Knowledge questline | None directly | Prerequisite for Chapter 5 recruitment quests |
Four recruits from a single quest; major roster expansion | |||
Chapter 5 | A Rumor at Glenbrite Farms | Unlocks the wagon service, Cook, and Quartermaster roles at camp | |
Chapter 5 | A Rumor in St. Hus | Provides the Engineer skill needed for wagon construction and engineering missions | |
Embers of Return, Reuniting with Comrades, Gathered Will, Solid Foundation | Many additional Greymanes | Continuous recruitment through the Tales of the Greymane questline; includes a Barber and the Dire |
Note that Marius is locked behind the Uninvited Guest main quest at the start of Chapter 5. In some situations you can find an NPC at their physical location, but because this is a main quest, you may need to progress it before continuing the recruitment chain.
Bryce is the wagon guy, recruited from the "A Rumor at Glenbrite Farms" quest. After unlocking him, visit him at camp to pick up his request quest. Completing this request is important because it may gate further camp expansion and additional rumor quests. If you are not receiving new rumor quests to find more Greymanes, check whether Bryce's request is still pending.
Arnold is the Engineer, recruited from the "A Rumor in St. Hus" quest. He is needed for the wagon construction quest and all engineering dispatch missions. Without Arnold (or another comrade leveled up with the Engineer skill, which takes longer), you cannot build the wagon. Prioritize his recruitment as soon as the quest becomes available.
Every Freesword comrade has a set of skills that determine how effective they are at different mission types. Skills are divided into two functional groups: Efficiency Boosters and Required Skills. Understanding the difference between these two categories is critical to running an efficient dispatch operation. The skill icons displayed on comrades match the icons shown on the map for each mission location, making it easy to see which type of mission a location offers.
Efficiency boosters increase the yield of missions that match their type. Assigning a comrade with a matching efficiency skill produces more resources than sending a comrade without that skill. These skills are not mandatory for starting a mission; they simply increase the output.
Skill | Effect |
|---|---|
Escort | Increases silver income from guard and escort missions |
Farmer | Increases food yield from harvest missions |
Rancher | Increases food yield from ranching missions |
Fisherman | Increases food yield from fishing missions |
Smith | Increases armament output from smithing missions |
Logger | Increases timber yield from logging missions |
Miner | Increases ore and stone yield from mining missions |
Required skills are mandatory for certain mission types. At least one comrade assigned to the mission must possess the relevant required skill, or the mission cannot be started at all. These skills unlock access to specialized dispatches that produce unique items or enable camp construction.
Skill | Purpose |
|---|---|
Craftsman | Required for crafting dispatch missions |
Jeweler | Required for jewelry and accessory production missions |
Engineer | Required for engineering production missions, including wagon construction |
Cook | Required for advanced food processing missions |
Explorer | Required for exploration and ruins dispatch missions |
Painter | Required for artistic and decoration production missions |
Weaver | Required for textile and clothing production missions |
Builder | Mandatory for all construction and camp expansion dispatch missions |
Exceeding the minimum headcount on a mission yields bonus rewards. Matching comrade skills to the mission type produces a 100% bonus in resource output, so strategic assignment is well worth the effort.
Each comrade skill has three tiers that progressively increase the bonus it provides. Higher-level skills translate directly into larger resource yields from matching dispatch missions.
Skill Level | Bonus | Example Title |
|---|---|---|
Level 1 (Novice) | 10% | Novice Farmer |
Level 2 (Skilled) | 30% | Skilled Farmer |
Level 3 (Expert) | 60% | Expert Farmer |
All Three Levels | 100% | Fully mastered skill |
When a comrade possesses all three levels of a single skill, the bonuses combine for a total 100% boost. This is the maximum skill bonus any single comrade can provide for a given mission type.
An important detail: these tier bonuses do not stack across multiple workers. Sending three comrades who each have only the Novice level of a skill yields just a 10% bonus, not 30%. The game takes the highest individual skill level present among all assigned comrades. For this reason, concentrating skill upgrades on one highly trained comrade is more effective than spreading them across several partially trained ones.
Comrade skills do not level up by using them in dispatch missions. Instead, skills improve exclusively through camp upgrades. When you complete a Howling Hill expansion dispatch mission, it increases the camp level, which in turn raises the skill levels of all comrades simultaneously or unlocks the next skill tier they have available. Certain quest and faction progression milestones can also unlock specific skill types independently of camp level.
Three separate bonus multipliers apply to dispatch mission rewards. All three stack with each other, and understanding how they combine is the single biggest factor in getting the most out of your comrades.
Bonus Type | Maximum Value | How It Works |
|---|---|---|
Skill Bonus | 100% | Based on the highest skill level among assigned comrades. Level 1 gives 10%, Level 2 gives 30%, Level 3 gives 60%. A comrade with all three tiers provides the full 100%. |
Comrade Bonus | 40% | Earned by sending more comrades than the minimum requirement. Each extra comrade adds +20%, up to +40% (two extra). You cannot exceed the listed maximum for the mission. |
Conversion Bonus | 100%+ | Increased by donating camp silver to the church donation box in the mission's region. Each Blessing level adds +2% to all dispatch rewards in that region. Permanent and stacks indefinitely. |
When all three bonuses are active, the combined multiplier can more than triple your base mission output. For example, a security mission that normally yields 1,900 silver could produce well over 5,000 silver per cycle once you have maxed skill bonuses, a full comrade team, and a high Conversion Bonus in that region.
Combat missions are a unique dispatch category that lets the player physically participate alongside their comrades in battle. These are tied to faction control missions where you must eliminate large numbers of enemies in a contested area. Unlike standard dispatches that run passively in the background, combat missions are interactive and offer some of the most exciting group combat in the game.
To start a combat mission, select it from the dispatch list and assign your comrades as usual. Some combat missions allow you to add up to 10 comrades. After confirming the dispatch, you can physically travel to the mission location and join the fight alongside your Greymanes. Your comrades will already be there engaging enemies when you arrive.
On top of the dispatched comrades, you can also bring Damian and Unka with you as companions, giving you a large team for massive battles. The combination of dispatched comrades and your personal companions makes combat missions feel like full-scale engagements and is one of the most satisfying experiences the game offers.
Some dispatch locations contain boss enemies. When you send comrades to one of these areas, they will clear out the regular enemies but will not defeat the boss for you. You must travel to the location personally and finish the boss fight on your own. Your comrades also cannot assist you during the actual boss encounter. You can bring your companions (Damian and Unka) to help speed up the boss fight, but the dispatched Greymanes will sit out that portion.
Dispatch missions fall into several broad categories, each producing different resources and serving different strategic purposes. Missions are tied to specific map locations, and new locations with dispatch opportunities unlock as you progress through the story and discover new regions.
Expansion missions are one-time dispatches that directly increase the Greymane Camp level upon completion. Each expansion unlocks new tents, carts, functional areas, and camp services. Expansion missions typically require the Builder skill from at least one assigned comrade and demand significant resource investment. They are the only way to raise the camp level, and each upgrade also improves all comrade skill levels simultaneously. Because expansion missions are one-time events, they do not auto-restart after completion. The resource costs for successive expansions scale dramatically. For example, the Fourth Expansion requires 1,500 armaments, 2,500 stone, 2,500 timber, 4,000 food, and 100,000 silver. Some expansions can take multiple in-game days to complete.
These are repeatable dispatches focused on collecting provisions for the camp.
Subtype | Resource Produced | Relevant Skill |
|---|---|---|
Harvest | Food (crops, vegetables) | Farmer |
Food (animal products) | Rancher | |
Food (fish) | Fisherman | |
Logger | ||
Ore and Stone | Miner |
Resource gathering missions auto-restart by default once completed. This means the comrades will immediately begin the same mission again without manual intervention. If you want to reassign them elsewhere, you must cancel the mission first.
Escort missions send comrades to guard locations such as manors, trade routes, or merchant outposts. These missions generate silver (camp currency) and sometimes other trade goods. The Escort efficiency booster skill increases the silver yield. Guard missions are among the most reliable sources of passive income and should be part of every dispatch rotation.
Production dispatches create finished goods such as armaments, weapons, or equipment components. These missions frequently require a specific Required Skill (Craftsman, Smith, Engineer, etc.) from at least one assigned comrade. The Warspike Spearmaker in Hernand is one of the earliest production missions available and serves as a primary source of armaments in the early game.
Location recapture dispatches reduce enemy combat power in contested areas of the map. Completing these missions weakens hostile forces in that region, making exploration and quest completion safer. These dispatches are strategic investments that pay off through easier gameplay rather than direct resource rewards.
Ruins dispatch missions send comrades to explore ancient ruins and recover Special Materials that cannot be obtained through standard gathering or other mission types. These missions require at least one comrade with the Explorer skill and consume Equipment (armor/weapons) provisions. Special Materials are used in advanced crafting and research. A specialized subset of ruins dispatches, called exploration missions (identified by a compass icon on the map), offers even more valuable rewards including skill points, rare crafting recipes, and abyss gear blueprints. See the Exploration Missions section below for full details.

Exploration missions are a distinct dispatch category identified by a compass icon on the dispatch mission list. Unlike farming missions (wheat icon) or crafting dispatches, compass missions send comrades to investigate ruins, dig sites, and excavation zones scattered across the world of Pywel. These missions are among the most valuable in the entire dispatch system because they reward unique materials, skill points, rare plants, and crafting recipes that cannot be obtained through any other method. At least one comrade with the Explorer required skill must be assigned to start an exploration dispatch.
Exploration missions appear on the dispatch list after you discover their corresponding location on the world map. To discover a location, simply walk or ride past it during normal gameplay. Once the area is added to your map, check whether a compass symbol appears next to the location name. If it does, that location has an exploration dispatch available. Some exploration sites may require you to clear nearby enemies or complete a prerequisite quest before the dispatch unlocks. Ringing bell towers is the fastest way to reveal large sections of the map and expose new exploration dispatch locations.
Most exploration missions become available from Chapter 2 onward, though the most rewarding sites are found in mid-to-late game regions like the Kingshield Mountains and Delesyia. The compass icon is visually distinct from the wheat symbol used for farming dispatches and the gear symbol used for production missions, making it easy to identify exploration dispatches at a glance on the world map.
The following exploration missions are some of the most impactful dispatches available. Each provides unique rewards that are difficult or impossible to obtain elsewhere.
Mission | Shown Reward | Hidden/Bonus Rewards | Location | Notes |
|---|---|---|---|---|
Time Worn Ruins | 1 to 5 skill points | None confirmed | Varies by region | Infinite and repeatable. One of the only consistent sources of skill points beyond the leveling cap. |
King Shield Dig Site | Recipes to craft abyssia like Malisbane; recipes for abyss gear effects; elemental imbument gear blueprints (e.g. Pillar of Wind) | Kingshield Mountains, directly north-left of the "D" in "Demise" on the map | Available from Chapter 2. Hidden recipe drops are the primary value. Allows multiple copies of abyss gear effects. | |
Reach Word Ruins | Random rare plants | Jinseng (used to upgrade max spirit beyond the cap via Pororin Research) | Varies | Critical for late-game spirit progression past the soft cap. |
Vheim Ruins | Additional progression resources | Varies | Skyroot is a valuable resource used in advanced progression systems. | |
Boarding Ruins | Gold bars (shown icon) | Unexpected crafting recipes including mech-related crafts (e.g. Power Module that resets mech cooldown) | Varies | The shown reward icon is not always guaranteed. Sometimes rewards a silver pouch instead of a gold bar. |
The Time Worn Ruins exploration dispatch deserves special attention because it is infinitely repeatable and awards between 1 and 5 skill points per completion. This is critically important because there is a hidden cap on the number of skill points you can earn through normal leveling. Once you hit that cap, the Time Worn Ruins dispatch becomes one of the only reliable ways to continue acquiring skill points for your skill tree. Players who want to unlock every skill or experiment with multiple builds should prioritize running this dispatch repeatedly throughout their playthrough.
For more details on the skill point cap and how many total skill points are available from all sources, see the How Many Skill Points Can You Get article.
The King Shield Dig Site is located in the Kingshield Mountains, positioned directly north and to the left of the letter "D" in "Demise" as it appears on the world map. This exploration dispatch becomes available as early as Chapter 2 and displays abyss cells as its primary reward. However, the real value lies in the hidden bonus rewards that can drop alongside the shown reward on each completion.
These hidden rewards include crafting recipes that cannot be obtained from any other source in the game. Among them are recipes to craft abyssia materials like Malisbane, as well as recipes that replicate abyss gear effects that are normally exclusive to boss drops and endgame weapon loot. This is significant because it allows players to craft multiple copies of abyss gear effects, bypassing the usual limitation of a single boss drop per effect. For example, a player reported receiving the "Pillar of Wind" blueprint, an elemental imbument gear piece, as a bonus drop from this dispatch. The ability to stack multiple copies of powerful abyss effects through crafted gear rather than being limited to a single boss drop makes the King Shield Dig Site one of the most valuable dispatch locations in the entire game.
The Reach Word Ruins dispatch rewards random rare plants as its shown reward. Among these rare drops is Jinseng, a key material needed to upgrade your maximum spirit beyond the soft cap through Pororin Research. Spirit is a crucial combat resource that governs how many special abilities and skills Kliff can use before needing to recover. Raising the spirit cap through Pororin Research allows for longer skill chains, more aggressive playstyles, and greater flexibility in combat encounters. Since Jinseng is difficult to find through regular gathering, the Reach Word Ruins dispatch is the primary reliable source for this material.
Every exploration dispatch has the potential to drop hidden bonus rewards on top of the shown reward icon. The shown reward is not always guaranteed either. For instance, the Boarding Ruins displays a gold bar icon, but completions sometimes yield a silver pouch instead. The hidden bonus reward pool for exploration missions includes:
Gold bars and other valuable trade goods
Crafting recipes for abyss gear: the most valuable reward category, as these recipes let you craft effects normally locked behind boss drops
Rare plants and progression materials like Jinseng and Skyroot
Mech-related crafting blueprints (e.g. Power Module for resetting mech cooldowns)
Because hidden rewards are randomized and drop alongside the main reward, running exploration dispatches repeatedly is the best way to farm rare recipes and materials. The recipes for abyss gear crafting are particularly sought after because they provide an alternative progression path to relying solely on rare boss drops.
Exploration missions tend to be more expensive to dispatch than standard gathering or escort missions. They typically consume Equipment provisions (armor and weapons donated to the camp) along with food and silver. To sustain repeated exploration dispatches, you need a strong Greymane Camp economy with reliable resource income from other dispatch types. Setting up the infinite resource loop described earlier in this article is highly recommended before committing to heavy exploration dispatch farming. A well-developed camp with multiple simultaneous security and gathering dispatches can fund several exploration runs per cycle without draining your reserves.
The world map and dispatch list use distinct icons to differentiate mission types at a glance. Learning to recognize these icons helps you quickly locate high-value exploration dispatches among the many available missions.
Icon | Mission Type | Examples |
|---|---|---|
Compass | Exploration / Ruins dispatch | Time Worn Ruins, King Shield Dig Site, Reach Word Ruins, Vheim Ruins, Boarding Ruins |
Capra Pasture, Muckroot Ranch, fishing and harvest missions | ||
Gear | Production / Crafting dispatch | Warspike Spearmaker, engineering missions, wagon construction |
Shield | Security / Escort dispatch | Oakenshield Manor, guard missions |
Sword | Location Recapture / Military dispatch | Fort sieges, enemy stronghold attacks |
Brick Wall | Construction / Camp Expansion | Howling Hill expansions, camp level upgrades |
Prioritize Time Worn Ruins early. Since skill points from leveling hit a hidden cap, starting Time Worn Ruins dispatches early ensures a steady supply of skill points throughout the game.
Farm King Shield Dig Site for recipes. Even if you do not need abyss cells, the hidden recipe drops make this one of the most valuable dispatches to repeat. Each completion rolls for rare crafting blueprints.
Check Reach Word Ruins for Jinseng. Jinseng is required for upgrading your maximum spirit beyond the cap through Pororin Research. This is the primary reliable source for this rare plant.
Do not ignore the shown reward icon. The displayed reward is not always what you receive. Boarding Ruins shows gold bars but can give silver pouches instead. Treat the icon as a guide, not a guarantee.
Build camp economy first. Exploration dispatches are expensive. Establish security and gathering loops to fund your exploration runs without depleting reserves.
Assign your best Explorer comrade. The Explorer required skill is mandatory, and having higher Explorer skill levels increases your yield from these missions through the standard skill bonus multiplier.
Explore the map actively. New exploration dispatches only appear after you discover their locations. Walk through unknown regions, ring bell towers, and look for the compass symbol next to newly revealed location names.
Engineering production missions have the broadest resource requirements among all dispatch types. They involve territory control, security operations, and the production of specialized items not available through other mission categories. At least one comrade with the Engineer skill is required. These missions become available later in the game and produce unique outputs such as wagons and advanced equipment.
Construction missions are expensive but essential. They grant Camp XP, which raises the camp's rank and unlocks new facilities, vendor stock, and higher-tier missions. Location Recapture missions are worth running regularly because they reduce the number of hostile enemies Kliff encounters when visiting those areas.
Several dispatch missions become available early in the game and form the foundation of your resource pipeline. All of the missions listed below are located in the Hernand region.
Mission | Type | Cost | Reward |
|---|---|---|---|
Howling Hill Camp Expansion | Expansion | Varies by camp level | Camp level increase, new facilities |
Escort (Guard) | 120 Food | ~1,900 Silver | |
Harvest | ~1,000 Silver | ~1,000 Food | |
Food (eggs, animal products) | |||
Production | Silver and Food | Armaments |
Later in the game, additional dispatch locations unlock in other regions. Missions in Demeniss include Thornbriar Food Storage, Sungrove Manor, and Azerian Manor. By Chapter 10 and beyond, high-tier locations such as Gorthak Ironworks in Delesyia become available and can produce thousands of armaments per dispatch cycle.
Once you unlock the Seal of Devotion, you gain access to contribution workers. These serve as extra generic workers that let you run more missions simultaneously, effectively expanding your dispatch capacity beyond your current Greymane roster.
Contribution workers differ from regular Freesword comrades in several important ways:
They are generic. They do not have individual profiles, names, or skill specializations.
You must still assign at least one regular Greymane to every dispatch mission. Contribution workers fill the remaining slots.
For missions that require a specific skill (Engineer, Builder, etc.), at least one Greymane with that skill must be assigned first. Beyond that requirement, the remaining slots can be filled entirely with contribution workers.
Contribution workers cannot be used for combat missions. They only work for farming, gathering, escort, production, and other non-combat dispatch types.
Each contribution worker costs 4 contribution points to hire, but this cost is temporary. The points are refunded as soon as the worker returns from the mission.
Workers are town-specific. The number of contribution workers available depends on your contribution score in each town or region.
Since the contribution point cost is temporary, you do not need to farm points repeatedly. However, having more total contribution points means you can send out more workers simultaneously. The higher your contribution standing in a region, the more workers you can deploy at once across that region's dispatch missions.
The key advantage of contribution workers is that they free up your skilled Freesword comrades for high-value missions. For example, if you need to run a basic harvest mission, assigning a contribution worker lets your Rancher-skilled comrade focus on a ranch mission where their skill bonus applies. Contribution workers provide no skill bonus themselves, but they do count toward the headcount bonus, so they still improve overall output.
You can hire contribution workers from two sources: the Greymane Camp contribution shop and town contribution shops in major cities. Each worker costs a set number of contribution points, which are temporarily reserved (not permanently spent). The points return when you dismiss the worker or when their current dispatch mission ends.
Contribution workers are unlocked by obtaining the Seal of Devotion, a one-time-use key item. The Seal comes from the Flame Knights quest, which is part of House Azerian's quest line in the Demeniss region. After defeating the boss at Flame Knight Castle, you receive the Seal of Devotion. Use it from your inventory to permanently unlock the contribution worker system.
The exact point at which this quest becomes available can vary. It may unlock after completing Chapter 7, or possibly earlier if you have completed all camp expansion quests including the Taylor Dedrich recruitment (the Red Fox Merchants Lake Stoneback Crab quest). You do not need to complete Chapter 8 to access this quest. Chapter 8 is when you can move freely through Demeniss without hostile guards, but the Flame Knights quest can be completed before that by navigating stealthily across rooftops and avoiding guard patrols. The quest has three parts: speaking to a servant in a guarded area, visiting a second hidden location, and then defeating the enemies and boss at Flame Knight Castle.
In version 1.0.02 of the game, town contribution workers are bugged and cannot be used. However, Greymane contribution workers still function correctly. If you are playing before this issue is patched, the Seal of Devotion is still worth pursuing because the Greymane workers remain available.
Dispatch missions both consume and produce camp provisions. Understanding the six resource categories is essential for keeping your dispatch operation running smoothly. All mission costs come from camp funds, not your personal silver.
Resource | Sources |
|---|---|
Silver (Money) | Escort missions, donated silver, sold valuables (rings, necklaces) |
Food (Provisions) | Harvest, ranching, and fishing missions; donated food, animals, herbs |
Armaments | Production missions; donated cloth, bones, unwanted gear |
Ore/Stone | |
Logging missions; donated wood resources | |
Comrades | Recruited through Greymane Faction Quests (not a consumable) |
Resources are donated to Carl, the provisions keeper, through his "Manage Provisions" menu. Different items contribute different amounts; for example, one piece of cloth adds 2 to the Armaments pool, while one Azurite ore adds 63 to the Ore/Stone pool. Collected items from completed dispatch missions appear in the Supply Chest located behind Carl at camp.
Food deserves special attention because almost every mission type draws from the food pool as a cost. Running out of food stalls your entire dispatch operation. Prioritize at least one food-producing mission at all times.
Donations are irreversible. Once you hand something to Carl, the only way to get it back is by loading an earlier save. Because of this, it helps to be deliberate about what you donate rather than dumping your entire inventory at once.
For a full breakdown of every provision source and stockpiling strategy, see the Camp Expansion Guide.
Camp management encompasses several interconnected systems beyond dispatch:
System | Description |
|---|---|
Producing cooking and crafting materials | |
Preparing meals that provide stat buffs | |
Vendor | Purchasing supplies from a camp merchant |
Construction | Building and upgrading camp structures |
Furniture Placement | Decorating and personalizing the camp |
Freesword Dispatch | Sending companions on off-screen missions |
Pearl Abyss's official press release states that the camp was "established by Kliff and his Greymane companions after losing their home to the Black Bears faction." Upgrading the camp directly improves character stats, unlocks new skills, and expands the roster of available companions.
Repeatable dispatch missions (resource gathering, escort, production) auto-restart once they finish. When the timer expires, the same comrades are automatically reassigned to the same mission and the timer begins again. This automation is extremely valuable for passive resource generation; you can set up a rotation and let it generate provisions indefinitely without any manual input.
However, auto-restart can sometimes cause issues. If you sleep at camp right before a mission completes, the mission may restart and reset the timer before you collect the reward. In this situation, cancel the restarted mission to recover all invested provisions, then manually reassign the comrades if you want a different mission. One-time missions such as camp expansion dispatches do not auto-restart.
Dispatch missions advance based on in-game time, not real-world time. This means you can speed up mission completion by resting in the main tent at camp, which fast-forwards up to 12 in-game hours at a time. You cannot rest consecutively without doing something else first, so plan around this limitation.
The first camp expansion mission takes roughly 17 in-game hours to complete. Later missions can take longer depending on their complexity and the number of comrades assigned. Each subsequent camp upgrade demands increased recruits and resources.
Completing Expansion Missions unlocks follow-up quests that allow you to recruit more Greymanes. This creates a feedback loop: more recruits enable more concurrent dispatches, which produce more resources, which fund further expansions.
Every dispatch mission displays a duration in hours before you confirm the assignment. This timer runs on in-game time, not real-world time. The clock advances whenever in-game time passes, whether through normal gameplay, fast travel, or sleeping. The Howling Hill Camp Expansion mission, for example, takes approximately 17 to 18 in-game hours to complete. Since one rest in a camp bed can fast-forward time by up to 12 hours, a single sleep cycle will bring a standard expansion mission to about 67% completion. Shorter missions can take as little as 8 hours.
While a mission is active, the map icon next to the dispatched location turns yellow to indicate work in progress. Once the timer expires and the mission finishes, the icon changes to signal completion and you can collect the rewards.
Dispatch mission timers are tied to in-game time, not real-world time. If a mission requires eight hours to complete, you do not need to wait eight real hours. Instead, find a bed or campfire and rest to advance time by 3, 6, or 12 hours. You can rest at the bed inside the main tent at Greymane Camp to fast-forward through dispatch timers. Combine multiple rest sessions (with some activity in between to clear the cooldown) to complete longer missions without waiting.
You can also fill the time productively by exploring, completing bounties, or working on Sealed Abyss Artifact challenges while your companions handle their assigned tasks in the background.
The Conversion Bonus is a permanent, region-specific multiplier that applies to all dispatch missions within a given area. It is widely considered one of the most powerful buffs available for dispatch farming because it stacks multiplicatively with the skill bonus and headcount bonus.
The bonus increases when you donate camp silver to the church donation box found in major cities within that region. Each donation raises your Blessing level in that region. Every Blessing level adds +2% to all dispatch mission rewards in that region, and this bonus is permanent. It never decays and applies to every future dispatch in the area automatically.
Important: church donations draw from camp silver (managed by Carl), not from Kliff's personal wallet. You must have sufficient silver in your camp provisions pool to make donations.
Each region has its own church where donations apply only to that region's dispatch missions. You must donate separately in every region where you want the bonus active.
Region | Church Location | Approximate Cost for 100% Bonus |
|---|---|---|
Church of Calphade in Hernand Town | ~110,000 camp silver | |
Demeniss | Church in Demeniss region | ~150,000 camp silver |
The Conversion Bonus compounds with the skill bonus and headcount bonus. For example, if a security mission normally yields 1,900 silver, adding a 100% skill bonus doubles it to 3,800. A 40% headcount bonus brings it to 5,320. A 100% Conversion Bonus then doubles the total again to over 10,000 silver per cycle. This is why investing camp silver into church donations early is one of the best long-term decisions for dispatch optimization.
Because the Conversion Bonus is permanent and applies to every dispatch in a region, it effectively pays for itself after just a few mission cycles. Players who farm Hernand dispatch missions should prioritize donating to the Church of Calphade as early as possible.
Once you have enough comrades (around 10 or more), you can set up a self-sustaining dispatch rotation that generates a net profit of silver while simultaneously producing unlimited lumber, stone, and food. The key is running multiple security missions for silver income alongside cheaper resource-gathering missions, so the silver earned covers the resource missions' costs with profit left over. Since all of these missions auto-restart after completion, this loop runs indefinitely until you manually cancel a mission.
Slot | Mission Type | Workers | Estimated Output (16h) |
|---|---|---|---|
1 | Oakenshield Manor Security | 4 | ~3,500 silver |
2 | Second security mission | 4 | ~3,500 silver |
3 | Lumber mission | 1 | |
4 | 1 | ~1,800 food + eggs |
The two security missions bring in roughly 7,000 silver per cycle. The lumber and ranching missions cost approximately 3,000 silver combined, leaving a net profit of around 4,000 silver on top of the timber and food they produce. With contribution workers unlocked, you can run even more missions simultaneously by using Greymane-worker hybrid teams to fill additional dispatch slots.
Timber and ore gathered through dispatch missions feed directly into blacksmith crafting and camp upgrades. Establishing a steady dispatch pipeline for these materials ensures you always have enough resources for weapon refinement and facility expansion.
When a Greymane is assigned to a dispatch mission, they physically leave the Greymane Camp and travel to the mission location. This means you will not be able to talk to them, complete their personal quests, or fulfill any Greymane Commissions until they return. However, if you need to interact with a dispatched comrade, you can sometimes find them at the physical location where they are working.
If a dispatched comrade has a pending request or personal quest you need to complete, cancel their current mission first. Cancelling a mission refunds all invested provisions entirely, so there is no cost to temporarily pulling someone off duty. You can always reassign them to the same mission afterward.
The number of dispatch missions available to you is directly tied to how much of the world map you have explored. Every discovered location on the map, including farms, mines, manors, and outposts, can potentially host dispatch missions. Locations hidden behind the fog of war do not appear in your dispatch list.
The fastest way to clear the fog of war is to ring bell towers. There are 8 bell towers scattered across Pywel, each tied to the Pororin Forest Guardians faction and the "Toll of Pywel" quest chain. Climbing a bell tower and ringing the bell at the top permanently reveals the surrounding region on your world map, unlocking any dispatch-eligible locations in that area.

When you first unlock dispatch missions, your limited roster means you can only run a few missions at a time. Prioritizing the right missions early accelerates your progression significantly. The following order applies to early and mid-game dispatch planning.
Camp Expansion missions first. These are one-time dispatches that permanently upgrade the Greymane Camp. Each expansion unlocks new facilities, recruits, and higher-tier dispatch missions. Expansion missions should always take priority over repeatable missions.
Food production second. Nearly every dispatch mission costs food. Without a steady food supply, your entire dispatch operation stalls. Assign at least one comrade to a ranch or harvest mission as soon as possible.
Silver income third. Security and escort missions generate camp silver, which is needed for expansion costs, church donations, and other dispatch mission fees. Run at least one silver-producing mission at all times.
Exploration dispatches fourth. Once you have a stable food and silver income, start running compass-icon exploration missions. These provide unique rewards like skill points, crafting recipes, and rare materials that cannot be obtained elsewhere.
Resource missions for specific needs. Lumber, ore, stone, and armaments missions should be dispatched as needed to fund specific upgrades or crafting projects. These are lower priority unless you are actively bottlenecked on a particular resource.
Some Greymane expedition dispatches roll their reward from a randomized pool rather than granting a fixed item. The best-known example is the Timeworn Ruins Excavation, whose reward is pulled from the full Timeworn Ruins abyss gear pool. This pool contains several rare blueprints that cannot be purchased anywhere else, including the Narima's Horn recipe, the Infinite Arrows recipe, and various abyss gear effect blueprints.
Because the reward is rolled at the moment the dispatch resolves, you can force a reroll with a hard save and a reload. This turns the dispatch into a one-time completion rather than a repeating grind, and it applies to any Greymane expedition whose reward is listed as random.
Queue the random-reward expedition (for example, Timeworn Ruins Excavation) and send your Greymanes on the normal multi-day run.
Wait in-game or through other activities until the dispatch timer shows less than 12 in-game hours remaining. This is the window in which you can sleep to complete the mission, which is exactly what you need for the reroll loop.
Open the menu and perform a hard save to a named slot before doing anything else. Do not use autosave or the overwrite slot for sleep; the reload must land you back at the pre-sleep moment so that the dispatch is still pending.
Sleep through the remaining hours. The dispatch resolves, and the reward appears in the stash or on the completion screen.
If the reward is not the blueprint or item you wanted, load the hard save from step 3 and sleep again. The game rerolls the reward every time, so a handful of retries usually surfaces the target blueprint.
Once you secure the blueprint you want, the farm is finished for good. Recipes like Narima's Horn unlock permanently in your Witch's Workshop list the moment the drop is registered, and from that point forward you simply gather the crafting components. Other random-reward expeditions across Pywel, especially those tied to ancient ruins and dig sites, can be manipulated with the same hard-save-before-sleep technique whenever a specific rare drop is your target.
Once all dispatch locations are unlocked and your Greymane roster is fully built out, the following configuration maximizes passive resource generation across every category.
The Arcosa dispatch yields 11,000 silver at base output. Assign Orion as the mission leader to double that to 22,000 silver per cycle. This is the single best money dispatch available.
For stone gathering, send workers to the Crimson Mountain Fortress. One worker in charge is usually enough; 10,000 stones per cycle is sufficient for most camp upgrade needs. There is no reason to max out workers on this dispatch unless you are preparing for a massive building push.
The Cacao Farm in Delesia produces cacao, which can be handed in at camp for bonus provisions. With Devon assigned as leader, this dispatch generates approximately 14,000 provisions per cycle, easily covering ongoing camp consumption.
For arms production, the Gorec Iron Works is the primary dispatch. It produces 3,600 weapons and armor at base output, doubling to 7,200 with Wyber as leader. Max out workers on this dispatch, since arms are always in demand for camp upgrades, contribution workers, and mecha worker production.
For additional arms supply, assign workers to the Sold Road Trading Post in the Crimson Desert region. This serves as a secondary arms source to supplement Gorec Iron Works output.
Send workers to Hellbart Hoery in Paloon for White Mountains logging. Eight workers are sufficient for steady wood output. Wood is needed in moderate quantities for camp maintenance and mecha worker crafting.
The Marne Steel Armory produces mecha workers, which are the key to scaling dispatch output infinitely. Assign at least two workers, and one of them must have the engineering specialty. Each mecha worker mission costs 5,000 weapons, 1,000 wood, 2,000 provisions, and 10,000 silver. In return, you receive 1 to 3 mecha workers every 3 hours.
The core loop is straightforward: produce mecha workers constantly, then use them to fill all remaining dispatch slots across every mission. As your mecha worker count grows, your total dispatch output scales with it. This is the foundation of the infinite resource loop described elsewhere in this article.
Before you can produce Mecca workers at the Marne Steel Armory, you must complete the Shaya research prerequisite. Mecca workers are robotic workers that can be crafted through dispatch missions and dramatically increase your total workforce beyond the limits of Freesword comrades and contribution workers.
To unlock Shaya research, travel to Doohaven Keep in Delesia. Be careful when entering the area: do not wear a rubber mask or the NPCs inside will become hostile and attack on sight. Speak with the researchers at Doohaven Keep to begin the Shaya research chain.
Once the Shaya research is complete, the Mecca worker dispatch mission becomes available at the Marne Steel Armory. The mission requires 2 workers (at least one must have the engineer trait), takes 3 hours to complete, and yields 1 to 3 Mecca workers per run. Each run costs 5,000 weapons, 1,000 wood, 2,000 provisions, and 10,000 silver.
To sustain Mecca worker production over time, balance your other dispatch missions to keep resources flowing. The recommended large-scale mission layout (described below) is designed specifically to maintain enough weapons, wood, provisions, and silver for continuous Mecca worker crafting.
Tower research is a separate prerequisite that unlocks large-scale dispatch missions. The researcher for tower research is located at Zargon Tank Works. Once tower research is complete, you can dispatch to Gorthk Iron Works and other large-scale mission locations that provide significantly higher yields than standard missions.
For abyss artifacts and rare crafting recipes, run Time Worn Ruins, Fallen Abyss, and Bordic Ruins simultaneously. All three can operate at the same time and reward different pools of artifacts and blueprints. This passive method complements active farming at locations like the Deminis Wildlife Park or the Scholar Stone Institute.
Keep every Freesword working. An idle comrade at camp is a wasted opportunity. Always have every Freesword assigned to a mission, even if the mission is not your highest priority.
Prioritize self-sustaining loops. Pair complementary missions so that one generates the provisions another consumes. For example, run a food-producing ranch mission alongside security missions that cost food.
Match comrade skills to missions. A single comrade with all three tiers of a matching efficiency skill provides a 100% bonus to output. Never waste a highly skilled comrade on an unrelated mission type.
Do not stack the same skill across workers. Sending three comrades who each have Novice Escort does not give 30%. The game takes only the highest individual skill level present among all assigned comrades. Put one skilled comrade on a mission and fill remaining slots with generalists.
Send extra comrades for the headcount bonus. Each additional worker beyond the minimum adds 20% bonus rewards, up to +40% for two extra workers. Fill missions to their maximum capacity whenever possible.
Invest in church donations early. The Conversion Bonus from church donations is permanent and compounds with skill and headcount bonuses. Donating camp silver to churches in Hernand pays for itself many times over.
Run exploration dispatches repeatedly. Compass-icon missions to Time Worn Ruins and the King Shield Dig Site drop rare recipes and skill points that cannot be obtained elsewhere.
Never let food run out. Almost every dispatch mission draws from the food pool as a cost. Running out of food stalls your entire operation. Keep at least one food-producing mission active at all times.
Dispatch before resting. Before sleeping at camp to advance time, make sure every comrade is assigned to a mission. Sleeping advances the in-game clock, so you can complete several missions in rapid succession.
Use the world map for remote dispatch. Once the Dispatch Coordinator is unlocked at camp level 2, you can assign missions from anywhere on the map through the world map's Inspect function. This saves fast-travel time.
Weaken enemy fortresses before visiting. Sending comrades to attack hostile locations reduces the enemy presence at that location. When you eventually travel there, you face fewer enemies and the area is easier to clear.
Check skill requirements before assigning. If no comrade has the required skill for a mission, you cannot start it. Plan camp upgrades and comrade recruitment around unlocking key required skills like Engineer, Craftsman, and Smith.
Several permanent camp members support the dispatch system, each filling a distinct role.
NPC | Role | Function |
|---|---|---|
Dispatch Coordinator | Manages the full dispatch roster, assigns Freeswords to missions, and displays available missions and skill overviews | |
Provisions Keeper | Accepts item and currency donations, converts them into the five provision categories, and manages the Supply Chest | |
Cook | Establishes the cooking station, sells bulk ingredients, and offers prepared meals | |
Quartermaster / Blacksmith | Purchases gear, sells refinement items and ammunition | |
Wagonmaster | Enables Engineering missions for wagon crafting and trade route establishment |
Ronnie, Tranan, and Brice all unlock through the Embers of Return: A Rumor at Glenbright Farm quest. Completing this single quest gives the camp access to cooking, blacksmithing, and wagon crafting at the same time.
Dispatch missions drive most camp improvements. Here are the key milestones unlocked through the dispatch system:
Camp Level 2: Available after completing the Expanding the Camp quest within the Embers of Return faction questline. Requires the first expansion dispatch.
Trading Center: Unlocked through Timberturner Wainwright Engineering missions. Enables trade routes and the Pywel Wagon for hauling packaged goods.
Emberwind Workshop: Produces Cloudcarts (hot air balloons) for aerial traversal.
Farm and Ranch: Allows growing crops and raising animals on a scheduled production cycle.
Pailune Reconstruction: Available in Chapter 7. Large-scale construction projects that reshape the region.
The Fourth Expansion is one of the most resource-intensive milestones, requiring 1,500 armaments, 2,500 stone, 2,500 timber, 4,000 food, and 100,000 silver. Planning dispatch rotations early is critical to stockpiling enough provisions.
As the story progresses, new dispatch locations unlock across the map. Some locations are more profitable than others.
Phase | Location | Best For |
|---|---|---|
Early Game | Silver income through Security/Escort missions | |
Early Game | Food through Harvest and Ranching missions | |
Early Game | Armaments production | |
Mid Game | Thornbriar Food Storage | Large food yields |
Mid Game | Sungrove Manor | Balanced resource output |
Mid Game | Mixed resource production | |
Late Game | Thousands of armaments per run |
After the Black Bears attack, surviving Greymane members are scattered across Pywel. As you progress through the story and explore the world, you will find and reunite with them:
Story encounters: Some Greymane members are found through main story missions and rejoin automatically.
Side quests: Others are tied to side quest chains that require completing specific objectives before they agree to return.
Passive arrivals: Certain companions hear rumors about the reestablished camp and arrive on their own over time.
Active recruitment: Some NPCs across Pywel can be convinced to join the Greymanes through dialogue choices or by demonstrating your faction's strength.
One of the most valuable applications of the dispatch system is sending companions to besiege enemy-controlled locations before you visit them. When companions attack a fortress:
The hostile presence at that location is reduced
Kliff encounters less resistance when arriving in person
This lets you chip away at enemy territory on multiple fronts simultaneously
This strategy is particularly useful in the mid-to-late game when the map expands and enemy fortifications become more challenging.
Journalists have drawn several comparisons to similar systems in other games:
Game | Similarity |
|---|---|
Red Dead Redemption 2 | The Greymane Camp as a whole is frequently compared to RDR2's camp system, though Crimson Desert's camp is more mechanically deep with farming, construction, and dispatch |
Pearl Abyss's own game features a worker/node dispatch system. Crimson Desert's Freesword Dispatch is a single-player, narrative-integrated evolution using named companions with individual stats rather than anonymous workers |
Now that the game has launched, many common questions about dispatch missions have been answered through player experience.
Question | Answer |
|---|---|
Can companions fail missions? | No. Dispatch missions always succeed once the timer expires. There is no failure state or RNG-based completion. The only variable is the bonus rewards, which depend on comrade skills, headcount, and the Conversion Bonus. |
Is there a cap on concurrent missions? | There is no hard cap on concurrent dispatch missions. The practical limit is determined by how many comrades and contribution workers you have available. With a full roster plus contribution workers, you can run 8 or more missions simultaneously. |
Do missions continue while logged out? | No. Dispatch timers run on in-game time only. Time only advances while you are actively playing, resting, or fast-traveling. |
Can I cancel a mission partway through? | Yes. Cancelling a mission refunds all invested provisions entirely. There is no penalty for cancelling. |
Do auto-restarted missions cost provisions again? | Yes. Each restart deducts the mission's resource cost from your camp provisions pool. If you run out of a required resource, the mission cannot restart and your comrades return to camp idle. |
Does the skill bonus stack across multiple workers? | No. The game takes only the highest individual skill level among all assigned comrades. Sending three comrades with Novice Escort yields only a 10% bonus, not 30%. Concentrate skill upgrades on one comrade per skill type. |
The most common way to add a new dispatch mission to your list is simply to visit the matching point of interest out in the open world. When you arrive at the location, a small pop-up appears in the corner of the screen letting you know that you have gained knowledge of the place. From that moment on, the location appears as a dispatch target at the Greymane Camp, as long as hostile forces no longer hold the area. If the area is still occupied by enemies, clear it first and the dispatch entry opens up automatically.
A useful side note: when a Greymane comrade has a request or dialogue ready for you but is currently out on a mission, you can meet them at the mission location and speak with them there instead of waiting for them to return. Dispatched comrades are physically sent to the mission site in the game world, not teleported away, so the handoff is literal.
Some dispatch missions are not unlocked just by visiting the point of interest. They may also require story progress, completion of a side quest, or research at the Pailune or Dohaven research stations. Whenever a location in the dispatch menu shows the message "further research required," that is the cue to open the research board and start the relevant research mission. To find out which research mission unlocks it, read the very last line of the research description. Researchers explicitly state which capability the project unlocks in that last line, for example "this research unlocks the ability to craft mech workers."
There are two separate multipliers that can double (or more than double) the rewards you receive from a dispatch mission. Both are worth setting up before running any large batch of missions because they apply on top of the Skill Bonus and Comrade Bonus from the dispatch interface itself.
Every major region has a church with a donation box, and donating your camp money to that church builds up a Conversion Bonus that is applied to dispatch missions in the same region. The Conversion Bonus caps at 200%, which means a maxed church can effectively double or even triple the payout of any affected mission. Each level of blessing adds 2% toward that cap, with diminishing returns at higher levels, so every new tier costs more than the last. Fully maxing out the Church of Hernand currently runs about 500,000 camp money, and each regional church has its own donation threshold.
To see exactly which missions a church will boost, open the world map and hover the cursor over the church icon. The tooltip lists the dispatch missions the church affects, which lets you focus donations on the region that hosts the missions you actually run. For example, if most of your high-value missions sit inside Hernand, funnel donations into the Hernand church first before touching any of the smaller regional churches.
The Golden Bear Key is a key item rewarded for completing the One Step Ahead side quest chain in the Demenis region. Unlike the Conversion Bonus, which is regional, the Golden Bear Key is a universal multiplier: clicking on it consumes the item and doubles the rewards from your next dispatch mission regardless of which region or mission type you use it on.
Important caveat: at the time of writing, several players have reported that the Golden Bear Key is buggy. In some cases the bonus fails to apply at all, and in others the bonus is lost after the mission returns. Always save manually before activating the key. If the effect fails to trigger or gets wiped, reload the save and hold the key for a future patch rather than wasting it.
After clearing Chapter 8 of the main story, you can travel to the Flame Knight's castle in the Demenis region and defeat the boss there. Some faction missions in the surrounding area may need to be cleared before the castle becomes accessible. Beating the Flame Knight drops a bundle of high-end weapons and armor, but the most important item in the reward list is the Seal of Devotion.
The Seal of Devotion is a permanent upgrade to the dispatch interface at camp. Once it is in your inventory, you gain the ability to hire temporary workers directly from the dispatch screen by spending Contribution Points. Hired workers fill dispatch slots exactly like any other Greymane comrade and can satisfy the personnel count on any mission they are eligible for.
The hired-worker mechanic pairs extremely well with multi-skill missions. If a mission requires a specific required skill such as Engineer, Craftsman, or Miner, you can assign a single qualified Greymane to cover the skill requirement and then fill every remaining slot with hired workers. The cost for the hires is paid in Contribution Points, and the points are fully refunded back to you once the mission returns to camp. That refund makes hiring effectively free at the cost of temporarily tying up your contribution balance, so there is very little reason to leave dispatch slots empty when hires are available.
A specific subset of exploration dispatches rewards abyss gear recipes and gems (beyond the basic recipes sold by the witches of Pywel). There are six sites total but only five explorer companions, so you have to rotate which site sits idle.
King's Shield Dig Site — unlocked via a Demeniss side-quest chain; boss-ability gems.
Varheim Ruins — Palune region near Odealo; weapon-ability gems.
Bordig Ruins — in the crimson desert, unlocked by clearing the Tash Kelp outlaw-warlord chain; gathering-focused gems (Blessings of Beast, Earth, Forest).
Time-Worn Ruins — northwest section of the desert; notable for Infinite Arrows and Legion Main drops, and also a renewable source of Abyss Artifacts.
Breachwood Ruins — unlocked by researching the Breachwood Ruins Dispatch Plan at Perorin Village; boss-ability gems.
Serpent Shrine — quest-locked behind the shrine's dragon encounter; mixed main gear and boss abilities.
Of the six, Time-Worn Ruins is worth singling out because its Abyss Artifact reward is effectively infinite. The turnaround is slow but it runs in the background, which makes it the only sustainable way to keep earning skill points after you have cleared every fixed Abyss Crescent on the map.
Not every exploration ruin is available from the moment its map icon appears. Several sites have quest or research prerequisites that must be cleared before the dispatch board will accept a mission. Plan the unlock order alongside the main story to avoid wasted travel.
King's Shield Dig Site (Demeniss): available early, focused on boss ability recipes for Abyss gear.
Varheim Ruins (Palune and Odealo border): rewards lean toward weapon ability drops used to roll new Abyss gear recipes.
Bordig Ruins (Crimson Desert region): gated behind the desert outlaw warlord quest chain that starts with Tash Kelp. Rewards skew toward gathering-focused Abyss gear, including effects like Blessing of Earth and Blessing of Forest.
Time-Worn Ruins (north of Bordig): the infinite skill point source and a reliable drop pool for Legion-tagged abilities.
Breachwood Ruins: accessible after completing the research prompt at Perorin Village. The reward pool is dominated by boss-ability recipes, making it a complement to the King's Shield Dig Site.
Serpent Shrine: tied to a specific main-story quest, so it only opens once that quest is active. Unlike the other sites, its rewards mix standard main-line Abyss gear with additional boss-ability drops.
When planning an Abyss gear farming route, pair two ruins that pull from different reward pools so each dispatch cycle drops a wider variety of recipes. For example, running King's Shield Dig Site alongside Varheim Ruins gives both boss abilities and weapon abilities on the same rotation.
Exploration dispatches are intentionally limited to five concurrent slots regardless of how many comrades have the Explorer skill. Unlike farming, logging, or escort missions which scale with the overall roster, the explorer queue is hard-capped at five active ruins dispatches at any given time.
Practical implications: always keep all five slots filled, rotate locations rather than stacking the same site five times in a row to diversify the hidden bonus rewards, and treat the Explorer skill as a specialist role rather than something every comrade needs. Two or three comrades with high-level Explorer skills are more than enough to cover the five-slot queue in perpetuity.
Pair this with the Camp Expansion Guide recommendation to keep equipment-producing dispatches running in parallel. Exploration missions eat more resources per run than standard dispatches, so the five-slot cap is a ceiling that only matters if the supporting economy can sustain it.