
Loading...
Loading...
Accessories
April 4, 2026 at 09:59 AM
Add wikilinks to table cells (94 new links)
Accessories are equippable items in Crimson Desert that provide stat bonuses beyond what standard weapons and armor offer. Unlike armor pieces, accessories occupy their own dedicated equipment slots and tend to focus on offensive stats, defensive stats, or utility effects like movement speed and elemental resistance.
Players can equip up to six accessories at once: two rings, two earrings, one necklace, and one cloak. Filling all accessory slots early in the game provides a noticeable power spike, so looting enemies and visiting Contribution Shops should be a priority as soon as you begin exploring.
Accessories are described in-game as small pieces of equipment that provide Kliff and other playable characters with various buffs and effects. They function as passive equipment that enhance character performance through stat increases and utility effects. Some accessories also carry active abilities, such as the Saint's Necklace, which grants a rapid stamina restoration effect on activation.
Filling the necklace slot, both earring slots, and both ring slots should be a top priority from the moment you start exploring. Even cheap crafted jewelry from a blacksmith provides significant stats once refined through the refining system. The stat gains from having all five jewelry slots occupied far outweigh the cost of basic materials, so do not leave any slot empty if you can help it.
Refinement adds the following bonuses to jewelry accessories at various levels: increased attack, attack speed, defense, and movement speed. Each refined ring provides a 2% stamina regeneration bonus, meaning two fully refined rings together contribute 4% passive stamina recovery. Refined earrings unlock health regeneration. The most important refinement bonus, however, comes from necklaces: spirit regeneration.
Spirit regeneration from necklaces is arguably the most important stat in the game. Spirit governs your ability to use skills, dodge, and perform special attacks. Without a necklace equipped and refined, spirit recovery is slow enough to leave you vulnerable during extended fights. A refined necklace keeps your spirit pool topped up so you can chain abilities without running dry. Prioritize equipping and refining a necklace above all other accessory slots.
Several reliable sources provide free accessories during the opening hours of the game. Knowing where to look lets you fill every slot before tackling the more difficult content in and around Hernand.
Source | Accessory | Details |
|---|---|---|
Upstairs on the northeast side. Solve the strongbox pattern puzzle (rotate blocks to form the picture) to receive an earring. | ||
House Roberts quest line | Earring + refinement materials | Complete the quest chain ending with "Count's Honor." Rewards an earring that starts at refinement level 2, plus jewelry refinement materials. |
Updated every time you liberate a location. Contains free necklaces and rings. Check back after each liberation. | ||
Blacksmith in Hernand City | Crafted jewelry | Craft rings, earrings, or necklaces if you still have empty slots. Requires basic materials gathered from the world. |
World exploration and quests | Various | Bandit drops, side quest rewards, and treasure chests throughout the open world provide assorted accessories. |
The House Roberts quest line is especially valuable because the earring reward arrives pre-refined at level 2, saving you materials that would otherwise be needed to reach that tier manually. Combined with the refinement materials included in the reward, it gives you a significant head start on the refining system.
Liberating locations is one of the best passive sources of free accessories. Red areas on the map indicate enemy-held territories that can be cleared through combat. Every time you liberate one of these locations, the supply chest at the Greymane Camp is updated with new items, including multiple necklaces and rings available for free.
This means that simply progressing through the open world and clearing hostile areas naturally stocks you with accessories. There is no need to farm specific enemies or save up contribution points for basic jewelry when the supply chest keeps providing new pieces after each liberation. Check the supply chest at Greymane Camp after every liberation to see what new accessories have become available.
The accessories from the supply chest are perfectly adequate for refinement. Even if their base stats are modest, refining them to level 3 or 4 unlocks the critical secondary and tertiary bonuses (stamina regeneration on rings, spirit regeneration on necklaces) that make a real difference in combat.
There are four categories of accessories in Crimson Desert. Each type has its own dedicated equipment slot, and each leans toward a specific stat profile.
Type | Slots | Primary Stat Tendency | Refinement Tertiary Bonus |
|---|---|---|---|
Ring | 2 | Attack | Stamina Regeneration |
Earring | 2 | Health Regeneration | |
Necklace | 1 | Attack / Critical Rate | Spirit Regeneration |
Cloak | 1 | Defense / Elemental Resistance | Varies |
Rings provide Attack bonuses and unlock Stamina Regeneration through refinement. Earrings lean toward Defense and Movement Speed, with Health Regeneration as a tertiary bonus. Necklaces boost Attack and can unlock Critical Rate, while their tertiary refinement bonus is Spirit Regeneration. Cloaks are unique in that they primarily offer elemental resistance rather than raw Attack or Defense, though they do carry some base Defense.
Additional cosmetic wearables such as masks, eyewear, and backpacks become available later in the game, but these do not provide combat stats. Crowns, available from Contribution Shops at 70 points, also serve as prestigious cosmetic rewards.
Rings primarily boost offensive stats and are equipped to enhance Attack and Attack Speed. There are 16 rings in the game.
Ring | Rarity | ATK | Bonus Stats | Special Effect |
|---|---|---|---|---|
Epic | 0-3 | Attack Speed Lv.0 (max Lv.3) | Stamina Regen -50000% | |
Uncommon | 0-3 | Attack Speed Lv.0 (max Lv.3) | Stamina Regen -50000% | |
Common | 0-7 | - | Stamina Regen -50000% | |
Common | 0-3 | Attack Speed Lv.0 (max Lv.3) | Stamina Regen -50000% | |
Legendary | 3 | Attack Speed Lv.0, Movement Speed Lv.0, Critical Rate Lv.0 | - | |
Rare | 0-3 | Attack Speed Lv.0 (max Lv.3) | Stamina Regen -50000% | |
Legendary | 2 | Attack Speed Lv.1, Movement Speed Lv.0, Critical Rate Lv.0 | - | |
Rare | 0-3 | Attack Speed Lv.0 (max Lv.3) | Stamina Regen -50000% | |
Legendary | 2 | Attack Speed Lv.0, Movement Speed Lv.0, Critical Rate Lv.1 | - | |
Legendary | 2 | Attack Speed Lv.0, Movement Speed Lv.0, Critical Rate Lv.0 | - | |
Epic | 0-3 | Attack Speed Lv.0 (max Lv.4) | Stamina Regen -50000% | |
Legendary | 2 | Attack Speed Lv.0, Movement Speed Lv.0, Critical Rate Lv.1 | - | |
Common | 0-7 | - | Stamina Regen -50000% | |
Epic | 4 | - | Charge Lightning (Skill) | |
Rare | 0-3 | Attack Speed Lv.0 (max Lv.3) | Stamina Regen -50000% | |
Legendary | 0-3 | Attack Speed Lv.0 (max Lv.3) | Stamina Regen -50000% |
Earrings focus on Defense and sustainability, providing bonuses like Movement Speed and Health regeneration. There are 16 earrings in the game.
Earring | Rarity | DEF | Bonus Stats | Special Effect |
|---|---|---|---|---|
Epic | 0-6 | Movement Speed Lv.0 (max Lv.4) | Health: +200 every tick sec | |
Legendary | 0-6 | Movement Speed Lv.0 (max Lv.4) | Health: +200 every tick sec | |
Common | 0-10 | - | Health: +200 every tick sec | |
Epic | 0-10 | - | Health: +200 every tick sec | |
Legendary | 0-10 | - | Dark Repose, Health: +200 every tick sec | |
Common | 0-4 | Movement Speed Lv.0 (max Lv.3) | Health: +200 every tick sec | |
Rare | 0-6 | Movement Speed Lv.0 (max Lv.4) | Health: +200 every tick sec | |
Uncommon | 0-10 | - | Health: +200 every tick sec | |
Uncommon | 0-6 | Movement Speed Lv.0 (max Lv.4) | Health: +200 every tick sec | |
Epic | 5 | - | Music Box (Skill) | |
Epic | 0-4 | Movement Speed Lv.0 (max Lv.3) | Health: +200 every tick sec | |
Rare | 0-4 | Movement Speed Lv.0 (max Lv.3) | Health: +200 every tick sec | |
Epic | 0-10 | - | Health: +200 every tick sec | |
Legendary | 0-10 | - | Health: +200 every tick sec | |
Rare | 0-10 | - | Health: +200 every tick sec | |
Common | 0-10 | - | Health: +200 every tick sec |
Necklaces offer a blend of offensive and utility stats, including Attack and Critical Rate bonuses. There are 25 necklaces in the game.
Necklace | Rarity | ATK | Bonus Stats | Special Effect |
|---|---|---|---|---|
Epic | 0-11 | - | Spirit: +100 every tick sec | |
Epic | 0-5 | Critical Rate Lv.0 (max Lv.4) | Spirit: +100 every tick sec | |
Common | 0-11 | - | Spirit: +100 every tick sec | |
Common | 0-11 | - | Spirit: +100 every tick sec | |
Rare | 0-5 | Critical Rate Lv.0 (max Lv.3) | Spirit: +100 every tick sec | |
Epic | 3 | - | Crossroads (Skill) | |
Rare | 0-5 | Critical Rate Lv.0 (max Lv.3) | Spirit: +100 every tick sec | |
Rare | 0-11 | - | Spirit: +100 every tick sec | |
Common | 0-11 | - | Spirit: +100 every tick sec | |
Uncommon | 0-5 | Critical Rate Lv.0 (max Lv.4) | Spirit: +100 every tick sec | |
Legendary | 0-11 | - | Spirit: +100 every tick sec | |
Rare | 0-5 | Critical Rate Lv.0 (max Lv.3) | Spirit: +100 every tick sec | |
Common | 0-5 | Critical Rate Lv.0 (max Lv.4) | Spirit: +100 every tick sec | |
Uncommon | 0-5 | Critical Rate Lv.0 (max Lv.4) | Spirit: +100 every tick sec | |
Epic | 0-5 | Critical Rate Lv.0 (max Lv.3) | Spirit: +100 every tick sec | |
Legendary | 0-5 | Critical Rate Lv.0 (max Lv.4) | Spirit: +100 every tick sec | |
Legendary | 0-11 | - | Spirit: +100 every tick sec | |
Common | 0-11 | - | Spirit: +100 every tick sec | |
Rare | 3 | - | Sunshine (Skill) | |
Epic | 4 | - | Rainstorm (Skill) | |
Legendary | 0-5 | Critical Rate Lv.0 (max Lv.3) | Spirit: +100 every tick sec | |
Rare | 0 | - | Vitality (Skill) | |
Epic | 0-5 | Critical Rate Lv.0 (max Lv.3) | Spirit: +100 every tick sec | |
Rare | 0-5 | Critical Rate Lv.0 (max Lv.4) | Spirit: +100 every tick sec | |
Epic | 0 | - | Second Wind |
Bracelets are versatile accessory pieces that provide various passive bonuses. There are 3 bracelets in the game.
Bracelet | Rarity | ATK | DEF | Bonus Stats |
|---|---|---|---|---|
- | - | - | - | |
- | - | - | - | |
- | - | - | - |
Cloaks are equipped on the back slot. Only one cloak can be worn at a time. Unlike rings, earrings, and necklaces, cloaks are primarily used for the elemental resistance they offer rather than raw Attack or Defense. Some cloaks also provide faction disguises that let players infiltrate certain areas.
Cloaks overlap between the accessory and armor systems. They are counted as one of the six accessory slots alongside rings, earrings, and necklaces, but they also appear under the broader armor equipment alongside headgear, body armor, gloves, and footwear. Cloaks can be obtained from contribution shops, quest rewards, crafting, or purchased from merchants.
Cloak | DEF | Resistance | Special | How to Obtain |
|---|---|---|---|---|
0 | Lightning Res. Lv.3 | - | Kliff's starting equipment | |
4 | Lightning Res. Lv.5 | Demenissian Faction Disguise | Damiane's starting equipment | |
2 | Fire Res. Lv.3 | - | Hernand Contribution Shop | |
1 | Lightning Res. Lv.3 | - | Found in world | |
2 | Ice Res. Lv.3 | - | Close Threat quest reward; Hernandian Tailor Shop | |
3 | Ice Res. Lv.3 | - | Contribution Shop / quest reward | |
3 | Ice Res. Lv.3 | - | Contribution Shop / quest reward | |
3 | Ice Res. Lv.3 | Civilian Disguise | Back Alley Shop (20.88 Silver) | |
1 | Ice Res. Lv.3 | - | Found in world | |
0 | Fire Res. Lv.3 | - | Found in world | |
1 | Fire Res. Lv.3 | - | Found in world | |
3 | Lightning Res. Lv.3 | - | Found in world | |
2 | Lightning Res. Lv.3 | - | Found in world | |
2 | Ice Res. Lv.3 | - | Craft: 5 Hay, 10 Cloth Pieces | |
0 | Ice Res. Lv.3 | - | Craft: 10 Cloth Pieces, 2 Fleece | |
0 | Ice Res. Lv.3 | - | Craft: 10 Cloth Pieces, 2 Fleece | |
0 | Ice Res. Lv.3 | - | Craft: 10 Cloth Pieces, 2 Fleece | |
3 | Ice Res. Lv.3 | Jackal Disguise | Found in world | |
St. Halssius Priest's Cloak | 3 | Ice Res. Lv.3 | St. Halssius Disguise | Familiar Curses quest reward |
TBC | Ice Res. Lv.3 | - | Contribution Shop |
Cloaks with faction disguises are especially valuable. The Disguise Cloak lets Kliff blend in among common townsfolk and is available from the Back Alley Shop in Hernand for 20.88 Silver. The Jack Cloth Cloak provides a Jackal Disguise, while the St. Halssius Priest's Cloak (earned from the Familiar Curses quest) provides a St. Halssius Disguise. The Demenissian Uniform Leather Cloak is the strongest cloak listed, with 4 Defense and Lightning Resistance Lv.5, and also grants a Demenissian Faction Disguise.
The fastest way to obtain accessories early in the game is by defeating and looting bandits. Bandit groups appear along roads and inside camps throughout Hernand and surrounding areas. They have a reasonable drop rate for Tarnished Rings and Tarnished Necklaces. After combat, white dots on the minimap show corpses that can be looted. Always loot every enemy you defeat to maximize your chances of getting accessory drops. Bandits spawn regularly along roadsides and respawn at intervals, making them a consistent farming source.
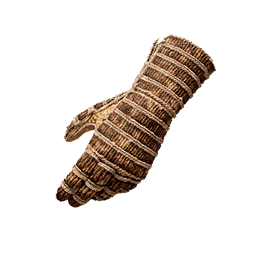
Some of the best accessories in the game are hidden behind strongbox puzzles scattered across manors in Hernand. These locked containers require solving various mechanical puzzles to open. The following accessories are confirmed strongbox rewards:
Accessory | Location | Priority |
|---|---|---|
Bluemont Manor (north) | High (refineable, +2 DEF) | |
Bluemont Manor (south building, upper floor) | Medium (ATK +1, Critical Rate Lv.1) | |
Hillside Manor (1st floor) | Medium (DEF +5, Vitality ability) | |
High (refineable, Move SPD Lv.1) |
The earrings from strongboxes are considered high-priority pickups because they can be refined further to unlock additional passive bonuses. Necklaces from strongboxes are useful but considered less unique than the earrings in the long run.
Each major region has its own Contribution Shop selling region-specific accessories. Contribution Points are earned through quests, bounties, and side activities, and they are region-locked. Accessories from contribution shops do not cost Silver; they are purchased entirely with Contribution Points.
Region | Accessory | Cost (pts) |
|---|---|---|
25 | ||
27 | ||
65 | ||
65 | ||
65 | ||
65 | ||
70 | ||
70 | ||
Delesyian Crown | 70 |
The highest-tier accessories (Signets at 65 points) require extensive regional engagement. Crowns cost 70 points each and represent the ultimate prestige reward, serving primarily as cosmetic items. The Demeniss Cathedral accessories at 25 and 27 points serve as useful mid-tier stepping stones before saving for Signets.
Certain main story and faction quests reward accessories or accessory-related items. The Hernandian Banquet Cloak is awarded for completing the Close Threat faction quest, for example. Complete quest lines thoroughly and check reward lists before choosing between multiple rewards.
Several cloaks can be crafted using gathered materials. Crafting requires both the raw materials and a recipe. Craftable cloaks include the Scarecrow Cloak (5 Hay, 10 Cloth Pieces), Delesyian Cloth Cloak (10 Cloth Pieces, 2 Fleece), Grey Wolf Cloth Cloak (10 Cloth Pieces, 2 Fleece), and White Bloodwind Cloth Cloak (10 Cloth Pieces, 2 Fleece). Cloth Pieces are a common material obtained from logging and other gathering activities.
The Blue Scout accessory set (Blue Scout Ring, Blue Scout Earring, and Blue Scout Necklace) was available as a promotional reward through Twitch Drops during the launch campaign. Players who watched 120 minutes of participating Crimson Desert streams could claim the set. These are limited-time promotional items.
All accessories can be upgraded through the Refinement system at any Blacksmith. There are 10 refinement levels for each accessory. Refinement uses materials gathered from logging, mining, or purchased from vendors. Accessories also accept duplicate copies of themselves as refinement materials, which is especially useful for common drops like the Tarnished Ring.
Refinement levels 1 through 4 require only standard materials (ores, ingots, cloth) and are cheap to complete. This range is highly encouraged for all players, as the stat gains are significant relative to the cost. Starting at refinement level 5, the Blacksmith stops asking for standard materials and begins requiring Abyss Artifacts. Since Abyss Artifacts also serve as skill points and are used for Health, Stamina, and Spirit stat upgrades, spending them on accessory refinement competes directly with character progression. Plan carefully before pushing past level 4.
Many accessories do not display their full stat potential until refined. Secondary stats like Critical Rate and Attack Speed may appear at certain refinement levels, and tertiary effects (Health Regeneration for earrings, Stamina Regeneration for rings, Spirit Regeneration for necklaces) typically unlock at Refinement Level 3.
Unlike weapons and armor, accessory refinement cannot be previewed. The only way to see what bonuses an accessory gains at higher levels is to refine it. Interacting with a Blacksmith and choosing Refinement opens a menu showing your currently equipped gear, and selecting a piece shows exactly which materials and quantities are required for the next upgrade tier.
Accessories in Crimson Desert follow these general rules:
Equipment Slots: Players can equip one ring, one earring, one necklace, and one bracelet at a time.
Rarity Tiers: Accessories come in Common, Uncommon, Rare, Epic, and Legendary tiers. Higher tiers offer better base stats and stronger bonus effects.
Refinement: Most accessories can be refined up to +10, increasing their primary stats and improving bonus effects at certain thresholds.
Special Effects: Many accessories provide passive effects like Health regeneration, Stamina recovery, Spirit regeneration, or Critical Rate bonuses that activate automatically while equipped.
Stat Synergy: Choosing accessories that complement your weapon and armor setup is key. Offensive builds benefit from rings and necklaces, while defensive builds gain more from earrings.
Fill all six accessory slots as early as possible. Even basic accessories like Tarnished Rings provide meaningful stat boosts when all slots are occupied.
Farm bandits along roads for quick accessory drops. Bandit spawns are frequent, the loot tables include accessories, and the spawns respawn at regular intervals.
Refine your accessories with duplicate copies. If you find multiple Tarnished Rings, use the extras as refinement fuel rather than selling them.
Prioritize earrings from strongboxes early. The Oath of Darkness and Engraved Gold Earring are high-priority pickups that can be refined to unlock passive bonuses.
The Finely Crafted Gold Necklace is one of the best early necklaces thanks to its Critical Rate Lv.1 bonus. Grab it from the Bluemont Manor south building strongbox.
The Saint's Necklace has a strong +5 Defense and an active stamina restoration ability, but the 30-minute cooldown limits its usefulness. If you need Silver more than the ability, it sells for 9.50.
Save your Contribution Points for Signets (65 pts) if you want the best contribution-shop rings. The Demeniss Cathedral accessories (25-27 pts) are useful stepping stones.
Refine accessories to level 4 freely using standard materials. Only push past level 4 if you can afford to spend Abyss Artifacts, since those same artifacts are needed for skill unlocks and stat upgrades.
Accessories do not have equipment weight in Crimson Desert. Equip the best pieces you have without worrying about encumbrance.
Cloaks with faction disguises (Disguise Cloak, Jack Cloth Cloak, St. Halssius Priest's Cloak) unlock access to restricted areas. Keep at least one disguise cloak in your inventory for infiltration missions.
Equipment - Overview of all equipment types
Shields - Defensive off-hand gear
Combat - Combat mechanics and strategies
One-Handed Weapons - Weapons to pair with accessories