Loading...
Loading...
Automation and Passive Farming
March 25, 2026 at 05:08 AM
Add wikilinks to table cells (2 new links)
Pokemon Pokopia allows players to set up automated systems that collect materials, water crops, and process resources without manual effort. These systems rely on Pokemon Specialties (Litter, Gather, Water, Burn, Chop, Recycle) working in chains with infrastructure like Community Boxes, Smelting Furnaces, sprinklers, and Water Basins. Setting up automation is a key post-game activity that keeps resources flowing while the player focuses on building, decorating, or Legendary hunting.
Sprinklers automatically water tilled soil around them by drawing water from a nearby source. When properly placed, they eliminate the need to manually water crops with Water Gun. A sprinkler draws water from up to five blocks away and sprays in a diamond-shaped pattern covering a substantial area of tilled soil.
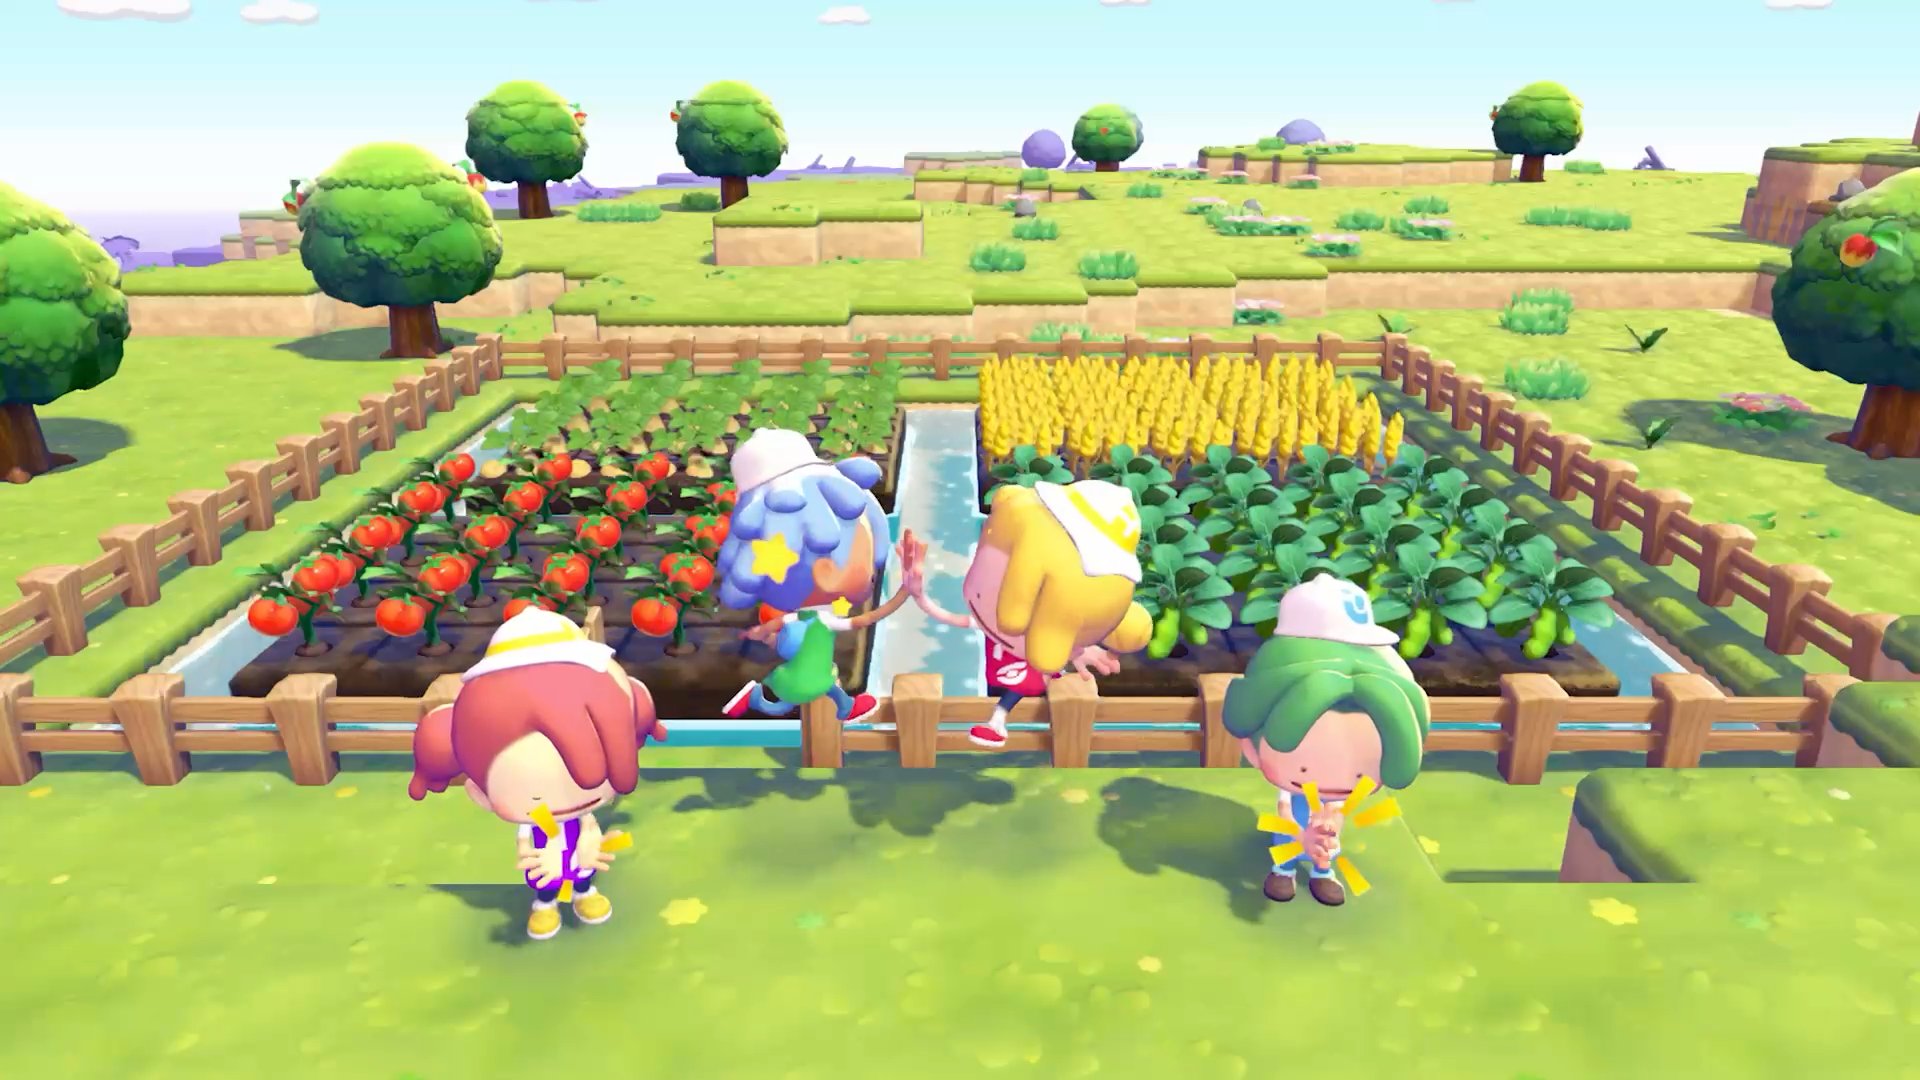
Sprinklers can be found as items in Bleak Beach or Rocky Ridges. Once found, photograph the sprinkler and use the 3D Printer at any rebuilt Pokemon Center to duplicate copies. Each copy costs a small amount of Pokemetal.
Flatten the terrain in your desired farming area.
Dig a water hole (at least 2x2 for a self-replenishing water source) within five blocks of the crop area.
Place a plank or bridge over the water hole.
Mount the sprinkler on top of the plank/bridge.
Use Rototiller to till the soil in a diamond pattern around the sprinkler.
Plant seeds in the tilled soil. The sprinkler handles watering automatically.
Spacing tip: Prototype a small layout first. If corners of the tilled area stay dry, the sprinkler is not covering them. For larger farms, overlap the edges of multiple sprinkler zones to ensure full coverage.
Layout | Sprinklers | Best For |
|---|---|---|
Single Center | 1 | Early game, small vegetable patch |
Overlap Grid | 4-9 | Mid-to-late game, large crop fields |
Berry Orchard | 2-4 | Sustained passive berry production |
Mature berry trees (Leppa, Chesto, Pecha, Rawst, Aspear, Lum) can be duplicated using the 3D Printer for one Pokemetal each. Row them out with paths between for quick picking, and position them near habitats to boost Pokemon spawn rates. Place sprinklers nearby so berry trees within range get auto-watered.
An alternative to sprinklers is using Pokemon with the Water specialty (such as Squirtle, Wartortle, Shellos, Gastrodon, Slowpoke, or Slowbro). These Pokemon automatically water nearby crops and dry areas when a Water Basin is set up.
Craft a Water Basin and place it near your crop fields.
Fill the basin with Water Gun.
Assign a Water-specialty Pokemon to a habitat near the basin.
The Pokemon will automatically draw water from the basin and spray nearby fields and plants.
Water-specialty Pokemon also perform Rain Dance to affect local weather, clean off mud from surfaces, and contribute to humidity levels.
The Community Box recipe becomes available at Environment Level 4. Purchase it from the Pokemon Center PC Shop for 100 Life Coins. Craft it at a workbench using 2 Lumber.
The Community Box is a shared storage container that Pokemon interact with automatically. Place it near Pokemon habitats, and Pokemon with compatible specialties will deposit items into it, withdraw raw materials for processing, and return finished goods.
Gather specialty: Pokemon pick up items from the ground and deposit them into the nearest Community Box.
Chop specialty: Pokemon take logs from the box, process them into Lumber, and return the Lumber.
Recycle specialty: Pokemon take Wastepaper or Nonburnable Garbage from the box and convert it to Paper or Iron Ore.
The most powerful passive farming setup combines the Litter and Gather specialties into an automated chain:
Litter Pokemon continuously drop items near their habitat without needing any input. Different species drop different materials.
Gather Pokemon pick up the dropped items from the ground and deposit them into the nearest Community Box.
Optional: Processing Pokemon (Chop, Recycle, Burn) near the Community Box withdraw raw materials and convert them into finished goods.
Place Litter and Gather Pokemon habitats adjacent to each other with a Community Box nearby. The Gather Pokemon will continuously collect Litter drops and stockpile them in the box.
Pokemon | Item Dropped | Processing Chain |
|---|---|---|
Chop specialty converts to Lumber | ||
Recycle converts to Iron Ore; smelt to Iron Ingot | ||
Used directly in crafting | ||
Used directly in crafting | ||
Used for cooking and Pokemon attraction | ||
Used directly in crafting | ||
Used directly in crafting | ||
Used for Salad cooking | ||
Burn converts to Bricks | ||
Smelt to Iron Ingot | ||
Used directly in building |
Some Pokemon have both Litter and a processing specialty, making them self-contained farms:
Pokemon | Litter Drop | Processing Specialty | Final Product |
|---|---|---|---|
Chop | Lumber (automatic) | ||
Recycle | Iron Ore (automatic) |
Pokemon with the Burn specialty (Charmander, Torchic, Magmar, Arcanine, and others) will automatically process ores at a Smelting Furnace placed near their habitat. Load the furnace with Iron Ore, Copper Ore, Gold Ore, or Sand, and the Burn Pokemon converts them into Ingots or Glass continuously.
Important: The Pokemon will stop processing and wander away once the furnace is empty. Restock it regularly, or chain it with a Gather Pokemon that feeds ore from a Community Box into the furnace area.
A fully automated Iron Ingot farm:
Place a Glimmet or Glimmora habitat (Litter: drops Iron Ore).
Place a Machop habitat nearby (Gather: picks up Iron Ore, deposits in Community Box).
Place a Community Box between the two habitats.
Place a Smelting Furnace next to the Community Box.
Assign a Burn-specialty Pokemon (Charmander, Torchic) to a habitat near the furnace.
The Burn Pokemon draws Iron Ore from the Community Box area and smelts it into Iron Ingots.
This chain runs completely passively. Check back periodically to collect finished Iron Ingots from the furnace output.
Powered vending machines dispense one random drink per day. Each drink doubles as a terraforming liquid when consumed by Ditto and spat out using the Suck Up Water move. The type of liquid produced depends on the drink, not the environment where you place it. This means a single vending machine connected to electricity gives you a daily source of whichever liquid type you receive.
Drink | Flavor | Liquid Produced | Uses |
|---|---|---|---|
Bland | Seawater | Coastal habitats, ocean-themed builds | |
Dry | Seawater | Same as Fresh Water; coastal terrain shaping | |
Sweet | Muddy water | Swamp habitats, Paldean Wooper attraction | |
Bitter | Hot spring water | Hot spring habitats, Psyduck attraction | |
Spicy | Lava | Volcanic terrain, Fire-type habitat creation |
To automate liquid collection, place a vending machine in your settlement and connect it to the power grid using utility poles or a Wireless Power Transmitter. Visit the machine once per in-game day to collect your drink. Since the drink is random, you may not always get the liquid type you need on a given day, but over time the machine provides a steady supply of all five drink types.
For faster liquid stockpiling, place multiple vending machines across different areas. Each machine operates on its own daily cooldown, so two machines give you two drinks per day, three machines give three, and so on. The vending machines in Bleak Beach are among the first you can access, with one near Mosslax's cave and another near Smearguru's painting kiosk.
Tip: Drinks can also be offered to Mosslax or used as cooking ingredients. If you need a specific liquid type urgently, prioritize vending machine visits and save drinks of the type you want rather than using them for cooking.
Honey is a valuable crafting and cooking ingredient used in party curry and Pokemon attraction. Rather than collecting honey manually, you can build a fully automated honey farm using Combee, Vespiquen, and a Gather-specialty Pokemon working together in the same flower habitat.
Build a Combee habitat: Create a Pretty Flower Bed habitat with exactly four wildflowers placed in a tight 2x2 square. Combee arrives quickly and begins dropping honey jars every few hours through its Litter specialty.
Expand for Vespiquen: Add more wildflowers to expand the patch to at least eight connected flowers in any configuration. Vespiquen typically moves in the same day once the expanded habitat is ready.
Add a Gather Pokemon: Place a Pokemon with the Gather specialty in or near the same flower area. Gather Pokemon automatically pick up all dropped honey jars and sparkling items from the ground and deposit them into the nearest Community Box. Good Gather options available early include Machop (found in boulder-shaded tall grass) and Gastly (found in spooky habitats).
Place a Community Box nearby: Position a Community Box within the activity range of the Gather Pokemon so collected honey is automatically stockpiled.
Optional Vespiquen trading: Vespiquen offers a daily trade of 3 Honey for 1 piece of furniture. Visit periodically to exchange surplus honey for exclusive furniture items.
The farm operates on a continuous loop. Wildflowers randomly sparkle and produce honey jars when inspected. Combee drops additional honey inside the habitat through its Litter specialty. The Gather Pokemon collects everything from the ground and deposits it in the Community Box. You can return at any time and collect a full stockpile of honey without any manual gathering.
Keep all flowers in one connected patch for maximum Combee and Vespiquen activity.
Sunny weather increases sparkle frequency and Litter drop rates, so build your honey farm in an area with frequent sunlight.
Expand the flower patch by adding groups of four flowers at a time. Larger patches improve Vespiquen's trade availability and Combee's drop frequency.
Higher comfort levels on your Combee and Gather Pokemon increase their activity rates and item production.
To maximize Iron Ore output from Glimmet and Glimmora, their habitat must include specific environmental features that match their preferences. A properly configured habitat keeps them comfortable, which directly increases how often they drop Iron Ore through Litter.
Required habitat components for Glimmet:
Stalagmites to simulate a cave-like structure (the primary environmental requirement).
Moss to provide the correct terrain atmosphere.
Wooden Crate as an interactable habitat object.
Powered Lantern connected to electricity to keep the habitat functional and lit.
Use multiple Glimmet or Glimmora in the same area for faster ore generation. Higher comfort levels mean more frequent drops, so furnish the habitat with all preferred items. Glimmet and Glimmora are the only Pokemon in Pokopia that litter Iron Ore, making them essential for any automated iron production setup.
Start with a simple Litter + Gather + Community Box chain. Add processing (Burn, Chop, Recycle) once the basics are working.
Haxorus is the best single Pokemon for passive Lumber farming. It drops Small Logs via Litter and converts them to Lumber via Chop on its own.
Sprinklers are more reliable than Water-specialty Pokemon for crop watering, since sprinklers run constantly while Pokemon wander.
Use the 3D Printer to duplicate sprinklers and berry trees. One Pokemetal per copy is a small cost for a permanent farming setup.
Place Community Boxes within the activity range of the Pokemon you want to use them. If a box is too far from a habitat, the Pokemon will ignore it.
Restock Smelting Furnaces regularly. Burn Pokemon stop working and wander when the furnace is empty.
For honey farming, place Combee (Litter: Honey) near a Gather Pokemon with a Community Box. Honey is needed for the party curry and Pokemon attraction.
Set up automation early. Even a basic Litter + Gather chain saves hours of manual material collection over a full playthrough.
For liquid farming, place multiple powered vending machines across your settlement. Each dispenses one drink per day independently, so more machines means more liquid.
Build your honey farm in a sunny area with connected wildflowers. Combee drops honey faster and wildflowers sparkle more often in sunny weather.
When setting up a Glimmet iron farm, include stalagmites, moss, a wooden crate, and a powered lantern in the habitat. Higher comfort means more frequent Iron Ore drops.