Building
Complete guide to all 43 buildings in Pokemon Pokopia, including residential houses, Pokemon Centers, power generators, public facilities, and legendary structures. Covers material requirements, construction times, Pokemon capacity, and worker specialties for every building kit.
On This Page
Overview
Building is one of the core gameplay systems in Pokemon Pokopia. Players construct residential homes for Pokemon, public facilities, power generators, and special structures. Buildings can be created using building kits purchased from the Pokemon Center PC Shop, or built block-by-block by hand. There are 43 buildings in total across residential, utility, commercial, and legendary categories.
Each area in Pokopia has a tally of 40 building points. Most building kits consume either 1 or 2 points depending on their size, so planning your layout carefully is important to avoid running out of space. Residential buildings house your befriended Pokemon and contribute to their comfort level, which in turn raises the area's Environment Level.
How Building Works
Buildings are constructed using building kits. Purchase a kit from the PC Shop, place it in your desired location, gather the required materials, and assign Pokemon with the Build specialty to work on it. The number of Pokemon needed varies by building size. Smaller structures like Dens need just 2 Pokemon (1 Build specialist plus 1 helper), while large Houses require 8 Pokemon with multiple specialties. Legendary building kits require 15 Pokemon.
Construction times range from 15 minutes for a Den to overnight (ready at 5:00 AM the next in-game day) for Houses and large structures. Having a Pokemon with the Engineer specialty (exclusive to Tinkmaster) participate in a build significantly reduces construction time for all kit projects.
Block-by-Block Building
You can also build structures block-by-block by hand. Hand-built structures follow these rules:
Rule | Details |
|---|---|
Minimum footprint | 2 blocks x 2 blocks |
Maximum footprint | 9 blocks x 10 blocks |
Minimum height | 2 blocks tall |
Walls | Must be fully enclosed (blocks or fences count as walls) |
Door | At least one door block required |
Furniture minimum | Place 3+ furniture items inside to register as a home |
Interior height | 3 blocks high recommended for walkability |
Pokemon capacity | Block houses hold up to 4 Pokemon |
Vertical stacking | Houses can be stacked vertically to create apartments |
Pokemon sharing a house benefit from all furniture placed inside it (shared comfort). Habitats built inside houses do not count against the 4-Pokemon capacity limit.
Custom structures offer the most flexibility for creative designs. You can build multi-story houses, open-air homes (roofless designs with just walls and a door), and elaborate mansions. The late-game Magnet Rise move is especially useful for custom building, as it allows vertical flight and mid-air block placement without scaffolding.
Building Sizes
Building kits come in four standard sizes plus special variants. The table below shows the capacity, grid footprint, floors, and typical build time for each size tier.
Size | Capacity | Grid | Floors | Build Time |
|---|---|---|---|---|
Den | 1 Pokemon | 2x2 | 1 | 15 minutes |
Hut | 1 Pokemon | 3x3 | 1 | 1 hour |
Cottage | 2 Pokemon | 5x4 | 1 | 2 hours |
House | 4 Pokemon | 8x6 | 2 | Ready at 5 AM |
Special Hut | 4 Pokemon | Varies | 1-2 | 1 hour to overnight |
Special Cottage | 4 Pokemon | Varies | 1-2 | Ready at 5 AM |
Legendary Kit | N/A (habitat) | Large | N/A | Ready at 5 AM |
Residential Buildings
Residential buildings come in four styles (Leaf, Sand, Stone, City) and four sizes each, plus 7 special residential designs. That makes 23 residential buildings in total. Each style is purely cosmetic; the size determines capacity and floor count. Styles use different construction materials that correspond to the area where they are most commonly available.
Leaf Style
Leaf-style buildings are the first housing kits you unlock in the Withered Wasteland. They use basic natural materials and have a rustic, woodsy appearance with leafy green rooftops.
Building | Capacity | Grid | Materials | Workers |
|---|---|---|---|---|
Leaf Den | 1 Pokemon | 2x2 | Sturdy Stick x3, Leaf x3 | 1 Build, 1 Any |
Leaf Hut | 1 Pokemon | 3x3 | Lumber x15, Leaf x15 | 1 Build, 1 Chop, 2 Any |
Leaf Cottage | 2 Pokemon | 5x4 | 1 Build, 1 Fly, 1 Chop, 3 Any | |
Leaf House | 4 Pokemon | 8x6 | 1 Build, 1 Fly, 1 Grow, 1 Chop, 4 Any |
Sand Style
Sand-style buildings become available at Bleak Beach. They have a warm, coastal aesthetic using sand-based and oceanic materials.
Building | Capacity | Grid | Materials | Workers |
|---|---|---|---|---|
Sand Den | 1 Pokemon | 2x2 | 1 Build, 1 Any | |
Sand Hut | 1 Pokemon | 3x3 | 1 Build, 1 Water, 2 Any | |
Sand Cottage | 2 Pokemon | 5x4 | 1 Build, 1 Water, 1 Generate, 3 Any | |
Sand House | 4 Pokemon | 8x6 | 1 Build, 1 Water, 1 Generate, 1 Recycle, 4 Any |
Stone Style
Stone-style buildings become available at Rocky Ridges. They use volcanic ash, copper, and stone materials for a sturdy, rugged look.
Building | Capacity | Grid | Materials | Workers |
|---|---|---|---|---|
Stone Den | 1 Pokemon | 2x2 | Stone x5, Volcanic Ash x10 | 1 Build, 1 Any |
Stone Hut | 1 Pokemon | 3x3 | Stone x10, Volcanic Ash x20, Copper Ingot x10 | 1 Build, 1 Crush, 2 Any |
Stone Cottage | 2 Pokemon | 5x4 | Stone x25, Brick x25, Iron Ingot x25 | 1 Build, 1 Burn, 1 Crush, 3 Any |
Stone House | 4 Pokemon | 8x6 | Stone x25, Brick x25, Iron Ingot x25 | 1 Build, 1 Burn, 1 Hype, 1 Crush, 4 Any |
City Style
City-style buildings become available at Sparkling Skylands. They are the most advanced residential kits, requiring industrial materials like Pokemetal, Glass, and Concrete.
Building | Capacity | Grid | Materials | Workers |
|---|---|---|---|---|
City Den | 1 Pokemon | 2x2 | 1 Build, 1 Any | |
City Hut | 1 Pokemon | 3x3 | 1 Build, 1 Gather, 2 Any | |
City Cottage | 2 Pokemon | 5x4 | 1 Build, 1 Gather, 1 Fly, 3 Any | |
City House | 4 Pokemon | 8x6 | Pokemetal x25, Glass x25, Concrete x25, Iron Ingot x25 | 1 Build, 1 Gather, 1 Fly, 1 Teleport, 4 Any |
Special Residential Buildings
In addition to the 16 core residential kits, 7 special residential buildings with unique appearances and higher Pokemon capacities are available. Most special buildings house 4 Pokemon despite being classified as Hut or Cottage size, making them excellent value for materials.
Building | Capacity | Build Time | Materials | Workers |
|---|---|---|---|---|
Log Cabin | 4 Pokemon | Ready at 5 AM | 1 Build, 2 Grow, 4 Any | |
Gray Hut | 4 Pokemon | 1 hour | Stone x10, Limestone x15, Glass x5, Iron Ingot x5 | 1 Build, 1 Gather, 3 Any |
Gray Cottage | 4 Pokemon | Ready at 5 AM | Iron Ingot x20, Gold Ingot x20, Limestone x20, Stone x5 | 1 Build, 2 Crush, 4 Any |
Orange Hut | 4 Pokemon | 1 hour | 1 Build, 1 Burn, 3 Any | |
Pink Hut | 4 Pokemon | Ready at 5 AM | Lumber x10, Stone x10, Leaf x5, Squishy Clay x5 | 1 Build, 1 Crush, 3 Any |
Pink Cottage | 4 Pokemon | Ready at 5 AM | Lumber x20, Squishy Clay x20, Twine x20, Seashell x20 | 1 Build, 2 Burn, 4 Any |
Yellow Hut | 4 Pokemon | 1 hour | Concrete x10, Glass x10, Iron Ingot x5, Pokemetal x5 | 1 Build, 1 Generate, 3 Any |
Pokeball House | 2 Pokemon | Ready at 5 AM | 1 Engineer, 1 Generate, 2 Any |
The Pokeball House is a unique residential building shaped like a giant Poke Ball. Unlike other special buildings, it requires an Engineer-specialty Pokemon (Tinkmaster) and a Generate-specialty Pokemon to construct. It only houses 2 Pokemon but is a popular decorative choice.
The Gray Cottage is one of the most luxurious residential options, described as a high-class house with a serene atmosphere full of luxurious furniture. It has 2 floors and requires Gold Ingots, making it a late-game building.
Pokemon Centers
Each area has its own Pokemon Center that must be rebuilt as part of the story. Rebuilding a Pokemon Center restores access to the PC Shop, 3D Printer, and PP restoration services. See Rebuilding Pokemon Centers for the full walkthrough.
Area | Materials | Workers | |
|---|---|---|---|
Wasteland Pokemon Center | 1 Build, 1 Chop, 1 Bulldoze, 4 Any | ||
Beach Pokemon Center | Twine x10, Brick x30, Sea Glass Fragments x10, Iron Ore x5 | 1 Build, 1 Bulldoze, 1 Water, 5 Any | |
Ridge Pokemon Center | Stone x25, Copper Ingot x25, Iron Ingot x25, Crystal Fragment x5 | 1 Bulldoze, 1 Build, 1 Crush, 5 Any | |
Skyland Pokemon Center | Pokemetal x25, Concrete x25, Glass x25, Gold Ingot x25 | 1 Bulldoze, 1 Build, 6 Any |
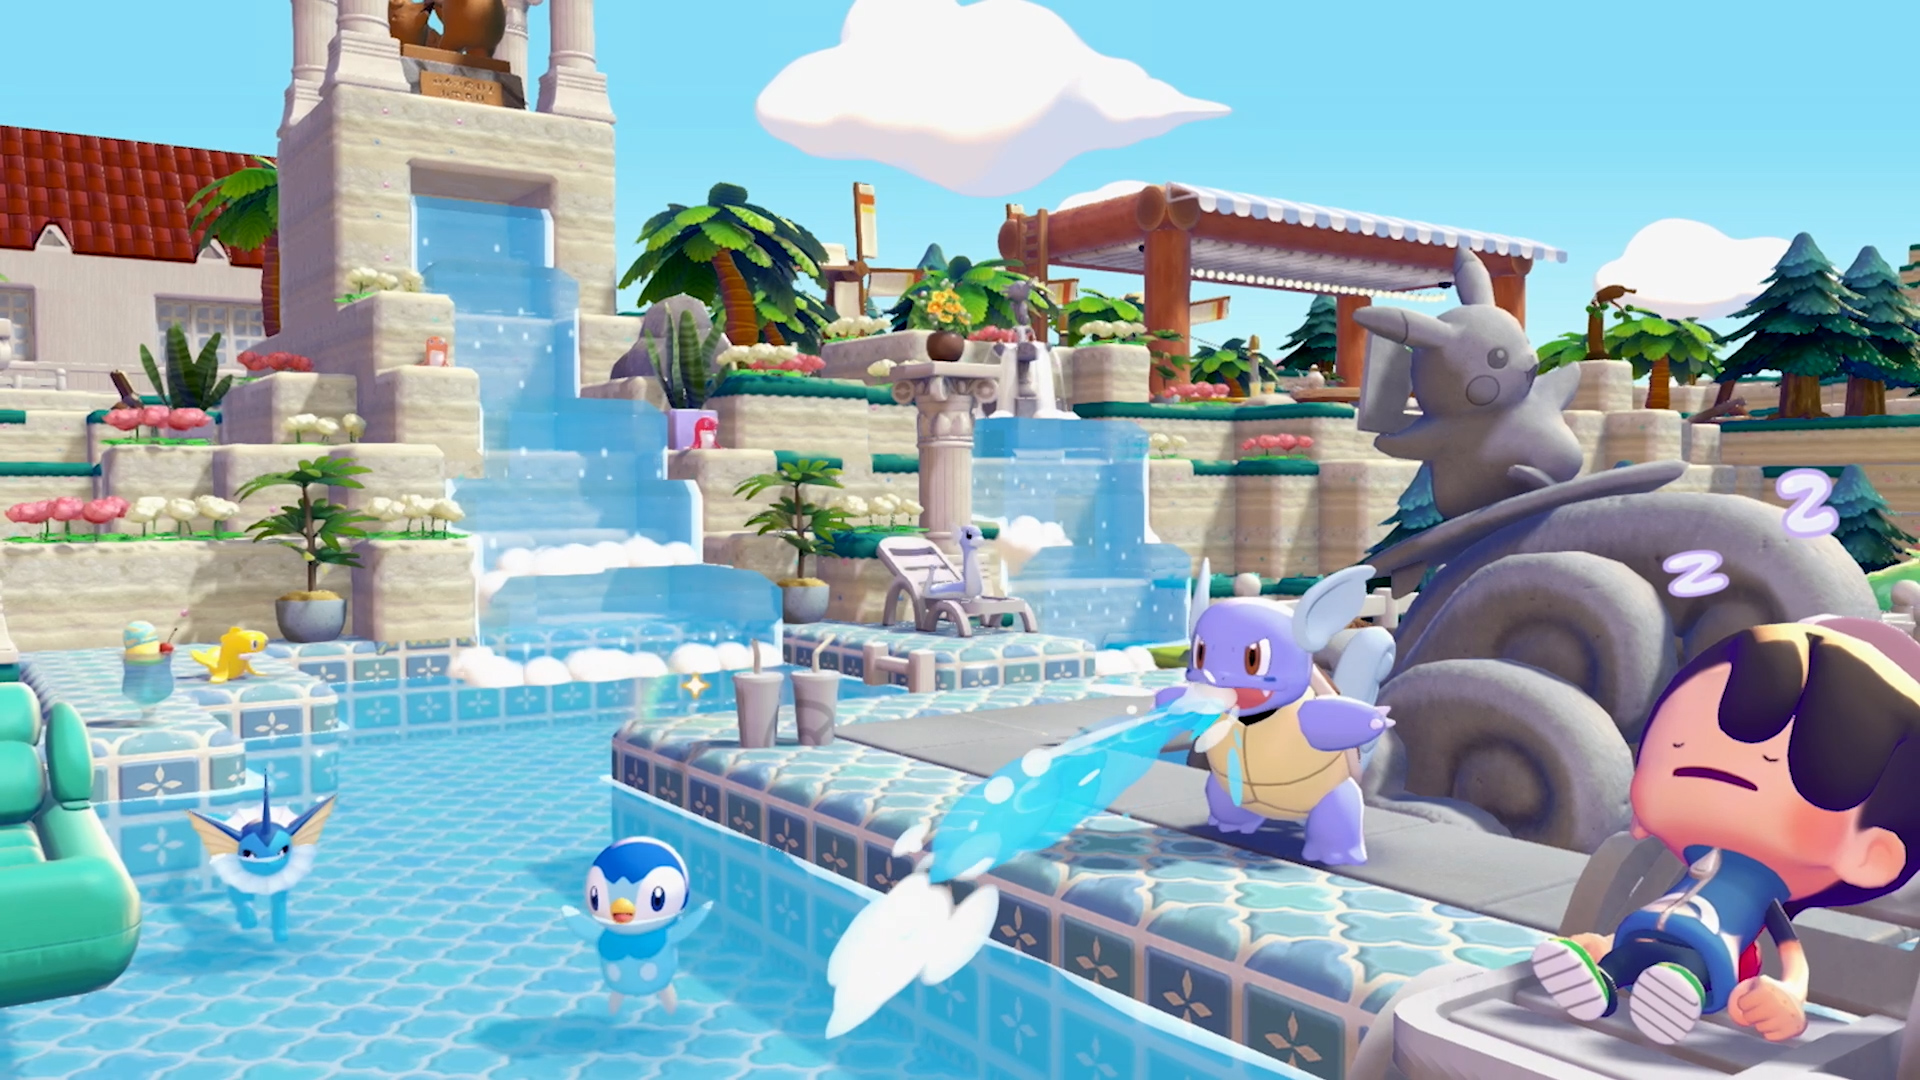
All Pokemon Centers are ready at 5:00 AM the next in-game day after starting construction. Each Pokemon Center provides PP restoration, access to the PC Shop with its daily rotating stock of building kits, and a 3D Printer for duplicating furniture and items. The Ridge Pokemon Center features stained glass that shines like jewels, while the Beach Pokemon Center lights up when powered by electricity and may increase the comfort levels of nearby Pokemon.
Power Generators
Power generators provide electricity to nearby items. Connect them to lights, machines, and powered items using Utility Poles. All four power generators take 1 hour to build and require 1 Build-specialty Pokemon plus 1 helper. The Charging Station is the most advanced option, requiring Pokemetal, but it is a central hub that can combine output from multiple generators.
Generator | Power Source | Materials | Description |
|---|---|---|---|
Windmill | Wind energy | Turns wind energy into loads of power. Cheapest generator. | |
Waterwheel | Water flow | Uses water to produce tons of power. Must be placed near water. | |
Furnace | Fuel combustion | Iron Ore x15, Sea Glass Fragments x5 | Burns fuel to produce heaps of power. Requires fuel input. |
Charging Station | Charging device | Iron Ingot x10, Pokemetal x10 | Perfect for charging things up. Can combine output from multiple sources. |
Public and Commercial Buildings
Public and commercial buildings add services and decoration to your settlements. These structures do not house Pokemon directly but provide functional benefits like shopping, entertainment, and aesthetic value. All are built using building kits and are ready at 5:00 AM the next in-game day.
Building | Type | Materials | Workers | Description |
|---|---|---|---|---|
Pokemart | Commercial | 1 Build, 1 Trade, 2 Any | A store that somehow always feels a little exciting. | |
Stylish Cafe | Commercial | Varies by area | Varies | A lovely cafe where you can take a little breather. |
Small Office | Commercial | Iron Ingot x10, Concrete x10, Glass x10, Pokemetal x5 | 1 Build, 2 Fly, 4 Any | A focused workspace building. |
Concert Stage | Public | Iron Ingot x10, Glass x5, Glowing Stone x10, Pokemetal x5 | 1 Build, 2 Hype, 4 Any | A stage big enough to hold all your friends. Used by DJ Rotom and Hype-specialty Pokemon. |
Fountain Plaza | Public | Lumber x20, Stone x20, Copper Ore x20 | 1 Build, 2 Water, 4 Any | A plaza that is perfect for meetups. |
Pikachu Fountain | Public | Brick x10, Sea Glass Fragments x5, Iron Ore x5, Stone x10 | 1 Build, 2 Any | Pikachu surfing on a big wave. Light it up for an electrifying atmosphere. |
Moonlight Dance Statue | Public | Iron Ingot x10, Copper Ingot x10, Stone x10 | 1 Build, 2 Any | A decorative dancing statue that will make you want to dance. |
Relaxing Park | Public | Varies by area | Varies | A park with an iconic Chansey tree. Boosts nearby Pokemon comfort. |
Legendary Building Kits
These massive structures are built in Palette Town to attract Legendary Birds. Each requires 15 Pokemon and large quantities of rare materials. You can only build one per day. These are the most resource-intensive constructions in the game.
Building | Attracts | Materials | Workers |
|---|---|---|---|
Freezing Chambers | Stone x50, Ice x50, Crystal Fragment x10, Pokemetal x10 | 1 Build, 1 Water, 1 Search, 12 Any | |
Abandoned Power Plant | Copper Ingot x50, Iron Ingot x50, Sea Glass Fragments x50, Brick x50, Pokemetal x10 | 1 Build, 1 Fly, 1 Crush, 1 Generate, 11 Any | |
Altar of the Flame | Copper Ingot x50, Gold Ingot x50, Lava Rock x50, Pokemetal x10 | 1 Build, 1 Fly, 1 Burn, 12 Any |
The Freezing Chambers create frozen mountains with a mystical atmosphere to attract Articuno. The Abandoned Power Plant is described as teeming with electricity, drawing Zapdos to its sparking turbines. The Altar of the Flame features roaring flames and is the only structure that requires Lava Rock, a material found exclusively in volcanic areas.
Complete Building Catalog
The following table lists all 43 buildings in Pokemon Pokopia organized by category. Use the detailed sections above for material requirements and worker specialties.
Building | Category | Capacity | Build Time |
|---|---|---|---|
Leaf Den | Residential (Leaf) | 1 Pokemon | 15 minutes |
Leaf Hut | Residential (Leaf) | 1 Pokemon | 1 hour |
Leaf Cottage | Residential (Leaf) | 2 Pokemon | 2 hours |
Leaf House | Residential (Leaf) | 4 Pokemon | Ready at 5 AM |
Sand Den | Residential (Sand) | 1 Pokemon | 15 minutes |
Sand Hut | Residential (Sand) | 1 Pokemon | 1 hour |
Sand Cottage | Residential (Sand) | 2 Pokemon | 2 hours |
Sand House | Residential (Sand) | 4 Pokemon | Ready at 5 AM |
Stone Den | Residential (Stone) | 1 Pokemon | 15 minutes |
Stone Hut | Residential (Stone) | 1 Pokemon | 1 hour |
Stone Cottage | Residential (Stone) | 2 Pokemon | 2 hours |
Stone House | Residential (Stone) | 4 Pokemon | Ready at 5 AM |
City Den | Residential (City) | 1 Pokemon | 15 minutes |
City Hut | Residential (City) | 1 Pokemon | 1 hour |
City Cottage | Residential (City) | 2 Pokemon | 2 hours |
City House | Residential (City) | 4 Pokemon | Ready at 5 AM |
Log Cabin | Special Residential | 4 Pokemon | Ready at 5 AM |
Gray Hut | Special Residential | 4 Pokemon | 1 hour |
Gray Cottage | Special Residential | 4 Pokemon | Ready at 5 AM |
Orange Hut | Special Residential | 4 Pokemon | 1 hour |
Pink Hut | Special Residential | 4 Pokemon | Ready at 5 AM |
Pink Cottage | Special Residential | 4 Pokemon | Ready at 5 AM |
Yellow Hut | Special Residential | 4 Pokemon | 1 hour |
Pokeball House | Special Residential | 2 Pokemon | Ready at 5 AM |
Wasteland Pokemon Center | Pokemon Center | N/A | Ready at 5 AM |
Beach Pokemon Center | Pokemon Center | N/A | Ready at 5 AM |
Ridge Pokemon Center | Pokemon Center | N/A | Ready at 5 AM |
Skyland Pokemon Center | Pokemon Center | N/A | Ready at 5 AM |
Windmill | Power Generator | N/A | 1 hour |
Waterwheel | Power Generator | N/A | 1 hour |
Furnace | Power Generator | N/A | 1 hour |
Charging Station | Power Generator | N/A | 1 hour |
Pokemart | Commercial | N/A | Ready at 5 AM |
Stylish Cafe | Commercial | N/A | Ready at 5 AM |
Small Office | Commercial | N/A | Ready at 5 AM |
Concert Stage | Public | N/A | Ready at 5 AM |
Fountain Plaza | Public | N/A | Ready at 5 AM |
Pikachu Fountain | Public | N/A | Ready at 5 AM |
Moonlight Dance Statue | Public | N/A | Ready at 5 AM |
Relaxing Park | Public | N/A | Ready at 5 AM |
Freezing Chambers | Legendary | N/A | Ready at 5 AM |
Abandoned Power Plant | Legendary | N/A | Ready at 5 AM |
Altar of the Flame | Legendary | N/A | Ready at 5 AM |
Housing Optimization
Understanding the 40-point building limit is essential for maximizing how many Pokemon you can house on each island. The system uses a value-based cap rather than a strict building count, and creative use of custom construction can bypass it entirely.
Building Point Math
Each area in Pokopia enforces a 40-point building limit on prefab structures (buildings placed from building kits). Smaller houses like Dens and Huts cost 1 point each, while larger Cottages and Houses cost 2 points. The most efficient way to maximize Pokemon capacity within the 40-point cap is to fill every point with the highest-capacity option available.
Strategy | Buildings | Points Used | Total Pokemon |
|---|---|---|---|
All Large Houses | 20 Houses (4 Pokemon each) | 20 x 2 = 40 | 80 Pokemon |
Mix of Houses and Special Huts | 10 Houses + 10 Special Huts (4 Pokemon each) | (10 x 2) + (10 x 1) = 30 | 80 Pokemon (10 pts left) |
All Dens (inefficient) | 40 Dens (1 Pokemon each) | 40 x 1 = 40 | 40 Pokemon |
All Special Huts | 40 Special Huts (4 Pokemon each) | 40 x 1 = 40 | 160 Pokemon |
Special residential buildings like the Gray Hut, Orange Hut, Pink Hut, and Yellow Hut are especially valuable because they house 4 Pokemon while only costing 1 building point (they are classified as Hut-sized). If you fill all 40 points with Special Huts, you can theoretically house up to 160 Pokemon per area, far exceeding the 80 you would get from 20 standard Houses.
Custom Block Houses Bypass the Limit
One of the most important mechanics to understand is that custom-built block houses are not subject to the 40-point building limit. The value cap applies only to prefab structures placed from building kits. Any house you construct by hand using blocks, roof tiles, doors, and windows does not count toward the 40-point tally at all.
Each custom block house can hold up to 4 Pokemon (provided it meets the minimum requirements: 2x2 footprint, fully enclosed walls, at least one door, and 3+ furniture items). This means there is no hard cap on how many Pokemon you can house if you are willing to build by hand. The only limits are the physical space on your island and the time it takes to gather materials and construct each structure.
Players who want to go beyond the prefab limit should consider dedicating some islands to prefab buildings (which are faster to set up) and others to custom block construction (which offers unlimited housing potential). This split approach lets you get quick housing online early while building out custom structures at your own pace.
Speeding Up Construction with Tinkaton
Tinkmaster (Tinkaton) is the only Pokemon in Pokopia with the Engineer specialty. Assigning Tinkaton as the lead builder on any building kit project significantly reduces construction time. Without Tinkaton, large structures like Houses and Pokemon Centers take overnight to complete (ready at 5:00 AM the next in-game day). With Tinkaton leading the crew, these projects finish in roughly one hour instead.
This makes Tinkaton one of the highest-priority Pokemon to recruit if you plan on doing any significant amount of building. You encounter Tinkaton during the Sparkling Skylands questline. Once befriended, assign Tinkaton to every building project that supports the Engineer specialty slot for maximum time savings.
In addition to construction speed, Tinkaton converts Iron Ingots into Tinkagears at a rate of 1 ingot per 3 gears. Tinkagears are required for late-game structures like lifts and elevators, making Tinkaton essential for vertical island builds.
Multi-Island Strategy
Since each area enforces its own independent 40-point building limit, experienced players distribute their Pokemon housing across multiple islands rather than cramming everything into one. A common approach is:
Strategy | Details |
|---|---|
Prefab islands | Use areas like Withered Wasteland and Bleak Beach for fast prefab housing. Fill the 40 points with Special Huts and Houses using locally available materials (Leaf and Sand style kits). |
Custom build islands | Reserve areas like Palette Town for elaborate custom block houses that bypass the building limit entirely. Use the extra space and freedom for creative multi-story designs. |
Functional islands | Keep Rocky Ridges and Sparkling Skylands partially dedicated to public buildings, power generators, and commercial structures, with remaining points allocated to housing. |
Planning your housing distribution before you start building saves significant materials and time. Tearing down and rebuilding wastes resources, so it is worth mapping out where each housing style will go across your islands before committing building points.
Relocating and Demolishing Buildings
Sometimes you need to rearrange your settlement layout or tear down a structure that no longer fits your plans. Pokemon Pokopia provides three ways to handle this: manual repositioning of lightweight objects, Relocation Kits for moving placed buildings, and Demolition Kits for destroying them outright.
Manual Repositioning
Small, lightweight player-built structures and placed objects can be picked up and moved by hand at no cost. Walk up to the object and hold the A button to grab it, then carry it to a new spot. This works for items like furniture, decorations, and small placed objects. However, it does not work for larger kit-built structures such as Houses, Cottages, or Pokemon Centers. For those, you need a Relocation Kit.
Relocation Kits
To move a building constructed from a building kit, purchase a Relocation Kit from the PC Shop for 10 Life Coins. Place the kit in front of the building you want to move, then assign a Pokemon with the Bulldoze specialty to carry out the relocation. The building will be picked up and can be placed in a new location of your choosing.
Detail | Info |
|---|---|
Cost | 10 Life Coins per kit |
Where to Buy | PC Shop (unlimited stock) |
Requirement | 1 Pokemon with Bulldoze specialty |
Works On | Player-built kit structures only |
Does NOT Work On | Pre-existing world buildings, custom block houses |
Relocation Kits only work on structures built from building kits. Custom block houses cannot be relocated this way and must be demolished and rebuilt manually at the new location.
Demolition Kits
If you want to remove a building entirely, buy a Demolition Kit from the PC Shop for 10 Life Coins. Place the kit in front of the unwanted structure and assign a Pokemon with the Bulldoze specialty to tear it down. Once the building is demolished, the construction materials used to build it are returned to you at the kit site. The only thing you lose is the 10 Life Coins spent on the Demolition Kit itself.
This makes rearranging your settlement relatively low-risk. If a building is in the wrong spot or you want to free up building points for a different structure, demolishing and rebuilding costs just the kit price plus the time to reconstruct.
Bulldoze Specialty Pokemon
Both Relocation Kits and Demolition Kits require a Pokemon with the Bulldoze specialty to operate. The Bulldoze specialty is also needed when rebuilding Pokemon Centers. The following Pokemon have the Bulldoze specialty:
Pokemon | Notes |
|---|---|
First Bulldoze Pokemon encountered during the main story | |
Available at Bleak Beach | |
Evolved form of Makuhita | |
Also has the Bulldoze specialty | |
Evolved form of Munchlax | |
Evolved form of Onix | |
Paldean Wooper evolution; also has Litter specialty | |
Small Rock-type; available in multiple regions | |
Rock/Ground-type; early Bulldoze option | |
Evolved form of Larvitar | |
Evolved form of Pupitar; powerful late-game Bulldoze Pokemon | |
Ground-type; found in desert areas | |
Evolved form of Trapinch | |
Evolved form of Vibrava; also has Fly specialty |
There are 14 Pokemon with the Bulldoze specialty in total. Onix is typically the earliest one you will encounter. Befriending Onix early is highly recommended since it unlocks the ability to rebuild Pokemon Centers, relocate buildings, and demolish structures. Later in the game, evolved forms like Steelix, Tyranitar, and Flygon provide additional Bulldoze options.
Structures That Cannot Be Moved
Pre-existing world structures that are already on the map when you arrive cannot be relocated or demolished. This includes landmarks like lighthouses, ruins, and other fixed environmental features. Only buildings that the player has constructed using building kits can be targeted by Relocation or Demolition Kits. Custom block houses also cannot be relocated with kits; they must be broken down by hand and rebuilt at the desired location.
Blueprint System
The Blueprint System allows players to save completed structures as reusable templates. Press X while in Build Mode to open the Blueprint menu.
Saved blueprints record every block type and position. To rebuild, select a blueprint from the menu, choose a placement location, and confirm if you have the required materials.
Blueprints can be shared with other players through Cloud Islands. Friends visiting your Cloud Island can view your builds and save them as their own blueprints.
Moving a building directly is not possible, but the Blueprint system provides an effective workaround: save the structure as a blueprint, demolish the original, and rebuild from the blueprint in the new location.
Feature | Details |
|---|---|
Access | Build Mode > X Menu |
Save Cost | Free |
Rebuild Cost | Same materials as original |
Sharing | Via Cloud Islands |
Max Saves | No confirmed limit |
Tips
The Leaf Den is the first building kit you unlock and the cheapest to build, requiring only 3 Sturdy Sticks and 3 Leaves.
Prioritize rebuilding your area's Pokemon Center early for access to the PC Shop, 3D Printer, and healing.
Place power generators near clusters of items that need electricity. The Windmill is the cheapest generator, needing only 5 Lumber and 5 Twine.
Pokemon with the Build specialty (Cubone, Marowak, Timburr, Gurdurr, Pinsir, Heracross) speed up construction.
Pokemon with the Bulldoze specialty (Onix, Makuhita, Hariyama) can relocate or demolish buildings.
Tinkmaster's Engineer specialty is required for the Pokeball House and reduces construction time for all building kit projects.
Special residential buildings like the Gray Hut and Orange Hut are great value: they house 4 Pokemon despite being classified as Hut-sized.
Each area has a 40-point building limit. Dens and Huts typically cost 1 point while Cottages and Houses cost 2 points. Plan your layout before building.
For advanced building techniques including floating objects, wall vines, and storage optimization, see Advanced Building Techniques.
Special residential buildings (Gray Hut, Orange Hut, Pink Hut, Yellow Hut) cost only 1 building point but house 4 Pokemon, making them the most point-efficient prefab option.
Custom block houses bypass the 40-point limit entirely, so there is no cap on Pokemon housing if you build by hand.
Assign Tinkmaster (Tinkaton) as the lead builder on every project to cut construction time from overnight to roughly one hour.
Spread your housing across multiple areas. Each island has its own 40-point cap, so using all four main areas gives you up to 160 building points for prefabs alone.