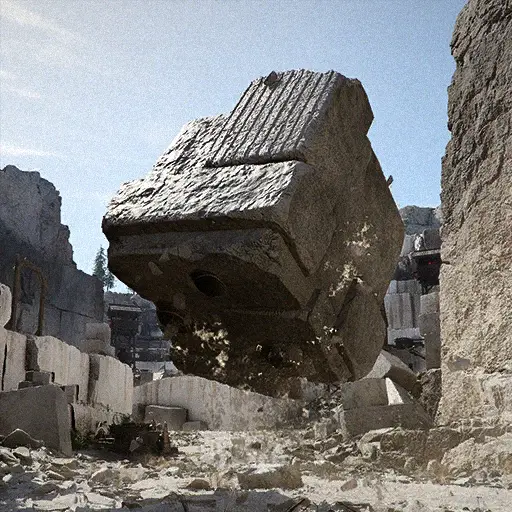
Grave Walker
The Grave Walker is one of the earliest World Bosses in Crimson Desert. This massive stone golem lurks inside the Silent Falls Hideout cave near Hook Rapids at the border between the Hernand and Demeniss regions. The fight centers on exploiting the boss's overhead slam to build stun damage.
On This Page
Overview
The Grave Walker is a World Boss in Crimson Desert and one of the earliest World Boss encounters players can find. This hulking stone golem hides inside a waterfall cave in the northeast reaches of Pywel, guarding loot that is well worth the detour. Despite being an early-access World Boss, the Grave Walker hits hard enough to catch unprepared players completely off guard.
The fight revolves around a methodical stun-based loop. Players must bait the Grave Walker's overhead slam, charge their own attack during the wind-up animation, and land counter-strikes that fill the stun gauge. Once the gauge is full, the golem shatters into fragments, creating a massive damage window that players should exploit with everything they have.
Boss Information
Attribute | Details |
|---|---|
Name | Grave Walker |
Type | World Boss |
Location | Silent Falls Hideout (cave near Hook Rapids) |
Region | |
Creature Type | Stone Golem |
Difficulty | Moderate to Hard (early-game World Boss) |
How to Reach the Boss
The Silent Falls Hideout sits along the border between the Hernand and Demeniss regions, far to the northeast of Hernand's capital city. An Abyss Cresset sits to the northwest of the cave entrance, and an Abyss Nexus point is positioned further north for fast travel access. To reach the arena, drop down into a chasm where two waterfalls converge, then swim along the inner cave wall to find the entrance.
Attack Patterns
The Grave Walker is a distance-reactive boss, meaning its behavior changes based on how far away you are. Understanding these ranges is critical to controlling the pace of the fight.
Attack | Description | How to Counter |
|---|---|---|
At long range, the Grave Walker summons boulders from the ground and hurls them toward the player. The projectiles are large and travel in a straight line. | Dodge sideways to avoid. Do not stay at extreme range for extended periods, as this attack is difficult to avoid repeatedly. | |
From long to medium range, the golem charges forward with a full-body rush that ends in a ground slam. Covers significant distance quickly. | Roll to the side as the charge begins. The forward momentum means the Grave Walker cannot change direction once committed. | |
Overhead Slam | At medium to close range, the Grave Walker raises its fist high and delivers a powerful downward slam. This is the most telegraphed attack with a clear wind-up animation. | This is the key attack to exploit. Position at medium distance just outside the slam's reach. Start charging your attack during the wind-up and release it the moment the fist hits the ground. |
Melee Swipes | Close-range sweeping arm strikes that come out faster than the overhead slam. Less damaging but harder to predict. | Dodge backward to create space. Avoid lingering at point-blank range for too long. |
Strategy
The Stun Loop
The entire fight revolves around baiting the overhead slam and punishing it with stun-focused damage. Here is the core loop:
Position yourself at medium distance, just outside the slam's reach.
Wait for the Grave Walker to rear its fist back for the overhead slam.
Once it commits to the animation, it cannot cancel. Start charging your attack during the wind-up.
Release your charged hit the moment the fist impacts the ground, then follow up with additional stun-focused strikes.
Repeat this cycle until the stun gauge fills completely.
Stun Window
When the stun gauge is full, the Grave Walker shatters into fragments and collapses. This is your real damage window. Unload everything you have during these few seconds: your strongest combos, abilities, and heavy attacks. The stun window is short, so prioritize your highest-damage options.
Range Management
Staying at long range is tempting but counterproductive. The boulder throws are difficult to dodge repeatedly, and the rushing slam closes the distance on the golem's terms rather than yours. Maintain medium range where the overhead slam becomes the golem's primary attack, since that is the attack you want to bait and punish.
Rewards
Reward | Details |
|---|---|
Abyss Core (Level 1) | 3 units dropped directly from the boss |
Power Core: Gate of Collapse | 1 unit |
A unique staff weapon. Not a direct drop. After the fight, look for two stone lanterns at the far end of the cave room. Light both lanterns to open a sealed gate, and the Sorcerer's Staff will be behind it. |
The Sorcerer's Staff is easy to miss. Many players defeat the Grave Walker and leave without noticing the stone lanterns. Always explore the full cave room after the fight to claim this hidden reward.
Tips
Do not stay at long range. The boulder throws are harder to deal with than the melee attacks you can exploit for stun damage.
The overhead slam is telegraphed clearly. Learn the animation timing and you can reliably charge your counterattack during the wind-up every time.
Save your strongest abilities for the stun window when the golem shatters. That brief collapse is where most of your damage should come from.
After defeating the Grave Walker, light both stone lanterns in the back of the cave to unlock the sealed gate containing the Sorcerer's Staff.
Bring adequate healing food. Even with good armor, the slam attacks deal substantial damage if they connect.