Chapter 11: Truth and Reality Walkthrough
Complete walkthrough for Chapter 11 of Crimson Desert's main story. Covers all 8 quests across the Brave New World and Foreboding Shadow sub-chapters, including the journey to Delesyia, the Strange Manor investigation, and the assault on Cloud Castle Orbian.
On This Page
Overview
Chapter 11, titled "Truth and Reality," is the penultimate chapter of Crimson Desert's main story. Following the events of Chapter 10: Counterattack, Kliff travels to the technologically advanced region of Delesyia to uncover the truth behind the forces threatening Pywel. Delesyia stands apart from every other region on the continent; its streets are lined with clockwork machinery, steam-powered infrastructure, and pilotable combat mechs that dwarf anything found in Hernand or Pailune. The chapter spans 8 quests divided into two sub-chapters: Brave New World and Foreboding Shadow.
Brave New World opens with Kliff's arrival in Delesyia and follows his investigation into the political machinations that have been fueling the conflict across Pywel. The Foreboding Shadow arc shifts the tone dramatically as Kliff discovers the full extent of the Abyss threat and culminates in a spectacular dragon-mounted assault on the Flying Fortress Orbian.
Preparation: Before starting Chapter 11, stock up on at least 200 Grilled Meat and ensure your weapons are refined to level 5 or higher. The Cloud Castle Orbian encounter at the end of this chapter requires arrows for the final boss, so purchase a full stack from any merchant before proceeding. If you enter the fortress without arrows, you will need to leave and redo the entire puzzle sequence. Equip fire-resistant armor if available, as several encounters in this chapter involve flame-based hazards.
Story Context
Chapter 11 finally introduces the player to Marni in person. His inventions have been threaded through the entire campaign, starting with the Visione in Chapter 2, and the chapter is built around peeling back the difference between the inventor's intent and what his name has actually been used for. Marni is one of the only beings other than Kliff to have reached the Abyss, and the abyssal puzzles above Delesyia are described as artificial constructions of his rather than the ancient architecture found elsewhere.
The first half of the chapter is the Delesyian conspiracy. Marni's first appearance is hostile; he refuses to call down the flying fortress unless allowed to study Kliff's abyssal abilities. The truth, revealed when Kliff is teleported to the basement, is that the figure giving orders from the keep is not Marni at all but an AI he originally built in his own image, called Hall, which has been corrupted by Umbra and seduced into alliance with Duke Caliburn.
The second half is the three-keys arc and the Golden Star confrontation. Kliff retrieves three keys from Marni's most dangerous strongholds, unlocks the secret site where Hall was originally built, and confronts the mechanical dragon Golden Star whose heart was forged from the original Blackstar's. Defeating Golden Star restores Blackstar to Kliff as a flying mount, which is what makes the assault on Fort Musket physically possible.
Key Story Beats
Kliff arrives at Marni's keep and is met by a figure he believes to be Marni. The figure asks to study Kliff's abyssal abilities in exchange for calling down the flying fortress and refuses to release the Pailune prisoners. Kliff refuses the bargain.
Kliff is teleported to the basement of the keep, where he meets the real Marni for the first time. The figure upstairs is the AI Hall, originally created as an assistant in Marni's image and since corrupted by an emergent Umbra contact.
Marni explains that he could not bring himself to shut Hall down even as the AI's behavior began drifting. When Hall finally staged its takeover of Delesyia, the population believed the all-encompassing AI face over the real Marni's word. Anyone who insisted on the truth was silenced.
Through the Visione, Marni assigns Kliff the task of retrieving three keys, each locked away in one of his most dangerous strongholds. The route runs through tank-like machines, giant dreadnought mechs, and lightning-clad variants until all three keys are in hand.
With the keys assembled, Kliff teleports to the secret site where Hall was first built. He learns that Marni perfected the Visione there both as a memory device and a mind-control device. He also built a mechanical guardian of the skies, the Golden Star dragon, by stealing the heart of the original Blackstar and combining it with an abyssal artifact.
Kliff faces Golden Star in a multi-stage aerial fight. Unkar is present for the finishing cutscene. Defeating Golden Star restores Blackstar's stolen power so that Kliff and Blackstar can be sealed together as the final allied pair.
Marni proposes a formal deal: Kliff retrieves Golden Star's power core, plants it inside the flying fortress, and detonates it. In exchange Marni will see all Pailune prisoners safely released.
With Blackstar at his back, Kliff flies to the flying fortress, knocks out its shield generators, and reaches the power core. Hall intervenes with a final laser-cannon stand and is stopped through Nature's Snare deflections.
Fort Musket loses its primary defense as the fortress falls. Kliff regroups with the gathered allies outside Fort Musket and encounters the next problem: Duke Caliburn has surrounded the fort with three giant turret super-weapons.
Kliff and Blackstar take to the air, dodging the turret fire and launching fireballs at each emplacement until all three are destroyed. With the fort opened, Marquis Lanford delivers the rallying speech that bridges into Chapter 12.
Named Characters
Character | Role in Chapter | Notes |
|---|---|---|
Protagonist | First chapter where he openly flies on Blackstar. Negotiates the deal with Marni and personally tops the flying fortress. | |
Ally (real, finally) | The actual Marni. Locked away in his own basement by Hall. Negotiates the Golden Star deal through the Visione, refusing to meet anyone in person. | |
Antagonist and final boss of the chapter | An AI built by Marni in his own image, corrupted by emergent Umbra. Allied with Caliburn. Defeated atop the flying fortress, though the ending hints it survives in some form. | |
Dragon ally | Restored to full strength after Golden Star is defeated. Becomes Kliff's mount from this point on. | |
Greymane combatant | Present for the finishing cutscene after the Golden Star fight. | |
Antagonist (off-screen) | Reveals the three turret super-weapons around Fort Musket. His final confrontation is held until Chapter 12. |
Bosses
Boss | Location | Notes |
|---|---|---|
Tank-like guardian machines | Marni's first stronghold | First key fight. Mechanical 'tank' design. |
Giant dreadnought mech | Marni's second stronghold | Second key fight. |
Lightning-clad tank guardian | Marni's third stronghold | Third key fight. |
Marni's Mysterium | Mechanical dragon built from Blackstar's stolen heart. Multi-stage aerial fight. Defeating it restores Blackstar. | |
Hall (atop the flying fortress) | Flying fortress core | Fought after the shield generators are dropped. Defeated through Nature's Snare reflections of its own laser fire. |
Outside Fort Musket | Aerial-only fight on Blackstar. Each turret destroyed by repeated fireball passes. |
Key Locations Visited
Delesyia and Marni's keep
Marni's three strongholds (three keys)
Marni's Mysterium (Golden Star)
Caliburn's flying fortress
Fort Musket exterior (turret destruction)
Lore Reveals
Marni's story is the chapter's biggest reveal. He is one of the only beings outside of the four guardians to have reached the Abyss, and he reached it as an engineer rather than a power-seeker. The abyssal puzzles in the Delesyian sector are described as Marni's own constructions, which is why they feel so different in design from the rest of the network.
Hall's corruption frames the campaign's recurring theme of who Umbra can reach. An AI of sufficient sophistication is no harder to seduce than a Duke or a witch. The same property that lets it impersonate Marni perfectly is what makes it pliable to a 'desire for limitless knowledge.' The way Hall is finally framed at the end of the chapter (with its 'I am huge, fleeing human' line) is also the seed for the ambiguity in the chapter 12 epilogue about whether Hall is truly gone.
Golden Star is also the chapter's mechanical mirror of Blackstar. By stealing Blackstar's heart and binding it to an abyssal artifact, Marni built a flying weapon that bypassed the natural-creature limits of the original dragon. Restoring that power to Blackstar through White Crow at the end is what gives Kliff a sky-mobile platform powerful enough to challenge Caliburn.
Quest List
Quest | Sub-Chapter | Type |
|---|---|---|
Exploration / Cutscene | ||
Investigation / Dialogue | ||
Investigation / Combat | ||
Puzzle / Exploration | ||
Cutscene / Dialogue | ||
Exploration / Combat | ||
Investigation / Puzzle | ||
Dragon Siege / Boss Fight |
Brave New World
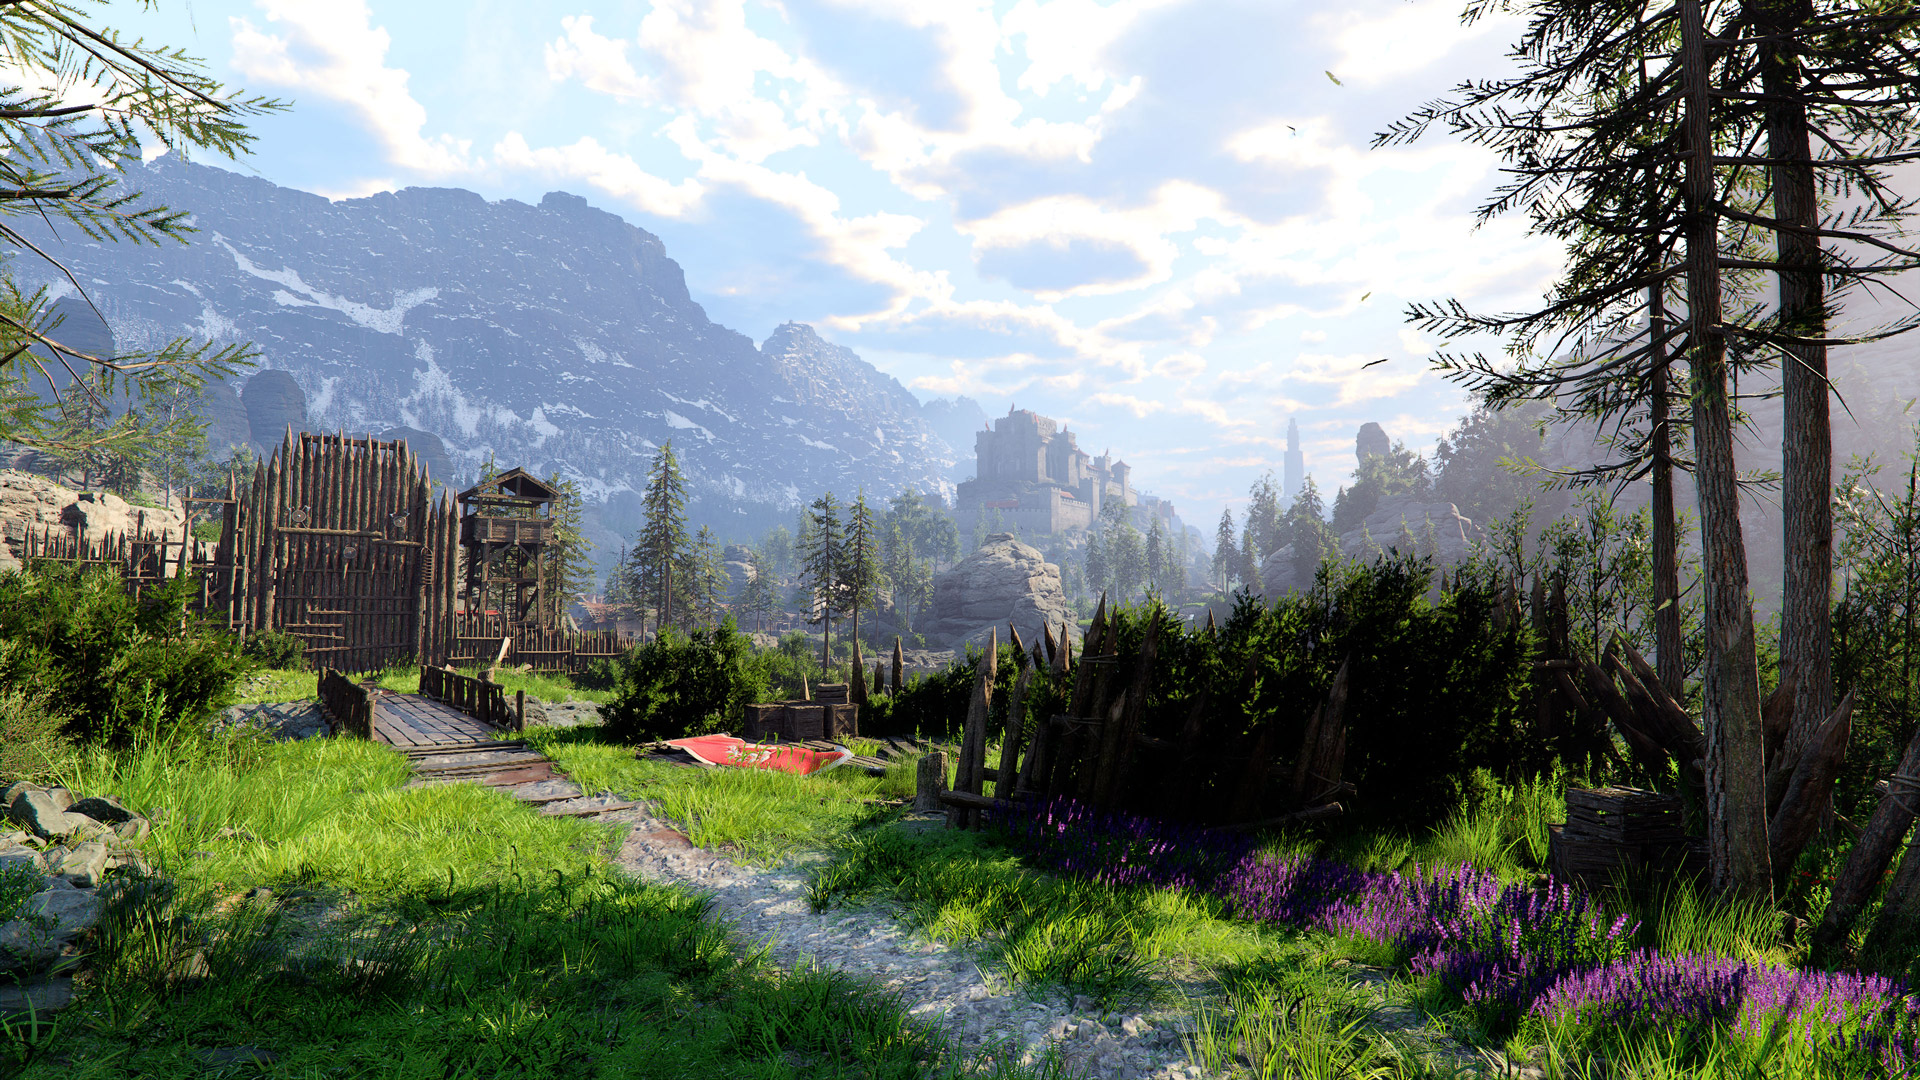
The Brave New World sub-chapter is Kliff's introduction to Delesyia, the most technologically advanced region on the continent. Unlike the feudal settlements of Hernand or the rural landscapes of Pailune, Delesyia is a sprawling industrial metropolis powered by steam engines, clockwork mechanisms, and technology derived from research into the Abyss. The contrast is stark: while other regions still rely on swords and shields, Delesyia fields combat mechs that tower over infantry. This sub-chapter contains five quests focused on exploration, investigation, and story revelations.
The City of Steel
The opening quest of Chapter 11 brings Kliff to Delesyia for the first time. The journey begins with a cinematic approach to the city. This shows the towering smokestacks, spinning gears, and mechanical constructs that define Delesyia's skyline. Upon arrival, Kliff is immediately struck by how different this region is from anything he has encountered across Pywel.
Arrive at the Delesyia border checkpoint. Follow the road east from the previous chapter's endpoint. A cutscene triggers as you approach the industrial outskirts. This shows the massive scale of Delesyia's infrastructure.
Pass through the gate. Speak with the border guards. After a brief exchange, Kliff is granted entry. Take note of the fast travel point that activates at the gate; this will save considerable backtracking later.
Explore the central district. The quest marker leads you through the heart of the city. Walk through the streets and observe the mechanical workshops, steam-powered carts, and Delesyian citizens going about their daily routines. Several interactive NPCs provide optional dialogue about Delesyia's history and culture.
Meet the contact. Navigate to the marked building in the city center. A cutscene introduces a key Delesyian figure who provides Kliff with background on the region's political situation and its connection to the broader conflict.
This quest is primarily narrative and exploratory. There is no combat. Take the time to speak with NPCs in the city, as several of them offer hints about side content and faction quests available in the Delesyia region. The vendor near the central plaza sells advanced equipment, including some of the best armor available at this point in the game.
Crossroads
With his initial reconnaissance of Delesyia complete, Kliff faces a critical decision point. The information gathered from the contact in The City of Steel reveals that multiple threads of the conspiracy converge in this region. The Crossroads quest presents Kliff with diverging leads that must be investigated to uncover the truth.
Speak with your allies. Return to the safehouse where your companions are staying. A conversation plays out in which the group discusses their next move. Several leads are presented, each pointing to different areas of Delesyia.
Investigate the first lead. Travel to the marked location in the industrial quarter. Speak with the workers there and examine the documents left on a desk inside the workshop. These documents reveal supply chain records linking Delesyian arms manufacturers to the conflict in Hernand.
Follow the second lead. Head to the merchant district and locate the warehouse indicated by the quest marker. Inside, you find evidence of clandestine shipments being routed through intermediaries.
Report back to your allies. Return to the safehouse to share what you have learned. A cutscene plays in which the group pieces together the evidence and identifies the next target: a manor on the outskirts of the city that is a hub for the conspiracy.
The Crossroads quest involves a significant amount of dialogue and investigation. Pay close attention to the documents you examine, as they provide context for events that unfold in later quests. There are no combat encounters during this quest, but the area around the warehouse is populated with hostile NPCs that can be avoided or engaged at your discretion.
Strange Manor
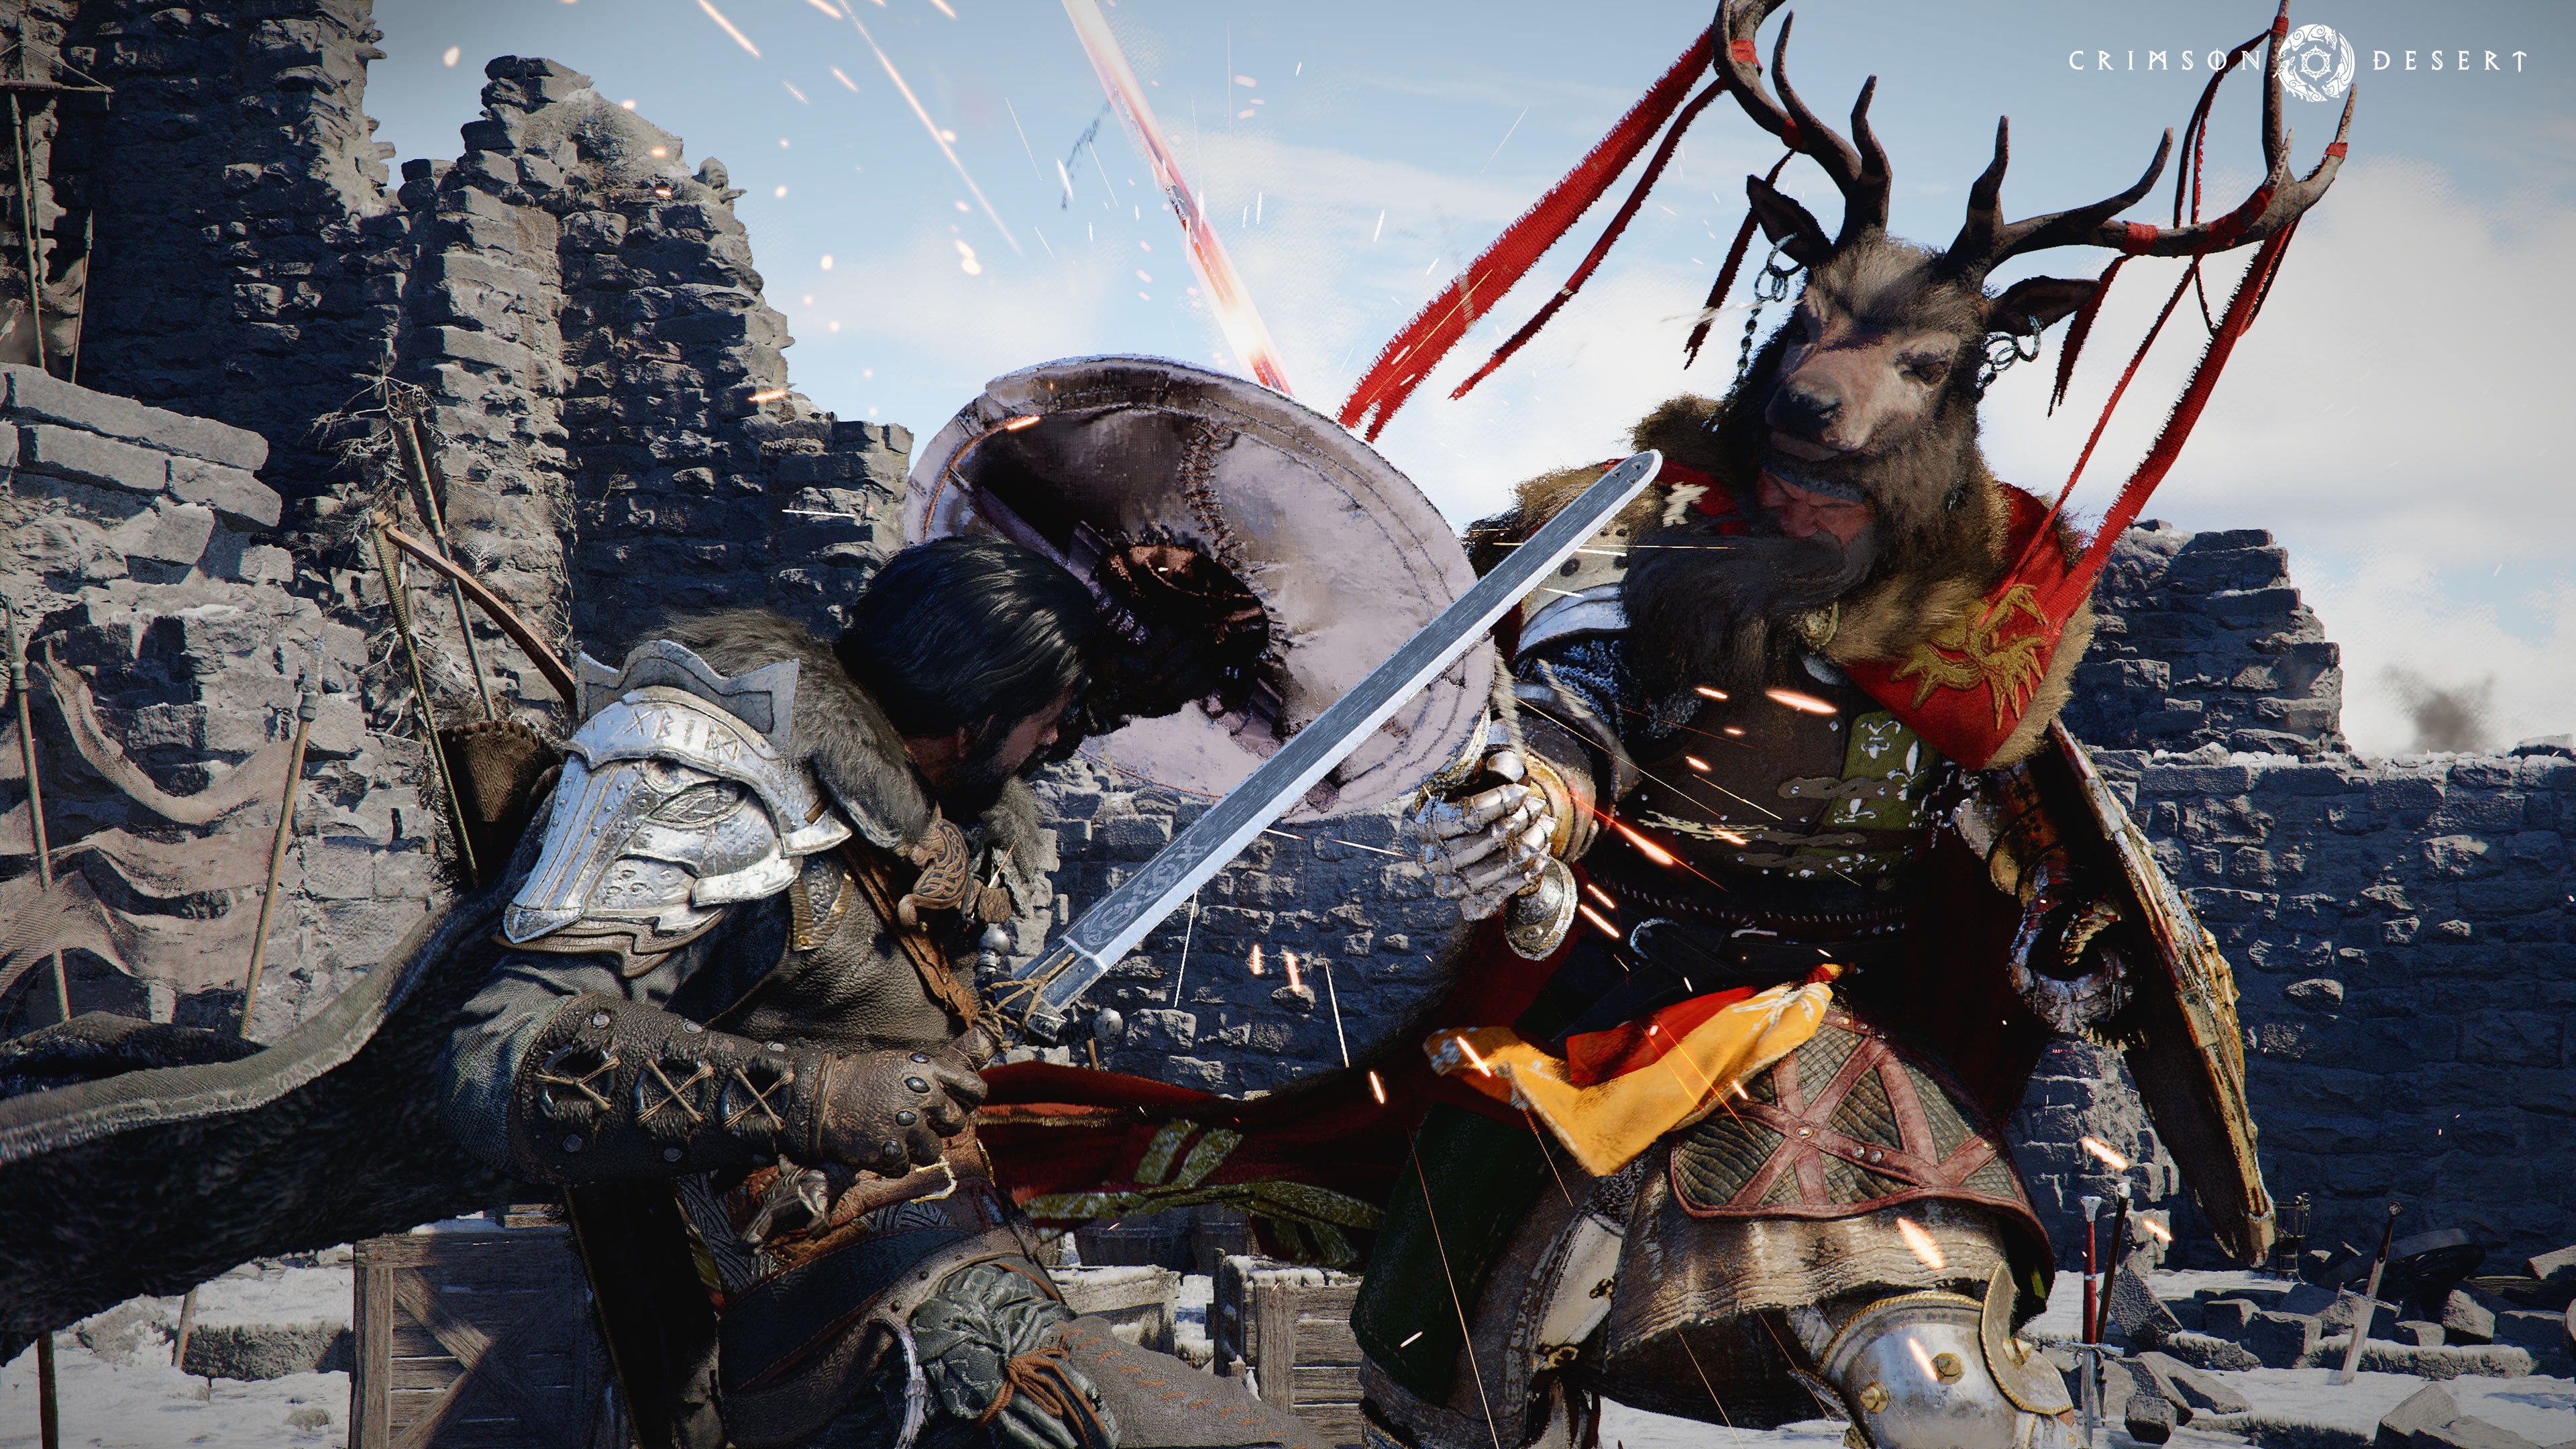
The trail leads Kliff to a remote manor on the outskirts of Delesyia. As you approach, signs of trouble are immediately evident. The gates stand open, and bodies are scattered across the courtyard. A body falls through the main gate as you arrive, and you are ambushed by a band of enemies before you can investigate further. This quest combines combat encounters with an interior investigation sequence.
Defeat the ambush party. As you approach the manor entrance, enemies surge out from behind cover. Eliminate all hostiles in the courtyard. They attack in two waves: the first consists of standard soldiers, while the second wave includes a shielded enemy who requires parrying or flanking to damage effectively.
Enter the manor. Once the courtyard is clear, approach the main door and interact with it to enter the building. The interior is dark and foreboding, with overturned furniture and signs of a struggle.
Search the ground floor. Investigate the rooms on the ground floor. Look for interactive objects highlighted by the HUD indicator. A journal on a writing desk provides key information about the manor's owner and their involvement in the conspiracy.
Ascend to the upper floors. Climb the staircase and follow the blood trail through the hallway. Additional enemies appear from behind doors. Defeat them and continue searching the rooms for evidence.
Discover the hidden chamber. In the study on the top floor, interact with the bookshelf to reveal a hidden passage. Follow it down to an underground chamber where you find documents and a map revealing the location of a heavily fortified structure.
The Strange Manor investigation is a pivotal quest that reveals the connection between Delesyia's political elite and the forces threatening Pywel. The combat encounters here are moderate in difficulty. Enemies are level-appropriate but appear in tight corridors, so wide-swinging two-handed weapons may be less effective than one-handed swords or daggers.
Fortress Keys
The documents recovered from the Strange Manor point to a series of security mechanisms that guard the approach to a massive fortified structure. Before Kliff can proceed, he must locate and activate several "fortress keys" scattered across the Delesyia region. Each key is a mechanical device that, when activated, disables one layer of the fortress's defenses.
Locate the first key mechanism. Travel to the marked tower on the eastern edge of Delesyia. The tower is covered in clockwork machinery with a spinning device on top. Climb to the upper platform using the external scaffolding. At the top, interact with the control panel and use Axiom Force to align the gears until the mechanism clicks into place.
Activate the second key mechanism. The second key is located in an underground facility beneath the industrial district. Descend through the maintenance hatch and navigate the corridors. Defeat the guards stationed inside, then interact with the power terminal. Rotate the connectors using the directional prompts to route power to the correct output.
Secure the third key mechanism. The final key is guarded by a mini-boss: a mechanized soldier operating a steam-powered combat suit. Dodge its sweeping attacks and wait for the overheating phase when the suit vents steam and becomes vulnerable. Land heavy combos during the opening, then retreat before it recovers. Once defeated, interact with the final control terminal to complete the sequence.
With all three keys activated, the path to the inner fortress is open. A cutscene shows the defense barriers powering down in sequence. The Greymanes regroup at a forward camp as they prepare for the next phase of the operation.
Truth and Lies
This quest is the narrative climax of the Brave New World sub-chapter. Kliff confronts the individuals responsible for orchestrating the conflict across Pywel. The truth emerges that the wars and political upheaval plaguing the continent were not random; they were engineered by a faction within Delesyia seeking to exploit the Abyss for its own purposes.
Enter the inner fortress. With the defense systems disabled, walk through the main gate. The interior is a blend of medieval architecture and Delesyian technology, with mechanical lifts and steam-powered doors.
Navigate to the command center. Follow the quest markers through a series of corridors and mechanical rooms. Several doors require pulling levers or activating panels with Axiom Force to proceed.
Confront the conspirators. A lengthy cutscene plays in which the full scope of the conspiracy is revealed. The antagonists have been manipulating the political landscape of Pywel to create instability, using the chaos as cover to search for Abyss Artifacts and harness their power.
Make your decision. After the cutscene, Kliff must decide how to respond. This is a dialogue-driven segment with no combat. The choices made here affect certain dialogue in later quests but do not alter the main story progression.
Truth and Lies is one of the most story-heavy quests in the entire game. There is no combat, but the revelations presented here recontextualize many of the events from earlier chapters. Players who have been paying attention to the political subplot will find several callbacks to events from Chapters 3, 5, and 8.
Foreboding Shadow
The Foreboding Shadow sub-chapter escalates the conflict dramatically. With the truth about Delesyia's role exposed, Kliff must now confront the physical manifestation of the Abyss threat. This sub-chapter features three quests culminating in the assault on the Flying Fortress Orbian, one of the most visually spectacular sequences in the game.
Master of a Forgotten Land
With the conspiracy exposed, Kliff receives intelligence about an ancient site in the Delesyia hinterlands where Abyss energy has been concentrated. The quest sends you into the wilderness beyond the city walls, into territory that the Delesyians themselves have abandoned.
Travel to the abandoned outpost. Follow the quest marker east through the industrial suburbs and into the countryside. The terrain transitions from paved roads to overgrown paths as you leave civilization behind.
Investigate the ruins. The outpost is a crumbling facility surrounded by flickering Abyss energy. Interact with the control panels scattered around the exterior to learn about the experiments that were conducted here.
Defeat the Abyss-corrupted creatures. As you delve deeper into the facility, corrupted creatures emerge from Abyss portals. These enemies glow with dark energy and deal additional damage compared to standard foes. Focus on dodging their area-of-effect attacks and counterattacking during recovery animations.
Reach the central chamber. Navigate through the facility's interior, activating door mechanisms with Axiom Force as you progress. The central chamber contains a large Abyss gate that pulses with energy.
Seal the Abyss breach. Use Force Palm on the Abyss gate to destabilize it. The gate requires three successive Force Palm strikes, with enemy waves spawning between each strike. Clear the enemies before attempting the next strike to avoid being overwhelmed.
Completing this quest rewards you with an Abyss Artifact. The sealed gate also reveals coordinates pointing to the location of the Flying Fortress Orbian, leading to the chapter's climax.
Whispers in the Wind
Returning from the forgotten land, Kliff receives word that strange occurrences have been reported across Delesyia. Winds carry fragments of whispered voices, and the sky has taken on an unnatural hue. The Abyss is becoming increasingly unstable, and time is running out to stop the threat.
Speak with the local scholars. Travel to the Delesyian research institute indicated by the quest marker. The scholars explain that the atmospheric disturbances are caused by the proximity of a massive Abyss structure in the sky: the Flying Fortress Orbian.
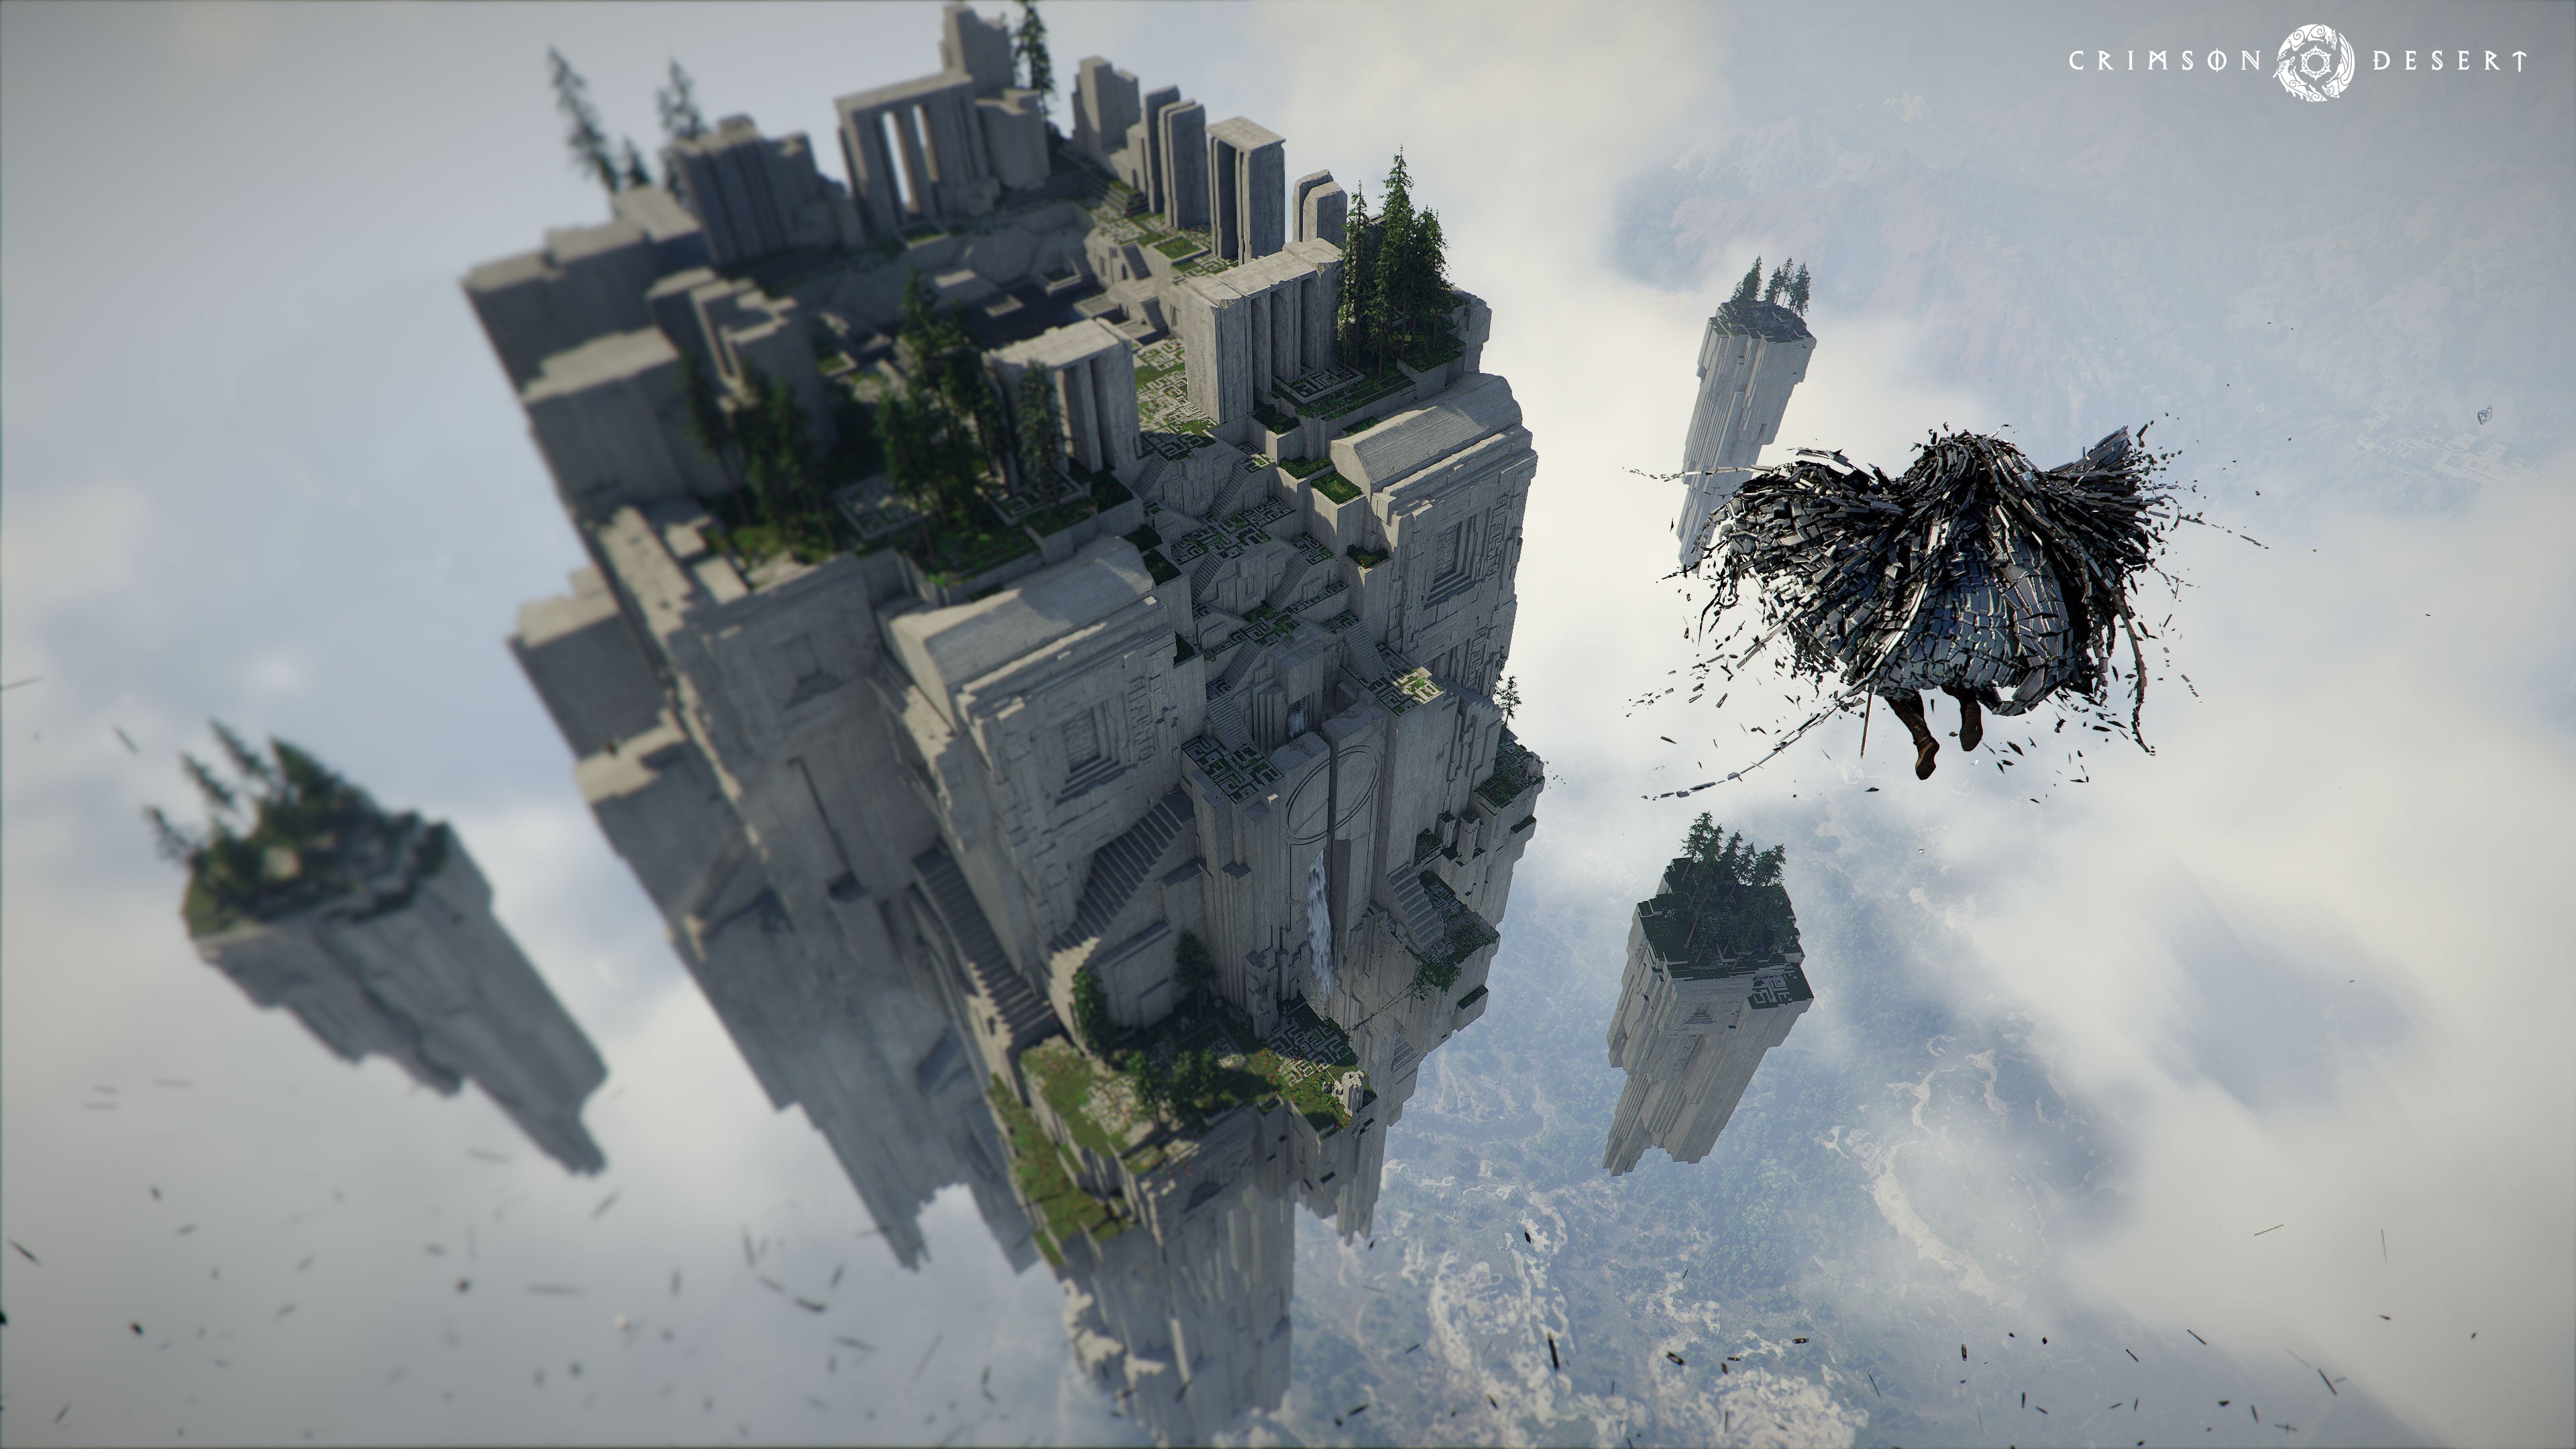
Gather information from the lookout tower. Climb the tallest tower in the district to get a visual on the fortress. A cutscene reveals Orbian in the distance, a colossal floating structure bristling with weapons and surrounded by swirling Abyss energy.
Locate the dragon summoning site. The scholars direct you to an ancient summoning circle on the outskirts of the region. Travel there and interact with the altar to begin the ritual. This involves solving a puzzle where you must rotate stone pillars using Axiom Force to align their symbols with the central glyph.
Bond with the dragon. Upon completing the puzzle, a dragon descends. A brief cutscene shows Kliff bonding with the creature. This dragon is your mount for the assault on Orbian in the next quest.
Whispers in the Wind is a transitional quest that builds tension before the climactic fortress assault. The puzzle at the summoning circle is moderately complex: align the outer ring first, then the inner ring, and finally activate the central node. If you rotate a pillar too far, it resets the connected symbols, so work methodically.
Cloud Castle Orbian
The climactic quest of Chapter 11, Cloud Castle Orbian is one of the most memorable sequences in Crimson Desert. Kliff mounts the dragon and launches an aerial assault on the Flying Fortress Orbian, a massive Abyss-powered structure hovering above Delesyia. This quest is divided into three distinct phases: the dragon siege, the interior puzzles, and the final boss encounter.
Phase 1: Dragon Siege
You approach the fortress on dragonback, soaring through clouds and avoiding anti-air fire from the fortress's outer defenses. The dragon's fire breath is your primary weapon during this phase.
Destroy the outer turrets. Target the glowing gun emplacements along the fortress walls. Use the dragon's fire breath to destroy them. The turrets fire projectiles that deal moderate damage to the dragon, so weave between shots while lining up your attacks.
Breach the hull plating. After eliminating the turrets, target the reinforced panels on the fortress's underside. These require sustained fire to break through. The dragon automatically repositions during this segment, so focus on maintaining your fire stream.
Land on the fortress. Once the hull is breached, the dragon lands on a platform near the entry point. Kliff dismounts and enters the fortress interior.
Phase 2: Interior Puzzles
The interior of Orbian is a mechanical labyrinth filled with puzzles that rely heavily on Axiom Force and Force Palm. Several combat encounters are interspersed between the puzzle segments.
Activate the central console. In the first chamber, locate the small central console. Pierce it with your sword and spin it to reveal an empty passageway leading to the next level.
Clear the upper level. Climb the metal grate to reach the upper floor. Defeat the three enemies stationed there. Use Force Palm jump or climb to reach the roof.
Destroy the green glass bulbs. On the roof, locate and destroy five to six green glass bulbs scattered across the surface. Your map marks their positions. Destroying all of them triggers the next phase.
Destroy the top console. With the bulbs eliminated, attack the central console on the fortress top. This opens a side platform with access to the boss chamber.
Navigate the spinning door. The door leading to the boss room rotates continuously. Use Axiom Force and Energy Surge in combination, then quickly mantle onto the door's edge as it spins past your position. This requires precise timing: activate Energy Surge first, then immediately press the mantle button when the door edge aligns with your character.
Phase 3: Boss Fight (Golden Star)
The final encounter pits Kliff against a spinning disc of light that is the fortress's Abyss-powered core. This boss is invulnerable to melee attacks under normal conditions.
Stun the boss. Use Force Palm and Energy Surge in combination to stun the disc. When stunned, it drops to the ground and becomes temporarily vulnerable.
Attack with arrows. While the disc is stunned, switch to your bow and fire arrows rapidly. This is the only reliable way to deal damage. Each stun window lasts roughly 5 to 7 seconds before the boss recovers and resumes spinning.
Repeat the cycle. Continue striking and shooting until the disc's health is depleted. Expect to repeat this cycle 4 to 6 times depending on your bow damage.
Critical warning: If you enter this fight without arrows, the boss is effectively impossible to defeat. You will need to leave, acquire arrows, and redo the entire interior puzzle sequence from the beginning. Always carry a full stack of arrows before entering Cloud Castle Orbian.
Defeating the disc of light triggers a cinematic in which the fortress begins to collapse. Kliff escapes on the dragon as Orbian breaks apart and crashes into the landscape below. The chapter concludes with a cutscene in which the Greymanes regroup and prepare for the final confrontation in the Abyss.
Tips for Chapter 11
Delesyia vendors sell some of the best equipment available before the endgame. Take time to browse their inventories and upgrade your gear before moving on.
The Strange Manor combat encounters take place in tight corridors. Consider switching to one-handed weapons or daggers for better maneuverability in confined spaces.
Always carry arrows. The Cloud Castle Orbian boss fight is arrow-dependent, and forgetting them means restarting the entire puzzle sequence.
The dragon siege phase is on-rails, meaning the dragon handles movement automatically. Focus entirely on aiming and firing rather than trying to steer.
Save your game manually before entering the fortress. The interior puzzles are lengthy, and if you need to leave for supplies, you will need to redo them from the start.
Abyss-corrupted creatures in the Master of a Forgotten Land quest deal bonus dark damage. Equipping accessories with dark resistance reduces incoming damage significantly.