Loading...
Loading...
Shields
March 30, 2026 at 03:23 AM
Restore combat mechanics guide content merged with crimsondesert.gg shield listings
Shields are one-handed defensive weapons in Crimson Desert that occupy one of the two one-handed equipment slots. They are most commonly paired with swords to create the classic sword-and-shield combination, which serves as the default loadout for protagonist Kliff in much of the game's promotional material. Shields provide the most reliable active defense in the game, offering consistent damage mitigation through blocking that other weapon types cannot match.
While primarily a defensive tool, shields actively participate in combat through parry mechanics, guard counters, and shield bashes. A well-timed shield use turns defense into offense, creating openings that reward reactive players. For information about the Defense stat and how damage reduction works as a number, see the Defense article.
Holding the block button (L1) raises the shield to absorb incoming attacks. Each blocked hit reduces the incoming damage significantly but consumes stamina. If the player runs out of stamina while blocking, the guard breaks, leaving them staggered and vulnerable. Managing stamina consumption is the central challenge of shield-based play.
Tapping the block button at the precise moment an enemy attack lands triggers a parry (also called a Perfect Block). A successful parry completely negates the incoming damage, costs less stamina than a normal block, and briefly staggers the attacker. The stagger window lasts long enough to follow up with a counter-slash from the paired weapon. Visual cues appear on screen to confirm a successful parry, helping players learn the timing against different enemy types.
After a successful block or parry, pressing the attack button immediately chains into a guard counter. Guard counters deal significantly more damage than standard attacks and often stagger enemies regardless of their poise. This mechanic forms the core offensive loop for shield users: block or parry, then punish.
Shields can also be used offensively as blunt striking tools. A shield bash interrupts enemy attack animations and can stagger lighter enemies outright. While the damage is minimal, the interrupt value makes shield bashes useful for creating breathing room in chaotic multi-enemy encounters. Journalists have described shield bashes chaining into super jumps, grappling-hook escapes, and full-screen shockwaves that send enemies flying.
Beyond the standard shield bash, shields can also perform a shove that pushes enemies backward for distance. This is particularly useful for creating space in tight corridors or near cliff edges, where a well-placed shove can reposition enemies into environmental hazards. The shove consumes less stamina than a full bash and recovers faster, making it a reliable crowd-control option during group fights.
Action | Input | Description | ||||
|---|---|---|---|---|---|---|
Standard Block | Hold L1 | Raise shield to absorb incoming damage at the cost of stamina | ||||
Parry / Perfect Block | Timed L1 press | Time the block at the exact moment of impact to negate damage and stagger the attacker | ||||
Guard Counter | Attack after Block/Parry | High-damage counterattack following a successful block or parry. Often staggers enemies. | ||||
Context-dependent | Offensive strike that interrupts enemy animations and staggers lighter foes | |||||
Shield Shove | Context-dependent | Push enemies backward. Lower stamina cost than bash; useful for crowd control. | ||||
4 | Move Speed Lv.2 | 2 | - | Crafting / Sanctum of Atonement | ||
5 | Move Speed Lv.2 | 2 | - | Verdant Paradise Underground | ||
6 | - | 2 | Defense +3, Guard -3% | Seaside Cave |
Aspect | Detail |
|---|---|
Damage Mitigation | Highest consistent damage reduction when blocking among all weapon types |
Parry Reward | Successful parries create large counter-attack windows for devastating ripostes |
Stamina Cost | Blocking drains stamina steadily; requires careful resource management |
Offense | Low direct damage; relies on the paired one-handed weapon for killing power |
Slot Cost | Occupies one of two one-handed slots, preventing dual-wielding |
Mobility | Slightly slower movement speed while actively blocking |
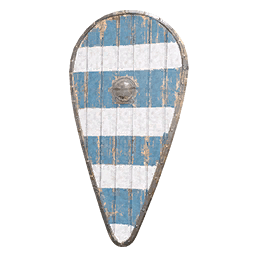
Several shield variants appear throughout Pywel, ranging from small bucklers to large kite shields. Smaller bucklers, such as those used by Damiane alongside her rapier, offer faster parry windows but absorb less damage per block. Larger shields provide better damage absorption but have slightly slower parry timing. The choice between shield sizes affects the balance between offensive and defensive playstyles.
Shields pair exclusively with single-handed weapons. The most common pairings are swords, spears, and one-handed hammers. Each pairing changes the feel of combat significantly: swords offer fast follow-up strikes after a parry, spears provide reach that lets shield users punish from a safer distance, and hammers deliver heavy stagger damage at the cost of slower swing speed.
Standard shields are lightweight defensive options that allow for faster movement and attack speed compared to large shields. There are 40 standard shields in the game.
Shield | Rarity | DEF | Guard Rate | Bonus Stats |
|---|---|---|---|---|
Legendary | 1-13 | 0-20 | Attack Speed Lv.2 | |
Rare | 1-13 | 0-20 | Attack Speed Lv.2 | |
Rare | 1-13 | 0-20 | Attack Speed Lv.2 | |
Rare | 1-13 | 0-20 | Attack Speed Lv.2 | |
Epic | 1-13 | 0-20 | Attack Speed Lv.2 | |
Epic | 1-13 | 0-20 | Attack Speed Lv.2 | |
Rare | 1-13 | 0-20 | Attack Speed Lv.2 | |
Uncommon | 2-14 | 2-25 | Attack Speed Lv.1, Movement Speed Lv.1 | |
Common | 2-14 | 2-25 | Attack Speed Lv.1, Movement Speed Lv.1 | |
Rare | 2-14 | 2-25 | Attack Speed Lv.1, Movement Speed Lv.1 | |
Rare | 2-14 | 2-25 | Attack Speed Lv.1, Movement Speed Lv.1 | |
Common | 2-14 | 2-25 | Attack Speed Lv.1, Movement Speed Lv.1 | |
Common | 2-14 | 2-25 | Attack Speed Lv.1, Movement Speed Lv.1 | |
Uncommon | 2-14 | 2-25 | Attack Speed Lv.1, Movement Speed Lv.1 | |
Legendary | 2-14 | 2-25 | Attack Speed Lv.1, Movement Speed Lv.1 | |
Rare | 2-14 | 2-25 | Attack Speed Lv.1, Movement Speed Lv.1 | |
Common | 2-14 | 2-25 | Attack Speed Lv.1, Movement Speed Lv.1 | |
Uncommon | 2-14 | 2-25 | Attack Speed Lv.1, Movement Speed Lv.1 | |
Rare | 2-14 | 2-25 | Attack Speed Lv.1, Movement Speed Lv.1 | |
Uncommon | 2-14 | 2-25 | Attack Speed Lv.1, Movement Speed Lv.1 | |
Rare | 2-14 | 2-25 | Attack Speed Lv.1, Movement Speed Lv.1 | |
Uncommon | 2-14 | 2-25 | Attack Speed Lv.1, Movement Speed Lv.1 | |
Rare | 2-14 | 2-25 | Attack Speed Lv.1, Movement Speed Lv.1 | |
Uncommon | 2-14 | 2-25 | Attack Speed Lv.1, Movement Speed Lv.1 | |
Common | 2-14 | 2-25 | Attack Speed Lv.1, Movement Speed Lv.1 | |
Rare | 2-14 | 2-25 | Attack Speed Lv.1, Movement Speed Lv.1 | |
Rare | 2-14 | 2-25 | Attack Speed Lv.1, Movement Speed Lv.1 | |
Common | 3-15 | 5-30 | Movement Speed Lv.2 | |
Epic | 3-15 | 5-30 | Movement Speed Lv.2 | |
Common | 3-15 | 5-30 | Movement Speed Lv.2 | |
Legendary | 3-15 | 5-30 | Movement Speed Lv.2 | |
Epic | 3-15 | 5-30 | Movement Speed Lv.2, Draconic Retribution (Skill 2 following 3 guards) | |
Common | 3-15 | 5-30 | Movement Speed Lv.2 | |
Rare | 3-15 | 5-30 | Movement Speed Lv.2 | |
Common | 3-15 | 5-30 | Movement Speed Lv.2 | |
Epic | 3-15 | 5-30 | Movement Speed Lv.2 | |
Rare | 3-15 | 5-30 | Movement Speed Lv.2 | |
Uncommon | 3-15 | 5-30 | Movement Speed Lv.2 | |
Epic | 3-15 | 5-30 | Movement Speed Lv.2, Runic Retribution (Skill 2 following 3 guards) | |
Uncommon | 6-6 | 10-10 | Attack Speed Lv.1, Movement Speed Lv.1, Stormy Retribution (Skill 2 following 3 guards) |
Large shields (also called tower shields) offer higher Guard Rate and Defense at the cost of mobility. They are equipped in the off-hand and pair with one-handed weapons. There are 16 large shields in the game.
Shield | Rarity | DEF | Guard Rate | Bonus Stats |
|---|---|---|---|---|
Rare | 2-27 | 25-50 | - | |
Uncommon | 2-27 | 25-50 | - | |
Epic | 2-27 | 25-50 | - | |
Rare | 2-27 | 25-50 | - | |
Epic | 2-27 | 25-50 | - | |
Common | 4-29 | 22-45 | - | |
Legendary | 4-29 | 22-45 | - | |
Rare | 4-29 | 22-45 | - | |
Epic | 4-29 | 22-45 | - | |
Uncommon | 4-29 | 22-45 | - | |
Epic | 4-29 | 22-45 | - | |
Common | 6-31 | 20-40 | - | |
Uncommon | 6-31 | 20-40 | - | |
Epic | 6-31 | 20-40 | - | |
Epic | 6-31 | 20-40 | - | |
Epic | 6-31 | 20-40 | - |
Right-hand shields are a special category that can fold into descent gear, reducing impact upon landing. There are 4 right-hand shields in the game.
Shield | Rarity | DEF | Guard Rate | Bonus Stats |
|---|---|---|---|---|
Epic | 1-13 | 0-20 | Attack Speed Lv.2 | |
Rare | 2-14 | 2-25 | Attack Speed Lv.1, Movement Speed Lv.1 | |
Epic | 3-15 | 5-30 | Movement Speed Lv.2 | |
Uncommon | 3-15 | 5-30 | Movement Speed Lv.2 |
In Crimson Desert, shields serve multiple purposes in combat:
Mechanic | Details |
|---|---|
Blocking | : Holding the block button raises the shield, reducing incoming damage based on Guard Rate and Defense. Blocking consumes Guard Stamina. |
Guard Counter | : Successfully blocking an attack at the right moment triggers a Guard Counter, which staggers the enemy and opens them up for a powerful follow-up strike. |
Parrying | : A precisely timed block creates a parry, deflecting the attack entirely and creating a longer stagger window than a Guard Counter. |
Refinement | : All shields can be refined at a Blacksmith to increase their Defense and Guard Rate stats. Refinement requires materials and Silver. |
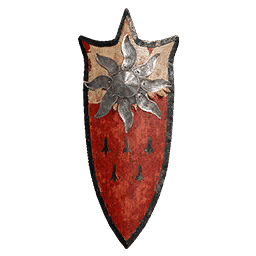
Twelve distinct shields have been identified across Pywel, each tied to a specific regional crafting tradition or faction. These range from standard infantry shields to large tower-style variants that offer greater coverage at the cost of weight and speed.
Shield | Type | Notes |
|---|---|---|
Large Shield | Regional weapon from the Balton line, offering extended coverage for defensive play | |
Shield | Regional weapon from the Balton line, balanced between parry speed and damage absorption | |
Large Shield | Regional weapon from the Bekker line, forged in the Hernand area | |
Shield | Regional weapon from the Bekker line, a lighter counterpart to the Bekker Large Shield | |
Shield | An ornate shield from the Demeniss region, featuring gilded detailing | |
Grey Wolf Wooden Shield | Shield | A wooden shield associated with the Grey Wolf faction, sturdy despite its simple materials |
Shield | A standard kite-shaped shield with solid all-around defensive stats | |
Mercenary Shield | Shield | A reliable shield favored by hired fighters. Recommended for beginners due to its forgiving Perfect Parry window. |
Large Shield | Regional weapon from the Rhonid line, built for sustained blocking | |
Shield | A named unique shield with distinctive lore ties | |
Shield | A round shield from the Sydmon line, compact and quick to raise | |
Thalwynd Large Shield | Large Shield | Regional weapon from the Thalwynd line, one of the heaviest shields available |
Shield | Craftable shield | |
Large Shield | Craftable shield | |
Shield | Craftable shield | |
Shield | Regional shield | |
Shield | Unique shield | |
Large Shield | Regional shield | |
Shield | Craftable shield | |
Shield | Craftable shield | |
Shield | Standard shield | |
Shield | Standard shield | |
Shield | Standard shield | |
Shield | Standard shield | |
Shield | Standard shield | |
Shield | Standard shield | |
Shield | Unique shield | |
Large Shield | Standard shield | |
Shield | Unique shield | |
Shield | Standard shield |
The Khaled Shield is an exclusive pre-order item available to players who pre-purchase any edition of Crimson Desert. It provides visual flair while maintaining the core defensive functionality of standard shields. See Pre-Order and Edition Content for the full list of edition bonuses.
The Shackle of Might (sword) and an Abyss Artifact is a boss reward obtained from defeating Fortain, the Cursed Knight. Unlike ordinary shields, it houses two spectral beings that can be summoned to fight alongside the player. This is one of the most powerful defensive tools in the game and carries a unique Signature Ability.
There are six Shield Challenges in Crimson Desert, part of the Mastery Challenges system. Completing all six unlocks the Master of Shields trophy and achievement. Each challenge is unlocked by finding a Sealed Abyss Artifact in the world, and the challenge itself tests a specific shield technique.
Challenge | Requirement |
|---|---|
Shield of Unchanging Will 1 | Defeat 3 enemies with a shield |
Shield of Unchanging Will 2 | Hit 3 enemies at once with a shield |
Shield of Unchanging Will 3 | Flip 5 enemies with a shield |
Shield of Unchanging Will 4 | Shield challenge in eastern Pywel |
Shield of Unchanging Will 5 | Advanced shield combat challenge |
Shield of Unchanging Will 6 | Final shield mastery challenge |
Shields are available from Equipment Shops, dropped by shield-bearing enemies, and rewarded from quests. Refinement at a Blacksmith increases a shield's base defense values. Abyss Gear augments can add effects such as reduced stamina consumption on block, faster parry windows, or elemental resistance bonuses.
The Mercenary Shield is widely considered the best starting option for players new to shield-based combat. Its Perfect Parry window is noticeably wider than other shields in its class, giving players more room for timing errors while they learn the parry mechanic. Once comfortable with the timing, players can transition to shields with tighter windows that offer other advantages, such as higher base defense or elemental resistances.
Shields are ideal for players who prefer a reactive, patient combat style. The sword-and-shield combination offers the safest learning experience in the game, with blocking available as a reliable fallback when dodge timing is not yet mastered. The Keen Senses ability also pairs well with shields, since it highlights incoming attacks and gives extra time to raise the guard.
Advanced shield users can transition to an almost entirely parry-based approach, where every enemy attack becomes an opportunity for a damaging counter. Investing in the Health stat branch through Abyss Artifacts complements shield play by increasing survivability. Pairing strong armor with a refined shield further reduces incoming damage across all encounters. Combined with stamina-efficient Abyss Gear, this creates a tanky build that can absorb sustained pressure from the game's toughest encounters.
Equipment - Overview of all equipment types
One-Handed Weapons - Weapons that pair with shields
Abyss Cores - Socket gems for gear customization
Blacksmith - Crafting and refinement NPC
Defense - The Defense stat explained