Overview
The Path of Providence is the largest chain of Abyss puzzle rooms in Crimson Desert, containing seven interconnected challenges that test your mastery of Axiom Force, Force Palm, Flight, and several advanced combat skills. The chain begins at the Ethereal Pathway Abyss Nexus and progresses through increasingly complex rooms, each awarding one Abyss Artifact upon completion. Clearing all seven puzzles earns a total of seven Abyss Artifacts, making the Path of Providence one of the single richest sources of progression currency in the game.
The seven rooms are, in order: Root's End, Precipice of Truth, The Secret Garden, Vault of Vengeance, Courtyard of Precision, Altar of Solitude, and Ice Cradle. While most rooms can be tackled in a single sitting, the later puzzles (particularly Altar of Solitude) demand careful spatial reasoning. This guide covers every room step by step, including the skills and tools you need before entering.
Prerequisites
Before starting the Path of Providence, you should have the following abilities and resources available:

Prerequisite | Details |
|---|---|
Flightability | Required to reach theEthereal Pathway Abyss Nexus and to traverse gaps between puzzle islands. You unlock Flight during the main story. |
Core ability used in every single room. It lets you grab, pull, and reposition objects at range. | |
Used to push objects into slots, activate gears, and open grates. The crouching and jumping variants are needed in specific rooms. | |
Useful for mid-air repositioning and reaching elevated mechanisms. Particularly helpful in the Vault of Vengeance and Precipice of Truth. | |
Required for the Vault of Vengeance and Courtyard of Precision. This skill lets you paint multiple targets with RB/R1 and fire at all of them simultaneously. It costs twoAbyss Artifacts from the spirit tree, so you must have completed at least two earlier Abyss challenges before tackling the Vault. | |
Required in the Vault of Vengeance to lift the heavystone door after shooting the timed targets. | |
Bring a generous supply. The Secret Garden, Vault of Vengeance, and Courtyard of Precision all consume arrows. | |
Stamina food | Especially useful during the Courtyard of Precision, where extended Flight sequences can drain your stamina bar quickly. |
How to Access the Path of Providence
Once you have unlocked Flight, open your map and press R3 to change the map layer. Tab over to show all icons, then look for the Abyss Nexus marker on the Ethereal Pathway. You can teleport directly to it. Alternatively, open the map, switch to the All category, enter the Abyss map view, and double-click the Nexus on the Ethereal Pathway.
At the Nexus entrance, a triangle forcefield blocks your path. Use Axiom Force to grab the floating switch, then rotate it with the D-pad until it clicks into place. This deactivates the barrier and opens the way to the first puzzle room. The forcefield mechanic recurs between several rooms throughout the chain, so get comfortable with it early.
Progression Path
The rooms connect in a linear chain, each linked by skybridges or teleporters that activate once you complete the current puzzle. The full route is:
Order | Room | Reward | |
|---|---|---|---|
1 | |||
2 | Precipice of Truth | ||
3 | The Secret Garden | Axiom Force, Arrows | |
4 | Vault of Vengeance | ||
5 | |||
6 | Altar of Solitude | Abyss Artifact, Bonus chest | |
7 | Ice Cradle |
After the Ethereal Pathway, the route passes through the Axiom Archive before reaching Root's End. Between rooms, you will encounter triangle forcefields that work the same way: grab the switch with Axiom Force, rotate with D-pad, and hold until the barrier drops. Crumbling platforms also appear on several bridges, so move quickly when crossing.
Room 1: Root's End
Root's End is the first full puzzle room after the initial forcefield. It is an introduction to the core loop of grabbing objects with Axiom Force, positioning them precisely, and locking them into place with Force Palm. The room is relatively compact, but the laser hazards and crumbling platforms keep you on your toes.
Reaching the Puzzle
After the forcefield, cross several floating platforms to reach a larger island. Three of these platforms crumble underfoot, so do not stop moving. Sprint across them and use Flight to recover if one collapses before you finish crossing. On the island you will find a large square room lit by floodlights.
Step-by-Step Solution
Locate the circular metal grate underneath an arch in the center of the room. Crouch and use Force Palm on it. Kliff will flip through the grate to the level below.
You are now in a vertical shaft lined with lasers. Avoid the laser beams as you descend. Use Flight to slow your fall and steer around them. If you touch a laser, you take damage and get knocked back.
At the bottom, look for a floating blue rectangle surrounded by electricity among the floating rocks. Use Axiom Force to grab it from a distance.
While still holding the blue rectangle with Axiom Force, guide it toward the open fuse slot on the ground level. Align it carefully with the slot.
Perform a jumping Force Palm to lock the fuse into the slot. This activates the nearby teleporter.
Move to the two columns nearby. Force Palm the right column to push it into the wall recess.
Look above for a gear mechanism. Perform a jumping Palm Strike on the gear to activate it and complete the puzzle.
Tips
Use Flight before you land after falling through the grate to avoid taking fall damage.
The lasers follow fixed patterns. Watch their timing before committing to a path downward.
If you miss the fuse slot alignment, simply re-grab the blue rectangle with Axiom Force and try again.
Exit
After completing the gear mechanism, head to the triangle forcefield at the far end. Grab the switch with Axiom Force and rotate it with the D-pad until it clicks. Glide across to the teleporter that takes you to the Precipice of Truth.
Room 2: Precipice of Truth
The Precipice of Truth raises the complexity significantly. You will work with multiple power cores, pedestals, wind generators, and a multi-step CPU placement system. Expect some platforming challenges between floating islands, especially during the final section where Force Palm while climbing can send you flying backward if you are not careful.
Step-by-Step Solution
At the cliff top near the entrance, locate the magical orb that is firing explosives. Use Axiom Force to grab it. The orb is destroyed, leaving behind a power core.
Pick up the power core with Axiom Force and place it on the square pedestal. This deactivates the forcefield blocking the path ahead.
Find the disconnected fuse near the fast travel point. Grab it with Axiom Force and position it near the slot, then use Force Palm to push it into place. This activates the first wind generator.
Ride the wind current upward. Glide to the upper floating islands.
On the upper island, extract the sphere and pocket its power core using Axiom Force combined with Y (Xbox) or Triangle (PlayStation).
Place the power core on the cube pedestal to gain access to the first CPU.
Push the CPU onto the cube pedestal. Glide in front of it and use Force Palm to lock it into position.
Repeat the process for the remaining two CPUs. Each CPU you place activates a new wind generator that carries you to the next platform.
After all three CPUs are placed, ride the final wind current to the powered gear.
Perform a Force Palm on the powered gear to complete the Precipice of Truth.
Tips
Be cautious while climbing near the final section. Using Force Palm while clinging to a wall can launch you backward off the platform. If this happens, deploy Flight immediately to recover.
The Kuku Pot interaction (Axiom Force + Y/Triangle) is used to store and retrieve power cores. If you are unfamiliar with this mechanic, practice on the first core before proceeding.
Wind generators remain active once triggered, so there is no time pressure on this section.
Room 3: The Secret Garden
The Secret Garden is a light-beam redirection puzzle that unlocks after you complete the Scholastone Institute main mission. This room tests your ability to manipulate objects in three dimensions, as you need to float a CPU upward to an emitter, redirect two separate light beams onto their targets, and then navigate a wind tunnel. Bring arrows before entering; you will need them for the later rooms that follow.
Step-by-Step Solution
Enter the puzzle chamber and look in the bottom corner for a floating CPU. Use Axiom Force to grab it.
Float the CPU upward toward the unpowered light emitter mounted at the top of the room. You need to jostle it into the recess. This requires gliding up alongside the CPU and using precise Force Palm taps to nudge it into the correct position.
Once the CPU is seated in the emitter, it powers on and produces a light beam.
Move behind the emitter and grab the circular control orb with Axiom Force. Use the D-pad to adjust the beam direction until the light shines onto the upper mirror.
The mirror reflects the beam. Continue adjusting until the reflected light hits the blue gem embedded in the wall. This gem glows when properly illuminated.
Switch to the opposite side of the room. Find the second control orb and grab it with Axiom Force.
Direct this second beam straight up so that it hits the mirror above. Adjust with the D-pad until the reflected light strikes the second blue gem.
Both gems now glow, opening the adjacent door.
Enter the wind tunnel behind the door. Open your cloak to glide upward through the tunnel.
At the top, interact with the broken power cable to reconnect it.
Climb up to the cog mechanism and perform a jumping Force Palm to activate it. This completes the Secret Garden.
Tips
Floating the CPU into the emitter recess is the trickiest part. If it keeps bouncing off, try approaching from directly below and tapping Force Palm gently rather than using a full-strength push.
The D-pad controls for beam direction are sensitive. Make small adjustments and wait for visual feedback (the gem glowing) before moving on.
The wind tunnel requires sustained gliding. If your stamina runs low, look for ledges on the tunnel walls to rest briefly.
Room 4: Vault of Vengeance
The Vault of Vengeance is the first room that requires advanced combat skills. You must have Focused Shot (costs two Abyss Artifacts from the spirit tree) and Nature's Grasp before entering. Without these skills, the door mechanism and the interior laser targets are impossible to complete. The vault rewards you with an Abyss Artifact, a Golden Sword, and various trade goods.
Opening the Vault Door
Locate the two blue cubes on either side of the vault entrance. Grab the cube on the right with Axiom Force and place it on the right pedestal.
Grab the cube on the left and place it on the left pedestal. Both pedestals must have cubes to remove the barrier.
Two lit circles flank the vault door. Shoot both of them with arrows quickly in succession before either timer expires. Aim carefully; if one times out before you hit the second, both reset.
After both targets are struck, the door loosens. Use Nature's Grasp (Y+B on Xbox, Triangle+Circle on PlayStation) to lift the heavy stone door upward.
Laser Chamber
Inside the vault, you find a chest guarded by four laser targets. These targets cannot be hit one at a time.
Equip Focused Shot. Hold RB (Xbox) or R1 (PlayStation) to enter targeting mode.
Paint all four yellow target symbols while holding the trigger. Each one highlights as you aim over it.
Release the aim button to fire simultaneously at all four targets. If done correctly, all four lasers deactivate at once.
Loot the room. Collect the Golden Sword from the lowering platform to progress the puzzle.
Laser Hallway and CPU Placement
Proceed deeper into the vault. The hallway features moving laser patterns that sweep back and forth across the corridor.
Watch the timing of each laser set. When a gap appears, sprint and slide through it. Time your slides carefully; getting hit pushes you back to the start of that section.
Beyond the lasers, find the CPU that needs to be positioned near the gears.
Use a combination of jump, Palm Strike on the floor, glide, and another Palm Strike to move the CPU into its final slot. This technique chains aerial momentum to cover the distance needed.
Return to the outer area via the teleporter. Find the broken fuse on the wall near the entrance.
Position the fuse with Axiom Force and Force Palm it into place.
Climb the gear and Force Palm its center while hanging on it to complete the Vault of Vengeance.
Room 5: Courtyard of Precision
The Courtyard of Precision is a target-shooting gauntlet that tests your aim and your Flight endurance. The room introduces floating red squares that fire bolts in random directions, and you must eliminate them in groups using Focused Shot. Completing this puzzle rewards you with an Abyss Artifact and, more importantly, unlocks the Lightning Pulse and Lightning Surge skills from the gear switch at the end.
Step-by-Step Solution
Cross the bridge from the previous area and activate the fast travel point.
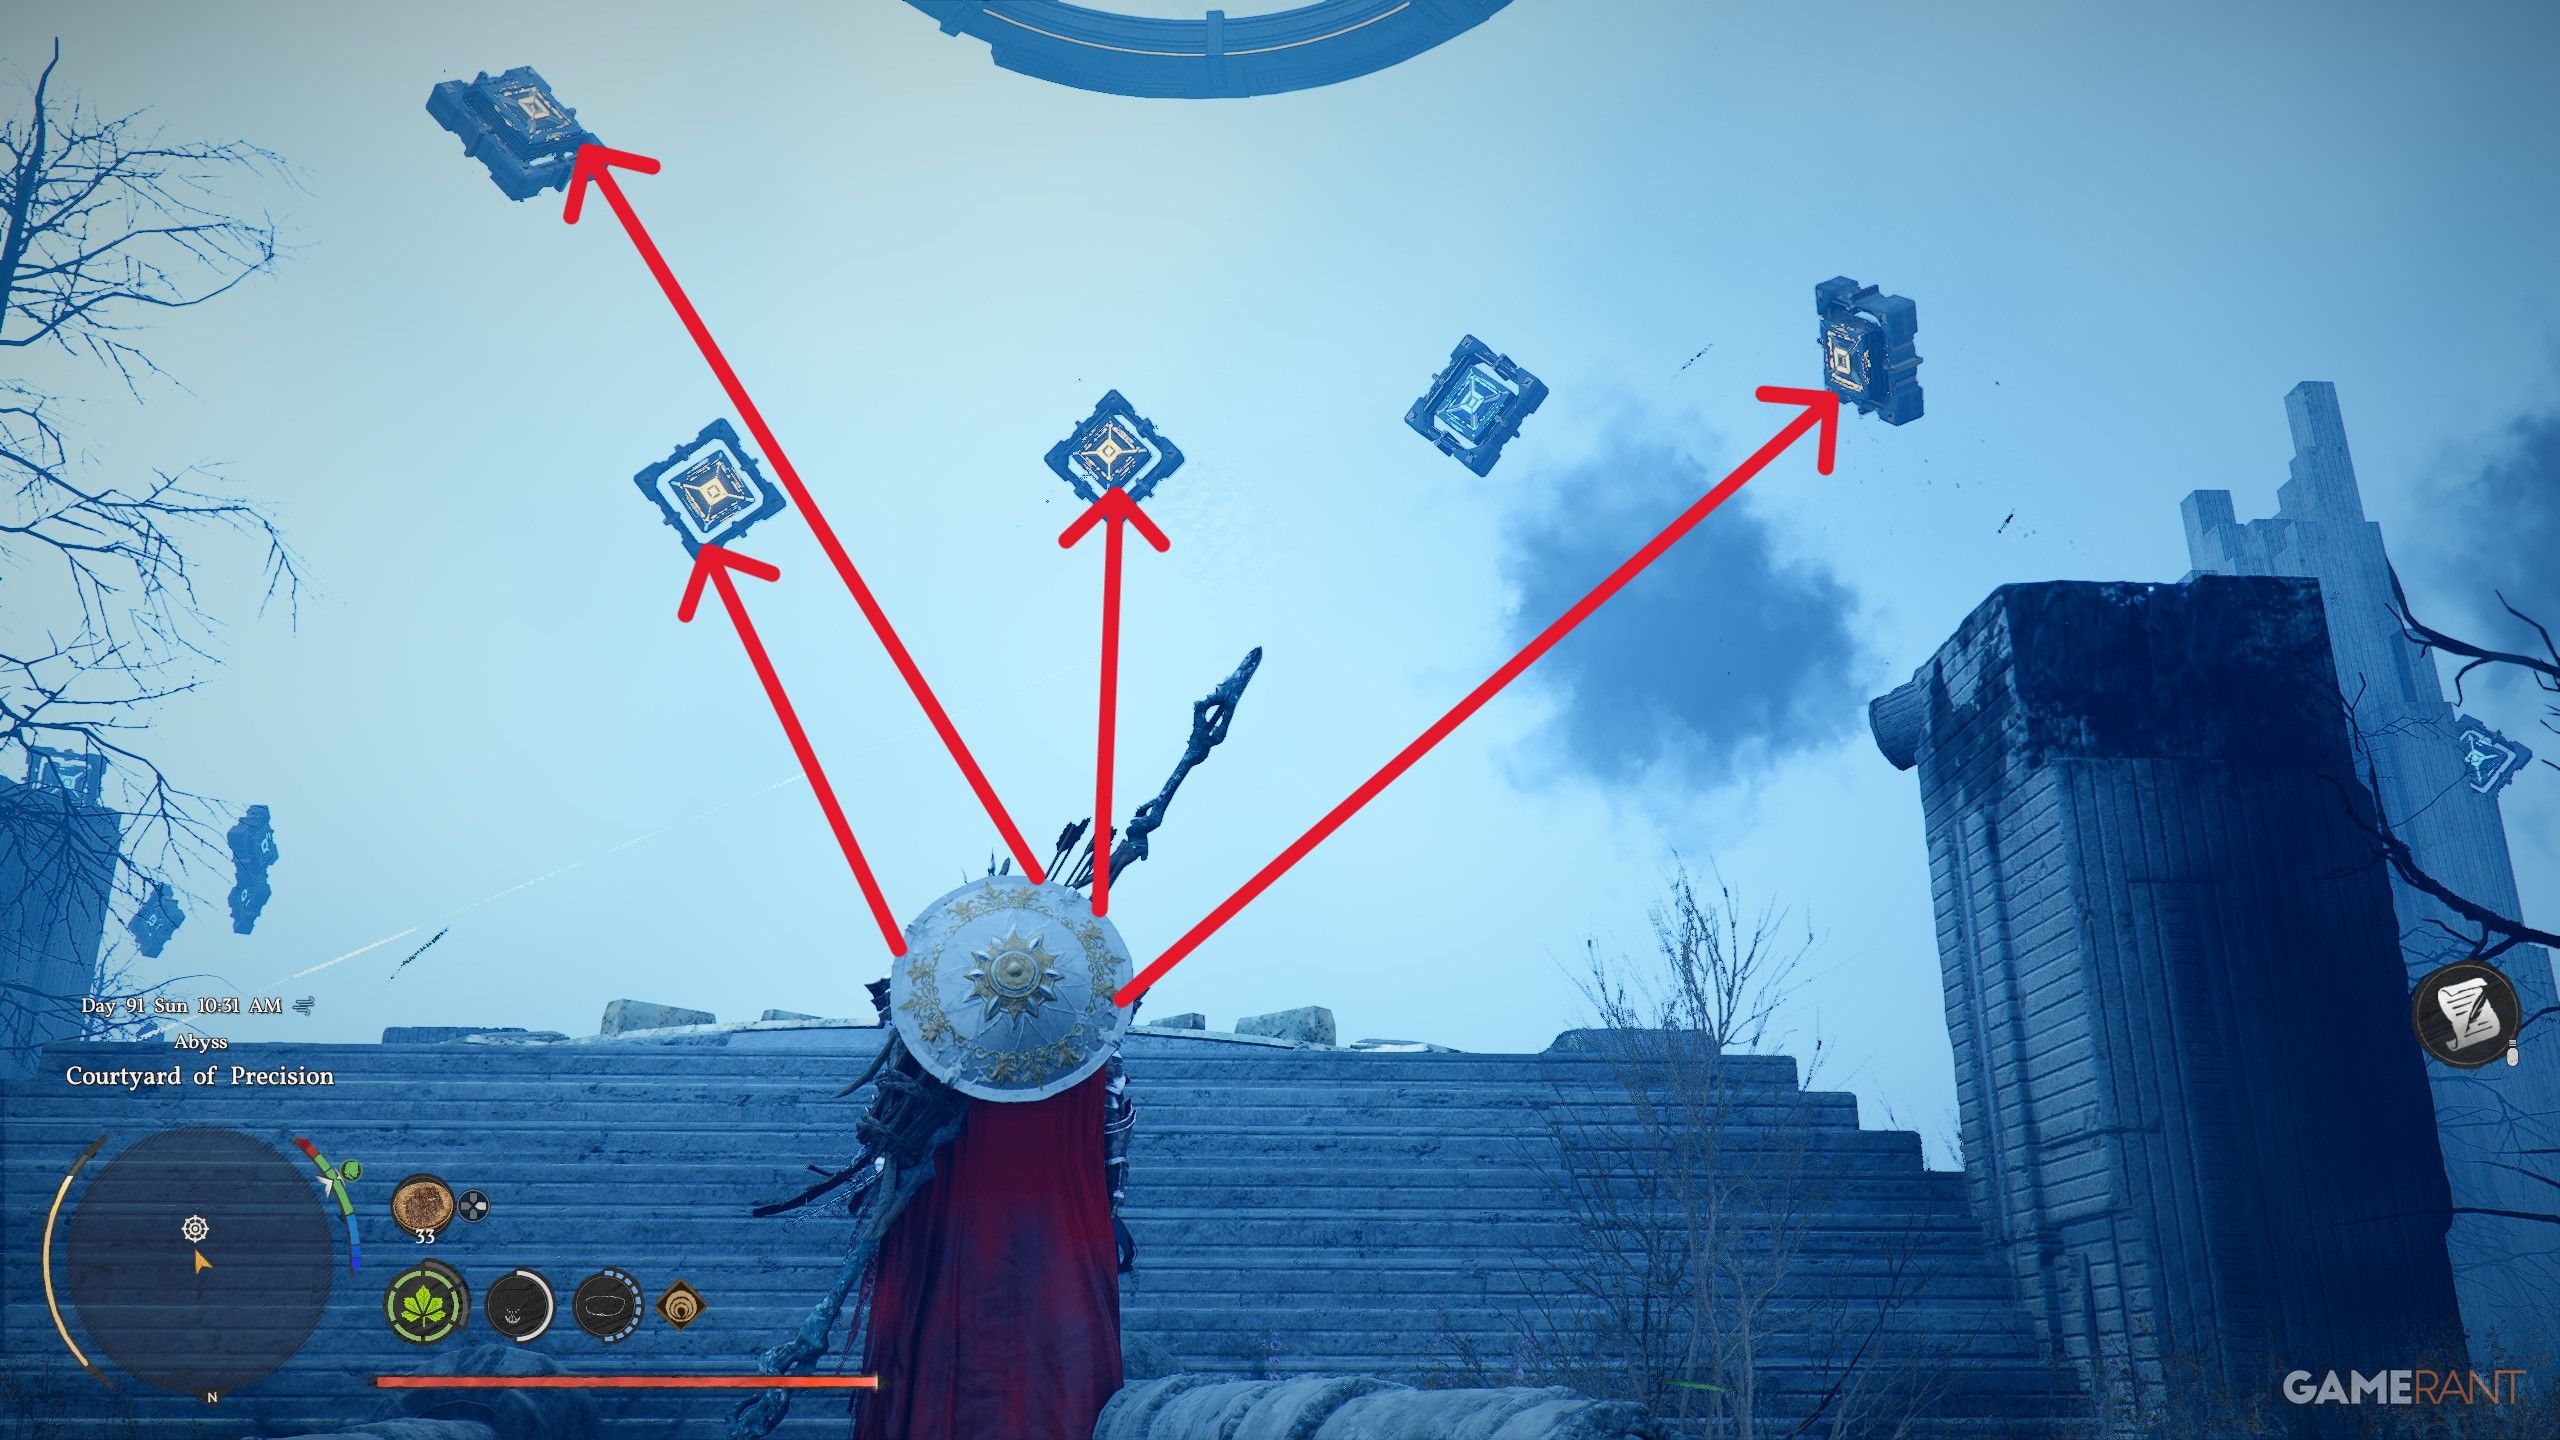
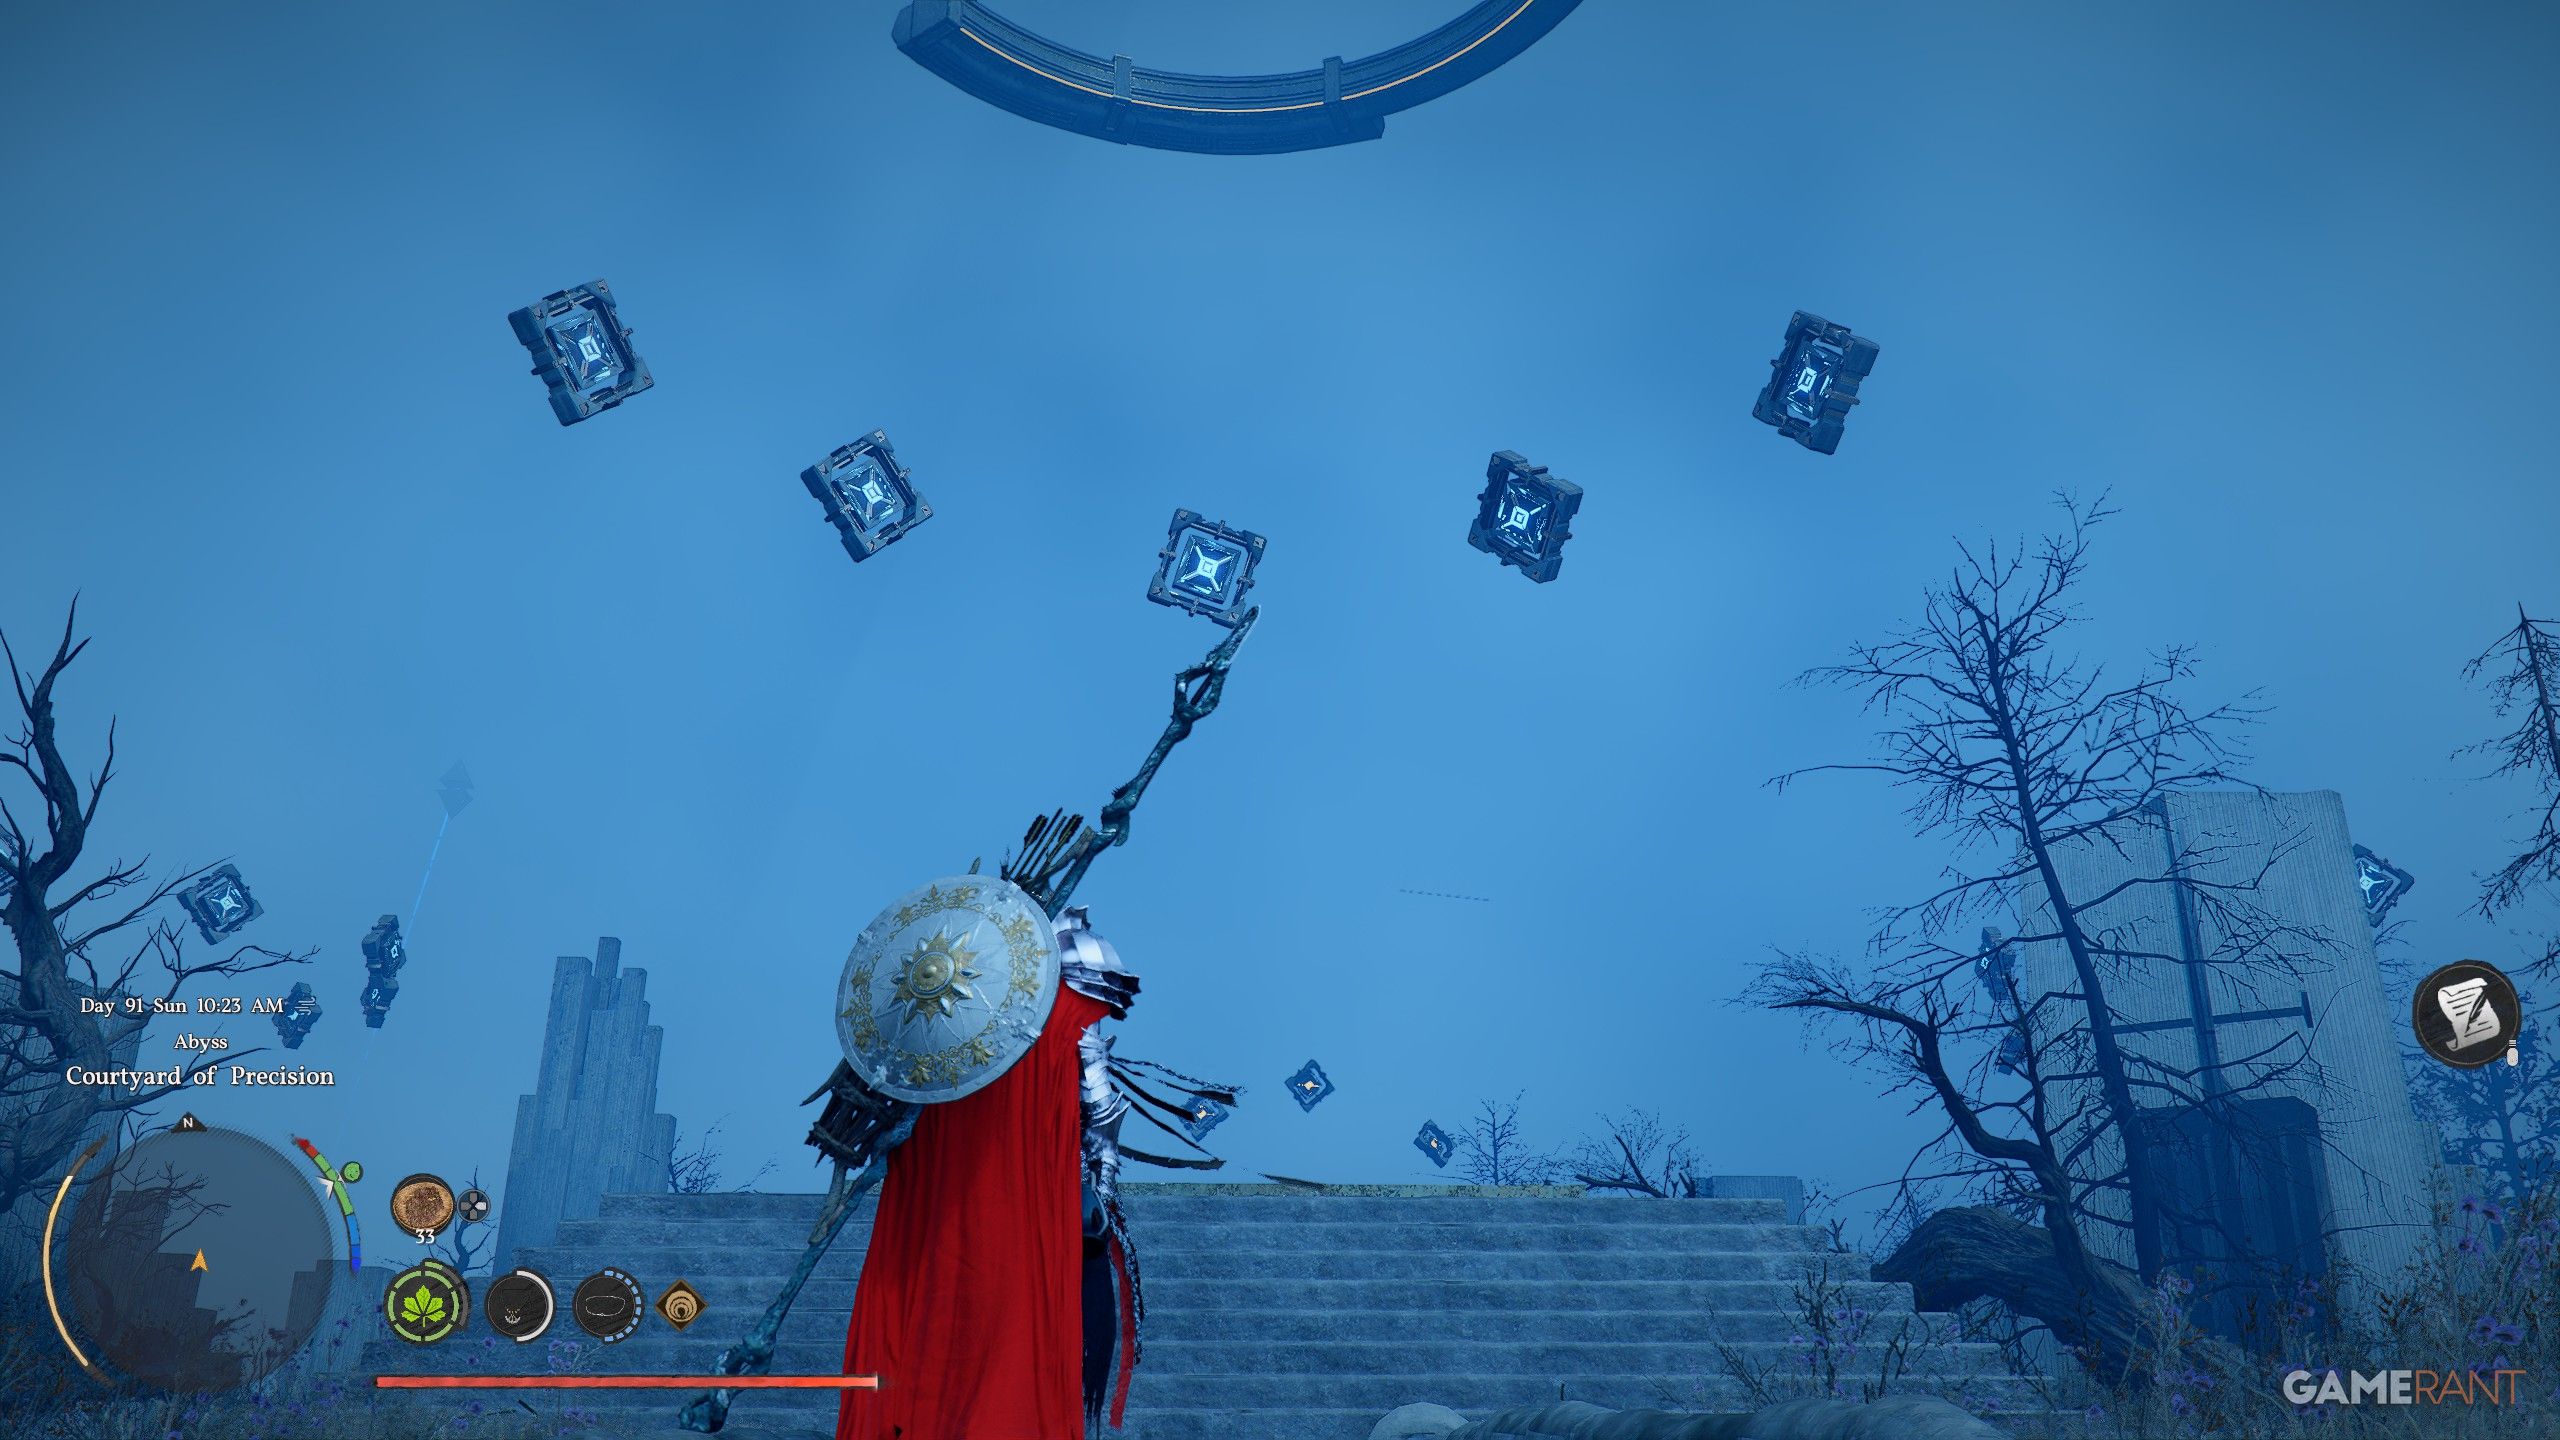
Survey the courtyard. You will see groups of floating squares. Red squares fire bolts randomly at the scenery; blue squares are already deactivated. Your goal is to eliminate all the red ones.
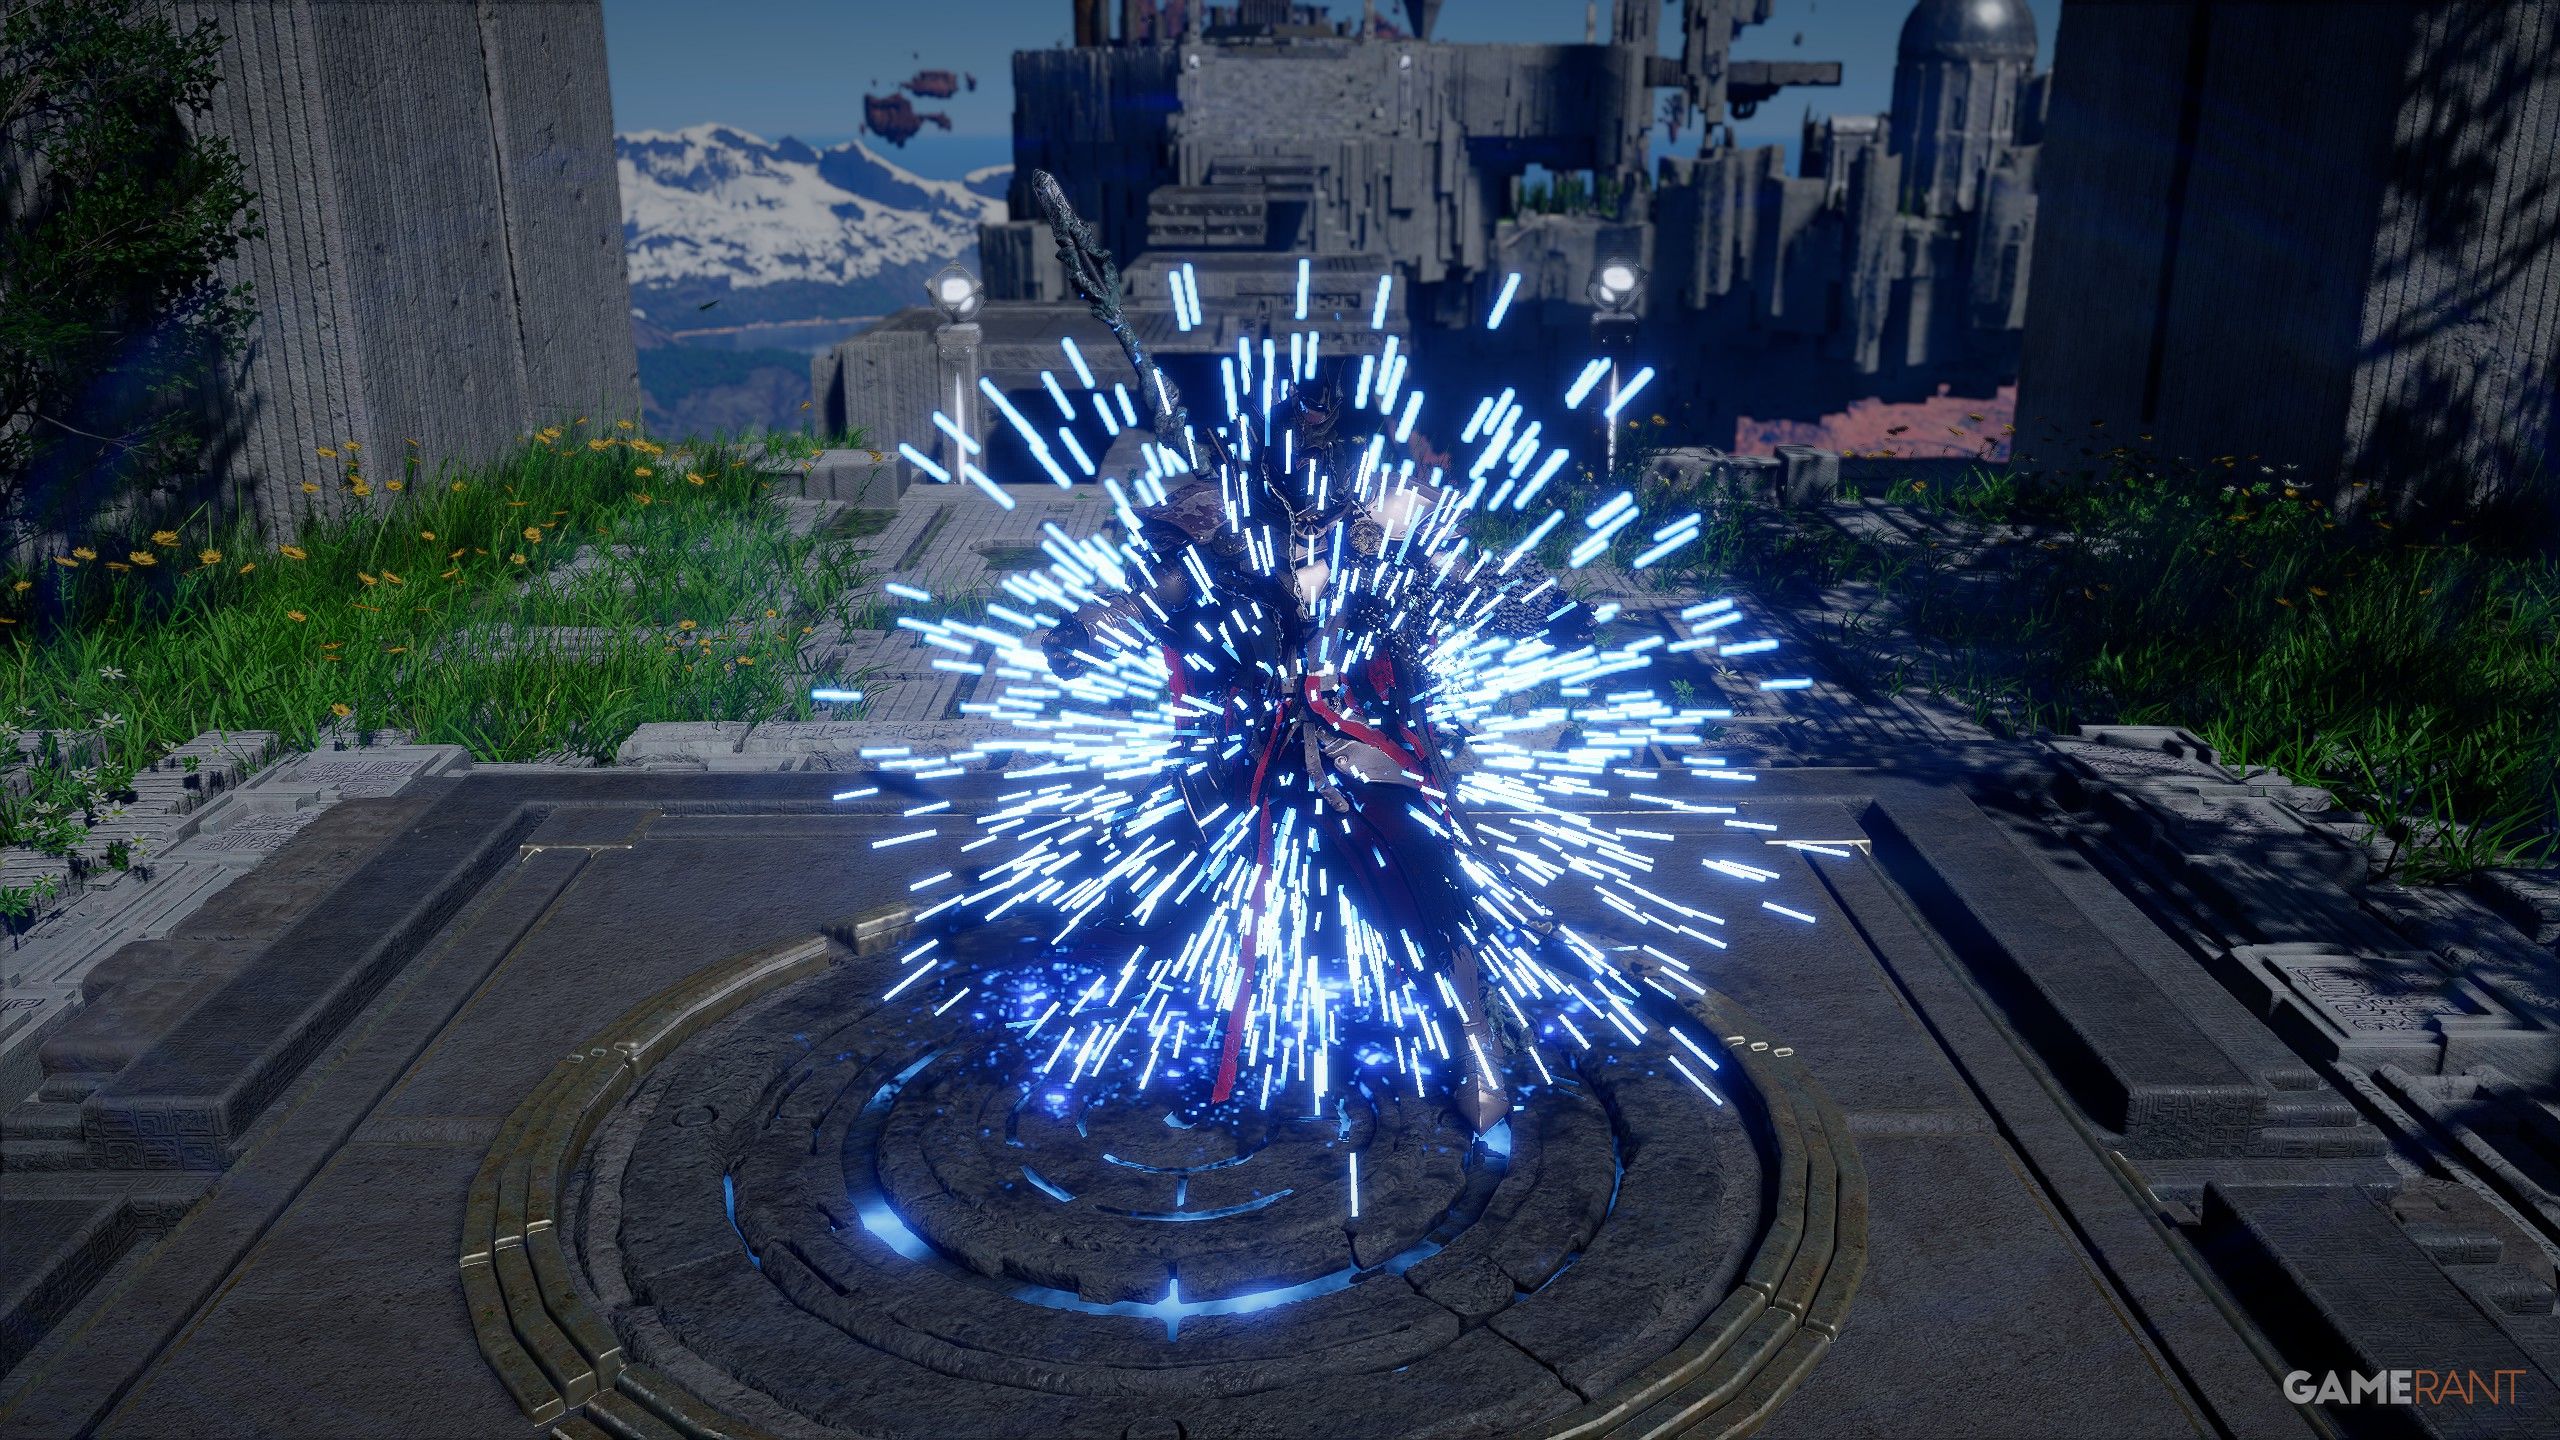
Use Focused Shot to paint all red squares in the first group. Hold RB/R1 to mark each target, then release to fire at all of them simultaneously.
Move to the upper platforms and repeat the process for the second and third groups of red squares.
After clearing the ground-level groups, step onto the circular launch platform below. It generates an updraft that launches you skyward.
While airborne, use Flight to stabilize. Locate the remaining aerial red square groups floating in ring formations above the courtyard.
You can land on circular platforms suspended in the air to steady your aim. From these vantage points, use Focused Shot to paint and eliminate each aerial group.
After all red squares are destroyed, descend to the north side of the courtyard. Find the gear switch.
Perform a jumping Palm Strike on the gear switch. This unlocks the Lightning Pulse and Lightning Surge combat skills.
Climb the stairs to the north to collect your Abyss Artifact.
Tips
Precision matters more than speed. Make sure every red square in a group is highlighted before releasing your shot. Missing one forces the group to reset.
Bring stamina-restoring food. Extended Flight segments during the aerial phase drain your stamina bar quickly.
The circular platforms in the air are stable. Do not rush your aerial shots; land on a platform, line up your targets, and fire from a stable position.
Reward Skills
Lightning Pulse creates a short-range electrical burst around Kliff, hitting all nearby enemies. Lightning Surge casts a persistent electrical field on the ground that damages enemies who step into it. Both skills become available in your skill tree immediately after activating the gear switch.
Room 6: Altar of Solitude
The Altar of Solitude is widely considered the most complex puzzle in the entire Path of Providence. It has a multi-layered floor-flipping mechanic, underground passages with narrow wall gaps, and a CPU extraction sequence that requires patient maneuvering. Take your time in this room; rushing leads to misplaced CPUs and wasted effort.
Step-by-Step Solution
Grab the floating blue cube near the entrance with Axiom Force and place it on the square pedestal near the fast travel save point.
Locate the first CPU in the upper-left area. Use Axiom Force to grab it and place it on one of the floor slots on the right side. Lock it with Force Palm.
Pull the existing left-side CPU from its position and move it to the right side as well. Both right-side slots should now be filled.
Move the blue cube to the floor-flip pedestal. The floor section flips, revealing an underground area. Drop through the gap during the flip.
In the underground area, find the third CPU. Retrieve it and push it through the wall gap. Some blocks require rotation to fit; use Axiom Force to rotate them before pushing through narrow openings.
Use the nearby teleporter to return to the upper level. Pull the CPU from the hole on the right side.
Place this CPU in the center slot between the left and right sections.
Move the blue cube to flip the right section. Extract both CPUs from the revealed slots.
Place both CPUs on the left side and Force Palm them into position.
Move the cube to flip the left section. Drop through during the flip.
Navigate through the underground passages to reach the final CPU. This one is visible through wall gaps and must be extracted through a specific sequence: pull it with Axiom Force through vertical and horizontal holes, rotating it as necessary to fit through each opening.
Drag the CPU to the area near the save point. Push it through the final hole and pull it out on the other side.
Place it on the remaining right-side CPU slot. Pull the middle CPU and place it on the other right-side slot.
Both sides are now fully populated. Descend to the gear and perform a Downward Palm Strike on it to complete the Altar of Solitude.
Bonus Chest
Before leaving, check the back right corner of the area. A chest sits behind a set of laser barriers. Nearby, you will find movable blocks. Pick them up with Axiom Force and position them to block the lasers, creating a safe path to the chest. Inside you will find a Faded Abyss Fragment and a Haste 2 piece of Abyss Gear. The Faded Abyss Fragment is a rare material, so this chest is well worth the extra effort.
Room 7: Ice Cradle
The Ice Cradle is the final room in the Path of Providence and has a unique musical puzzle that has no equivalent elsewhere in the game. You need to listen to an automated instrument, memorize the note sequence, and replay it using your sword's light. After the music puzzle, you restore power to the final cog through a series of cable and pipe repairs.
Accessing the Ice Cradle
The skybridge to the Ice Cradle unlocks after you complete the Altar of Solitude. Cross the triangle forcefield using the standard Axiom Force and D-pad rotation, then step onto the teleporter that delivers you to the cave entrance.
Musical Instrument Puzzle
Drop into the cave. You will hear strange automated music playing from an instrument embedded in the wall.
Stand in front of the instrument. There are five buttons arranged in a row, numbered 1 through 5 from left to right (1 = leftmost, 5 = rightmost).
Hold RB + LB (Xbox) or R1 + L1 (PlayStation) simultaneously, then press LB/L1 to activate Blinding Flash. This shines your sword's light onto the instrument buttons.
You need to play the buttons in the same order as the song. The correct sequence is:
5 - 1 - 2 - 3 - 4 - 5 - 1 - 1
Shine your sword light on each button in that exact order. After hitting the final note, the instrument activates and a machine powers on deeper in the cave.
Power Restoration
After the machine activates, head toward the frozen flower cave area. Look up at the roof for a hole with a power cable hanging through it.
Climb up through the hole. If you have the Aerial Maneuver skill, this climb is much easier; without it, you may need several attempts on the trickier ledges.
At the top, find the floating blue fuse rectangle. Grab it with Axiom Force.
Drag the fuse to the slot above and to the right of the powered CPU. Glide up and use Force Palm to push it into place.
Exit the cave and locate the broken pipe leading to the main cog mechanism. Interact with it to reconnect the pipe.
Climb onto the powered cog and perform a Force Palm on its center to restore the final Abyss power supply and complete the Ice Cradle.
Tips
Write down the musical sequence (5-1-2-3-4-5-1-1) if you are worried about forgetting it. There is no penalty for incorrect notes, but you will need to restart the sequence from the beginning.
The climb after the cave can be challenging without Aerial Maneuver. Stock stamina food and take it slowly.
After the final Force Palm on the cog, the exit opens via a triangle forcefield and platform that carries you out of the Path of Providence entirely.
Rewards Summary
Completing the entire Path of Providence chain yields the following rewards:
Room | Primary Reward | Additional Rewards |
|---|---|---|
None | ||
Precipice of Truth | None | |
The Secret Garden | None | |
Vault of Vengeance | Golden Sword, trade goods, coins | |
Lightning Pulse skill, Lightning Surge skill | ||
Altar of Solitude | Faded Abyss Fragment, Haste 2 Abyss Gear (bonus chest) | |
Ice Cradle | None |
In total, the Path of Providence provides seven Abyss Artifacts, two combat skills (Lightning Pulse and Lightning Surge), a Golden Sword, a Faded Abyss Fragment, a piece of Haste 2 Abyss Gear, and various trade goods. This makes it one of the most rewarding Abyss chains in the game, especially for players looking to fill out their spirit tree or upgrade their Abyss Gear loadout.
General Tips
Save frequently. The Altar of Solitude in particular has many steps that can go wrong. Use the fast travel save points between rooms to create checkpoints.
Master the triangle forcefield. The switch rotation with the D-pad appears between almost every room. Practice finding the sweet spot quickly; the visual and audio feedback tells you when the rotation is correct.
Carry stamina food. Flight-heavy sections like the Courtyard of Precision and the climb in the Ice Cradle can exhaust your stamina bar mid-air.
Do not rush the CPU puzzles. In the Precipice of Truth and Altar of Solitude, misplacing a CPU means backtracking. Take your time to read the environment before committing a placement.
Unlock Focused Shot early. It costs two Abyss Artifacts from the spirit tree. Without it, you cannot complete the Vault of Vengeance or Courtyard of Precision. Prioritize it as soon as you have enough artifacts.
Force Palm while climbing is risky. In the Precipice of Truth, using Force Palm while clinging to a wall launches you backward. Be ready to deploy Flight to catch yourself.
The bonus chest in Altar of Solitude is optional but valuable. The Faded Abyss Fragment and Haste 2 Abyss Gear are worth the extra time to grab before leaving.
Related Articles
Article | Description |
|---|---|
Overview of all Abyss Artifact sources and uses | |
How to equip and upgrade Abyss Gear | |
Locations and uses for Faded Abyss Fragments | |
Full breakdown of the Axiom Force ability | |
All Force Palm variants and their applications | |
How to unlock and use Focused Shot | |
Skill details and combat uses | |
Skill details and combat uses | |
Master list of every puzzle in Crimson Desert | |
Guide to all non-Abyss puzzle types |