Overview
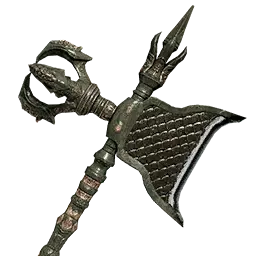
Aeserion Halberd is a two-handed halberd in Crimson Desert. It is classified as a Mythic-grade weapon with a base Attack of 6.
As a two-handed weapon, this halberd requires both hands to wield, preventing the use of an off-hand item. Two-handed weapons compensate with higher damage output and wider attack arcs compared to their one-handed counterparts.
Stats
Attribute | Value |
|---|---|
Weapon Type | Two-Handed Halberd |
Grade | Mythic (Red) |
Attack Power | 6 |
Attack (+0) | 14 |
Attack (+10) | 39 |
Enhancement Levels
Aeserion Halberd can be enhanced from +0 to +10 through the refining system. Each enhancement level increases the weapon's Attack stat.
Level | +0 | +1 | +2 | +3 | +4 | +5 | +6 | +7 | +8 | +9 | +10 |
|---|---|---|---|---|---|---|---|---|---|---|---|
Attack | 14 | 16 | 18 | 20 | 22 | 24 | 26 | 28 | 31 | 34 | 39 |
Crafting Recipe
Aeserion Halberd can be crafted and enhanced using the following materials:
Output | Ingredients |
|---|---|
Aeserion Halberd (+1) | |
Aeserion Halberd (+1) | |
Aeserion Halberd (+1) | |
Aeserion Halberd (+2) | |
Aeserion Halberd (+2) | |
Aeserion Halberd (+2) | |
Aeserion Halberd (+3) | |
Aeserion Halberd (+3) | |
Aeserion Halberd (+3) | |
Aeserion Halberd (+4) |
How to Obtain
As a Mythic-grade weapon, Aeserion Halberd is exceptionally rare. It is most likely obtained through challenging endgame content, elite boss encounters, or special quest chains. Players should be prepared for difficult combat when pursuing this weapon.
Enhanced versions of this weapon can be crafted at a workbench using the materials listed in the crafting recipe table above.
Combat Tips
At maximum enhancement, Aeserion Halberd reaches an Attack value of 39, making it one of the stronger options in its category. Investing refinement materials early can pay dividends throughout the mid and late game.
As a Mythic-grade weapon, Aeserion Halberd is among the strongest in its class. It is worth investing refinement materials to push its base stats even higher, making it viable well into the endgame.
Halberds combine the reach of a spear with the cutting power of an axe. Alternate between thrust attacks for range and slashing attacks for damage. The axe blade can hook enemy shields and pull them open for follow-up strikes.
As a two-handed weapon, this halberd prevents the use of off-hand equipment. Consider your build and playstyle carefully when choosing between the higher damage of two-handed weapons and the versatility of one-handed options with shields or dual-wielding.
Forging the Aeserion Halberd
Aeserion Halberd is forged from the same blueprint chain as the rest of the Aeserion weapon set. The recipe is unlocked by reading the manual hidden at the Serpent Shrine, and every weapon in the set, including the Aeserion Longsword, Aeserion Halberd, Aeserion Sword, Aeserion Bow, Aeserion Dagger, Aeserion Spear, Aeserion Greataxe, Aeserion Greathammer, Aeserion Mace, and Aeserion Warhammer, shares the same crafting station and the same rarest ingredient: Platinum.
Materials Checklist
Gather the materials below before visiting the smithy. The Aeserion's Scales and Aeserion's Gear Blueprint are unique to the Aeserion set, while Platinum, Brimstone, Mercury, Holy Water, and Gold Bar feed into every recipe in the family.
Material | Yield / Source | Notes |
|---|---|---|
Pick up at the Serpent Shrine | Read every page on both the left and right sides of the manual to unlock the full Aeserion crafting list at the smithy. | |
About 50 per pass at the Serpent Shrine | Harvest from the area around Aeserion, the Great Serpent using Axiom Force. The serpent itself is passive; only the nearby soldiers attack. | |
Crafted at the witch's alchemy table | Combine Gold Bar, Brimstone, Mercury, and Holy Water using the Alchemy Formula: Platinum. | |
40+ per loop at Deadfire Mountain | Living rocks above Demeniss. Whack the white-gas rocks for two to three each, or plug two of the three vents on the yellow-gas rocks with Force Palm and finish with Nature's Snare for four per rock. | |
15-20 per pass at the Deadfire pond | Slightly right of the Brimstone area. Fire three or four ice-imbued arrows at the pond to freeze it, then collect the drops. | |
Purchased from any church | ||
Crafted at the witch from Gold Ore and Golden Apple | Pick up the Gold Bar recipe at the Pelune cave between the I and L of the Pelune label, farm 70-80 Gold Ore across the Demeniss pit, Silverwolf Cave, and Second-Finger Cave, and gather Golden Apples from the Greyrock Dock hedgehogs between 4 PM and 9 PM using Blinding Flash. | |
~15 per Oreback Crab at Drakefall Castle | Shiny patches host Bismuth Oreback Crabs north of Demeniss and Hernand. Activate each crab with Blinding Flash before attacking, and leave one patch undisturbed so the others repopulate. | |
Dense farm on the island east of Demeniss | The same island also yields Azerite. Both materials repopulate every few days. |
Acquisition Route
The forging chain runs through six regions but most steps cluster around Demeniss, Hernand, and the small island holding the Serpent Shrine. The route below is the order used to fill the materials list above with the least back-and-forth.
1. Unlock the Recipe at the Serpent Shrine
Open the world map and fast travel to the Serpent Shrine on the small island southwest of Delesyia. Follow the cliff edge until you spot the soldiers firing on the serpent. The serpent is passive, but the soldiers will attack on sight. Jump off the cliff and glide past them. On the lower ledge, use Force Palm to break the rock barrier, then read both the left and right pages of the on-site book. Missing even one page locks part of the Aeserion crafting list at the smithy.
2. Harvest Aeserion's Scales
Climb back up to the serpent and sweep the surrounding ground with Axiom Force to pull Aeserion's Scales out of the terrain. One thorough pass nets roughly 50 scales, more than enough for the full crafting and refining run.
3. Collect the Platinum Recipe
Travel to the Scholastone Institute, enter the front gate, and walk straight ahead until you reach a flight of stairs on the left. Take the narrow passage at the top of the stairs and find the Alchemy Formula: Platinum on the shelves to the left. The Platinum Recipe Location page covers the same pickup in detail.
4. Farm Brimstone at Deadfire Mountain
Fast travel above Demeniss to the Deadfire Mountain abyss crescent. Two rock types yield Brimstone:
White-gas living rocks: hit each one a few times for two or three Brimstone. There are usually three of these within line of sight of the fast travel.
Yellow-gas three-vent rocks: hold the Force Palm stick (R3 on a controller), then press the movement stick (L3) to place the targeting circle on a vent, and release both sticks at the same time to plug the hole. Plug two of the three vents, then hold both L3 and R3 and rotate to fire Nature's Snare on the third. When the gold light fades the rock drops four Brimstone.
A single full pass of the area nets 40 or more Brimstone, well beyond what one forging session requires.
5. Freeze the Pond for Mercury
Move slightly right from the Brimstone rocks to find a small pond. Switch to ice-imbued arrows and fire three or four shots into the water. Once the surface freezes solid, walk on and pick up 15 to 20 Mercury from the ice.
6. Buy Holy Water
Stop at any of the three major churches to buy Holy Water. The Hernand, Demeniss, and Delesyia churches all stock it in bulk.
7. Smelt Gold Bars at the Witch
Head to the Pelune area, follow the cave entrance between the I and L of the Pelune label, and pick up the Gold Bar recipe behind the books inside. With the recipe in hand, run the gold ore loop:
Drop into the huge pit below the D of Demeniss and Force Palm the gold-colored rock for 25-30 ore.
Travel to Silverwolf Cave near the A of Pelune, drop into the second pit, and break a second gold rock for another 25-30 ore.
Visit Second-Finger Cave at the L of Pelune, drop past the local artifact pickup, and break the third gold rock for 25-30 more ore.
Clear the bandits at Greyrock Dock between Hernand and Demeniss, then use Blinding Flash on the hedgehogs that spawn between 4 PM and 9 PM to drop Golden Apples. Reset spawns by fast travelling away and back.
Return to the witch's alchemy table and craft Gold Bar in bulk. Twenty to twenty-five minutes of this loop yields enough Gold Bars to cover an entire Aeserion forging session.
8. Farm Bismuth Ore at Drakefall Castle
Travel north of Demeniss and Hernand to Drakefall Castle, which sits west of the Ancient Rift label and south of Drakefall Gorge. Locate the shiny patches scattered through the ruin and activate the Bismuth Oreback Crabs with Blinding Flash before attacking. Each crab drops around 15 Bismuth Ore. Leave one patch (the one beside the skeleton head is a clean marker) undisturbed so the rest of the patches repopulate the next time you return.
9. Strip-mine Copper Ore and Azerite
Glide or sail to the island directly east of the Demeniss label. The shoreline is dense with Copper Ore and Azerite veins, and both nodes repopulate every few days, making this the simplest return loop in the chain.
10. Craft Platinum and Forge at the Smithy
With Brimstone, Mercury, Holy Water, and Gold Bar in your inventory, craft Platinum at the witch using the formula from the Scholastone Institute. Carry the Platinum, Aeserion's Scales, and any remaining materials to the smithy and select Aeserion Halberd from the unlocked Aeserion list.
Tips
The serpent at the Serpent Shrine does not attack the player. The risk comes from the soldiers firing on it, so glide past them rather than trying to fight your way through.
Read every page on both sides of the Aeserion book. Even one missed page locks part of the Aeserion crafting list at the smithy.
Stack Holy Water purchases on a single church visit so you do not have to backtrack mid-craft.
Bring ice-imbued arrows before leaving for Deadfire Mountain. Without the ice element unlocked, the Mercury pond will not freeze.
Leave one Oreback Crab patch at Drakefall Castle untouched so the other patches repopulate.
Aeserion Halberd sits in the same top-tier bracket as the Aeserion Longsword, Aeserion Halberd, and Aeserion Sword, which the forging guide singles out as the strongest picks in the set.
See Also
Two-Handed Weapons - All two-handed weapon types
Two-Handed Spears - Pure thrust polearms
Two-Handed Greataxes - Pure cutting two-handed weapons
Weapons and Equipment - Full weapons overview
Combat System - Guide to combat mechanics
Database Stats
Grade: T5 · Type: HALBERD · Max Refinement: +10 · Max Attack: 39 · Max Critical Rate: REFINEMENT
Refinement Levels
Level | Attack | Attack Speed | Critical Rate | Price (Silver) | Materials |
|---|---|---|---|---|---|
+0 | 14 | Lv 1 | 3,180 | - | None |
Crafted at: Smith.