Overview
Fast travel in Crimson Desert is handled through a network of Abyss Nexus waypoints scattered across the continent of Pywel. These ancient stone platforms serve as teleportation points, letting players instantly warp between any two activated Nexus locations from the world map. There are 47 Abyss Nexus fast travel points spread across five major regions: Hernand, Pailune, Demeniss, Delesyia, and the Crimson Desert.
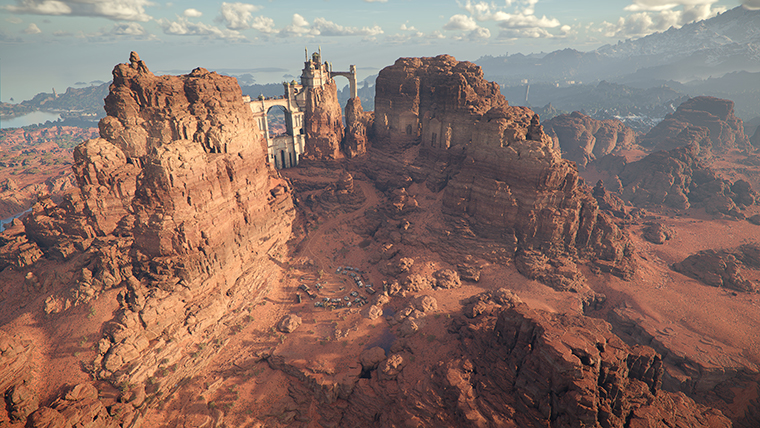
Unlike many open-world games, Crimson Desert does not hand you fast travel for free. Every single Nexus point must be discovered and activated through exploration. They appear as flat stone platforms with an engraved circular pressure plate in the center. Walking onto the plate activates the Nexus permanently, turning its map icon from a white question mark to a blue fast travel symbol.
In addition to Abyss Nexus points, the game also features Abyss Cresset locations that function as fast travel points after solving a puzzle. This guide focuses exclusively on the 47 standard Abyss Nexus locations.
How to Discover Abyss Nexus Points
Undiscovered Abyss Nexus locations show up on your map as large white circles marked "Mysterious Energy" with a question mark icon. These search areas indicate that something of interest is nearby, but not every Mysterious Energy zone contains an Abyss Nexus. Some contain Sealed Abyss Artifacts, Abyss Cressets, or Ancient Ruins puzzles instead.
To pinpoint the exact location of a Nexus within a Mysterious Energy zone, use the following approach:
Use Blinding Flash (Guiding Light): Press L1+R1 (PlayStation), LB+RB (Xbox), or Ctrl+Left Click (PC) to activate Kliff's Blinding Flash ability. This sends out a pulse of light that reveals nearby points of interest as glinting trails in the distance.
Seek Higher Ground: Blinding Flash works best when you have a clear line of sight. Climb to a hilltop, cliff edge, or rooftop before using it so the light trail can reach farther.
Follow the Light Trail: When Blinding Flash detects something, a faint trail of light points toward the location. Follow it to find the stone platform.
Step on the Pressure Plate: Once you find the flat stone platform, walk onto the circular disc in the center. After a brief moment, the Nexus activates permanently and appears as a blue icon on your map.
Unfogging the Map First
Before hunting for all 47 Nexus points, it is highly recommended to ring all eight bells scattered across Pywel. Each bell clears the fog of war from a large section of the map, revealing terrain, roads, and points of interest. Once all eight bells have been rung, the entire map is visible, making it much easier to spot Mysterious Energy zones and plan efficient routes between them. See the Fog of War and Map Discovery article for details on bell tower locations.
How to Use Fast Travel
Once you have activated at least two Abyss Nexus points, you can fast travel between them:
Open the World Map and locate the blue Abyss Nexus icon at your desired destination.
Hover over the icon and press Triangle (PlayStation), Y (Xbox), or double-click (PC) to teleport.
Make sure you are not mounted when attempting to fast travel. Dismount your horse first, then open the map.
On the map filters, make sure either the "All" or "Environment" tab is selected so that fast travel icons are visible.
Hernand Region (12 Locations)
The Hernand region is the central plains area and your primary base of operations early in the game. It has the densest cluster of fast travel points, with 12 Abyss Nexus locations covering everything from the castle to the surrounding countryside.
# | Location | Area | Notes |
|---|---|---|---|
1 | Northwest Hernand | On the road toward Calphade; one of the first Nexus points most players find | |
2 | Central Hernand (North) | Hernand City Outskirts | Near the stables north of the city |
3 | Central Hernand (South) | Hernand City Outskirts | West side of the city, near the Kuku Iron Pot crafting area |
4 | Northwest of the castle grounds | ||
5 | Requires a puzzle to activate; the centerpiece must be recovered from a cave near Karin Quarry using Force Palm | ||
6 | Western Hernand | Deep in the forest west of the main city | |
7 | Hernand South | Southern Hernand | South of the Goldleaf Guildhouse, near Pororin Village |
8 | Southern Hernand | Near the research institute; accessible after Chapter 4 | |
9 | The Ironwood | Eastern Hernand | In the dense woodland east of the main road |
10 | Willow River | Central Hernand | Along the riverbank running through the heart of the region |
11 | Lower Nas River | Southeast Hernand | Near the lower stretch of the Nas River |
12 | Northeast Hernand | Further upstream along the Nas River, near the regional border |
Pailune Region (10 Locations)
The Pailune region lies to the north and features mountainous terrain, thick forests, and the Silver Wolf Mountain range. Its 10 Abyss Nexus points cover a wide area from the southern peaks to the northern highlands.
# | Location | Area | Notes |
|---|---|---|---|
1 | Southern Pailune | On a high vantage point overlooking the southern approach | |
2 | Central Pailune (East) | Central Pailune | Eastern side of the central woodland area |
3 | Central Pailune (West) | Central Pailune | Western side of the central area, near trade routes |
4 | Central Pailune (South) | Central Pailune | Southern edge of the central zone |
5 | Wayward Woods | Western Pailune | In a clearing within the western forest |
6 | Pailune West | Western Pailune | Near the western border of the region |
7 | Silver Wolf Mountain (South) | On the southern slopes of the mountain range | |
8 | Silver Wolf Mountain (North) | Higher up on the northern face of the range | |
9 | Pailune North | Northern Pailune | In the northern highlands near the regional border |
10 | Pailune Town | Pailune Settlement | Inside or adjacent to the main Pailune settlement |
Demeniss Region (6 Locations)
The Demeniss region is a mid-sized area with 6 Abyss Nexus locations spread from Anvil Hill in the west to Breezeblown Knoll in the east. One particularly useful Nexus sits near the fair just outside the city gates.
# | Location | Area | Notes |
|---|---|---|---|
1 | Anvil Hill | Western Demeniss | Near the Stoneback Crab Cave on the western edge of the region |
2 | Central Demeniss | Central Demeniss | Near the fair outside the Demeniss city gates; one of the most useful points in the region |
3 | Demeniss Town | Demeniss Settlement | Inside or adjacent to the main town area |
4 | Demeniss North | Northern Demeniss | Along the northern road leading out of the region |
5 | Demeniss East | Eastern Demeniss | On the eastern side of the region |
6 | Breezeblown Knoll | Far Eastern Demeniss | On a windswept hill at the far eastern edge |
Delesyia Region (6 Locations)
The Delesyia region covers coastal and island territory in the south. Its 6 Abyss Nexus points include an island location and the port town of Dewhaven.
# | Location | Area | Notes |
|---|---|---|---|
1 | Delesyia North | Northern Delesyia | Near the northern approach into the region |
2 | Delesyia Island | Offshore Island | On a small island off the coast; requires swimming or a boat to reach |
3 | Gorthak Area | Near the Gorthak Ironworks industrial area | |
4 | Delesyia Town | Delesyia Settlement | Inside or adjacent to the main settlement |
5 | Mount Benus | Southern Delesyia | On the slopes of Mount Benus in the south |
6 | Dewhaven | Dewhaven Port | At the coastal port town of Dewhaven |
Crimson Desert Region (13 Locations)
The Crimson Desert region is the largest single area for fast travel coverage, with 13 Abyss Nexus points. It spans the southern stretches, the Tashkalp area, Forebearer's Barrens, and the town of Varnia. This region becomes more accessible in the later chapters of the story.
# | Location | Area | Notes |
|---|---|---|---|
1 | Crimson Desert South (East) | Southern Desert | Eastern side of the southern desert expanse |
2 | Crimson Desert South (West) | Southern Desert | Western side of the southern desert |
3 | Tashkalp Inner Town | Tashkalp | Inside the main settlement of Tashkalp |
4 | Tashkalp (North) | Tashkalp Outskirts | North of the Tashkalp settlement |
5 | Tashkalp (East) | Tashkalp Outskirts | East of the settlement |
6 | Tashkalp (South) | Tashkalp Outskirts | South of the settlement area |
7 | Forebearer's Barrens (Northwest) | Forebearer's Barrens | Northwestern corner of the Barrens |
8 | Forebearer's Barrens (Northeast) | Forebearer's Barrens | Northeastern section of the Barrens |
9 | Forebearer's Barrens (Southwest) | Forebearer's Barrens | Southwestern area of the Barrens |
10 | Forebearer's Barrens (Southeast) | Forebearer's Barrens | Southeastern edge of the Barrens |
11 | Outlaw Canyon | Central Desert | In the canyon area between the desert zones |
12 | Trader's Expanse | Central Desert | Along the main trade route through the desert |
13 | Varnia Town | Varnia | Inside or adjacent to the desert town of Varnia |
Region Summary
Region | Number of Nexus Points |
|---|---|
12 | |
10 | |
6 | |
6 | |
13 | |
Total | 47 |
Sky Map Fast Travel
In addition to the 47 ground-level Abyss Nexus points, Crimson Desert offers a separate fast travel system through the Sky Map. As you complete Abyss Restoration challenges throughout the game, you unlock fast travel points on floating sky islands above the world. From these islands, you can skydive down to the surrounding landscape, providing an alternative way to reach remote areas quickly.
Sky island fast travel points are separate from ground-level Abyss Nexus locations. They unlock through the Abyss Restoration system rather than through exploration, and traveling from a sky island involves a short skydiving sequence rather than an instant teleport. Note that not all playable characters can use sky island fast travel points.
Abyss Cressets vs. Abyss Nexus
Do not confuse Abyss Nexus points with Abyss Cressets. Both serve as fast travel locations, but they work differently:
Abyss Nexus: Flat stone platforms activated by stepping on the pressure plate. No puzzle or combat required (with one exception at Howling Hill).
Abyss Cresset: Small pillars that require completing a trial, puzzle, or challenge before activation. Interacting with a Cresset also rewards a Sealed Abyss Artifact.
The Howling Hill Special Case
The Abyss Nexus at Howling Hill near the Greymane Camp is unique among all 47 Nexus points because its centerpiece is missing when you first discover it. The circular teleportation stone has been removed, and you need to retrieve it before the Nexus can function.
To fix the Howling Hill Abyss Nexus:
Progress through the story until you have completed Chapter 4 and learned the Force Palm: Focus ability at the Scholastone Institute.
Travel to Karin Quarry, located south of Hook Rapids and northeast of camp.
Drop into the hole beneath the large crane at the center of the quarry.
Use Force Palm: Focus to destroy the crystal wall blocking the tunnel and retrieve the missing teleportation stone.
Return to Howling Hill and the Nexus will activate automatically.
Tips for Finding All 47 Nexus Points
Ring all eight bells first. This removes all fog of war from the map, revealing every Mysterious Energy zone. See Bell Locations for the full list.
Check the map filter settings. Make sure you have the "All" or "Environment" filter tab selected on your map. Otherwise, Abyss Nexus icons may be hidden.
Not every Mysterious Energy zone is a Nexus. White question mark zones can also contain Abyss Cressets, Ancient Ruins, or Secret Places. If Blinding Flash reveals a structure that does not look like a flat stone platform, it is likely one of these other types.
Dismount before teleporting. You cannot fast travel while riding a horse. If the teleport option is grayed out, dismount and try again.
Use the Exploration and Traversal guide. For broader tips on navigating Pywel efficiently, see the Exploration and Traversal article.
Track your progress with challenges. Discovering all fast travel points contributes to various exploration challenges and overall map completion.
See Also
Fast Travel
Sky Map and Fast Travel
Abyss Cresset Locations
Sealed Abyss Artifact Locations
Bell Locations
Fog of War and Map Discovery
Exploration and Traversal
Map Completion Guide