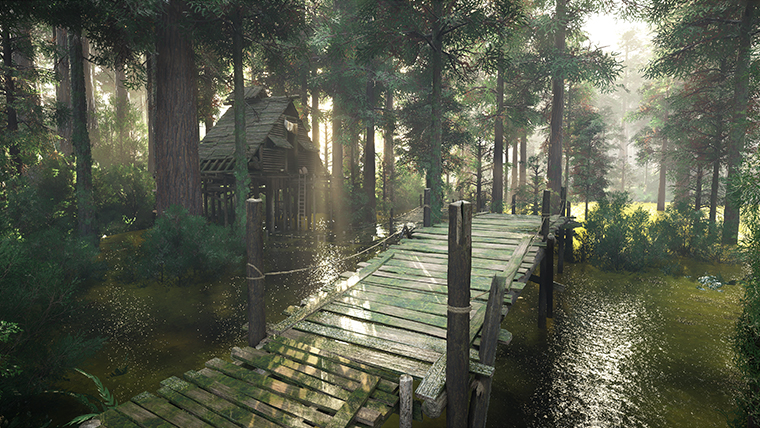
Overview
There are 16 sanctums scattered across the world of Pywel in Crimson Desert. These ancient ruins have been overtaken by hostile forces known as the Antumbra, and cleansing each one is required to progress the witch faction questlines, earn powerful Kuku weapon and armor blueprints, and unlock the Lightbringer trophy/achievement. This guide covers every sanctum location, the puzzle solution for each, and the rewards you receive for restoring them.
Fifteen sanctums are available as open-world exploration challenges tied to four witches. The sixteenth, the Sanctum of Mortification, is encountered during Chapter 9 of the main story. Completing all 16 is necessary for 100% game completion.
Prerequisites
Before you can cleanse any sanctum, two conditions must be met. First, you need the Kuku Pot, which is obtained automatically during Chapter 4 in the main quest "The Mysterious Pot." The Kuku Pot allows you to seal and transport Fusion Reactor Cores that are too large or too awkwardly placed to carry directly to the sanctum generators.
Second, you must meet the witch associated with each sanctum. If you approach a sanctum before meeting the correct witch, a message will tell you that your connection is not strong enough. You can still defeat the enemies at that location, but the puzzle components will not respond to Axiom Force until the corresponding witch quest is active.
The first witch most players encounter is Elowen, the Witch of Wisdom, who is introduced during Chapter 5 of the main story. The remaining three witches are discovered through acts of kindness in the open world.
General Sanctum Mechanics
Every sanctum follows the same basic structure, though the specific puzzle layout differs from site to site. Understanding the core loop will help you approach each one with confidence.
Liberate the sanctum. When you arrive, the area is overrun by Antumbra worshippers. Defeat all hostiles until the green progress bar reaches 0%. Enemy groups typically consist of 6 to 10 fighters spread across the ruins, and most sanctums have roughly 40 enemies in total. Some sanctums also feature a named boss such as Antumbra's Sword, Antumbra's Spear, or Antumbra's Staff.
Find the puzzle components. Each sanctum has a central generator (also called a device or reactor). One or two components are missing: a cylindrical pillar top and/or a cube-shaped power core. These pieces are hidden inside nearby buildings, behind walls, under breakable floors, or sealed behind vine-covered doorways.
Transport the components. Use Axiom Force (hold L3 on controller or TAB on keyboard) to grab and carry objects. If a piece is trapped behind bars or in an unreachable spot, seal it inside your Kuku Pot (Triangle / Y / R), walk to the generator, open your inventory, and discard the item from the pot to spawn it beside you.
Install the pillar top. Position the cylindrical piece above the broken pillar and rotate it until green leaf particle effects appear, indicating correct alignment. Then climb on top and perform a jumping Force Palm (jump + R3 on controller or jump + Mouse Wheel on keyboard) to lock it into place. The grounded Force Palm often does not work for pillar tops; you must use the aerial version.
Insert the power core. Carry the cube-shaped core to the hole on the side of the generator. Align it until leaves appear, then use Force Palm or Force Current to push it flush into the slot.
Speak to the witch. Once both pieces are installed, the generator powers up and an illuminated square appears on the ground. Stand in the square to trigger a cutscene where the associated witch appears and shares lore about the sanctum. If the witch does not appear automatically, walk toward the light.
Sanctum Puzzle-Solving Guide
All sanctums share the same basic motif and puzzle structure. Once you understand the core loop, every sanctum becomes approachable. Here is a step-by-step walkthrough of the general puzzle-solving process that applies to every sanctum.
Step 1: Liberate the Sanctum
When you arrive at a sanctum, the area is overrun by Enumbra's followers. Massacre all hostile forces until the area is clear. You cannot interact with puzzle components while enemies remain active.
Step 2: Locate the Central Generator (Kiln)
Head to the oddly-looking magical contraption at the center of the sanctum. This is the kiln or generator. It has four pillars surrounding a central core. In most sanctums, you will notice that one pillar is broken and one cubic reactor is missing from the core.
Step 3: Check the Mini Map for Components
Open your mini map and look for two distinct icons near the sanctum. One icon represents the missing pillar piece and the other represents the missing reactor (the cubic power core). Both components are always within a short radius of the sanctum itself, so if you find yourself wandering far from the ruins, you have gone too far.
Step 4: Retrieve the Reactor (Cubic Core)
The cubic reactor is often hidden in a passageway, behind bars, or in an otherwise hard-to-reach spot. Use Axiom Force to grapple it. If the reactor is behind bars or in a confined space, seal it inside your Kuku Pot (Triangle / Y / R) so you can carry it through tight spaces. When you reach the generator, open your inventory and select Discard (not Withdraw) to drop the reactor next to you. Then grapple it with Axiom Force and push it into the core slot using Force Palm.
Step 5: Retrieve the Pillar Piece
The pillar piece may require solving a small sub-puzzle to access. Common obstacles include ice walls you need to break with your Pickaxe (just hit it repeatedly), vine-covered doorways that must be burned with Focused Light, or water-filled chambers that drain once a barrier is destroyed. Check surrounding buildings and walls for unusual openings or breakable surfaces.
Step 6: Install the Pillar Piece
Grapple the pillar piece with Axiom Force and carry it to the broken pillar on the generator. Place it on top and rotate until green leaf particle effects appear, confirming correct alignment. Then climb on top of the pillar piece and perform a jumping Force Palm (jump first, then Force Palm mid-air) to lock it into place. The grounded Force Palm often does not work for pillar installations; you must use the aerial version.
Step 7: Install the Reactor
If you stored the reactor in your Kuku Pot, discard it from your inventory (use Discard, not Withdraw). Grapple the cubic reactor and carry it to the hole in the side of the generator's core. Align it until green leaves appear, then use Force Palm to push it flush into the slot.
Step 8: Find the Hidden Chest
Every sanctum location has at least one hidden chest. Look for flower growth on building walls or unusual vegetation on structures. These flowers indicate a hidden chest is nearby. Some chests require additional steps to access, such as lighting torches to open a sealed door. Always explore thoroughly after completing the puzzle to collect all available loot.
Sanctum Quest Scope
Four witches have sanctum quests (Elo, Barry, Lyselia, and the Witch of Strength), and each witch assigns approximately four sanctums. That totals roughly 16 sanctums across the game, each containing unique loot, blueprints, and Abyss Gear rewards. Tackling sanctums as soon as each witch's quest becomes available provides a steady stream of powerful gear throughout the game.
Key Controls Reference
Action | Controller | Keyboard/Mouse |
|---|---|---|
Axiom Force (grab/carry) | Hold L3 (Left Stick click) | Hold TAB |
Force Palm (connect) | Press R3 (Right Stick click) | Press Mouse Wheel |
Aerial Force Palm (jump + connect) | Jump + R3 | Jump + Mouse Wheel |
Seal in Kuku Pot | Triangle / Y | R |
Focused Light (burn vines) | L1 + R1, then hold L1 | CTRL + Left Click, then hold CTRL |
Nature's Grasp (move rock) | Circle + Triangle / B + Y | C |
Witches and Their Sanctums
The 15 open-world sanctums are divided among four witches. A fifth witch, the White Crow, resides in the Wayward Woods and is unlocked only after all four Witch Tokens have been collected by completing every other witch's sanctum assignments. The sixteenth sanctum (Mortification) is tied to the main story rather than a specific witch.
Witch | Title | Location | How to Meet | |
|---|---|---|---|---|
Witch of Wisdom | The Witchwoods, south of Hernand | 4 | Automatic during Chapter 5 main quest | |
Bari | Witch of Kindness | Cabin on Crimson Lake, Pailune | 4 | Light the brazier to warm a shivering woman near Silver Wolf Mountain |
Lyselia | Witch of Humility | Cave in Serpent Marsh, between Demeniss and Delesyia | 4 | Help an NPC hanging off a broken bridge in northern Demeniss |
Areciel | Witch of Strength | Cliff cabin west of World's Navel | 3 | Give a coin to a beggar child near the posthouse in Tommaso |
Wayward Woods Witch | Wayward Woods, Pailune | 1 (story) | Insert all four Witch Tokens into the hideout door |
Elowen's Sanctums (Witch of Wisdom)
Elowen is the first witch most players encounter. She is rescued during Chapter 5 of the main story and resides in the Witchwoods, south of Hernand. After meeting her, four sanctums in the Hernand region become available to cleanse in any order.
Sanctum of Temperance
Location: Hernand, south of Unicorn Cliff. Approach from the north side where the Abyss Nexus is located.
After liberating the sanctum from Antumbra forces, return to the northern entrance and head up the stairs. Turn left to find a building section with a knocked-out wall. Retrieve the cube-shaped power core from inside this opening using Axiom Force and transport it to the device. Position the core in the hole on the eastern side of the generator until leaves surround it, then use Force Current to push it in.
Next, look at the small building adjacent to the device. Its north side has a foliage-covered opening. Burn the vines away using Focused Light (L1 + R1 on controller, CTRL + Left Click on keyboard). Inside you will find the cylindrical pillar top. Grab it with Axiom Force and place it on the broken pillar in the northeast corner. Rotate until leaves appear, then climb on top and perform a jumping Force Palm to secure it.
Rewards: Kuku Lightning Spear and Kuku Bird Boltspitter blueprints.
Sanctum of Absolution
Location: Hernand, Mountain of Frozen Souls (southern section). Enter from the eastern side near the Abyss Nexus.
This is the most challenging of Elowen's sanctums. After clearing the standard enemies, you face Antumbra's Sword, a powerful boss who uses duplicate ground-pound attacks that can kill in a single hit when he powers up. Dodge his magical attacks, parry his standard strikes, and counter during openings. Bring plenty of healing food and focus on applying bleed damage through stab moves. Defeating this boss drops the Vessel of Dark Pursuit two-handed sword and an Abyss Artifact.
After the boss fight, proceed inside the building. Drop through a floor opening to reach the outside area where the generator sits. Enter the northern doorway (watch for fire hazards) to find the cylindrical pillar piece on the left side. Carry it outside and position it above the broken pillar until leaves swirl around it, then jump and Force Palm to lock it in.
Return inside, climb back up through the ceiling hole, and destroy the jars in the hallway to reveal the cube-shaped power core. Use Axiom Force to transport the block outside to the mechanism. Align it with the eastern hole until leaves surround it, then use Force Current to push it into place.
Rewards: Enhanced Kuku Pot blueprint, Kuku Spear blueprint, and Vessel of Dark Pursuit two-handed sword from the boss.
Sanctum of Benediction
Location: Western Hernand, far to the west of the map. Approach from the southern side where the roads are.
After liberating the sanctum, descend the right staircase from the rooftop device, then continue down additional stairs beneath an archway. On the left side you will find a sealed door. Light the torch to the right of this door to open it. Inside the newly opened chamber, the cylindrical pillar piece sits immediately to the left. Before grabbing it, loot the chest in the room, which contains the Legendary Leather Helm of the Fallen Kingdom.
Transport the pillar piece to the broken pillar on the northeast side of the device. Align it until green leaves surround the piece, then climb atop and execute a jumping Force Palm to slot it in.
For the second component, descend the visible stairs on the west side of the device and enter the first right-side door at the bottom. Retrieve the cube-shaped block using Axiom Force. Return to the west side of the device and position it in the slot until leaves appear, then use Force Palm to push it flush.
Rewards: Kuku Marni Laser Helm blueprint.
Sanctum of Penitence
Location: Hernand, between The Ironwood and Unicorn Cliff. Approach from the north side between the building and the device.
This is one of the easier sanctums because it requires only a single Fusion Reactor Core. After liberating the area, look toward the stairs and the wall at the back. Climb up the wall to the top of the building. Once at the summit, proceed left (eastward) down a set of stairs, then immediately down another set. At the bottom, look to the left in the hole to find the cylindrical pillar piece.
Retrieve it and bring it outside to the device in the northern area. Set the piece above the broken pillar and rotate it until green leaves start surrounding it. Climb on top and use Force Palm by jumping and pressing R3 or Mouse Wheel.
Rewards: Kuku Pack blueprint.
Bari's Sanctums (Witch of Kindness)
Bari is found in the snowy northern reaches of Pailune. To meet her, locate a woman shivering from the cold near Silver Wolf Mountain and light the nearby brazier to warm her. She then relocates to a cabin floating on Crimson Lake. Visit her cabin and listen to her request to unlock her four sanctums.
Sanctum of Exaltation
Location: Pailune, just east of Silver Wolf Mountain.
This sanctum has roughly 40 Antumbra enemies, including several flying adversaries with heavy-hitting attacks. After liberation, retrieve the first block from a caged room under the stairs on the eastern side. Use Axiom Force to grab it and place it in the slot on the sanctum's north side, then secure it with Force Palm.
Return to the gated chamber and use your Pickaxe on a broken portion of the northern wall that is blocked by ice. Breaking the ice releases water and drains the area below. Drop down to collect the second piece from a hole in the floor above the drained section using Axiom Force.
Bring this piece to the broken pillar in the southeast corner. Rotate it until green leaves emit from the piece, indicating correct positioning. Climb on top and activate Force Palm to lock it in place.
Rewards: Two Kuku blueprints upon completion.
Sanctum of Solace
Location: Pailune, north of the Ancient Rift. Look for the "A" in Pailune on the world map. The sanctum is southwest of the City of Pailune and east of Bari's cabin on Crimson Lake.
After clearing the standard enemies, you face Antumbra's Staff, a magic-focused boss. This enemy uses ranged magical attacks that must be dodged rather than blocked. Wait for his standard melee strikes to parry and create openings for heavy counterattacks.
Once the area is liberated, cross the bridge to locate the device. Head south from the bridge's center and descend to the lower floor. Find a crack in the northern wall and climb inside to discover a block hidden behind spears. Use Axiom Force to grab it and seal it in the Kuku Pot.
Exit the crack and locate a floating pillar piece in an alcove to the right. Grab it and position it above the broken pillar in the southern corner, rotating until leaves surround it. Jump on top and execute a jumping Force Palm to lock it. Then access the device's southern side, discard the Fusion Reactor Core from your Kuku Pot, grab it with Axiom Force, align it with the hole, and use Force Palm to insert it.
Sanctum of Deliverance
Location: Hernand, east of Stormtalon Ridge. Approach from the southern road.
After liberation, head down the right staircase from the ruins center. Enter the first left doorway and look upward to spot a floating pillar piece visible through a ceiling crack. Use Axiom Force to grab and pull it through the floor. Transport it north to the device and position it above the broken pillar at the northern corner. Rotate until leaves indicate correct alignment, then jump onto it and perform a jumping Force Palm.
For the second piece, climb back via the broken wall to the ruins' top. Find the eastern short wall with two windows and scale to the roof. Step on the ground to collapse it, creating a hole. Drop down to find a floating block below. Grab it with Axiom Force and seal it inside the Kuku Pot.
Return to the device and locate the northwestern block hole. Open your inventory and discard the Fusion Reactor Core from the Kuku Pot. Grab the block, position it against the hole, rotate until leaves appear, and use Force Palm to insert it.
Rewards: Kuku Flame-Resistant Armor and Kuku Frostspitter blueprints.
Sanctum of Atonement
Location: Hernand, adjacent to Haunted Hill. Approach from the east.
After clearing the Antumbra forces (roughly 40 enemies including dangerous flying units), enter through both archways into the main doorway. Use Axiom Force to grab the oversized pillar piece inside, then seal it in the Kuku Pot.
Exit through the original door and find wall openings on the right side. Pass through the lower opening to retrieve a block visible above and to the right. Transport this block to the device in the southwest ruins. Position it in the slot on the device's east side until leaves surround it, then press Force Palm to secure it.
Remove the pillar piece from your inventory by discarding it from the Kuku Pot. Position it atop the broken pillar on the device's north side. Rotate until leaves appear, then jump and Force Palm to complete the installation.
Rewards: Kuku Watcher Pack and Kuku Propeller Spear blueprints.
Lyselia's Sanctums (Witch of Humility)
Lyselia is hidden in a cave in the Serpent Marsh area, on the island between Demeniss and Delesyia. Colorful flags mark the cave entrance. To trigger her questline, first help an NPC who is hanging off a broken bridge in northern Demeniss, west of Deadfire Mountain. She then reveals her true location. Visit her cave and listen to her request to unlock four sanctums.
Sanctum of Devotion
Location: Delesyia, northwest of the Cliff of Despair.
After liberation, locate stairs on the left side of the main courtyard. Follow them to find a floating pillar piece above a doorway. Grab it with Axiom Force and seal it in the Kuku Pot.
Next, climb the stone pillar at the hall's end. Spot a block within a crack in the left wall. Retrieve it and seal it in the Kuku Pot as well.
Find the hole on the device's northeast side. Discard the cube-shaped Fusion Reactor Core from your inventory, grab it, and position it until leaves surround it. Push it in with Force Palm.
Remove the pillar piece from the Kuku Pot and place it on the broken pillar. Rotate until surrounded by leaves, then jump on top and perform a jumping Force Palm to install it.
Sanctum of Veneration
Location: Delesyia, Blue Thicket area on Mount Benus. Approach from the eastern side.
After clearing enemies, jump north from your spawn point onto the ruins below. Land on the small building and hop off the northeast side. Use Nature's Grasp (Circle + Triangle on controller, C on keyboard) on the center section of the building to lift the rock and reveal a block underneath. Retrieve it using Axiom Force.
Transport the block westward to the upper device area. Locate the hole on the device's south side. Align the block until leaves appear, then use Force Palm to punch it into place.
Sanctum of Oblation
Location: Delesyia, west of Marni's Laboratorium. Approach from the south via the road.
After liberation, head east through the doorway. Turn left, proceed through another doorway, and turn right. Walk to the hallway's end where stairs with webbing are visible. Descend to find additional stairs leading deeper underground. At the bottom, locate the cylindrical pillar piece in the room ahead. Use Axiom Force to grab it, then seal it in the Kuku Pot.
Exit and find the broken pillar to the north. Open your inventory, discard the Fusion Reactor Core from the Kuku Pot, and pick it up with Axiom Force. Position it above the broken pillar until leaves begin surrounding it. Climb atop and perform a jumping Force Palm to slot it in.
Sanctum of Faith
Location: Delesyia, east of The Grey Forest. Approach from the west along the road.
After liberation, you spawn on a ledge facing south. Descend to the thorny vines below and use Focused Light (L1 + R1 on controller, CTRL + Left Click on keyboard) to burn them away. Enter the doorway to find a floating block.
Grab the block with Axiom Force and transport it to the device in the northeast area. Align it with the hole on the device's north side until surrounded by leaves, then slot it using Force Palm.
Enter the building adjacent to the device from the south side to find the floating cylindrical pillar piece. Locate the broken pillar on the northeast side of the device. Position the piece above it until leaves surround it, then climb on top and perform a jumping Force Palm.
Areciel's Sanctums (Witch of Strength)
Areciel is the final witch and the hardest to reach. Her cabin is built on a sheer cliff west of World's Navel in the far eastern reaches of Pywel. To initiate her questline, find a beggar child near the posthouse in Tommaso and give him a coin. The boy vanishes and you are directed to Areciel's cabin. Climb to the roof to speak with her. Areciel becomes available after completing Chapter 8 and the early portion of Chapter 9. She assigns three sanctums.
Sanctum of Expiation
Location: Demeniss, north of the Gate of Truth. Approach from the eastern road.
After liberation, proceed northward and drop off the ledge. Burn the thorns blocking a doorway using Focused Light. Crouch through the opening, descend the path, climb up, and continue until you reach another drop point. Clear the foliage from a second door opening the same way.
Look up to the right to find the cube-shaped power core. Grab it using Axiom Force, bring it to the device on the right, and use Force Palm from the south side to push it into place.
For the pillar piece, scale the northern ruins' back wall to reach the roof. Run across the breakable floor to destroy it, then drop inside. The pillar piece is behind windows in the northeast corner. Collect it with Axiom Force and seal it in the Kuku Pot.
Return to the device and discard the pillar piece from your inventory. Position it above the broken northwest pillar, rotate until leaves indicate correct placement, and perform a jumping Force Palm to complete the installation.
Sanctum of Renunciation
Location: Demeniss, west of the Red River. Approach from the south.
After liberation, enter the building ahead. Look for a hole in the bars on the left side, then check the right wall's upper hole to find the cylindrical pillar piece. Use Axiom Force to grab it and seal it in the Kuku Pot.
Head right through another hole in the bars, then left into broken wall sections. The upper section contains the cube-shaped block. Retrieve it and carry it to the device. Find the open hole on the device's south side, align the block until leaves appear, and use Force Palm to push it in.
From your inventory, discard the pillar piece from the Kuku Pot. Place it over the broken western pillar, rotate until leaves appear, then jump and Force Palm to secure it.
Sanctum of Revelation
Location: Demeniss, north of the Bamboo Forest. Approach from the south.
This sanctum has a boss encounter with Antumbra's Spear, a fast and aggressive enemy that relies heavily on magic-based attacks. Dodging is more effective than blocking against this boss. Parry his standard attacks and use heavy strikes to fill the stagger meter beneath his health bar.
After liberating the sanctum, head west from the boss courtyard to find an isolated building with a collapsible roof. Step on the roof to open it and reveal the pillar piece inside. Carry it back to the device, position it above the broken pillar in the western corner, rotate until leaves appear, and jump on top for a jumping Force Palm.
From the device facing east, locate a floating block on the ledge above. Grab it and align it with the hole on the north side until leaves indicate correct positioning. Use Force Palm to push the block into place.
Rewards: Blueprint II: Kuku Rishi's Boots.
Sanctum of Mortification (Story Sanctum)
Location: Demeniss, near the Denn River. This sanctum is encountered during Chapter 9 of the main story as part of the quest "Fragments of Darkness." Unlike the other 15 sanctums, you cannot visit this one freely; it only becomes accessible during this specific story mission.
The quest objective marks an orange search area on your map, but this area is misleading. The objects you need are actually outside the marked zone. Do not waste time searching within the highlighted area.
Enter the north side of the main building on the bottom floor. Inside you will find the dome of the broken pylon. Use Axiom Force to lift it, then carry it upstairs and out of the building. Place the dome on top of the broken pylon outside. When positioned correctly, green leaves will fly around it. Climb to the top of the dome and perform a jumping Force Palm to connect it, triggering electrical activation.
Head to the north side of the sanctum, just outside the ruins where you found the pylon dome. Look for vines on the wall and burn them away using Concentrated Light. This reveals a cube behind the vines, though it can be hard to see. Grab the cube through the grate using Axiom Force, then seal it in the Kuku Pot.
Open your inventory and discard the Fusion Reactor Core from the Kuku Pot. Retrieve it with Axiom Force and install it in the reactor tower's side slot using Force Palm. A cutscene plays upon completion, ending the quest.
Completing All Sanctums
After cleansing all 15 open-world sanctums, each witch grants you a Witch's Token. Collect all four tokens (one from Elowen, Bari, Lyselia, and Areciel) and travel to the Wayward Woods in southern Pailune. Approach the door of the witch hideout and insert all four tokens. This opens the door to the White Crow, who unlocks the most powerful Abyss-related capabilities in the game.
The sixteenth sanctum, the Sanctum of Mortification, is completed as part of Chapter 9's main story and does not count toward the Witch Token requirements. However, it is necessary for the Lightbringer trophy/achievement, which requires all 16 sanctums to be cleansed.
Full Sanctum Reference Table
Sanctum | Region | Witch | Notable Feature |
|---|---|---|---|
Vine-covered door requiring Focused Light | |||
Antumbra's Sword boss fight; drops Vessel of Dark Pursuit | |||
Western Hernand | Lantern-activated sealed door; hidden treasure chest | ||
Single core required; easiest sanctum | |||
Bari | Ice wall requiring Pickaxe; water drainage puzzle | ||
Bari | Antumbra's Staff boss fight | ||
Bari | Collapsible roof; Kuku Pot transport required | ||
Bari | Flying enemies; both components sealed in Kuku Pot | ||
Lyselia | Both components require Kuku Pot sealing | ||
Lyselia | Nature's Grasp ability needed to lift rock | ||
Lyselia | Deep underground descent with web-covered stairs | ||
Lyselia | Thorn vines requiring Focused Light | ||
Areciel | Breakable floor; vine-blocked passageways | ||
Areciel | Navigate through holes in iron bars | ||
Areciel | Antumbra's Spear boss fight; collapsible roof | ||
Story (Ch. 9) | Misleading quest marker; only available during Fragments of Darkness |
Tips and Strategies
You can cleanse sanctums in any order within a witch's set. Start with the Sanctum of Penitence if you want the easiest puzzle to learn the mechanics.
Bring fire arrows or have the Blinding Flash ability equipped. Several puzzles require burning vines or lighting lanterns, and running out of tools mid-puzzle wastes time.
Clear every enemy before attempting the puzzle. Environmental objects such as Fusion Reactor Cores and pillar tops will not respond to Axiom Force while enemies are still active nearby.
If a pillar top does not seem to snap into place, make sure you are using the jumping Force Palm (jump first, then Force Palm mid-air). The grounded version often fails on pillar placements.
Watch for green leaf particle effects when dragging a Fusion Reactor Core or pillar top. These effects confirm that you are moving the component in the correct direction and that it is close to its final position.
Puzzle components are always within a short radius of the sanctum itself. If you find yourself wandering far from the ruins, you have gone too far.
Use the sword obtained from Crowcaller when dealing with flying Antumbra enemies. Its projectiles home in on airborne targets, making these fights much easier.
Mark sanctum locations through your Journal once the witch quest is active. Waypoints save a significant amount of wandering.
For the Sanctum of Absolution boss fight (Antumbra's Sword), bring plenty of healing food and avoid being greedy with attacks. Focus on bleed damage through stab moves while waiting for openings after the boss finishes his attack chains.
The Sanctum of Mortification's orange quest marker is intentionally misleading. Look outside the marked area, particularly to the north of the ruins, for the components you need.
See Also
Witches of Pywel
Kuku Iron Pot
Fusion Reactor Cores