Loading...
Loading...
NPC Crew
May 8, 2026 at 09:11 AM
Applied Title Case to body headings
NPC crew members play a central role in Windrose, handling tasks from base management to ship combat. The game features several types of NPC interaction: quest-givers, merchants, contractors for automated work, and ship crew who fight alongside you during boarding actions.
Doctor Galen Skelton is the first NPC the player encounters. He appears at your camp after you mine copper ore during the Islander tutorial. He provides the player's first rowboat, unlocks two main quests (Rescuing the Crew and I Need a Bigger Boat), and offers a free Minor Healing Potion (35% HP restore) approximately every hour of in-game time.
Doctor Galen can be settled at any Bonfire via the Guests tab (press E at a Bonfire, select Settle). He can appear at multiple bonfires simultaneously. Warning: do NOT use the Evict option, as it can cause him to disappear permanently.
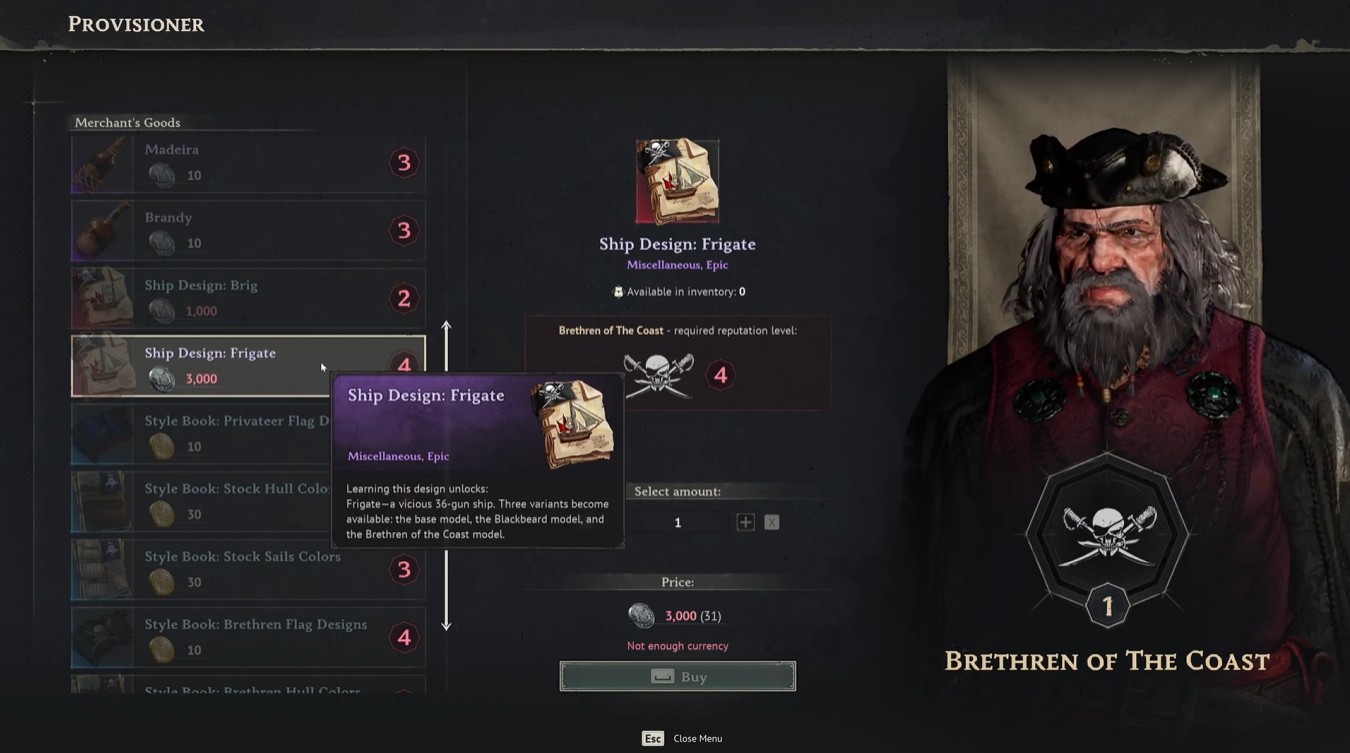
Three buildable merchant stalls provide access to goods at your settlement. Each requires a Merchant Contract item, a roof, and must be within Bonfire range. All merchants trade in piastres (the in-game currency). Advanced goods unlock after clearing threats on the island.
Merchant | Basic Goods | Advanced Goods (after clearing threats) |
|---|---|---|
Animal Products | Meat, Rough Hide, Hog Tusk, Grease, Wolf Fang, Mountain Goat Horn, Bezoar | |
Sweet Potato, Cayenne Pepper, Lime, Aloe, Corn, Tomato, Flax (plus seeds) | ||
Natural Resources | Wood, Stone, Clay, Plant Fiber | Copper Ore, Iron Ore, Sulfur, Hardwood, Tree Bark |
The Farming Contractor automates crop production for players who prefer to spend time on combat and exploration:
Detail | Value |
|---|---|
Unlocked | After reaching Tortuga |
Purchase Cost | 10 gold coins from the Recruitment Vendor |
Job Cost | 50 seeds of a single plant type + 20 silver coins |
Processing Time | 8 hours (works passively, including while offline) |
Returns | 50 seeds back + harvested crop resources |
Interference | Does not affect your personal Seedbed crops |
See Farming and Fishing for details on the 8 plantable crop types and the farming system.
A Miner NPC can be unlocked later in the game to gather Sulfur passively and efficiently. Sulfur is otherwise obtained by mining Foothills deposits with an Iron Pickaxe once your iron-tool progression is online, and the Miner NPC helps smooth out that gunpowder-crafting bottleneck over time.
As you progress, a small group of NPCs becomes available at your base. They can assist with tasks such as gathering resources or crafting essential items and gear, "for a price." The system is entirely optional. Workers can be assigned to handle tasks at your base, such as manning workstations, reducing repetitive micromanagement.
Crosswind Devblog #1 (April 24, 2025) covered "Life on your base & NPC workers" as a key topic. Devblog #2 confirmed that "wanderers, merchants, quest-givers, or would-be crewmates" will occasionally arrive at your settlement, described as "the first step toward a broader crew system" that will eventually "forge connections between land-based NPCs and ship roles."
The "Rescuing the Crew" quest requires the player to free multiple captured crewmates from pirate camps across the starting island chain. These crew members are needed to repair a shipwreck in the "I Need a Bigger Boat" quest (100 Wood, 20 Nails, 20 Coarse Fabric, 10 Ropes). After the ship is repaired, the crew operates it alongside the player.
NPC crew members are visible on ship decks and have been actively developed:
Crew members have visible animations: shooting cannons, reloading, and fighting during boarding actions
Deckhands head below decks, sleep in hammocks, and follow day-night routines
Crew sing sea shanties while sailing, triggered by the player at the helm
Once recruited, crew members stay on the ship unless boarding an enemy vessel
During boarding, crew fight alongside the player. Unupgraded crews die quickly; fully upgraded crews can handle most enemies independently
Boarding Party Gear is ship equipment that improves NPC crew combat performance during boarding. It is crafted at the Shipwright's Workshop (7 Copper Ingots + 7 Rough Hide + 7 Coarse Fabric) and equipped via the Wharf's ship management interface. Upgrading at the Shipwright's Workshop Upgrade tab increases crew HP, Defense, and Attack. This is the single most impactful preparation for boarding encounters.
In co-op multiplayer, groups can currently include up to 8 players total, though official sources still recommend closer to 4 for smoother late-game performance, and each player commands their own ship with NPC crew filling the other roles. Developer Yar_master confirmed: "At this point, one player commands one ship. We will consider such features for the future." The FAQ mentions exploring "allowing multiple players to crew a single ship, with each person taking on distinct roles and responsibilities."
Multiple currencies and payment systems exist for NPC services:
Currency | Used For |
|---|---|
Purchasing goods from the three merchant stalls | |
Gold coins | Purchasing NPC contractors (e.g., Farming Contractor for 10 gold) |
Silver coins | Paying per-job costs for NPC contractors (e.g., 20 silver per farming job) |
NPC workers at the base also charge for their services in currency, creating a gold sink that gives money a purpose beyond gear purchases. Trade goods (Naval Supplies, Medical Crates, Contraband) collected from enemy ships and pirate camps are sold to Traders at Tortuga for currency.
The developers have indicated several NPC-related improvements:
Multi-crew ships where co-op players take distinct roles (under consideration)
Wandering NPCs arriving at settlements for recruitment
Connections between land-based NPCs and ship roles
The Brig ship class is receiving additional crew-related gameplay mechanics
Ship progression and crew systems planned for expansion during Early Access
A second tier of NPC help becomes available once you reach Tortuga. These are base workers hired from NPC vendors for a community-reported flat fee of around 500 piastres each. Unlike the ship crew, base workers do not wander or interact on camera; they are assigned to specific crafting stations from the bonfire's worker tab or from the station's own worker slot, and they then contribute a passive percentage chance to bonus outputs whenever that station is used.
Worker | Specialty | Assigned Station | Effect |
|---|---|---|---|
Master Salvager | Disassembly bench and armor upgrade station | 30% chance to recover resources spent upgrading gear (most reliable on armor) | |
Master Bottle Maker | Alchemist station | Doubles Clay Bottle production plus 30% chance to craft an extra elixir | |
Cook helper | 30% chance to craft an extra meal |
Jasper Crow is usually the first pick because cannon and armor upgrades both burn through huge quantities of Copper Ingots and Wooden Planks. Even an armor-only refund rate pays back the hire cost within a handful of upgrade sessions. Rosalinda Mercer earns her keep once alchemy recipes open up and elixirs become a scheduled combat preparation step; the double Clay Bottle output is especially valuable because bottles are a common recipe bottleneck. Black Axel fits groups that burn through meals quickly, such as co-op squads preparing boarding assaults together.
After hiring, a worker's name appears in the Workers tab at the bonfire. Open that tab, pick the worker, and assign them to the target crafting station. Each station also has its own worker slot accessible from the station menu; either interface works and they reflect the same underlying assignment.
Workers do not need beds or a separate home; they are abstracted onto the station. Early Access reports from launch confirmed that workers do not share the ship crew system, so a base worker assigned to the Disassembly bench has no effect on a boarding fight and vice versa. Do not expect to see hired workers wandering the camp interacting with props; their only visible presence is the name badge at the station they're assigned to.
Developer posts during Early Access described the two systems (base workers and ship crew) as steps toward a unified crew framework. For now, think of it this way: base workers buff your camp economy, while the ship crew from the Rescuing the Crew quest plus Boarding Party Gear decides your combat survivability at sea.
The seven sailors you rescue in the Rescuing the Crew quest operate your main combat vessel. They man cannons, reload, sing sea shanties while sailing, and board alongside you during boarding actions. Upgrading Boarding Party Gear at the Shipwright's Workshop directly raises their HP, Defense, and Attack during boarding, turning them from speed bumps into competent combatants.
The single most important fact about ship crew and your own character during boarding is that death has no checkpoint. If you die mid-boarding, the entire naval encounter resets, including any cannon damage you already dealt. This is what makes Boarding Party Gear the top priority ship upgrade in the game; a crew that holds aggro keeps you alive, and a dead captain re-rolls the whole fight.
Launch-build creator guides describe the recruit system as one of the strongest long-term investments in the game, specifically because of the percentage-based output bonuses recruits apply to the stations they are assigned to. The general rule is that a recruit turns a repetitive crafting station into a small chance of free output, and that chance quietly repays the hiring fee several times over across a play session.
Alchemy: 33% extra-craft chance. A recruit assigned to an Alchemy Table or alchemist station has a roughly 33 percent chance of producing an extra copy of the crafted item without consuming additional ingredients. Over a night of pre-boarding elixir prep, that is effectively a free batch every third craft.
Workbench: free-material chance. A recruit assigned to a Workbench has a chance per craft to produce the item without consuming any of the listed materials. This is the headline perk: repeated crafts of expensive items (cannons, upgrade kits, armor pieces) can net enough free outputs to fully refund copper, iron, and rough hide totals over time.
Other station bonuses: additional recruits extend the pattern to other stations. The in-game listing from the Recruitment Vendor names each worker's specialty (cook helper, master salvager, master bottle maker, etc.) and the percentage effect they apply. See the Tortuga-Hired Base Workers section above for the currently confirmed roster.
Creator guides describe the recruitment fee as "a little bit expensive" at first glance, particularly for new players who have not yet built up a steady piastres or gold flow from Tortuga trading. The math, however, is favorable: every station a worker is assigned to turns into a passive refund engine. A Jasper Crowe stationed at the Disassembly Table and the Anvil will recover enough copper and iron across a normal upgrade schedule to cover his 500-piastres hire price inside a handful of crafting sessions. Rosalinda Mercer's double Clay Bottle output repays itself fastest of the three, because bottles are a recurring bottleneck for every alchemy recipe.
The structural takeaway: recruits are not cosmetic. They are a material-cost multiplier, and skipping them leaves meaningful progression gains on the table. Hire at least one worker the first time you reach Tortuga with the fee in hand, and add more as the economy allows.
Recruits are sourced primarily from ports, with Tortuga as the main hub in the current build. Approach any NPC marked as a recruiter or stall vendor and the dialogue exposes the per-recruit fee alongside the specialty. Hiring is a one-time payment per worker; no upkeep, no per-use cost, no rehiring.
Where to find them: the Recruitment Vendor stall in Tortuga sells the confirmed launch roster. Additional wandering recruits are documented in the devblog roadmap and will expand the pool in later patches.
Pay once, assign once: after purchase the recruit appears in the Workers tab at your bonfire. Open the tab, pick the worker, and assign them to the target station.
Station-locked bonuses: each worker's percentage effect is tied to their assigned station. Moving them reassigns the effect to the new station; they cannot double up.
Camp helpers vs ship crew: these recruits run your base economy. The ship crew that operates your main combat vessel comes from the Rescuing the Crew quest line and is a separate system governed by Boarding Party Gear.
If budget limits you to one or two recruits on the first Tortuga visit, the creator-favored order is:
Jasper Crowe first. Disassembly and armor-upgrade refunds hit the most expensive material flows in the game (copper ingots, wooden planks, rough hide). His 30 percent recovery rate cashes out across dozens of upgrade sessions.
Rosalinda Mercer second. Her double-bottle output plus the 30 percent extra-elixir chance compounds as soon as alchemy becomes a scheduled pre-boarding habit. Bottles are otherwise a chronic shortage.
Black Axel third or for co-op. Extra meals matter most when multiple players are prepping food buffs simultaneously. Solo players can usually wait on him until the other two have paid back their fees.
Two named Bonfire Guests are confirmed in the current Windrose build. Guests differ from Workers in that they attach to a Bonfire via the Guests tab instead of being slotted into a crafting station, and neither Guest has a passive crafting perk. Both serve as narrative and quest-line anchors rather than as material multipliers.
Guest | Profession | Recruitment Cost | Role |
|---|---|---|---|
Doctor | Not listed | First major ally, main quest-giver from Islander tutorial through Foothills | |
Researcher | Not listed | Rescued cartographer at end of Needle in a Haystack; settlement ally |
Settle Guests at a Bonfire through the Guests tab rather than through any crafting-station menu. Community testing reports that using the Evict option at a Bonfire can cause a Guest to disappear permanently; always use Settle at the new Bonfire location instead when relocating a Guest.