

Windrose includes farming, fishing, and mining as resource gathering activities alongside standard survival game material collection. These activities provide the raw materials for cooking, alchemy, and crafting.
Farming
Players can cultivate crops at their settlements. Farming requires Fertile Soil, which is found at Ancient Farms on Foothill islands (southeast of the starting area). Use a pickaxe to harvest soil patches from these locations. Fertile Soil is a required material; you cannot plant crops without it.
Seedbed Crops
The following crops can be planted in Seedbeds using Fertile Soil:
Image | Crop | Use |
|---|---|---|
| Peppers (Cayenne Pepper) | Cooking ingredient for spicy recipes (Spicy Chicken with Sweet Potato) |
| Batata (Sweet Potato) | Versatile cooking ingredient used in multiple recipes |
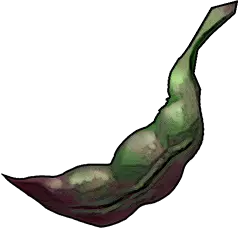
| Bean | Cooking ingredient |
| Cooking ingredient (Meaty Croc Kebab) | |
| Cooking ingredient (Seafood Skewer) | |
| ||
Flax | Crafting material for cloth and fabric | |
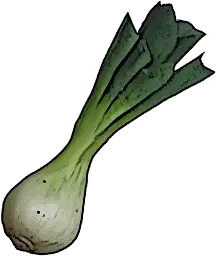
| Cooking ingredient (Meaty Croc Kebab, Nut Pie) |





Ground Plants
These plants are placed directly on the ground anywhere on your plot, without requiring a Seedbed:
Shrub
Ficus
Palm
How Seeds Work
Seeds are found randomly while gathering wild plants and food across islands. When you harvest a mature crop, it returns both the crop resource and new seeds, creating a sustainable loop. There is no watering mechanic; crops grow automatically over time. Press E to harvest when fully grown.
Farming Contractor NPC
For players who prefer automation, a Farming Contractor NPC is available:
Unlocked after reaching Tortuga
Purchased from the Recruitment Vendor for 10 gold coins
Place the contractor at your home base
Each farming job requires 50 seeds of a single plant type + 20 silver coins
Processing time: 8 hours (works passively, including while offline)
Returns: 50 seeds back + harvested crop resources
Does not interfere with your personal seedbed crops
Fishing
Fishing is referenced as a side activity in the game's design. Fish Fillets appear as a cooking ingredient (used in the Seafood Skewer recipe: 1 Crab Meat + 4 Fish Fillets + 2 Tomatoes). Crab Meat is obtained by collecting crabs found on beaches. The full fishing system is expected to expand during Early Access.
Mining
Caves scattered across islands contain ore deposits for mining. Different biomes yield different ores, and mining provides the raw materials for weapon and armor crafting.
Ore Types
Image | Ore | Location | Tool Required | Notes |
|---|---|---|---|---|
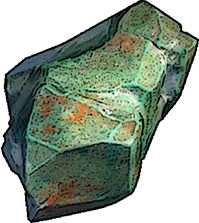
| Caves on starting island and other Coastal Jungle islands | Stone Pickaxe (3 Wood + 3 Stone) | Primary early-game ore; appears as bluish-white stone walls | |
| Natural quarries on Foothill islands | Copper Pickaxe or better | Used to make Foothills Iron Ingots | |
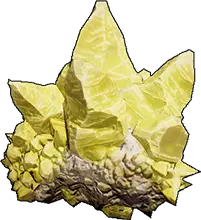
| Foothill islands | Required for gunpowder crafting at the Millstone once your iron-tool progression is online | ||
| Swamps biome | Not specified | Rare resource; used for jewelry and the Vial Table |


Smelting Recipes
Product | Ingredients | Station |
|---|---|---|
6 Copper Ore + 1 Charcoal | Smelting Furnace (30 Stone + 15 Clay) | |
1 Wood | Charcoal Kiln (25 Wood + 20 Clay) | |
10 Homemade Gunpowder |
Ore Respawn
Ore deposits respawn approximately 3 in-game days after a cave or quarry is completely emptied. Community reports suggest roughly 2 to 4 real-time hours for the starting island cave, though timing may vary.
Mining Progression
Stone Pickaxe (3 Wood + 3 Stone): mines Copper Ore
Copper Pickaxe (upgrade): mines Iron Ore
Iron Pickaxe (upgrade): mines Sulfur
A Miner NPC can be unlocked later in the game to gather Sulfur passively and efficiently, similar to the Farming Contractor.
Cooking
Cooking transforms raw farm and gathered ingredients into food buffs that boost stats for 7 to 30 minutes. There are no hunger or thirst bars; food is purely beneficial.
Known Recipes
Image | Recipe | Ingredients | Buff | Duration | Station Required |
|---|---|---|---|---|---|
| Dodo meat | HP buff | 7 min | ||
| Coconuts + Bananas | Max stamina increase | 7 min | ||
| Vitality boost | 7 min | |||
| +10 Agility | 30 min | |||
Nut Pie | +5 Precision | Not confirmed | |||
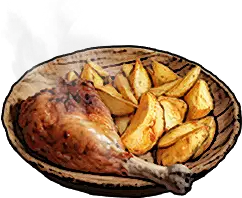
| Spicy Chicken with Sweet Potato | 1 Bird Meat + 4 Sweet Potatoes + 4 Cayenne Pepper | +20 Strength | 30 min | |
4 Crocodile Tail + 2 Mysterious Spices + 5 Cocoplum + 5 Leek | +20 Strength | 30 min | |||
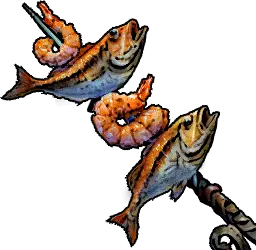
| 1 Crab Meat + 4 Fish Fillets + 2 Tomatoes | Not confirmed | Not confirmed |




Cooking Station Progression
Image | Station | Recipe | Function |
|---|---|---|---|
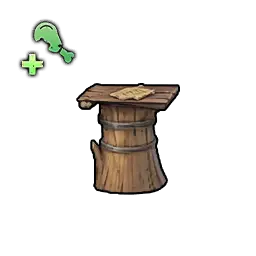
| Base cooking station; Comfort +1 | ||
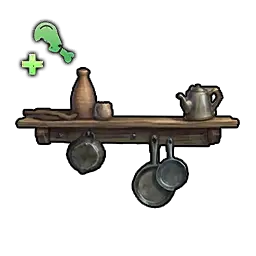
| 10 Wood + 2 Copper Ingots | Upgrade; unlocks intermediate recipes; within Bonfire range | |
| Upgrade; unlocks advanced recipes and potions; requires roof; within Bonfire range | ||
| 5 Hardwood + 5 Coffee Beans + 5 Salt + 5 Nuts + 5 Lobster Mushrooms | Advanced cooking upgrade |

NPC Automation
Players who prefer spending their time on combat and exploration can assign NPC workers to handle farming and basic resource gathering. Workers can be stationed at your settlement to gather resources or tend crops while you are away. This optional system respects the player's time while maintaining the economy through NPC wages.
Seedbed Placement Tips
One of the most helpful quality-of-life details for farming is that Seedbeds can be lifted up after placement. The lift option means the bed does not have to sit flat on the ground; uneven, sloped, or rough terrain around the base is all usable as a farm plot as long as the seedbed itself is adjusted to a level position. This saves the long search for a perfectly flat patch of land that most early players waste time on when they first try to start a farm.
Practical layout tip: put a storage box right next to the seedbeds. When a crop is ready to harvest, the flow becomes harvest, walk one step, drop the crops and seeds into the box, and move to the next bed. Without a nearby box, a full row of mature crops will overflow the character inventory and force several round trips back to the main stash. A single small crate placed in the middle of the farm row turns a twenty-minute harvest run into a five-minute one.
The same logic extends to the rest of the farming square. Keep the watering or gathering-related tools, the storage box for crops, and ideally a Cooking Fire within a few tiles of the seedbeds so a full cycle (harvest, stash, cook into a buff meal) happens without leaving the area. This matters more once the character has unlocked the Strength, Agility, and Precision food buffs, because frequent re-cooking starts to make up a noticeable chunk of base-side time.
Crop Growth Timing
Every crop planted on a Seedbed reaches full maturity after roughly 70 real-time minutes, regardless of type. Peppers, Batata, Beans, Leek, Tomato, Corn, Flax, and Cocoplum all share the same approximate growth window. Crops visibly cycle through a few growth stages before maturing, but the final harvest prompt appears at the same point for every plant slot. A full farm planted at the same time can therefore be harvested in a single pass about an hour and ten minutes later.
Weather, season, and location do not affect growth. Windrose has no irrigation, watering, fertilizer, or sunlight mechanic. The 70-minute timer ticks down whether the seedbed is placed on a beach, in a jungle clearing, or on a foothills plateau. The only placement rule that matters is that the seedbed must be above sand-level and not partially buried, because a seedbed that is even half submerged in a sand mound will refuse to accept seeds in some of its plant slots.
Each seedbed costs 5 Fertile Soil. Seedbeds are placed like any other base foundation: drop-down placement, free rotation, and the ability to be lifted after placement so they sit level on uneven ground. A typical starter farm of six seedbeds costs 30 Fertile Soil, which is one or two full scavenging runs through the Ancient Farms in the Foothills.
Harvest returns are usually net-negative on seeds. Harvesting a mature crop returns the food resource plus a small number of seeds, but for most plants the seed payout is lower than the seed cost to plant. This means a self-sustaining farm still requires gathering wild plants in the overworld to top up the seed pool. Flax is the most important exception target because its seeds are harder to find in the wild, making every mature Flax plant on the farm worth harvesting even when the rest of the field is not yet ripe.
Palm trees and bananas are not seedbed crops. The farming menu includes a few plantable decorative items like palm trees and banana trees that can be planted directly on the ground anywhere in the base, without a seedbed. These are not part of the 70-minute growth loop and function more as landscaping than as a food source. They are useful for decorating an island settlement but should not be confused with the Flax, Tomato, or Pepper lines that actually feed cooking and ship crafting.
Flax and Linen Pipeline
Flax is the single most important crop to prioritise once the farming system unlocks. The entire mid-to-late-game ship building track depends on a steady supply of Flax Fiber, which is processed into Linen Fabric on the Spinning Wheel, and Linen Fabric is consumed by the hundreds when crafting a Ketch, Brig, or Frigate at the Wharf.
Wild Flax is slow to gather. Flax Fiber appears in the overworld as small clusters of bright purple flowers, found only from the Foothills biome onwards. A typical cluster yields roughly ten Flax Fiber per full harvest. Clusters are sparse, so a dedicated gathering run through a Foothills island usually produces well under a hundred Flax Fiber in one trip. This is the main reason the farmed Flax loop matters: a well-stocked farm with three rows of Flax seedbeds produces more Flax per hour than a long gathering sweep, and does it passively while the player is off sailing.
Spinning Wheel conversion: 3 Flax Fiber to 1 Linen Fabric. Once Flax Fiber enters the base stockpile, it feeds directly into the Spinning Wheel at a 3-to-1 ratio. This means every end-to-end ship-build target translates directly into a Flax Fiber quota: triple the Linen Fabric requirement to get the raw Flax Fiber count, then triple it again mentally as a safety margin for cooking recipes that also consume linen-adjacent materials.
Ship material costs dominate the Flax budget. A late-game hull like the Frigate consumes hundreds of Linen Fabric to complete (community builds at the current Early Access launch list 240 Linen Fabric for a full Frigate), which translates to roughly 720 Flax Fiber just for the sail and rigging materials on a single vessel. The smaller Ketch and Brig hulls still consume linen in the low hundreds, and ship equipment at the Shipwright's Workshop also draws from the same stockpile. Treat Flax as the bottleneck and overshoot rather than undershoot; there is no realistic scenario in the current build where a Flax farm produces too much for the player to use.
Recommended Flax allocation: As soon as the player unlocks seedbeds in the Foothills and has a working row of plots, dedicate the first full row to Flax before planting any cooking ingredients. Because all crops share the 70-minute grow timer, a Flax row does not slow the food rotation, it simply runs alongside it. Only after the Flax row is in the ground is it worth prioritising Tomato, Leek, Pepper, or Batata for the cooking pipeline.
Simple Fishing Rod and Mechanics
The dedicated Fishing article carries the full rod workflow; the short version lives here because farming and fishing share the same mid-game pacing once the Foothills biome unlocks.
Simple Fishing Rod: 2 Foothills Iron Ingot + 3 Rope + 5 Hardwood. Craft at a Workbench upgraded to Level 2. The Level 2 upgrade is the Sawhorse (20 Wood + 10 Copper Ingot); a stock Level 1 Workbench will not start the craft. The rod recipe auto-unlocks the moment the player first picks up Hardwood from a Foothills Divi Divi Tree, so the practical sequence is: beat the Coastal Jungle boss, sail to the Foothills with a Copper Axe, harvest a stack of Hardwood, smelt Foothills Iron Ore at the Furnace, then return to base, build the Sawhorse, and craft the rod at the Workbench.
Fishing loop: cast, wait for the flat splash, reel. Fishing uses one rod for both shallow and deep water, and the only active input is timing the reel-in. A successful cast produces two visible surface events: a quick dip when the fish first nibbles, then a flat splash when it properly takes the bait. The reel cue is the second event. Reeling on the dip loses the bait; reeling after the flat splash loses the fish. Higher-level fish stretch the delay between the dip and the flat splash, so playing the delayed splashes is how the high-tier catches land.
Gut for Fish Fillet. Raw caught fish cannot be cooked directly. Right-click the fish in the inventory (or press X on controller) to convert it into Fish Fillet, which is the ingredient every fish-based cooking recipe actually consumes. Gutting is instant, costs no stamina, and does not require a cooking station.
Cast from a peninsula for dual-depth access. Standing on a small outcrop or peninsula that reaches into open water lets a single cast reach a deep-water tile while shallow-water tiles are still within stepping distance. This is the fastest way to collect both depth categories without relocating between casts, which matters because fish species split across the two depth tables and the collection goal is a complete spread rather than one depth in bulk.
Farmable Plants Database
Windrose has 16 plantable saplings in the current build, split between twelve Seedbed-only crops and four ground-only trees and bushes (Ficus, Lime, Palm, and Shrub). The Lime Sapling is a Farming-category crop that still grows on open ground rather than in a Seedbed. The master table lists every sapling with its tier, placement rule, seed cost, growth time, and primary harvest so a base planner can budget Seedbed slots and open-ground acreage side by side.
Sapling | Tier | Placement | Seed Input | Growth Time | Main Yield |
|---|---|---|---|---|---|
T2 | Seedbed only | Aloe Seeds x1 | 1h 10m | ||
T1 | Seedbed only | Banana Seeds x1 | 1h 10m | ||
T3 | Seedbed only | Bean Seeds x1 | 1h 10m | ||
T3 | Seedbed only | 1h 10m | |||
T3 | Seedbed only | 1h 10m | |||
T2 | Seedbed only | Corn Seeds x1 | 1h 10m | ||
Ficus Sapling | T1 | Ground only | Ficus Seeds x1 | 1h 10m | Wood (1) |
T2 | Seedbed only | Flax Seeds x1 | 1h 10m | ||
T2 | Seedbed only | 55m | |||
T3 | Seedbed only | Leek Seeds x1 | 1h 10m | ||
T2 | Ground only | Lime Seeds x1 | 1h 10m | ||
Palm Sapling | T1 | Ground only | Palm Seeds x1 | 1h 10m | Wood (1) |
T1 | Seedbed only | 1h 10m | |||
Shrub Sapling | T1 | Ground only | Shrub Seeds x1 | 1h 10m | Plant Fiber (1) |
T1 | Seedbed only | 1h 10m | |||
T2 | Seedbed only | Tomato Seeds x1 | 1h 10m |
Growth time is uniform at 1 hour 10 minutes across fifteen of the sixteen saplings; the Healing Herb Sapling is the one outlier at 55 minutes. Every sapling refunds exactly one seed per harvest, and every crop pays out its main material at 100% chance, so there is no RNG drop chance on cultivated output. Tier is an informal shorthand for sapling ID rather than a rarity; every sapling is functionally renewable once its seed is acquired.