Loading...
Loading...
Treasure Chests Guide
April 17, 2026 at 02:22 AM
Add wikilinks to table cells (1 new links)
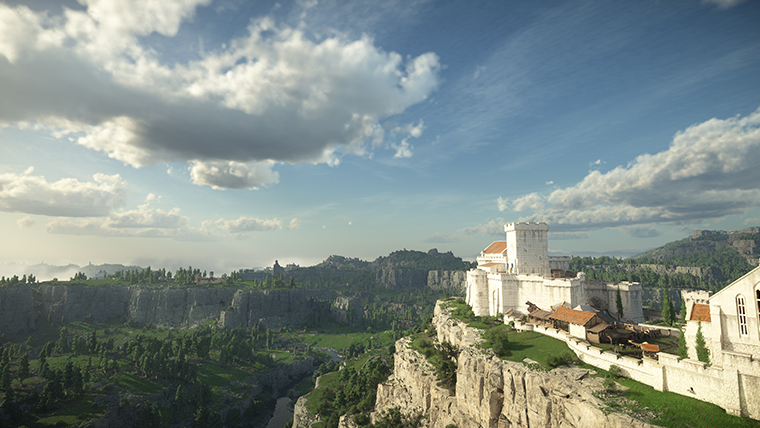
Pywel is packed with treasure chests hidden behind waterfalls, locked inside manor strongboxes, tucked into sanctum ruins, and scattered across the floating islands of the Abyss. Finding them all is one of the most rewarding parts of exploration and traversal in Crimson Desert, and the loot inside ranges from basic crafting materials to rare armor sets, unique accessories, Abyss Gears, and Faded Abyss Artifacts that let you respec your entire skill tree.
There are over 121 known treasure chests spread across the Hernand, Demeniss, and Pailune regions, plus additional chests inside Abyss sections and sanctums. This guide covers every chest type in the game, explains how to detect and reach them, breaks down the strongbox puzzle mechanics, and provides tips for making sure you never walk past hidden loot.
Crimson Desert uses several distinct chest categories. Each type has its own visual appearance, loot tier, and access requirements. Knowing what you are looking at helps you prioritize which chests to pursue first.
Chest Type | Visual Indicator | Typical Rewards | Access Method |
|---|---|---|---|
Regular Chest | Small wooden or metal box, no lock icon | Silver, basic crafting materials, consumables | Open directly; no puzzle or key required |
Treasure Chest | Larger ornate chest, sometimes with a faint glow | Open directly; may require defeating nearby enemies first | |
Heavy iron safe with a visible lock mechanism | Rare accessories, unique weapons, crafting recipes, keys | Solve a unique puzzle (rotation, scroll wheel, sliding tile, or sequential button press) | |
Waterfall Cave Chest | Chest inside a cave behind a waterfall; stacked stones (cairns) mark the entrance | Use a Sword Stab (Pierce attack) to break through the waterfall | |
Sanctum Hidden Chest | Hidden in a corner, behind a breakable wall, or below a collapsing floor inside a sanctum | Abyss Gear, crafting materials, silver, unique armor pieces | Explore the sanctum thoroughly after cleansing it |
Abyss Chest | Glowing chest on floating Abyss islands or inside Abyss dungeons | Faded Abyss Artifacts (respec items), Abyss Gears, Abyss Artifacts (skill points) | Reach by platforming across floating islands in the Abyss; requires Chapter 4 access |
Marked container near camps, settlements, and quest locations | Any uncollected loot from cleared camps, quests, and dispatch missions | Open directly; acts as a lost-and-found for missed drops |
The Pirate King Hat is one of the most useful items for treasure hunters in Crimson Desert. It has a built-in "Detect Treasure" passive ability: the feather on the hat glows white whenever Kliff is near a treasure chest. This works for all chest types, making it an invaluable tool when exploring new areas or backtracking through regions you may have missed.
The Pirate King Hat is located aboard the Singing Catfish, a pirate ship anchored off the west shore of the Steel Mountains. To reach it:
Travel to the western coast of the Steel Mountains and look for a rowboat along the shore.
Mount the rowboat and row toward the Singing Catfish. The waters around the ship are mined, so approach carefully from behind the vessel to avoid the mines and the ship's operational cannons.
Board the Singing Catfish and fight through the pirates on deck. There are several waves of enemies, so come prepared with healing items and a solid weapon loadout.
After clearing the ship, loot the Pirate King Hat from a chest (or body) on the upper deck.
Once you have the hat, equip it in your headgear slot. The treasure detection passive activates automatically. As you explore, keep an eye on the feather. When it starts glowing white, slow down and search the immediate area. The glow intensifies the closer you get to the chest, so use it as a hot-cold indicator to zero in on the exact location.
The Pirate King Hat is especially powerful when combined with thorough exploration of regions like Demeniss and Pailune, where many chests are tucked into hard-to-spot nooks. It also helps in sanctums, where hidden chests are often placed in corners or behind destructible walls that you might otherwise overlook.
Beyond the Pirate King Hat, Kliff has two built-in detection tools that help locate chests, items, and points of interest: the Blinding Flash ability and the standard lantern.
Blinding Flash is activated by pressing L1+R1 (PlayStation), LB+RB (Xbox), or the corresponding keybind on PC. When used while exploring (even while mounted), Kliff channels a burst of light that marks nearby locations of interest with a glowing blue marker on the horizon. These markers often indicate Abyss Artifacts, Abyss Cressets, fast travel spots, puzzle locations, and hidden chest areas.
Regular use of Blinding Flash while traversing new regions is one of the most efficient ways to populate your map with Mysterious Energy markers. Each marker represents a point worth investigating, and many of them lead directly to treasure. Get into the habit of pulsing Blinding Flash every time you enter a new area or crest a hill with a good vantage point.
Hold L1 (PlayStation), LB (Xbox), or Left Control (PC) to raise Kliff's lantern. The lantern illuminates the area in front of you and highlights nearby loot, memories, breakable objects, and points of interest. Items that react to the lantern light may reveal hidden symbols, clues, or paths that are invisible without it.
The lantern is critical inside dark environments like caves, sanctums, and the interiors of manors. Focus the lantern on suspicious walls or floors. Some walls display a leaf symbol when illuminated, indicating a climbable surface or a hidden passage. In Delesyia Castle, for example, holding the lantern reveals a leaf mark on a wall that, when climbed and hit with Force Palm, rotates to expose a hidden chamber with a treasure chest.
Combining the Pirate King Hat with the lantern and Blinding Flash gives you a triple-layer detection system. The hat tells you a chest is nearby, Blinding Flash points you toward the general area, and the lantern reveals the specific path or hidden mechanism to reach it.
Strongboxes are the highest-tier overworld chests in Crimson Desert. There are 15 strongboxes spread across the Hernand, Demeniss, and Pailune regions. Each one is locked behind a unique puzzle and guarded by enemies or hidden in a location that requires creative exploration and traversal to reach. The rewards include rare accessories (many of which are refineable), unique weapons, crafting recipes, and keys that unlock further areas.
Strongbox puzzles fall into four categories. Each category has a distinct mechanic, and the difficulty varies depending on the specific strongbox.
Puzzle Type | Mechanic | Example Location |
|---|---|---|
Rotation Puzzle | Rotate individual panels or fragments to reconstruct a target image. The formation is randomized each time, but there is no move or time limit. | Lioncrest Manor (Hernand), Sungrove Manor (Demeniss) |
Scroll Wheel Puzzle | Turn each wheel a set number of times, then pull the confirm switch. The correct number of scrolls per wheel must be determined by examining clues in the environment. | Hillside Manor (Hernand), Bluemont Manor South (Hernand) |
Sliding Tile Puzzle | Move grid squares in a specific sequence to rearrange them into the correct pattern. These are the most mechanically challenging puzzles. | |
Sequential Button Press | Press numbered or marked buttons in the correct order. The solution is usually hinted at by environmental clues such as paintings, engravings, or notes found nearby. | Bluemont Manor North (Hernand), Hernand Castle |
The 15 strongboxes are distributed across three major regions. Here is a summary of the known locations and their notable rewards.
Location | Puzzle Type | Notable Reward |
|---|---|---|
Lioncrest Manor (2F, Eastern Room) | Rotation (randomized image of girl with fairy wings) | Engraved Gold Earring (refineable, passive bonus) |
Hillside Manor (2F, Southwestern Room) | Scroll Wheel (5 wheels) | Saint's Necklace (temporary Stamina boost) |
Bluemont Manor North (Owl Puzzle) | Sequential Cylinder Rotation (align owl image across 4 sections) | Oath of Darkness Earring (refineable, stacking passive) |
Bluemont Manor South (Piston Puzzle) | Scroll Wheel (5 segmented wheels controlling piston heights) | Unique accessory |
Hernand Castle (Melody Puzzle) | Sequential (crank dial, listen to melody, replicate it) | Lavish Meal Recipe |
The Demeniss region contains six strongboxes, including some of the game's most complex sliding tile puzzles. Notable locations include Sungrove Manor (rotation puzzle, 2F accessible via southeast window), Duskpond Manor, and several outlying cabins in the western reaches of the region. Rewards in Demeniss tend toward higher-tier accessories and weapon components.
Pailune's four strongboxes are spread across manors and fortifications in the region. Stellen Manor contains two strongboxes: the first drops the Stellen Manor Closet Key, which unlocks a separate locked area within the manor that holds additional loot. The remaining two are found in remote locations northeast of Drakesfall Gorge.
Check the environment for clues. Most sequential and scroll wheel puzzles have hints nearby. Look at paintings, engravings on walls, notes on tables, and symbols carved into door frames.
Rotation puzzles are forgiving. There is no move limit, no time limit, and no penalty for wrong rotations. Just keep rotating each fragment until the image aligns. If you lose track, step back and look at the overall picture.
Sliding tile puzzles require patience. These are the hardest puzzles in the game. If you get stuck, back out and look up the specific sequence online. The Mudridge Cabin puzzle, for example, requires a precise 10-step move order.
Clear enemies first. Many strongbox locations are guarded by bandits or hostile NPCs. Always clear the area before attempting the puzzle so you can focus without interruptions.
Access often requires climbing. Several strongboxes sit on the second floor of manors. Look for open windows, climbable walls, or balconies on the building exterior. The game rarely gives you a front-door route to these rooms.
There are 43 waterfall caves (also called Waterside Caves) scattered across Pywel. Every single one contains at least one treasure chest, and many hold valuable loot including armor pieces, weapons, ores, and diamonds.
Not every waterfall hides a cave. Accessible waterfalls are marked by two key indicators: a small stone platform at the base of the waterfall, and a stack of stones (cairns) placed just outside the water wall. If you see both of these features, there is a cave behind the waterfall. If there are no stacked stones, there is no cave, and trying to enter will just get Kliff wet.
You cannot simply walk through a waterfall in Crimson Desert. To break through the water wall and enter the cave behind it, perform a Sword Stab (also called a Pierce attack). The inputs are R1+Triangle on PlayStation, RB+Y on Xbox, and Left Shift+Right Mouse Button on PC. Kliff lunges forward with the stab and the waterfall parts, granting access to the cave interior.
Once inside, loot the chest and explore the full cave. Some waterfall caves are small single-room spaces, while others have branching paths with multiple chests and additional loot on the ground. Use your lantern in darker caves to spot items you might miss.
If you want every waterfall cave marked on your map without finding them one by one, complete the Dragon's Stone Chamber Puzzle. This Abyss puzzle, located in the ancient ruins, reveals all 43 waterfall cave locations on your world map when solved. This saves a tremendous amount of time if you are working through a completionist run.
Every sanctum in Crimson Desert contains at least one hidden chest tucked away in a corner, behind a breakable wall, or below a collapsing floor. These chests are not direct rewards for cleansing the sanctum. They are separate, optional finds that require thorough exploration of the sanctum after the main threat has been dealt with.
Explore after cleansing. Once a sanctum is purified, areas that were previously blocked by corruption or enemies become accessible. Walk through every corridor and check every room before leaving.
Watch for collapsing floors. In the Sanctum of Penitence, for example, there is a spot where the ground crumbles beneath Kliff's feet after you acquire the Fusion Reactor Core. Falling through leads to a hidden area with a treasure chest containing the Blackwing Leather Gloves (part of the Crowcaller's Blackwing armor set).
Use the lantern in dark corners. Sanctum interiors are often poorly lit. Raise your lantern to highlight loot and breakable objects that blend into the dark stone walls.
Look behind pillars and in alcoves. Sanctum architecture is full of decorative pillars, archways, and side alcoves. Chests are frequently placed in these spots, just out of your natural line of sight as you walk through.
Check above and below. Some sanctum chests are on upper ledges accessible by climbing, or in lower areas reached by dropping down from a platform. If a sanctum has multiple vertical levels, explore all of them.
Sanctum hidden chests can contain Abyss Gears, crafting materials, silver, and unique armor pieces. The Crowcaller's Blackwing armor set, for instance, has pieces distributed across several different sanctums. If you are collecting a full set, you need to explore every sanctum thoroughly rather than just completing the cleansing objective and moving on.
The Abyss is an otherworldly dimension of floating islands and ancient ruins that becomes accessible during Chapter 4, specifically after the Forbidden Knowledge main quest and the Spire of the Stars segment. Chests found in the Abyss are among the most valuable in the entire game, consistently rewarding Faded Abyss Artifacts, Abyss Gears, and occasionally full Abyss Artifacts (skill points).
Reward | Description |
|---|---|
Consumable items that reset all allocated skill points, letting you rebuild your entire skill tree. Essential for experimenting with different builds. | |
Abyss Gears | Rune-like items that slot into weapons and armor to add elemental bonuses (Fire, Ice, Lightning, Wind) and passive effects. |
Permanent skill points used to unlock and upgrade skills in the skill tree. Found less frequently than Faded variants. | |
High-tier materials used for weapon and armor refinement. |
Abyss chests are scattered across the floating islands and tucked into alcoves within Abyss dungeon interiors. Reaching them often requires platforming across gaps between islands, climbing walls, and navigating environmental puzzles. The islands do not have obvious paths, so exploration is key.
Check every floating island. Even small, seemingly insignificant islands may have a chest sitting on them. If you can see an island, try to reach it.
Look inside ruins. Abyss dungeons often have side rooms with chests that are easy to miss if you follow only the main path. Take detours into branching corridors.
Use Blinding Flash. The Guiding Light function works in the Abyss and can highlight distant chests and artifacts that are hard to spot against the visual noise of the floating islands.
Prioritize Faded Abyss Artifacts. If you are farming respec items, the Abyss is the best source. The floating island chests have a high drop rate for Faded Abyss Artifacts compared to overworld chests.
Hidden Treasure Map Pieces are special collectibles scattered across the open world. Each map piece is a hand-drawn illustration that depicts a specific location in Pywel. There are no quest markers, no map icons, and no NPC hints for these. You find the map piece, study the drawing, and figure out where the depicted treasure is buried.
Find a Hidden Treasure Map Piece. These are often placed on top of shrines, inside small huts, or on tables in abandoned buildings.
Open the map piece from your inventory. Study the drawn landscape, landmarks, and any text or symbols on the map.
Travel to the location depicted on the map. This may be in a completely different region from where you found the map piece.
Search the area for the hidden chest. You may need to use the lantern to reveal a hidden mark on a wall, climb to a specific vantage point, or use Force Palm to open a concealed passage.
Compare landmarks carefully. The maps are stylized drawings, not precise replicas. Look for distinctive features like towers, bridges, rock formations, and coastlines that match the drawing.
The treasure is often in a different region. A map found in northern Paloon might point to a treasure in Delesyia. Do not assume the treasure is nearby.
Use the lantern at the destination. Many treasure map destinations have hidden marks (leaf symbols, runes) on walls that only appear when illuminated by the lantern.
Force Palm and climbing may be required. Some hidden chambers are accessed by climbing a marked wall section and using Force Palm to rotate a wall panel or break through a barrier.
The 121+ overworld treasure chests are distributed across all major regions of Pywel. Here is a general breakdown of what to expect in each area.
Region | Estimated Chest Count | Notable Features |
|---|---|---|
30+ | Five strongboxes (Lioncrest Manor, Hillside Manor, Bluemont Manor x2, Hernand Castle). Multiple waterfall caves along the rivers. Several sanctums with hidden chests. | |
30+ | Six strongboxes including complex sliding tile puzzles. Dense forest areas hide many regular and treasure chests in clearings and ruins. | |
25+ | Four strongboxes (including Stellen Manor x2). Coastal areas with waterfall caves along cliff faces. | |
15+ | Hidden treasure map destinations. Delesyia Castle contains a hidden chamber accessible via lantern + Force Palm. | |
Paloon | 10+ | Remote mountain areas with chests near ancient ruins. Several Hidden Treasure Map Pieces found here. |
Abyss (Floating Islands) | 20+ | Faded Abyss Artifacts and Abyss Gears. Requires Chapter 4 access. Platforming needed to reach most chests. |
For exact chest positions, use one of the community interactive maps (such as crimsondesert.th.gl or the Gamer Guides Pywel Interactive Map) that allow you to filter by chest type and track your discoveries.
Supply Chests are a unique category that function as a lost-and-found system rather than traditional treasure containers. Whenever you clear a bandit camp, liberate a stronghold, or finish a quest without looting everything, those uncollected items are automatically sent to the nearest Supply Chest. Rewards from Dispatch Missions also appear here.
Supply Chests are marked on the map and found near camps, settlements, and quest hubs. Check them regularly, especially after completing a string of quests or camp liberations. You may find upgrade materials, food, weapons, and other valuable items that you missed in the heat of battle.
Equip the Pirate King Hat as soon as you get it. The Detect Treasure passive is always active while the hat is equipped. The feather glowing white is the most reliable indicator that a chest is nearby, even if it is hidden behind a wall or underground.
Pulse Blinding Flash from high ground. Hilltops, cliffs, and tower rooftops give you the best vantage points for Blinding Flash. The blue markers it reveals can point toward chests, Abyss Cressets, and other hidden locations.
Raise your lantern in every dark space. Caves, ruins, sanctum interiors, and manor rooms all have items that only become visible under lantern light. Make it a reflex to hold L1/LB/Control whenever you enter a new indoor or underground space.
Look for cairns near waterfalls. Stacked stones at the base of a waterfall mean there is a cave behind it. No cairns means no cave. This saves you time testing every waterfall you find.
Complete the Dragon's Stone Chamber Puzzle. Solving this Abyss puzzle reveals all 43 waterfall cave locations on your world map at once. If you want to collect all waterfall cave chests efficiently, prioritize this puzzle.
Explore sanctums after cleansing. The main objective in a sanctum is the purification, but the hidden chests are scattered in side rooms, behind breakable walls, and under collapsing floors. Never leave a sanctum without checking every corner.
Approach the Singing Catfish from behind. When going for the Pirate King Hat, row your boat around to the stern of the ship to avoid the mines and cannons at the front. The pirate crew is not that difficult if you come prepared with healing items.
Read Hidden Treasure Map Pieces carefully. These maps contain visual clues to treasure locations in distant regions. Compare the drawing to your world map and look for matching landmarks before setting out.
Revisit regions with new abilities. Some chests require Force Palm, the Pirate King Hat, or specific traversal abilities to reach. If you spot an area you cannot access early in the game, mark it and return later.
Use interactive maps for completionist runs. Community-created interactive maps track every chest type by region and let you mark which ones you have already collected. These are invaluable for getting 100% completion.
Exploration and Traversal - movement mechanics, climbing, and open-world navigation
Pirate King Hat - full details on obtaining and using the hat's Detect Treasure passive
Waterfall Caves - all 43 waterfall cave locations and how to enter them
Sanctums - sanctum cleansing guide with locations and rewards
Blinding Flash - controls, puzzles, and combat applications of Blinding Flash
Hidden Chests - detailed list of every hidden chest location in Pywel