Overview
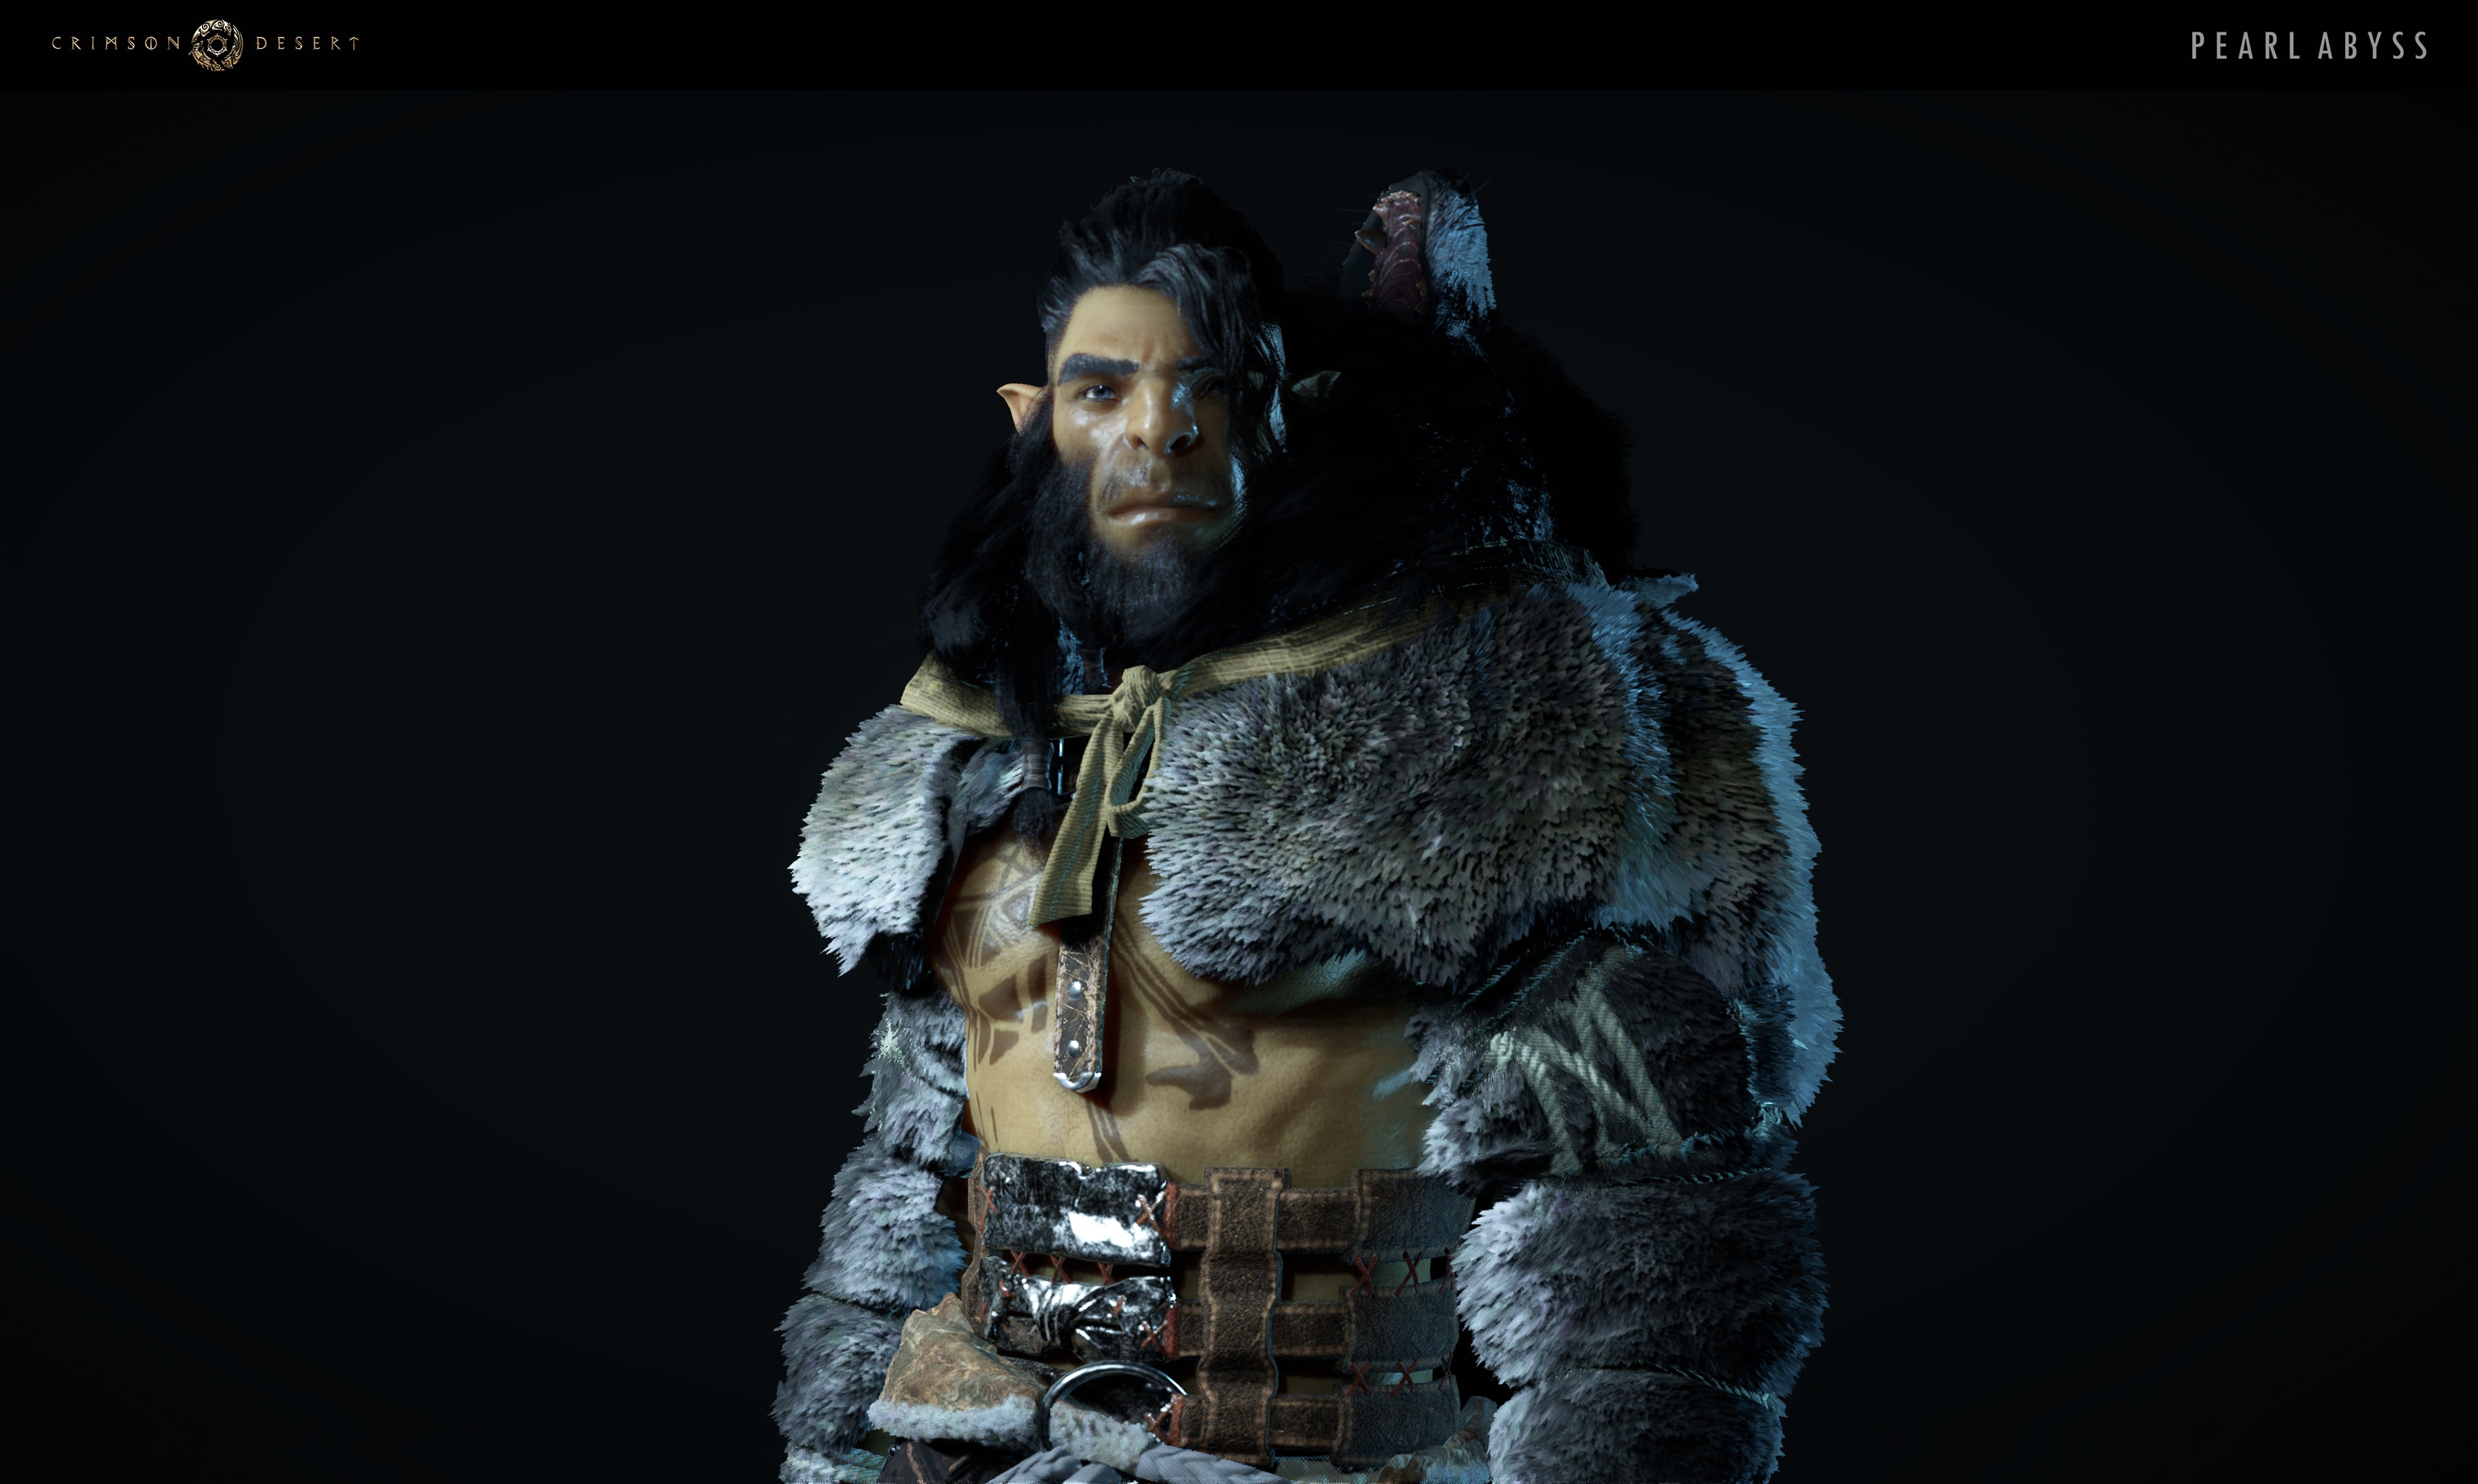
The dual wield build in Crimson Desert replaces the shield with a second one-handed weapon, creating a fully offensive setup that prioritizes attack speed and damage over defensive blocking. This build focuses on overwhelming enemies with rapid attack chains, using Blinding Flash Finisher for burst damage and Forward Slash for sustained pressure.
Dual wielding works for any character but is most commonly built on Kliff. The trade-off is clear: you lose the dedicated shield block, but you gain faster attack animations, higher overall damage output, and the ability to combine Abyss Cores from two separate weapons for more build flexibility. You can still block and parry while dual wielding, and the damage mitigation is similar to a shield for most incoming attacks.
How to Set up Dual Wielding
Dual wielding is not a separate skill or unlock. You enable it through the weapon wheel at any time:
Hold Left on the D-Pad (or the equivalent keyboard key) to open the Armed Combat menu (weapon wheel).
Use the analog stick to hover over the shield slot.
Press R2 or L2 to swap out the shield for a second one-handed weapon of your choice.
Important: Only weapons marked as "One-Handed" can be dual wielded. Two-handed weapons like longswords, greatswords, and spears are not compatible. Daggers are a separate stealth weapon and cannot be equipped in the dual wield slot.
Recommended Weapons
The best dual wield combinations pair a fast primary weapon with a hard-hitting secondary. Both weapons contribute their Abyss Cores to your build, so consider complementary core loadouts.
Weapon | ATK | How to Obtain | Notes | |
|---|---|---|---|---|
13 | ATK Spd Lv. 2 | Defeat Kailok the Hornsplitter (Chapter 2) | First weapon with Abyss Gear slots. Comes with Destruction I, Swift I, and Wind Slash. The high attack speed makes it ideal as a primary. | |
15 | ATK Spd Lv. 1 | Found during Chapter 5 progression | Highest ATK among early one-handed weapons. Comes with Crow's Pursuit Abyss Gear for passive crow attacks on each swing. | |
12 | ATK Spd Lv. 0 | Starting weapon | Placeholder until you obtain Sword of the Lord. Can be enhanced with Hwando Abyss Gears for a temporary power boost. |
Recommended Pairings
Primary + Secondary: Sword of the Lord (primary) paired with Tauria Curved Sword (secondary). The Sword of the Lord's high ATK Speed lets you chain attacks quickly, while the Tauria adds raw damage and Crow's Pursuit passive hits.
Early Game: Two copies of the Sword of the Wolf, or Sword of the Wolf with any available one-handed weapon from equipment shops. Strip the Hwando's Abyss Gears onto your swords for a significant early damage boost.
Bekker Axes: Available in the Underbridge area after the prologue. These dual axes provide fast area-of-effect swings and are a strong option for players who prefer cleaving through groups.
Essential Skills
The dual wield build emphasizes offensive skills from the Stamina tree, backed by Keen Senses and Nature's Echo from the Spirit tree.
Stamina Tree (Primary)
Skill | Priority | Effect |
|---|---|---|
Essential | Your main attack. Upgrade to Forward Slash Proficiency and then Forward Slash Sure Hit for guaranteed accuracy. This is the primary source of sustained damage. | |
Essential | Stuns enemies with a light-reflection burst. The Blinding Flash Finisher follow-up deals massive AoE damage and is the build's primary burst tool. Consumes Spirit. | |
High | Wide sweeping attack that chains naturally from Forward Slash. Use it to transition between targets in a group. | |
Essential | Increases base weapon damage with each level. Unlocks Evasive Slash at level 3 and Quick Swap for rapid weapon switching. |
Spirit Tree (Secondary)
Skill | Priority | Effect |
|---|---|---|
Essential | Unlocks Parry, Dodge, and Counter. Critical for the dual wield build because you have no dedicated shield block. Get all upgrades for truly agile gameplay. | |
Essential | Creates a spectral clone that replicates your attacks. Echoing Forward Slash effectively doubles your Forward Slash damage. This is what makes the dual wield build viable at higher difficulties. | |
High | Quick dodge that provides invincibility frames. Essential for an offense-first build that cannot rely on shield blocking. |
Health Tree (Utility)
Skill | Priority | Effect |
|---|---|---|
Moderate | Grants Aerial Maneuver for traversal. Not combat-critical but saves time when exploring. |
Recommended Armor
The Canta Plate Set works well for the dual wield build because the gloves and boots provide both ATK and ATK Speed bonuses, directly amplifying your attack chains.
Slot | Piece | |
|---|---|---|
DEF 3 | ||
DEF 6, Abyss Gear: Vigor I, Haste I, Frostward I | ||
DEF 3, ATK 13, ATK Spd 1 | ||
Boots | DEF 3, ATK 13, ATK Spd 1 | |
Cloak | DEF 3, Ice Res 3 | |
Necklace | ATK 1 |
As the game progresses, fill all five accessory slots (necklace, two rings, two earrings) with items that boost Health, Stamina, and Spirit regeneration. Early accessories share similar stats, so prioritize filling empty slots over min-maxing individual pieces.
Abyss Cores
The dual wield build's biggest advantage is having Abyss Core slots on two weapons instead of one weapon plus a shield. This lets you stack more offensive cores for higher damage output.
Core Type | Effect | Why It Matters |
|---|---|---|
Increases attack power | Stack Destruction cores on both weapons for maximum raw damage per swing. | |
Increases attack speed | Faster attacks mean more hits per combo chain. Pairs naturally with Forward Slash spam. | |
Sends magical crows at enemies with each weapon swing | Comes pre-loaded on the Tauria Curved Sword. Provides passive damage that stacks with your rapid attack chains. | |
Adds an area-of-effect wind projectile to attacks | Comes on the Sword of the Lord. Extends your effective range and hits enemies behind your primary target. | |
Recovers stamina on successful hits | Sustains your combo chains by refunding stamina. Lets you attack for longer without needing to disengage. |
Stat Allocation
The dual wield build favors Stamina for extended combo chains, with Health as a close second for survivability without a shield.
Stamina (5+ points): Execute full Forward Slash and Spinning Slash chains without running dry. At least 5 points ensures you can complete a full rotation before needing to recover.
Health (4+ points): Without a shield, you will take hits. A solid health pool prevents one-shot deaths against bosses.
Spirit (3+ points): Powers Blinding Flash Finisher, which is your primary burst damage tool. You need enough Spirit to fire it at the start and end of each engagement.
Combat Rotation
Standard Rotation
Open with Blinding Flash Finisher to deal immediate AoE burst damage and stun nearby enemies.
Chain Forward Slash repeatedly for sustained damage. Use Forward Slash Sure Hit for guaranteed connects.
Weave in Spinning Slash when enemies group together.
When Spirit regenerates, fire Blinding Flash Finisher again for a second burst.
Use Dodge and Counter from Keen Senses to seamlessly chain defensive reactions back into offense.
Boss Encounters
Against bosses, the dual wield build demands more active defense since you cannot simply hold block. Focus on Dodge and Counter from Keen Senses to create openings, then punish with short Forward Slash chains. Activate Nature's Echo before your damage windows to double your output. Save Blinding Flash Finisher for moments when the boss is recovering from a heavy attack.
Strengths and Weaknesses
Strengths | Weaknesses |
|---|---|
High sustained damage output with rapid attack chains | No dedicated shield block; requires active dodging and parrying |
Double Abyss Core slots from two weapons | More punishing against bosses if you mistime dodges |
Strong AoE with Blinding Flash Finisher for mob clearing | Daggers cannot be used in the dual wield slot (stealth weapon only) |
Agile, rewarding playstyle that chains offense and defense together | Requires consistent Spirit management for Blinding Flash Finisher |
Tips
You can still block and parry while dual wielding. The damage mitigation is comparable to a shield for most attacks, so do not hesitate to use it when dodging is unsafe.
Combining different Abyss Cores on each sword creates hybrid effects. For example, Stamina Transference on one weapon and Destruction on the other gives you both sustain and damage.
Dual wielding rewards aggression. R2 attacks and Finishers deal more brutal damage with two weapons than with a sword and shield.
For boss fights where you keep dying, temporarily switch back to sword and shield. There is no penalty for swapping loadouts through the weapon wheel.
Invest in Dodge and Counter from Keen Senses early. These two skills replace the shield as your primary defensive tools.
See Also
Weapons
Abyss Cores
Per-Weapon Crit Chance in Dual Wield
One mechanic that changes how crit-focused dual wield builds plan their sockets: crit rate is tracked per weapon in a dual wield loadout rather than as a single global pool. Crit rate gears socketed into the primary weapon only influence strikes thrown by that weapon, and crit rate gears socketed into the secondary weapon only influence strikes thrown by the secondary. Swinging the main hand does not inherit crit from the off-hand, and vice versa.
Ring, necklace, and earring stats remain global across both weapons, which is why the foundation pair of Mark of Darkness and Witch's Ring still contributes the full +8 attack speed across the entire dual-wield rotation and why the Necklace of Lightning's +4 crit applies to both weapons even though the necklace sits in a single slot. Armor crit rolls on chest, helmet, and cloak pieces also stay global.
The piece that changes is the weapon's own Abyss Core sockets. With a single main weapon plus a shield, a crit build can concentrate every weapon-socket crit roll on the single weapon that actually swings. Dual wielding splits that budget in half: to maintain the same per-hit crit rate on both weapons, crit rate gears must be duplicated on both sides. Crit-focused dual wield builds typically burn roughly four of the six weapon sockets (two per weapon) just to reach the crit rate cap across both hands, which leaves only two weapon sockets free for offensive utility gears like Crow's Pursuit or Ground Surge. This is the main reason crit-focused dual wield carries noticeably less socket flexibility than a crit-focused two-handed setup on the same refinement tier even though both configurations ostensibly have access to more sockets than a sword-and-shield build.
Weapon Selection for Crit Dual Wield
The split pool is the practical reason crit dual wield builds lean hard on weapons that already carry native crit rate in their base stat block. A weapon that ships with innate crit rate effectively gives the build free crit on that hand, which reduces the number of crit sockets that have to be duplicated between the two weapons. Two weapons that both roll innate crit rate are the ideal pair because the two native crit rolls compound with the global crit from the Necklace of Lightning and free up the most weapon sockets for anything other than crit rolls. Any one-handed weapon that lists a Critical Rate value in its stat sheet qualifies as a foundation piece for this build axis, and the specific weapon model is mostly a cosmetic choice within the crit-rate archetype.
Gloves and Boots Are Not a Workaround
Slotting crit rate gears into gloves or boots does not solve the per-weapon split. Crit rate rolled on glove and boot Abyss Gear sockets only applies to unarmed attacks, not to the sword strikes thrown by the dual wield moveset, so those slots are wasted on crit in a weapon-based build. The established rule for the glove and boot slots in a dual wield loadout is to fill them with attack speed gears, which are global and do carry over to the weapons, rather than trying to smuggle crit rate through the armor sockets. The Mark of Darkness article walks through this armor-versus-weapon attribution rule in more detail and confirms that the only place crit rate belongs in a dual wield kit is on the weapons themselves, on the accessory slots, or on full-armor pieces that treat the whole body as a single source (chest, helmet, cloak).
The net effect is that crit dual wield still works and still performs well, especially against single-target bosses where the per-hit crit doubles its way through a large health pool, but the socket planning is less forgiving than a crit greatsword or crit sword-and-shield setup because the build has to pay for the crit cap twice instead of once.