
Loading...
Loading...
Keen Senses
November 2, 2026 at 06:47 AM
Clarify default skills, Counter observation, named Spirit costs and conditional gear triggers; retain earlier Backstep and boss accounts.

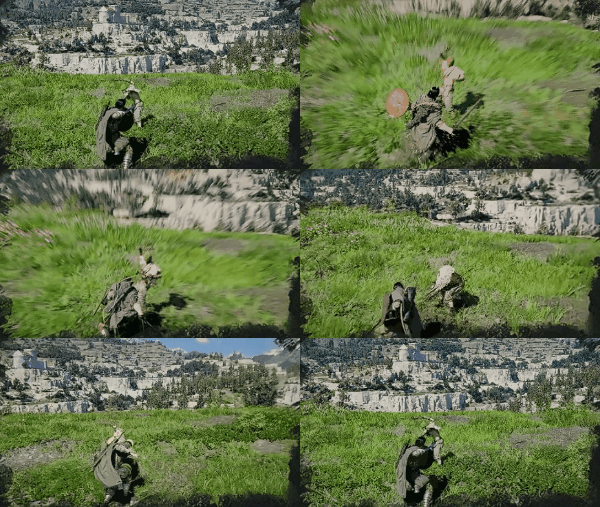
Keen Senses is a Spirit-tree skill listed for Kliff, Damiane and Oongka in Crimson Desert, with defensive combat effects tied to Parry, Dodge and Counter. The guide says the parent skill is unlocked by default for all three. Its Kliff progression lists Parry at Level 1, Dodge at Level 2 and Counter at Level 3. The earlier Green Branch and Abyss Tree account called the second action Backstep and quoted the description "Harness the power of nature to enhance momentary movements." Those earlier labels are preserved without establishing Backstep as a current alias for the separately named Dodge entry.
Detail | Info |
|---|---|
Character | |
Skill Tree | Spirit (Green) |
Category | Perception / Passive |
Input | Passive |
How to Unlock | Unlocked by default; Abyss Artifact costs concern upgrades rather than an initial paid unlock. |
Earlier recommendations called Keen Senses one of the best skills to unlock early and advised spending the first Abyss Artifacts to reach Rank 3 before any other skill. The documented default parent skill and starting Parry entry mean those defensive options should not be described as universally absent until an initial Artifact purchase. The progression still lists Dodge and Counter, but Kliff also has an observation route for Counter that does not automatically raise the parent rank.
Because of how varied the three unlocks are, Keen Senses fits smoothly into almost any play style. Aggressive players benefit from the Counter, defensive players rely on the Parry, and mobile players gravitate toward the Backstep dodge. Maxing the skill early transforms how fights feel and dramatically improves survivability against both regular enemies and bosses.
Rank | Unlocks | Input | Description |
|---|---|---|---|
Rank 1 | Earlier PlayStation input report: L1 + R2 (timed) | Earlier timing, damage and animation account: Parry an enemy attack perfectly. Completely negates incoming damage, costs less stamina than a normal block, and briefly staggers the attacker. Creates a window for a devastating riposte. | |
Rank 2 | Dodge (recorded); Backstep (earlier label) | Earlier PlayStation input report: Circle (timed) | Earlier timing, damage and animation account: Escape from an imminent threat with a precisely timed backstep. Functions as a perfect dodge with extended invincibility frames. Creates distance and a brief counter window. |
Rank 3 | Earlier PlayStation input report: Attack (timed) | Earlier timing, damage and animation account: Predict the enemy's movements to strike first. When timed correctly, Kliff attacks before the enemy's blow lands, interrupting their action and dealing bonus damage. |
The Counter guide gives Kliff a specific observation route: approach the pair of soldiers slowly practicing with spears in Hernand Castle's training yard or behind Lioncrest Manor, wait for Observe, then hold LB, Ctrl or L1 according to the listed platform. The guide calls that learning route free but says it does not automatically increase Keen Senses to Level 3. Damiane and Oongka instead have a listed Level 3 parent-skill route. That distinction concerns skill learning, not a blanket statement about all combat input costs.
The Parry mechanic requires holding shield block (L1) and pressing R2 at the exact moment an enemy attack connects. A successful parry is confirmed by visual and audio feedback on screen. The timing window varies by enemy type: regular soldiers have generous windows, while bosses have much tighter timing. After a parry, the attacker staggers, giving Kliff enough time for a full riposte counter-attack.
Unlike a standard block (which drains Stamina with each absorbed hit), a successful parry costs very little Stamina and fully negates damage. Mastering the parry timing is one of the most rewarding aspects of Crimson Desert's combat system.
The parry window itself sits in a satisfying middle ground. It is more forgiving than the split-second deflect windows found in games like Dark Souls or Sekiro, but it is not so generous that it trivializes the mechanic. Players still need to read enemy wind-up animations and commit to the timing. Something as essential to medieval melee combat as parrying is actually locked behind this skill, so unlocking Rank 1 should be an immediate priority once you gain access to the Abyss Tree.
Backstep (Rank 2) adds a precision dodge option separate from the standard Evasive Roll. When timed at the exact moment of an incoming attack, Kliff steps backward with extended invincibility frames. This is particularly useful against unblockable attacks (grabs, magic, ground slams) where shield-based parrying is not an option.
Successfully executing a timed Backstep is arguably the single most impactful ability in the game. Whenever the dodge connects at the right moment, the game enters a slow-motion state, giving you a relatively peaceful second or two to survey the battlefield and plan your next move. This brief pause turns frantic encounters into manageable decision points, allowing you to line up a heavy attack, reposition, or switch targets without pressure. The slow-motion effect is also visually distinct, accompanied by a green glow around Kliff to confirm the successful timing.
The earlier Backstep account described a Spirit cost on activation, with a cheap single dodge against slow swings from golems, large beasts and world bosses but rapid depletion during five- or six-hit combos. Keep that account separate from the named skill cards: Keen Senses, Parry, Dodge and Counter list no cost to use, while Evasive Roll lists 10 Spirit and describes rolling away while being hit. These entries do not establish Backstep as an alias for Dodge or assign one cost to every ordinary evade, guard or roll. The cards also do not quantify Stamina spent by every underlying defensive input.
Earlier Kearush the Slayer advice described long Act 5 combo chains, warned against repeated Backstep attempts and recommended creating space before a counterattack. It called standard Evasive Roll a Stamina action rather than a Spirit action. The separately named Evasive Roll card instead lists 10 Spirit and a roll while being hit. Preserve the tactical spacing advice, but do not use the older naming and cost distinction as proof that every roll is free of Spirit cost.
Self-awareness about when to use Backstep versus when to simply roll away is one of the biggest skill gaps between average and advanced players. As a rule of thumb: if the enemy is swinging more than twice in a row, roll out and wait for the recovery phase rather than trying to perfect-dodge each swing.
Counter appears at Rank 3 in the listed parent progression, but Kliff also has an observation route that does not automatically grant Keen Senses Level 3. Its skill card says to attack right before being hit to interrupt the enemy. The older description of predicting the enemy, bonus damage, stagger and the tightest timing window remains an earlier combat account rather than a measured comparison of every defensive action.
In practice, the Counter works by attacking right before an enemy strikes. If timed correctly, Kliff knocks the opponent's weapon out of the way and lands his own blow instead, seamlessly turning defense into offense in a single motion. While it demands the tightest timing of all three Keen Senses abilities, the payoff is enormous: the enemy takes bonus damage and is left staggered, opening them up for follow-up attacks or combos. Counter shines against enemies with slow, telegraphed patterns where the attack window is easier to read.
Focus Level 3 unlocks Kliff's Focused Insight. Base Focus slows time and restores Spirit while maintained, while the Focused Insight card lists 1 Spirit per second and describes automatically facing incoming attacks while Focused and countering them. The earlier L3+R3 activation and L1 parry sequence is retained as an input report. The costed upgrade should not be described as a wholly free refill, and its net recovery while combined with the parent action has not been measured here.
Earlier performance recommendation, not a guarantee that every parry or directional input is risk-free: This essentially removes the skill barrier from parrying. Even players who struggle with the standard Keen Senses Rank 1 parry timing can land consistent parries while Focus is active, because the slow-motion effect gives you a much wider reaction window and the auto-facing means you never miss because you were looking the wrong direction. For boss fights where missing a parry means eating a full combo, Focused Insight is a safety net that lets you play aggressively without the risk of a mistimed input.
Earlier Antumbra encounter and upgrade-order recommendation, not a newly measured requirement or guaranteed clear: The combination is powerful enough that Focused Insight alone can carry you through some of the harder early sanctum fights, including Antumbra's Sword. The recommended early skill path for most players is: Keen Senses Rank 1 (parry) first, then Focus to Level 3, then come back to finish Keen Senses Ranks 2 and 3. That order gives you a reliable parry option through Focused Insight before you even unlock Backstep or Counter.
Landing a parry, Backstep, or Counter is only half the fight. What you do during the stagger window determines whether the opening translates into real damage. Two combos stand out as the highest-damage follow-ups available after a Keen Senses proc.
Force Palm applies a defense-reduction debuff on the target (shown as a leaf symbol beneath the enemy health bar). Once that debuff is active, immediately chain into Blinding Flash Finisher (L1 + R1 followed by R2). The Finisher locks into a rapid six-hit heavy attack sequence that deals its full damage against the target's reduced defenses. The entire combo takes roughly three seconds and outputs more damage in that window than almost any other skill chain in the game. Repeat the loop each time you land a parry or Counter: apply Force Palm, follow up with Blinding Flash Finisher, then reset to a defensive stance and wait for the next opening.
Turning Slash (hold R1 + R2) is another strong option after a successful parry or Backstep. At Proficiency level, you can chain a light attack directly into Turning Slash for a faster version. At Level 3, the charged version ignores super armor entirely, which means it launches even enemies that normally power through your hits. Turning Slash also has invincibility frames during its startup animation, so it doubles as a defensive tool if you mistime your initial parry and need a quick escape that still deals damage.
Against bosses, the general priority is: land a parry or Backstep, apply Force Palm for the defense debuff, then either Blinding Flash Finisher (max burst) or charged Turning Slash (if the boss recovers too quickly for a full Finisher chain). Experiment with both to see which fits the recovery window of each boss.
Imbue Elements becomes available for enhancement after learning at least one elemental skill. Choose an unlocked element through the Food Quick Slot menu and use the imbue prompt for a compatible action listed in the skill tree; those imbued actions consume Spirit. Earlier notes placed this in the middle of Chapter 4 and called the Lightning element the earliest route through the Courtyard of Precision. Those global timing and earliest-route claims remain earlier exploration guidance. Elemental Turning Slash is listed at Imbue Element Level 1 for Kliff; this does not make every follow-up attack automatically elemental.
Earlier elemental-combo, damage-stacking and named boss-weakness reports; exact damage and reaction guarantees remain unverified here: The practical loop is straightforward: parry or Backstep to create an opening, then hit with an element-imbued Turning Slash or Force Palm. The elemental bonus damage stacks with the defense debuff from Force Palm, which leads to noticeably larger numbers. Against bosses with a specific elemental weakness, swapping to the right element before the fight makes a significant difference. Kearush the Slayer is extremely weak to the Fire element: hitting him with flame-imbued attacks causes him to roll around on the ground, which creates a free DPS window. Ludvig takes extra damage from Frost in certain phases. Check each boss's weaknesses and have the correct element ready before you enter the arena.
Abyss Gear effects must match their named trigger rather than every one of the earlier elemental attacks. Orbs of Lightning says attacks imbued with Lightning can trigger its effect at additional Spirit cost and requires Lightning plus Imbue Element Level 1 or higher. The Scorchflame Plate Gloves record lists Volcanic Eruption as installed gear. That gear says Flame-imbued attacks can trigger it with additional Spirit and requires Flame plus Imbue Element Level 1 or higher. Installed gear and conditional triggers are distinct from assuming every hit on those gloves causes a free intrinsic eruption.
Each boss requires different use of the Keen Senses toolkit. The right approach depends on the boss's speed, attack patterns, and which attacks can actually be parried versus those that need to be dodged.
Details | |
|---|---|
ideal for parry practice. His sword strikes have readable wind-ups and generous parry windows. | |
too fast for consistent parries. Backstep is more reliable against his rapid combos. | |
many attacks are unblockable ground slams. Backstep and Counter are essential; parrying only works on claw swipes. | |
Fortain | requires mixing all three. Parry his direct strikes, Backstep the spectral being's attacks, and Counter when openings appear. |
charge attacks cannot be blocked or parried. Backstep is the only Keen Senses option for charges; use terrain for blizzard phases. |
The earlier Antumbra's Sword strategy alternated parries for standard melee swings and dodges for red-hued attacks, then used stagger and poise breaks for Blinding Flash Finisher openings. It described using Focused Insight to parry "for free." Keep the encounter and poise account as earlier strategy, but separate the resource entries: the Parry card lists no use cost, while maintaining Focused Insight lists 1 Spirit per second. That distinction does not prove zero Stamina for every guard animation or guarantee a successful automatic parry.
When you see a red glow on the boss, stop trying to parry and space out immediately. The red flare wave attacks and ground thrusts cannot be blocked. Roll or Backstep through them, wait for the boss to return to standard swings, then re-enter Focus and resume the parry loop. Bring at least three Palmar Pills as insurance. Even with starting gear, this fight is very doable if you let Focused Insight handle the parry timing for you.
Earlier Kearush the Slayer notes described an ape-like beast with three health bars and fast multi-hit combos, claimed its strikes could not be shield-blocked and warned that repeated Backstep drained Spirit. Those encounter, timing and unblockability details remain earlier reports. The named Dodge card lists no use cost; Evasive Roll is a different named action with a listed 10 Spirit cost. Do not infer a universal cost for ordinary rolling or the earlier Backstep label from either entry.
The earlier Kearush plan was to roll past or around long strings, wait for recovery, land two or three quick attacks and reserve Backstep for a single heavy slam. That tactic and its slow-motion payoff remain earlier strategy. Its parenthetical "Evasive Roll costs Stamina, not Spirit" should not be applied to the named Evasive Roll card, which lists 10 Spirit. Ordinary movement and the named reactive skill must be distinguished.
Fire is extremely effective here. Hitting Kearush with Fire element attacks causes him to catch fire and roll around on the ground, which creates a long free damage window. Fire spears dropped by enemies at Karin Quarry are the earliest fire source available for this fight. If you have Imbue Elements unlocked, equip fire and use imbued attacks during his recovery phases for massive bonus damage. Stock up on food before this fight: 100+ Grilled Meat is recommended because the fight is long and punishing.
Ludvig has two distinct phases, and Keen Senses applies differently to each. In Phase 1, Ludvig fights as a swordsman and most of his attacks are parryable. This phase is almost a free parry training session if you have Focused Insight. Enter Focus, parry his swings, and counter with Force Palm into Blinding Flash Finisher during stagger windows. Look for destructible terrain (stone pillars) in the arena. You can break them and slam the debris into Ludvig for a large chunk of damage plus an extended DPS window.
Phase 2 changes everything. Ludvig gains lightning attacks: orbs, sword slashes with electric trails, and a screen-darkening lightning maze. The lightning orbs should not be blocked (they stun through a shield). Roll through them or use terrain for cover. When he creates lines of lightning on the ground, stand between the lines and wait for them to dissipate. During his clap-into-darkness attack, start rolling immediately because lightning strikes rain down in sequence.
The key in Phase 2 is to stay patient. Backstep his melee swings to trigger slow-motion, use the pause to identify his next attack, and punish his recovery frames. A Focused Force Palm interrupt can stagger him out of certain wind-ups. Ranged Focus shots also build stun buildup at a safe distance, which can force him into a vulnerability state without needing to be in melee range.
The earlier Spirit-management account said a timed Backstep both cost Spirit and refunded Spirit and Stamina, while a missed perfect dodge spent Spirit without a refund. Those exact cost/refund mechanics remain unverified reports. The named Keen Senses, Parry, Dodge and Counter cards list no use cost; Evasive Roll lists 10 Spirit. Those entries concern named skills and do not establish zero Stamina for every underlying evade or identify the old Backstep label as a current skill alias.
Base Focus is documented as slowing time and restoring Spirit while maintained. Kliff's Focus Level 3 unlocks Focused Insight, which separately lists 1 Spirit per second. The earlier claim that Level 3 necessarily regenerates Spirit faster is not established by those two cards. Check the action you are maintaining rather than assume the upgrade is a free or faster recovery loop; its net combined restoration is not measured here.
For extended boss fights, bring food and healing items in bulk. Buy meat from merchants at Greymane Camp or the Hernand butcher. General merchants restock food every 24 in-game hours. Hunting deer and goat packs is another reliable meat source. Palmar Pills (regular: 30% health revive; Refined: 100% health revive) provide emergency recovery. Refined Palmar Pills can be found near waterfalls in the Hernand region.
Keen Senses pairs well with several other Abyss Tree skills:
Synergy | Details |
|---|---|
: after a successful parry or counter, Force Palm delivers high damage to a staggered target and applies a defense-reduction debuff that amplifies all follow-up hits. | |
: chains directly after Force Palm for a six-hit burst that takes full advantage of the defense debuff window. | |
: invincibility frames on startup make it a damage-dealing dodge alternative. Charged version at Level 3 breaks through super armor. | |
: phantom clones can follow up on openings created by parries. | |
Base Focus slows time and restores Spirit. Focused Insight automatically faces incoming attacks while Focused and counters them, at a listed 1 Spirit per second. The earlier near-automatic-parry recommendation against fast enemies is not a guarantee of success or a wholly free upkeep cost. | |
Use an unlocked element on compatible actions listed under Imbue Element, following the imbue prompt and spending Spirit. The earlier advice to swap elements for boss weaknesses does not mean all follow-up attacks are automatically imbued. | |
(Rank 5, Rush): the Rush skill complements Counter by providing another preemptive strike option. |
Keen Senses is listed as unlocked by default for Kliff, Damiane and Oongka among the playable characters. Upgrades are individual; the guide distinguishes them from shared primary Health, Stamina and Spirit upgrades. For Kliff, the dedicated Counter guide documents observing two spear-wielding soldiers at Hernand Castle's training yard or behind Lioncrest Manor. Learning Counter this way does not automatically raise Keen Senses to Level 3. The source's per-character Dodge entries differ, so the Kliff progression should not silently be imposed on every character.
Patch 2.00.00 separately changed skill-learning resources. Spending Abyss Artifacts to learn a skill grants equivalent Abyss Links to the other playable characters, and each character can reset its own progression and recover its spent Links. The initial launch after the update reset prior progression and refunded learning resources once. This does not make every later upgrade free or turn a skill-card use cost into an Artifact learning price.
Practice parry timing against regular enemies before attempting it on bosses.
Watch for visual cues: most enemies telegraph attacks with a brief glow or wind-up animation.
When parrying feels too risky, fall back to Backstep. It has a more forgiving window.
Counter requires the most practice but offers the highest reward. Use it against enemies with slow, predictable patterns.
Investing in the Green Branch early to unlock at least Rank 1 (Parry) dramatically improves survivability.
Earlier multi-hit-combo advice warned that Backstep Spirit costs would accumulate and recommended Evasive Roll instead. Check the named action: Dodge lists no use cost, while Evasive Roll lists 10 Spirit. This does not assign a cost to every ordinary roll or prove the Backstep label is an alias for Dodge.
Unlock Focus to Level 3 before maxing Keen Senses Ranks 2 and 3. Focused Insight makes parrying dramatically easier and can carry you through tough early sanctum bosses.
Before a boss fight, sharpen your weapon at an anvil and repair your armor at a grindstone. Both give temporary buffs that stack with your Keen Senses openings.
One-hand plus shield setups are better for parry-heavy fights because the shield block stance (L1) transitions into parry naturally. Two-handed weapons hit harder during punish windows but lack the shield block stance.
If you die during a boss fight, use a Palmar Pill to revive on the spot rather than restarting. Refined Palmar Pills restore 100% health.