Loading...
Loading...
Law System
March 22, 2026 at 11:18 AM
Merged unique content from crime-system and bounty-system into law-system
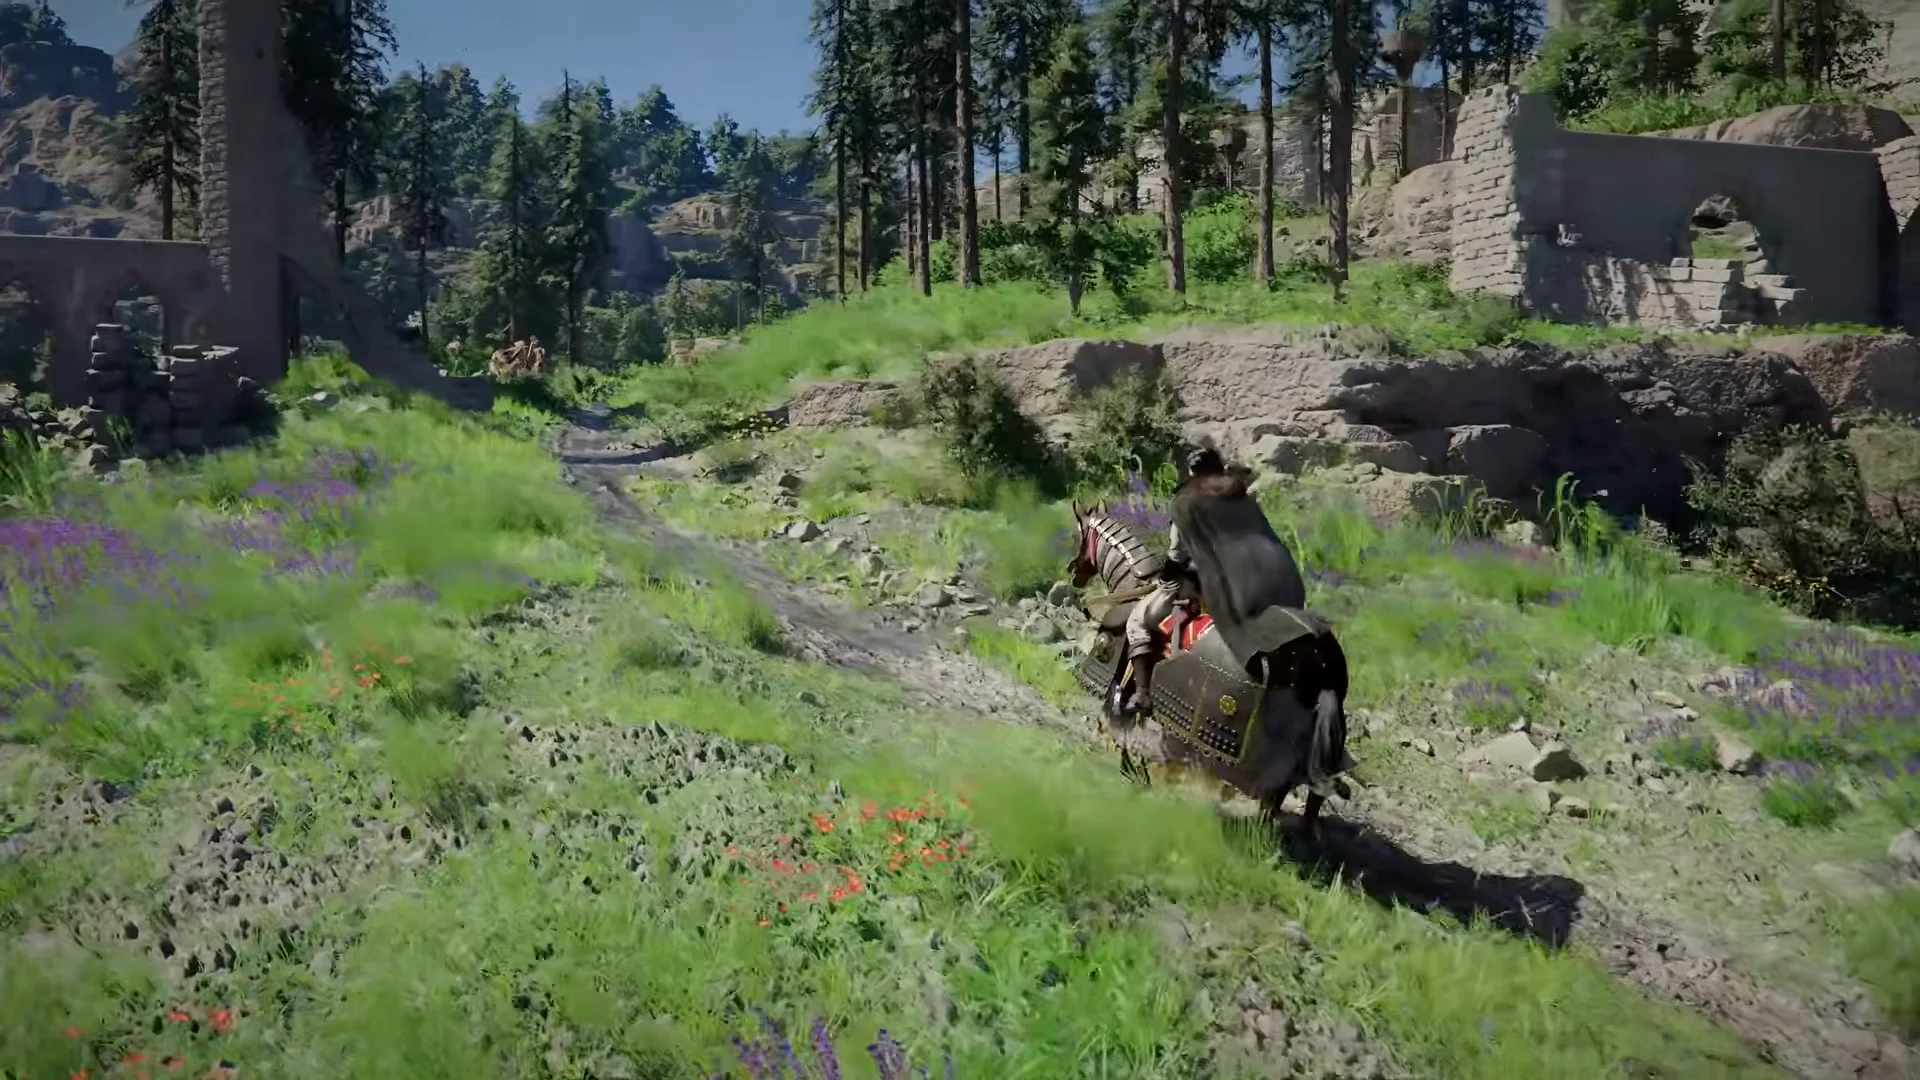
Crimson Desert has a law system that tracks criminal behavior across Pywel's towns and cities. Harmful actions toward residents and their property have real consequences, ranging from fines to imprisonment. Pearl Abyss has described the system as "another piece of the combat and progression puzzle" rather than a simple morality meter. Criminal behavior offers temporary strategic advantages but generates escalating risks.
Before committing crimes against NPCs, players must first equip a criminal mask. This mask serves as a gameplay gate: pickpocketing, attacking civilians, and other criminal actions are only available while wearing it. The mask must be acquired during gameplay, though the specific method of obtaining it has not been detailed. Removing the mask returns the player to normal NPC interactions.
The following actions are recognized as crimes. Criminal activity escalates from petty theft through intimidation to full-fledged violence.
Crime | Description | Contribution Penalty |
|---|---|---|
Pickpocketing | Stealing directly from NPCs while wearing the criminal mask. Awards stolen goods such as coin pouches. | -5 Contribution EXP (minor) |
Theft | Stealing items from the world, including goods from vendor stalls. Even taking something as small as a piece of dropped fruit triggers a red "Crime: Theft" overlay on screen. | -5 Contribution EXP (minor) |
Threatening | A "Threaten" option exists under the NPC interaction menu, allowing players to intimidate NPCs for information or compliance. | Varies |
Bullying | An escalation step between petty theft and violence. Includes shoving and intimidation of civilians. | Moderate |
Assault | Attacking NPCs and civilians while wearing the criminal mask. Requires the mask to initiate. | -30 Contribution EXP (serious) |
Horse theft | Kicking someone off a carriage and stealing horses. Shown in pre-release footage as an available criminal action. | Moderate to serious |
The escalation path typically follows: pickpocketing and stealing, then bullying and intimidation, then full-fledged conflict. Each step increases the severity of guard response and reputation penalties.
Crimes reduce Hernandian Contribution, a reputation metric that tracks the player's standing with regional factions. The HUD displays two metrics: Contribution (current standing level) and Contribution EXP (progress toward the next tier). Penalties range from -5 Contribution EXP for minor offenses like petty theft to -30 Contribution EXP for serious crimes like assault.
Low Contribution in a region restricts NPC interactions and limits access to certain towns or services. Vendor prices increase, quest availability changes, and some NPCs refuse to deal with the player entirely. Positive actions like completing quests, paying alms, and helping NPCs rebuild the Contribution over time.
Committing a crime places a bounty on Kliff's head. A wanted poster appears on screen showing the character's face and the current bounty amount. The wanted posters are rendered as individual sheets with full paper physics when inspected. Repeated offenses raise the bounty value, making guards and residents progressively more aggressive.
A "Bounty Notice" marked "Arrested" appears in the top-right corner of the screen when crimes are committed. Bounty status persists until cleared through arrest, paying fines, or other means. While wanted, active bounty status affects NPC interactions and restricts access to certain towns and services.
When crimes are committed, guards and patrols become hostile. The system deliberately creates overwhelming opposition: players face dozens of enemies simultaneously when wanted, making escape difficult without serious preparation. Guards have sophisticated detection capabilities beyond standard vision cones, described in hands-on previews as possessing impressive awareness at range.
With a high enough bounty, an entire town can turn hostile. Both civilians and guards refuse to deal with the player, and guards actively attempt to arrest or fight the player. The number of guards that respond is deliberately overwhelming, so fighting through a wanted situation is rarely viable.
If guards take Kliff down, the player is arrested and placed in a wooden holding cell. Serving jail time clears the current bounty, though the player loses time in the process. Getting arrested is one of the primary ways to clear wanted status for players who cannot afford to pay fines. Specific details about sentence duration, inventory impact, and escape mechanics have not been fully detailed in pre-release coverage.
Several methods exist for dealing with an active bounty.
Method | Details |
|---|---|
Pay the fine | The simplest approach. Pay off the bounty to clear wanted status immediately. The amount depends on the severity of accumulated crimes. |
Serve jail time | Being arrested and serving time in a holding cell clears the bounty. You lose time but keep your progress. |
Leave the area | Leaving the affected region and returning later may allow the situation to cool down, though this is less reliable than paying or serving time. |
Unlike a simple morality system, Crimson Desert's crime mechanics can be used strategically. Pearl Abyss has confirmed that players can gain additional attack power based on negative notoriety. Specific gear pieces have attack bonuses tied to the player's wanted level, meaning that notoriety "can contribute to raising your damage if you have the right gear equipped."
The developers rejected a traditional good/bad path system. Instead, criminal behavior offers temporary combat advantages but generates escalating risks from guards, bounties, and restricted access. Pearl Abyss has confirmed that the main story is built around Kliff and the Greymanes as central figures. Since the Greymanes "aren't inherently villains," there is no long-term story impact from pursuing a criminal playstyle. When asked about a full evil playthrough, developer Will Powers commented: "Would I recommend a full playthrough in that playstyle? Eh, I don't know."
The game features full stealth mechanics with enemy vision cones visible on the minimap and silent takedowns. Stealth allows players to approach crime more carefully, though hands-on previews noted that guards proved difficult to avoid due to their detection range. Players can also hogtie and deliver captured criminals or enemies for bounty rewards, serving as bounty hunters themselves.
Players can participate in the law system from the other side by accepting bounties from wanted posters on notice boards in towns. Bounty hunting involves tracking down the target, knocking them out, and carrying them to a guard to turn them in. Finding a guard while carrying an unconscious bounty target can be tricky, adding a practical challenge to the process.
The villages and cities feel alive with NPCs reacting to unlawful behavior. Harmful actions against innocents turn residents and guards hostile, while accumulated criminal history affects how NPCs interact with the player over time. Notably, some NPCs can pickpocket the player as part of the living world simulation, turning the crime mechanic in both directions.
Save before experimenting with crime. The consequences are real and can lock you out of vendor access in a town you need.
Guards are numerous and tough. Trying to fight your way out of a wanted situation is rarely worth it unless you have specific notoriety-boosting gear.
The regional reputation hit from crimes affects vendor prices, quest availability, and NPC willingness to interact.
If you accidentally commit a crime, paying the fine immediately is usually the cheapest option before the bounty escalates.
Consider keeping notoriety-scaling gear in your inventory if you plan to use the crime system strategically for combat bonuses.
The game tracks several categories of criminal behavior. Each type adds to the player's bounty and reduces regional Contribution at different rates.
Offense | Description | Severity | Contribution Penalty |
|---|---|---|---|
Pickpocketing | Stealing items from NPC pockets or bags. Requires wearing a criminal mask. | Minor | minor penalty |
Theft | Taking dropped fruit from vendors, looting unattended goods, or stealing from market stalls. | Minor | minor penalty |
Bullying | Intimidating or harassing NPCs without direct combat. | Moderate | moderate penalty |
Assault | Attacking civilian NPCs or friendly characters. | Serious | significant penalty |
Murder | Killing civilian NPCs. | Severe | severe penalty |
When a crime occurs, a red "Crime: Theft" (or similar) notification appears on screen. Successful pickpocketing awards stolen goods like coin pouches.
Certain criminal activities like pickpocketing require the player to equip a criminal mask. The mask serves as a game mechanic that gates access to petty crime, preventing accidental activation. Wearing the mask signals criminal intent and unlocks the pickpocketing interaction prompt when near NPCs. Without the mask equipped, the option to pickpocket does not appear.
Each crime contributes to a cumulative bounty value displayed in the player's HUD. A "Bounty Notice" marker appears in the top-right corner of the screen. As the bounty increases, consequences escalate:
Bounty Level | Consequence |
|---|---|
Low | NPCs become wary. Some refuse to trade or offer services. Guards watch the player more closely. |
Medium | A wanted poster appears on-screen showing the player character's face and bounty amount. Guards actively patrol for the player. |
High | Guards become hostile on sight. Dozens of heavily armed guards converge simultaneously, making open combat extremely dangerous. |
The system is designed to discourage crime through overwhelming force rather than making it impossible. Pearl Abyss has noted that players face dozens of enemies at once when wanted, making escape difficult without careful preparation.
Getting caught by guards or losing a fight against law enforcement results in arrest. Kliff is placed in a wooden holding cell. The imprisonment mechanic serves as the primary punishment for criminal behavior, along with any bounty gold that must be paid as a fine. After release, the player's bounty is reduced.
Criminal behavior causes the player's Hernandian Contribution reputation to drop in the affected region. Lower Contribution means reduced access to regional benefits like vendor discounts, faction services, and NPC interactions. Positive actions (completing quests, helping NPCs, paying alms) increase Contribution, but rebuilding it after criminal activity takes time and effort.
Beyond guards, civilian NPCs in the affected area become hostile or fearful. Quest-givers may refuse to interact with a wanted player, merchants may close their shops, and townspeople may flee or alert guards. An entire town can become hostile based on criminal actions. This social consequence makes extended crime sprees increasingly impractical as the player loses access to essential services.
In an interesting twist, Will Powers confirmed during a Dropped Frames podcast interview that certain gear can boost attack power based on the player's wanted level. Players could strategically raise their bounty before a tough boss fight to spike their damage output. However, Powers cautioned against sustaining an "evil playthrough," stating: "Would I recommend a full playthrough in that playstyle? Eh, I don't know." The crime system is designed more as a reactive consequence framework than as an alternative playstyle.
The crime system works in reverse as well. Notice boards in settlements display wanted posters for criminals and bandits. Players can accept these bounty contracts and track down targets in the open world. Fugitives may attempt to flee, requiring the player to chase and tackle them.
After defeating a target, players can hogtie them and physically carry or transport the bound prisoner back to town authorities for bounty rewards. This creates a gameplay loop where the player acts as a bounty hunter, earning currency and reputation by clearing the world of criminal NPCs.
The game recognizes several categories of criminal behavior. These were demonstrated in the Features Overview #3: Life in Pywel trailer, which showed Kliff pickpocketing NPCs, stealing vendor goods, and escalating to violence.
Crime | Description | Severity | Contribution Penalty |
|---|---|---|---|
Pickpocketing | Stealing items directly from NPC residents. Triggers a "Crime - Theft" notification on screen. | Low | ~-5 Contribution EXP |
Vendor Theft | Taking items from vendor stalls, such as fruit from a food stand | Low | ~-5 Contribution EXP |
Bullying NPCs | Intimidating or pushing civilians without lethal force | Medium | Moderate penalty |
Assaulting Townspeople | Engaging in open combat with non-hostile NPCs | High | ~-30 Contribution EXP |
Attacking Guards | Fighting law enforcement or military patrols directly | Very High | ~-30 Contribution EXP |
Each criminal action adds to a running bounty value tracked in the UI. The more severe the crime, the larger the bounty increase. Repeated offenses in a short period cause the bounty to rise rapidly.
Interestingly, NPCs can also pickpocket the player, suggesting a two-way interaction where the streets of Pywel's settlements are not entirely safe even for the protagonist.
As the bounty value increases, the system creates a visible Wanted Poster that displays the player character's face along with the current bounty amount. This poster appears on-screen as both a gameplay indicator and a narrative touch, reinforcing that Kliff's criminal behavior is noticed and documented by the communities he moves through.
The bounty operates on a sliding scale rather than a simple toggle between "wanted" and "not wanted." Different thresholds trigger different levels of response from the world. A small bounty from a single act of theft might result in wary NPCs and the occasional patrol keeping an eye on the player. A large bounty accumulated through sustained violence will turn entire settlements hostile.
Once the bounty exceeds certain thresholds, guards and military patrols become actively hostile. They pursue Kliff on sight, engaging in combat to subdue or arrest him. The response scales with the bounty level:
At lower wanted levels, guards may issue warnings or attempt to detain the player
At higher levels, guards attack with lethal intent and call for reinforcements
Players face dozens of enemies simultaneously when wanted, making escape difficult without preparation
Bounty hunters appear and actively pursue the player across the region
Townsfolk, residents, and guards all become aggressive toward the player
Guards are not omniscient. The system appears to use line-of-sight and proximity detection, meaning players can potentially evade pursuit by breaking line of sight and putting distance between themselves and their pursuers. However, returning to the scene of a recent crime while the bounty is still active immediately re-engages the authorities.
Depending on the severity of committed crimes, players may need to pay fines to resolve their wanted status. Red94 reported that players may need to "fight their way out of the city, pay large fines, or even serve time in prison," indicating that fines are one of several options for dealing with criminal consequences.
One of the most significant long-term consequences of criminal activity is the loss of regional faction contribution. Criminal actions reduce Contribution and Contribution EXP for the regional faction (e.g., "Hernandian Contribution"), with penalties ranging from -5 for minor offenses to -30 for serious crimes. This same Contribution currency is earned through the liberation system and positive faction engagement, meaning criminal behavior directly undermines liberation progress.
Losing faction contribution means losing access to location-specific benefits:
Vendor discounts and merchant access in the affected region
Access to certain NPC services and quest lines
Resource nodes tied to that faction's territory
Deeper faction relationships and story branches
A player who has built up favorable standing through quests and liberation can see that progress eroded by a crime spree in the same region.
In a distinctive risk-reward design, certain gear provides an ATK+ bonus based on the player's Wanted level. Will Powers (Pearl Abyss Director of Marketing) confirmed this mechanic during the Dropped Frames podcast interview: players can "make evil decisions and be rewarded for those playstyles with additional attack level based on your negative notoriety."
The strategic implication is significant: players may want to intentionally raise their notoriety to gain a spike in power before challenging a tough boss. This creates a calculated trade-off between the increased attack power and the consequences of being wanted: hostile guards, bounty hunters, faction contribution loss, and restricted access to settlement services.
The specific gear pieces that provide this notoriety-scaling ATK bonus have not been detailed in pre-launch materials. The exact scaling formula (how much ATK per notoriety level) is also unknown.
The bounty persists until cleared through one of several methods:
Method | Description |
|---|---|
Arrest and Imprisonment | Getting caught by guards results in a brief jail sequence; bounty resets after serving time |
Paying Fines | Depending on crime severity, players can pay monetary fines to clear their status |
Other Methods | Additional bounty clearance options exist but have not been fully detailed in pre-launch materials |
The system is designed to ensure that players cannot simply wait out their wanted status without consequence. The bounty remains active until actively resolved.
System | Interaction |
|---|---|
Criminal behavior reduces the same Contribution currency earned through liberation, directly undermining territorial progress | |
Faction Standing | Each region has its own faction contribution tracker; crime in one region does not affect standing in others |
Resources obtained through theft may not offset the lost benefits of good regional standing | |
Factions do not affect the main story ending, meaning criminal behavior has no narrative consequence beyond side content |
Will Powers (Pearl Abyss Director of Marketing) acknowledged that the system allows for an "evil playthrough" where the player commits crimes freely. However, he commented: "Would I recommend a full playthrough in that playstyle? Eh, I don't know." This suggests that while the system supports full criminal agency, the accumulated penalties make a purely villainous approach significantly more challenging than a balanced or lawful playstyle.
Multiple outlets have compared the system to Red Dead Redemption 2's crime and bounty mechanics, though Pearl Abyss has not explicitly made this comparison. The game is "not Grand Theft Auto" in terms of lawless freedom; the wanted system is designed as one component of a broader world that rewards engagement over destruction.
Petty crimes like pickpocketing can provide quick resources but risk compounding bounties if guards notice
Attacking guards dramatically escalates the wanted level, making escape much harder
Regional reputation loss can lock players out of vendor discounts and NPC quest lines
The notoriety ATK bonus creates a legitimate reason to maintain wanted status before tough boss fights
Imprisonment clears the bounty but costs time
Fines offer a monetary alternative to jail for resolving criminal status
Crime in one region does not affect standing in other regions, allowing targeted criminal activity
The system interacts with the liberation system, as both share the faction Contribution currency
Topic | Connection |
|---|---|
Shares the faction Contribution currency with the wanted system | |
Guards and bounty hunters engage in full combat when pursuing wanted players | |
Greymane Camp | Camp management interacts with resources obtained through criminal means |
Settlements discovered through exploration become crime-capable locations | |
Stolen materials can potentially be used in crafting |
The game recognizes several categories of criminal behavior, each with different severity levels and Contribution penalties. Criminal activity ranges from petty theft all the way up to murder.
Crime | Description | Severity | Contribution Penalty |
|---|---|---|---|
Pickpocketing | Stealing items directly from NPC pockets. Requires a mask to be equipped. Awards stolen goods such as coin pouches. | Low | -5 Contribution EXP |
Theft | Taking items from containers, vendor stalls, shelves, strongboxes, and chests while wearing a mask. Even taking something as small as a piece of fruit triggers a red "Crime: Theft" overlay on screen. | Low | -5 Contribution EXP |
Vandalism | Destroying property such as fences and posts, which often happens accidentally while galloping on horseback through settlements. | Low | Minor |
Trespassing | Entering restricted areas or private homes without permission while wearing the criminal mask. | Low to Moderate | Minor to Moderate |
Threatening | Using the "Threaten" option in the NPC interaction menu to intimidate residents for information or compliance. | Moderate | Moderate |
Bullying | Intimidating, shoving, or harassing civilians without direct lethal combat. | Moderate | Moderate |
Assault | Attacking civilian NPCs or friendly characters while wearing the criminal mask. | High | -30 Contribution EXP |
Horse Theft | Kicking someone off a carriage and stealing their horse. | High | Moderate to High |
Murder | Killing civilian NPCs or guards. Continually striking an NPC counts as murder and places a bounty on your head instantly. | Very High | -30 Contribution EXP |
The typical escalation path runs from pickpocketing and theft, through bullying and intimidation, up to assault and murder. Each step increases the severity of the guard response and the reputation penalties you face.
With your mask equipped, approach any chest, dresser, shelf, or strongbox and look for the "Steal" button prompt. Hold L1 on PlayStation (LB on Xbox, or the PC equivalent) to bring out your lantern, which lets you scan nearby objects and highlight stealable items more easily. Loot bag icons on the minimap mark containers with keys or valuables, and book icons mark crafting recipes.
Buildings like the Royal Trading Post's Product Storage are packed with containers and can yield around 90 silver in a single run if you clean them out. For a full breakdown on container theft, see the How to Steal Items guide.
Strongboxes are a special case. These locked containers are scattered throughout Pywel and can only be opened by solving the mechanical puzzle built into each one. The items inside count as stolen goods, so you must be wearing a mask to take the contents after solving the puzzle. Without a mask, you can still solve the puzzle, but you cannot claim the loot. Strongbox theft carries the same -5 Contribution penalty as regular theft regardless of whether anyone sees you.
Pickpocketing uses a specific bump-and-grab technique rather than a simple button press. Here is how it works:
Equip your criminal mask.
Pick a target NPC and sprint directly into them.
The collision causes the NPC to stumble backward.
While looking at the stumbling NPC, the pickpocket prompt appears (Square on PlayStation, X on Xbox).
Press the button to complete the pickpocket.
You receive stolen goods such as coin pouches.
Pickpocketing always costs -5 Contribution EXP in that region, even if nobody witnesses the act. If an NPC or guard spots you during the attempt, you enter the Spotted stage of the wanted system.
Stolen items cannot be sold to regular vendors. You need to visit a Black Market vendor to unload your stolen goods. The earliest Black Market vendor available is Grimrak, who operates the Back Alley Shop southeast of Hernand town. His shop sits at the end of the road closest to the river, on the west side, right next to the Livestock Fence. Later in the game, you can also sell stolen items through Black Market vendors found at Goldleaf Tradeposts.
Different types of stolen property require different fences:
Stolen Property | Where to Sell | Notes |
|---|---|---|
General items | Black Market vendor (Grimrak or Goldleaf Tradeposts) | The earliest option is Grimrak southeast of Hernand. |
Stolen livestock | Livestock Fence | You must be actively carrying or riding the animal to sell it. The earliest Livestock Fence is opposite Grimrak near Hernand. |
Stolen wagons | Wagon Fence | Only Wagon Fence NPCs buy stolen wagons. One is located east of Hernand, south of the Halssius Apothecary. |
When you commit a crime and there are eyewitnesses in the area, you enter the wanted system. This system has two escalating stages that determine how aggressively the authorities respond.
The Spotted stage begins immediately after you commit a crime within sight of witnesses. A red detection radius appears on your minimap, indicating the area where guards are actively searching. A white timer appears in the upper right corner of the screen, showing how long you have before your status escalates.
During this stage, you can escape without earning a bounty. Sprint out of the red radius before the timer expires and no bounty will be recorded. If the crime is minor (a botched pickpocket attempt, minor vandalism), simply running into the wilderness and staying out of the search zone is enough to clear the alert.
If you linger inside the red detection radius for too long or continue committing crimes after being spotted, eyewitnesses report you and your wanted status escalates to the Searching stage. At this point a bounty notice is officially issued, complete with your portrait and a bounty amount. Guards shift from passive searching to active pursuit.
Once a bounty has been issued, simply leaving the area no longer clears your wanted status. The bounty persists on your record until you pay it off at a church or get arrested. Areas where you have an active bounty are marked in red on the world map.
Every criminal action reduces your regional Contribution, the reputation metric that tracks your standing with factions in each area. Penalties range from -5 Contribution EXP for minor offenses like pickpocketing to -30 Contribution EXP for serious crimes like assault or murder. These penalties apply even if nobody witnesses the crime.
Low Contribution in a region has practical consequences. Vendor prices increase, quest availability changes, some NPCs refuse to interact with you entirely, and you lose access to certain services.
The same Contribution currency is earned through the liberation system and positive faction engagement, so criminal behavior directly undermines your territorial progress. Rebuilding Contribution requires positive actions: completing quests, helping NPCs, and paying alms at churches. Recovery takes time, so preserving your reputation is usually more efficient than trying to rebuild it.
There are several ways to deal with an active bounty. The method you choose depends on how much money you have and how much time you are willing to spend. For a detailed walkthrough, see How to Pay Fines and Bounties.
The primary method for clearing a bounty is to visit the Confessional at any Church of Solumen and purchase a Writ of Absolution. This immediately clears your wanted level and calls off the guards. The cost depends on the severity of your accumulated crimes, ranging from copper coins for minor offenses to significant silver amounts for serious crimes.
Confessionals are marked on the world map by an icon that resembles an artistic rendition of the sun or a traditional compass (a yellow sun icon with an orange background). You can pay off bounties from other regions at any Confessional, and the cost remains the same regardless of where you pay.
Church locations include the Church of Hernand (south of Hernand Castle) and the Cathedral of Demeniss (in Demeniss City, near the southern wall).
If guards manage to take Kliff down (either through the tackle QTE or by defeating you in combat), you are arrested and placed in a holding cell. A brief jail sequence plays out, time skips forward, and your bounty is automatically paid upon release. Getting arrested clears the bounty without requiring you to visit a church, but you lose in-game time and suffer additional Contribution penalties on top of those already deducted by the crimes themselves.
During the Spotted stage only, you can avoid a bounty entirely by leaving the red detection radius before the timer expires. Once your status has escalated to Searching and a bounty has been formally issued, leaving the area does not clear it. The bounty remains on your record until resolved through the church or arrest.
Crime in Crimson Desert is tracked on a per-region basis. Each region (Hernand, Demeniss, and others) maintains its own bounty ledger and Contribution score. A crime spree in Hernand has no impact on your standing in Demeniss, and vice versa. This regional separation allows for targeted criminal activity; you can exploit one region for resources through theft while maintaining a clean record in regions where you need access to vendors, quest givers, or faction services.
Bounty notices are scattered across the Hernand region on notice boards, lamp posts, and walls. They are marked on the minimap with a distinctive purple letter icon, making them easy to spot while exploring. Most of the initial bounty posters can be found on posts and boards around the City of Hernand and nearby locations such as the Hernand Farmhouse area.
To pick up a bounty, approach a notice board or poster and interact with it. Hold L1 (PlayStation) or LB (Xbox) to inspect the details on the poster. The notice displays the target's name, bounty price, race, age, gender, and a description of their crimes. Once you accept the bounty, the target's last known location is marked on your world map. The bounty notice itself is stored as a Key Item in your inventory and cannot be sold.
New bounty notices appear as you progress through the main story. Check notice boards regularly when visiting towns, as later bounties become available in later chapters. Some bounties also require completing prerequisite quests or liberating specific locations before the notice spawns.
Capturing a bounty target alive earns the full Silver reward. Killing the target, whether intentionally or by accident, results in only half the bounty payout. The Contribution EXP is awarded regardless of whether the target is alive or dead. The standard capture procedure works as follows:
Travel to the target's location: Open your map and follow the bounty marker to the target's last known area. Ride your horse to cover the distance quickly.
Locate the target: The target will be identifiable by matching the poster description. When you get close, they will appear as an icon on your minimap. Most bounty targets attempt to flee the moment they spot you.
Chase and tackle: Sprint after the target and wait for the tackle prompt to appear. Press Cross (PlayStation) or A (Xbox) to tackle them to the ground.
Subdue with punches: After tackling, punch the target repeatedly. Each hit builds up a stagger meter. After several punches (usually two to four), the "Tie Up" option appears. Press the button immediately to restrain them. Be careful not to continue punching after the prompt appears, as excessive hits can accidentally kill the target and reduce your reward.
Load onto your horse: Pick up the bound target and summon your horse. Load the prisoner onto the horse's back. Kliff will automatically hold the prisoner while riding.
Deliver to the constabulary: Ride to the guard station (constabulary) listed on the bounty notice. The bounty notice specifies which constabulary accepts the target. For most Hernand bounties, this is the Hernand Constabulary located just outside the city walls along the western edge. Dismount, pull the prisoner off the horse, and approach the guards to turn them in.
You cannot fast travel while carrying a bounty target, so plan your route back to the constabulary before heading out. If your horse takes damage or gets spooked, both Kliff and the prisoner will fall off, and you will need to pick the target up again and remount.
The constabulary where you turn in the outlaw does not always match the area where you found them. An outlaw may be located outside Hernand City but still needs to be turned in at the city's constabulary. Always read the bottom of the bounty notice for the correct turn-in location.
Some targets are surrounded by hostile companions. Deal with nearby enemies first before attempting to tackle the bounty target.
If the target does not appear at the marked location, rest at a nearby bonfire or bed and wait several in-game hours. Some targets are time-sensitive and only appear during certain periods.
Wearing a Mask (obtained from the Jeffrey bounty) can prevent certain enemies from becoming immediately hostile, giving you more time to approach.
Capturing each bounty target yields a "Note with a Suspicious Symbol" item alongside the standard Silver and Contribution rewards.
The following bounty targets are part of the House Celeste faction quest line. All bounty notices become available starting in Chapter 2 unless otherwise noted. The Silver amounts listed are for capturing the target alive; killing the target pays half.
Target | Crime | Location | Silver (Alive) | Contribution | Notes |
|---|---|---|---|---|---|
Pickpocketing | Wandering in the City of Hernand | 1 | +100 | Tutorial bounty. Introduced by Pedro, the Hernand Guard Captain. Also rewards 1 Mask. | |
Pickpocketing | Near Rhett's Shop in the City of Hernand | 2 | +100 | Last spotted at Hernand's Inn. May attempt to hide or flee. | |
Murder | Church of Hernand area | 5 | +300 | Professional killer. Circle around the church to find her. She flees immediately on sight. | |
Theft | Scholastone at the Everfrost Basin | 8 | Yes | Poster found near Hernand Farmhouse. Target flees on detection. | |
Banditry | Greenfield Highlands near Ironwood Bandit Camp | 12 | Yes | Walks with a limp, easy to identify. Hostile bandits may be nearby. | |
Murder | Sunset Valley (southern Hernand) | 12 | +300 | Found near the windmill at the back of the settlement. Flees when confronted. | |
Unauthorized looting of ruins | Unicorn Cliff, near Hornsplitter's camp | 15 | +200 | Goblin target. Only appears before 1:00 PM in-game time. Blends in with other goblins before fleeing toward Nas Riverside. | |
Unknown | Pororin, southern Deepwoods | 25 | Yes | Requires completing "The Unreachable Village" quest to access the area. |
Jeffrey is a pickpocket who steals money from townspeople in Hernand City. This is the first bounty available and serves as a tutorial for the entire bounty system. The quest begins when you speak with Pedro, the Hernand Guard Captain, at the constabulary outside the city. After reading the bounty notice, locate Jeffrey on the city streets using the bounty icon on your minimap. Tackle him, punch him three times, and tie him up. Deliver him to Guard Antoni at the constabulary to complete the quest and receive 1 Silver, 1 Mask, and +100 House Celeste Contribution EXP. The Mask unlocks the ability to commit crimes while disguised.
Billy is a mid-40s pickpocket last spotted near Hernand's Inn. His bounty notice can be found around the City of Hernand. Track Billy using the minimap icon and look near Rhett's Shop. He may attempt to hide or run away when you approach. Tackle and subdue him, then deliver him to the constabulary outside the city plaza. Rewards 2 Silver and +100 Contribution EXP.
Bianca is a professional killer who pretends to need help so her victims lower their guard, then stabs them with a blade. Her bounty notice can be found on notice boards and lamp posts around Hernand, including near the Hernand Farmhouse. She is located at the Church of Hernand. Rather than going inside the church, circle around the building on the narrow dirt path to find her standing in a corner at the back. She flees immediately upon seeing Kliff, so be ready to sprint after her. Capture her alive for 5 Silver and +300 Contribution EXP.
Simon de Montfort is wanted for theft and can be found at Scholastone in the Everfrost Basin region. His bounty poster is located around the Hernand Farmhouse area. When you reach Scholastone, Simon will attempt to flee on detection. Chase him down, tackle, and restrain him. Transport him back to the constabulary for 8 Silver.
Alessio is an outlaw hiding in the Greenfield Highlands near the Ironwood Bandit Camp, in the southeastern part of the Hernand region. His bounty notice is found on lamp poles and notice boards in Hernand. On arrival, Alessio is easy to spot because he walks with a visible limp. Be prepared for nearby bandits in the camp. After subduing Alessio, note that the stagger builds up across multiple strikes before the bind prompt appears, so hit, wait briefly, and hit again rather than mashing. Rewards 12 Silver.
Salvatore is a murderer hiding in Sunset Valley, located at the southernmost part of the Hernand region. Head to the settlement and look for the windmill at the back of the town. Salvatore is found inside or near the windmill. He attempts to flee when confronted, so tackle and restrain him using the standard procedure. Capture alive for 12 Silver and +300 Contribution EXP. Players have noted that Salvatore's bounty poster appearance resembles "Let Me Solo Her" from Elden Ring, likely an easter egg from the developers at Pearl Abyss.
Blix is a goblin wanted for unauthorized looting of state-owned ruins. He is found at Unicorn Cliff near the Hornsplitter gang's main camp. Blix blends in with other goblins in the area before fleeing toward Nas Riverside when he spots you. A critical detail: Blix only appears at his location before 1:00 PM in-game time. However, if you arrive before 1:00 PM and are already close to his location, he will remain even after the clock passes 1:00 PM. If you miss the window, rest at a campfire and try again the next morning. Place his body on your horse for faster travel back to the City of Hernand constabulary. Rewards 15 Silver and +200 Contribution EXP.
Warren is located in Pororin at the southern edge of the Deepwoods. His bounty notice is posted in Hernand. However, reaching Warren requires completing the "The Unreachable Village" quest first, which grants access to the Pororin Forest area. Once you can enter the area, travel to Pororin, restrain Warren, and deliver him to the guard station. Rewards 25 Silver, making him one of the highest-paying bounties in the Hernand region.
Bounty hunting provides three categories of rewards:
Silver: The cash reward listed on the bounty notice. Capturing the target alive pays the full amount. Killing the target, whether intentionally or accidentally, reduces the Silver payout to exactly half.
Hernandian Contribution EXP: Reputation points with the Hernand faction (House Celeste). Contribution EXP is awarded regardless of whether the target is alive or dead. Contribution unlocks items at the Hernand Contribution Shop, including exclusive armor sets and horse bardings.
Note with a Suspicious Symbol: A quest item dropped by each bounty target upon capture. These notes appear to be connected to a broader story thread within the House Celeste quest line.
Bounties are one of the most reliable ways to earn Silver and Contribution in the early and mid game. The rewards scale with difficulty, ranging from 1 Silver for the tutorial bounty (Jeffrey) up to 25 Silver for Warren in the Deepwoods. Completing all available bounties also builds your reputation with House Celeste, unlocking increasingly valuable rewards at the Contribution Shop.
The bounty system intersects with several other game mechanics:
Crime System: The bounty system is separate from the player's own crime and wanted status. Kliff can accumulate his own bounty through criminal actions like theft and assault, which must be paid off at the constabulary. However, hunting NPC bounties is a lawful activity that does not increase Kliff's own wanted level.
Contribution System: Each bounty awards Contribution EXP for the Hernand faction. Higher Contribution levels unlock better items at the Hernand Contribution Shop. Bounties are one of the primary ways to build Contribution alongside Hernand Commissions.
House Celeste: All bounty notices are issued by House Celeste, one of the major factions in Hernand. Bounty quests appear in the faction quest log under House Celeste.
Mask: The Mask item, obtained from the Jeffrey bounty, enables disguise mechanics that allow Kliff to infiltrate hostile areas without being recognized immediately. This can be useful when approaching certain bounty targets in enemy-heavy zones.