Overview
Throughout Crimson Desert, players encounter a variety of human and non-human enemies that follow recognizable combat archetypes. Whether fighting Bleed Bandits at a drug den, Black Bear soldiers on a battlefield, or guards at a noble house's stronghold, the individual enemies within each faction fall into consistent combat roles. Understanding these archetypes helps players prioritize targets, choose the right weapon, and survive encounters against large groups.
The game's combat encounters are designed around groups of mixed enemy types. A typical hostile camp or stronghold has a combination of melee fighters, ranged attackers, and tougher defensive enemies. Learning to read the composition of an enemy group at a glance is one of the most important survival skills in the early game.
Melee Fighters
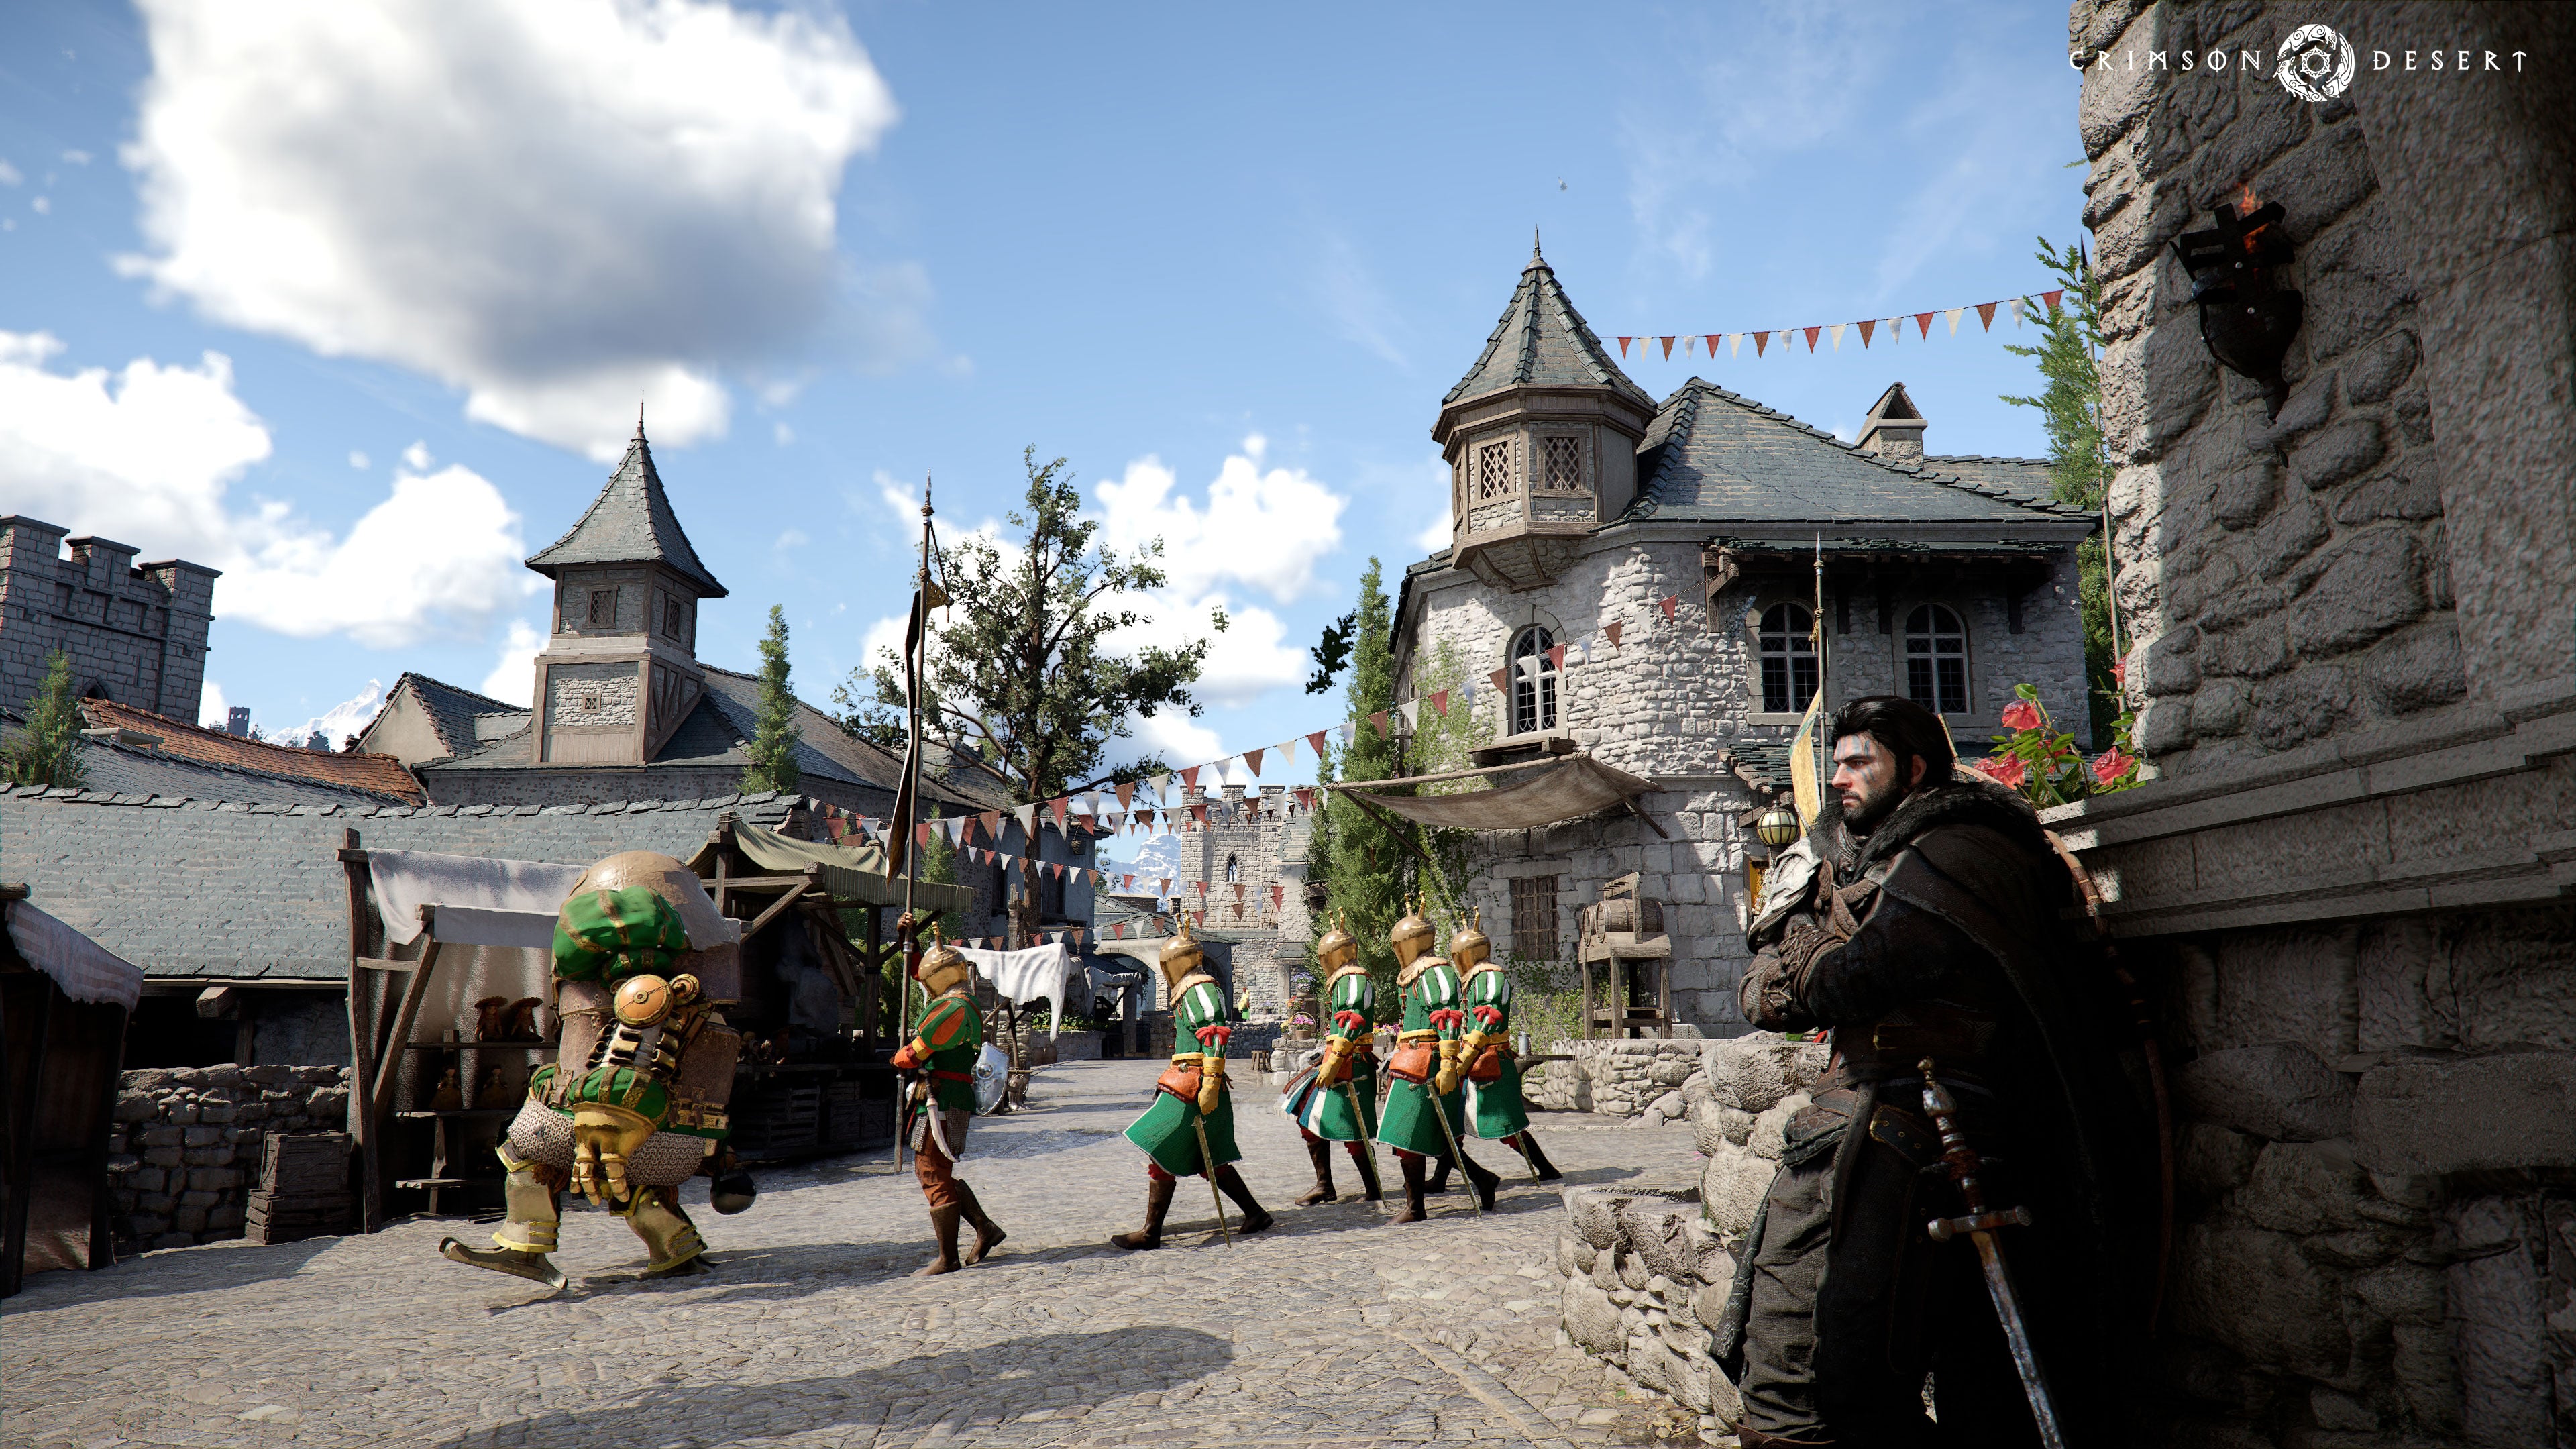
Melee fighters are the most common enemy archetype across all hostile factions. They close distance quickly and attack with swords, axes, clubs, or improvised weapons. Most melee fighters are lightly to moderately armored and rely on aggression and numbers rather than sophisticated tactics.
In group encounters, melee fighters tend to spread out and approach from multiple directions. They will attempt to surround the player, creating a situation where attacks come from blind spots. Keeping your back to a wall or obstacle helps prevent encirclement. The combat system's parry mechanic is particularly effective against melee fighters: blocking right before an attack lands triggers a parry that regenerates both Stamina and Spirit while opening a counterattack window.
Melee fighters appear in every hostile faction, from Southern Bandit ambushers on trade routes to Hornsplitter's Guards protecting the Goldleaf Merchant Guild's operations. Their individual threat level varies by faction; bandit melee fighters are generally weaker than military troops from organized factions like the Black Bears.
Archers
Archers are ranged enemies who position themselves at the edges of combat encounters. When a fight begins, archers almost immediately run to the periphery of the battlefield and begin firing arrows from a distance. If left unchecked, they chip away at the player's health while melee fighters keep the player engaged up close.
The recommended strategy against archers is to prioritize them first. Roll or evade to the edges of the fight and eliminate the archers before turning attention to the melee enemies. This prevents stray arrows from interrupting combos or draining health during prolonged engagements. A bow or other ranged weapon can also be used to pick off archers from a distance before closing in.
Archers are present in most faction strongholds and camps. During siege battles like the Calphade Rebellion, archers may also fire from walls and elevated positions, creating persistent ranged pressure that players need to avoid through positioning and movement.
Shield Bearers
Shield-bearing enemies use defensive equipment to block frontal attacks, making them more durable than standard melee fighters. They hold their shields up while advancing, and direct attacks bounce off without dealing meaningful damage until the guard is broken.
Breaking a shield bearer's guard requires sustained pressure or guard-breaking attacks. The spear's basic R1 attack is a quick triple thrust that pressures a guarding enemy effectively. If chained into the Stab skill with correct timing, it becomes a rapid-fire six-thrust assault that is almost guaranteed to break the guard of any standard shield-bearing enemy. Greatswords and heavy weapons also work well due to their high stagger values.
Shield bearers often serve as the front line of organized military factions. They advance slowly, drawing attention and absorbing attacks while melee fighters and archers attack from the flanks. Flanking a shield bearer or attacking from behind bypasses the shield entirely.
Spear and Halberd Users
Some enemies carry polearm weapons such as spears and halberds, giving them longer reach than standard melee fighters. These enemies can hit the player from further away and are harder to approach safely. Their attacks tend to have wider arcs and can hit multiple targets in their sweep.
Polearm enemies are less common than swordsmen but appear in military factions and as camp defenders. Their extended reach makes them dangerous when combined with other enemy types, since they can strike from behind shield bearers or melee fighters without stepping into the player's range. Dodging into their attacks (closing the distance) and using fast weapon combos is more effective than trying to outrange them.
Gwen Kraber is a notable example of an enemy boss who uses a spear with devastating effectiveness. His super armor state allows him to chain multiple stab attacks in rapid succession, making dodge rolls essential during his assault phases.
Sorcerers and Supernatural Enemies
Some factions field enemies with magical or supernatural abilities. The Reed Devil Faction's foot soldiers are evil spirits inhabiting scarecrow bodies that do not fall no matter how often they are stabbed or cut. The Antumbra Order employs dark ritualists connected to the Abyss. Hexe Marie summons Urn Soldiers and Urn Swordsmen, ceramic automatons that emerge from urns during her boss fight.
Supernatural enemies often require different tactics than standard human opponents. The Reed Devil's scarecrow minions need their animating spirits disrupted rather than simple physical damage. Hexe Marie's Urn Soldiers must be cleared quickly before they accumulate and overwhelm the player. Against magical enemies, ranged weapons and area-of-effect skills are often more effective than single-target melee combos.
Faction Leaders and Mini-Bosses
Each hostile faction has leaders or elite enemies that function as mini-bosses within their strongholds. These enemies have significantly more health than regular troops, unique attack patterns, and often trigger special combat encounters. Faction leaders typically guard the innermost part of a camp or stronghold and must be defeated to complete a liberation.
Leader | Faction | |
|---|---|---|
Fast rapier techniques; blocks most physical attacks; four-slash combos | ||
Spear fighter; super armor stab chains; environmental arrow hazards | ||
Heavy mace and shock-emitting shield; environmental pendulum hazards | ||
Teleportation; vanishing attacks; protective totems; reed field arena | ||
Relentless bear-like fighting; underhanded tactics; brutality and fear |
Group Encounter Tactics
Most enemy encounters in Crimson Desert involve fighting multiple opponents simultaneously. The game is designed so that enemies attack from all directions, not just one or two at a time. Here are strategies for handling group encounters effectively.
Kill archers first. Roll or evade to the edges of the fight and eliminate ranged threats before they chip away at your health from safety.
Avoid encirclement. Keep moving and position yourself so enemies approach from one direction. Use walls, rocks, or terrain to limit the angles of attack.
Use parrying. A successful parry regenerates both Stamina and Spirit instantly while creating a counterattack window. Against melee-heavy groups, well-timed parries are more efficient than pure dodging.
Switch weapons. Greatswords and spears with wide arcs are effective against groups. Switch from single-target weapons like the sword to area-of-effect weapons when surrounded.
Use the Blinding Flash Finisher. This skill is one of the best crowd control tools, striking multiple enemies and giving breathing room in chaotic fights.
Dispatch allies beforehand. The Dispatch System lets you send Greymane companions to weaken enemy positions at blockaded locations before engaging personally.
Enemy Scaling by Region
Enemy difficulty varies by region and quest progression. The Hernand region, where the game begins, has the easiest hostile factions. The Southern Bandits and early Bleed Bandit encounters serve as introductions to faction combat. As players progress to other regions and tackle higher-level faction quests, enemies become better armed, more numerous, and more aggressive in their tactics.
The early game is often cited as the most difficult period because player gear and skills are limited while enemy groups can still overwhelm through sheer numbers. Investing in the Armed Combat skill level early, which boosts melee damage and unlocks Quick Swap (attacking while switching weapons), makes group encounters significantly more manageable.
Tips
Carry a secondary weapon suited for group combat. A spear or greatsword complements a sword-and-shield loadout by providing reach and area damage.
Learn parry timing early. It is the single most important defensive skill against melee fighters and returns resources on every successful parry.
Always loot defeated enemies. They drop silver, crafting materials, and occasionally weapons or armor that can be sold or equipped.
Use pets to auto-loot during combat. This prevents missing drops from enemies killed in the chaos of group fights.
Camps and strongholds can be pre-emptively cleared before receiving a quest to liberate them. This earns Contribution and faction standing.