Beginner's Guide
Comprehensive beginner's guide for Crimson Desert covering playable characters, first steps in Hernand, combat fundamentals, stamina management, exploration, traversal unlocks, camp management, gear refinement, recommended skills, cooking, money-making, Abyss Gear, inventory management, horse care, Contribution system, companion dispatch, boss strategies, pets, crime system, locked doors and keys, Sky Islands, and quality of life tips.
On This Page
Overview
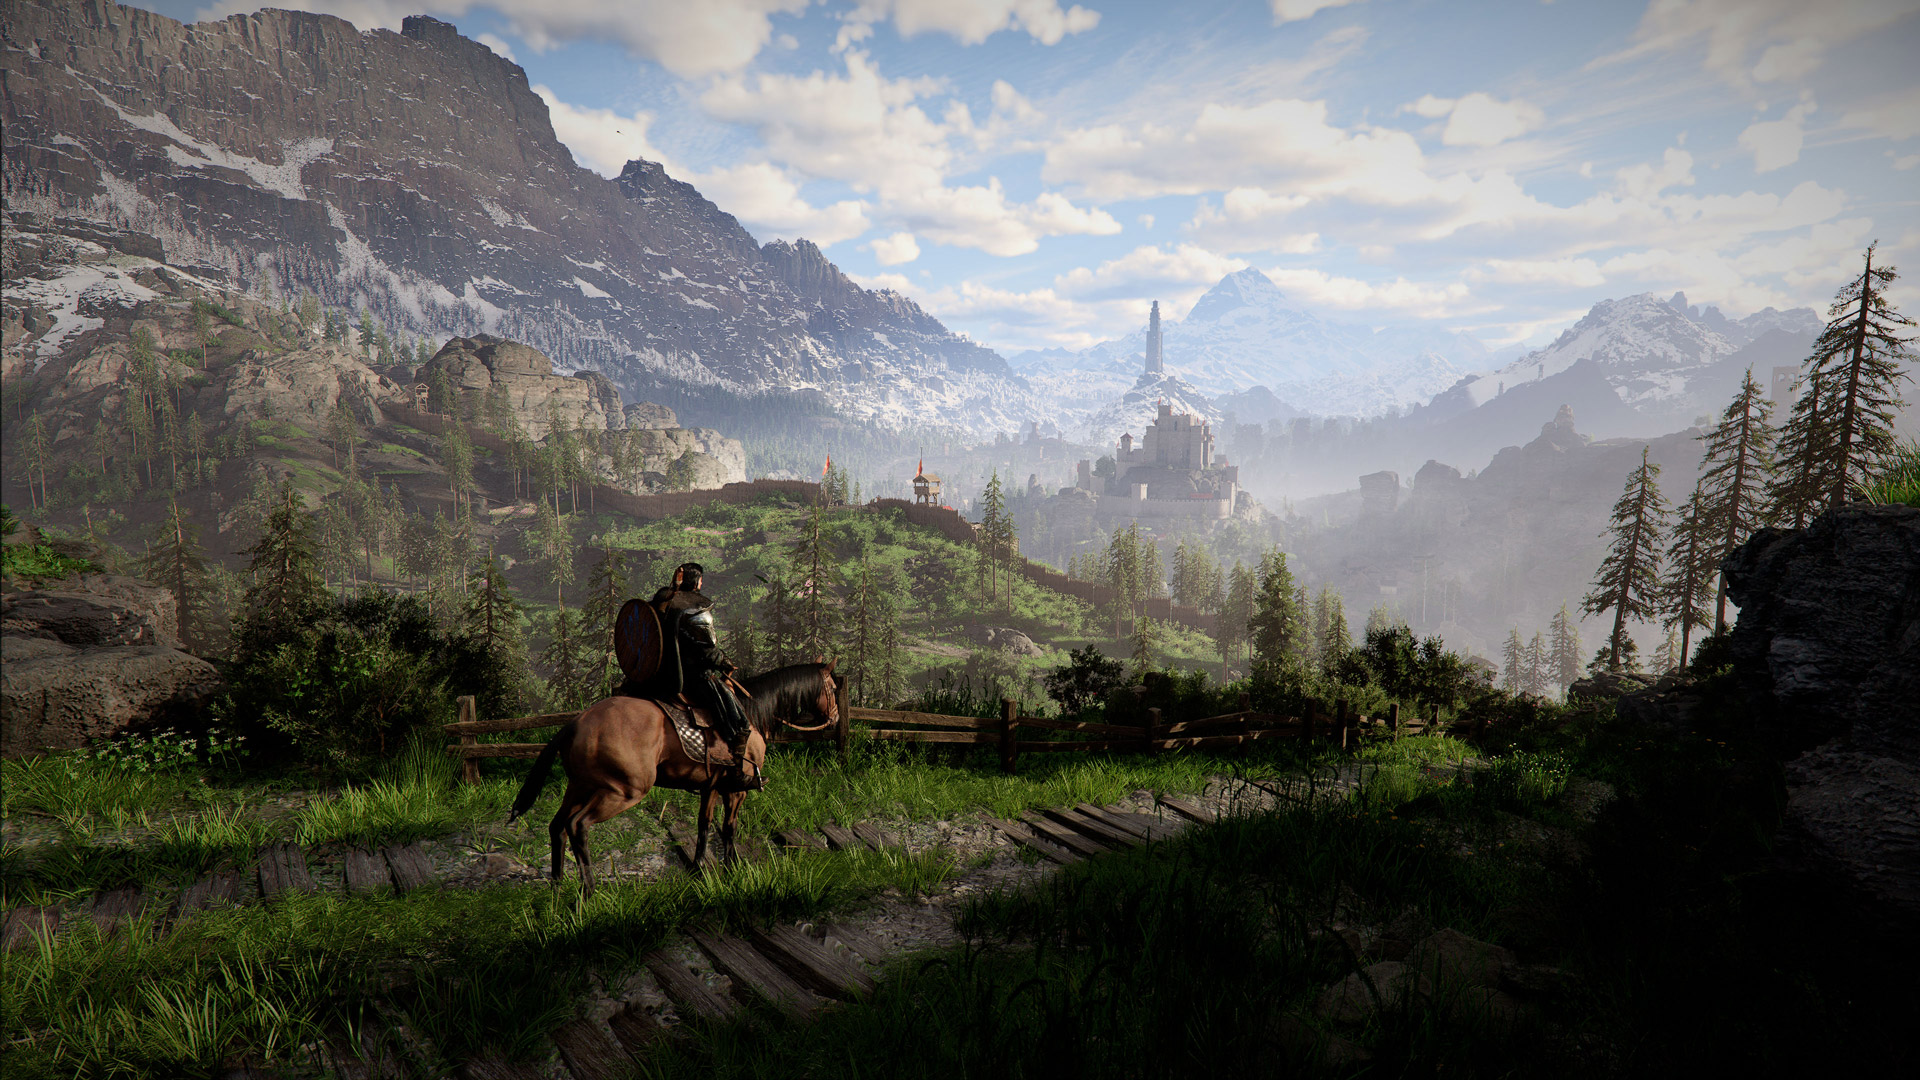
Crimson Desert is a massive open-world action RPG set on the continent of Pywel. You play as Kliff, leader of the Greymane mercenaries, with two additional playable characters (Damiane and Oongka) unlocked through story progression. The game has no traditional class system; instead, your weapon choice and skill investments define your playstyle. This guide covers everything you need to know to get started.
Playable Characters
Crimson Desert has three playable characters. You start the game as Kliff, leader of the Greymane mercenaries. Two additional characters unlock through story progression:

Damiane unlocks at the beginning of Chapter 3, when you head to Howling Hill to assemble your new camp. Damiane wields rapiers and firearms such as the musket. She has her own skill tree with unique abilities that Kliff cannot access.
Oongka unlocks at the end of Chapter 7, after you fight alongside him in Chapter 6. Oongka specializes in heavy weapons like axes and hammers, and carries an orc blaster as his ranged weapon. Note that permanent access to Oongka requires completing the "Gentle Sound of Flowing River" side quest.
To switch characters, hold Up on the D-pad (F1 on keyboard) to open the Character Wheel, then use the right stick to select the character you want. All three characters share the same inventory, so items collected by one character are accessible to the others. However, each character has exclusive weapon types and a separate skill tree. Abyss Artifacts spent on one character's tree do not carry over to the others, so plan your investments accordingly.
First Steps in Hernand
You begin the game in the Hernand region after the Black Bears attack on the Greymanes. Your first priorities should be:
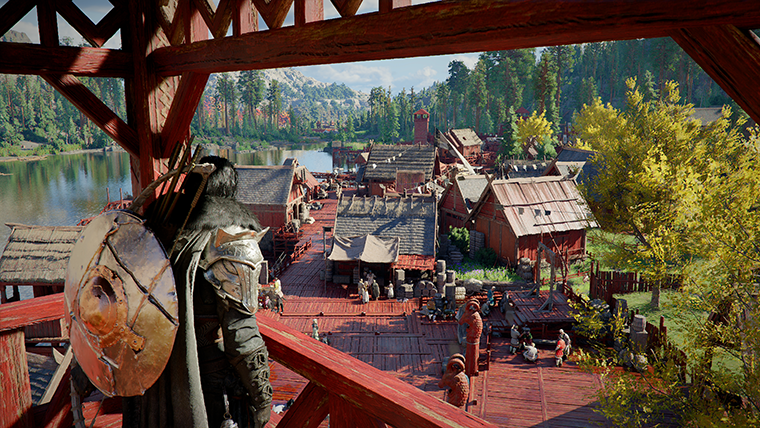
Explore Hernand Town: Talk to every NPC you encounter. The town is packed with merchants, side quests, and hidden discoveries. Back alleys and rooftops hide secret shops and lore items.
Set up the Greymane Camp: Your camp near Hernand Town is your home base for the entire game. Familiarize yourself with its facilities.
Visit the blacksmith: Purchase or refine a weapon before heading into the wilderness. Even a basic upgrade makes early encounters much more manageable.
Learn fishing: Head to the Nas River dock and observe the fisherman NPC. Fishing provides a steady supply of cooking ingredients.
Get your horse: The story takes you to Deepfog Basin early on, where you obtain your first horse. This dramatically speeds up exploration.
Combat Essentials
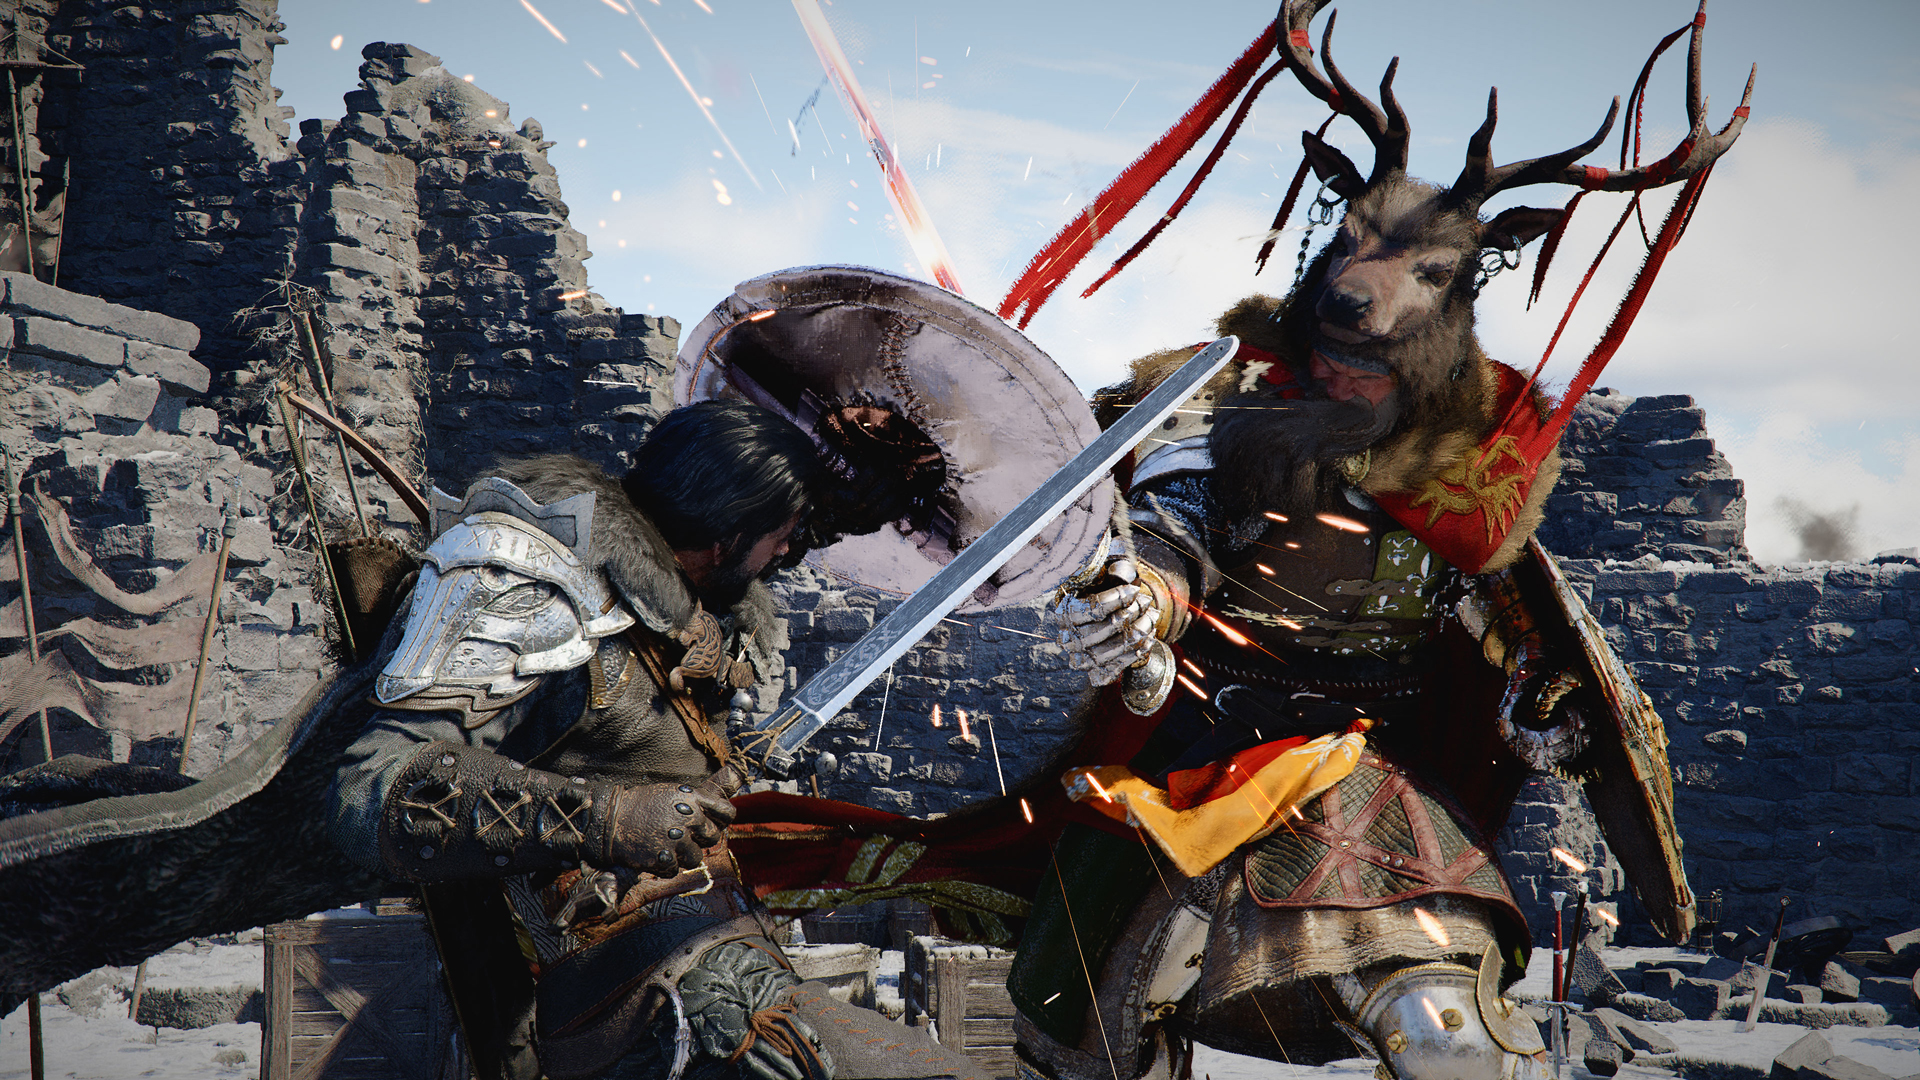
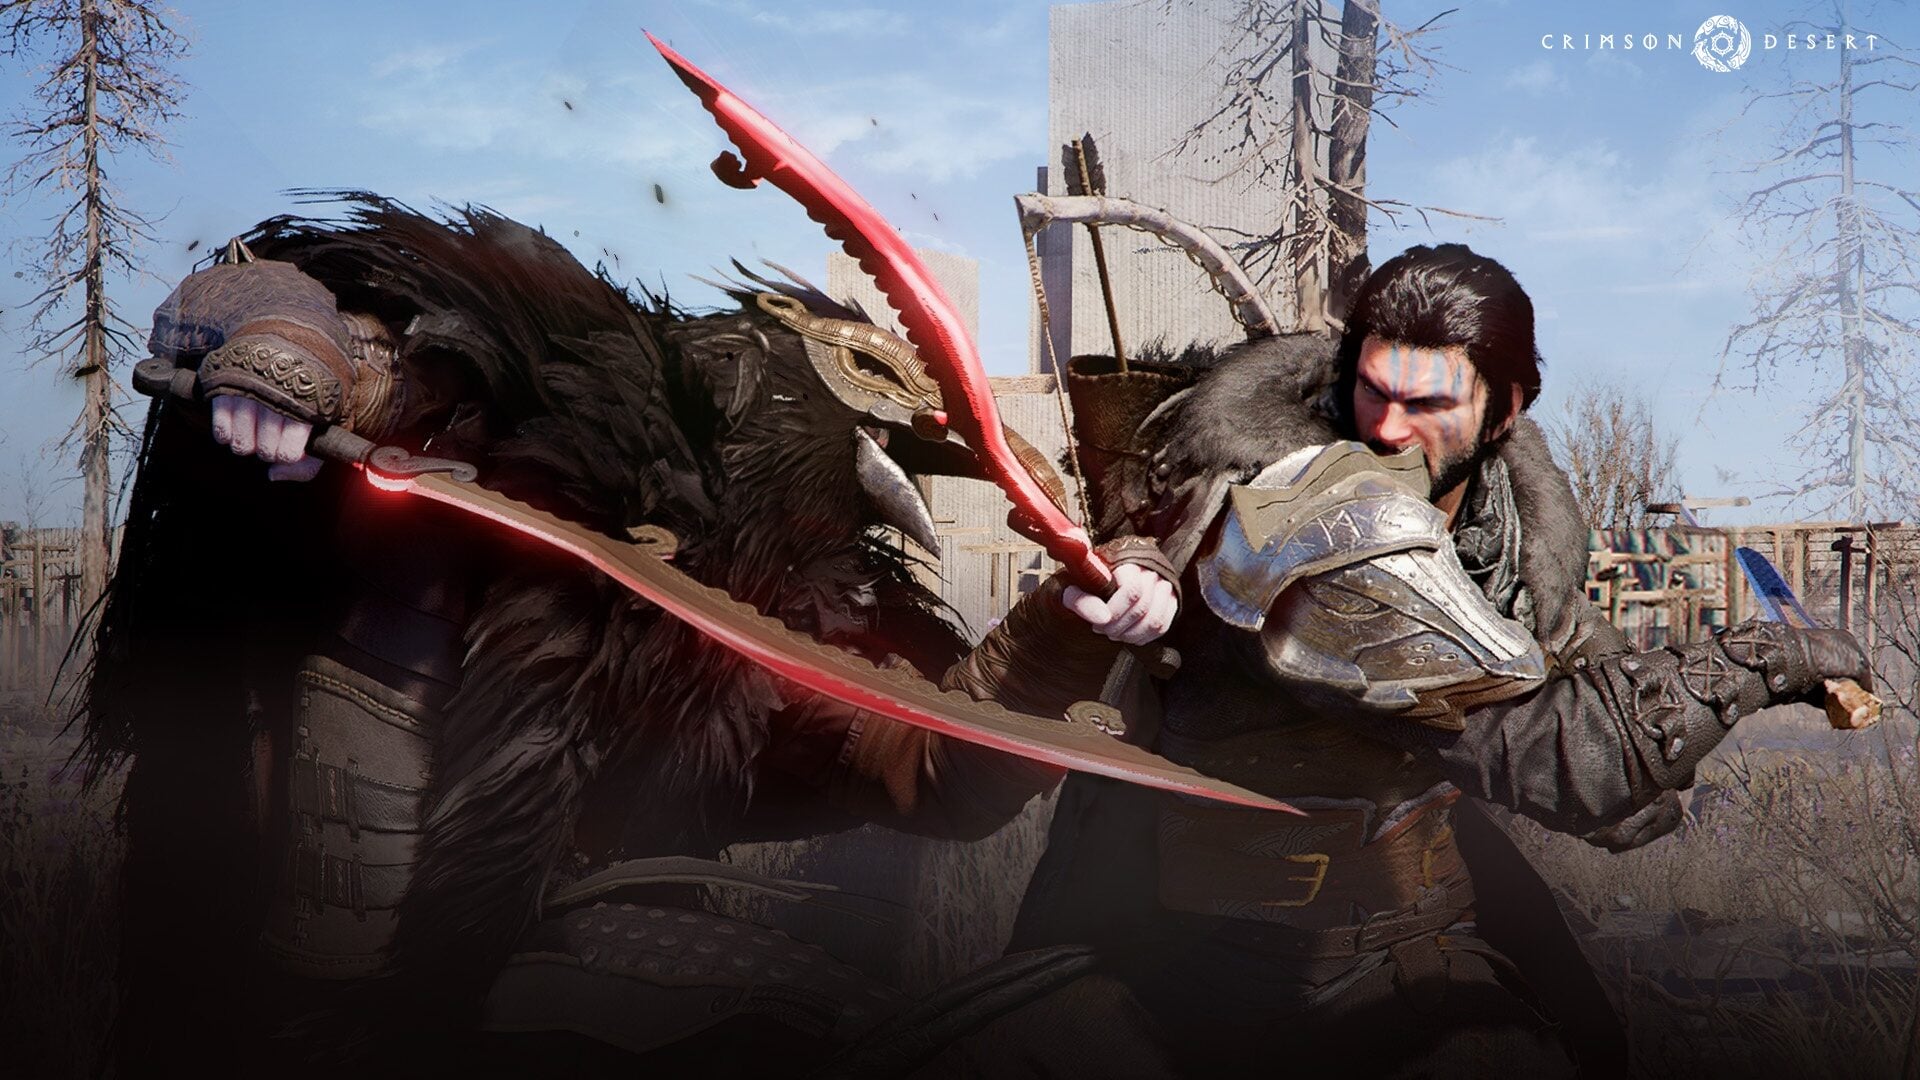
Combat in Crimson Desert is action-oriented and requires good timing. Light attacks (R1 / RB) are fast and consume no stamina, while heavy attacks (R2 / RT) deal more damage and break enemy guards but drain your stamina bar. Mix light and heavy attacks to create combos.
Parrying: Press L1 / LB right before an enemy attack lands to parry. A successful parry interrupts the attack and opens a window for a quick R1 / RB combo. Parrying is especially effective against human-type enemies and bosses.
Dodging: Dodge rolling provides invincibility frames and is your primary defense against unblockable monster attacks. After dodging, strike during the enemy's recovery window. You can also block with L1 / LB to reduce incoming damage, though blocking still consumes stamina.
Arrow Deflection: You can deflect incoming arrows by timing your block correctly. This is important when facing ranged enemies or mixed groups.
Mounted Enemies: When fighting mounted enemies, you can grab them and pull them off their mount, then slam them to the ground for heavy damage.
Basic Controls
Combat in Crimson Desert is fast-paced and fluid, with smart enemies that work to surround and overwhelm you. On a controller:
Input | Action |
|---|---|
R1 | Fast strikes chained into combos |
R2 | Slower, powerful heavy attacks |
Circle + Triangle | Grab and throw enemies (crowd control) |
L1 | Block and lock-on to enemies |
Dodge (Circle) | Dodge roll with invincibility frames |
D-pad Up | Whistle to summon your horse |
Dodge and Parry
Mastering the defensive mechanics is critical for surviving boss encounters:
Dodge roll: Has invincibility frames during the animation. A perfect dodge (timed precisely) restores a small amount of stamina instead of consuming it.
Parry: Time your block (L1) exactly as an attack lands. A successful parry negates all damage and staggers the enemy, opening them to a counterattack.
Arrow deflection: Learn the timing early. Archers appear frequently, and deflecting arrows gives you a reliable counter against ranged threats.
Weapon Switching
There is no class system in Crimson Desert. Your weapon choice determines your fighting style. Confirmed weapon types include swords, axes, spears, greatswords, bows, and more. You can switch weapons mid-combat to adapt to different enemy types. Swords offer a balanced starting style with good versatility, making them ideal for learning the system before specializing.
Hostage Taking
When fighting groups of enemies, grab a foe using the Circle + Triangle combination. Holding an enemy as a hostage causes nearby enemies to briefly freeze, giving you breathing room. This crowd-control technique is especially useful against bandit camps and group encounters.
Boss Fight Tips
Crimson Desert has no difficulty selector. Bosses are designed to challenge you, and the game expects you to take damage and heal through it. If a boss feels impossible, the solution is usually to explore more, find additional Abyss Artifacts, upgrade your gear, and bring more food. See Boss Strategies for fight-specific guides.
Bring 50 to 100 pieces of cooked food to every boss fight. Hearty Grilled Meat is cheap and effective.
Heal between every few attacks. Quick R1/RB swings let you weave in food consumption between combos.
Watch for blue splashes. These indicate the enemy's attack has super armor and cannot be interrupted. Dodge or block instead of trying to trade hits.
Human bosses can be parried. Time your L1/LB block to interrupt their swings, then follow up with a quick combo.
Monster bosses have unblockable attacks. Dodge through their combos and punish during recovery windows.
Use heavy attacks (R2/RT) against shielded enemies to break their guard. Light attacks alone will not get through.
Reserve Palmar Pills for multi-phase bosses. These pills revive you with 30% HP upon death, saving you from restarting a long fight.
Major bosses display a segmented health bar at the center of the screen. Multi-phase bosses like the White Horn typically have three color-coded phases (blue, green, red). Each phase may introduce new attack patterns, so stay alert when a phase transitions.
Bosses in Crimson Desert have multi-phase health bars. The bar changes color between phases: blue for the first phase, green for the second, and red for the final phase. Cutscenes play between phases. Bosses inflict heavy, often unavoidable damage, so bring plenty of healing food (100+ grilled meat is recommended for tough fights). Use light attacks to chip away at health while eating food to heal between hits.
Stamina Management
Stamina is a shared resource governing sprinting, jumping, climbing, gliding, dodging, and blocking. A stamina wheel appears during combat and traversal. Running out of stamina at the wrong moment, especially during a boss fight, can be fatal.
Reserve stamina for dodges: A common mistake is burning stamina on blocks right before a boss unleashes a big attack. Keep at least a partial reserve so your dodge roll stays available.
Perfect dodge recovery: Nailing the perfect dodge timing restores stamina rather than consuming it. Practice this against basic enemies before attempting it on bosses.
Upgrade stamina capacity: Invest Abyss Artifacts into stamina-related nodes on the skill tree to increase your stamina pool.
Cooking buffs: Certain meals temporarily increase your stamina cap or accelerate stamina recovery. Cook before difficult encounters.
Exploration and Traversal
Fog of War and Bell Towers
The world map of Pywel starts largely unexplored. As you travel, fog of war clears to reveal the terrain, points of interest, and collectibles. The map is estimated at 80 to 110 square kilometers, taking roughly six hours to cross on foot or two hours on horseback.
Eight hidden bell towers are scattered across Pywel's settlements and high points. Ringing each bell triggers a panoramic zoom-out that reveals the entire surrounding region on your map, clearing fog of war and displaying all points of interest. This is by far the fastest way to reveal the world map. Without bells, you would need to physically walk through every area to clear the fog.
Prioritize bell towers: Whenever you enter a new region, look for tall structures with bells. Climbing them early saves hours of manual exploration.
Linked to the Pororin Forest Guardians faction: Ringing all eight bells progresses your standing with this faction, unlocking additional rewards.
Combine with Guiding Light: After ringing a bell, use the Blinding Flash (L1+R1 on controller) from a high vantage point to spot bright flashes indicating nearby fast travel pressure plates, Sealed Abyss Artifacts, and other secrets.
The world map starts covered in fog. There are 8 hidden bells (called Tolls) scattered across Pywel. Ringing all 8 bells unfogs the entire map. They are not marked on the map, so you need to find them by exploring.
Bell | Location | Notes |
|---|---|---|
Hernand (clocktower, north side of town) | Climb up and ring it | |
Scholastone Institute (pagoda in the plaza, south-west Hernand region) | Accessible via mountain climbing with Force Palm | |
Church in northern Hernand | Temporarily unavailable during Chapter 6 | |
Demeniss (tallest clocktower in the capital) | Hang from the flagpole to lower the bell, then climb up to ring it | |
Clocktower in north-west part of Delesyia capital | Straightforward climb | |
Tashkalp capital (Crimson Desert region, north-east) | Straightforward climb | |
Varnia (north-east edge of the map) | Long path; follow main roads north through the desert | |
Pailune (red tower near the docks) | Only available after liberating Pailune in Chapter 7 |
Plan roughly 5 or more hours to ring all bells and activate fast travel points along the way.
Eight Hidden Bells are scattered across Pywel's towers. Ringing each bell triggers a panoramic zoom-out that reveals the entire surrounding region on your map, clearing fog of war and displaying all points of interest. Finding and ringing these bells early saves an enormous amount of time that would otherwise be spent manually exploring every corner of each region. Prioritize climbing bell towers whenever you enter a new area.
Traversal Ability Unlocks
Several key traversal abilities in Crimson Desert are unlocked through the main story rather than the skill tree. Progressing the main questline is the only way to gain access to these movement tools, so do not neglect the story in favor of pure exploration. Without these abilities, large portions of the world are difficult or impossible to reach.
Ability | When It Unlocks | What It Does |
|---|---|---|
Ranged energy push; can be used three times in mid-air to catapult upward like a grappling hook | ||
Chapter 1 (unlocked from the White Crow in the Abyss during the "Abyss Without Balance" quest; Visione is a separate Chapter 2 item) | Glide through the air from high ground; eliminates fall damage when deployed before landing | |
Chapter 4 (The Price of Knowledge quest, on the road to Scholastone) | Enhanced version of Force Palm with greater range; somewhat missable if you take an alternate path to Scholastone | |
Polar Opposites Abyss Nexus quest (expanded via skill tree) | Grapple to distant anchor points; further investment unlocks Aerial Swing and Aerial Maneuver |
If you missed Focused Force Palm during Chapter 4, you can still learn it later in Chapter 9, but having it earlier opens up significantly more exploration options. Prioritize picking it up during your first pass through the Scholastone road.
Layered Traversal
Movement in Crimson Desert uses multiple systems:
Method | Use Case |
|---|---|
Horseback | Long-distance travel across open terrain. Summon with D-pad Up. |
Climbing | Scale cliffs and buildings. Consumes stamina. |
Traverse gaps and descend from heights. Uses the Crow's Wings ability. | |
Swimming | Cross bodies of water. Governed by stamina. |
Teleport between discovered Abyss Nexus and Abyss Cresset. |
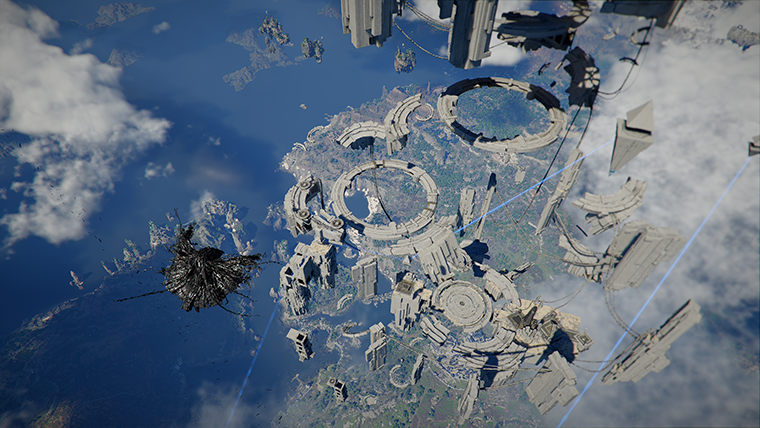
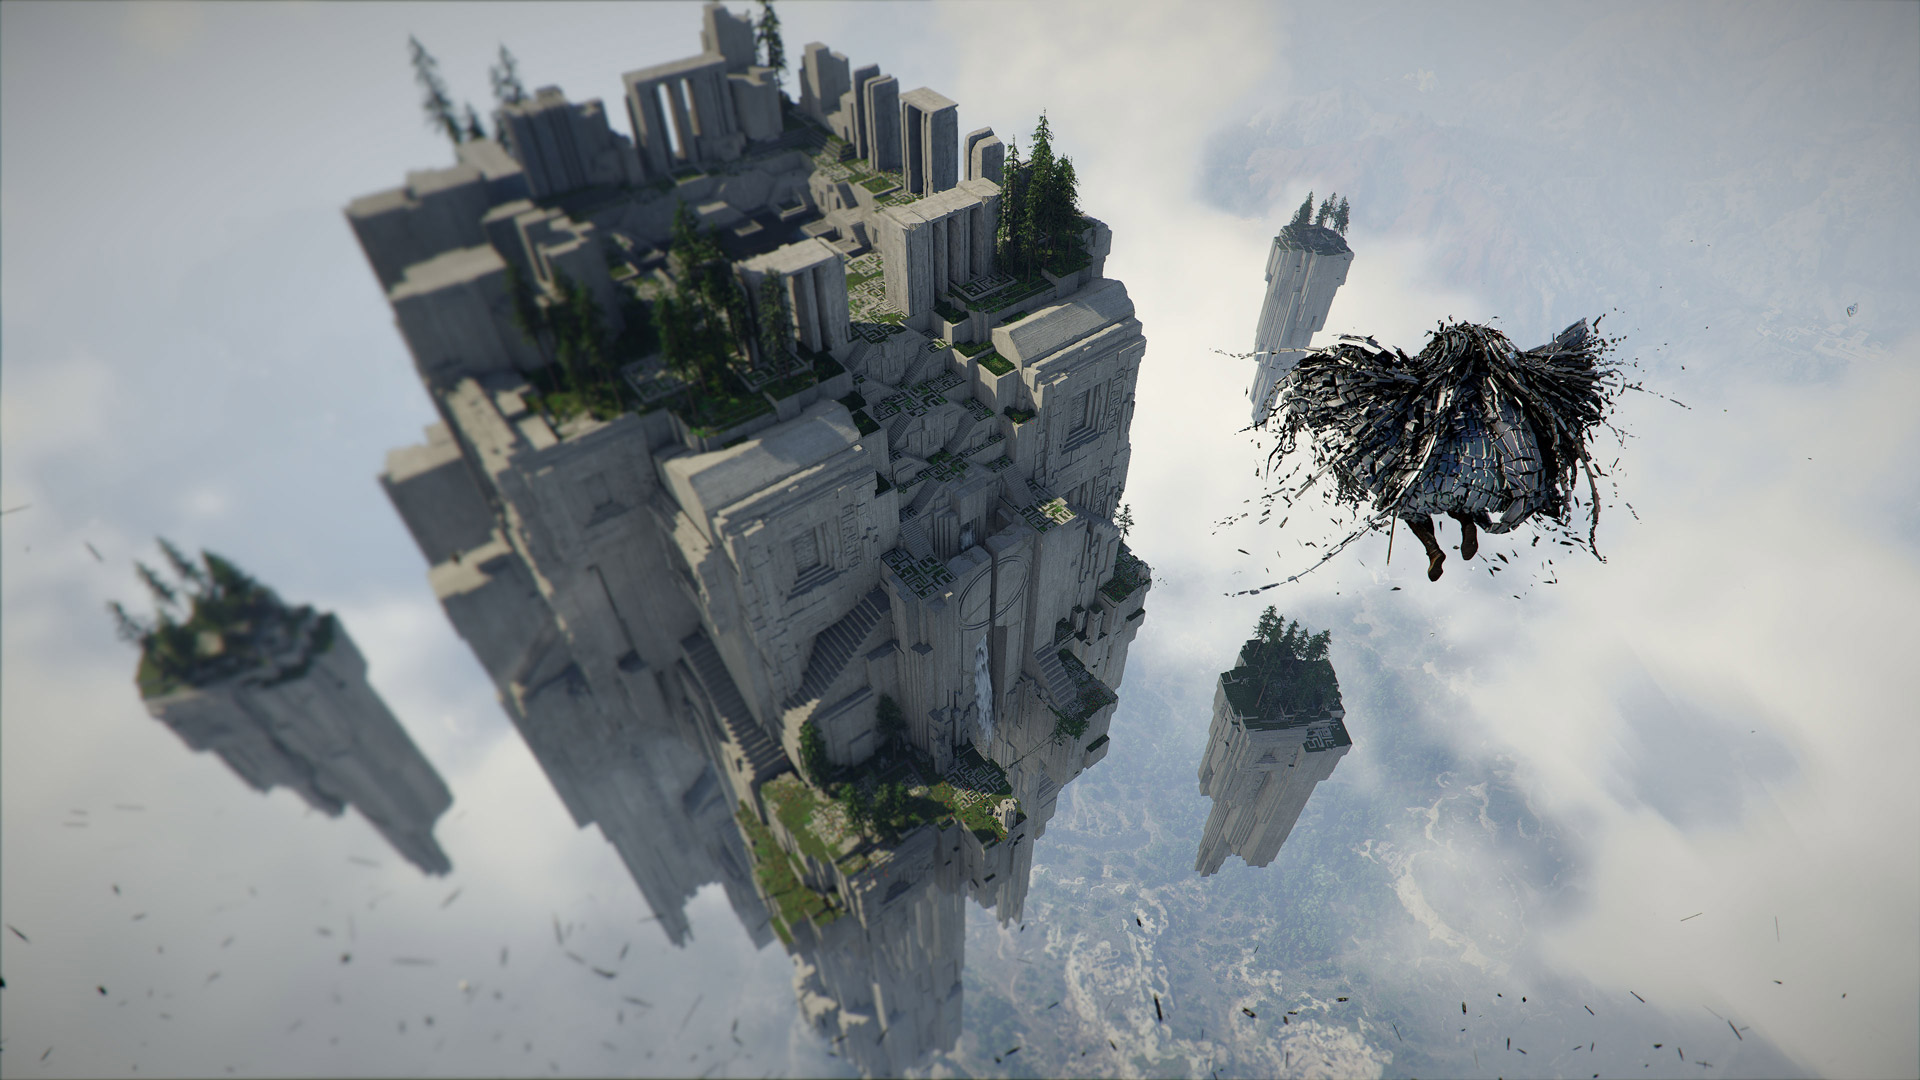
Sky Islands and Air Travel
The Sky Islands are a set of floating platforms accessible from the opening hours of the game. Press R3 on the map screen (Mouse Wheel on PC) to switch to the sky map view. From Sky Island fast travel points, you can skydive back down to the surface, landing closer to your destination than walking or riding would allow.
Gliding consumes stamina, but simply hovering in place does not. Use hovering to scout locations below before committing to a descent. Always deploy your wings before hitting the ground to negate fall damage. Combining Sky Island travel with Flight and Force Palm catapults gives you enormous freedom of movement across Pywel.
Open the sky map by pressing R3 / mouse wheel while on the map screen. You can dive from the nearest sky fast travel point to reach ground locations faster than ground travel in many cases.
Fast Travel
Look for Abyss Nexus points and Abyss Cressets scattered across the landscape. Abyss Nexus points activate instantly when you step on them, while Abyss Cressets require solving a puzzle first. Both serve as fast travel points, which dramatically reduce travel time. Prioritize finding these early in each new region you enter.
Fast travel points are shown on the map as white circular "?" search areas. When you enter the area, use Guiding Light (L1+R1 / LB+RB / CTRL+Click) to highlight nearby pressure plates with a blue glow. Stand on the plate briefly to activate the Abyss Nexus fast travel point. Once activated, you can teleport to that point from anywhere via the map.
Priority: Activate the fast travel point north of Hernand immediately. You will travel to and from Hernand frequently throughout the game.
Force Palm Climbing Trick
Force Palm is not just a combat ability. When used three times consecutively in mid-air (press the right stick three times), Force Palm catapults Kliff upward, effectively functioning as a grappling hook. This trick is essential for reaching high ledges that appear out of climbing range. Combine Force Palm with the Crow's Wing glide and standard climbing to access nearly any surface in the game. This traversal technique is one of the most useful movement tricks that the game does not explicitly teach you.
Observation Is Key
Pay constant attention to what NPCs and enemies are doing. The skill observation system means that watching an NPC perform a unique action, or seeing an enemy use a flashy combat move, can teach you new abilities. If you spot an NPC doing something unusual, approach them and hold the observation button to learn their technique.
Skills and Progression
Crimson Desert does not use traditional experience levels. Your character's power comes entirely from gear upgrade levels and Abyss Artifacts spent on the skill tree. Artifacts function as skill points: each one lets you unlock a node on the tree.
Earning Artifacts
You earn Abyss Artifacts by defeating enemies, completing quests, and exploring. A yellow bar on the left side of the HUD fills as you kill enemies. Each time it fills completely, you receive 1 Artifact (1 skill point). This means you can farm Artifacts infinitely by fighting enemies in the open world.
Recommended Skill Priority Order
While the existing Recommended Early Skills section above covers the full skill tree, community consensus after launch has solidified around a clear priority order for your first few Abyss Artifact investments. Following this order gives the biggest immediate payoff.
Priority | Skill | Target Level | Why |
|---|---|---|---|
1 | Level 3-4 | Survive early bosses; extra HP pool is forgiving while learning | |
2 | Level 5 | Boosts all melee damage; unlocks Evasive Slash (Lv3) and Quick Swap (Lv5) | |
3 | Level 3 | Parry (Lv1), Backstep (Lv2), Counter (Lv3); prerequisite for Nature's Echo | |
4 | Level 3 | Upgraded heavy attack; combined with Keen Senses 3 unlocks Nature's Echo | |
5 | Level 3-4 | More dodges, blocks, and climbing before exhaustion |
Health and Stamina
Before unlocking flashy abilities, put points into Health and Stamina. Reaching level 4 in both gives you enough survivability to handle the bosses in Chapters 2 through 4. Higher Health lets you absorb extra hits, while higher Stamina lets you dodge and block more frequently. You can always respec later using Faded Abyss Artifacts, so there is no risk in investing early.
Of the two, Stamina is arguably the more impactful early investment. Stamina governs sprinting, attacking, dodging, climbing, and staying airborne. As you unlock more advanced sub-skills, individual special moves can cost 40 to 60 Stamina per swing, which quickly depletes a small pool. Aim to reach at least 200 Stamina as early as possible. This threshold unlocks the full potential of skills like Aerial Maneuver and Aerial Swing, which each cost 200 Stamina per use. Without enough Stamina, these powerful traversal and combat abilities become impractical. After Stamina, invest in Spirit to power Force Palm and Spirit-based special moves.
Armed Combat (Blue Tree)
Increasing Armed Combat should be your first priority for all three playable characters. Every point in Armed Combat directly boosts your melee damage, which affects every single fight. At level 3, Armed Combat unlocks Evasive Slash, a powerful counter-stance that is particularly devastating with spears. At level 5, it unlocks Quick Swap, which lets you switch weapons mid-combo without opening any menu. Quick Swap transforms combat from a single-weapon affair into a fluid multi-weapon chain where you can open with a spear poke, close the gap with twin blades, and finish with a grapple throw in one seamless sequence.
Keen Senses (Green Tree)
Keen Senses is the foundation of Kliff's defensive kit. Upgrading it with Abyss Artifacts unlocks three critical abilities in sequence: Parry at rank 1 (negates all damage and staggers the enemy), Backstep at rank 2 (precisely timed sidestep out of range), and Counter at rank 3 (simultaneously blocks and deals damage back). Note that basic dodge rolling is available from the start of the game and does not require Keen Senses.
Keen Senses is the single most impactful defensive investment. While the basic dodge roll is available from the start, Keen Senses adds layered defensive options at each rank. At rank 1, you unlock Parry (negate all damage and stagger the enemy on a timed block). At rank 2, you get Backstep (a precisely timed sidestep out of attack range). At rank 3, you unlock Counter (simultaneously block and deal damage back), which is the strongest defensive skill in Kliff's kit. Reaching rank 3 is also a prerequisite for unlocking Nature's Echo, one of the most powerful damage skills in the game.
Forward Slash and Nature's Echo
Forward Slash is the upgraded heavy attack skill. Even just the first level of Forward Slash is enough to unlock the level 1 version of Nature's Echo, which replicates your Forward Slash with a spectral echo for double damage. Fully upgrading Forward Slash to level 3 (combined with Keen Senses level 3) unlocks the full Nature's Echo chain, which is one of the highest damage-per-second combinations in the game.
Stab is one of the highest damage-per-second basic skills available. At max level it unlocks the Rend Armor perk, which bypasses enemy super armor. This is extremely useful against bosses and elite enemies whose attacks cannot normally be interrupted.
Nature's Echo duplicates your attacks with a spectral echo that follows up with an identical strike. This is extremely powerful when paired with heavy two-handed weapons or the Forward Slash ability. It effectively doubles your damage output during brief windows. Unlocking it requires all three levels of Forward Slash (blue) and all three levels of Keen Senses (green).
Axiom Force, Aerial Maneuver, and Flight
Reaching Axiom Force level 3 unlocks Aerial Swing and Aerial Maneuver, which function like a grappling hook for traversal. These skills let you catapult up walls and cliffs, making exploration far more enjoyable. Force Palm can also be used three times consecutively in mid-air for additional height.
Gliding with Flight is the single best traversal skill in the game. It lets you cover enormous distances from high ground and eliminates fall damage as long as you deploy your wings before hitting the ground. Leveling Flight further reduces its stamina drain.
Skill Tree Priorities
Kliff's skill tree has three branches: Stamina (blue), Health (red), and Spirit (green). Each branch ends with a large circle that increases that stat permanently. The nodes along each branch grant skills related to that resource.
Recommended early path: Reach Health Level 4 and Stamina Level 4 first. Stamina is the most important stat because advanced sub-skills consume 40-60 stamina per use, and traversal actions like gliding and Axiom Force propulsion drain it heavily. Health is second most important since there are no difficulty modes and even mini-bosses can chunk large portions of your health with signature moves.
After reaching those levels, unlock Nature's Echo on the green skill tree, which duplicates your heavy attacks. This is particularly powerful with the Tauria Curved Sword. Nature's Echo requires all three Forward Slash and Keen Senses skills first.
Swift Flight is another top-priority skill for traversal. It lets you glide faster in mid-air and clear large gaps, though it consumes extra stamina.
Note: Stat upgrades (Health, Stamina, Spirit levels) carry over to all playable characters. Focus all investment on Kliff, since he is the main protagonist and the other characters are unavailable for most of the story.
Learning Skills Through Observation
Some skills do not need Abyss Artifacts at all. Crimson Desert has an Observation Learning system where time slows down when Kliff watches a unique enemy maneuver or an NPC performing an unusual action. If the conditions are right, he automatically absorbs the technique for free. Always pay attention to glowing prompts above NPCs and enemies.
Some skills are learned by observing NPCs or enemies rather than spending Artifacts. When you see a "Learning in Progress" notification, you need three successful observations from enemies or holograms before the skill unlocks. These moments require uninterrupted focus, so clear nearby threats first.
Camp Management
The Greymane Camp is your central hub. It starts small but can be expanded using gold and resources. Key facilities include:
Facility | Function |
|---|---|
Blacksmith | Weapon crafting and refinement. Upgrade it to unlock higher-tier enhancements. |
Alchemy lab | Craft dyes, medicines, and combat-enhancing potions from plants and insects. |
Cooking area | Prepare meals that restore Health, Spirit, and Stamina with temporary buffs. |
Farm and ranch | Grow crops and raise animals for cooking and crafting ingredients. |
Trading center | Exchange goods for useful items. |
Companion dispatch | Send reunited Greymane members on missions to gather resources. |
Invest in camp upgrades whenever you can. A well-developed camp provides a steady supply of crafting materials, cooking ingredients, and passive resources through companion dispatch missions.
Critical tip: Greymane faction quests are the single most important side content in the game. Whenever new Greymane quests appear in your Journal (under Faction Quests), complete them immediately. The Grounds of the Sunrise chain (38 quests) recruits scattered Greymane survivors who unlock camp facilities and become comrades for dispatch missions. The Greymane Commissions chain (27 quests) awards a Medium Bag per quest for +81 total inventory slots. Neglecting these quests means slower camp progression, fewer dispatches running in the background, and a weaker resource pipeline throughout the mid and late game. The gather-material commissions can wait, but recruitment and expansion quests should never sit in the backlog.
Greymane Camp Details
Greymane Camp is your home base, unlocked after defeating Kailok the Hornsplitter. The camp expands over time with facilities including the Freesword Management Office and livestock pens.
Freeswords: Hire Freeswords from the Management Office and send them to blockaded camps to fight enemies or dispatch them to gather resources on your behalf. Each Freesword has specialized gathering skills.
Faction quest priority: The Greymane faction quests in your Journal are the primary way to grow the camp. They are split into three tabs: Scattered Embers (camp life and morale), Grounds of the Sunrise (survivor recruitment and facility unlocks), and Greymane Commissions (item delivery requests for inventory bag rewards). Prioritize the Grounds of the Sunrise quests above all other side content, as each completed quest adds a new comrade or unlocks a camp upgrade. See the Camp Expansion Guide and Faction Quests articles for full details.
Gear and Equipment
Gear Refinement at the Blacksmith
The Blacksmith offers a Refinement service that permanently increases the stats of your weapons and armor. Each piece of equipment can be refined up to 10 levels. Early refinement levels use common materials like Iron Ore and Copper Ore, while higher levels require rarer drops such as Bloodstone. No silver is spent on refinement; only raw materials are consumed.
It is important to distinguish between permanent refinement and temporary buffs. Refinement at the blacksmith is a permanent stat increase that stays on the item forever. The Grindstone and Anvil, on the other hand, provide temporary boosts. Using a Grindstone before a fight temporarily raises your weapon's attack power, while an Anvil temporarily raises your armor's defense. Both wear off after a set duration.
Grindstones and Anvils are scattered throughout the world at camps, bandit outposts, and near boss arenas. If you see one placed near a boss entrance, the game is giving you a hint to use it. Always sharpen your weapon and repair your armor before difficult encounters.
Hold onto Iron Ore, Copper Ore, Thin Hide, and timber. Metal weapons require ore for refinement, while fabric and leather armor require hides. Do not sell these materials to vendors; stockpile them for upgrades. Note that materials stack up to 50 per inventory slot, so carrying 51 pieces of iron ore burns two inventory slots for a single extra piece. Refine a piece of gear to bring your stacks below the cap and free up space.
Weapon and Armor Maintenance
Before every major fight, sharpen your weapons at a grindstone and repair your armor at an anvil. This brings the Reinforcement stat to its maximum, which directly increases your Attack and Defense. Neglecting maintenance means you deal less damage and take more hits.
Gear Upgrading
Visit the blacksmith in central Hernand (marked with a "?" on the map) to upgrade your equipment. Upgrades require forging materials obtained through mining (ore), hunting (bones, hides), NPC purchases, or quest rewards. Aim for at least Refinement Level 5-6 before progressing through the story.
The blacksmith is first unlocked after completing Turnali's Request quest in Chapter 1. After that, you can refine gear at smithies throughout Pywel.
Armor Selection
There is no equipment weight penalty in Crimson Desert. Heavy plate armor always provides the most defense, so prioritize it over leather or linen variants. Purchase plate armor from merchants near the blacksmith and upgrade it repeatedly.
Best Early Weapons
The weapons you find in the first few chapters have a massive impact on your combat effectiveness. Here are the standout early-game weapons confirmed by the community.
Weapon | Type | How to Obtain | Why It Is Strong |
|---|---|---|---|
One-Handed Sword | Reward for defeating Kailok, the Hornsplitter during the End of Greed questline (Chapter 2) | First weapon with pre-loaded Abyss Gear; has level 2 attack speed, excellent for dual-wielding | |
Two-Handed Sword | Found next to a grave at the fork in the road southeast of Hernand, near Goldleaf Trading Post | Strong two-handed option with wide arcs; available very early with no combat required | |
Katana-Style Sword | Found in a waterfall cave near the Reed Devil boss area | 14 ATK with pre-loaded Abyss Artifacts for Critical Rate and Attack Speed; outperforms shop weapons | |
Polearm | Purchased from weapon vendors or looted from enemies | Superior reach, fast attacks, and Evasive Slash with the Spear is one of the most overpowered early counters in the game |
The Spear deserves special mention. With Armed Combat at level 3 unlocking Evasive Slash, the Spear's version of this counter-stance is significantly safer than a standard parry and deals devastating damage. Many experienced players consider it the strongest weapon type for the first half of the game.
Best Early Armor
Armor upgrades are harder to find than weapons in the early game, but several powerful pieces can be collected before you face any serious combat encounters. These are in addition to the Witch of Wisdom Sanctum gear listed in the Best Places to Visit Early section above.
Armor Piece | Type | Location | Notes |
|---|---|---|---|
Sanctum of Benediction (light the lantern to reveal the chest) | One of the best early headpieces; lootable before enemies spawn | ||
Sanctum of Temperance (hidden behind tall grass near the entrance) | Strong defense boost; available from the start of the game | ||
Sanctum of Penitence (jump into the hole near the brown dog) | Solid glove upgrade with no combat required to obtain | ||
Cloak | Strong cloak available early; combines well with the matching helm | ||
Bolton Armor Set | Full Set | Hernand Contribution Shop (requires building Contribution in the Hernand region) | Themed armor set; strong mid-early game option once Contribution is high enough |
Boss Weapons
Keep unique weapons dropped by bosses rather than selling them. Many boss weapons have superior special effects. Notable examples include:
Weapon | Source | Strength |
|---|---|---|
Fast attack speed, good for aggressive playstyles | ||
Boss #6 | Wide sweeps, excellent for crowd control |
Cooking and Food
Eating food is the only way to heal in Crimson Desert. There are no traditional health potions. You access your food pouch with D-pad Right on a controller (F3 on keyboard) and can eat as many times as you want during combat with no cooldown. This makes your food supply the single most important resource before any difficult fight.
Food is your primary healing source. There are no healing potions in the traditional sense. You heal by eating cooked food during combat or exploration. You can consume food as many times as you need, even in the middle of a fight. Raw ingredients provide minimal healing; always cook them at a bonfire or cooking pot first for much better restoration.
The cheapest and most effective early-game healing is grilled meat. Buy tough meat from a butcher and cook it at any bonfire. Each piece of grilled meat restores roughly 80 health. Stockpile 100 or more pieces before tackling bosses.
Different meals restore different stats: Health, Spirit, and Stamina. Some meals also grant temporary buffs, such as ice resistance for a set duration. Cook specific meals required for certain quests and donate extra food to Greymane Camp supply management.
How Cooking Works
You cook at Cooking pots or campfires found throughout the world, including the one at Greymane Camp. Raw ingredients restore very little health. Cooking them, even with the simplest recipe, dramatically increases the amount of health restored. Recipes are found as documents scattered around Hernand and other towns. Once you read a recipe, it is permanently learned and the document can be sold.
Approach any campfire or cooking pot and interact with it to open the cooking menu. Select a recipe and confirm. Cooking is instant as long as you have the required ingredients.
Essential Early Recipes
Recipe | Ingredients | Effect | How to Obtain |
|---|---|---|---|
Tough Meat (from butcher) | Restores 200+ HP per serving | Available from the start at any campfire | |
Any fish | Restores HP; varies by fish type | Learn fishing at the Nas River dock | |
Herbs, water | Restores HP and provides stamina regen buff | Recipe found in Hernand Town | |
Various vegetables | Restores moderate HP | Purchase vegetables from the Grocer | |
1 Meat | +80 HP | None | |
Meat Skewer | 1 Meat, 1 Fruit or Vegetable | +120 HP, +10 Spirit | None |
1 Meat, 1 Berry | +120 HP, +10 Spirit | Fire Resistance Lv 2 (30s) | |
Advanced ingredients | +560 HP | Strongest single-use heal |
Boss Fight Food Preparation
Before any boss encounter, stock up on at least 50 to 100 pieces of Hearty Grilled Meat. Buy the cheapest Tough Meat from the butcher in Hernand Town, cook it at the nearby campfire, and repeat. Vendor stock refreshes at midnight (0:00 in-game time), so rest near a cooking pot to skip time if needed. The universal boss strategy is to heal constantly while attacking. Eat between every few swings with R1/RB, and if your health drops dangerously low, dodge away while healing back to full.
Palmar Pills
Palmar Pills are the most important consumable in the game. When you die, a Palmar Pill automatically revives you with 30% HP, saving you from restarting a fight entirely. The recipe can be crafted with basic alchemy materials: 2 Water and 15 of a specific medicinal herb (insects are not valid Palmar Pill ingredients). Prioritize obtaining the Palmar Pill recipe from the alchemy lab at Greymane Camp and keep at least 5 to 10 Palmar Pills in your inventory at all times. They are especially critical for multi-phase boss encounters where dying in the final phase would otherwise force you to restart from the beginning.
Palmar Pills are consumable items found throughout Pywel. If you die while carrying one, it automatically resurrects your character with roughly 30% of your HP restored. Always keep one in your inventory for insurance during boss fights or dangerous exploration.
Making Money
Silver is the primary currency and you will need plenty of it for gear upgrades, socket creation at Witches, and buying supplies. Here are the best early-game money sources. For a full breakdown, see How to Make Money Fast and Early.
Method | Details | Approximate Earnings |
|---|---|---|
Archery Contest | Located at Lioncrest Manor northwest of Hernand. Hit ten targets faster than opponents. Repeatable indefinitely. | 80 copper entry fee per round (winnings vary by placement) |
Pick up bounty notices from House Celeste boards. Track and subdue targets, then deliver them to the Guard Station. | Varies; reliable income | |
Goblin Farming | Head to Sunrise Plains south of Greymane Camp. Kill Fundamentalist Goblins and loot Crude Devil Masks (25% drop rate, sell for ~13 silver each). | ~100 silver per 10 minutes |
Red Croton Flowers | Found in large fields roughly 1000 meters southwest of Hernand. Pick and sell in bulk to any merchant. | Quick passive income |
Selling Documents | Old books, posters, and letters can be sold after reading. They have no further use once the text is learned. | Frees inventory space too |
Cooked fish sells for a high price at vendors. Fish at any lake or river with a fishing rod. | Steady income |
Silver is the main currency and you need it for gear, materials, and Abyss Cores. Mining high-value ore or harvesting flowers yields solid income early on. After reading a recipe, it is permanently learned, so sell the recipe item afterward for extra silver. Once you accumulate around 100 silver coins, financial stress becomes minimal.
Once you read a recipe scroll, the recipe is permanently learned and the physical document serves no further gameplay purpose. Sell it immediately to free inventory space and earn copper. The same applies to letters, old books, posters, and any other readable documents. Your inventory space is limited (starting at 50 slots), and keeping read documents wastes valuable slots that could hold crafting materials or food.
The Hernand Bank can be robbed for a significant early-game payday. While committing crimes normally reduces your Contribution in the local region, the bank heist is worth the trade-off for the large silver payout. Before attempting the robbery, purchase a mask from a merchant to conceal your identity, which reduces the Contribution penalty. Make sure you have enough silver to pay any resulting fines, and avoid robbing the bank if you are close to unlocking a Contribution Shop reward you need. For a step-by-step walkthrough, see How to Rob Hernand Bank.
Inventory Management
Inventory space in Crimson Desert is limited and there is no persistent storage chest or bank. Every item you pick up occupies one slot regardless of size or weight. A two-handed sword takes the same space as a recipe scroll. Managing your inventory is critical from the very first hour.
How to Get More Slots
You earn permanent inventory slots by completing specific quests. Hernand Commissions reward three extra inventory slots per quest, making them the fastest way to expand your capacity. You can also purchase individual slots from certain vendors for 50 copper each, and faction quests sometimes reward Small, Medium, or Large inventory bags. See How to Get More Inventory Slots for a full list.
Your inventory has limited slots at the start. Increase capacity with Small, Medium, and Large Bags obtained from faction quests or merchants. Prioritize quests that reward Medium Bags for the biggest early boost. The Standard Inventory Expansion Tool is also found through specific quests.
What to Keep and What to Sell
Documents, letters, old books, and posters should be sold immediately after reading. They have no further gameplay purpose once their text is learned. Recipes are the same: once read, the recipe is permanently learned and the physical scroll can be sold. Keep ore, hides, and crafting materials for gear upgrades. For a full guide, see Best Items to Keep, Buy, and Sell.
The Supply Chest at Greymane Camp stores items you missed during exploration. If you leave loot on the ground and your inventory is full, those items eventually appear in the supply chest. Check it periodically.
Mining and Logging Tools
Life tools are essential for gathering resources throughout the game. You acquire a free fishing rod early in the story, but the Pickaxe and Logging Axe must be obtained separately. The Pickaxe is required for mining ore deposits (diamonds, iron, other minerals), which are key materials for weapon upgrades and Abyss Gear crafting. The Logging Axe lets you harvest timber for camp construction and certain recipes. Do not sell or discard these tools, as they cannot easily be replaced.
Buy the Pickaxe and Logging Axe from the Provisioner's Shop in Hernand. Equip them via D-Pad Left (F3 on PC). You can also break ore deposits with Force Palm (R3 / mouse wheel) and fell trees using Turning Slash (R1+R2 / RB+RT).
Merchant Restocking
Vendors restock their inventories at midnight (0:00 in-game time). Rest at a cooking pot to skip time efficiently if you need to buy more supplies.
Horse Care and Riding
Your horse is your primary means of long-distance travel. You obtain your first horse during the main story when you visit Deepfog Basin in the early chapters. Horses have their own health bar and can be injured in combat or from hard falls.
Pet your horse and feed it Horse Items such as hay, sugar beets, or Horse Tonic to increase its trust level and unlock new mounted abilities. Higher trust levels improve horse handling, speed, and combat responsiveness. Visit saddler Annabella in Hernand or the Equinsher Saddlery southeast of the city for saddles and horse equipment.
Horses do not take fall damage, so you can safely ride off cliffs. However, your horse can die in combat if you do not heal it. Transform Force Palm into Healing Palm by pressing the appropriate button combination (hold R3 then L3 on controller, Tab on keyboard) while near your horse to restore its health.
For mounted combat strategies, see Mounted Combat.
You obtain your first horse during Chapter 1 at Deepfog Basin. Horses are essential for traversing the vast open world. Call your horse with D-pad Up. Additional mounts, including mechs and dragons, unlock later in the story with unique movement abilities.
Horse Healing: Convert Force Palm into Healing Palm by holding R3 (mouse wheel) then L3 (Tab on PC). Monitor your horse's health through the inventory screen.
Contribution and Reputation
The Contribution System is one of Crimson Desert's core progression mechanics. Almost everything you do that benefits a community increases your Contribution rank in that region: completing quests, fulfilling bounties, clearing bandit camps, and helping NPCs. Higher Contribution levels unlock better items from the regional Contribution Shop, including themed weapons and armor sets.
The Contribution Shop in Hernand Castle sells the Bolton Armor Set and other strong early-game equipment. Prioritize raising your Hernand Contribution by completing Hernand Commissions and Faction Quests. Criminal acts such as stealing, attacking NPCs, or trespassing reduce your Contribution, so avoid crime in regions where you are building reputation.
Contribution System Details
The Contribution system is one of the core progression mechanics in Crimson Desert. Almost everything you do that benefits a community increases your Contribution rank in that region: completing quests, fulfilling bounties, clearing bandit camps, and helping NPCs. Higher Contribution levels unlock better items from the regional Contribution Shop, including themed weapons and armor sets.
Build Contribution in Hernand first: The Hernand Contribution Shop sells the Bolton Armor Set and other strong early-game equipment. Complete Hernand Commissions and Faction Quests to raise your rank.
Avoid crime in your home region: Criminal acts such as stealing, attacking NPCs, or trespassing reduce your Contribution in the local region. If you want to commit crimes, do so in a region where your Contribution does not matter.
Contribution recovers slowly: Lost Contribution recovers over time or can be recovered quickly by completing Contribution-giving quests. Plan accordingly.
Earning Contribution Points
Engage in side quests and bounties to accumulate Contribution Points. These points unlock armor and accessories from regional vendors. Avoid committing crimes (stealing, attacking NPCs) in regions where you are trying to build Contribution, as criminal acts reduce your standing.
NPC Trust System
The Trust system tracks your relationships with individual NPCs across Pywel. A trust gauge shows your standing with each NPC, with green indicating positive actions and red indicating disliked behavior. Building trust with specific NPCs unlocks tangible benefits.
Lower vendor prices: NPCs with high trust offer reduced prices on their goods. This is especially valuable for merchants you visit frequently.
New quests and dialogue: Trusted NPCs may offer side quests and additional story dialogue that untrusted characters never see.
Pet companions: Some animals in the world can be befriended through the trust system. Feed them and interact with them daily to build trust to 100, at which point they follow you and auto-loot items.
Gifting is not always worth it: While you can gift items to NPCs to raise trust, the trust gains are often small compared to the value of the items. Focus on completing quests and positive interactions instead.
Companion Dispatch
As you progress through the story and reunite with members of the Greymanes, you unlock the Freesword Dispatch System (also called Companion Dispatch). From the Freesword Management Office at camp, you can send companions on timed missions to gather resources, earn silver, or obtain rare materials while you explore.
Dispatch missions run in real time and complete whether you are actively playing or not. Some missions reward crafting materials, while others bring back food ingredients or currency. Investing in camp upgrades expands the number of simultaneous dispatch missions you can run. For full details, see the Companion Dispatch Guide.
Pets and Auto-Looting
Pets are animal companions you recruit by building trust with stray animals found in the wild. Feed them meat or pet them daily to increase their trust. Once trust reaches 100, the pet follows you and automatically picks up loot drops during exploration and combat. This saves significant time when clearing bandit camps or farming enemies.
You can pet the same animals once per in-game day for 25 trust points. Reaching 30 unique pets also progresses one of the life challenges. Pets are not just cosmetic; the auto-loot feature is genuinely useful and worth pursuing early.
Recruiting a pet should be one of your earliest priorities. Pets follow you around and automatically pick up loot drops during exploration and combat, saving significant time when clearing bandit camps or farming enemies. To recruit a pet, find a stray animal in the wild, feed it meat, and pet it daily to build trust. Once trust reaches 100, the pet permanently follows you. You can pet the same animals once per in-game day for 25 trust points. The auto-loot feature alone makes pets one of the most valuable quality-of-life upgrades in the game.
Build trust with stray animals by feeding them meat or petting them daily. Each interaction gives +25 trust per in-game day. Once you reach 100 trust, press Square and select "Take In" to recruit the animal as a companion. Pets follow you around and auto-loot defeated enemies. Collecting 30 unique pets completes a challenge.
Crime and the Wanted System
Crimson Desert has a full Crime System. Stealing, attacking NPCs, and trespassing will reduce your Contribution in the local region and can trigger the wanted system. If you accumulate enough infractions, guards will pursue you aggressively. Getting jailed results in a significant loss of both Contribution Points and silver. If you cannot pay the fine, your currency can go negative.
If you want to steal, purchase a mask from a merchant or earn one by completing bounties. Wearing a mask conceals your identity, but your Contribution still takes a small hit even if you are not caught. Greet strangers you encounter while masked to reduce suspicion. Early in the game, avoid crime entirely until you have built a financial cushion.
Disruptive actions like theft and vandalism cause contribution point losses with the affected faction. Wearing a mask allows you to commit crimes without being identified, but nearby NPCs become suspicious. Avoid losing contribution points early on, as they are needed to purchase gear from faction shops.
Abyss Artifacts and Gear
Abyss Artifacts serve as the game's skill points. They drop from quests, boss battles, and hidden locations found during exploration. Rather than traditional experience points and leveling, your character power grows by investing Artifacts into the skill tree.
Early recommendations for new players:
Prioritize stamina nodes: Expanding your stamina pool makes both combat and exploration significantly easier.
Unlock core combat skills: Focus on basic dodge upgrades and your primary weapon's combo extensions before branching out.
Mount-related nodes: The skill tree has dedicated horse nodes that improve mounted combat abilities and mount handling. These are worth early investment if you enjoy horseback fighting.
Save some Artifacts: Some skills require observation before they can be unlocked with Artifacts. You cannot brute-force skills you have not observed yet, so keep a reserve for newly discovered moves.
Abyss Gear and Witches
Abyss Gear (also referred to as Abyss Cores) are special enhancement items that slot into your weapons and armor. They provide stat boosts such as extra attack damage, defense bonuses, or unique passive abilities. You cannot interact with Abyss Gear until you unlock a Witch.
You gain access to your first Witch during Chapter 3 of the main story. After attending the banquet in the "Demenissian Delegation" quest and beginning the fight against Kearush, a white crow will appear and deliver a letter. Reading the letter starts the faction quest "The Hermit Witch," which takes you to the Witchwoods west of Hernand. There you will find Sylvia, the first Witch. Additional Witches exist in every region of Pywel. For details, see Where to Meet the Witch.
Witches offer several services related to Abyss Gear. Installing and extracting gears is free, but creating sockets on your equipment costs silver. The first socket is cheap (around 5 silver), while additional sockets can cost 100 silver or more. You find Abyss Cores by completing Abyss challenges found as glowing cubes on roadside rocks throughout Pywel. Some challenges also reward Faded Abyss Artifacts, which allow you to respec your skills.
Witch Service | Description | Cost |
|---|---|---|
Install Abyss Gear | Slot a gear into an existing socket on any weapon or armor piece. | Free |
Extract Abyss Gear | Remove a slotted gear without destroying it. | Free |
Create Socket | Open a new gear slot on a piece of equipment. | 5 to 100+ silver |
Craft Abyss Gear | Create new gears using recipes purchased from the Witch. | Recipe + materials |
Abyss Gear Tutorial
Following the day-1 patch, a mandatory tutorial quest was added at the start of Chapter 3 to teach players how to use the Abyss Gear system. Before this patch, many players reached mid-game without understanding how to socket and enhance their equipment. The tutorial walks you through:
Installing Abyss Gear: How to slot a gear crystal into an existing socket on any weapon or armor piece (free of charge).
Extracting Abyss Gear: How to safely remove a slotted gear without destroying it (also free).
Creating sockets: How to open new gear slots on equipment at a Witch's station. The first socket is cheap (around 5 silver), while additional sockets cost significantly more.
If you skipped this tutorial or started before the patch, visit any Witch to access Abyss Gear services. The first Witch, Sylvia, becomes available during Chapter 3 through the "The Hermit Witch" faction quest. For full details, see the Abyss Gear article.
Sealed Abyss Artifacts and Challenges
Sealed Abyss Artifacts are collectible items scattered throughout Pywel. Collecting them unlocks Challenges, which are optional objectives that each reward one skill point upon completion. Importantly, challenge progress only counts after you collect the corresponding artifact (it is not retroactive). Collect them early to start tracking progress immediately.
Best Places to Visit Early
Certain locations in the Hernand region contain powerful loot that can give you a significant edge in the early chapters. Visiting these places before progressing the main questline lets you collect gear without facing combat encounters.
Witch of Wisdom Sanctums
Three Witch of Wisdom Sanctums in the Hernand area contain chests with high-quality Abyss Gear. The enemies inside these sanctums only spawn once their respective questline is active, so you can loot the chests safely if you visit beforehand.
Sanctum | Loot | How to Reach the Chest |
|---|---|---|
Found behind a nook hidden by tall grass near the entrance. | ||
Jump into the hole near the brown dog to reach the chest below. | ||
Light the lantern inside to reveal a hidden area containing the chest. |
The gear from these sanctums is powerful enough to carry you through the first several chapters. Prioritize visiting all three before engaging with the Witch of Wisdom questline.
Icemoor Castle Ruins
The Icemoor Castle Ruins contain a Leather Cloak of the Fallen Kingdom. Like the sanctums, this location can be looted early for a strong armor piece.
Hernand Highlands Cavern
Located southeast of Greymane Camp in the Howling Hill area, this cavern allows you to mine diamonds. Diamonds are a key material for crafting Abyss gear, and the cavern is accessible from the very beginning of the game.
Mysterious Energy Locations
Mysterious Energy markers scattered across the map often contain fast travel points. Prioritize discovering these early to drastically cut down travel time between regions. Some also feature unique loot behind minor puzzles.
Locked Doors and Keys
Keys in Crimson Desert are generic, universal items. A single "Key" works on any standard locked door across Pywel. The catch is that walking into a door automatically consumes a key if the door happens to be locked, and there is no visual indicator telling you whether a door is locked or unlocked beforehand. This means you can accidentally waste keys on doors that lead to empty rooms or minor loot.
Where to Find Keys
Keys drop from enemies, particularly bandits and goblins. Looting defeated enemies has a decent chance of yielding one or more keys. You can also purchase keys from Back Alley Shops for roughly 30 copper each. Some quest rewards and exploration chests contain keys as well.
Climbing Through Windows
Most buildings with locked front doors also have accessible windows on the exterior. Climbing the outside wall and slipping through a window gets you inside without spending a key. This is especially useful when searching for Crafting Manuals hidden in private residences and workshops. Keep in mind that entering through a window still counts as trespassing. Equip a mask before climbing through to reduce the Contribution penalty, or accept the small reputation hit.
Tips for Conserving Keys
Do not hoard keys in your inventory. Because walking into any locked door automatically uses a key, carrying keys while casually exploring leads to accidental consumption. Some players intentionally avoid picking up keys until they have a specific door in mind.
Named keys are different. Certain quest-specific named keys (like the "Cellar Key" or "Prison Key") only work on their designated door and are not consumed by random locked doors.
Check for windows first. Before spending a key on a building, circle the exterior and look for climbable walls or open windows. This preserves your key supply for doors where climbing is not an option.
Quality of Life Tips
Use the Focus/Lock-On button constantly. Pressing L1/LB (CTRL on PC) in combat locks onto enemies and raises your guard. Outside combat, it highlights interactable objects and NPCs, making it easier to pick the right target in crowded areas.
Ring the bells to clear the map. Eight hidden bells are scattered across Pywel's towers. Ringing them removes fog of war over large regions, revealing all points of interest without needing to walk through every area.
Sheathe your weapon for certain interactions. Press D-pad Left (T on PC) to put away your weapon. Many NPC interactions and environmental actions require your weapon to be sheathed.
Vendors restock at midnight. Merchant inventories refresh at 0:00 in-game time. Rest at a cooking pot or campfire to skip time if you need to buy more materials.
The Knowledge System tracks everything. Check it regularly through the menu. It records every person, creature, territory, item, and technique you have encountered, serving as a useful progress tracker.
Enemies can disarm you. If your weapon is knocked away during combat, do not panic. Walk over it to pick it back up, or grab an enemy weapon off the ground.
Sharpen weapons and repair armor before bosses. Use the Grindstone for an attack boost and the Anvil for a defense boost. Both are found at the Greymane Camp and at various bandit outposts.
Cook meals in bulk before entering a new region. Food-based healing is far cheaper and more effective than buying potions from merchants.
Talk to tavern NPCs for rumors. Some rumors unlock side quests and point you toward hidden locations containing valuable loot.
Do not overexplore ahead of the main quest. Entering boss arenas or triggering encounters prematurely can cause issues. Explore each region thoroughly, but follow the main story's pacing.
Activate Hernand Town's fast travel point immediately. It is the location you will return to most often, so having it available from the start saves a great deal of time.
Check for Sealed Abyss Artifacts early. Collect Sealed Abyss Artifacts to unlock Challenges that grant additional skill points. Progress only counts after the artifact is collected, so grab them as soon as you can.
Use Guiding Light to find hidden items. Press L1+R1 (LB+RB on controller, CTRL+Left Click on PC) to activate your sword's Guiding Light, which marks nearby blue glints indicating collectibles and fast travel pressure plates.
Controller vs. Keyboard
If you are playing on PC, it is strongly recommended to use a PlayStation or Xbox controller. The combat system is designed around controller inputs, and the fighting game-style button combinations feel significantly more natural with analog sticks and face buttons. Mouse and keyboard is functional but substantially harder to master, especially for grappling combos, mounted combat, and precise dodge timing. Many veteran players report that the game is "very, very difficult" on keyboard compared to controller.
Quest Tips
Side quests matter. Keep doing faction quests and commissions. Higher contribution levels unlock unique items from regional vendors, including thematic weapons, armor, and horse barding. Some faction quests are locked to certain characters, which is displayed on the map.
Quest guides: When a quest gives you a guide NPC, call your horse and ride alongside them. Maintain proximity or the guide will abandon you.
Research projects: In settlements you help, you can kickstart research projects that complete over time. These grant powerful boons and unlockable functions, so start them as early as possible.
UI and Menus Quick Reference
Menu | Button | Contents |
|---|---|---|
Main Menu | Options button | |
Sub-categories | L1/R1 tabs, L2/R2 sub-tabs | Navigate within each menu section |
Help Menu | Available after Prologue | Controls, Quests, Adventure, Life, Special Equipment, Abyss Cores, Camp Management, Minigames |
Weapon Sheathe | D-Pad Left / T on PC | Required for many non-combat interactions |
Call Horse | D-pad Up | Summons your horse to your location |
Key HUD Elements
Boss HP Bar: Displayed at top center during boss fights; changes color per phase
Minimap: Reveals nearby area, quest markers, and points of interest
Character HP Bar: Your remaining health
Stamina Gauge: Depletes with heavy attacks, blocking, sprinting, and traversal
Spirit Gauge: Used for special abilities and Axiom Force skills
Lock-on Marker: White dot that appears when targeting an enemy
Artifact Bar: Yellow bar on the left; fills by killing enemies, grants 1 Artifact when full
Faction Attires, Memory Fragments, and Minigames
Faction Attires
Certain areas require faction-specific clothing to enter. For example, the Hernandian Attire is needed to access Hernand Castle. You earn attires through quest completion (in this case, house-cleaning duties). Check quest rewards before progressing so you do not miss required attires.
Memory Fragments and Visione
The Visione is a special helmet that lets you read memory fragments scattered through the world. When your lantern pulses, a memory fragment is nearby. Equip the Visione via D-pad Left or the special equipment tab, then interact with the fragment. You acquire the Visione at the Lioncrest Watchtower in Chapter 2.
Minigames
Interactive activities like Rock, Paper, Scissors and Arm Wrestling are found throughout towns. They offer small rewards and achievements. Minigame rewards refresh every 23 hours of in-game time.
Early Progression Tips
The first few hours of Crimson Desert set the pace for the rest of the game. Following these priorities helps you build a strong foundation before tackling tougher content.
Defeat Marni's Excavatron
Complete House Roberts's questline, starting with the "Troubled Count" quest. Finishing this chain rewards the Mining Knuckledrill, which is one of the tools for ore extraction. Pickaxes and Force Palm also work, but the Mining Knuckledrill is the most efficient method for mining materials for weapon and armor upgrades.
Earn Contribution Points
Engage in side quests and bounties to accumulate Contribution Points. These points unlock armor and accessories from regional vendors. Avoid committing crimes (stealing, attacking NPCs) in regions where you are trying to build Contribution, as criminal acts reduce your standing.
Unlock Camp Features
Complete Greymane Camp quests to expand the camp's facilities. Upgraded facilities unlock companion dispatch missions that generate resources passively while you explore.
Equipment and Resource Tips
Refine gear regularly at the blacksmith to increase attack and defense values. Even a single refinement level makes a noticeable difference.
Sell read documents and books to free up inventory space and earn copper. Once a document has been read, it no longer serves a gameplay purpose.
Obtain a pet early to automatically pick up loot drops during exploration. Pets save significant time when clearing enemy camps.
Use the supply chest at camp as a backup for uncollected items from the field. Items you miss during exploration are sent here.
Reserve Palmar Pills for multi-phase boss encounters. Deploy them during the final phase to avoid restarting the entire fight if you die.
Crimson Desert drops you into the vast continent of Pywel with very little hand-holding. There is no traditional leveling system, no experience bar, and no quest markers pointing you toward every upgrade. Instead, your power comes from Abyss Artifacts, refined gear, and the food in your inventory. This guide covers everything a new player needs to know to survive and thrive in the first dozen hours.
First Steps: Chapters 1 and 2
Chapter 1 (The First Encounter) introduces protagonist Kliff Macduff as he arrives in the City of Hernand. The opening hours walk you through core systems one at a time: arm wrestling at the tavern, helping townsfolk, and entering your first Abyss Nexus.
Chapter 1 Priorities
Activate every Abyss Nexus you pass. These function as both fast travel anchors and checkpoints. Skipping them means long backtracking sessions later.
Complete the Trials of Kindness. This quest chain sends Kliff across Hernand to help citizens. It is required to progress the story and rewards your first Abyss Artifacts.
Learn Axiom Force. A white bird lands on Kliff's hand during Chapter 1 and grants the Axiom Force ability. This telekinetic power lets you grab, push, and pull objects. It is the foundation for nearly every puzzle in the Abyss.
Unlock Flight. At the end of Chapter 1 you receive a set of wings. These let you glide across the open world and are essential for exploration from this point forward.
Chapter 2 Priorities
Chapter 2 (Unexpected Gift / Hernand in Chaos) opens Hernand up as a full hub area. This is when the game gives you real freedom.
Talk to every NPC with a quest marker. Several NPCs in Hernand offer side quests that unlock inventory slots, contribution points, and crafting tools.
Complete "Estate in Dismay" early. This side quest is available at the start of Chapter 2. It awards Contribution Points for Hernand and the Mining Knuckledrill, which you need for gathering ore.
Visit the Butcher and Grocer. Buy ingredients for cooking. You will need a steady supply of meat and vegetables before tackling any boss fight.
Start exploring west of Hernand. The riverbanks and waterfalls northwest of town hide some of the best early-game gear (see the gear section below).
How Combat Works
The combat system in Crimson Desert rewards patience and timing over button mashing. Stamina management is the core tension: heavy attacks drain stamina, while light attacks do not. Understanding the five basic actions will carry you through most encounters.
Action | Input (Controller) | Input (Keyboard) | Notes |
|---|---|---|---|
Light Attack | RB / R1 | Left Click | Fast, no stamina cost. Bread-and-butter damage. |
Heavy Attack | RT / R2 | Shift + Left Click | Slow, high stagger damage, costs stamina. |
LB / L1 (before hit lands) | Q (before hit lands) | Replenishes stamina and spirit on success. Cannot parry red-glow attacks. | |
Dodge / Backstep | B / Circle | Alt | Requires Keen Senses Level 2 unlock. Has i-frames when timed correctly. |
Attack at parry timing | Attack at parry timing | Requires Keen Senses Level 3. Blocks and damages simultaneously. |
Parrying
Parrying is already unlocked by default under the Spirit tree (Keen Senses Level 1). Press the parry input right before an enemy attack connects. A successful parry replenishes your stamina and spirit, giving you resources to counterattack. However, attacks with a red glow cannot be parried. You will see these primarily on bosses and elite enemies. When you spot the red flash, dodge instead.
Dodging
Dodging requires spending one Abyss Artifact to upgrade Keen Senses to Level 2. Once unlocked, pressing the evade input within the proper timing window grants invincibility frames. This is your only defense against unblockable (red-glow) attacks. Prioritize unlocking dodge early; it makes every boss fight significantly easier.
Launcher Combo
The Launcher combo (Light, Light, Heavy) knocks smaller enemies into the air and allows an aerial follow-up. This is extremely effective for thinning out groups of bandits before their archers can reposition. Get into the habit of rolling to the edges of a group, chaining launchers on isolated archers, then turning to face the melee fighters.
Get a Mask Early
Masks let you steal items from NPCs without being recognized. Getting one early opens up a secondary income stream and lets you grab useful consumables for free.
Three Ways to Get a Mask
Method | Location | Details |
|---|---|---|
Hernand (southeast end of main road near the river) | Costs only 10 copper. Available as early as Chapter 1. This is the fastest method. | |
Jeffrey Bounty | Hernand bounty board | Pick up the "Bounty Notice: Jeffrey" from the board. Track and capture the pickpocket to receive a mask as a reward. |
Bandit Drops | Hernandian Territory (various) | Bleed Bandits and other bandit enemies have a random chance to drop masks. Not reliable, but you may get one while farming. |
The Back Alley Shop at Grimrack is the fastest and cheapest option. Walk to the southeast end of Hernand's main road near the river and buy one for 10 copper. Once you have a mask equipped, approach any NPC from behind and hold the steal button to pickpocket items.
Fill Your Accessory Slots
Crimson Desert has six accessory slots: one necklace, two earrings, two rings, and one cloak. Even the weakest accessories provide free stat bonuses, so filling every slot as early as possible gives you a noticeable power boost for zero effort.
Slot | Quantity | Primary Stats | Refinement Bonus |
|---|---|---|---|
Necklace | 1 | Attack, Critical Rate | Spirit Regeneration |
Earring | 2 | Health Regeneration | |
Ring | 2 | Attack, Stamina | Stamina Regeneration |
Cloak | 1 | Elemental Resistance, Defense | Varies |
Where to Find Early Accessories
Bandit drops. Killing bandits while questing through the Hernandian Territory frequently drops Tarnished Rings and Tarnished Amulets. Equip these immediately.
Merchants. Hernand vendors sell basic accessories for copper. Check the general goods merchant and the Back Alley Shop.
Treasure chests. Explore caves, ruins, and buildings off the beaten path. Many hidden chests contain accessories.
Do not worry about quality at this stage. A Tarnished Ring with +3 Attack is still better than an empty slot with +0 Attack. Swap in better pieces as you find them.
Get Stamina to 200 for Aerial Maneuver
Blue nodes in the skill tree increase your stamina. Reaching 200 stamina is the first major milestone you should aim for because it unlocks Aerial Maneuver, one of the most transformative traversal abilities in the game.
Aerial Maneuver is tied to Axiom Force Level 2. Once unlocked, it allows Kliff to leap across enormous distances in an instant, making exploration dramatically faster. The ability costs 200 stamina per use, which means you literally cannot activate it until your stamina pool hits that threshold.
Prioritize spending Abyss Artifacts on blue (stamina) nodes early. The mobility gains from Aerial Maneuver are worth more than any marginal combat upgrade in the opening hours. Stamina also fuels climbing, gliding, dodging, and heavy attacks, so every point invested pays dividends across all activities.
Refine All Gear to Level 4
The refining system lets you upgrade weapons and armor at blacksmiths using common materials. Each piece has 10 refinement levels, but there is a critical breakpoint at level 5.
Refinement Level | Materials Required | Notes |
|---|---|---|
Level 1 to 4 | Iron Ore, Copper Ore, Timber, Fine Timber, Hides | Standard materials found by mining and gathering |
Level 5 and above | Same materials PLUS Abyss Artifacts | Competes directly with skill point spending |
Levels 1 through 4 use only standard crafting materials: Iron Ore and Copper Ore for melee weapons, Timber and Fine Timber for bows and shields, and a mix of ores and hides for armor. You can mine ore from deposits found across the world (use the Mining Knuckledrill from the "Estate in Dismay" quest) and chop wood from forest nodes.
Starting at refinement level 5, every upgrade begins consuming Abyss Artifacts on top of regular materials. Since Abyss Artifacts are the same currency you spend on skills, stats, and traversal abilities, spending them on gear upgrades in the early game is a bad trade. Get every piece of equipment to +4, then redirect your Artifacts toward the skill tree.
The Abyss and Skill Points Explained
Crimson Desert has no character levels. Your power comes entirely from Abyss Artifacts, which function as the game's skill points. Every ability you unlock, every stat boost you want, and every high-tier gear refinement runs through this single currency.
How to Earn Abyss Artifacts
A yellow meter sits to the left of your minimap. Every enemy you kill fills it. When the bar is full, you receive one Abyss Artifact. There is no cap on how many times you can repeat this cycle, so grinding is always an option.
Kill enemies. The XP bar fills with every kill. Farming bandit camps and respawning enemy groups is the most consistent method.
Complete main quests. Several story quests award Abyss Artifacts directly as quest rewards.
Find Abyss Cressets. Look for glowing "Mysterious Energy" circles on the map. These contain Abyss Cresset puzzles that reward Artifacts on completion.
Faction quests. Greymane Rumor quests and Grounds of the Sunrise quests award Artifacts (see below).
Achievements. Certain in-game achievements reward Abyss Artifacts.
Secret Shop. You can buy Abyss Artifacts from the Secret Shop for silver.
How to Spend Abyss Artifacts
Open the skill tree to spend Artifacts. There are three node colors, each tied to a core stat:
Node Color | Stat | What It Does |
|---|---|---|
Red | Health | Increases maximum health, unlocks health-related passives |
Green | Increases spirit (mana), unlocks spirit-related abilities and passives | |
Blue | Increases maximum stamina, unlocks stamina-related abilities (including Aerial Maneuver) |
For the early game, focus on blue (stamina) nodes to reach 200 stamina, then branch into the Keen Senses tree to unlock dodge (Level 2) and counter (Level 3). After that, invest based on your preferred playstyle.
Greymane Camp Importance
The Greymane Camp is your home base and the hub for faction quests. Once established, the camp provides access to three quest categories that drive progression.
Quest Category | Source | Key Rewards |
|---|---|---|
Naira, Yann, Oongka, and other companions | Story content, camp upgrades, companion abilities | |
Marius (camp expansion missions) | Abyss Artifacts, new facilities, rescued Greymane members | |
Rescued Greymanes living in camp | Medium Bags (+3 inventory slots each), materials, silver |
Why Faction Quests Matter
Greymane faction quests are the most time-efficient source of Abyss Artifacts outside of pure enemy grinding. The Grounds of the Sunrise chain in particular sends you to locate scattered Greymane survivors. Each completed Rumor quest rewards at least one Abyss Artifact, and some quests like "Embers of Return" award two Artifacts along with consumables and a Medium Bag.
With 27 Greymane Commissions available, you can earn up to 81 extra inventory slots by finishing them all. Since there are no storage chests in Crimson Desert and everything you carry is on your person, those extra slots are essential.
Tip: Set aside dedicated time to run through available faction quests in batches. Completing several Rumor and Grounds of the Sunrise quests back to back is one of the fastest ways to stock up on Artifacts and expand your inventory in a short session.
Cooking Food for Healing and Buffs
There are no potions in Crimson Desert. Cooking food at campfires and cooking pots is your only source of healing. Every boss fight, exploration trip, and dungeon run depends on how much food you have in your inventory.
Getting Ingredients
Hunt animals. Kill and skin deer, boars, and other wildlife for Meat, Hides, and Horns.
Buy from the Butcher. The Butcher in Hernand sells Meat and related products.
Buy from the Grocer. The Grocer in Hernand sells Fruits, Vegetables, and Berries.
Grow your own. After upgrading your Greymane Camp, you can grow fruits and vegetables there.
Tip: There is no cooldown or penalty for eating during combat. You can eat food even while being grappled. Always keep at least 10 to 15 Meat Skewers on hand before heading into any boss fight or dungeon.
How the Witch System Works
The witch system unlocks in Chapter 3 and introduces Abyss Gears, which are stat-boosting modifications that slot into your weapons and armor. Think of it as Crimson Desert's socketing or gem system.
Unlocking the System
After reaching Chapter 3, a white crow delivers a letter that starts "The Hermit Witch" quest. This leads you to Shadow's Whisper Cave, located just north of Hernand, where you meet Sylvia, a witch-in-training who acts as your first Abyss Gear vendor.
Warning: There is a known bug where entering Shadow's Whisper Cave before you have the quest can cause Sylvia to vanish permanently, locking you out of her services. Do not explore this cave until the quest sends you there.
What Witches Do
Each witch maintains a workshop where she can perform four services:
Embed Abyss Gears into equipment sockets
Extract existing Gears for reuse in different equipment
Create new sockets on weapons and armor that do not have them
Craft Abyss Gears from recipes and materials
The Five Witches
As you progress through the game, you will encounter five witches across Pywel, each named after a virtue:
Witch | Title | Region |
|---|---|---|
North of Hernand (Shadow's Whisper Cave) | ||
Unlocked through story progression | ||
Bari | Unlocked through story progression | |
Lyselia | Unlocked through story progression | |
Areciel | Unlocked through story progression |
Sylvia is the novice-tier witch with limited capabilities, but she gives you full access to the Abyss Gear system. As you find more witches, you unlock higher-tier gear modifications and crafting recipes.
Exploration Tips
Pywel is packed with hidden secrets and environmental rewards. Here are the most important things to look for while exploring.
Waterfalls Hide Caves
If you see a waterfall, walk through it. Many waterfalls in Crimson Desert conceal cave entrances that contain treasure chests with rare gear. The area west and northwest of Hernand along the riverbanks is especially dense with waterfall caves. Use the Stab ability (or sprint and jump) to pass through the falling water.
Bell Towers Clear Fog
Your world map starts almost entirely covered in fog. Ringing bell towers is the primary way to reveal the map. There are 8 bell towers spread across Pywel, tied to the Toll of Pywel quest and the Pororin Forest Guardians faction.
When you ring a bell, a Shai child appears and magically clears the fog for that surrounding region, revealing a large chunk of the map. Some bell towers sit in plain sight inside major cities, so always check rooftops and tall structures in any settlement you visit. A bell icon appears on your minimap when you are close.
Grindstones and Anvils Give Temporary Buffs
Scattered throughout the world are grindstones and anvils. These are not the same as permanent blacksmith refinement. Instead, they provide free, repeatable temporary buffs.
Station | Effect | Best Use |
|---|---|---|
Grindstone | Temporarily increases weapon attack power | Use before boss fights or tough encounters |
Anvil | Temporarily increases armor defense | Use before boss fights or exploration in dangerous areas |
Look for these near fast travel points and camp areas. There is no cost to use them, so sharpen your weapon and repair your armor every time you spot one.
Other Exploration Tips
Activate every Abyss Nexus. Fast travel saves enormous amounts of time. Never walk past a glowing nexus point without activating it.
Check Mysterious Energy circles. These glowing areas on the map contain Abyss Cresset puzzles. Solving them rewards Abyss Artifacts.
Climb everything. Crimson Desert rewards verticality. Rooftops, cliffs, and mountain peaks often have chests or NPCs.
Talk to people with quest icons. Side quests frequently reward inventory slots, contribution points, and crafting recipes.
Where to Find Early Gear
Two gear sets stand out as major early-game power spikes that are available before you complete Chapter 2.
Dark Ringleader Set (Waterfall Caves)
The Dark Ringleader set is one of the best early-game armor sets, offering excellent movement speed, spirit regeneration, damage reduction, and solid ice resistance. All four pieces are found west and northwest of Hernand City along the river, hidden behind waterfalls.
Piece | Location |
|---|---|
Cloud Mist Cave (behind the first major waterfall) | |
Shadow Heart Grotto (behind another waterfall) | |
Echoing Tunnel (behind a waterfall near the river) | |
Blade Cavern (behind a waterfall) |
Follow the river northwest from Hernand and check every waterfall you see. Each cave has a chest containing one piece. The set bonus is not required; even individual pieces outperform most other early armor.
Hwando (Lion Crest Manor)
The Hwando is an exceptionally powerful two-handed katana available as soon as you reach Hernand Town. It outperforms all other early two-handed weapons in base damage.
Head northwest of Hernand's castle town to Lion Crest Manor. Look for the storehouse next to the manor building. Enter through any of the second-floor windows, then search inside for a gilded chest containing the Hwando.
Pairing the Hwando with a full Dark Ringleader set gives you an enormous power advantage for the next several chapters. Refine both the weapon and armor to +4 using standard materials for even more of an edge.
Combat and Survival Tips Worth Knowing Early
Beyond the systems already covered above, three smaller mechanics make the early hours of the game noticeably easier once you know about them. None of these are explained more than once during the opening hours, so they are easy to miss in your first run.
Tip | What It Solves | Default Binding |
|---|---|---|
Hold-Attack Continuous Combo | Frees your eyes from input timing so you can read enemy windups for parry or dodge | Hold light attack (R1 on PlayStation, RB on Xbox, left mouse button on PC) |
Sprint Kick on Shielded Enemies | Bypasses raised shields that ignore sword swings, opening the target for a grapple or finisher | Sprint, then Triangle on PlayStation, Y on Xbox, F on PC |
Clean Fish Into Fillets | Saves inventory slots, restores more HP per item, and unlocks higher-tier cooked recipes | Open inventory, select a raw fish, choose Clean |
Hold the Attack Button for a Continuous Basic Combo
In addition to tapping the light attack input for individual swings, you can hold the light attack button down to chain Kliff's basic Combos automatically. The character keeps swinging through the standard sequence on its own, with the same animations you would get from rapid tapping. The advantage is not raw damage; it is attention. Because your fingers are not committed to the rhythm of each click, your eyes are free to track the enemy and you have time to spot a Parry window or a Dodge cue. Holding the attack button is especially useful when you are still learning the cadence of a particular weapon family or when several enemies are circling you and you need to stay aware of the wider fight. The same hold input is one of the easier ways to maintain pressure on enemies that try to creep behind your guard, since you keep swinging while you reorient.
Sprint Kick Through Raised Shields
Some bandits and human enemies in Pywel carry large shields that absorb sword strikes outright; light swings against a raised shield deal no damage at all. The article above already notes that heavy attacks chip through these guards, but there is a faster reset. While sprinting, press the heavy kick input (Triangle on PlayStation, Y on Xbox, F on PC) to launch a running kick that staggers almost any human shield bearer on the first hit. The kick ignores the shield rather than fighting it, knocks the target out of guard, and leaves a clean opening for a grapple, a heavy combo, or a finisher.
Combine the kick with the existing Grappling advice in the Hostage Taking section above for a reliable opener against shield groups: sprint kick to break the front shield, immediately grapple the staggered enemy, and either throw them at the rest of the formation or hurl them off the nearest ledge. The kick also chains naturally into Combat System follow-ups such as launchers if you have invested in those skill tree nodes. Note that on some early-game characters the kick has to be unlocked from the skill tree before the bind starts working, so check the input prompt the first time you try the technique.
Clean Fish Into Fillets Before Cooking
Once you have picked up the Fishing Rod and started landing catches at the Nas River dock, do not feed whole fish straight to a campfire. Open your inventory, highlight any raw fish, and choose the Clean option to convert it into Fish Fillet stacks. The verb is Clean rather than Fillet in the menu, which is easy to overlook. A single fish typically yields multiple fillets, and each fillet takes far less inventory space than the whole-fish item it replaces.
Fillets serve three purposes that whole fish do not. They are the ingredient required by the higher-tier Recipes available later in Cooking, they restore noticeably more HP per item than a plain grilled whole fish, and they sell for a competitive amount of silver if you would rather convert a haul into money than carry it home. Cleaning a stack right at the riverbank is also a quick way to free up bag space before you ride back to Hernand, which dovetails with the inventory pressure called out in the Inventory Management section above. If you plan a long fishing run, bring the Salmon and other regional species back as fillets rather than whole fish so you can keep casting without having to dump catches early.
Quick Reference Checklist
Use this checklist to track your early game progress:
Activate all Abyss Nexus points near Hernand
Buy a mask from the Back Alley Shop (10 copper)
Fill all six accessory slots (necklace, 2 earrings, 2 rings, cloak)
Collect the Dark Ringleader armor set from waterfall caves
Get the Hwando from Lion Crest Manor
Refine all gear to +4 at the blacksmith
Invest Abyss Artifacts in blue stamina nodes until you reach 200 stamina
Unlock Aerial Maneuver (Axiom Force Level 2)
Unlock Dodge (Keen Senses Level 2)
Stock up on Meat Skewers (aim for 10 to 15 before any boss fight)
Ring bell towers to clear fog from the world map
Complete Greymane faction quests for Abyss Artifacts and inventory slots
Wait for Chapter 3 to unlock the witch system (do not enter Shadow's Whisper Cave early)
Additional Resources
For deeper dives into specific systems, check out these related guides:
Combat System for advanced combat mechanics and ability combos
Skill Tree Guide for optimal skill point spending and build paths
Accessories for a complete list of all rings, earrings, necklaces, and cloaks
Refining System for refinement material locations and upgrade costs
Cooking for all recipes and ingredient locations
Witch Locations for all five witch locations and Abyss Gear details
Silver and Gold Farming for money-making strategies
Mounts for mount types, locations, and taming guides
Tips and Tricks for miscellaneous advanced tips