Armor
Complete guide to armor in Crimson Desert covering all five equipment slots (headgear, body armor, cloaks, footwear, gloves), weight classes, obtaining methods, the disguise system, refinement upgrades, Abyss Core socketing, notable armor pieces, and recommended early-game equipment.
On This Page
Overview
Armor in Crimson Desert is equipped across five body slots: headgear, body armor, cloaks, gloves, and boots. When equipped, armor provides protection against attacks from hostile enemies, and each piece grants different types of buffs at different levels. Three weight classes (Cloth, Leather, and Plate) create meaningful trade-offs between defense and secondary stats. The Dye System allows full cosmetic customization without affecting stats. For weapon details, see Weapons. For shields and defensive mechanics, see Shields. For refinement and upgrade systems, see Refining System.
Each armor piece independently affects both the character's appearance and their defensive statistics. Beyond raw defense, armor can grant elemental resistances (fire, ice, and lightning), movement speed bonuses, attack speed bonuses, and even faction disguises that allow infiltration of restricted areas. Many armor pieces also have slots for Abyss Cores, which are upgrade gems that provide additional effects. Armor can be refined at a blacksmith for up to ten levels of improvement, with each level increasing the piece's base stats.
Armor Categories Summary
Crimson Desert splits armor across five distinct equipment slots. Each category serves a different role in the player's overall build and provides different primary stat bonuses. Only one piece can be equipped per slot at any given time.
Category | Slot | Piece Count | Primary Stats | Notes |
|---|---|---|---|---|
Head | 22+ | Some grant disguises, status immunities (Daze, Tinnitus, Confusion, Roar), or special effects (Visione reads memory fragments) | ||
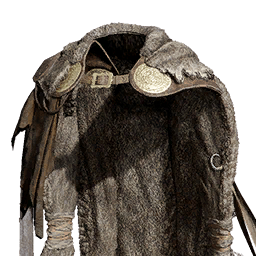
Torso | 17+ | Defense, Elemental Resistance | Many grant faction disguises for infiltration; highest defense values of any slot | |
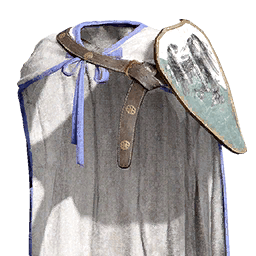
Back | 9+ | Elemental Resistance | Primarily provide fire, ice, or lightning resistance; every cloak grants at least one resistance level | |
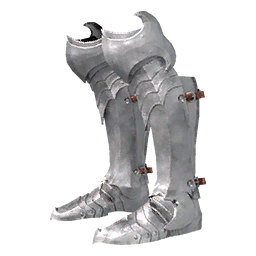
Feet | 11+ | Attack, Defense, Movement Speed | Provide both offensive and defensive stats; some grant Attack Speed | |
Hands | 8+ | Attack, Defense | Offensive-focused with high Attack values; some grant Movement Speed or Lightning Resistance |
In addition to armor, characters equip two weapons at a time (main hand and swap slot) via an equipment wheel that allows instant mid-combat switching. A shield can be equipped in the off-hand when using a one-handed weapon, and accessories provide further stat customization.
Armor Weight Classes
Armor falls into three weight categories that influence defensive stats and secondary bonuses. The weight class affects your character's overall stat distribution. Importantly, there is no equip-load penalty in Crimson Desert, meaning Plate Armor does not slow you down compared to Cloth. This makes Plate one of the strongest early purchases since you get the highest defense with no movement speed drawback.
Weight Class | Defense Range | Best For | |
|---|---|---|---|
Cloth (Light) | 2 to 7 DEF (body armor) | Cloth Pieces, Fleece (purchasable from Provisioner's Shop or enemy loot) | Often includes Movement Speed bonuses; some pieces grant unique utility effects |
Leather (Medium) | 3 to 15 DEF (body armor) | Hides, Bones (obtained from hunting animals) | Balanced defense with frequent Lightning Resistance and Movement Speed bonuses |
Plate (Heavy) | 4 to 13 DEF (body armor) | Iron Ore, Copper Ore, rare ores (mined from open-world deposits or purchased) | High defense values with many pieces including multiple Abyss Core slots; some late-game Leather pieces can exceed Plate defense |
Certain armor pieces also offer specialized bonuses outside of the standard defense trade-off. Some headgear grants status immunities such as Daze Immunity (Ferman Plate Helm), Tinnitus Immunity (Canta Plate Helm), Confusion Immunity (Scarlet Blades Gas Mask), and Roar Nullification (Flame Knight's Plate Helm). The Beekeeping Suit body armor grants Bee Swarm Immunity, and the Duskfang Leather Armor increases Food Effect duration and Climb Speed. Some pieces also grant resource-gathering bonuses that speed up mining, hunting, or logging.
Obtaining Methods
Armor enters the player's inventory through several channels. The acquisition method often determines the armor's quality tier and whether it carries unique properties. Crimson Desert does not lock most gear behind mission progress in the early game, so players can explore to find powerful equipment early.
Where Found | Details | Currency / Requirements |
|---|---|---|
Tailors and provisioners in towns across Pywel sell armor. Different regions stock different inventory, encouraging exploration. Plate Armor can be bought directly from vendors near blacksmiths. | Silver coins, bronze coins | |
Faction contribution shops offer exclusive armor in exchange for contribution coins earned through faction quests and activities. The contribution shop manager near the main castle in the City of Hernand sells the Bolton Plate Armor, obtainable after completing 3 to 4 story missions. | Contribution coins | |
Crafting | Blueprints found in hidden locations feed into the crafting system. Gather materials and forge armor at a blacksmith. The Northern Fighter's Chain Mail, for example, requires 5 Iron Ore and 2 Copper Ore. | Blueprints + gathered materials |
Quest Rewards | Story missions, side quests, and faction quests offer armor as completion rewards. The Hernandian Attire is obtained from the "Actions Speak Louder than Words" main quest. The St. Halssius Priest Attire comes from the "Familiar Curses" quest. | Quest completion |
Enemy and Boss Drops | Defeating bosses yields exclusive armor. The Blackwing Leather Armor (12 DEF, 3 Abyss Core slots) comes from defeating Crowcaller in Chapter 5. The Sunset Reed Cloth Gloves drop from the Reed Devil boss. | Combat drops |
Sanctums and Exploration | Hidden chests, Sanctums, secret passages, and dungeon rewards. The Leather Helm of the Fallen Kingdom is found at the Sanctum of Benediction. Odeck's Protector Plate Boots are found at the Sanctum of Temperance. | World exploration |
Starting Equipment | Each playable character begins with a default armor set appropriate to their combat style. See the Starting Equipment section below. | Default |
Prices at vendors can vary depending on faction reputation. Building positive standing with a region's faction can unlock better prices and exclusive inventory.
Notable Armor Pieces
While dozens of armor pieces exist across all five slots, several stand out for their stats, Abyss Core slots, or unique effects. The following table highlights particularly noteworthy pieces verified through in-game data.
Body Armor Highlights
Name | Class | DEF | Abyss Slots | Key Effects | How to Obtain |
|---|---|---|---|---|---|
Plate | 13 | 3 | Highest base defense Plate body armor | Purchasable for 9.56 Silver; also rewarded from the "Time to Face Justice" main quest (Chapter 7) | |
15 | Unknown | Movement Speed Lv.1, Lightning Resistance Lv.1, Stamina Regen +2%, Defense +3 | Late-game acquisition | ||
12 | 3 | Movement Speed Lv.1, Lightning Resistance Lv.1 | Defeat Crowcaller (Chapter 5) | ||
Plate | 10 | Unknown | Daze Immunity | Deluxe Edition exclusive | |
Plate | 8 | 3 | Strong early-game defense | Contribution Shop in Hernand | |
5 | Unknown | Fire Resistance Lv.1, Food Effect +1, Climb Speed +2% | Behind a waterfall in Whispering Grotto, near Senia | ||
Cloth | 5 | Unknown | Lightning Resistance Lv.1, Bee Swarm Immunity | Dwelling at Pollengarth Apiary | |
Plate | - | - | Grade 4 ceremonial plate; pairs with Baltheon Plate Gloves | Master-smith craft |
Headgear Highlights
Name | DEF | Key Effects | How to Obtain |
|---|---|---|---|
5 | Highest defense headgear | Deluxe Edition exclusive | |
4 | High defense, no special requirements | Purchase from vendors | |
4 | Defeat Crowcaller (Chapter 5) | ||
3 | Daze Immunity | Vendor or exploration | |
3 | Tinnitus Immunity | ||
3 | Lightning Resistance Lv.1, free Abyss Core socket with Momentum (+35% Turning Slash Damage) | ||
0 | Allows viewing memory fragments scattered throughout the world | Story progression |
Footwear and Gloves Highlights
Name | Slot | DEF | ATK | Key Effects | How to Obtain |
|---|---|---|---|---|---|
Feet | 5 | 16 | Atk Speed +1, Move Speed +1; 2 free Abyss Core sockets (Aegis II, Haste I) | Sanctum of Temperance (chest) | |
Feet | 4 | 17 | Lightning Resistance Lv.1 | Hernand vendors or quest rewards | |
Feet | 3 | 18 | Highest base ATK footwear (tied with Solas Plate Boots) | Deluxe Edition exclusive | |
Hands | 4 | 17 | Lightning Resistance Lv.1 | Hernand vendors or quest rewards | |
Hands | 1 | 11 | Move Speed +1; 2 free Abyss Core sockets; grants the Slashing Reed skill | Boss drop from Reed Devil | |
Hands | 5 | 12 | Lightning Resistance Lv.1, Move Speed +1; highest DEF gloves | Exploration or quest reward |
Disguise System
Many armor pieces grant faction disguises that allow the player to infiltrate restricted areas without alerting enemies. Wearing the appropriate disguise lets Kliff blend in with specific groups, bypassing guards and gaining access to locations that would otherwise require combat. You can tell if an armor piece is meant for infiltration by checking your inventory for a "Disguise" or "Access" tag beneath its stats.
The following disguises have been confirmed through in-game armor pieces and quest rewards:
Disguise | Armor Source | Use Case |
|---|---|---|
Bandit Disguise | Infiltrate bandit hideouts and camps | |
Jackal Disguise | Blend in with Jackal faction members | |
Demenissian Disguise | Access Demenissian-controlled areas | |
Civilian Disguise | Appear as a common citizen in towns | |
Hernand Castle Access | Access restricted castle areas; obtained from "Actions Speak Louder than Words" quest (Chapter 1) | |
St. Halssius Disguise | Pass through St. Halssius checkpoints; obtained from "Familiar Curses" quest (Chapter 3) | |
Black Bear Disguise | Infiltrate Black Bear territory; Gas Mask also grants Brimstone Immunity | |
Bleed Bandits Disguise | Move freely among Bleed Bandit groups |
Disguises are primarily granted by body armor, though some headgear pieces also carry disguise tags. Equipping the right combination of faction armor is required for certain quest objectives that involve social stealth. Alternative approaches to guarded areas include purchasing access passes (such as the St. Halssius Visitor Pass for 10 Silver) or sneaking in undetected, though being caught while sneaking results in expulsion.
Armor Sets
Several armor pieces share the same naming prefix, forming recognizable sets. Named sets in Crimson Desert include the Canta Plate set, Kairos Plate set, Bolton Plate set, Solas Plate set, Demenissian Uniform set, Hernand Ceremonial Guard set, and Unyielding Warrior's set, among others.
Note: The extent of armor set bonuses in Crimson Desert is limited. While most armor pieces function independently, some late-game sets may provide minor bonuses when wearing matching pieces. Named sets exist primarily for cosmetic consistency and thematic grouping, so players should focus on each piece's individual stats, Abyss Core slots, and special effects rather than collecting full matching sets for bonus purposes alone.
The Dye System allows full cosmetic customization of any armor, so players can create a visually cohesive look regardless of which individual pieces they choose to equip.
Refinement and Upgrades
Armor can be refined at a blacksmith, with up to ten refinement levels available for each piece. Refinement progressively increases the armor's base stats (defense for armor, attack for weapons). Refinement does not cost any silver coins; it only requires the appropriate materials.
The first blacksmith is Turnali, located in the center north district of the City of Hernand. Additional blacksmiths can be found in other towns across Pywel. To check what materials a refinement level requires, open your inventory, select "Inspect" on the item, then select "Refinement Information."
Refinement Level | Materials Required | Notes |
|---|---|---|
Levels 1-3 | Basic ores (Copper Ore, Iron Ore) for Plate; Hides and Bones for Leather; Cloth Pieces and Fleece for Cloth | Low cost; highly recommended as an early-game investment |
Level 4 | Standard materials in larger quantities | Last level before Abyss Artifacts are required |
Levels 5-10 | Standard materials + Abyss Artifacts | Abyss Artifacts are also used for leveling up to gain skill points, creating a resource trade-off between gear upgrades and character progression |
Material requirements differ based on the armor's weight class. Plate armor requires ores (Iron Ore, Copper Ore) that can be mined from open-world deposits or purchased from merchants. Leather armor requires hides and bones obtained from hunting animals (different animal sizes yield different bone and hide types). Cloth armor requires Cloth Pieces and Fleece, which can be purchased from the Provisioner's Shop or obtained as enemy loot.
For a complete breakdown of upgrade materials and locations, see Refinement and Upgrade Materials. For detailed socketing and enchanting mechanics, see Equipment Sockets and Enchanting.
Abyss Core Slots
Many armor pieces come with one to three slots for socketing Abyss Cores (also called Abyss Gears), which are upgrade gems that grant additional effects to equipment. The number of pre-existing slots varies by piece. Some armor comes with Abyss Cores already embedded; for example, the Leather Helm of the Fallen Kingdom arrives with the Momentum core (+35% Turning Slash Damage), and Odeck's Protector Plate Boots come with Aegis II and Haste I.
Abyss Cores cannot be installed by the player directly. Instead, Witches handle all Abyss Core functions. The first Witch you encounter is Elowen, located at the Witch's House in The Witchwoods of Hernand. Abyss Core socketing unlocks after Chapter 5 during the "Witch of Wisdom" questline.
Witches provide the following services for armor:
Slot | Details |
|---|---|
Embed Abyss Core | : Socket an Abyss Core into an available slot on your armor |
Remove Cores | : Extract a previously installed core without destroying it |
Create Sockets | : Add additional core slots to armor that has fewer than three (costs Silver) |
Sell Recipes | : Purchase crafting recipes to make your own Abyss Cores |
The effects granted by Abyss Cores range from elemental damage bonuses and defensive resistances to movement speed increases and skill damage multipliers. Choosing the right cores for your build is a key part of late-game armor optimization. Pieces with three Abyss Core slots (such as the Blackwing Leather Armor, Bolton Plate Armor, and Solas Plate Armor) are especially valuable for endgame builds.
Recommended Early-Game Armor
The following armor pieces are accessible during the first several chapters and provide a significant power spike over starting equipment. Prioritizing these pieces makes boss encounters and progression noticeably easier.
Item | Details |
|---|---|
(8 DEF, 3 Abyss Core slots): Available from the Contribution Shop manager near the main castle in the City of Hernand after completing a few story missions. One of the highest early-game defense values, and the same armor worn by Hernand City's elite soldiers. | |
(3 DEF, Lightning Resistance Lv.1): Found at the Sanctum of Benediction east of Hernand. Comes with a free Abyss Core socket already loaded with the Momentum core, granting +35% Turning Slash Damage. | |
(5 DEF, 16 ATK, Atk Speed +1, Move Speed +1): Found at the Sanctum of Temperance in a treasure chest. Two free Abyss Core sockets come pre-loaded with Aegis II (damage reduction) and Haste I (movement speed). | |
(1 DEF, 11 ATK, Move Speed +1): Dropped by the Reed Devil boss. Two free Abyss Core sockets and grants the Slashing Reed skill, making these valuable for combat-focused builds. | |
(12 DEF, Move Speed +1, Lightning Resistance Lv.1, 3 Abyss Core sockets): Obtained from defeating Crowcaller in Chapter 5. A strong mid-game body armor that remains viable well into late-game thanks to its three core sockets. |
All of these pieces can be further enhanced through refinement and Abyss Core customization. The Bolton Plate Armor and early Sanctum finds serve as transitional gear, strong enough to carry you through the first few chapters but worth replacing once Blackwing and later Solas-tier armor becomes available.
Character Starting Equipment
Each playable character in Crimson Desert begins with a default armor set tailored to their combat style. These sets provide a solid foundation but are quickly outclassed by armor found through exploration, quests, and vendors.
Kliff
Kliff starts with the Ynitium Leather set, a medium-weight leather ensemble that balances defense with mobility. The set consists of four pieces, all of which include Lightning Resistance Lv.1:
Item | Description |
|---|---|
(Body, 3 DEF, 3 Abyss Core slots) | |
(Back, Lightning Resistance Lv.3) | |
(Feet, 1 DEF, 9 ATK, Move Speed +2) | |
(Hands, 1 DEF, 11 ATK) |
Damiane
Damiane uses several distinct armor sets depending on the situation. This reflects her versatile role within the Greymanes. Her starting body armor is the Demeniss Elite Uniform Leather Armor (12 DEF, Lightning Resistance Lv.1, 3 Abyss Core slots, Demenissian Faction disguise). Her known sets include the Ashclaw set, Blackwing set, Demeniss Elite set, and Jackals' set, each geared toward different combat encounters and infiltration scenarios.
Tips
Plate Armor is available for purchase early from vendors near blacksmiths and is one of the strongest early options, since there is no equip-load penalty in the game.
Armor set bonuses are limited, so focus on each individual piece's stats, Abyss Core slots, and special effects rather than collecting full matching sets.
Always check regional vendors when arriving in a new area. Each region stocks different armor, and some exclusive pieces are only available in specific towns.
Keep faction disguise armor in your inventory even if you find pieces with better stats. Many quests require specific disguises for social stealth objectives, and there is no alternative if you have sold the armor.
Prioritize refining your main armor to at least level 3 early on. The material cost is low and the stat gains are meaningful. Avoid pushing past level 4 unless you have Abyss Artifacts to spare, since those are also used for skill point leveling.
Visit Elowen the Witch after Chapter 5 to socket Abyss Cores into your armor for extra resistances, movement speed, or damage bonuses.
Cloaks provide elemental resistance (fire, ice, or lightning) rather than raw defense. Choose your cloak based on the elemental threats in the area you are exploring.
Armor pieces with three Abyss Core slots (Blackwing Leather Armor, Bolton Plate Armor, Solas Plate Armor, Canta Plate Armor) are particularly valuable for endgame optimization.
Check Sanctums early in your playthrough. The Sanctum of Benediction and Sanctum of Temperance both contain powerful armor with pre-loaded Abyss Cores that provide a significant early advantage.
Patch 1.13.00 Additions
Patch 1.13.00 (July 4, 2026) added roughly 47 new equipment pieces. These include five boss outfit sets (Tarandus the Ashen, Unyielding Hero, Knight of Carnage, Martial Monk, and grand general of Demeniss), 16 armor pieces and 3 headgear pieces, plus 8 more armor pieces obtainable through quests, achievements, and shops. New craftable plate armors were also added: Lightning Bolt Plate Armor, Scorchflame Plate Armor, and Frostcursed Plate Armor.