
Loading...
Loading...
Boss Strategies
March 22, 2026 at 11:37 AM
Accuracy fix: Kailok 1 HP bar, Cassius 1 HP bar, Golden Star mandatory, Muskan note, Split Horn clarification
Boss encounters in Crimson Desert are among the game's most demanding challenges. Across the continent of Pywel, fearsome bosses rule, coming in many forms: human and beast, steel and sorcery, brute force and mystery. They test the player's limits in different ways, and defeating them rewards unique equipment with Signature Abilities, Abyss Fragments, and rare crafting materials.
Boss health bars use a color-coded phase system that signals how the fight will progress:
Bar Color | Phase | Meaning |
|---|---|---|
Blue | Phase 1 | Opening phase. The boss uses its base moveset with standard aggression. |
Green | Phase 2 | Mid-fight escalation. Boss gains new attacks and increases speed. Only present on 3-phase bosses. |
Red | Final Phase | Most dangerous. Maximum aggression, fastest attacks, and often new mechanics. |
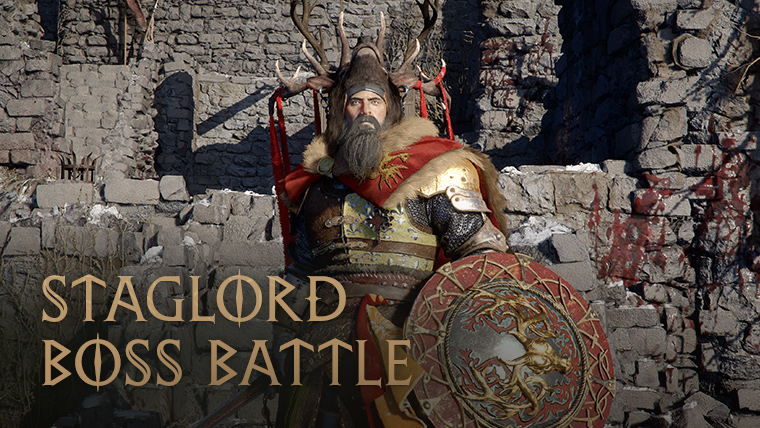
When a health bar is depleted, a cutscene plays showing an interaction between Kliff and the boss. After the cutscene, the health bar resets to the next color and the boss's aggression escalates noticeably. Most bosses have 2 health bars (blue then red). Some bosses like the Staglord and Kearush the Slayer have 3 health bars (blue, green, red). Walter Lanford is an exception with only 1 health bar, compensating with swift evasive movement.
Boss | Type | Health Bars | Key Mechanic |
|---|---|---|---|
Beast (mountain spirit) | 3 | Conjures snowstorms and hail blizzards; rhythm-based pattern learning | |
Humanoid warlord | 3 | Mirror-match sword-and-shield; immune to grapple due to massive size | |
Colossal creature | 2+ | Climb the boss's body to reach weak points; geysers launch the player airborne | |
Fast swordsman | 3 | Creates protective totems; uses clones and hides in wheat field | |
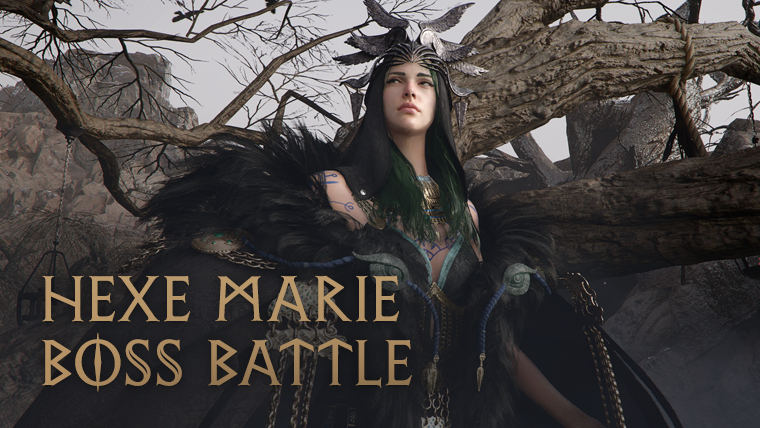
Sorcerer | 2 | Transforms into crows; summons Hexe warriors; teleports around arena | |
Human gunslinger | 1 | Double-barreled gun; smoke bomb evasion; smoke bomb evasion; use Blinding Flash to close gaps | |
Gorilla-like beast | 3 | Wall-climbing slams; can be mounted Dragon's Dogma-style | |
Humanoid traitor | 1 | Heavy mace and shield; arena pillars deal massive damage when he's staggered | |
Humanoid brawler | 2 | Bonepit arena fighter; pugilist with sweeping kicks and choke slams (details from pre-release footage; some specifics may differ in released game) | |
Mechanical dragon | Multi | Mandatory story boss (Chapter 11); fortress arena with EMP bombs; electrical weakness | |
Goblin king | 2 | Goblin boss; fast and chaotic projectile attacks | |
Humanoid (Branchmaster) | 1 | Branchmaster of the Goldleaf Merchant Guild; sword with wind-powered ranged slashes; parry-focused fight | |
Humanoid occupier | 2 | Must be defeated to reclaim Root Hold | |
Black Bear leader | 2+ | Leader of the Black Bears; story-critical encounter |
Defeating bosses drops their equipment along with Signature Abilities and unique stat bonuses. Boss-derived gear carries the boss's signature skill as a built-in effect when equipped. Some Signature Abilities carry elemental properties baked in, meaning the player gains elemental enhancement effects without manually applying them. A piece of gear with a Signature Ability can outperform higher-stat equipment that lacks one, especially when its effect counters upcoming challenges.
Bosses also drop Abyss Fragments used for the skill tree, rare crafting materials, and Knowledge System entries. Loot is not randomized in the ARPG style; unique gear comes specifically from boss drops, blueprints, and crafting recipes.
Upgrade weapons and armor to the highest tier available before the fight.
Stock up on healing consumables and buff items from cooking and alchemy.
Review the boss's elemental affinity and equip appropriate resistance from the Axiom Bracelet.
Assign relevant abilities from the Abyss skill tree to active slots.
Carry auto-revive consumables for insurance against sudden death.
Every boss telegraphs attacks with animations and audio cues. Spend the first attempts of a new boss fight observing rather than attacking aggressively. Identify the tells for major attacks, the safe windows for counter-attacks, and the recovery animations where the boss is vulnerable. Most bosses follow a repeating pattern within each phase that changes when they transition to the next phase. The way each heavy-hitting boss moves to a rhythm makes syncing with their attacks and finding their telegraphs essential.
Stamina is the primary limiting factor in boss fights. Dodging, sprinting, and heavy attacks all consume stamina, but light attacks cost nothing. Running out at the wrong moment leaves Kliff unable to dodge a follow-up attack. Keep at least 30% stamina in reserve at all times. Certain combo chains and weapon skills bypass stamina cost entirely.
Perfect dodge timing is critical: a perfectly timed dodge restores stamina rather than consuming it, rewarding precise play during extended boss fights. Burning all stamina on blocks right before a boss's major attack is the most common mistake. A successful parry followed by the strongest available attack deals bonus damage and can stagger even large enemies.
The game provides several recovery options during boss fights:
Consumable food items: Inventory wheel displays food such as grilled skewers and burgers that restore Health and Stamina. Players can craft or purchase these.
Auto-revive consumables: Stackable items that automatically revive the player after death. Multiple can be carried for multiple revives in a single fight.
No difficulty settings: If a boss is too hard, the intended solution is to leave, explore, upgrade equipment, complete side content, find more Abyss Fragments, and return better prepared.
Boss arenas are not featureless platforms. Each arena contains interactive elements that factor into the fight:
Boss | Environmental Tactic |
|---|---|
Geysers on the boss's back launch the player airborne. The arena is the boss itself. Use Crow Wings to prevent fatal falls. | |
Dragon fire activates fortress pylons that dispense EMP bombs. Load them into the arm-mounted cannon to stun the dragon. | |
Broken pillars in the arena deal massive damage when the boss is staggered into them. His own shield can be used against him. | |
Wheat field provides concealment for the boss's stealth and clone mechanics. Bow is essential for destroying totems. | |
Snowstorms and blizzards affect visibility. The boss uses weather to hide and reposition. |
Several bosses feature distinctive mechanics not found in regular combat:
Mounting bosses: Players can clamber onto the Queen Stoneback Crab and Kearush the Slayer, attacking weak points from their bodies. Bosses actively try to shake the player off.
Bullet reflection: Against Walter Lanford, players must dodge his shotgun blasts (they cannot be parried) and use Blinding Flash Finishers to close the gap.
Precision Focus: Launching into the air (via Force Palm or environmental geysers) and activating slow-motion archery for devastating multi-shot barrages from above.
Grapple attacks: The grappling hook latches onto scalable enemies as a gap closer. On the Queen Stoneback Crab, a Spider-Man-style grapple lets the player swing around the boss.
EMP cannon: In the Golden Star fight, players use an arm-mounted cannon loaded with arena-dispensed EMP bombs to stun the mechanical dragon.
Comic book defeats: Some bosses like the Reed Devil and Hexe Marie escape via narrative cutscenes rather than dying permanently, allowing recurring encounters.
The Axiom Bracelet's elemental system plays a key role in boss fights. Four main elements exist: Fire, Ice, Lightning, and Wind. Fire deals extra damage and stuns through rapid hits. Ice freezes enemies, halting movement and interrupting attacks for a reliable stun. Lightning is particularly effective against mechanical bosses like the Golden Star. Elemental effects come from artifacts, boss drops with built-in elemental properties, and progression-locked skills.
Over-committing to combos: Attacking through a boss's wind-up animation results in heavy damage. End combos early when the boss begins a new attack.
Ignoring adds: Some bosses like Hexe Marie summon smaller enemies. Clearing these prevents being overwhelmed from multiple directions.
Hoarding consumables: Use healing items and buffs freely during boss fights. They exist for this purpose.
Staying at range: Most bosses have gap-closing attacks that punish passive play. Controlled aggression is safer than constant retreat.
Burning stamina on blocks: Blocking drains stamina quickly. Saving stamina for perfect dodges (which restore it) is more sustainable than shield-tanking every attack.
