

Battles in Fire Emblem: Fortune's Weave are fought on a square grid, with each side moving all of its units before the other side acts. Nintendo's own rundown of the system covers party setup, movement and attack range, the roles the six attack types fill, and the way position on the map decides whether an attack draws a counterattack. Layered on top of that base are three optional systems that cost something to use: Combat Arts spend weapon durability, Blaze Arts spend a Hero's HP, and Magic has a limited number of casts.
Setting Up a Match
Before each match you choose which party members to bring and where each one starts on the field. Once the battle begins you take turns moving and fighting across the map. Victory conditions vary; Nintendo names defeating the opposing leader as one of them and states there are others.
Deployment limits vary by map. Skirmish battles cap the party at six units, most other battles allow at least six, and the final battle of Part III allows as many as 25.
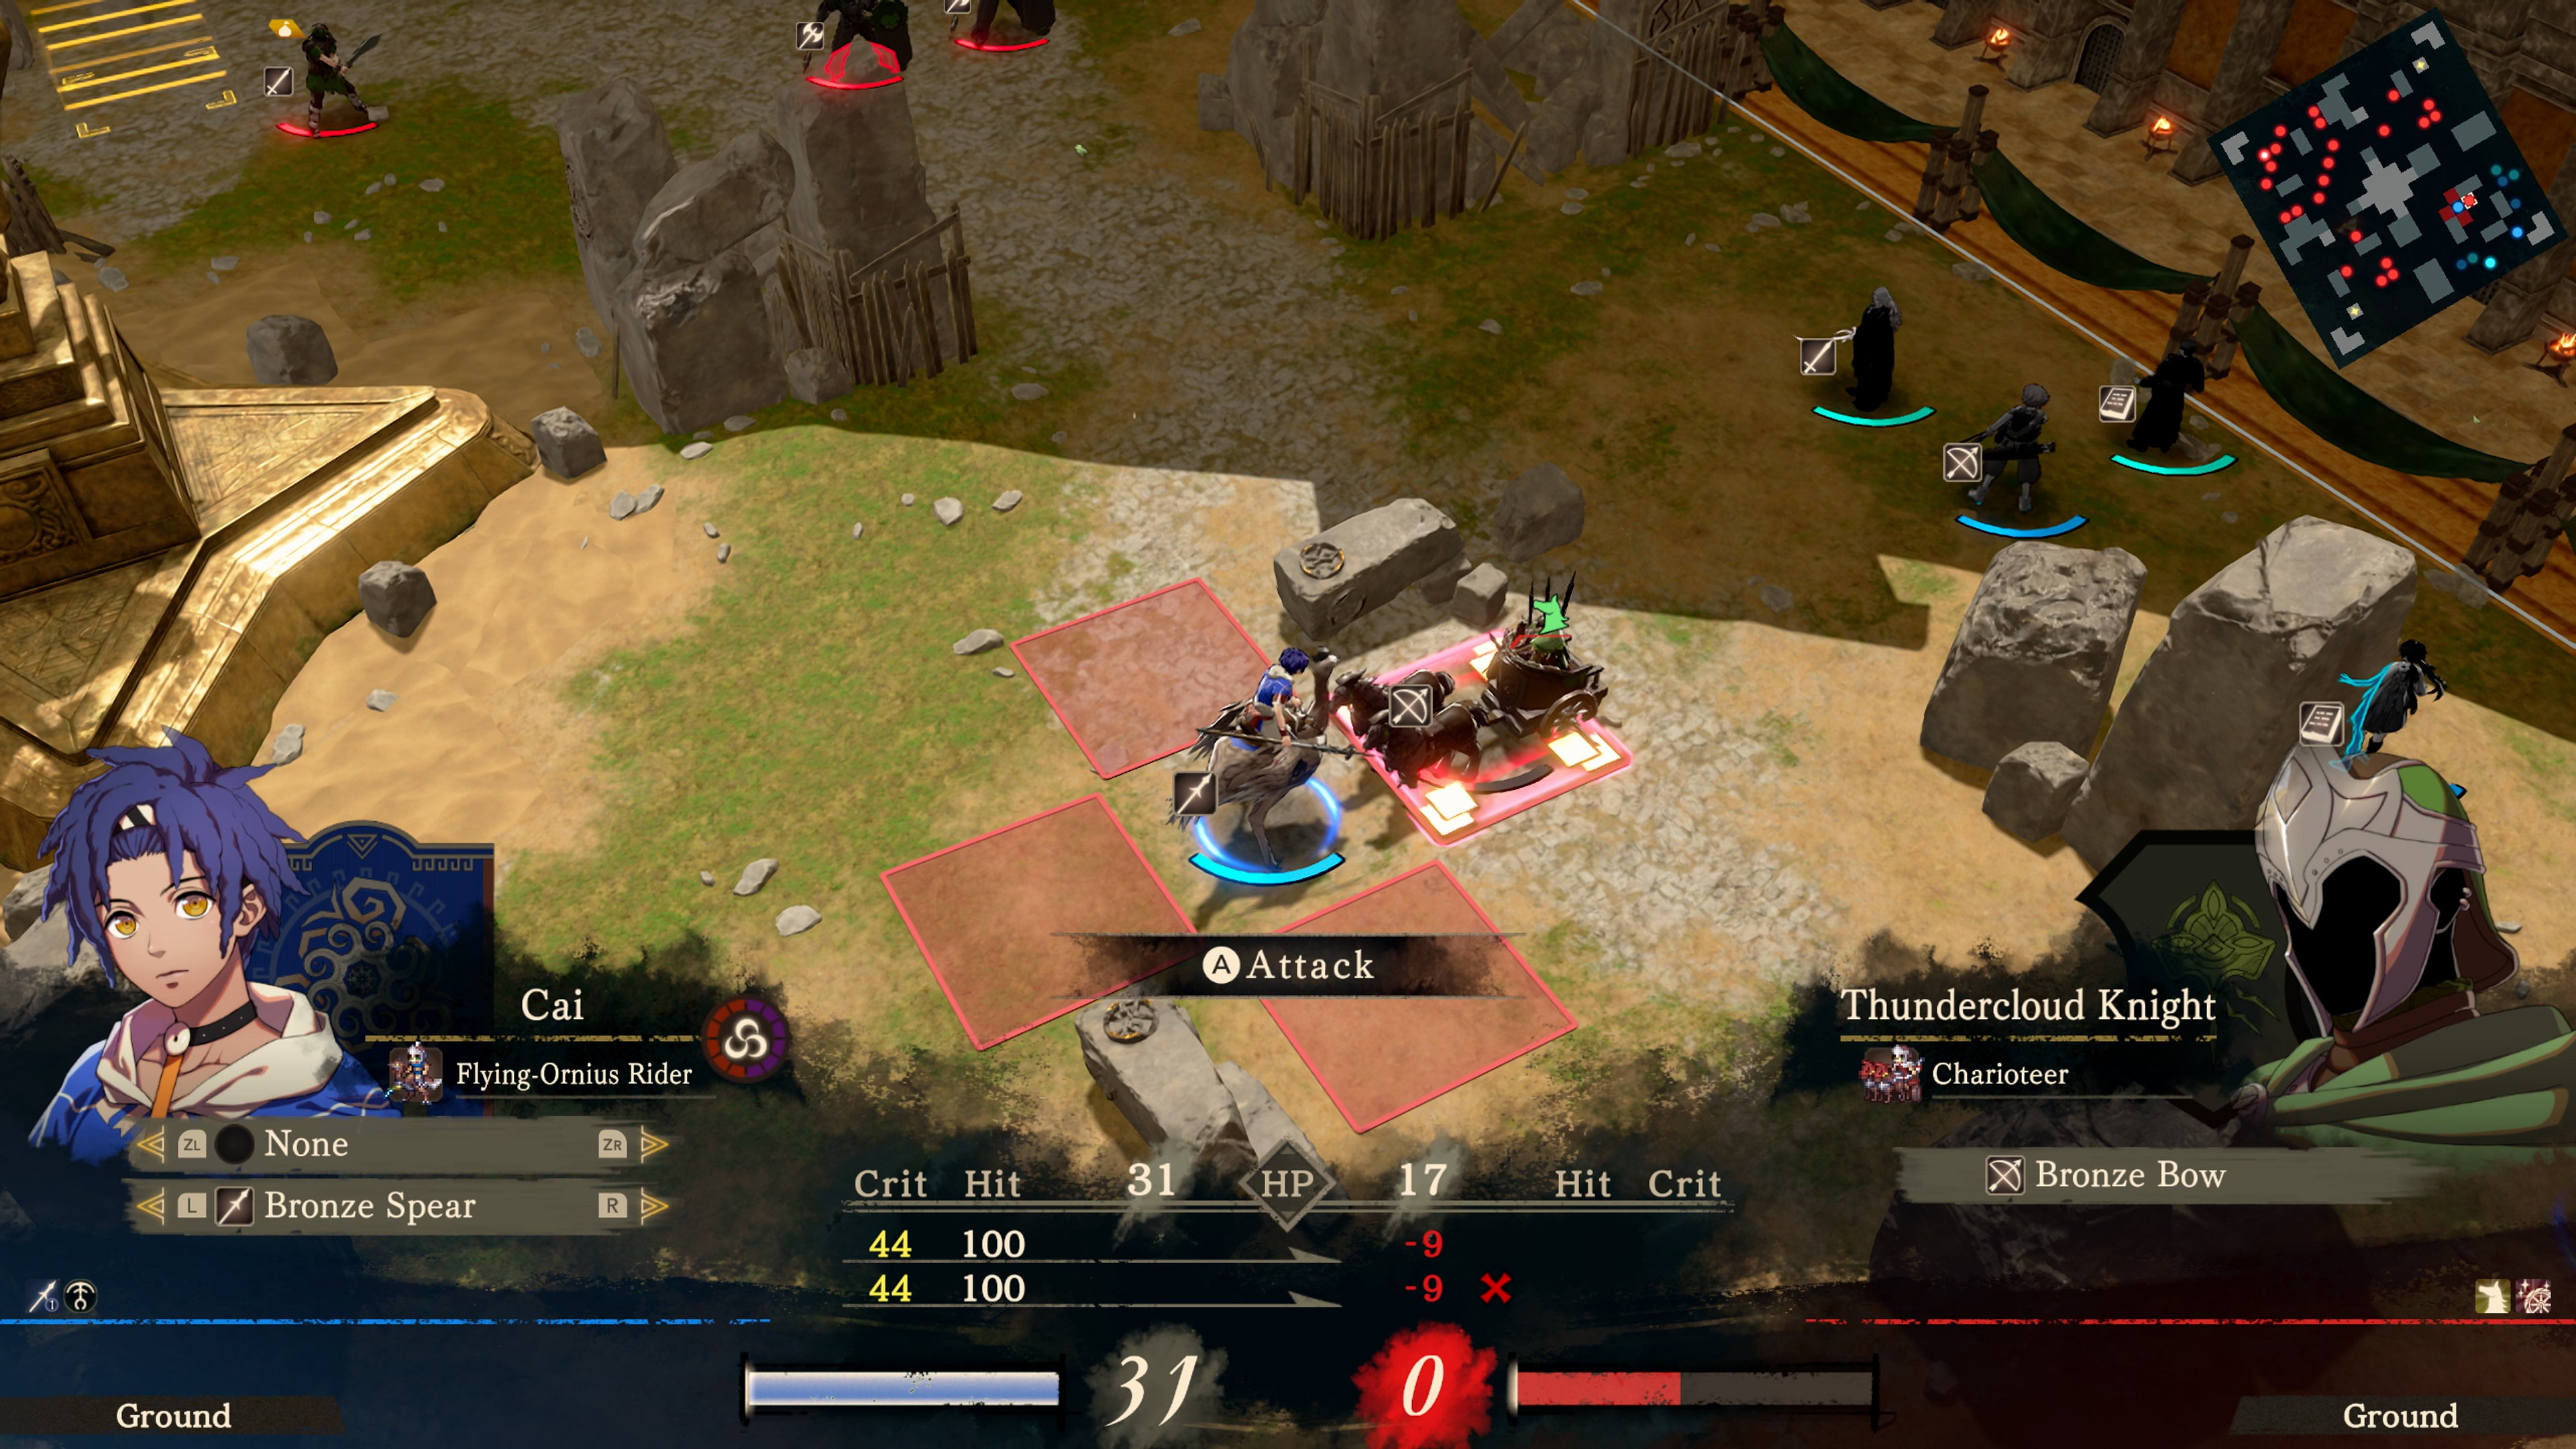
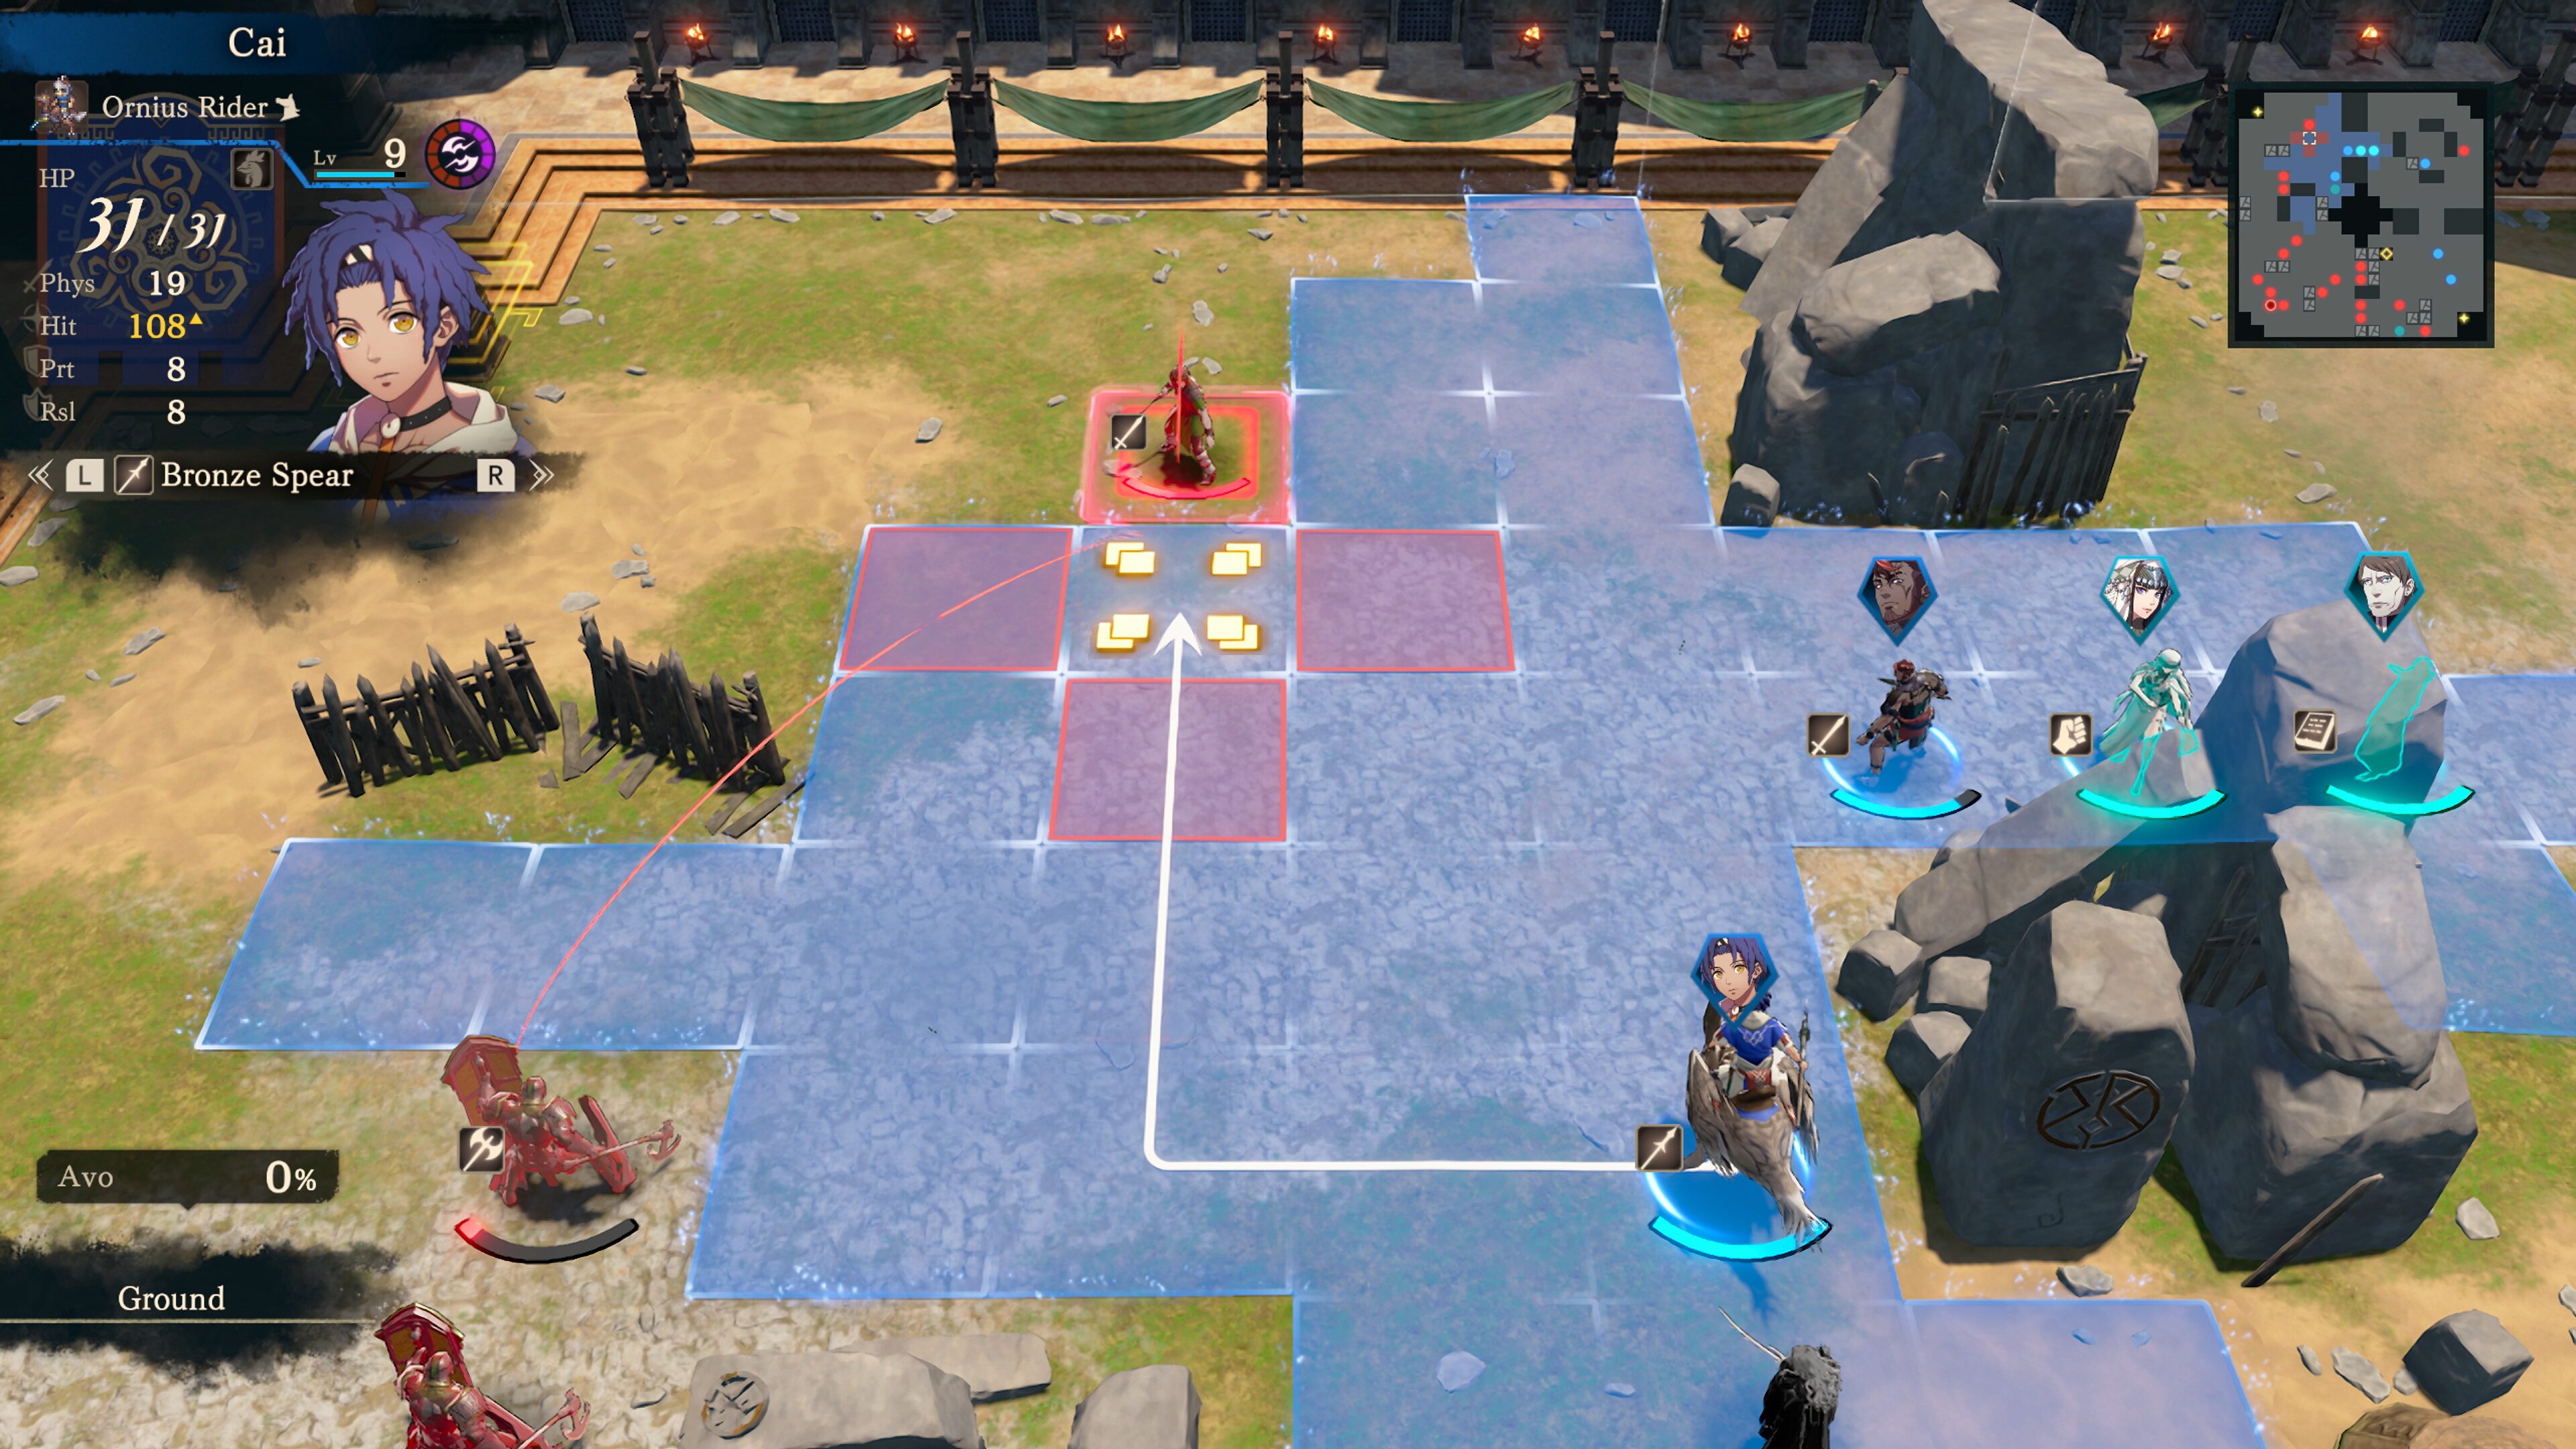
Each unit's movement range is drawn in blue and its attack range in red. Once all of your units have finished acting, the opponent's turn begins.
Weapon Roles
There are five weapon types, plus magic as a separate system that spellcasting classes use in place of an equipped weapon. Which types a unit can carry depends on its current class, so the roster of roles available to you shifts as units certify into new Classes.
Type | Attack Range | Role in Battle |
|---|---|---|
Sword | 1 | Straightforward and easy to wield. Hands-on reports describe swords dealing 1.2 times damage on a follow-up attack. |
Spear | 1 | Deals heavy damage to cavalry units. |
Axe | 1 | Low accuracy but high attack power. Hands-on reports describe a damage floor that guarantees at least 5 damage on any hit that lands. |
Bow | 2 | Strikes from a distance and can deal fatal blows to flying units. Range 2 covers two squares orthogonally or one square diagonally. |
Gauntlets | 1 | Make it easier to evade attacks. Some gauntlets are built as firearms, including the Zerberus. |
1 to 2 | Effective against foes in heavy armour. Also heals and supports allies. |
There are unique weapons outside those baselines, including swords that call down lightning and the firearm-shaped gauntlets. The full stat schema, including the game's new Curse value, sits on the Weapons page.
No Weapon Triangle
The rock-paper-scissors weapon triangle familiar from most of the series does not exist in this game. Swords, spears and axes are separated by the per-type properties in the table above rather than by a circular advantage chart. Nintendo's own weapon rundown describes only role-based matchups and never mentions a triangle, and hands-on coverage states the absence outright. Those same hands-on accounts put the rough raw-power order at axe above spear above sword.
Effective and Effective+
What replaces the triangle is written on the weapon itself. An attack that is Effective against its target, flagged with an orange icon, deals twice the weapon's Might. An attack that is Effective+, flagged with a red icon, deals three times the Might of the weapon or the gambit behind it. Six target groups are published: Cavalry, Armored, Flying, Dragon, Beast and Undead. Bonus Damage lists the classes in each group and the weapons that answer them.
Positioning and Terrain
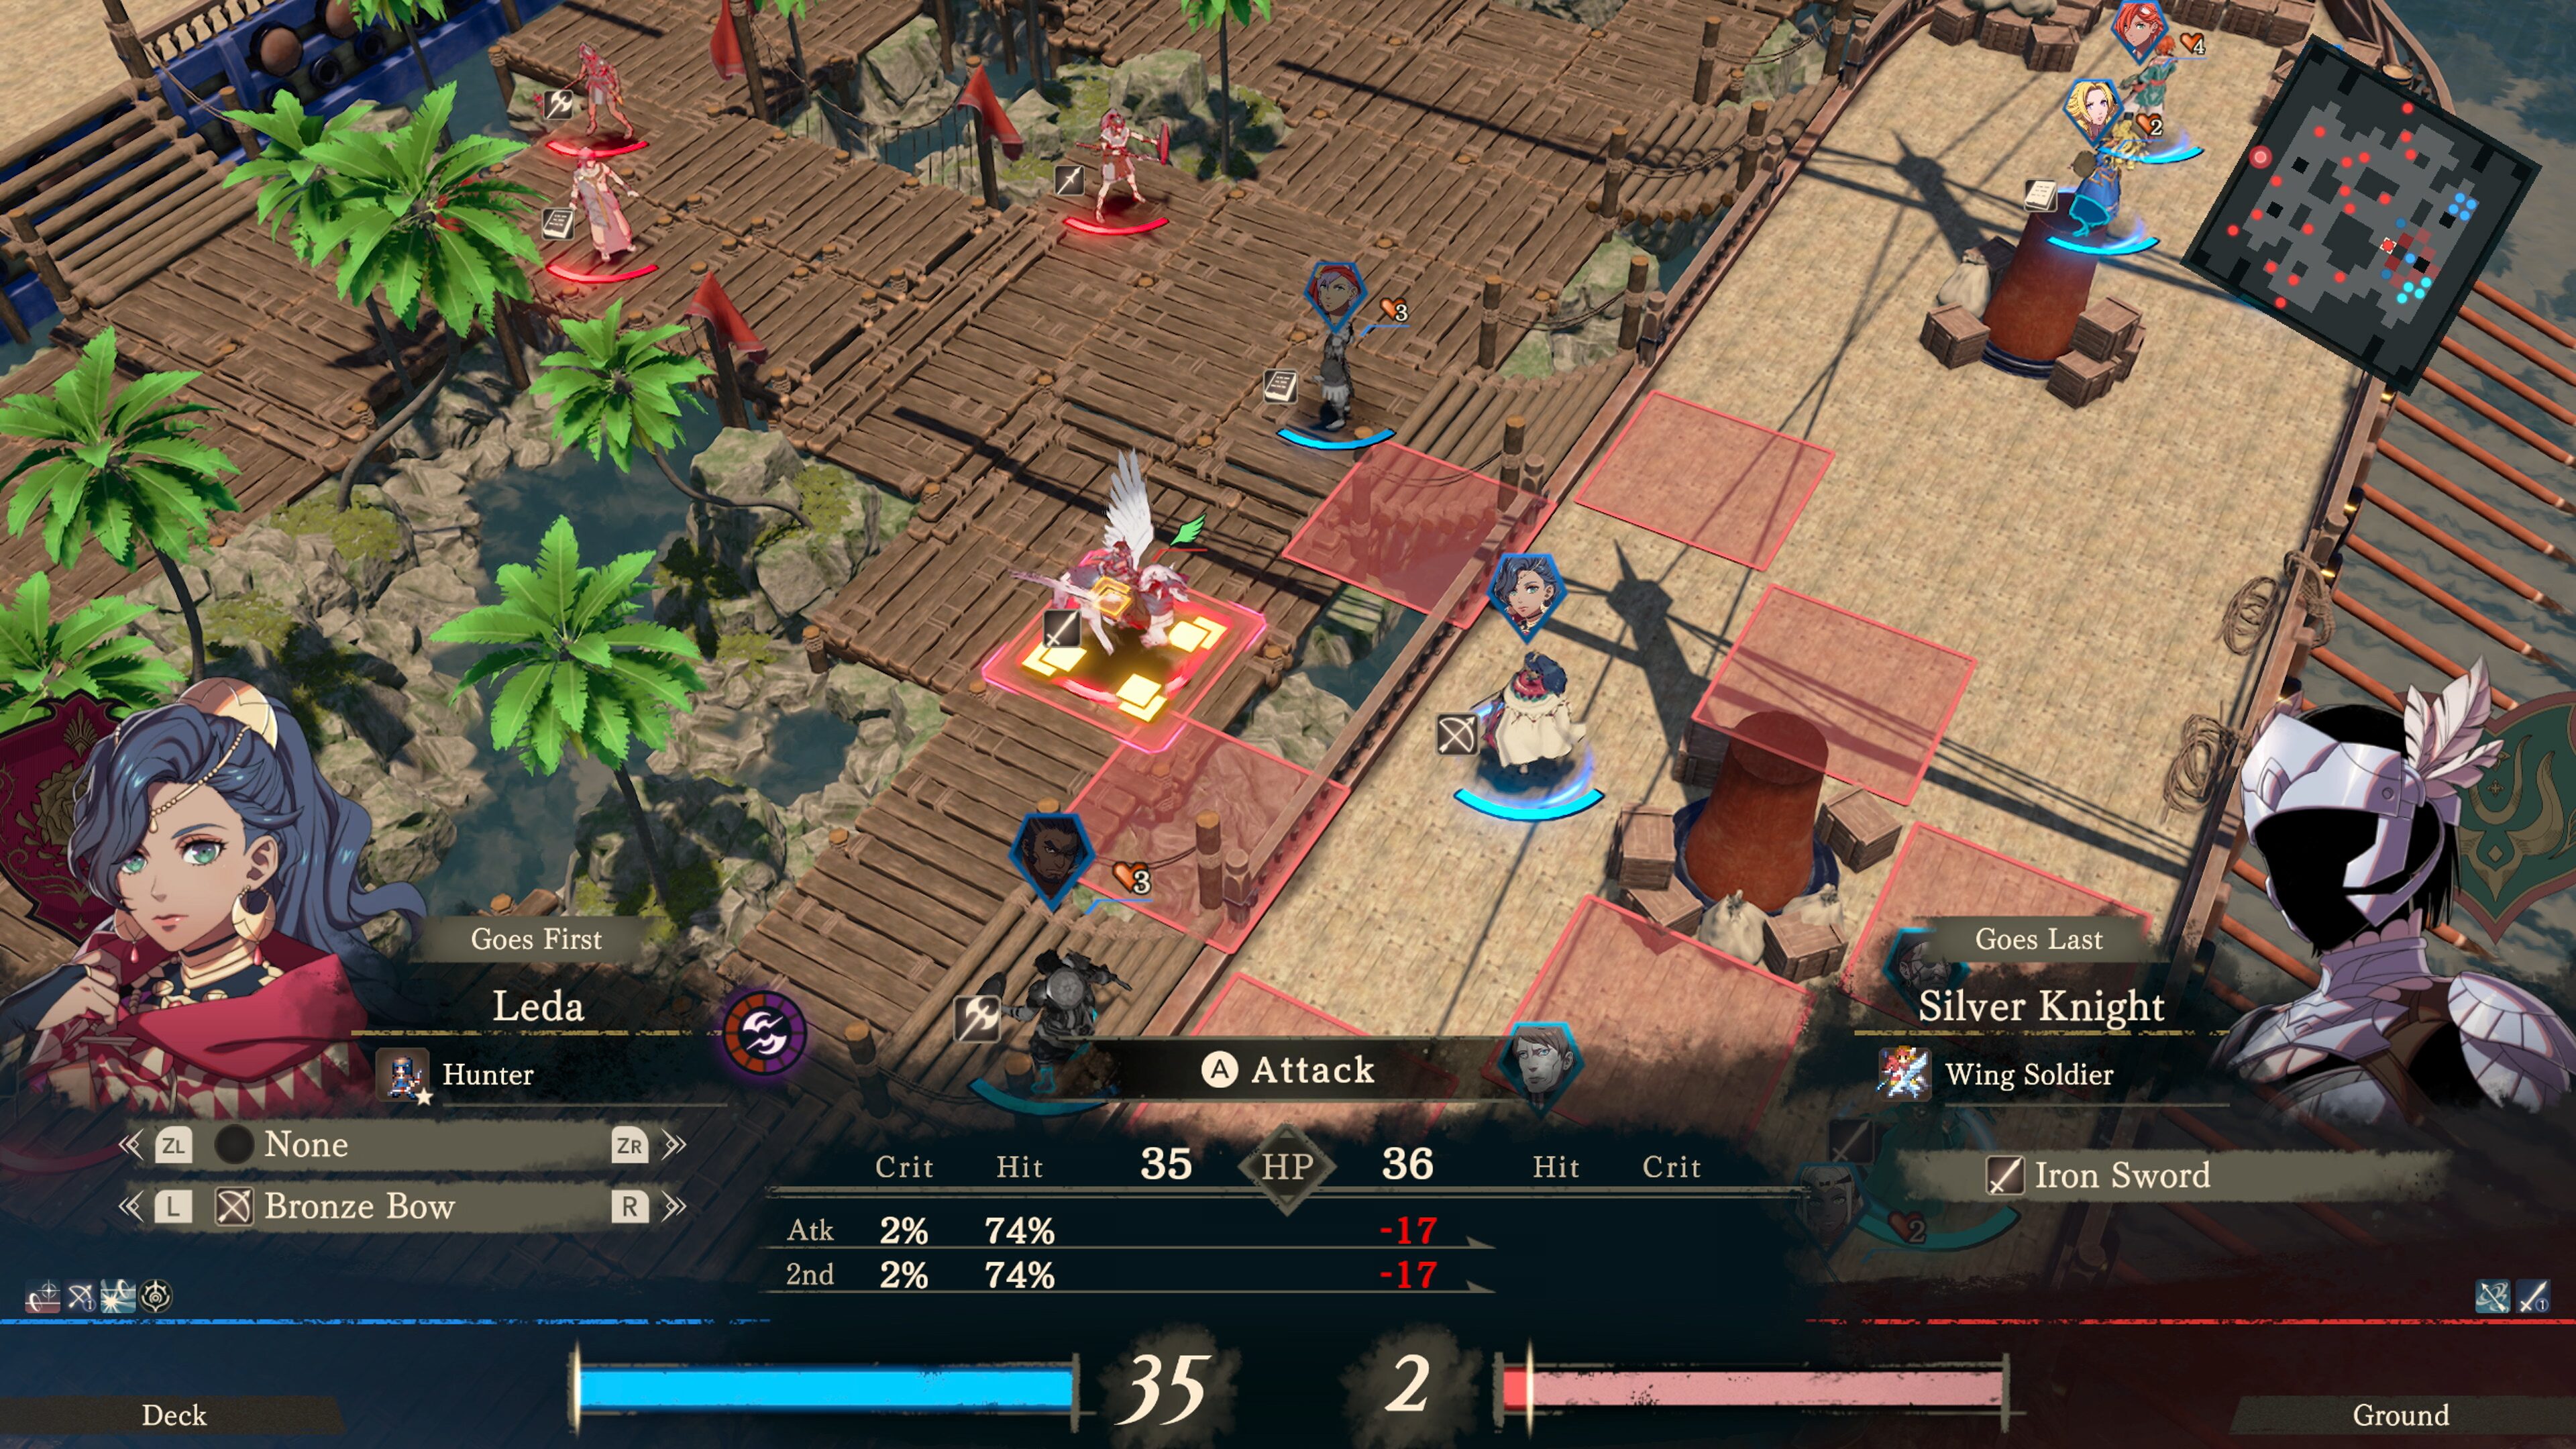
Where you stand matters as much as what you swing. Striking a foe from inside that foe's attack range may draw a counterattack, so the game's own advice is to hit close-range enemies from a distance and to close the gap on long-range enemies. Terrain modifies the exchange, and standing next to an ally can grant buffs.
Pre-launch footage has shown the following terrain values, which are read from the battle interface rather than published in a manual.
Terrain | Effect |
|---|---|
Thicket | Avoid +30 |
Deep Thicket | Avoid +40 |
Forest | Avoid +30 |
Wasteland | Avoid -20 |
Desert | Costs 2 movement, Avoid -20 |
Swamp | Costs 2 movement |
Low obstacle | Impassable to infantry, crossable by mounted units |
Adjacency also drives the support system. When two characters who have grown close stand beside each other, the interface shows the partner's portrait with a heart icon and a numeric level, and the bonus appears as a banner. Support conversations themselves take place at inns during Between-Match Preparation. See Supports for more.
Special Attacks
Four systems sit on top of the basic attack, each with its own cost.
System | Cost | Summary |
|---|---|---|
Weapon durability | Attacks with greater power, longer range or another advantageous effect, meant for decisive moments. Ordinary attacks cost no durability. Every published cost for this game is a durability figure; none of them is priced in HP. | |
The user's HP | The new signature system. Each Hero has arts tied to a legendary artifact, and using them fills a gauge that first buffs the unit and then penalises it. | |
A limited number of casts | Spellcasting classes attack with magic instead of a weapon. Magic is effective against heavy armour and covers healing and support. | |
Nothing on Normal difficulty | Rewinds the battle to any earlier point, so a lost unit or a bad move can be taken back. |
Gambits also appear in this game, tied to Theodora and the Battalions she recruits on the world map rather than to units generally. In Part I only Theodora's team can have battalions assigned, and completing her path unlocks the Battalions and Troop Points functions for Part III. One gambit has been shown in full: Theodora's Disturbing Strike, selected from a command bound to the A button, limited by uses (a released battle shot catches the counter stepping down from 2 to 1), targeting a three-tile box that covered three enemy soldiers at once, with a forecast of 94 hit and 0 critical for 7 damage. Two further Gambit names have since been published, Blaze and Disturbing Volley. Disturbing Volley is the only one of the three with a published effect line: it is Effective+ against flying units, and a hit inflicts Immobilize on the target. As of September 2026, this wiki has not recorded a Might, range, uses figure or area value for any other Gambit, or a battalion shown with a gambit attached to it by name. Battalions get their own section below.
Battalions
Three battalions were named before release: Novice Hunters, Twin Jewel Fans and Holy Apprentices. All three are listed as available to the player. On Theodora's path, Novice Hunters is the battalion she starts with at the battalion tutorial in Chapter 4, Priest Trainees joins automatically in Chapter 5, and a Recruit Soldiers tutorial later opens the way to raising more on town nodes. They are not only a combat attachment. The overland Search screen carries a Deploy to Search panel whose instruction reads "Direct a battalion to spend its time searching for materials", so a battalion can be sent out to gather on the world map instead of marching with the party. Two values are shown against each one on that panel: a Skill Req letter grade, and a Gather Cap number that caps what the deployment brings back. The Gather Cap can be shown boosted above its base figure.
Battalion | Skill Req | Gather Cap | Icon Type |
|---|---|---|---|
Novice Hunters | E | 8 | Sword |
Twin Jewel Fans | C | 14 | Sword |
Holy Apprentices | E | 10, shown boosted | Heart |
Two Twin Jewel Fans entries appear side by side on the same panel, so more than one battalion of a given name can be held at once. In battle a battalion gives the unit carrying it extra options on its turn and raises its stats, and transferring battalions between units earns Tactics Manuals, which raise the Authority skill. As of September 2026, this wiki has not recorded an endurance figure, a stat bonus figure, an authority requirement, or a gambit tied to a battalion by name.
Other Battle Features
The combat forecast previews an exchange before you commit to it, listing predicted damage, hit rate, critical chance, which unit strikes first or last, and whether the target can counterattack at all. Critical hits are reported to deal triple damage. Backing out of the forecast returns the unit to where it stood before you selected it.
Foresight
A map can be inspected before it is entered. The Foresight option shows the layout of the field, hints at the unit types waiting on it, and gives a suggested level for taking it on. It is optional, so a player who would rather go in cold can decline it.
Equipped Abilities
Each unit carries up to five equippable abilities at once, chosen from what that unit has learned. They sit alongside the Class Ability passives a unit gets automatically from its current class, which do not take up any of the five slots. The wider list of names is on Skills.
The controller carries one piece of tactical information that is not on screen. HD rumble fires when the cursor moves into the fatal range of an enemy archer, so the danger registers in the hands before the move is confirmed.
Skills in the Forecast
The forecast also lists the skills and effects live on both sides of the exchange, and the number of slots it shows is not fixed. One unit has appeared with six, another with four in one match, two in the next after switching off gauntlets, and one at a lower level. Weapon type and level both seem to feed into what gets listed. Only a handful of the names on those readouts have a documented effect; the wider list is on Skills.
Skill or Effect | What It Does |
|---|---|
Underworld Boon | Halves incoming damage unless the attack is effective against the bearer |
Cleansing Blade | Negates the opponent's Underworld Boon so damage lands in full. The effect triggers at the start of combat |
Magic Basics | Magic +1 and Resistance +1 |
Sword Prowess | Name read off a forecast, effect not published |
Brawling Prowess | Name read off a forecast, effect not published |
Cleansing Blade exists to answer Underworld Boon, and the two cancel out when they meet. Cleansing Blade was read as Purifying Sword in an earlier pass over the same footage; Cleansing Blade is the text on screen and the name used here. Several other icons on those readouts have not been identified with any confidence and are left out until they are.
The unit information screen carries a proficiency bonus line alongside the class description, naming the proficiencies the current class strengthens. The Rogue's line reads Sword, Bow and Infantry, and the same panel credits the class with picking locks and moving easily through forest tiles. Which proficiencies a class strengthens is therefore visible before a certification is committed rather than after.
Fog of war is in the released game: the paralogue Missing Brave-Warrior Statue, available on Dietrich's path, is fought on a fog-of-war map. Dismounting is reported to return as well, appearing as an innate class skill on the Bardinger rather than a menu-only action, though that detail still rests on pre-launch sourcing.
The game offers two difficulties, Normal and Hard, and two modes, Casual and Classic, chosen in the Prologue. Replaying the Prologue lets both be changed later, and the Shrine of Causality in the Obelisk Chamber carries a Change Difficulty option that is reported to allow lowering the difficulty only. On Hard the rewind costs Divine Sand. See Difficulty and Modes.
Related Pages
Two costed attack systems sit on top of an ordinary swing: Combat Arts, which spends weapon durability, and Blaze Arts, which spends the user's health. For the rewind that takes back a bad exchange, see Fortuna's Blessing, and for the full stat schema behind each weapon type, see Weapons.