

Fire Emblem: Fortune's Weave asks two separate questions before a run starts, and they are easy to collapse into one. The first is how hard the fights are. The second is what happens to a unit that falls. They are set independently, so there are four combinations rather than four difficulty levels.
The Two Settings
Setting | Options | What It Controls |
|---|---|---|
Difficulty | Normal, Hard | How demanding the battles are. |
Mode | Casual, Classic | Whether a defeated unit is lost permanently. |
The prologue asks both questions after its opening scenes: first Normal or Hard, then Casual, with no permadeath, or Classic, with permadeath. Before launch the pairing was documented from a press play session, whose writer played on Normal with Casual selected. A headline reading of the same screen described four difficulty options, which is a misreading: there are two difficulties and two modes, and the four comes from multiplying them.
Casual and Classic
The series' permadeath rule returns, and it is optional. On Classic a unit defeated in battle is gone for good. On Casual a fallen unit comes back after the battle ends. Battle objectives answer part of the question for the most important units: in Part II a battle is lost if the route's Hero, Theodora or Bertrand falls, and in Part III it is lost if Eshmel falls. This wiki has not documented how Classic treats other story-critical units, or a Hero who falls outside those objectives, as of September 2026.
Changing It Later
The choice is not locked in at the start, and there are two ways to change it. The Descend Again option, which guides to the finished game place on the title screen once the game has been saved in the Obelisk Chamber, replays the prologue and creates a new Eshmel while keeping the progress made on the four Heroes. A prologue walkthrough written from the retail game says that replaying it this way changes the difficulty, the Casual or Classic setting and Eshmel's appearance without losing progress on any path, at the cost of playing its two battles again.
A separate retail guide describes a Change Difficulty option at the Shrine of Causality, on the second floor of the Obelisk Chamber, which is reached through the Pale Raven from Chapter 4. By that account the shrine can only lower the setting, from Hard to Normal, never raise it, and its writers had not found a way to switch between Casual and Classic. A third walkthrough of the finished game confirms that both are right: the shrine can lower the difficulty at any time without touching story progress, while raising it or switching between Casual and Classic takes a replay of the prologue through Descend Again. One review of the finished game describes turning the difficulty back down to Normal for the endgame.
Difficulty by Route
The four campaigns are not balanced against each other. Preview accounts describe Cai's Fox route as the intended on-ramp, built to ease a player into the setting slowly, and Dietrich's Lion route as noticeably harder, reading as a path for someone who has already finished a campaign. That is structural difficulty rather than a setting, and Routes covers the campaigns themselves. The same accounts add that battles were not especially demanding even on Hard in the opening five chapters, which was the only part of the game anyone outside Nintendo had played before release.
Guides written from the retail game describe Cai's route the same way, as a slow introduction to the structure and its systems. One review of the finished game adds that Hard grows steadily harder across each Part as the stakes rise, rather than staying at the level of the opening chapters.
Assist Systems
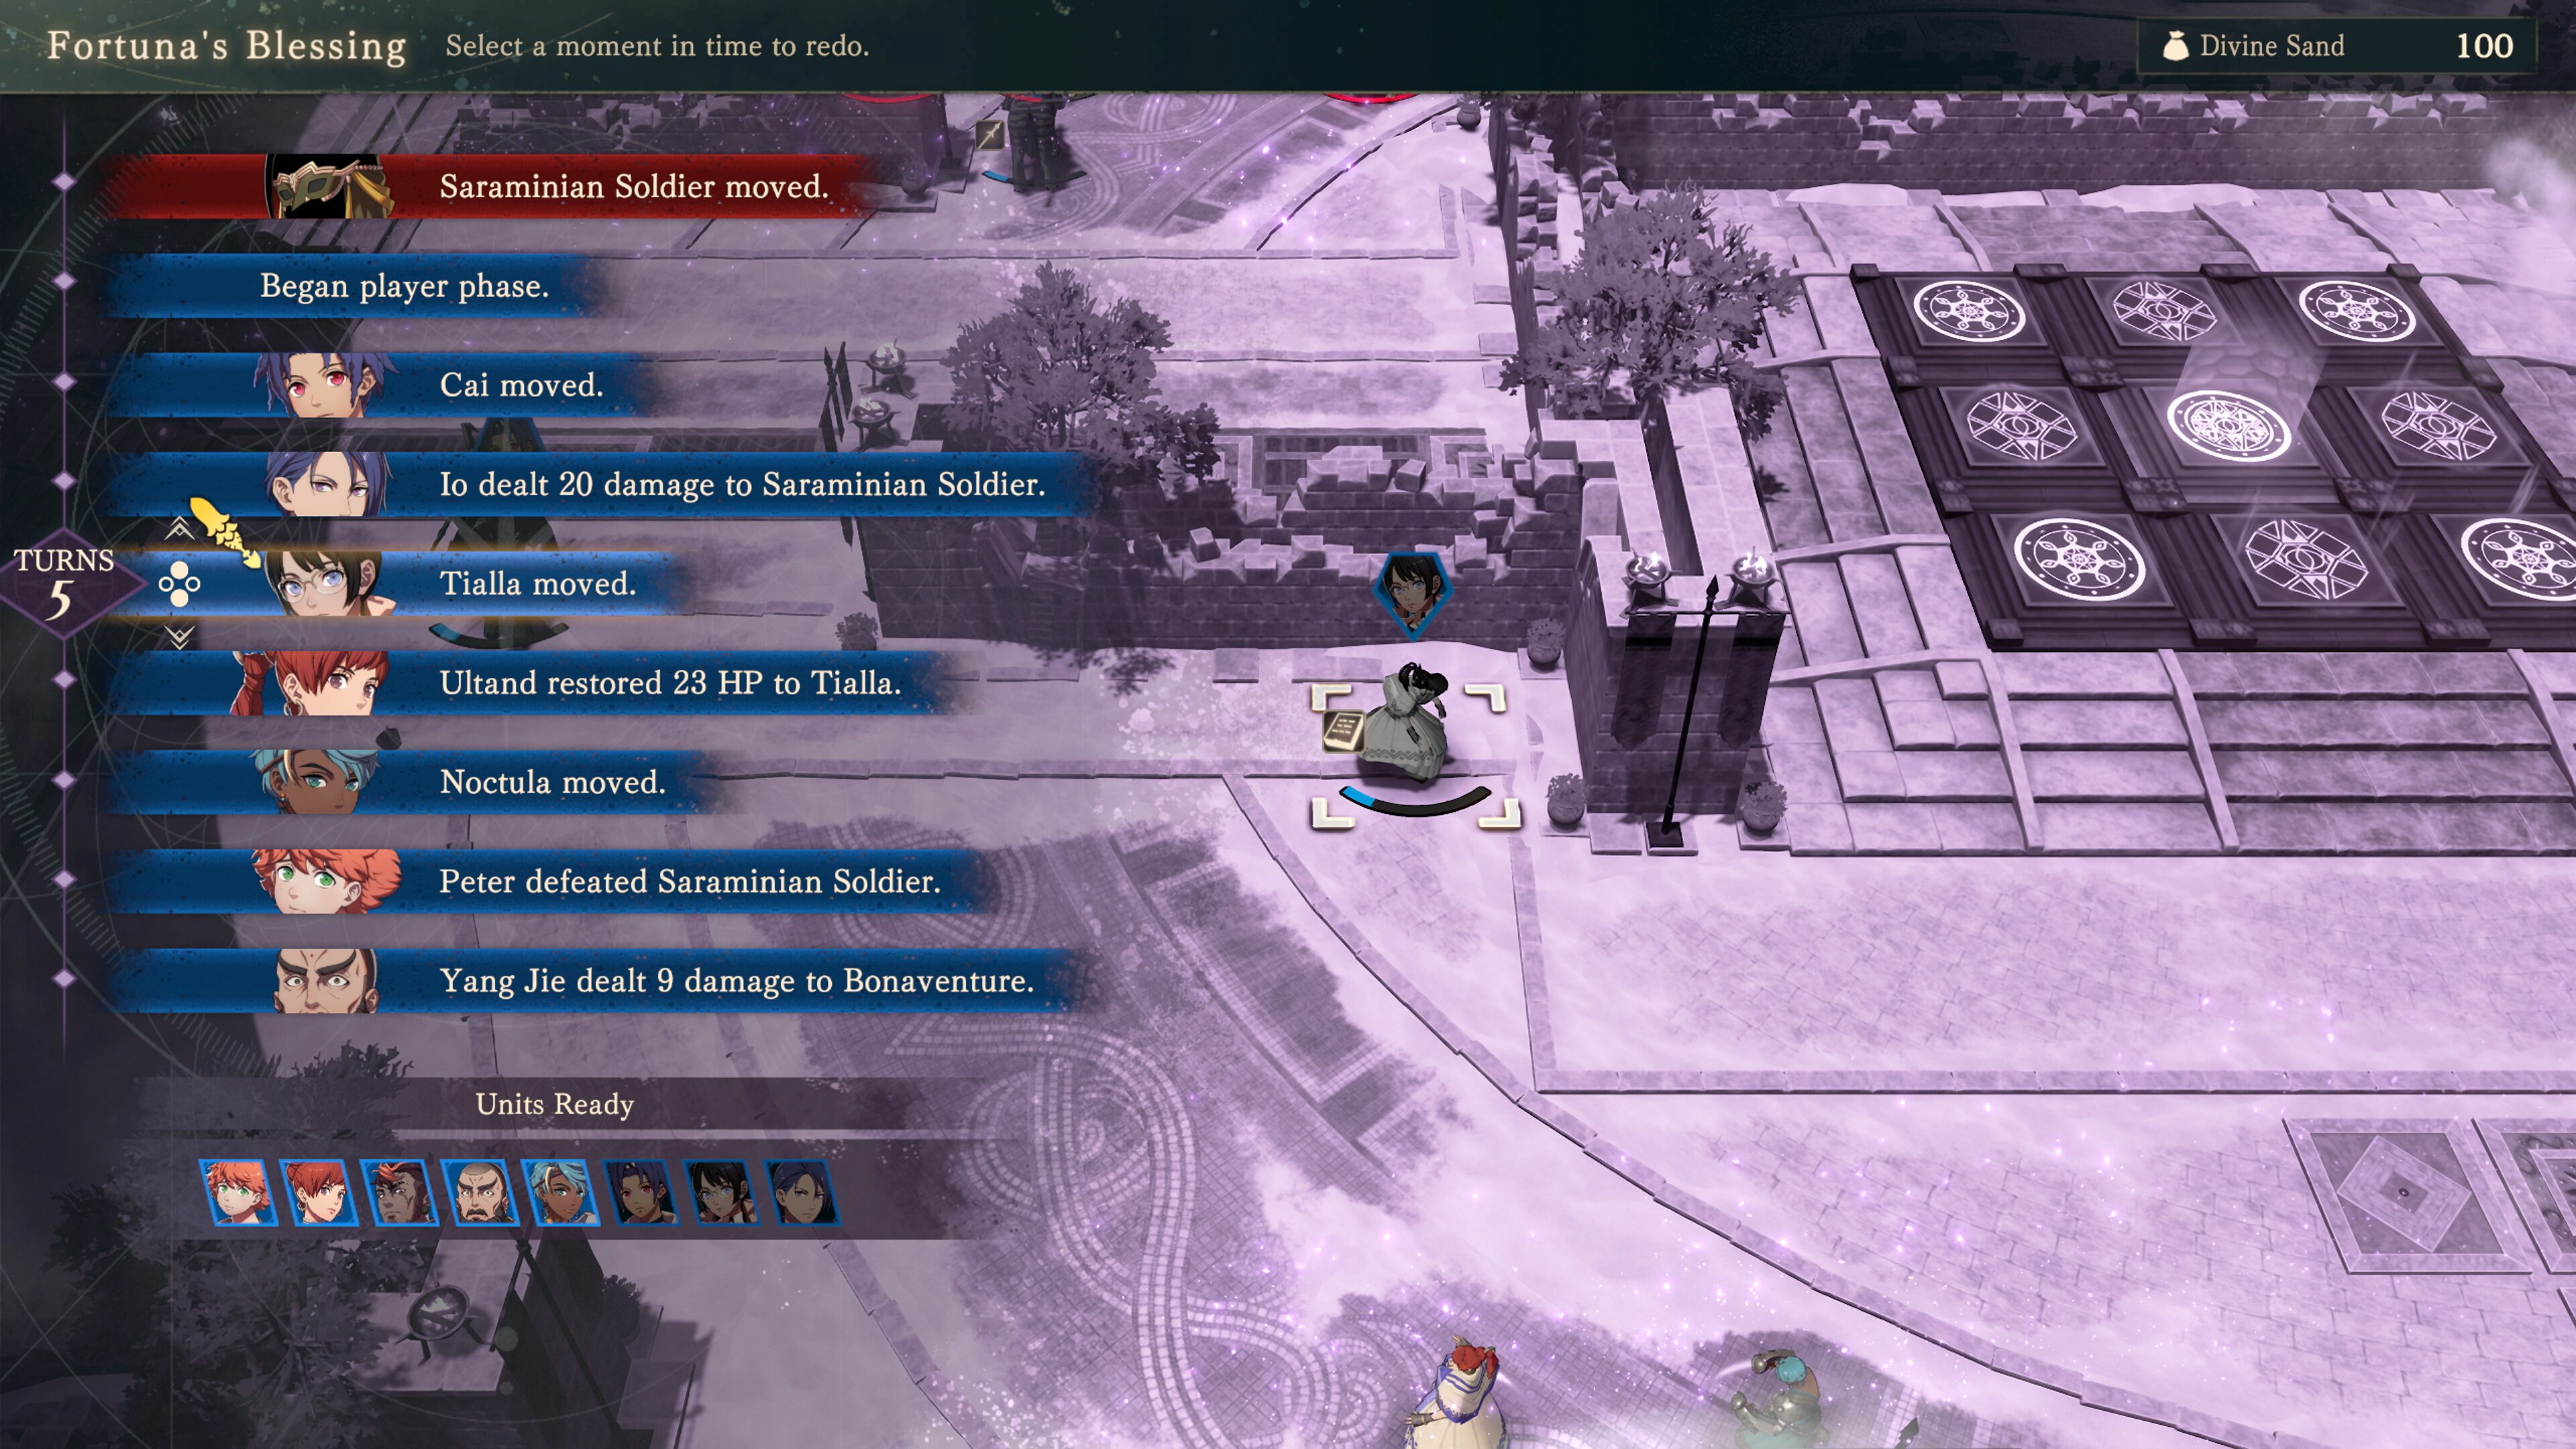
Two systems soften a bad turn without touching the difficulty setting. Fortuna's Blessing winds a battle back to any earlier point after a move has been made, which Nintendo describes as a way to rethink a plan or recover a unit that was routed unexpectedly. Temple Blessings carry buffs into a fight that can halve incoming damage for a turn. Neither is presented as an accessibility feature, but both do the work of one.
The rewind is not priced the same on both difficulties. On Normal it can be used without limit. On Hard each rewind costs Divine Sand, so winding a battle back becomes a resource decision rather than a free retry. The gods' blessings draw on Divine Sand as well, at a much higher cost than a rewind, so on Hard the two compete for the same stock. In Part II the Divine Sand stock refills at the start of each chapter. That trade-off is the clearest mechanical difference between the two settings.
Accommodations
One accommodation is built into the opening. During the prologue Fortuna asks how the player feels about insects; answering "I can't stand to see them." turns on an arachnophobia setting that changes how some insect enemies look, and it can be switched later in the settings. Before launch the option was known only from a preview writer's note that a mode partly replaces the design of the insectoid monsters. Those enemies turn up in the monster fights covered on Dungeons and Clashes.
Two more options soften the time cost rather than the challenge. Dungeon encounters can be fast-forwarded or skipped straight to the results screen by holding the Plus button to Skip to Conclusion, and the party can be set to train for a fixed number of days before jumping to the next main fight. Both are covered on Dungeons and Clashes and Between-Match Preparation.
What Is Not Yet Documented
The released game offers two difficulty settings, Normal and Hard, and no third. As of September 2026 no harder setting has been announced, and speculation that one might be added later rests on what earlier games in the series did rather than on anything said about this one. Beyond the arachnophobia setting above, this wiki has not documented text size options, colourblind modes, subtitle scaling, audio description or a formal accessibility menu in the released game as of September 2026. The surfaces where such a list would normally be published are not ones this wiki can check, so read that as undocumented rather than as absent.
Related Pages
Obelisk Chamber is where the setting can be changed mid-run, Fortuna's Blessing is the in-battle rewind, and Combat System covers what the difficulty setting is scaling. For the input options rather than the challenge options, see Controls.