Beehive Club
The Beehive Club is a mace in Crimson Desert that spawns a bee swarm on hit, dealing persistent tick damage over time. Learn how to farm it, its stats, and boss-killing strategies.
Loading...
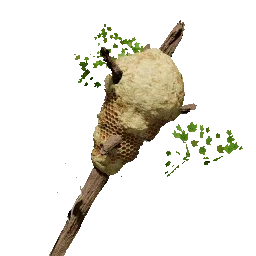
The Beehive Club is a mace-type weapon in Crimson Desert that can be obtained very early in the game. It is, quite literally, a beehive strapped to the end of a stick. What makes the Beehive Club unusual is its on-hit effect: every swing releases a swarm of bees that latch onto nearby enemies and deal continuous tick damage for an extended period. The bees persist in the area around the target, stinging anything hostile that stays within range.
Despite its low base attack power of 18 and T1 rarity, the Beehive Club's bee swarm effect makes it one of the most unexpectedly powerful weapons available in the early game. The damage-over-time from the bees stacks and continues ticking even if the player is knocked down, dies, or enters a revive animation. Under the right conditions, a single hit from the Beehive Club can generate enough accumulated bee damage to take down enemies and bosses that would otherwise be far too strong for an early-game character.
Attribute | Value |
|---|---|
Weapon Type | Mace (One-Handed) |
Attack | 18 |
Tier | T1 |
Special Effect | Spawns a bee swarm on hit that deals continuous tick damage to nearby enemies |
Durability | Very low (approximately 25 to 35 swings) |
Repairable | No |
Farmable | Yes (multiple spawn locations, respawns after fast travel) |
The Beehive Club cannot be repaired or sharpened at a Weapons workbench. Once its durability runs out, the weapon breaks and is gone for good. Because of this limitation, players should stockpile multiple copies before heading into a tough fight.
When you strike an enemy with the Beehive Club, a swarm of bees erupts from the weapon and begins attacking anything hostile in the immediate vicinity. The bees deal tick damage over time, and they continue stinging for as long as the target remains within the swarm's area. The damage is not tied to the player's stats or position; the bees operate independently once released.
One of the most notable properties of the bee swarm is that it persists through player death. If you hit a boss, get killed, and then revive using a Palmar Pill (which restores the player at 30% health), the bees keep dealing damage the entire time you are on the death screen. This means you can land a single hit, die, come back, and find that the boss has lost a large portion of its health bar while you were down. In some cases, the boss may even be dead by the time you stand back up.
The bees deal their damage in a zone around the initial impact point. If a boss moves out of the swarm's area, the damage stops. However, most bosses tend to stay in their arena, so the swarm usually has full uptime on large or stationary targets.
The Beehive Club is obtained by shooting beehives out of trees using a bow and arrows. Beehives hang from the branches of certain trees throughout Pywel. When you look up into the treetops, you can spot them as dark, rounded shapes located among the branches. Shoot one with an arrow and it drops to the ground. Most of the time the beehive yields Honey or other gathering materials, but there is a chance it drops a Beehive Club instead.
The drop rate is RNG-based, but the Beehive Club is not extremely rare. In practice, farming for about 15 minutes in a dense tree area can yield two or three clubs. Since the weapon cannot be repaired, building up a supply of them is the most practical approach.
The most efficient farming spot sits just north of Hernand, the first major town players visit in the game. This area contains a dense cluster of 50 to 60 trees, many of which can spawn beehives in their branches. The area is accessible almost immediately after leaving Hernand, making it available before most players have progressed far into the story.
Activate the fast travel point near the forest north of Hernand. This is your reset point.
Equip a bow and make sure you have a good supply of arrows. Save your game before you start if your arrow count is limited.
Walk through the forest and look up into the treetops. Beehives appear as dark, bulbous shapes hanging from branches.
Shoot each beehive with an arrow. Pick up whatever drops (Honey, Beehive Club, or other items).
After clearing all visible beehives, fast travel to the nearby point and return. The beehives respawn on different trees each time.
Repeat until you have several Beehive Clubs in your inventory.
Do not cut down the trees. Using a Logging Axe, Force Palm, or heavy attacks to fell trees will remove them. Trees take much longer to respawn than beehives do. If you cut the trees, you destroy your own farming route. Stick to shooting the beehives out of the branches with arrows.
Stock up on arrows beforehand. Each beehive requires one arrow to knock down. With 50 to 60 trees in the area, you will burn through arrows quickly. Buy extra from a vendor or craft them before you start.
Save before you begin. If you run low on arrows or want to reset your RNG luck, having a save file right before the farming session lets you reload without losing resources.
Beehives drop other items too. Even when you do not get a Beehive Club, the beehives drop Honey and other useful materials, so the farming session is never a total waste.
While the forest north of Hernand is the most concentrated farming spot, beehive-bearing trees can be found in wooded areas across Pywel. Any tree with a beehive in its branches has a chance of dropping the Beehive Club when the hive is shot down. Players who are exploring new regions should keep an eye on the treetops, as incidental beehive drops can supplement a farming stockpile over time.
The Beehive Club's real strength is its bee swarm, not its melee damage. With only 18 base attack, swinging it at enemies for direct damage is inefficient. The optimal strategy is to land one or two hits on a strong enemy to deploy the bees, then switch to your primary weapon and fight normally while the swarm chips away at the target's health in the background.
The Beehive Club is most effective against bosses with large health pools who stay in one area. The bee swarm's persistent tick damage adds up over time, turning fights that would otherwise take minutes into much shorter encounters. Here is a general approach:
Equip the Beehive Club before entering the boss arena.
Land a hit on the boss to release the bee swarm. One solid swing is enough.
Switch to your main weapon and continue the fight. The bees work on their own.
If you die, use a Palmar Pill to revive. The bees keep dealing damage during the death animation and revive screen.
If the boss is still alive after one swarm fades, equip another Beehive Club and hit it again.
Players have reported using this strategy to defeat bosses that were far above their level, including enemies that could kill them in a single hit. The combination of persistent bee damage and Palmar Pill revives makes it possible to brute-force encounters that would otherwise require significantly more levels and gear.
The Beehive Club's biggest drawback is its extremely limited durability. With only 25 to 35 swings before it breaks, and no way to repair it, every hit counts. For boss fights, you only need one or two clean hits to deploy the bee swarm, so durability is rarely an issue in single encounters. The problem comes when using the club for general exploration, where swinging at regular enemies drains it quickly.
The best practice is to carry multiple Beehive Clubs and treat them as disposable tools rather than a primary weapon. Keep them in your inventory for tough encounters, and use your regular melee weapons for everything else. Since the clubs are farmable, running out is an inconvenience rather than a permanent loss.
Weapon | Attack | Tier | Repairable | Special Effect |
|---|---|---|---|---|
18 | T1 | No | Bee swarm (damage over time) | |
22 | T1 | Yes | None | |
37 | T1 | Yes | None | |
30 | T1 | Yes | None | |
42 | T2 | Yes | None |
On paper, the Beehive Club is the weakest mace in the game by raw attack power. Every other mace hits harder per swing and can be repaired indefinitely. The Beehive Club's value is entirely in its unique bee swarm effect, which no other weapon replicates. Against single tough targets where sustained DPS matters more than per-hit damage, the club's total damage output from bees can exceed what higher-attack maces deliver through normal combat.
Beekeeping Suit: An armor set themed around bees. While it does not directly boost the Beehive Club's damage, it complements the bee theme and provides its own defensive bonuses.
Palmar Pill: The single most important companion item for the Beehive Club strategy. Using a Palmar Pill to revive after death lets the bees continue dealing damage through the entire revive sequence.
Refined Palmar Pill: An upgraded version that restores more health on revive, giving you a larger buffer to continue fighting after the bees have softened the target.
Bows: Required for farming. You need a bow to shoot beehives out of trees. Any bow works; accuracy matters more than damage since you are shooting stationary targets.
The Beehive Club was significantly nerfed in a post-launch patch. Early in the game's lifecycle, the bee swarm effect was considerably stronger, making the Beehive Club one of the most powerful weapons available in the opening hours. After the balance change, the AoE bee damage no longer scales as effectively into the mid-game and beyond.
While the weapon remains a fun and thematic novelty, its practical effectiveness is now limited primarily to early-game content. The bee swarm still triggers on hit and provides some bonus area damage, but the damage output is no longer enough to trivialize mid-game encounters the way it could before the patch.
The Beehive Club is a purely random drop obtained by destroying beehives that hang from trees throughout the open world. There is no fixed spawn location or quest requirement. Simply knock beehives out of trees (using a bow, Force Palm, or any ranged attack) and collect whatever drops. The club appears as a random reward alongside more common drops like honey and other gathering materials.
The Beehive Club is one of the few weapons in Crimson Desert that has a damage-over-time environmental effect rather than a straightforward attack modifier.
Bees released from the Beehive Club behave similarly to bees dropped from the player's inventory. If bees are dropped in a town, they attack NPCs and trigger crime notifications, as noted in Steam community discussions.
The weapon's effectiveness against bosses led some players to call it the strongest early-game weapon in Crimson Desert, despite its T1 classification and low attack stat.
Because the bees keep dealing damage during the death and revive screens, the Beehive Club is one of the only weapons in the game that can kill a boss while the player is technically dead.
The Beehive Club's drop is gated behind destroying beehives, which are scattered across the map. The drop rate is not generous; expect to break several before one drops. The most efficient single farm spot reported by the community is the Three Saints Falls area in the starting region. Beehives are clustered throughout the trees there, so a single circuit of the area usually yields enough to keep one or two clubs in reserve.
How to farm: Travel to Three Saints Falls. Walk under the trees and look up for beehive clusters hanging from the branches. Each hive can be destroyed with a standard melee attack or a thrown projectile. Continue until you have at least two or three Beehive Clubs in inventory.
On paper, the Beehive Club looks useless. Base stats are weak, attack speed is unremarkable, and the rarity tier is low. The reason it is on every hidden-weapon list anyway is the on-hit effect: every swing spawns a swarm of bees that attacks nearby enemies as a damage-over-time mechanic.
Targets nearby enemies. The swarm seeks out hostile targets in the area around the impact, not just the directly hit enemy.
Continuous tick damage. The bees deal damage over time rather than a single burst, which scales the longer they stay alive on the target.
Stacks with multiple swings. Each swing adds another swarm, so the more you hit, the more bees compound on the target.
Against single-target hard encounters (boss fights in particular), this turns the Beehive Club into a low-effort, high-damage option. Swing once or twice to seed the swarm, then back off and let the bees chip the boss's health bar down on their own.
The play that has emerged from this mechanic is to keep one or two Beehive Clubs in inventory as an emergency option for hard boss encounters. Switch in for two swings, swap back to a primary weapon, and let the swarm do background damage while you focus on dodging. Since the bees persist after the wielder enters knockdown or death animations, the swarm can sometimes finish a fight even after the player goes down.
This is not a primary weapon; it is a situational consumable that happens to occupy the weapon slot. Treat it like a bottle of damage rather than a sword.
Three Saints Falls