Overview
Basements and Foundations are the ground-level support pieces that raise a building off uneven terrain, cliffs, or the waterline. They sit below the Floors layer in the standard build stack and are almost always the first pieces dropped when starting a new camp. Every Base Building project begins by deciding how the structure will meet the ground: a flat floor on level dirt, a sticks foundation leveling a gentle slope, stacked stone foundations climbing a cliff face, or a Pier plus foundation chain stretching a tavern out over shallow water.
The group covers seven placeable piece types across two shapes and four materials, sold in plans scattered across Points of Interest and faction vendors. The cheapest variant costs two Plant Fiber and can be crafted the moment a player exits the starting tutorial. The top-tier stone blocks cost only one Stone each once the correct base-set plan is learned, making them one of the most material-efficient upgrades in the game.
Because demolition refunds one hundred percent of the raw materials, it is safe to prototype a layout in Foundation (Sticks) and upgrade to Foundation (Stone) once the footprint is locked in. Nothing is lost by experimenting.
Foundation and Basement Pieces
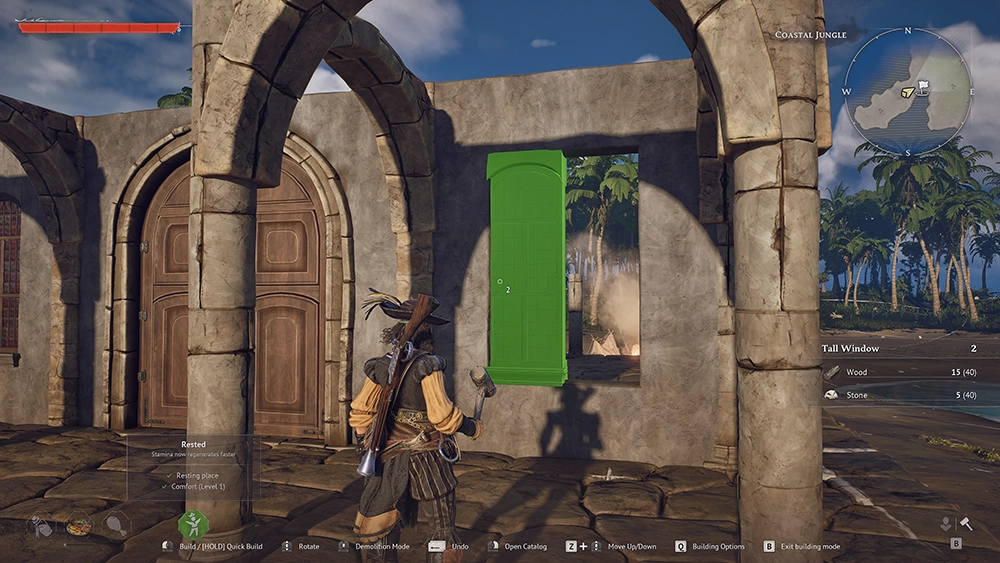
Windrose offers four distinct piece kinds under this category, several with Large (2x size) variants. The small and large sizes snap to the same grid as Floors and can be mixed freely within a single building.
Piece | Cost | Max HP | Role |
|---|---|---|---|
Plant Fiberx2 | 1,500 | Tier 1 starter foundation. Available by default at the Workbench with no plan required. | |
Woodx3 | 2,000 | Log-tier foundation for early permanent shelters; tougher than a sticks piece and visually closer to a proper cabin. | |
Stonex1 (small) or x2 (large) | 2,500 | Mid-game stone foundation unlocked by the Stone and Planks base-set plan. Small variant is the cheapest per-tile footprint in the game. | |
Stonex1 (small) or x2 (large) | 2,500 | Solid stone cube used as a basement wall, retaining wall, or cliff staircase step. Unlike Foundation (Stone) the top face does not accept a floor cap on its own. | |
Woodx1 | 1,500 | Wooden piling driven into shallow water. The only piece in the group that is allowed to snap onto a seabed tile. |
Large variants cost the same amount of stone per placement as the small variants in the current Early Access build, so laying a 2x2 grid with Foundation (Stone) Large at one stone per tile is significantly cheaper than four small tiles at two stone each. A mid-game player who learns the base-set plan usually swaps their entire stick-and-log platform for large stone variants in a single afternoon.
Full entries for every piece in this group are linked above. Note that Piers has its own dedicated article covering shoreline anchoring, large pier blueprints, and wharf interaction.
Plans and Unlock Paths
The sticks foundation and the plain pier are available at the Workbench from the moment a player unlocks base building. Every other piece in this group requires a recipe paper.
Plan | Unlocks | Where Found |
|---|---|---|
Stone and Planks, Base Set | Foundation (Stone), Block (Stone), basic stone and plank floors and walls. This is the single most valuable early-game plan in the building tree. | Bought from the Smugglers provisioner in Tortuga for ten Guineas once the Smugglers faction reputation is at base level, or looted from Smugglers camp Points of Interest on the pre-Tortuga islands. |
Foundation (Logs) | Log-tier foundation variant with 2,000 HP. | Looted from early-game Privateer and Smugglers outposts on the first two islands. Sometimes drops from Prebuilt Structures containers on coastal camps. |
Large Pier Blueprint | A single placement that replaces ten to fifteen Pier + Floor tile pairs, dramatically speeding up over-water builds. | Rare drop from shipwright-themed Points of Interest or bought from dockyard vendors on the later islands. Not required, but highly recommended for any over-water tavern. |
Plans are account-wide once learned. A player who consumes a recipe paper on one character keeps the unlock permanently, and the unlock carries across singleplayer and co-op sessions.
Placement Rules
Foundations and basement pieces sit under the floor layer in the build stack and must be placed before walls or roofs can be snapped onto the same grid position.
The build hologram turns green when a placement is legal and red when something blocks it. For foundations the usual red-light causes are clipping into rock, overlapping another foundation, or hovering in open water without a Pier to anchor the chain.
Every subsequent floor, wall, or roof tile must sit on flat terrain, on a Foundation piece, or on a Pier piece at the shoreline. Floors placed directly on slopes refuse to snap and show the red preview until a foundation is added under them. A Pier is the only piece in the group that can extend over water, and it is also the only piece that a Wharf structure accepts as a snap target.
Bonfire Radius. A Bonfire defines the circular area inside which most crafting stations operate. Foundations themselves have no radius requirement and can be placed freely, but any station built on top of a foundation outside the bonfire radius will not function. Place the first bonfire on flat terrain with at least three free directions before laying foundation grids around it.
Stacking Vertically. Foundation pieces stack on top of each other without collision issues, which is the technique of choice for building up the face of a cliff. Place the first foundation at sea level, the second one grid tile higher and one step inland, the third higher again, and walk each step to the plateau. Stone variants are preferred for stacked cliff work because they take less damage from environmental sources and look considerably cleaner than sticks.
Building Over Water
Shoreline and over-water construction is one of the main reasons to master this piece group. The build sequence that avoids floating structures and clipped planks is always the same.
Step 1. Stand on solid ground near the water edge and place a Piers piece at the very first tile that touches shallow water. The pier snaps to the seabed, not to an existing foundation, so it must be the first over-water placement.
Step 2. Chain additional piers outward, one grid tile at a time, until the planned edge of the platform is reached. Jump between piers as they are placed so the preview keeps snapping.
Step 3. Fill the interior tiles of the platform with Foundation (Sticks) or Foundation (Stone). These pieces do not need to anchor to the seabed because they now sit on a perimeter of piers.
Step 4. Cap the whole grid with Floor pieces. Floors placed on top of Foundations slightly overhang the piers, which produces the typical pirate wharf silhouette where the planks poke out over the water.
Step 5. Add walls, roofs, and a Wharf if the build is intended as a docking point. A wharf snaps to pier pieces directly and produces a clean ramp for ship access.
A single Large Pier blueprint replaces the manual chain from steps one and two, skipping roughly ten to fifteen individual placements. For a large tavern or trading post over water the large-pier plan is worth a specific expedition to acquire.
Basement Construction
A basement in Windrose is a Foundation grid where the player has intentionally added a floor cap at ground level and then excavated walkable space below. Because foundations already raise a floor above the terrain, any sufficiently tall foundation stack produces a sub-floor volume. The workflow turns that volume into a usable room.
Step 1. Choose a basement footprint, typically 3x3 or 4x4 foundation tiles. Place the foundations at least two grid tiles above the ground so there is standing room below.
Step 2. Lay a perimeter of Block (Stone) pieces around the outside of the basement footprint, from ground level up to the underside of the foundation tiles. The blocks form the basement walls.
Step 3. Cap the basement ceiling with Floor pieces so the interior of the basement is enclosed overhead. The top of those floors becomes the main-level floor of the building.
Step 4. Add an access point. Two common options:
Hatch. Leave a single Floor tile unplaced in the basement ceiling. A hatch door or a demountable floor piece covers the gap. Players drop through the opening and climb a Ladder or jump back up.
Interior Staircase. Remove a line of ceiling floor tiles and replace them with the stair/ramp piece from Floors. The staircase anchors to the basement wall and produces a walkable descent from the main level.
Step 5. Furnish the basement. Storage containers, a Workbench, and a secondary cooking fire all work below ground as long as the parent Bonfire radius covers the space. The bonfire radius is spherical, so a basement directly under a well-placed bonfire is inside the radius by default.
Basement Block (Stone) walls inherit the 2,500 HP value of the piece, so they are substantially tougher than the typical stick or plank wall on the main level. For bases that face heavy creature attacks from the world event system, a stone basement is the most survivable storage site available.
Terrain Leveling Use Cases
Foundation placement solves most of the uneven-terrain problems that the snap grid would otherwise refuse to resolve.
Gentle Slopes. A single row of Foundation (Sticks) levels a lightly sloped beach. The foundation auto-fits the terrain underneath so the top face is flat, and walls snap onto it cleanly.
Hills. Stack two or three Foundation (Stone) tiles along the uphill edge of the footprint. The tops align, the floor sits flat, and the hill seam disappears beneath the structure.
Cliffs. Stacked Foundation (Stone) grids run up the cliff face like a staircase, with each grid tile one step higher and one step inland than the one below. This allows a base to climb a sheer wall without needing a path carved into the rock.
Boggy or Forest Floor. A foundation raised above tree roots or dense undergrowth avoids the placement errors caused by invisible vegetation collision meshes.
Interaction with Other Building Systems
Roof Check. A Foundation piece counts as an interior surface for station placement checks. A Workbench or merchant placed on a Foundation plus Floor combination satisfies its roof requirement as long as a Roofs piece is placed above.
Comfort Decorations. Decorations placed on a foundation still contribute to the Comfort score, provided the foundation is within the bonfire radius. There is no penalty for placing decorations below ground level in a basement; the radius is volumetric.
Settlement Building. In Settlement Building mode, foundations count as a floor level for structural purposes. A two-floor building on stacked foundations is treated as a taller structure by the settlement growth checks.
Stockade Perimeter. A Stockades wall line attaches to the ground, not to foundation tiles, so stockades should be planted on the terrain outside the foundation footprint. Planting stockades on top of a foundation fails the placement check.
Prebuilt Structures. Some Prebuilt Structures spawn with their own foundation pre-baked. Repairing or extending them uses the standard foundation snap rules; the baked-in base counts as placed terrain and will accept new foundation snaps around its edges.
Demolition and Material Refund
Dismantling any placed structure returns one hundred percent of the raw materials that went into it. This is true for every piece in the foundation group regardless of tier, and it is true whether the piece was placed one minute or one hundred hours before the teardown. There is no time window and no durability penalty.
Because dependency tracking protects load-bearing pieces, foundations must be dismantled last in any full teardown: roofs first, then walls and windows and doors, then floors, and finally the foundations. Attempting to dismantle a foundation with structure on top of it fails with a warning instead of cascading collapses, which prevents accidental mass destruction.
The one-hundred-percent refund is the reason prototyping in cheap tiers is always correct. Lay the whole shape in Foundation (Sticks) with a day or two of plant fiber gathering, decide if the footprint works, dismantle the sticks, and re-lay the final version in Foundation (Stone) once the plan is acquired. No stone is wasted on experimental geometry.
Six-Tier Structural System
Every structural piece in Windrose, including foundations and floors and walls, is offered in multiple material tiers. Each tier up costs more processed materials but grants higher Max Health and cleaner visual styling. The tiers are:
Tier | Material | Where Found |
|---|---|---|
1 | Harvested from grass; default unlock. | |
2 | Sticks | Chopped from small trees and bushes; default unlock. |
3 | Bark | Looted from the first wave of Smugglers outposts. |
4 | Plank | Wood-processed at the Workbench. Plans drop from mid-game island vendors. |
5 | ||
6 | Late-game plans from distant island vendors and faction reputation rewards. |
Within the foundation group specifically the available tiers are sticks, logs, and stone. There is currently no plank or hardwood foundation variant in Early Access. The Block (Stone) piece slots into tier five alongside the stone foundation and is the only piece in the group that is primarily a vertical element rather than a horizontal base.
Common Layout Patterns
Raised Coastal Villa. A 4x4 or 5x5 grid of Foundation (Stone) raised two tiles above a beach, with a stone perimeter and a capped stone roof. The elevation keeps the interior dry during storms and produces a commanding view of the surrounding water. Add a short staircase from the sand up to the front door.
Cliff-Top Lookout. A pure stacked-foundation approach where four to eight stone foundations run up the cliff face in a spiral, with a small 3x3 platform at the top for a bonfire, a cooking station, and a storage chest. The climb itself doubles as a staircase, so no separate ladder is needed.
Over-Water Tavern. A Large Pier blueprint extends twelve tiles into a lagoon, with Foundation (Sticks) or Foundation (Stone) filling the interior, plank walls, a peaked roof, and a Wharf attached to one corner. This is the canonical pirate base layout and the reason the group includes a pier piece at all.
Fortified Basement Camp. A basement carved from Block (Stone) underneath a modest plank-and-stone house, used primarily as organized storage space for bulk materials and unused armor sets. The thick stone perimeter walls survive most creature attack events without taking damage.
Settlement Platform. A large Foundation (Stone) Large grid, often 8x8 or larger, used as the shared floor of a multi-player co-op base. Because the large stone tile costs only one stone per placement, the entire platform can be laid for under a hundred stone total, freeing the rest of the stone budget for walls and crafting stations.
Tips
Foundation (Sticks) has twice the Max HP of a Wall (Sticks), making the tier one foundation the single most durable piece available to a brand-new character. Use it as a defensive wall in emergencies.
When stacking Foundation (Stone) up a cliff, place one tile at a time and jump up onto each new tile before placing the next. The placement preview is relative to the player's feet, so standing on the previous step makes each subsequent placement snap at the correct height.
A Pier is the only piece in this group that can accept a Wharf snap. If a ship cannot dock at a shoreline build, the usual cause is that the player placed a foundation instead of a pier at the waterline. Replace that edge tile with a Pier and the Wharf preview turns green.
Buy the Stone and Planks base-set plan from the Smugglers provisioner in Tortuga as soon as the faction unlocks. The ten-Guineas price tag pays for itself on the first 4x4 platform.
For basement cold storage, the small Block (Stone) tile is sufficient for walls; the large version is overkill and costs the same per tile, so it is worth it only if the basement is unusually tall.
Before building a permanent base, walk the intended footprint and make sure no respawning resource nodes sit inside it. Foundations do not remove existing node spawns; placing on top of a copper node simply hides the node, which is a mild but recoverable loss.
See Also
Base Building - the general overview of the Windrose building system, tier unlocks, and build order.
Building Pieces - the master list of every placeable structural piece in the game, grouped by role.
Floors - the piece that caps a foundation to produce a walkable surface.
Walls - wall variants that snap onto floors above foundations.
Roofs - the roof pieces required for station placement checks.
Piers - the dedicated article for the Pier piece, including large pier blueprint details.
Stockades - palisade walls for perimeter defense.
Prebuilt Structures - pre-placed buildings scattered around the world that a player can repair and claim.
Settlement Building - the higher-level settlement mechanics layered on top of individual buildings.
Bonfire - the camp anchor that defines the radius within which most crafting stations function.