Loading...
Loading...
Elemental Reactions
April 4, 2026 at 04:13 AM
Add Gematsu press screenshots
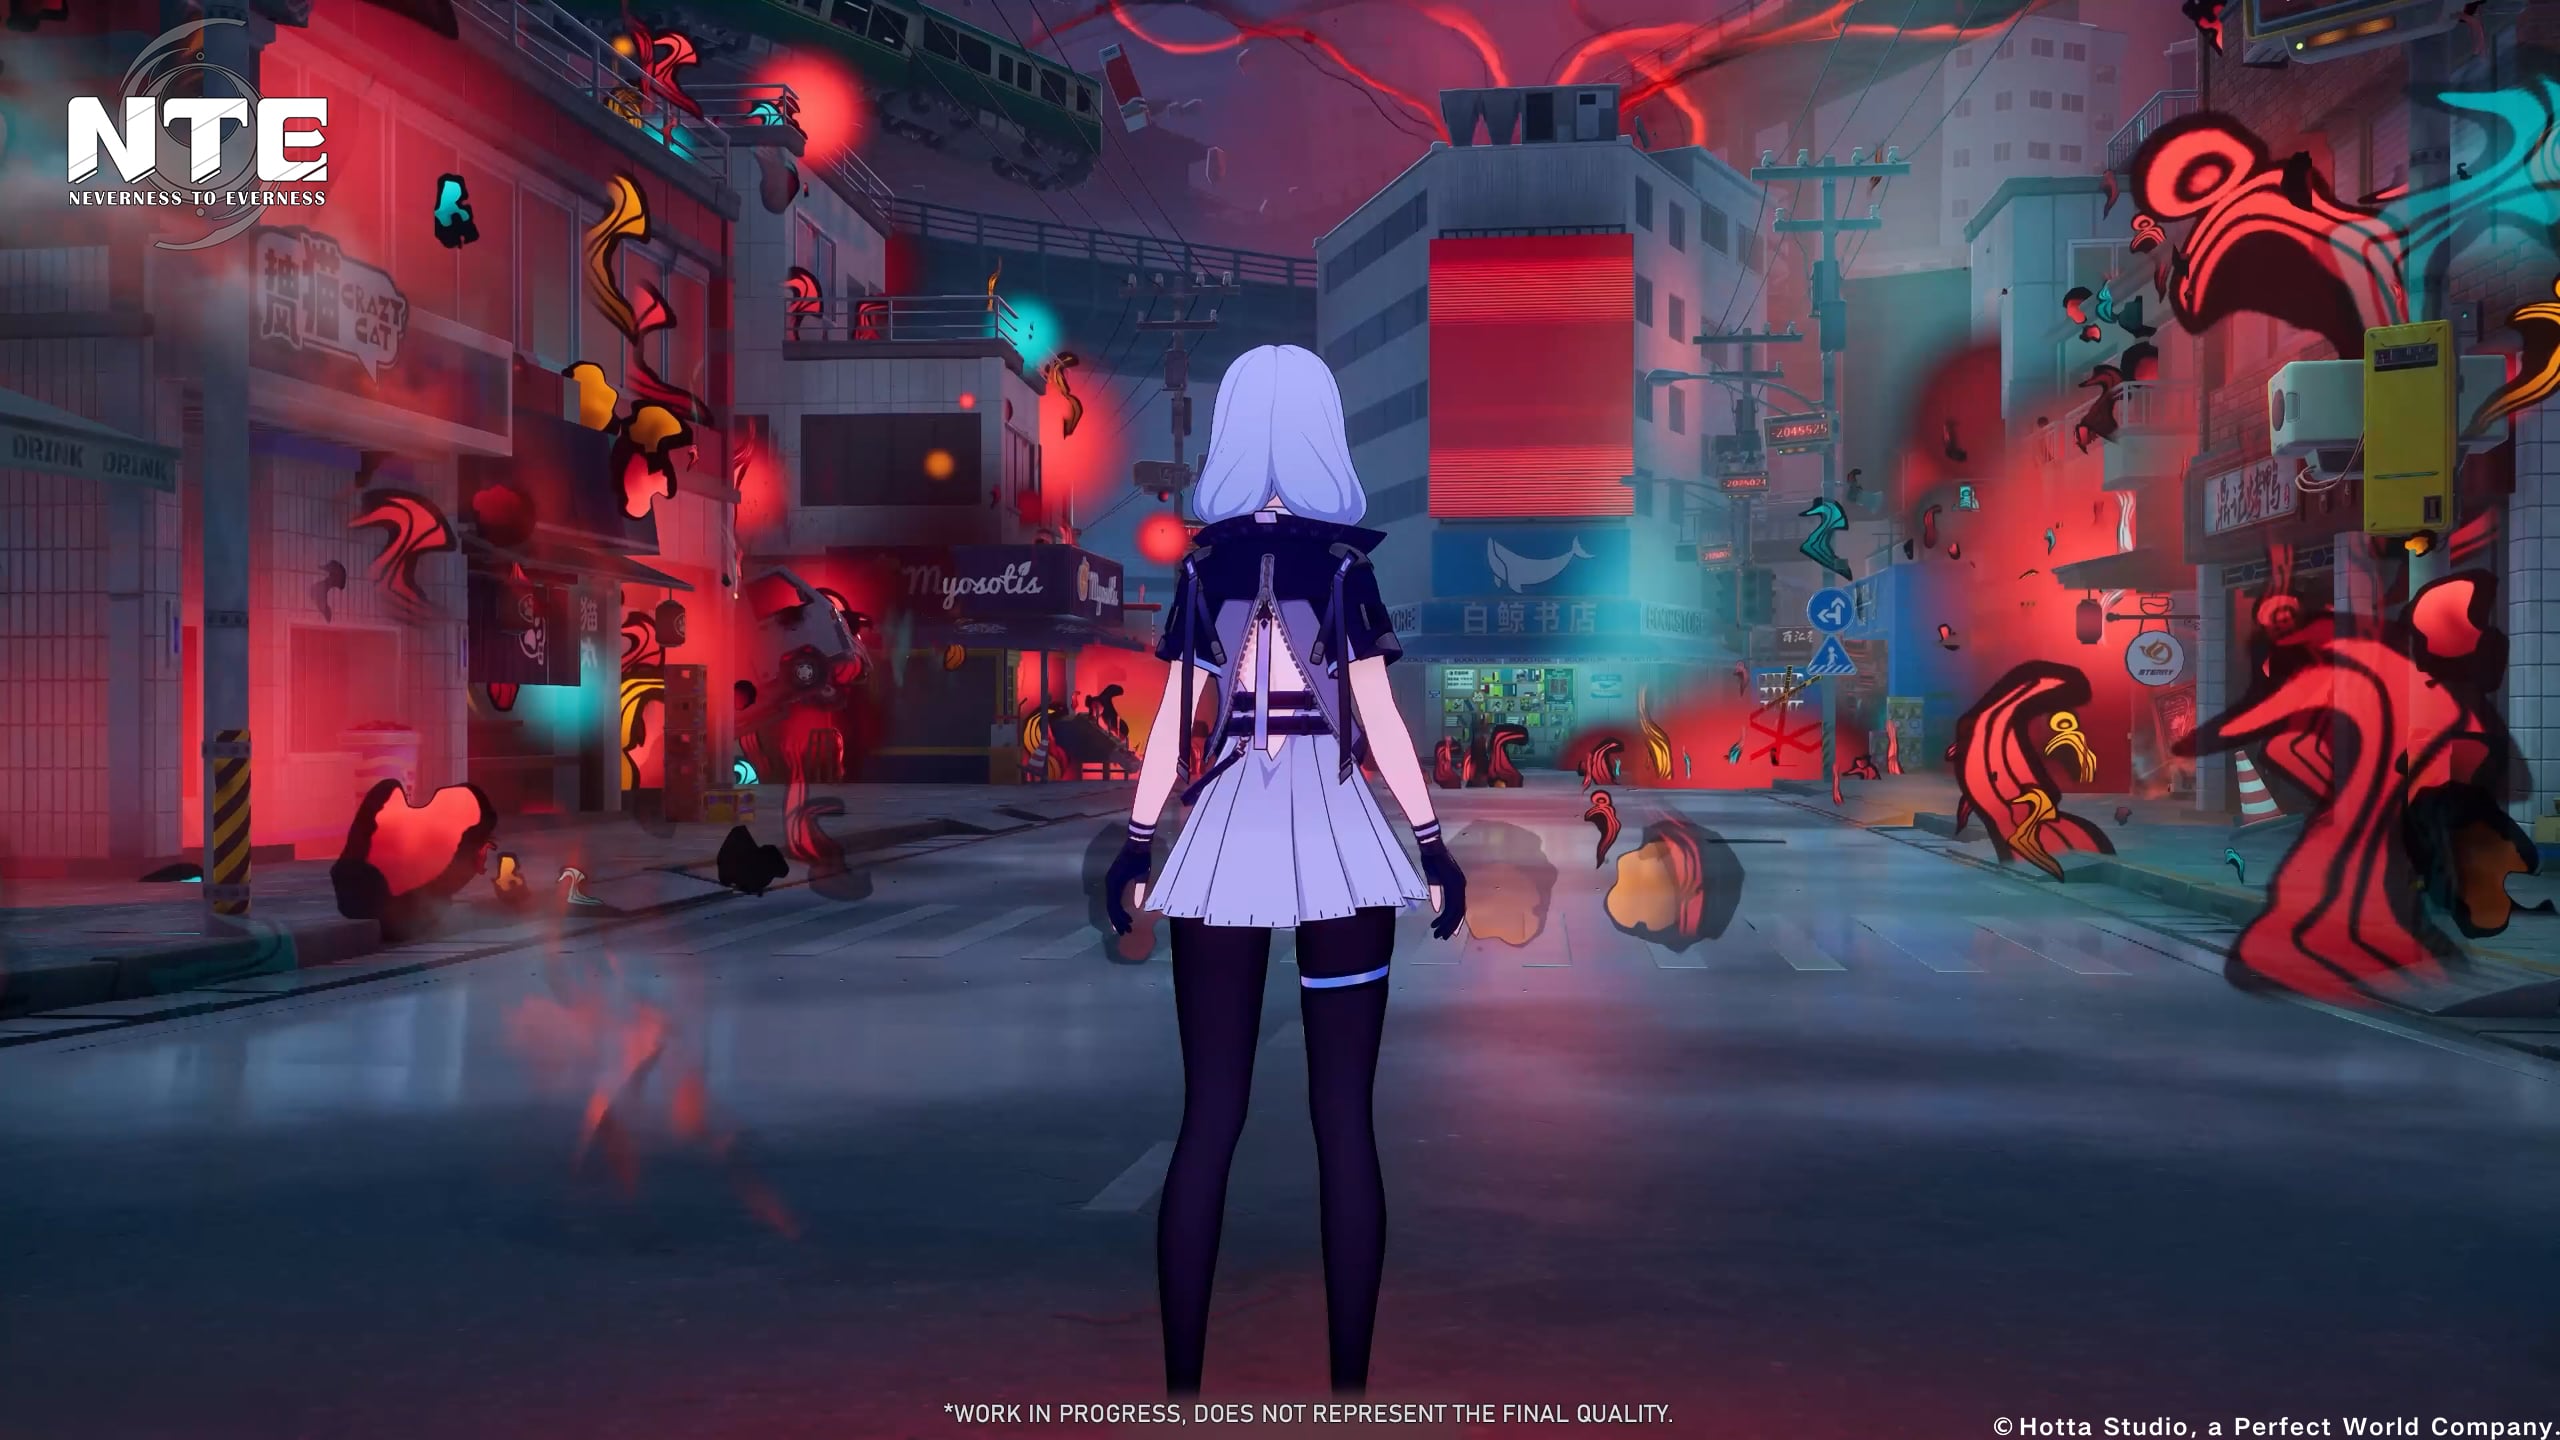
Elemental reactions are at the heart of combat in Neverness to Everness. The game features six elements arranged in a cyclical ring: Cosmos, Anima, Incantation, Chaos, Psyche, and Lakshana. When two adjacent elements on this ring interact on a single target, they trigger a duo reaction with a unique combat effect. These reactions are central to the Esper Cycle system and define how players build teams and approach encounters.
There are six duo reactions in total, each corresponding to a pair of adjacent elements. Additionally, combining three elements can trigger the more powerful trio reactions, Charge and Discord, which are detailed in the Trio Reactions section below.
Reactions are triggered when a character applies their element to a target that already has a different adjacent element on it. The order of application does not matter for duo reactions; what matters is that both elements are present on the target simultaneously.
Reaction | Elements | Effect Type | Description |
|---|---|---|---|
Blossom | Cosmos + Anima | AoE Damage | Spawns a projectile that attacks nearby targets, dealing area damage |
Hexed | Anima + Incantation | Bonus Damage | Triggers extra Unison damage based on recent elemental damage taken by the target |
Scorch | Incantation + Chaos | Damage over Time | Applies a burning DoT effect lasting 15 seconds |
Nova | Chaos + Psyche | Delayed Burst | Marks the target, causing accumulated damage to burst after 5 seconds |
Stain | Psyche + Lakshana | Vulnerability Debuff | Target takes 50% more Psyche and Lakshana damage for 12 seconds |
Remora | Lakshana + Cosmos | Crowd Control | Slows the target's movement speed and attack speed |
Blossom is triggered when Cosmos and Anima elements interact on the same target. The reaction spawns a persistent projectile entity, sometimes referred to as a "peashooter," that automatically attacks nearby enemies and deals area damage. This projectile continues to fire for a limited duration, providing consistent off-field AoE damage without requiring additional player input.
Blossom is particularly valuable because it serves a dual purpose. On its own, it provides solid supplementary AoE damage during combat. More importantly, the Blossom projectile is the key trigger for the Charge trio reaction. When a Blossom projectile strikes a target that is already affected by the Remora status, it activates the Charge reaction and grants the active character ultimate energy with each hit.
Mint (A-Rank, Anima) has a passive ability that directly enhances Blossom. When Mint is on the team, the Blossom projectile splits into two, effectively doubling the reaction's damage output. The split projectiles also explode on contact with targets, increasing the AoE coverage. Mint's passive grants 20% DEF increase and 30% Interruption resistance to Mint herself while she is on the field.
Strong Cosmos characters for triggering Blossom include FZero, MZero, Hotori, and Chiz, while Nanally and Jiuyuan are the primary S-Rank Anima options.
Hexed occurs when Anima and Incantation elements combine on a target. This reaction triggers extra Unison damage that scales based on the total amount of elemental damage the target has recently absorbed. In practical terms, Hexed rewards aggressive elemental application; the more elemental hits a target has taken in a short window, the larger the Hexed bonus damage becomes.
This makes Hexed a strong reaction for teams that can rapidly apply multiple elemental hits in quick succession. Characters with fast attack strings or multi-hit skills pair well with Hexed, as they build up the recent-damage pool that feeds the bonus calculation.
Anima characters like Nanally and Jiuyuan paired with Incantation characters like Sakiri or Baicang provide the element coverage needed to trigger Hexed consistently. Sakiri's multi-hit abilities and crowd-control skills make her especially effective at building the recent-damage pool that amplifies Hexed's bonus.
Scorch is triggered when Incantation and Chaos interact on a target. The reaction applies a damage-over-time (DoT) burning effect that lasts for 15 seconds. This sustained damage ticks continuously over the full duration, making Scorch one of the longest-lasting reaction effects in the game.
Scorch excels in extended fights where its full 15-second duration can play out. Against bosses and elite enemies with large HP pools, the cumulative damage from Scorch adds up significantly. The reaction also serves as one of the two prerequisites for the Discord trio reaction, which requires both Scorch and Nova to be active on the same target simultaneously.
Adler (A-Rank, Incantation) has a passive ability called "Temperance" that transfers Scorch status between enemies. When an enemy afflicted with Scorch is defeated, the burn effect jumps to a random nearby enemy. This makes Adler invaluable in encounters with multiple foes, as Scorch can chain through an entire group without needing to be manually reapplied.
Sakiri (S-Rank, Incantation) enhances Scorch through her passive "Can I Eat This?" which triggers random debuffs whenever Scorch activates: either -15% ATK, -10% Esper Resistance, or +15% Break Effectiveness for 15 seconds. These debuffs do not stack with themselves but add significant tactical value on top of the base DoT.
Lacrimosa (S-Rank, Chaos) and Daffodil (S-Rank, Chaos) provide the Chaos element needed alongside Incantation characters to trigger Scorch.
Nova is triggered when Chaos and Psyche elements combine on a target. The reaction places a mark on the target that detonates after a 5-second delay, dealing a burst of Cognito damage (in-game term). Cognito damage is a special damage type unique to this reaction, distinct from standard elemental damage.
The 5-second delay before Nova detonates creates a strategic window. Players need to keep the target engaged and prevent the mark from expiring prematurely. The delayed burst nature of Nova makes it complementary to Scorch's sustained DoT. Having both active on the same target at the same time is the trigger condition for the Discord trio reaction.
Fadia (S-Rank, Psyche) is currently the primary Psyche character for triggering Nova. Her kit revolves around damage redirection and team protection, making her a natural fit for sustained engagements where Nova's 5-second timer can fully resolve. Haniel (A-Rank, Psyche) provides an alternative Psyche option. On the Chaos side, Lacrimosa and Daffodil are the available choices.
Stain is triggered when Psyche and Lakshana interact on a target. The reaction applies a powerful vulnerability debuff: the target takes 50% more damage from Psyche and Lakshana sources for 12 seconds. This is one of the most impactful debuffs available, effectively multiplying the damage of two entire elements by 1.5x.
Stain is a cornerstone reaction for burst-damage strategies. Teams built around Stain typically apply the debuff first, then follow up with heavy Psyche or Lakshana damage during the 12-second window. The long duration gives plenty of time to cycle through character rotations and land multiple skill combos.
Skia (Lakshana) has abilities that synergize strongly with Stain. His Fang Thrust mechanic reduces enemy Lakshana Resistance, which stacks with Stain's vulnerability bonus for even higher damage amplification. Paired with Fadia or Haniel for the Psyche element, Skia can create devastating damage windows.
Hathor (S-Rank, Lakshana) benefits enormously from the Stain debuff. As a hyper-mobile main DPS character dealing Lakshana damage, the 50% damage increase during the Stain window lets Hathor's combos hit considerably harder.
Remora is triggered when Lakshana and Cosmos elements combine on a target. The reaction applies a crowd-control effect that slows both the target's movement speed and attack speed. This makes Remora the only duo reaction focused on enemy debilitation rather than dealing direct damage or amplifying damage.
The slow effect provides breathing room in hectic fights and makes it easier to land charged attacks, combos, and positioning-dependent skills. Remora also plays a critical role as one of the prerequisites for the Charge trio reaction. When a Blossom projectile hits a target affected by Remora, it triggers Charge and generates ultimate energy.
Hathor (S-Rank, Lakshana) has a Remora Enhancement passive called "Delay Warning." When Hathor applies her Excellent Rating Lock status to targets that are already in Remora, the lock is treated as an extension of the Remora effect. This effectively extends Remora's utility and keeps the crowd-control active longer.
Skia's "Suppression" passive notes that targets suffer heavy damage when breaking free from Remora status effects, adding a damage payoff to the crowd-control reaction. On the Cosmos side, Hotori, FZero, MZero, and Chiz all provide element application for triggering Remora.
Trio reactions are advanced combinations that require specific duo reactions to overlap on the same target. They are harder to set up than duo reactions because they require characters from three adjacent elements, but they deliver exceptionally powerful effects. Two trio reactions have been confirmed.
Reaction | Trigger Condition | Effect |
|---|---|---|
Charge | Each hit from the Blossom peashooter grants the active character ultimate energy, rapidly filling burst gauges | |
Discord | Reduces a percentage of the target's break meter, providing the fastest path to a stagger state |
Charge requires characters from three adjacent elements on the ring: Lakshana, Cosmos, and Anima. The setup involves two steps. First, apply Remora (Lakshana + Cosmos) to mark the target with a movement and attack speed slow. Then trigger Blossom (Cosmos + Anima) while the Remora mark is still active. The Blossom projectile (the autonomous "peashooter") will recognize the Remora mark on each hit and grant the active character ultimate energy per hit. This creates an extremely efficient energy generation loop, allowing teams to cycle through ultimates far more frequently than normal.
Charge is especially valuable in sustained fights against bosses, where the consistent ultimate energy generation lets your team maintain a steady rotation of powerful burst abilities. Characters like Mint, whose passive splits the Blossom projectile into two, effectively double the energy generation rate from Charge.
Discord requires characters from three adjacent elements: Incantation, Chaos, and Psyche. The setup involves applying Scorch (Incantation + Chaos) to inflict the 15-second burning DoT, and then triggering Nova (Chaos + Psyche) before Scorch expires. When both effects are present on the target simultaneously, Discord activates and reduces a percentage of the target's break meter.
Discord provides the fastest path to staggering enemies through the Stagger System. Against elite enemies and bosses with large break meters, Discord can strip a significant chunk of the meter in a single trigger. Lacrimosa's Esper Cycle Passive ("Tomato Banquet") further enhances Discord by reducing the target's break cap by 10% for 60 seconds per trigger, stacking up to 30%. This makes Lacrimosa nearly essential for Discord-focused teams.
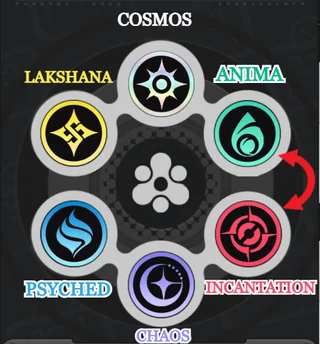
The six elements in Neverness to Everness are arranged in a ring, and only adjacent pairs on this ring can trigger duo reactions. Understanding the ring layout is essential for team building, as it determines which element combinations produce reactions and which do not.
The ring order is: Cosmos, Anima, Incantation, Chaos, Psyche, Lakshana, and then back to Cosmos. This means Cosmos is adjacent to both Anima and Lakshana, Anima is adjacent to Cosmos and Incantation, and so on around the full circle.
Elements that are not adjacent on the ring (for example, Cosmos and Chaos, or Anima and Psyche) do not produce any duo reaction when combined. When building a team, focus on characters whose elements sit next to each other on the ring to ensure your squad can trigger useful reactions.
Elemental reactions are tied to the Esper Cycle system. Each character has an Esper Cycle Meter that fills during combat through three methods: continuous attacking (normal hits and combos), skill usage (provides larger charge bursts), and successful parries (generates significant charge). Every character has a Cycle Rate stat that determines how quickly their actions fill the meter.
When the meter reaches full capacity, eligible squad members glow to signal readiness. At this point, swapping to a glowing character and applying their element to a target already affected by the adjacent element triggers the corresponding duo reaction.
Every character in Neverness to Everness has a unique Esper Cycle Passive that remains active even when the character is off-field. These passives often enhance specific elemental reactions, making them a critical consideration for team building. Characters do not need to be on the field for their passive to take effect.
Character | Element | Passive Name | Effect |
|---|---|---|---|
Incantation | Can I Eat This? | When Scorch triggers: applies random debuff (-15% ATK, -10% Esper Resistance, or +15% Break Effectiveness for 15s) | |
Incantation | Temperance | Transfers Scorch status from defeated enemies to random nearby enemies | |
Chaos | Tomato Banquet | Discord Enhancement: target's Break cap reduces by 10% for 60s per trigger, stacks up to 30% | |
Lakshana | Delay Warning | Remora Enhancement: Excellent Rating Lock in Remora counts as Remora | |
Anima | Blossom Enhancement | Blossom projectile splits into 2 and explodes on targets; grants 20% DEF and 30% Interruption resistance | |
Lakshana | Suppression | Targets suffer heavy damage when breaking free from Remora status effects |
Build teams with at least two pairs of adjacent elements to ensure you can trigger reactions consistently throughout a fight.
Pay attention to Esper Cycle Passives when selecting your team. Even characters who spend most of their time off-field can dramatically boost your reaction damage through their passives.
Scorch and Nova are the two prerequisites for the Discord trio reaction. If you want to trigger Discord, include at least one Incantation, one Chaos, and one Psyche character.
Blossom and Remora are the two prerequisites for the Charge trio reaction. If you want to trigger Charge, include at least one Cosmos, one Anima, and one Lakshana character.
Stain's 12-second damage window is one of the longest debuffs in the game. Use it as the opener in burst rotations to maximize the damage boost.
Remora's slow effect helps the entire team land combos more reliably. Consider including it in teams that rely on charged attacks or positioning-dependent skills.