Character Creation
Echoes of Aincrad gives the player a created hero rather than placing them in the shoes of Kirito. The opening lets the player design their own avatar, who will be treated as one of the ten thousand players trapped in Aincrad at the moment the death game is announced.
Pick a Weapon
The game has six weapon types, and the one chosen in the early hours will define the rhythm of combat for much of the campaign. See the Weapon Types article for the full list, including one-handed weapons that can pair with a shield and two-handed weapons that give up defence for reach.
Learn the Timing
Combat is built around reading enemy attacks rather than out-statting them. The basic defensive options are block and dodge, but a well-timed block triggers Parry Slash, and a well-timed dodge triggers Dodge Slash. Both are team-up attacks with the player's NPC companion and deal heavy damage.
Sword Skills
Each weapon has a roughly ten-skill pool, but only three sword skills can be equipped at once. Picking skills that cover different ranges and openings is more important than stacking the highest-damage move.
Mind the Stamina
Every attack, dodge, and block drains the player's stamina bar. Chaining actions without leaving room for stamina recovery will leave the hero gassed mid-combo, which is the main reason the developers describe the game as methodical rather than twitchy.
Decide on Death Game Mode
The game has three save slots, but only slots 2 and 3 can enable Death Game Mode. On a first playthrough, leaving Death Game Mode off is usually the intended experience. It exists as an optional challenge for a second run.
Try the Demo First
A free demo released on June 15, 2026 for Steam and June 16, 2026 for PlayStation 5 and Xbox Series X|S, and its save data can be carried into the full game on version 1.0.2 or later. It covers the prologue set during the in-universe closed beta, runs about five missions across the opening of Floor 1 into early Floor 2, and lets a new player learn the combat rhythm before committing to the full game. The demo uses a fixed beta-era avatar, so the full character creator is only available in the retail release. Progress is capped at character level 15 and weapon proficiency 3, and demo save data carries over into the full release on the same platform, so any time spent there is not wasted. The demo is limited to the Story and Normal difficulty tiers, and its first stretch ends in a boss encounter, so it is a fair preview of how a real fight escalates without exposing the full challenge settings. When the full game launches, a prompt on first start asks whether to carry the demo data over, and choosing to carry over transfers all save slots, so the demo's progress is preserved as long as the main game has installed its latest update.
The Core Loop for a New Player
The opening hours of Echoes of Aincrad set a rhythm that repeats for most of the rest of the campaign. Leave a safe hub in town, gear up, travel to a field or dungeon, fight through the area, reach a Safe Area to recover, push deeper, and come home. The short version of what a new player needs to know is below. For the broader setting and scope of the game, see the overview.
Step 1: Create Your Character
The game opens with a character creator rather than dropping the player into a preset role. Supported parameters include gender, hairstyle, face shape, body shape, and height, along with several other adjustment options for building your own avatar. The developers have not confirmed whether recustomization is available later in the game, so treat the opening creator as a commitment and pick a look you are comfortable living with for a long time.
Step 2: Pick Your Starting Difficulty
Four difficulty modes are available from the start: Story, Normal, Hard, and Very Hard. Difficulty is not locked in for the whole run. You can switch between these four options later on, but only in town and only while you are not inside an active quest. Pick whichever matches the kind of pace you want for your first few hours, knowing you can dial it up or down once you settle in.
Death Game Mode is the fifth, optional difficulty layer and is handled separately from the standard four. It unlocks after the first clear of the main story, or immediately on day one if you pick up a copy that includes day-one access. See editions and pre-order bonuses for which copies include day-one Death Game Mode, and the main death game mode entry for how the permadeath ruleset actually plays.
Step 3: Expect to Die on the Way to Your First Safe Area
The first field push from town usually ends with at least a few deaths. That is by design. Safe Areas are the anchor points of the overworld: they act as respawn spots, healing points, teleport hubs, and restock locations. Reaching one for the first time in an area converts that point into a permanent checkpoint for every future trip through the same map.
Safe Areas emit a faint pillar of light that is visible even when the surrounding terrain has not been mapped yet. The practical advice on a first trip into a new region is to ignore the minimap, look for the pillar on the horizon, and work in that direction. Dying a few times along the way is cheaper than getting lost, because each attempt takes you a little further and teaches you where the enemy patrols sit.
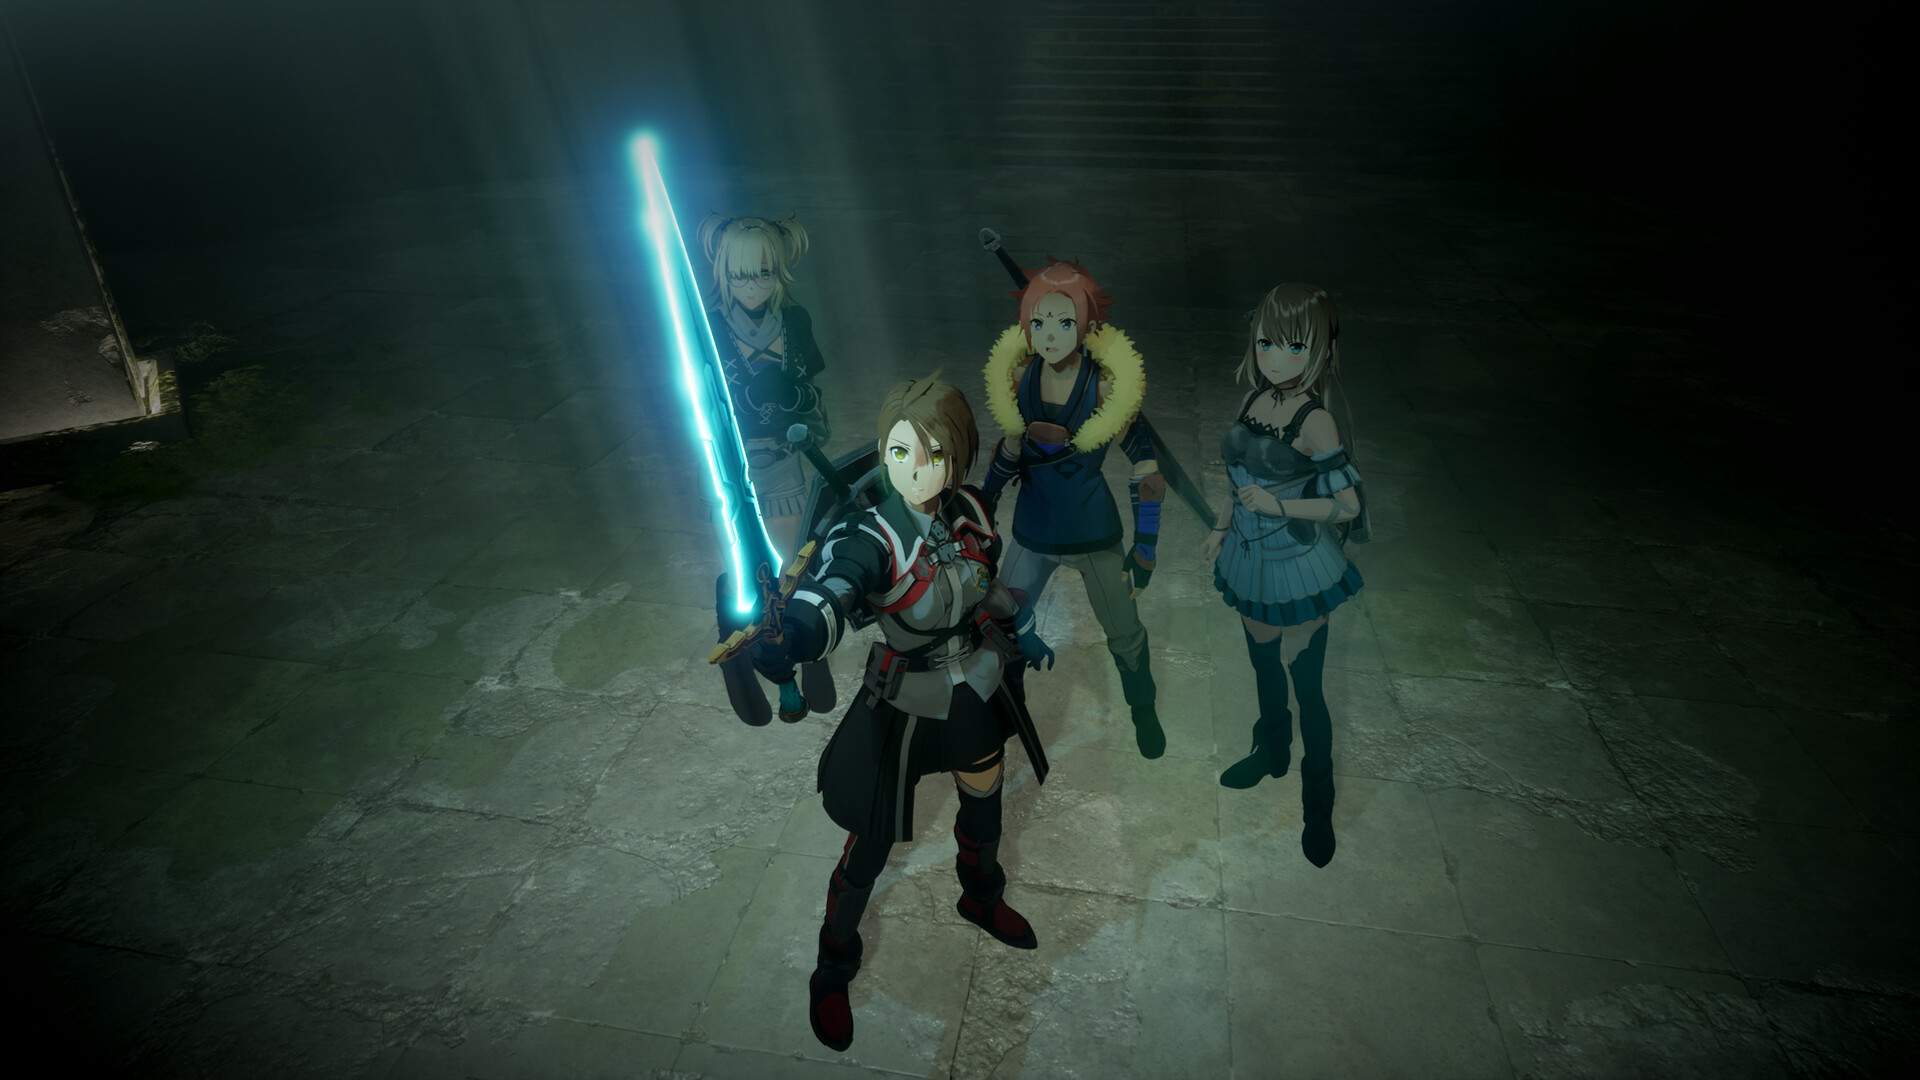
Step 4: Bring the Right Partner
A standard party is you plus one AI-controlled partner, and the partner choice changes the feel of combat more than any single piece of gear. Before leaving town, step into the party menu and pick which companion joins you from the roster you have unlocked. The reveal gameplay showed several confirmed partners: Iori, Wyzeman, Argo, and later Zash. Each partner brings a different weapon type and a different Support Skill, so the right answer for a new player is usually to try each one for a session and see which pairing feels best with your own build.
Partner | Notes |
|---|---|
Solo swordsman introduced early. Approachable for a first run because his kit is built around covering the player. | |
Mace-focused partner with a heavier, crowd-control style. Good when pulls go wide. | |
Information-oriented partner whose Support Skill helps scout and surface hidden threats. | |
Later-unlocking partner revealed in the gameplay footage. Round out the roster once available. |
Step 5: Stamina is a Real Resource
The stamina bar in this game is not a soft suggestion. Light attacks, heavy attacks, sprinting, and evasion all draw from the same pool. The pool refills while you are walking or standing still, but it does not refill while you are acting. New players often try to sprint away from losing fights, and it usually ends badly: enemies in this game stick to their target, disengaging is hard, and a flat stamina bar mid-retreat leaves you with no evade and no sprint at the worst possible moment. Staying in the fight and pacing your inputs is almost always safer than running.
This pacing is the core of the combat system, where reading enemy swings matters more than output-per-second. Budget your stamina the same way you would budget mana in a traditional RPG: commit a combo, step back, let the bar top off, re-engage.
Step 6: SP Powers Sword Skills
Alongside stamina, a second resource called SP fuels the heavier attacks. SP refills as you land basic attacks on enemies, and it can also be topped off by drinking a specific potion. The natural loop inside a fight is to open with basic attacks to rebuild SP and Support Skill charges, then spend SP on a sword skill when a window opens, then go back to basic attacks to recover. Picking special skills and a good Support Skill combo to sit alongside your sword skills helps this loop feel smoother in the early floors.
Resource | How It Drains | How It Refills |
|---|---|---|
Stamina | Spent on light attacks, heavy attacks, sprinting, and evasion. See stamina. | Refills passively while walking or standing still. |
SP | Spent on sword skills and special skills. | Refills by landing basic attacks on enemies, or by drinking a specific potion. |
Step 7: Stock up Before Every Trip
Equipment, levels, and loadout choices are all locked the moment you leave town. There is no opening a menu in the field to respec or swap gear. Before every trip, the standard checklist is to stock healing crystals for emergency HP recovery, pack consumables such as paralysis traps, throwing items, and potions, and visit the smithy to make sure your weapon and armor are the best you can afford. Heading out with the wrong gear is a common mistake on the first field trip, because the cost of turning around is much higher than it would be in a game with in-field menus.
Step 8: Map Once, Benefit Forever
Exploration is front-loaded. Mapping an area and lighting up its Safe Areas only has to be done once per map. Any repeat quest that sends you back to the same area will reuse the checkpoints and pathways you already opened, so early exploration pays forward across the whole campaign. This makes it worth the extra time on a first pass to find side paths, reach every Safe Area, and fill in as much of the map as you can before the quest itself pulls you away.
Map markers help with the parts of a region you have not explored yet. Set a marker on a point of interest and a pillar of light appears at that spot in the overworld, the same way Safe Areas do. The pillar is visible even when the surrounding terrain is still hidden, so you can navigate toward it as a landmark rather than staring at a half-filled minimap. Markers stack well with the always-on Safe Area beacons, letting you read the horizon as a layered set of lights instead of memorizing coordinates.
Step 9: Use the Main Terminal for Quests
The Main Terminal in the Town of Beginnings is the hub where you accept quests. Each quest is tagged as either a field quest or a dungeon quest, and the tag is a useful signal for what kind of trip to prepare for. Some quests take place on their own dedicated maps rather than inside the shared overworld, and some drop you at a unique entry point rather than starting you at the quest board. Reading the quest tag and the start location before you commit saves a trip back to town for extra consumables or a different partner.
Published Guidance Worth Knowing Early
The developers published a set of tips after launch. Several of them cover features that are easy to miss for hours if nobody points them out.
Tip | Why It Matters |
|---|---|
Drop pins on the map | Map detail only appears once you activate a Safety Area or Warp Terminal in a region. Once it does, pinning your objective is the intended way to navigate later areas with complex layouts. |
Look down from high ground | Quest areas are large and vertically layered. Finding a vantage point and studying the route is often faster than following the marker in a straight line. |
Enhance before you judge a weapon | Dropped weapons arrive unenhanced. A higher-class unenhanced weapon can be weaker than a lower-class enhanced one, so take a promising drop to the smithy before deciding it is bad. |
Use Return to Checkpoint | From the map menu you can fast travel back to a Safety Area mid-quest. It is disabled inside dungeon quests, so plan supplies differently for those. |
Suspend rather than push on | Selecting Transfer at a Safety Area and then Return to Town suspends the quest while keeping every item and every Col you collected. Pulling out to restock costs nothing. |
Let the terminal restock you | Opening the Start Quest screen at the Main Terminal automatically refills Item Pouch consumables from matching items in your Chest, and fills empty slots with recovery items. Buying in bulk once makes this work forever. |
Buy and use consumables early | The published advice is to start using shop consumables from the opening hours so the controls and effects become familiar before a fight depends on them. Turning on the button guide display makes activation easier to read. |
Force Relocation exists | If you wedge your character in terrain while climbing somewhere unintended, Settings then Gameplay Settings then Force Relocation moves you somewhere safe. Reloading is not the only option. |
One framing point is worth setting expectations on: the developers describe the game as neither open-world nor a retry-driven high-difficulty action RPG. Exploration is quest-gated and areas unlock as the story advances, so a region you cannot reach yet is usually a sign that it opens later rather than that you missed a path.
Camera distance is adjustable under Gameplay Settings. Very Close and Close give a more dynamic view of combat, while Medium and Far make it easier to track multiple enemies. Control bindings can be changed freely at any time for both controller and keyboard.
Quick Reference: The First-Trip Checklist
Set your difficulty. Pick from Story, Normal, Hard, or Very Hard. Change it later in town if the pace feels off, but do not change it mid-quest.
Pick a partner. Rotate through the unlocked roster to find the support style that matches your build.
Stock healing crystals. These give an instant large HP recovery in a pinch and are the single most important consumable on a first trip.
Pack utility consumables. Paralysis traps, throwing items, and potions turn bad pulls into manageable ones.
Visit the smithy. Upgrade or swap gear while you still can. No changes in the field.
Aim for the pillar of light. Your first objective in a new area is reaching its Safe Area. Map markers emit the same pillar effect for places you want to find.
Fight, do not flee. Stamina gates both sprint and evade, and enemies stick to you, so disengaging mid-fight is rarely clean.