Loading...
Loading...
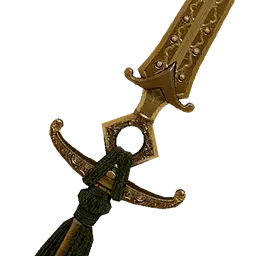
Machina Knight with Marni Longsword
May 25, 2026 at 02:35 PM
Added Database Stats section with HP, attack, defense, stamina, knockout, and fatal values
The Machina Knight with Marni Longsword is the first phase of a two-phase elite boss encounter in Crimson Desert. Located at Marni's Outpost in the northern part of the Delesyia region, this mechanical knight is one of the many automated constructs created by the genius inventor Marni. The outpost itself sits just north of Gorthak and is populated by various hostile robots and automated defenses, with the Machina Knight serving as the area's most dangerous guardian.
Interacting with the Machina Knight triggers the "Blade of Discipline" Delesyia faction quest. There are no prerequisites for accessing the fight; players can attempt it at any point after reaching the region. However, the encounter is best suited for mid-to-late game characters because of the high damage output across both phases. Defeating both the longsword phase and the subsequent Machina Knight with Marni Spear phase rewards the Electro-Mecha Longsword, a unique two-handed weapon with Lightning Affinity.
The longsword phase is the more straightforward half of the encounter. The Machina Knight fights methodically with a large two-handed sword, relying on powerful but telegraphed swing combos. Players who have developed their parry timing will find this phase manageable, as nearly every attack in the knight's repertoire can be countered with a well-timed parry. The real challenge comes in the second phase when the knight switches to its spear configuration.
Attribute | Details |
|---|---|
Name | Machina Knight with Marni Longsword |
Type | Elite Boss |
Weapon | Two-Hand Sword (Electro-Mecha Longsword) |
Location | |
Region | |
Quest | Blade of Discipline (Delesyia Faction Quest) |
Phase | Phase 1 of 2 (transitions to Machina Knight with Marni Spear) |
Difficulty | Mid-to-late game recommended |
Stat | Value |
|---|---|
HP | 1,896 |
Attack | 218 |
100 | |
100 | |
Knockout | 750 |
Fatal | 5 |
The Machina Knight in its longsword configuration wears a full set of Machina Plate armor alongside its primary weapon. This equipment reflects the construct's origin as one of Marni's engineered creations, designed for heavy combat duty at the outpost.
Slot | Item | Type |
|---|---|---|
Weapon | Two-Hand Sword | |
Upperbody | Machina Plate Armor | Upperbody |
Cloak | Machina Plate Cloak | Cloak |
Hand | Machina Plate Gloves | Hand |
Foot | Machina Plate Boots | Foot |
The Machina Knight with Marni Longsword has two passive skills that shape its behavior and combat classification throughout the fight.
Skill | Type | Description |
|---|---|---|
Boss Large Human | Passive | Classifies the boss as a large humanoid enemy, affecting stagger thresholds, hit reactions, and player abilities that grant bonus effects against large enemies. |
Skill Bastier Buff | Passive | A passive enhancement tied to the Bastier combat framework built into Marni's constructs, granting the knight increased resilience and combat performance as an automated guardian. |
The Machina Knight's longsword moveset revolves around deliberate, heavy sword swings that deal significant damage but have clear telegraphs. The knight favors a repeating three-hit combo as its primary attack sequence. Each individual strike in the combo can be parried, making this phase a test of the player's ability to read and react to the attack rhythm.
Attack | Description | How to Counter |
|---|---|---|
Three-Hit Combo | The knight's signature attack. It swings the Electro-Mecha Longsword in a sequence of three consecutive horizontal and diagonal slashes. Each strike deals heavy damage and has a consistent timing window between swings. | Parry each hit individually with a well-timed L1 input using your shield or weapon. The timing between strikes is consistent, so once you learn the rhythm, you can parry all three reliably. |
Overhead Slam | The knight raises the longsword above its head and brings it crashing down in a single powerful vertical strike. This attack has the highest single-hit damage in the longsword phase. | Dodge sideways rather than attempting to parry. The slam has a narrow hitbox, so a lateral roll avoids it cleanly. Punish during the recovery animation. |
A wide horizontal arc that covers a large area in front of the knight. The knight steps forward slightly during the swing, extending its effective range. | Parry on timing or dodge backward. The forward step can catch players who try to back away too slowly. | |
Charged Thrust | The knight briefly pauses, holding the longsword at its side, before lunging forward with a powerful thrust. The pause is the telegraph for this attack. | Dodge sideways when you see the lunge begin. Parrying is possible but risky due to the speed of the thrust after the wind-up. |
The Machina Knight cycles through a small set of repeating three-move attacks across both phases. Once the timing on the three-hit pattern is internalized, the entire encounter compresses into backtrack the first two strikes, dodge through the third, counter during the recovery. The boss reuses the same animations rather than introducing fresh tells mid-fight, so a single read carries the whole encounter.
Use this section as a quick reference once the parry-based Turning Slash loop in the Strategy section above starts breaking down (typically during the spear half, when the moveset gets longer and forces wider spacing).
The longsword phase opens with the boss anchored in a slow, telegraphed sword stance. Every attack here is dodge-counterable rather than parry-only, which gives less parry-confident players an alternate solution to the same fight.
Attack | Tell | Reaction | Counter Window |
|---|---|---|---|
Teleport-Raise + 3-Slash + Force Palm | Boss raises the sword high overhead and vanishes into a short-range teleport directly toward the player. | Dodge to either side as the teleport resolves so the slashes pass through empty space. The final beat is a force-palm shove that is easy to read once the sword stops swinging. | Three to four attack inputs fit cleanly into the recovery between the force palm and the next move; the boss does not super-armor through this window. |
Wide Left-Swing 3-Strike Combo | Boss winds the longsword all the way to its left side before the first swing; the wide cross-body pull is the visual cue. | Backtrack the first two swings so the arc passes through air. Dodge the third strike (the hardest read in Phase 1) by rolling either toward the boss or sideways. | Two to three light hits, then disengage to reset spacing for the next pattern. |
Teleport-Stab | Boss lifts the longsword and teleports to gap-close, identical opening frames to the 3-slash combo but resolves into a single committed thrust. | Dodge sideways out of the line of the thrust during the teleport flash; the recovery on this attack is the longest in the longsword phase. | Full Turning Slash or four light hits with stamina to spare before the next cycle begins. |
All three Phase 1 attacks share the same backtrack-first-two, dodge-third rhythm. Once the cadence is committed to muscle memory, the longsword phase reduces to a metronome.
Defeating the longsword form does not end the fight. The boss immediately transitions into a spear stance (the same weapon line as the boss Electromecha Spear reward, dropped by its sibling encounter the Machina Knight with Marni Spear). The spear adds longer-reach pokes and a ranged overcharge that punishes close-range play.
Attack | Tell | Reaction | Counter Window |
|---|---|---|---|
Two Stabs + Overhead Slam | Two quick spear thrusts straight ahead, followed by a wide overhead slam that buries the spear tip in the ground. | Sidestep the two stabs (do not backtrack; the reach will catch a retreating player). Dodge through the overhead slam, ending behind or to the side of the boss. | Long. The boss must yank the spear free before the next attack, opening room for a Turning Slash or a Forward Slash chain. |
Two Underarm Swings + Jump Attack | Spear is held low and swept up from underneath in two passes; the jump tell is a brief crouch before the leap. | Backtrack the first two underarm sweeps to stay outside the arc. The jump attack tracks vertically, so dodge horizontally (sideways), not backward. | Short. Get one to two hits and disengage; the boss can chain straight into the overcharged spear from here. |
Overcharged Spear (Ranged Projectiles) | The spear visibly fills with lightning arcs, and the boss steps back to brace. This is the only attack in the encounter that punishes close range harder than long range. | Sprint to maximum distance before the cubes fire. At point-blank, the projectiles are a near guaranteed kill even on a tanky setup. | None during the cast. After the projectiles fire, the boss usually follows up with a Stab into a two-swing chain; treat it as the start of the next cycle. |
Phase 2 keeps the same backtrack-first-two rhythm, but the third-hit dodge has to clear longer reach and faster recovery. When in doubt during the spear half, prioritize spacing over greed: every successful dodge of a three-move set still opens a counter window even if no follow-up damage lands.
Trying to backtrack the overcharged spear. The projectiles travel faster than the player can sprint backward from short range; commit to the run before the lightning arcs finish charging.
Greeding the third attack window. Both phases reward exactly the documented number of hits per opening. Forcing an extra input late drags the player straight into the next cycle's opener and burns a heal cycle.
Standing in front of the jump attack. The boss tracks vertically, not horizontally, so any sideways dodge clears the landing zone. Players who roll backward eat the slam on the way down.
Ignoring stamina between cycles. Even with dodge-counter spacing, the spear half drains stamina faster than the longsword half. Drop one to two hits per opening to leave a buffer for the overcharged spear chase.
Defeating both phases auto-rewards the Electro-Mecha Longsword in the inventory after the closing cutscene, alongside the standard chest and currency drops. The companion encounter, the Machina Knight with Marni Spear, drops the matching Electro-Mecha Spear on the same two-phase template.
The longsword phase is designed around the parry system. The recommended strategy is to alternate between Turning Slash (R1+R2) and parry (L1) in a repeating loop. Turning Slash cancels the Machina Knight's attack animation, interrupting its combo and creating an opening. Follow each Turning Slash immediately with a parry to catch the knight's next attack, then use Turning Slash again.
This cycle of Turning Slash to parry, Turning Slash to parry, allows you to maintain constant pressure while staying safe. The three-hit combo is the most frequent attack pattern, and it presents the best opportunity for building stagger damage through consecutive parries. Successfully parrying all three strikes in sequence builds significant stagger, which can lead to a stun state and a large damage window. Focus on mastering this timing above all else.
Unlike many bosses where patience and defensive play are key, the longsword phase rewards aggression. The knight's attack patterns are predictable enough that skilled players can stay in melee range continuously, trading parries and counterattacks without needing to disengage. The more time you spend attacking, the faster you build stagger and the sooner you can transition to the more challenging spear phase with the knight at reduced health.
Each parry consumes a small amount of stamina, and Turning Slash has its own stamina cost. Keep an eye on your stamina bar during extended parry sequences. If your stamina drops too low, back off briefly to let it recover rather than risking a failed parry that results in a full damage hit. The knight's recovery windows after its combos are the safest moments to regenerate stamina.
Marni's Outpost is located in the northern section of the Delesyia region, positioned just north of the "K" in "Gorthak" on the world map. The outpost is a fortified compound filled with various mechanical enemies and automated defenses, all products of Marni's engineering.
To reach it, travel to the eastern edge of Delesyia and head north toward the elevated terrain surrounding the outpost. Once you arrive near the outpost, you can glide down into the compound from the surrounding cliffs to trigger the boss encounter. Approaching the Machina Knight and interacting with it initiates the "Blade of Discipline" faction quest automatically. No prior quest completion or story progression is required.
The Machina Knight is one of many mechanical constructs built by Marni, the genius inventor whose creations populate much of Delesyia. Marni's technology blurs the line between science and sorcery in the world of Pywel. Her inventions range from small automated drones to colossal constructs like the Golden Star, a massive mechanical dragon. The Machina Knight represents a mid-tier construct: a humanoid automaton outfitted with interchangeable weapon systems designed for guard duty at the outpost.
Other notable Marni-related bosses include Marni's Excavatron, a quarrying machine encountered during the Stolen Quarry quest at Karin Quarry, and the Mechanicus. These encounters share a common theme of mechanical opponents that require different combat strategies than the game's organic enemies. Where living bosses telegraph attacks through body language, Marni's constructs operate with mechanical precision, making their patterns rigid but their timing unforgiving.
Defeating the longsword phase alone does not grant any rewards. The encounter continues immediately into the second phase, where the Machina Knight switches to its Machina Knight with Marni Spear configuration. Only by defeating both phases do players receive the Electro-Mecha Longsword, a unique two-handed weapon with Lightning Affinity. The Electro-Mecha Longsword has 27 Attack Damage and applies an electrical effect on each strike, allowing hits to stun and electrocute enemies. Note that this weapon cannot be upgraded or fitted with Abyss Gears.
Although the Machina Knight can be fought at any point after reaching Delesyia, the encounter is designed for mid-to-late game characters. Tier 5 or higher armor is recommended, ideally with Abyss Cores that provide Damage Reduction. The knight's attacks hit hard enough that poorly geared players can be killed in just a few unblocked hits. Invest in defensive stats before attempting this fight.
Bring a generous supply of healing food. The fight spans two full phases without a break, so you need enough consumables to sustain yourself through both the longsword and spear encounters. Healing items that restore both Health and Spirit are particularly valuable since parrying and using Turning Slash repeatedly drain your Spirit reserves.
A weapon with strong parry interactions is ideal. One-handed swords paired with a shield offer reliable parries, while two-handed weapons trade defensive safety for higher stagger damage on successful counters. Choose the option that matches your comfort level with the parry system.
Defeating the two-phase fight auto-rewards the Electro-Mecha Longsword, but the unique weapon is no longer in the boss's drop table once that fight has been completed. Players who killed the Machina Knight before realising the weapon would gain Abyss Gear sockets in Patch 1.06.00 still have two practical routes to add the longsword to a save: the smaller Machina Knights stationed at the same outpost network, and the Machina Knights patrolling Marni's Drilling Rig further east. Both routes rely on the brace-and-counter variant of the disarm mechanic.
Location | Enemy | Notes |
|---|---|---|
Marni-themed outposts around the boss arena east of Delesyia near Gorthak | Smaller Machina Knights with one-handed sword loadouts | Stationed at any of the outposts in the cluster. If the outpost has not been liberated, the same loadout respawns until cleared, supporting repeat attempts. |
Machina Knights with the Mecha longsword loadout | Far-east site near the rig structures. Same disarm rhythm; useful when the closer outposts have already been liberated. |
The brace-and-counter input does not change. Carry a small round shield and a one-handed sword (the basic loadout sold in Hernand is sufficient), brace with LB or L1, and counter on contact with RT or R2 to roll for a successful spin. The retrieval-speed change introduced in Patch 1.06.00 applies here as well: keep a pet bird out so the auto-loot reaches the weapon before the disarmed knight does, and save before each attempt so an accidental kill can be rolled back without burning the encounter.
Once disarmed, the dropped weapon can be picked up and equipped the same way as a boss reward. The weapon is identical to the boss drop in stats, lightning attack proc, and now-supported Abyss Gear socket count. The full disarm walkthrough including input timing and farming loop is on the dedicated disarm mechanic page.
The three-hit combo is the knight's most common attack. Learn its timing first, as parrying all three strikes builds massive stagger damage.
Alternate between Turning Slash (R1+R2) and parry (L1) for a reliable damage loop that keeps the knight interrupted.
Turning Slash cancels the Machina Knight's attack animation, so use it aggressively to prevent combos from completing.
Save healing items for the second phase. The longsword phase is more forgiving and allows you to practice parry timing without burning through consumables.
Watch for the charged thrust telegraph: the knight pauses and holds the sword at its side. Dodge sideways when the lunge begins.
This phase transitions directly into the Machina Knight with Marni Spear fight. Conserve resources where possible.
Combat attributes recorded in the game database for TWO-HAND SWORD.
Stat | Value |
|---|---|
HP | 2,085 |
Attack | 358 |
Defense | 150 |
Stamina | 100 |
Knockout | 600 |
Fatal | 0 |