Loading...
Loading...
Clay
May 23, 2026 at 08:34 AM
Removed two garbled placeholder rows from the Properties table, and added internal links to the stations that consume Clay, the smelting and alchemy chains, the gathering tool, and
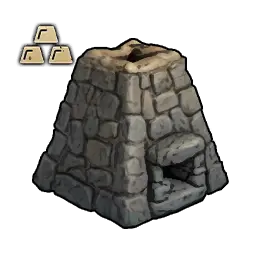
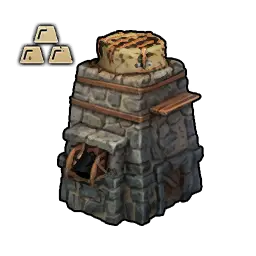
Clay is an early-game resource in Windrose used to build the core smelting pipeline. Every player needs Clay within the first hour or two, because the Charcoal Kiln and Smelting Furnace both require it, and without them you cannot produce Copper Ingots.
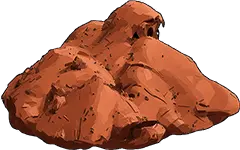
Clay appears as dark, cracked, muddy patches on the ground. On the starting island, the most reliable Clay deposits sit between the Ancient Ruins and the Copper Deposit, near water. Look for areas where the ground color shifts to a damp brown/gray and the texture appears cracked.
Attribute | Details |
|---|---|
Tool required | Stone Pickaxe (3 Wood + 3 Stone at the Workbench) |
Biome | |
Respawn | Clay patches regenerate over in-game time |
Image | Recipe | Clay Required |
|---|---|---|
| 20 | |
| 15 | |
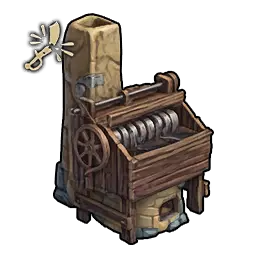
| 20 | |
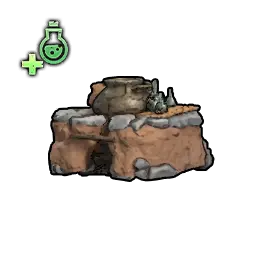
| Stove and Pot (Alchemy Table upgrade) | 5 |
| 10 | |
| Alchemy Table (Clay Pot consumed) | Used to craft 1 Clay Pot, which is an Alchemy Table input |
Gather 60+ Clay in a first pass to cover Charcoal Kiln, Smelting Furnace, and Disassembly Table without having to return
Carry a Torn Sailcloth Bag for extra inventory when Clay farming
Combine Clay runs with Copper Ore runs on the starting island to cut travel time
Clay can be purchased from the following vendor.
Vendor | Stock Qty | Faction Level | Price |
|---|---|---|---|
50 |
| 10 Piastre |
Clay is an ingredient in the following recipes.
Recipe Output | Quantity |
|---|---|
×1 | |
×6 | |
| |
Buildings, Stations, and Decorations that require this item |
|
| |
x20 | |
x10 | |
x20 | |
x15 | |
x5 | |
| |
x1 | |
x2 | |
x2 | |
x2 | |
x2 | |
x4 | |
x2 | |
x3 | |
x3 | |
x3 | |
x3 | |
x3 | |
x2 | |
x2 | |
x1 | |
x1 | |
x2 | |
| |
x2 | |
x2 | |
x3 | |
x3 | |
x3 | |
x3 |
Charcoal Kiln - primary consumer
Smelting Furnace - smelting station
Resources - resource overview
Because island layouts regenerate between saves, no compass directions for Clay stay true across runs. Three terrain cues do. All three point to the same general strip of shoreline about 10 to 30 paces inland from the waterline.
Sand-to-grass border. The transition zone where beach ends and Coastal Jungle starts is the highest-density Clay strip on any island.
Slightly darker soil near the coast. Clay patches blend into the ground texture; the visual tell is a muddier brown tint sitting in shallow depressions.
Cluster spawns. Once one patch is found, scan a 15-meter radius; additional patches usually sit in the same cluster.
Clay never spawns deep inland, in caves, or inside rock outcrops. Runs that tunnel past the first tree line are wasted. Surface ground, near water, is the rule.
Each fully mined Clay node returns roughly 50 to 80 Clay, depending on node size and whether the player clears every segment. The respawn timer runs in in-game days rather than real time; community measurements put a typical node back in roughly three in-game days. Partial harvests reset the same timer without granting the full yield, so every trip should clear nodes to completion before moving on.
Base-camp proximity disables respawn. Any Clay node that sits inside a built area (roof coverage, flooring, or claim radius) will not regenerate after being mined. The practical result: pick nodes far enough from the base that the build tool does not mark them as claimed. Mine them once and then rotate through multiple coastline clusters rather than hovering over a single patch.
The fastest farming method is a parallel-to-shore patrol rather than random exploration. Walk the sand-to-grass border with the water within eyesight on one side, and scan the ground texture continuously as the camera tracks ahead. A single circuit of a mid-sized island's coastline usually returns enough Clay for both the Charcoal Kiln and the Smelting Furnace in one run.
Equip a Stone Pickaxe on the active hotbar slot before leaving camp. Clay nodes give no interact prompt without a pickaxe in hand.
Clear every node to full yield before moving on. The respawn timer per node is long enough that partial harvests cost a follow-up trip.
Rotate between coastal clusters on different trips so that respawns have time to complete.
Hitting a Clay shortage mid-game is especially painful because three independent production chains pull from the same stockpile.
Chain | Key Items | Why It Matters |
|---|---|---|
Metal | Locks Copper Ingot production and every higher-tier tool or ship component that depends on it. | |
Every potion in the game routes through Alchemical Base, which consumes Clay Bottles. | ||
The Homeward Journey potion is brewed from an Alchemical Base, so continuous fast-travel use means continuous Clay demand. |
Players who stockpile Clay aggressively during the first coastal patrol tend to avoid the mid-game bottleneck where all three chains queue up behind the same resource. Sixty to eighty Clay before the first Misty Orchid run is a reasonable initial target for most saves.
Walking the coast with an empty pickaxe hotbar is the baseline method, but two map-side tricks cut time on the first clay run.
Open the world map and zoom all the way in on a stretch of starting-island coastline before setting out. Clay deposits often render as a visibly darker patch in the otherwise uniform beige of the beach texture, so a careful scan of the sand-to-grass border from the map can flag likely spots without a physical patrol.
The read is imperfect. Some dark patches are rocks or shadow, and some clay nodes blend into their surroundings. Use the map trick to pick a starting direction, then confirm on foot with the standard muddy-brown terrain cue.
During the Islander tutorial, the game sends the player into a Copper Cave. Immediately after exiting that cave, several nearby clay deposits are pinned on the map automatically as part of the quest direction. Those auto-pins are temporary: once the Charcoal Kiln and Smelting Furnace have been built, the quest step completes and the system-placed clay markers are removed.
Workaround: while the auto-pins are still on the map, open the map screen and drop custom pins on top of each reveal location with a descriptive label. Custom pins are not tied to the tutorial step and persist indefinitely, so the farming route survives the transition out of the tutorial and remains useful later when a second Charcoal Kiln, a Disassembly Table, or a batch of clay bottles all queue up against the same stockpile.
Exiting the tutorial Copper Deposit cave for the first time temporarily highlights every nearby Clay deposit on the world map. This is the fastest single-pass clay scouting window in the early game.
Trigger: the first time you walk out of the Copper Cave on the starting island, with the Copper Ore tutorial step active.
Window: the auto-reveal stays until the first Smelting Furnace and Charcoal Kiln are placed; pin manual markers before that, because the markers persist after the highlight clears.
Procedure: press M to open the map, right-click on each highlighted node, label each marker "Clay," then resume the tutorial chain.
Backup: if you missed the window, the sand-to-grass coastline scouting pattern still works on every island. Clay deposits cluster along the brown-to-green ground transition.
Property | Value |
|---|---|
Weight | 0.5 |
Stack | 50 |