Loading...
Loading...
Smelting Furnace
May 23, 2026 at 08:23 AM
Cleaned the garbled unlock entry into readable text and corrected the Mire Metal Ingot recipe to its real ingredients and station.
The Smelting Furnace is the station that converts raw metal ore into Ingots in Windrose. Every player builds one within the first few hours because Copper Ingots unlock the bulk of the game's crafting recipes.
Attribute | Details |
|---|---|
Cost | |
Placement | Outdoors, within Bonfire range |
Roof | Must be outdoors (no roof) |
Image | Product | Inputs | Time (Standard) | Time (Large) |
|---|---|---|---|---|
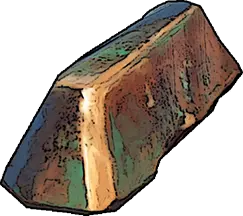
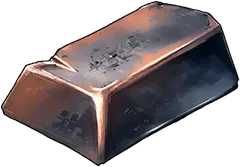
| 4 Copper Ore + 1 Charcoal | 30 s | 15 s | |
| 3 Foothills Iron Ore + 1 Charcoal | 30 s | 15 s | |
| Made at the Large Smelting Furnace only | 30 s |
The Large Smelting Furnace is an upgraded variant that halves smelt time. It costs 20 Hewn Stone + 10 Foothills Iron Ingot + 20 Clay and must be placed outdoors within Bonfire range. Once Iron is flowing, converting your primary smelter to Large is a major throughput boost. Keep the standard furnace online as a second station to parallelize Copper and Iron runs.
Charcoal - fuel
Charcoal Kiln - fuel production
Crafting - crafting overview
The build tutorial recommends treating your smelters as a dedicated outdoor smelting row rather than scattering them around the base. Because furnaces and kilns are outdoors-only, they cannot share the covered main building with the Workbench and Alchemy Table. The cleanest solution is a narrow strip of foundation sticks running off the side of your main hut, typically two tiles wide and three tiles long, with the furnaces and kilns sitting on it like a row of ovens.
Place two smelting furnaces side by side on the strip. Running two in parallel lets you process Copper Ore and Foothills Iron Ore at the same time during a heavy ore run.
Flank the furnaces with two charcoal kilns, slightly tilted for a more natural appearance. Two kilns feed two furnaces comfortably and keep ash production up for Gunpowder brewing.
Surround the smelting row with rope fences or a custom railing built from pillars and beam locks so you do not slip off the pier during a late-night resource run.
Open one side of the fence where it meets a path back to your storage chests. Hauling ingots indoors is the most frequent foot-traffic route at a mature base.
A single smelting furnace is the bottleneck for the entire mid-game. Copper Ingots gate most of the starter crafting recipes, and once you unlock Foothills Iron Ore, iron smelts compete with copper smelts for furnace time. The tutorial's fix is to keep the base copper furnace running as a background processor and dedicate the second furnace (ideally upgraded to the Large Smelting Furnace) for iron and other higher-tier smelts. This roughly doubles your ingot throughput during an active smelting session and removes the headache of pausing a copper run mid-smelt to slot in iron ore.
The Large Smelting Furnace is not a replacement for the standard furnace; it is a throughput booster. It halves smelt time but does not reduce fuel cost, so one Large furnace plus one standard furnace will produce ingots roughly 50 percent faster than two standard furnaces while using the same charcoal per ingot. Once you have a steady iron flow, upgrading one of your two smelting-row furnaces to Large is a major quality-of-life boost. Keep the standard furnace online so you can still parallelise copper and iron when a big ore haul comes in from a mining trip.
The Smelting Furnace eats Charcoal at a rate of 1 charcoal per ingot. The Charcoal Kiln converts 1 Wood into 1 Charcoal plus some Ash byproduct. The math is simple: one kiln running in parallel with one furnace keeps fuel balanced as long as you feed the kiln wood as fast as you feed the furnace ore. Two kilns beside two furnaces is the standard tutorial layout because ore mining runs always dump more ore than a single kiln can keep up with.
The Ash byproduct of charcoal production is not waste. It feeds directly into the Millstones recipe for Homemade Gunpowder. Because both stations sit in your base at the same time, you get a passive pipeline from wood logs to gunpowder that runs in the background while you are out looting.
Outdoor only: never build a roof directly over the furnace. A partial canopy that leaves the furnace's top face exposed is fine for aesthetics, but if the placement hologram refuses to turn green, the roof is too close.
Bonfire radius: the furnace must sit inside the Bonfire radius so crafting menus can pull ore from nearby chests automatically.
Chest proximity: the closest storage chest should be within a short walk of the furnace. Consider dedicating one chest to raw ore and a second chest to finished ingots, so pulling stock into the furnace and dumping output into storage becomes a two-step rhythm.
Flat foundation: drop foundation sticks before placing the furnace so the hitbox does not clip into sloped terrain. A level foundation also makes the placement hologram snap cleanly without needing to hammer at the rotation keys.
Fire safety: although the furnace is fireproof itself, placing it a foot away from wooden walls and ceiling chains reads as safer and avoids visual clutter during peak smoke output.
Property | Value |
|---|---|
Max Health | 3,000 |
Duration: 1s
Ingredient | Quantity |
|---|---|
x15 | |
x30 |
Unlocked through the Ingot and Charcoal Production discovery, which becomes available once you reach the Coastal Jungle and gather Copper Ore.
Category | Bonus |
|---|---|
Hearth | +1 |